The Alexandrian

Rulings in Practice: Traps

August 16th, 2020

People have a problem with traps: They’re boring.

Not only are they boring when they’re triggered — with the DM arbitrarily telling you to make a saving throw at the penalty of suffering some minor amount of damage — they engender boring play by encouraging players to turtle up and methodically, laboriously, and excruciatingly examine every square inch of the dungeon in torrid bouts of pace-murdering paranoia.

And if you feel this way, you’re in illustrious company. Here’s Gary Gygax giving some of the worst GMing advice you’ll hopefully ever read (Dungeon Master’s Guide, 1979):

Assume your players are continually wasting time (thus making the so-called adventure drag out into a boring session of dice rolling and delay) if they are checking endlessly for traps and listening at every door. If this persists, despite the obvious displeasure you express, the requirement that helmets be doffed and mail coifs removed to listen at a door, and then be carefully replaced, the warnings about ear seekers, and frequent checks for wandering monsters (q.v.), then you will have to take more direct part in things. Mocking their over-cautious behavior as near cowardice, rolling huge handfuls of dice and then telling them the results are negative, and statements to the effect that: “You detect nothing, and nothing has detected YOU so far—” might suffice. If the problem should continue, then rooms full of silent monsters will turn the tide, but that is the stuff of later adventures.

Uh… yeah. Do literally none of that.  But you can feel Gygax’s palpable frustration with the style of play his own killer dungeons had created boiling off the page.

Despite this, traps are a staple of Dungeons & Dragons. They date back to the earliest days of the hobby and they remain a prominent part of the game’s culture and its adventures. In fact, if you go back to the ‘70s and ‘80s you’ll find that traps weren’t just tolerated, they were gleefully celebrated.

Is that because people were clueless back then? They were just fooling themselves into thinking they liked traps?

No, in fact. It turns out that traps used to be different.

We’ll start by looking at how they were different, and then we’ll talk about why that’s important.

QUICK HISTORICAL SURVEY

If you look all the way back to the original edition of D&D in 1974, there are three things to note:

  1. Thieves didn’t exist yet, and there were no skills (or other checks) that could be used to find or disable traps.
  2. Traps did not automatically trigger. Instead, they triggered on a roll of 1 or 2 on a d6. (In other words, any time someone walked down a hallway with a trap in it, there was only a 1 in 3 chance the trap would actually go off.)
  3. Carefully searching an area for a trap took 1 turn. This was a substantial systemic cost, because the DM made a wandering monster check (with a 1 in 6 chance) every single turn.

In Supplement 1: Greyhawk (1975), the thief class was added. There was now a skill check that could be made to find and disable traps.

AD&D (1977-79) dropped the 1 in 3 chance of a trap triggering. This mechanic was still commonly found in published modules of the era, however, and, therefore, remained part of the meme-sphere for a time. However, as play moved away from open table megadungeons and DMs increasingly ran disposable dungeons designed for a single traverse, the 1 in 3 chance meant that some traps would never be encountered. The idea of PCs not seeing every single scrap of material in a scenario became a sort of heresy, and this mechanic phased out.

The use of wandering monster checks also became deprecated. First by significantly reducing the frequency of checks and, later, often eliminating the wandering monster check entirely. This eliminated the system costs associated with searching anywhere and everywhere.

Over the course of 2nd Edition, modules slowly standardized trap stat blocks. 3rd Edition then incorporated these into the DMG (actually presenting the most extensive resource of pre-built traps seen in a core rulebook up to that point). Whereas previously the presentation of traps had been organic and narrative, it was now largely formalized into a check-or-damage mechanical format.

3rd Edition also substantially reduced the amount of time required to search an area for traps from 1 turn (10 minutes) to, generally, 1 round.

Dungeon Master's Guide (5th Edition)Jumping to 5th Edition, we discover both the worst advice and some good advice for running traps jammed together on the same page.

The worst advice is the mechanical structure: Passive Wisdom (Perception) checks determine whether anyone notices the trap. If they do, an Intelligence (Investigation) allows the character to figure out how to disable it. And then a Dexterity (Thieves’ Tools) check determines whether they can actually disable it.

In other words, by 5th Edition the mechanical resolution of a trap has devolved into an entirely automatic sequence of mechanical interactions which the players neither initiate nor make meaningful choices during.

No wonder people think traps are boring! You could do this with ANY element of the game and it would be boring! Imagine if every social interaction was resolved with a passive Charisma check to initiate the conversation, a Wisdom (Insight) check to determine what you should say to them, and a Charisma (Persuasion) check to see if you say it successfully.

Both the fiction and the mechanics have atrophied, and the fiction-mechanics cycle has broken down.

The good advice is this bit:

Foiling traps can be a little more complicated. Consider a trapped treasure chest. If the chest is opened without first pulling on the two handles set in it sides, a mechanism inside fires a hail of poison needles toward anyone in front of it. After inspecting the chest and making a few checks, the characters are still unsure if it’s trapped. Rather than simply open the chest, they prop a shield in front of it and push the chest open at a distance with an iron rod. In this case, the trap still triggers, but the hail of needles fires harmlessly into the shield.

Why is this good advice? And what does it mean to actually put this advice into practice?

HOW TRAPS WORK

Let’s briefly sum up how traps used to work:

  1. There was a cost associated with initiating a search, so players had to make deliberate and specific choices about when and where to look for traps.
  2. The 1 in 3 mechanic made the outcome of even identical traps less predictable: It wasn’t always the guy in front who triggered the trap. Sometimes it would be the last person in line. Or maybe the trap would go off in the middle of the group. Or you might walk past it safely on your way into the dungeon only to trigger it as you were desperately trying to run back out again. Completely different dynamics (and experiences) in each case.
  3. There were no mechanics, so players had to creatively interact with a trap in order to both find and deal with it. And, on the flip-side, this also forced DMs to creatively define the nature of the trap beyond skill check DCs.

Let’s start with the cost. If you want to avoid every expedition being slowed to a snail’s crawl by paranoia (or players simply feeling resentful that they have to choose between having fun and avoiding an intermittent damage tax), then there needs to be a cost associated with searching so that the players have to strategically decide when it’s worthwhile to pay that cost. In other words, the cost forces the players to make meaningful (and interesting) choices.

This cost will usually take the form of time: Time wasted searching for traps makes you vulnerable to other threats. Wandering monster checks are one way of modeling an environment filled with active threats that can find the PCs. Adversary rosters are another. Any form of time limit can be effective, however, as long as the searching chews up meaningful chunks of that time.

Alternatively, recognize that there is no cost in the current situation and, therefore, no reason for the PCs to not laboriously search every inch and be as safe as possible. This usually means that no meaningful choices are being made during these searches, which is what The Art of Pacing describes as empty time. You want to skip past that empty time and get to the next meaningful choice. I recommend using Let It Ride techniques here.

Note: This may not always be the right call. If the players are having fun making those meticulous decisions, then they ARE meaningful choices and it’s OK to live in that moment. Similarly, these choices can also be used to effect. I’ve run horror scenarios, for example, where the fact that the PCs have been reduced to terrified paranoia is 100% the desired emotional space, and cutting past those moments of paranoia wouldn’t be the right call. The thing you’re trying to avoid here is boredom.

Next let’s talk about the trigger uncertainty. I don’t think it’s universally true that traps should have unreliable triggers, but it’s a concept that’s worth playing around with if you haven’t tried it. There’s a lot of fun stuff to be discovered in play here. To a large extent, you can just graft the old 1 in 3 mechanic back in. (Or use slightly different odds, like a coin-flip.) Alternatively, you might have a trap trigger 100% of the time, but randomly determine which party member or rank in the marching order it afflicts.

Finally, there’s creative engagement with the players. This is vital. If all you can do with a trap is make a skill check to Search for it, make a skill check to Disable it, and/or make a saving throw to avoid taking damage from it, then the trap will be boring. The players have to be able to creatively engage with traps the same way they can creatively engage other aspects of the game world.

However, achieving this does NOT require you to simply throw out the mechanics.

PLAYER EXPERTISE

In The Art of Rulings, I actually use a trapped chest to demonstrate the fundamental principles of making a ruling in an RPG because properly adjudicating a trap is an almost perfect example of how a GM can use the mechanics of an RPG effectively. To briefly review:

  • Passive observation is automatically triggered.
  • Player expertise activates character expertise.
  • Player expertise can trump character expertise.

If we look at 5th Edition’s mechanical method for traps, it exists entirely in the first two categories: Traps are detected through passive Wisdom (Perception) checks that do not require a declaration from the players (i.e., passive observation is automatically triggered). Analyzing the trap and then disabling it presumably require player declarations, but the rote formulation is the most basic example of player expertise activating character expertise. It requires no meaningful decision-making on their part: You detect a trap, you say you’re analyzing it, and then you say you’re disabling it.

To make traps more interesting, what we want to do is push that entire interaction up the hierarchy: Instead of starting with passive observation and ending with shallow declarations of player expertise, we want to start with the players making meaningful choices and end by opening the door to players creatively figuring out how to trump the basic skill check.

Start by requiring player expertise to search for traps. You can use 5th Edition’s rules for passive checks if you want (I’m not a fan), but it should still require the players to say, “I’m going to check for traps.” As we’ve discussed, of course, there has to be a cost to this declaration for it to be meaningful. Otherwise it’s just a rote catechism of dungeoncrawling (make sure you say it or the DM will getcha!). What you want is for the characters to be making broad strategic choices about when and where and why they’re choosing to search (and, conversely, when and why and where they choose NOT to search).

In order for this to be effective, the placement of traps has to make sense. As the 3rd Edition Dungeon Master’s Guide says:

The solution is to place traps only when appropriate. Characters and creatures put traps on tombs and vaults to keep out intruders, but traps can be annoying and inappropriate in well-traveled areas. An intelligent creature is never going to build a trap that it might fall victim to itself.

If the placement of traps is random or capricious, there’s nothing for the players to base their decisions on. The result will be either frustration or resignation.

As a rule of thumb, you’ll know you’ve gotten the balance right if the players start actively trying to collect intel on traps. (They might question prisoners, check blueprints, cast auguries, etc.) If they’re doing that, then they both value those strategic decisions AND have faith in the logic and consistency of the game world.

Design Note: You can also explore – possibly at the prompting of your players – resolution options somewhere between not searching and detailed searching. An old school example is tapping a ten foot pole in front of you while walking down a dungeon corridor. This standard operating procedure probably doesn’t reduce the party’s speed, but still has a chance of prematurely triggering a trap before someone walks into it. This synced well with the old 1 in 3 chance of triggering a trap: The GM could simply add such a check for the pole-tapping (or perhaps a 1 in 6 chance to reflect that the pole was less likely than a full-grown person to effect certain triggers).

The method thus had a significantly reduced cost (in gold and encumbrance costs for the pole itself, plus a penalty to stealth tests from the tap-tap-tapping), but a similarly reduced efficiency in terms of actually detecting the trap.

If the players are expressing a desire for some sort of “extra caution, but not so extra that we have to pay the normal cost for a detailed search,” ask them what that looks like. Maybe they’ll come up with pole-tapping. Maybe they’ll come up with something completely different! Then see if there’s a way you can model that with a minor cost and/or minor benefit.

Another option is Matryoshka search techniques coupled to passive observation. Rather than saying “you found a trap,” you can instead use 3rd Edition-style Spot checks or 5th Edition-style passive Perception checks to incorporate details into your description of the dungeon which, if investigated in more detail, would reveal the trap. (For example, you might mention the line of decorative holes running down the length of the hall… which turn out to be the firing tubes for an arrow trap.)

PLAYER CREATIVITY

When it comes to the trap itself, the description of the trap should not be limited to a mechanical effect. Understand how the trap works and communicate that to the players (either in response to their search efforts or when the trap is triggered). It is these details which allow the players to engage the trap creatively – to “get their Indiana Jones on.” This is what begins to move a trap away from being a rote mechanical interaction and turns it into an interesting and interactive experience.

There’s no hard-and-fast rule for this, but if the PCs start doing stuff like scavenging the tension ropes that reset a spike trap in order to tie up a kobold prisoner or draining the alchemist’s fire through the nozzles of a flame trap to pour down the arrow holes of another, then you’ve nailed it.

You’ll also start seeing the PCs thinking about ways to bypass the trap, often in ways that also bypass the mechanical resolution of disabling the trap. (This is where player expertise trumps character expertise!) For example, they might use chalk to outline a pit trap so that everyone can walk safely around it. Or put a board in front of the arrow holes in the wall. Alternatively, some of these solutions might simply shift the mechanical resolution: Placing a board across a pit, for example, might require Dexterity (Acrobatics) checks for everyone to walk across instead of Dexterity (Thieves’ Tools) to disable.

And if the PCs do disable the trap, I recommend asking them how they actually do it. (Or, at the very least, describe it specifically when narrating resolution.) When they disable the pit trap do they wedge it open? Do they nail a board over the top of it? Do they wedge it with spikes so that it can support their weight one at a time? The difference will matter if they end up getting chased back down that hall by ogres!

Getting this type of specificity can sometimes be challenging with magical traps. Check out Random GM Tips: Disarming Magical Traps for some thoughts on how you can make these more interesting than just saying, “It’s magic!”

Go to Part 2: Advanced Techniques

Farm Field in Winter

Go to Part 1

NODE 6: DAVIS FARM

  • Located in Stearns County near Holdingford (the “moonshine capital of Minnesota”).
  • About 90 miles north of the Twin Cities.
  • Bootlegging is, in fact, rampant up here. The biggest moonshine-brewing operation is run by the monks of St. John’s Abbey, but a lot of local farms (currently mired in the middle of the Agricultural Depression that lasted from 1920 through 1934) get in on the action.

THE DAVIS FARM

  • They farm corn and have a small number of cattle. The fields are harvested now, so there are just stubs of corn stalks jutting up here and there like a primitive, haphazard cemetery.
  • They’ve had some light snow up here and the fields are dusted with it (although you can still see the raw, frozen dirt between the small drifts).
  • The buildings are set back from the road, with a narrow drive running between the shields and then dropping over a small rise.
  • It’s a simple farm: There’s a house, a barn, and a machine shed.

THE HOUSE

  • Ellie Davis and Billie Davis live here.
  • Living room and kitchen on the ground floor.
  • Bedroom and bathroom upstairs.

THE BARN

  • Stalls for a half dozen milk cows and mounds of hay for their winter feed.
  • Hidden Kegs: Kegs of Minnesota 13 whiskey are hidden under the hay mound. (See Node 2: Minnesota 13 for analysis.)

THE MACHINE SHED

  • Crowded with two tractors (one no longer working) and the Davis’ pick-up truck, along with corn hooks, plows, hay rakes, harrows, and grain bins.
  • Fake Wall: The back wall of the machine shed is fake. There’s a hidden room in the back with Ellie’s still.

THE STILL

  • Chemistry: It’s a sophisticated set-up. Ellie is re-naturing the denatured alcohol and then using bubblegum to hide the lingering flavor.
  • Ethanol Barrels: Label coding on the bottom of the barrels indicates that they came from Node 7: Harris Chemical Plant.

ELLIE DAVIS

Left Hand of Mythos - Ellie Davis

APPEARANCE

  • Prop: Photo of Ellie Davis

ROLEPLAYING NOTES

  • Witty and uncouth.
  • Big grin.
  • Thumbs through her suspenders.

BACKGROUND

  • She’s the brains of the operation. The only bootlegger in Stearns County who can deal with the denatured alcohol Oleg gets from the Harris Chemical Plant.
  • Went to college, but had to come back home when her mom got sick. Ended up marrying “that big goof” Billie and settled down to the happy life of a farm wife.
  • Got into bootlegging because it seemed like everybody else in Stearns County was doing it, and with the chemistry courses she took in college she’s got a knack for it.

CLUE

  • Reassurance: She knows the source of Oleg’s denatured ethanol is from the Harris Chemical Plant. (Label coding on the bottom of the barrels.)
  • Reassurance: They sell their Minnesota 13 through Oleg Andersson (who runs it into Minneapolis and St. Paul).

NOTES

  • Ellie Davis is inspired by the story told by Elaine Davis of her grandmother, a central Minnesota farm wife during Prohibition, who leapt into bed and pretended to be sick when a bunch of G-men spilled out of their cars into the front yard. She delayed ‘em long enough for her husband to make sure the kegs were safely stowed under the hay mounds in the barn.

ELLIE DAVIS: Athletics 6, Driving 4, Firearms 4, Fleeing 5, Scuffling 7, Weapons 6, Health 8
Alertness Modifier: +1 (eyes open)
Stealth Modifier: +1 (Hides in plain sight)
Weapons: Fists (-2), Whatever’s Around (0), Shotgun – while at the house, (+1)


BILLIE DAVIS

Left Hand of Mythos - Billie Davis

APPEARANCE

  • Prop: Photo of Billie Davis

ROLEPLAYING NOTES

  • Cool, dry sense of humor.
  • Ignorant, but not in a willful way.
  • Speaks slow. (And gets slower if you’ve pissed him off.)

BACKGROUND

  • Billie is a farmer who helps Ellie with her work on the stills. He can keep the fires lit, and knows what you can drink and what’ll make you blind, but not much more than that.
  • He’s never left Stearns County.

CLUE

  • Reassurance: He knows the source of Oleg’s denatured ethanol is from the Harris Chemical Plant. (Label coding on the bottom of the barrels.)
  • Reassurance: They sell their Minnesota 13 through Oleg Andersson (who runs it into Minneapolis and St. Paul).

BILLIE DAVIS: Athletics 12, Driving 4, Firearms 4, Fleeing 2, Scuffling 6, Weapons 2, Health 12
Alertness Modifier: -1 (focused on work)
Stealth Modifier: 0 (unskilled)
Weapons: Fists (-2), Farm Implements (+0 or +1, depending), Rifle or Shotgun (+1)

Go to Node 7: Harris Chemical Plant

Descent Into Avernus - Wizards of the Coast

Go to Table of Contents

The PCs’ goal in Avernus is to free Elturel, and this requires three things:

  1. Bellandi’s pact with Zariel must be broken.
  2. The chains holding Elturel must be severed.
  3. Elturel must be returned to the Material Plane.

Of these, the essential modus operandi is the first: For most of their time in Avernus, the PCs can be strictly motivated by figuring out how to break the pact and the campaign will keep ticking along happily. In fact, it’s theoretically possible for them to actually destroy the contract only for them to then realize that, pact or no pact, Elturel is still physically stuck in Hell.

BREAKING THE PACT: There are three ways to break Bellandi’s pact.

  1. Both copies of the infernal contract must be brought together and then destroyed. Destruction requires special effort, such as dipping the contracts in the River Styx, the fires of an ancient dragon (perhaps Tiamat?), or a wish
  2. If Zariel is redeemed, she will cancel all of her infernal contracts.
  3. If Zariel is killed, all of her infernal contracts are canceled.

SEVERING THE CHAINS: The chains holding Elturel can be severed before the infernal contract is broken, but they will simply reform. They are a metaphysical manifestation of the contract and become physically severable only when the contract no longer exists. They can be severed in four ways.

  1. Zariel could do it with or without the Sword (because it was her pact which formed them).
  2. The PCs could form an alliance with a powerhouse (Bel, Tiamat, or a released Gargauth; but not the planetar or any holy power other than a redeemed Zariel for metaphysical reasons).
  3. The Sword of Zariel can cut the chains.
  4. There is a control room for the Dock of Fallen Cities in Zariel’s Flying Fortress, which can be used to release the chains.

RETURNING ELTUREL: If the PCs break the contract and sever the chains, then Elturel is left floating above the plains of Avernus. Now what? Moving an entire city through planar space is a non-trivial task, that’s why Zariel bathed the city in the Companion’s light for fifty years in order to build up an etheric charge (see Part 4B).

Good news, though: When that negative charge was reversed to generate the energy wave that brought Elturel to Avernus, an equal and opposite charge was passed into the Companion. (That’s the reason it’s been crackling with lightning this whole time.) This means that if the planetar inside the Companion is released, it will be able to literally lift the entire city out of the Nine Hells and return it to the Material Plane.

  1. The PCs can release the planetar by retrieving the adamantine key rods.
  2. A redeemed Zariel can also do so.

ALTERNATIVE – GATE ESCAPE: Once Bellandi’s pact has been broken and the chains severed, it becomes possible to evacuate Elturel. (Prior to that, anyone who was in Elturel when it was brought to Avernus is bound and cannot leave the Nine Hells.) We’ll be seeding a few options for opening long-term gates that last long enough for thousands of people to pass through them into Part 7; it’s also possible that the PCs might be able to convince powerful allies (like Tiamat or Bel) to do the same.

A full-scale evacuation option, however, is a corner case I’m not going to spend time prepping unless the players jump for it. The particulars of the evacuation will depend a lot on current circumstances. Things to think about:

  • How can the PCs make sure everyone in Elturel knows about the evacuation?
  • Who might attempt to stop the evacuation? (Zariel launching a full-fledged devil invasion of Elturel to prevent her prizes from escaping is definitely an option at this point.)
  • How will the PCs protect the gate?
  • What other problems, roadblocks, and catastrophes might afflict the evacuation effort?
  • What factions can help the PCs (and how)?
  • What ethical quandaries need to be resolved? (For example, who gets to go first? And should some people be allowed to go at all? Some factions might not want High Rider Ikaia and his vampiric spawn coming with them.)

To make things really epic, remember that we’ve set up the metaphysics so that it’s literally the good souls in Elturel which keep the city floating above the Avernian plains. Although in this scenario the chains are no longer dragging the city down, if those souls literally leave, the whole city could begin rapidly falling. Imagine:

  • A final siege upon the gate’s position by Zariel.
  • One whole half of the city cracks loose and falls into the Styx below.
  • The PCs desperately trying to get the last few thousand people through the gate as the ground begins to crack and crumble around them!

BARGAINING WITH ZARIEL

Things an unredeemed Zariel could potentially do:

  • Give the PCs her copy of the Bellandi pact.
  • Cancel the Bellandi pact outright.
  • Sever or release the chains holding Elturel.
  • Release the planetar from inside the Companion.

The only thing Zariel is willing to trade for is the Sword of Zariel. (The published adventure suggests a couple other possibilities, but given the scope of what Zariel is giving up — a plan 50+ years in the making and tens of thousands of new foot soldiers for her armies — it’s really difficult justifying any of them.)

I further recommend that, by default, Zariel will only trade the Sword for the physical contract itself. (Primarily because the special effort still needed to destroy the paired contracts is more interesting than just having Zariel do it herself.) Smart PCs will make sure the bargain includes a provision that Zariel won’t send a task force of devils to steal the contracts back from them.

If the PCs can sweeten the deal (giving her the Shield of the Hidden Lord, agreeing to kill one of her enemies, etc.) they might be able to get her to cancel the contract outright or sever the chains, too.

REDEEMING ZARIEL

As we’ll discuss more in Part 6D, the Sword of Zariel contains a literal spark of goodness: Zariel placed a shard of her own soul in the Sword deliberately, knowing that the devils were coming for her and sensing her own weakness. The Sword will thus offer the PCs an opportunity to redeem Zariel if they have the chance.

If Zariel is redeemed, she can (and will):

  • Cancel all of her infernal contracts.
  • Sever the chains holding Elturel.
  • Release the planetar.

This is more or less the “official” or “best” ending of Descent Into Avernus. If the PCs can pull off the redemption, they pretty much solve the whole problem in one fell swoop.

ALTERNATIVE – DREAM MACHINE REDEMPTION: As an alternative to the Sword of Zariel, it might also be possible to redeem Zariel by somehow maneuvering her into the dream machine with Lulu, forcing her to relive her memories, and, thus, giving her the opportunity to make a different choice.

This seems like a pretty long shot. But if one of the players make a 1,000 IQ play and they somehow manage to pull it off, more power to them. (Knocking Zariel unconscious and literally dragging her into the machine is one way. In her hubris, she’d probably also be willing to agree to get into the dream machine for a price considerably lower than the Sword of Zariel.)

RAID ON THE FLYING FORTRESS

In Part 7D, I’ll be redesigning Zariel’s Flying Fortress using the Raiding the Death Star! scenario structure. There are two things the PCs can gain by raiding the Descent Into Avernus - Zariel's Flying Fortressfortress:

  • Zariel’s half of Bellandi’s contract.
  • Access to the control room for the Dock of Fallen Cities (which they can use to detach the chains if the pact has been broken).

ALTERNATIVE – ASSAULT ON THE DOCK OF FALLEN CITIES: I’ve put the control room for the Dock of Fallen Cities on the flying fortress mostly to simplify my prep. In practice, there are some shortcomings: You can justify Zariel having the controls on her mothership, but logically it probably makes more sense for the Dock’s control center to be onsite. There’s also a real risk of déjà vu (with the PCs raiding the fortress for the contract, going to destroy the contract, and then having to raid the fortress again to disengage the chains). You can work around this by either allowing the PCs to set the controls to disengage once the contract is destroyed (so they can do both tasks in one raid) OR by making the second raid distinct and interesting in some way (by increasing security, for example).

Alternatively, you could move the control center to some spire or turret in the Dock of Fallen Cities and prep an alternative scenario in which the PCs (having somehow destroyed the contract) must now assault the Dock and release the chains!

(For example, you could take this map, put this map at the bottom of it, and then put this map on top of the second map. Stock it up with a devilish security team and some magical defenses and away you go.)

POWERFUL ALLIES

There are some very powerful allies (or, at least, allies of convenience) that the PCs can make in Avernus. Likely candidates include Bel, Tiamat, and Gargauth (if he’s freed from the Shield of the Hidden Lord). Kostchtchie, Crokek’toeck, Yeenoghu, and maybe even Shummrath are significantly less likely options.

These allies can:

  • Help the PCs kill Zariel. (Without such aid, it’s extremely unlikely the PCs can pull this off.)
  • Sever the chains holding Elturel.

Almost without exception, all of them are more likely to do the latter than the former. And, of course, getting any of them to help is going to come at a price.

UNLOCKING THE COMPANION

Unlocking the Companion requires nine adamantine control rods which were lost when Zariel’s previous flying fortress crashed (DIA, p. 118). The unlocking process is briefly described on DIA, p. 154.

Note that I’m deliberately getting rid of the option of shattering the Companion by hitting it with the Sword of Zariel. Because the Sword can also sever the chains, my personal preference is for it not to be a one-stop shop for solving the whole problem. Your mileage may vary, however, and there’s nothing inherently wrong with a Sword-wielding PC swooping up and hacking the planetar out of its prison.

ALTERNATIVE – RODS, RODS, EVERYWHERE: As written, all nine adamantine control rods are located in the wrecked flying fortress. Alternatively, the fortress could have been looted decades ago and the rods scattered across the Avernian plains. Maybe Zariel has recovered some and they’re in her current fortress; maybe Bel has some; maybe some warlords prize them; maybe Maggie has one and doesn’t even know what it is (the PCs see it early in the campaign and later realize – OMG! – it was right in front of them the whole time!).

This will extend the campaign, but can be used to push the PCs into interacting more widely/deeply with locations in Avernus.

REVELATION LIST: THE BIG THREE

There are a number of revelations necessary for the PCs to complete the Avernian quest, so let’s whip up some revelation lists. Like the list in Part 3C: The Vanthampur Revelations, I’m including brief descriptions of each clue for clarity since many of these clues refer to material that won’t be available until after this post goes live.

HOW TO FREE ELTUREL: Break the pact and sever the chains to free the city. Then you’ll still need to find a way to take it home.

  • Liashandra. The demon sent to stop Zariel from claiming Elturel will happily share her knowledge of how it can be prevented.
  • Bel’s Forge. The original plans for the Dock of Fallen Cities would spell it out.
  • Gargauth. If pushed to the brink (see Addendum: Playing Gargauth), Gargauth can explain how to save Elturel.
  • Dock of Fallen Cities. (Partial) The control instrumentation would indicate that the chains cannot be disengaged unless the pact has been broken.

HOW TO BREAK THE PACT: Get the other half of the contract from Zariel, kill her, or make a bargain with her.

  • Sylvira and Traxigor. They explain this in their “mission briefing” before the PCs go to Hellturel.
  • Pherria Jynx & Ravengard. If the PCs tell them that they have Bellandi’s copy of the contract, Jynx knows enough lore to recognize what they have to do. Ravengard will explicitly tell them that this is what they should do.
  • Gargauth.
  • Talking to almost anyone in Hell. Pretty much everybody in Hell knows how to break an infernal contract.

HOW TO SEVER THE CHAINS: Can’t be done until the infernal contract is broken. Requires someone or something of incredible power. Zariel herself could do it using the control room on her flying fortress.

  • Studying the Chains. DC 16 Intelligence (Arcana) check while studying the chains with proper tools/spells will make it clear how much strength would be required; and possibly that the chains have a remote connection to something that must be controlling them.
  • Liashandra. She doesn’t know where the control room is, but knows that it must exist.
  • Bel’s Forge. The original plans for the Dock of Fallen Cities. Bel himself may also offer it in trade.
  • Gargauth. If pushed to the brink, Gargauth can tell them how “impossible” it is to release the chains.

HOW TO RETURN ELTUREL: Open the Companion and free the planetar.

  • Bel’s Forge. The original plans for the Dock of Fallen Cities or Companion reveal the negative charge built up in the Companion.
  • Dock of Fallen Cities Control Room. Instrumentation reveals the negative charge built up in the Companion.
  • Gargauth. If pushed to the brink, Gargauth knows the planetar can save the city.

REVELATION LIST: ADDITIONAL REVELATIONS

The revelations above reveal WHAT the PCs need to do. These supporting revelations point to HOW they can do it.

ZARIEL WANTS THE SWORD: And therefore might be willing to trade something for it.

  • The Vision from Torm (Lulu’s Memories)
  • Maggie (Fort Knucklebones). She’s an expert in Zariel lore.
  • Original Hellriders. Any of the original Hellriders know how important the Sword is to Zariel.
  • Swordhunters. Found throughout the Avernian plains, seeking Zariel’s long-standing bounty for its recovery.

THE TRUE NATURE OF THE SOLAR INSIDIATOR: There’s a planetar locked inside (and maybe you should free it).

  • Bel’s Forge. Where the Companion was built. The original plans can be found there; they have been notated to indicate that the control rods were lost in the wreck of Zariel’s previous flying fortress.
  • Dock of Fallen Cities Control Room. Instrumentation reveals true nature of the Companion.
  • Gargauth. Gargauth knows. He may be willing to reveal this information without being pushed to the brink if circumstances / the offer is right.

BEL’S FORGE IS WHERE THE COMPANION WAS BUILT: And you can find out how to open it there.

  • Maggie (Fort Knucklebones). Knows the Companion was designed at Bel’s Forge.
  • Gargauth. Doesn’t know how to open the Companion, but knows it was built at Bel’s Forge.
  • Dock of Fallen Cities Control Room. Instrumentation bears Bel’s forgemark.

LOCATION OF THE CRASHED FLYING FORTRESS: Where the adamantine control rods are.

  • Bel. He knows.
  • Maggie. She knows.
  • Avernian Warlord Rumors. PCs can hunt for rumors (see Part 7I).

THE SPARK IN THE SWORD: The Sword of Zariel contains a spark of Zariel’s divine light (and could be used to redeem her). This is not a proper revelation, but it is a significant info-dump so it may be worth pointing out here.

  • Lulu’s Memories. Foreshadow the truth.
  • Claiming the Sword. The moment of claiming the Sword makes it crystal clear that the spark exists (and why it exists). See Part 6D.

Go to Part 6C: Quest for the Dream Machine

Go to Part 1

NODE 5: FATIMA’S SHRINE

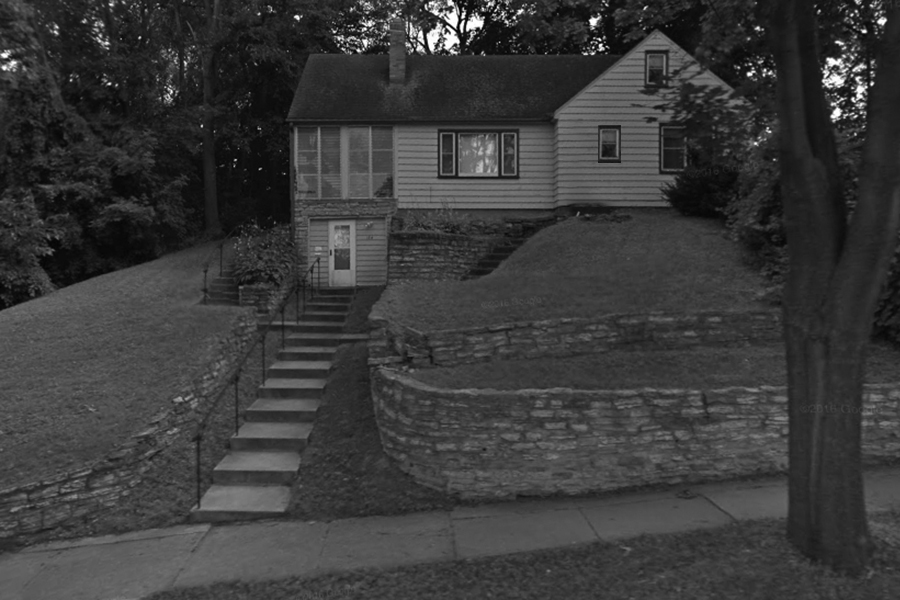
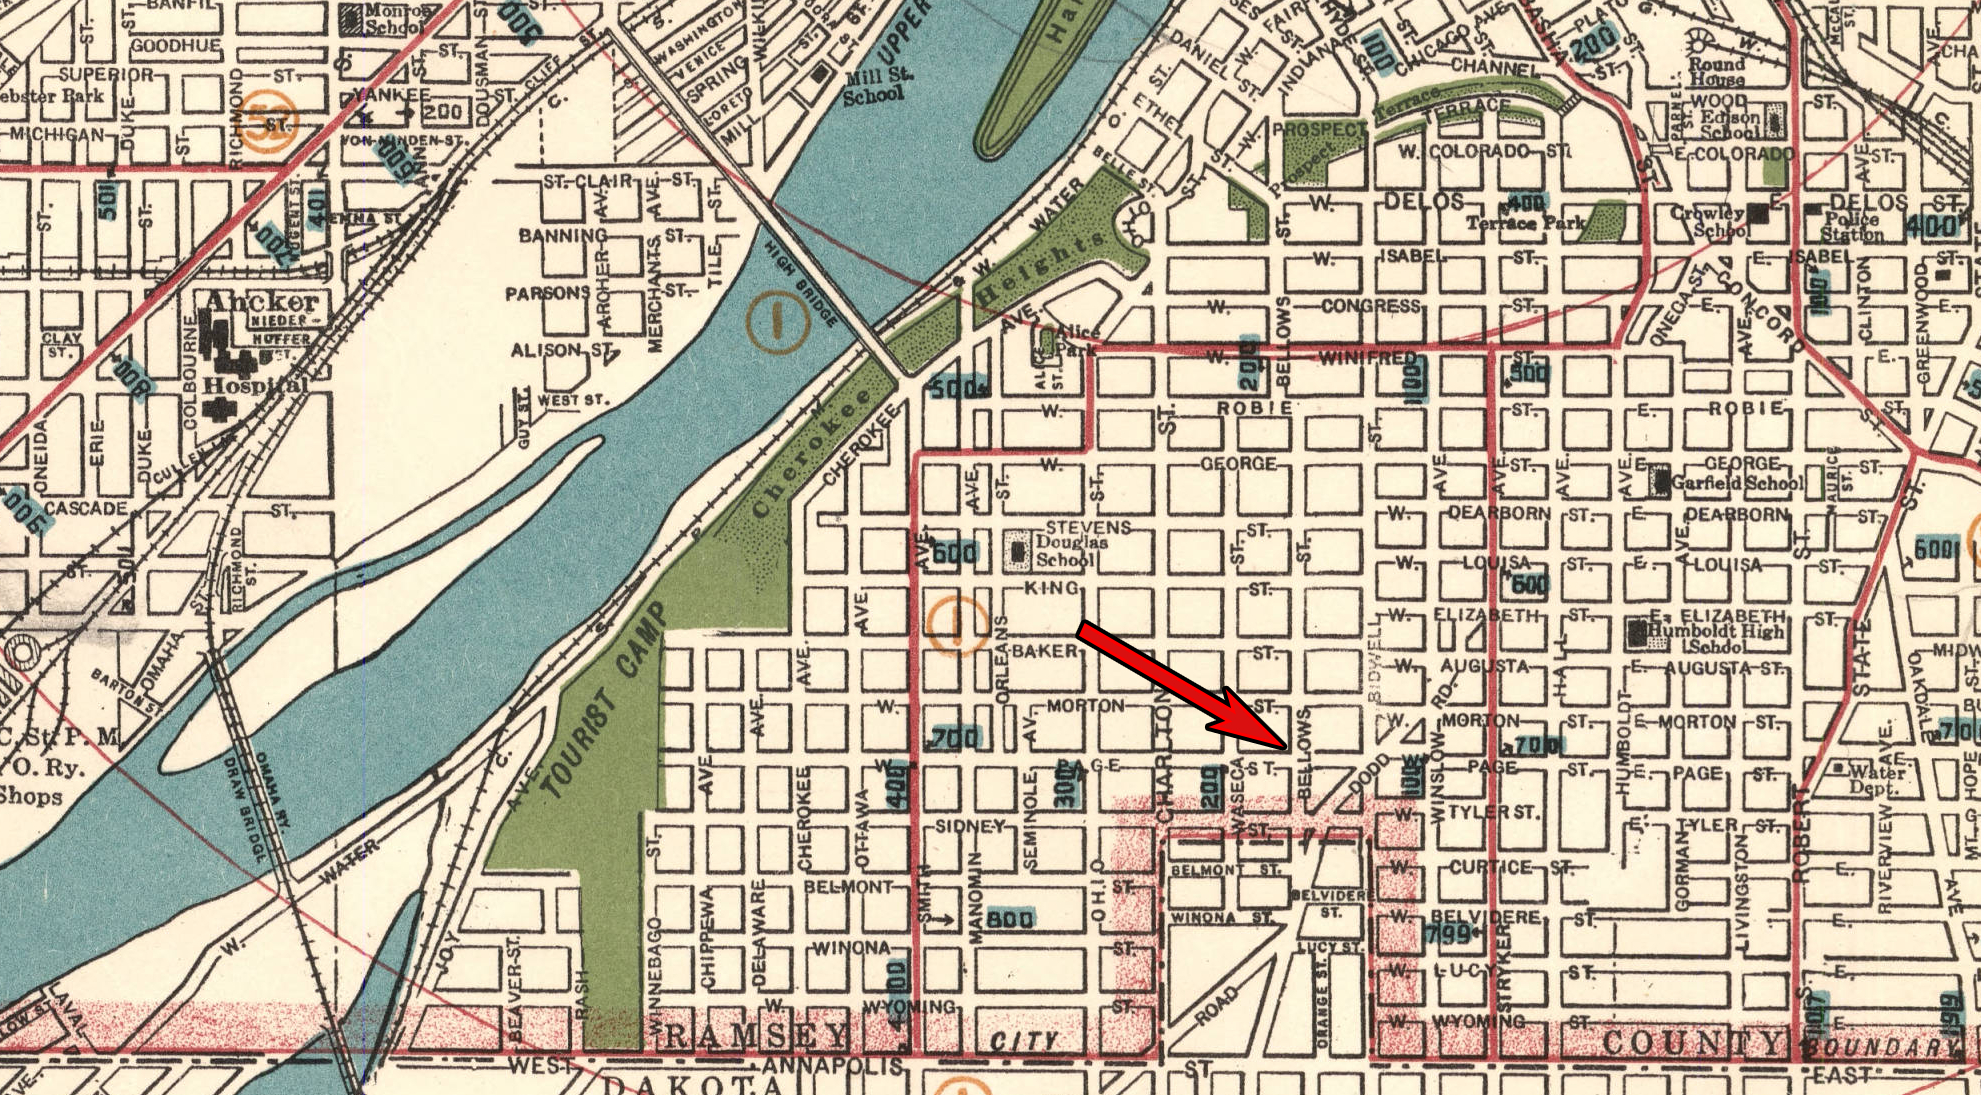
(169 Page Street West, St. Paul, MN)

  • Across the Mississippi River from downtown St. Paul.
  • Couple blocks off the streetcar lines.

THE HOUSE

Back Door: Leads to kitchen.

Front Entry: Front door leads to a small coat room. Stairs lead up to the indoor garden and front room.

  • Gardening boots on the mat, but no coats on the hooks. (The boots, on closer inspection, are unused.)
  • Architecture / Evidence Collection: There’s a secret hatch in the wall behind the coat rack. (You can grab the rack and pull the whole wall away.) Behind the hatch is a staircase leading to the basement.

Indoor Garden: Opens from the front room.

  • Glass walls let in the sun.
  • Tiered platforms hold numerous flowering plants.
  • Biology: The flowers growing here are Rosa richardii, acacia, willowherb, dragonwort, and Crinum lilies. These are all species notably native to Egypt. (Medicine 1 / History: Historically, all of these species had medical applications in Egypt and, later, the Mediterranean in general).

Front Room: Opens to the indoor garden. Doors to the kitchen and two bedrooms.

  • Well-accoutered. A sofa, two chairs, and a coffee table.
  • The coffee table has a magazine rack on one side with several magazines in it.
  • Evidence Collection: The magazine are all from January 1925.

Kitchen: Backdoor leads to the backyard. Another door leads to the front room.

  • Everything looks normal at first glance. But casual inspection reveals that the cupboards are empty and the food packages on the counters are also empty.
  • Icebox: Empty. There’s no ice.
  • Kitchen Table: There’s a stack of Prop: 13 Black Cats Flyers on the table.

Bedrooms: Each has a door leading to the front room.

  • Single Beds: The quilts
  • Bedside Table: Drawer empty.
  • Closets: Empty.

Basement Shrine: Stairs down from the hidden panel in the front entry.

  • Basement has been converted into a work space, with a large table in the middle of the room.
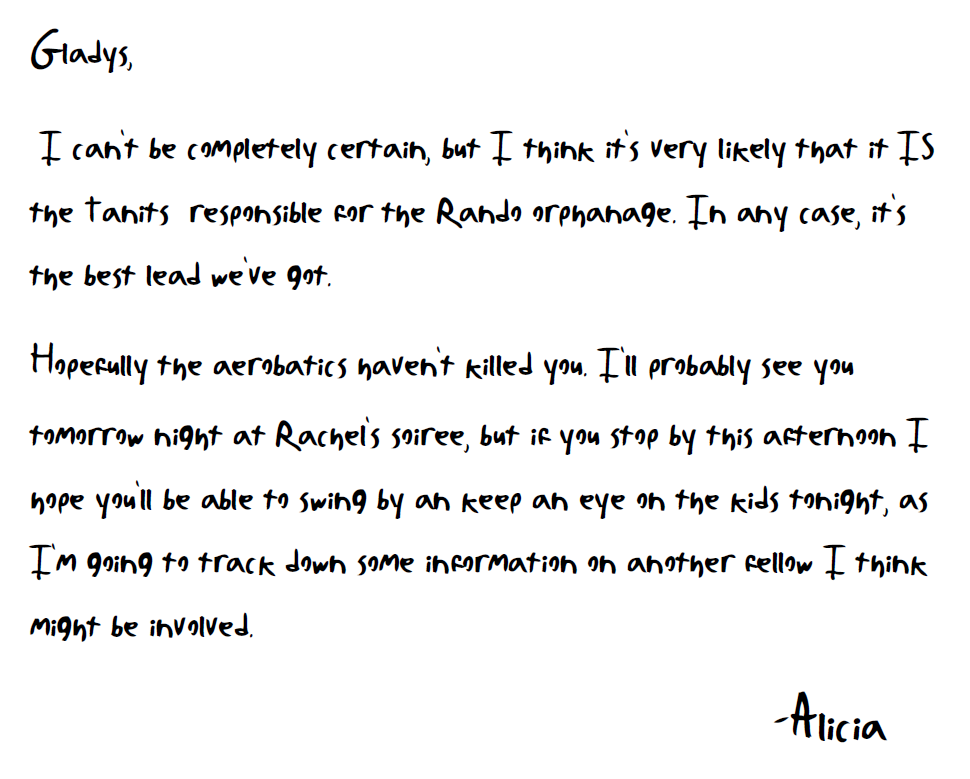
  • Letter: Prop: Letter to Gladys is lying on the table.
  • Photostat Machine: With more Prop: 13 Black Cat Flyers next to it.
  • Shrine: On the far wall, there’s a shrine built around a Hamsa made from lapis lazuli. Stubby white candles covered in melted wax surround the hand. (If the Hamsa is removed, the Eye of Ra can be found carved into the wall behind it.)
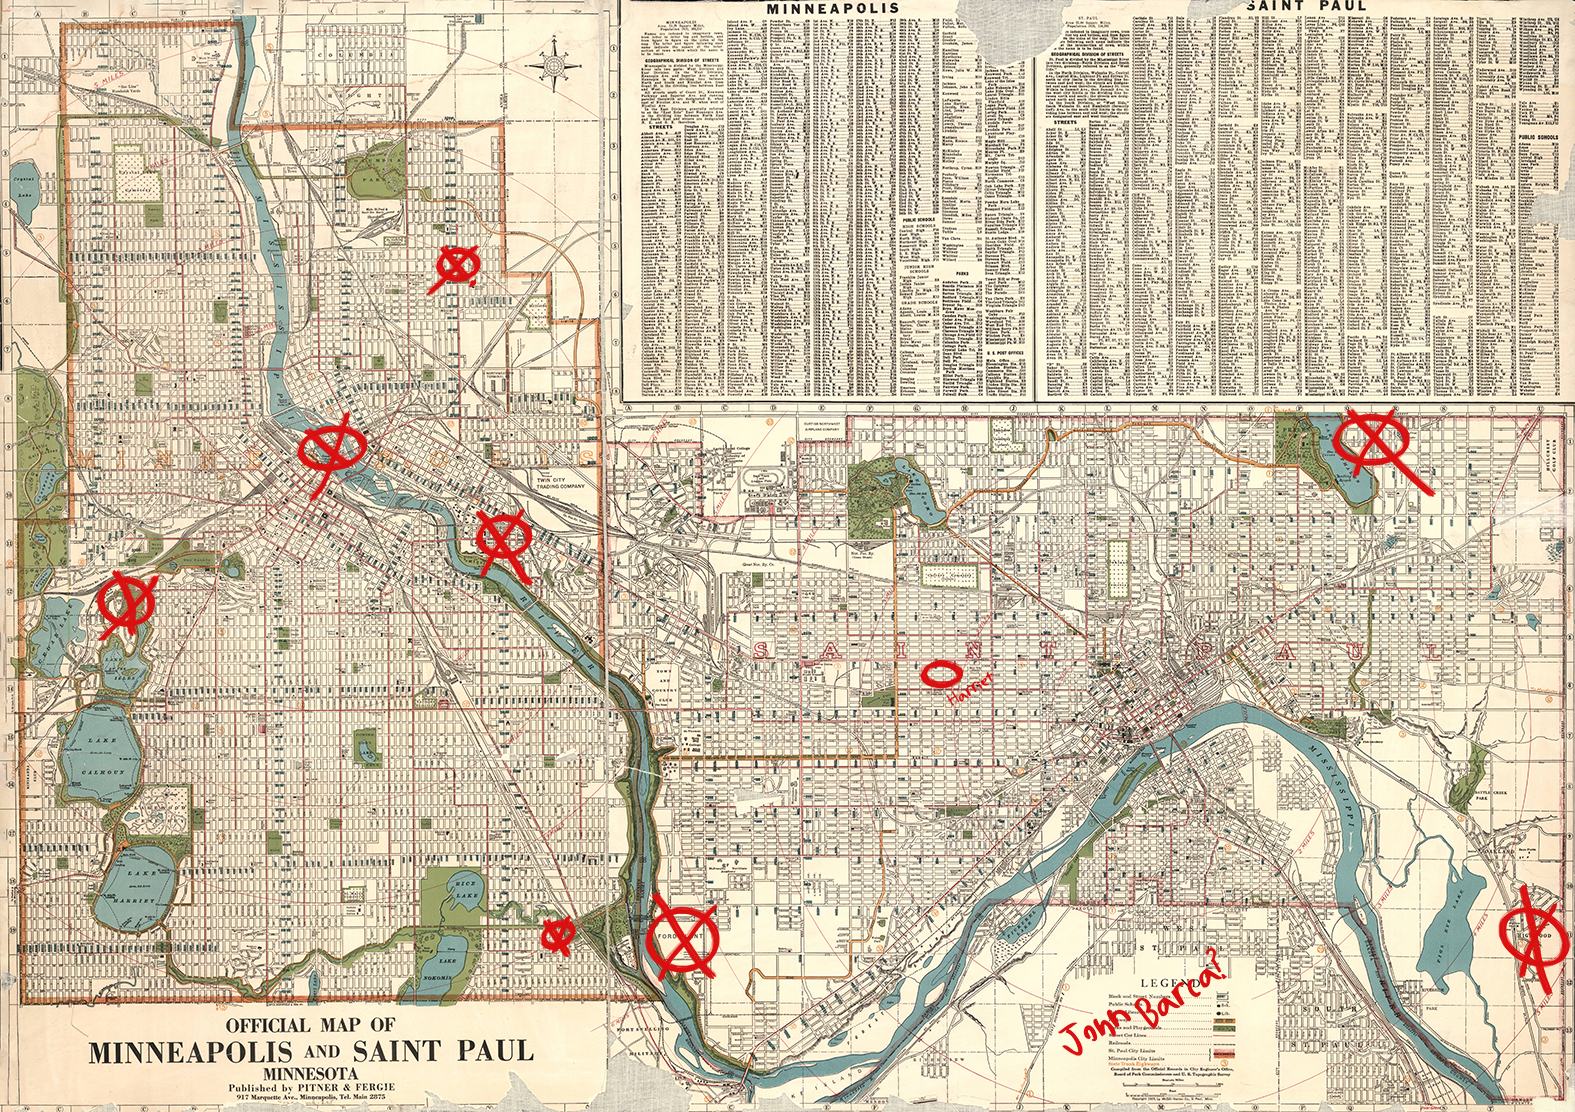
  • Map of the Twin Cities: Thumb-tacked to the wall. (Prop: Map of the Twin Cities)

GM Background: The map shows locations Alicia Corey was investigating for possible Tanit cultist activity. The only non-eliminated location on the map (labeled “Harriet”) is the Node 4: Harriet Tubman’s Asylum for Colored Orphans. The name “John Barca” has also been written on the map, perhaps allowing the PCs to research him.

MAP OF THE TWIN CITIES

Left Hand of Mythos - Map of the Twin Cities

(click for larger version)

LETTER TO GLADYS

Left Hand of Mythos - Letter to Gladys

Go to Node 6: Davis Farm

Descent Into Avernus - Haruman's Hill

Go to Table of Contents

As the PCs leave Elturel, I think the time has come to take a step back and look at the big picture: They’re in Avernus now. So what are they trying to do, exactly?

This post takes a close look at how the adventure is currently structured (and the problems I have with that structure). Then the rest of Part 6 is going to present the big picture of how we’re going to remix this structure. We’ll want this big picture to get us oriented in Part 7: Exploring Avernus and keep us pointed in the right direction as we wrap things up in Part 8: The End.

QUICK SUMMARY: THE ORIGINAL CAMPAIGN

  1. The PCs indirectly get a vision from Torm which reveals that (a) Lulu helped hide the Sword of Zariel before she lost her memories and (b) she talked to a couple of kenku at some point after doing so. (The NPCs are all convinced the Sword of Zariel will save Elturel, although it is not explained how or why.)
  2. Lulu remembers that she met the kenku at Fort Knucklebones, so the PCs go there.
  3. Lulu remembers that the Sword of Zariel was at Haruman’s Hill, so the PCs go there. (It isn’t.)
  4. Lulu remembers two other locations that will lead to the Sword of Zariel, so the PCs choose one of them and go there.
  5. Each location is the starting point of a different linear railroad. If the PCs follow the railroad they’ve selected, they eventually get the Sword of Zariel.

THE PROBLEM WITH LULU’S MEMORIES

As you can see above, recovering/following Lulu’s memories is the key to the entire adventure.

When the PCs first meet Lulu and she starts tagging along with them, we’re given the back story of what actually happened (DIA, p. 51) and a little table of random memories that she can intermittently recover during the adventure. This is clever, giving the DM a simple tool for keeping this central theme/plot gimmick consistently in focus as the campaign progresses.

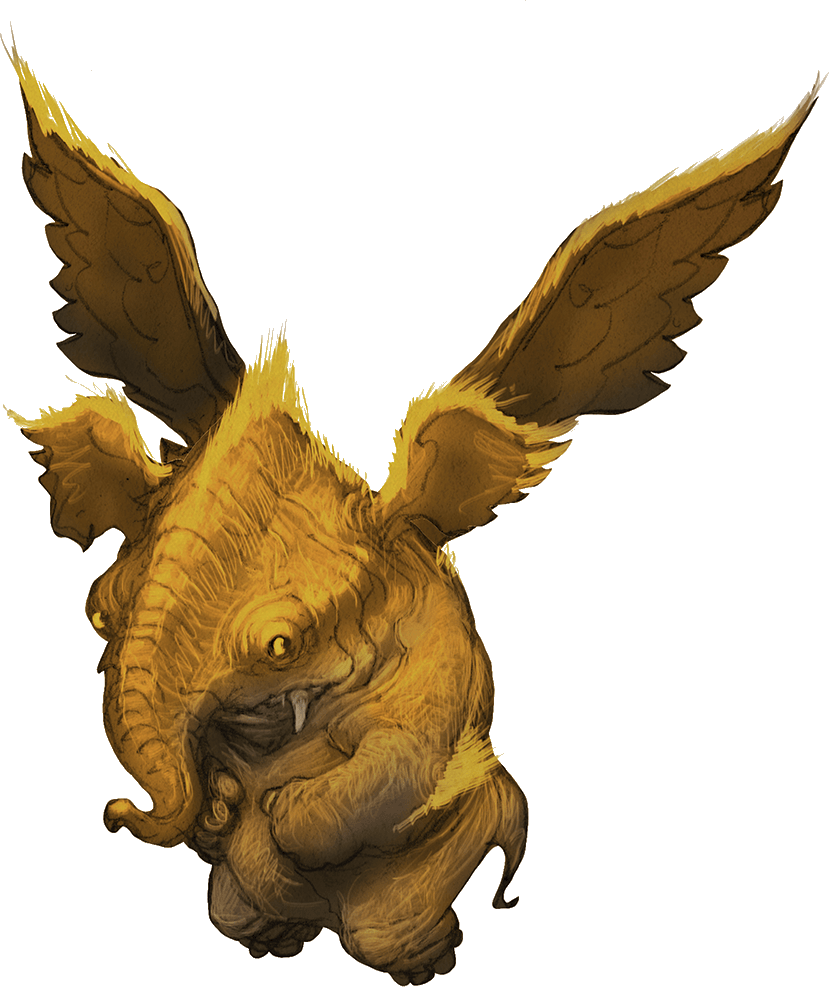
Descent Into Avernus - LuluHaving made Lulu’s memories the central plot gimmick of Descent Into Avernus, however, you might conclude that the designers would make sure that her back story is crystal clear to the DM, ensuring that this absolutely vital continuity is easily handled without error.

You would be wrong.

In fact, Lulu’s back story doesn’t even make sense. For example, the vision from Torm says, “The elephant knows! After hiding the Sword she met some kenku!” And Lulu says: “I remember! The kenku live at Fort Knucklebones! Let’s go!”

But:

  1. If you flip back to the summary of Lulu’s story (DIA, p. 51), neither the kenku nor Fort Knucklebones appears. This is an egregious oversight. However, you can eventually conclude that her visit there MUST have happened when “Lulu wandered Avernus for months” after Zariel’s fall.
  2. Those kenku, although still alive, should definitely be dead. Zariel’s fall happened in 1354 DR and Lulu “wandered Avernus for months.” That means she met the kenku 140 years ago. Kenku only live for 60 years.
  3. The kenku are at Fort Knucklebones because they work for Mad Maggie. But when Mad Maggie first came to Avernus (and before going to Knucklebones), “she “found pieces of a beautiful tapestry that chronicled the fall of Zariel.”

So within a few months of Zariel’s fall:

  • Someone made a tapestry;
  • The tapestry was ripped to shreds;
  • Mad Maggie found the tapestry;
  • Mad Maggie founded Fort Knucklebones; and then
  • Lulu came to Fort Knucklebones (meeting some kenku who are, I guess, immortal).

You can kind of shuffle things around so that this makes sense (change it so that Maggie didn’t find the tapestry and become interested in Zariel lore until recently, long after founding Fort Knucklebones; which also explains why she didn’t pump Lulu for all the information she knows about Zariel the FIRST time she met Lulu), but it’s still a massive continuity glitch sitting right in the middle of a crucial scenario hook in the middle of the campaign.

And this is just one example! Lulu’s timeline is filled with contradictions and inconsistencies!

Descent Into Avernus positions this as THE central mystery of the campaign, but then it basically doesn’t have a coherent solution to the mystery. It’s like a murder mystery that can’t quite make up its mind about who committed the murder.

DIA: You MUST figure this out!

Players: Yes! We NEED to find the answers to this!

DIA: Find the answers to what now?

We’ll be sorting this out in Part 6D: Lulu’s Memories.

THE KENKU PROBLEM

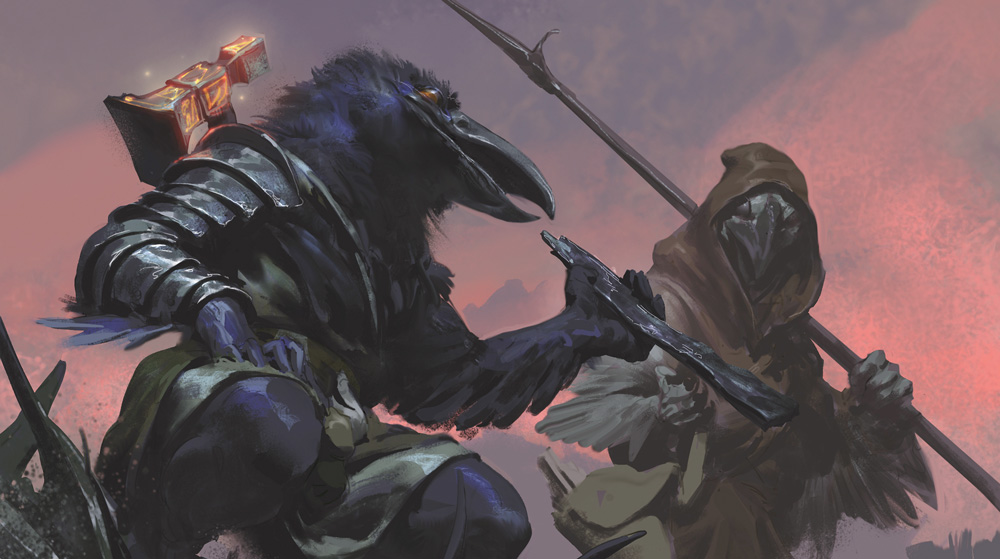
Descent Into Avernus - Kenku

Remember those kenku?

Descent Into Avernus says, “Find the kenku! They knew Lulu back in Ye Olde Days! They’ll have valuable information that will help you to find the Sword!”

So the PCs go to Fort Knucklebones. They find the kenku. The adventure says, “The kenku Chukka and Clonk instantly recognize Lulu, since they’ve met her previously.” And then… nothing.

Literally nothing.

The kenku remembering Lulu is, as far as I can tell, never mentioned again. And if the players decide to push the issue and try to get the valuable information they were promised, there’s absolutely nothing for the DM to give them.

This isn’t just a dead end either: Remember that the kenku DO remember Lulu. Even if they don’t have any vital information, there’s still a story to be told here — a lost fragment of Lulu’s memories to recover in a scenario which has been explicitly positioned as being about recovering Lulu’s memories. It’s not that Descent Into Avernus says “nothing to find here”; it’s that Descent Into Avernus just completely forgets the reason the PCs came to Fort Knucklebones.

It was almost incomprehensible to me that such an egregious oversight could have made it into print… until I took a step back and tried to understand the designers’ mental paradigm.

What we are, in fact, talking about here is the scenario structure. I’ve talked in the past about the fact that D&D (and RPGs in general) do a pretty terrible job of teaching scenario structures to new DMs. In fact, they’ve historically only taught one (dungeoncrawling), and in 5th Edition they’ve even failed to do that. (5th Edition notably doesn’t teach a new DM how to key a map — or even provide an example of a keyed map! — let alone teach them how to use it in play.)

Without primary sources, new DMs are largely learning their scenario structures from published examples. But it’s been decades now and the communal knowledgebase is atrophying. It’s gotten so bad that even a lot of professional designers don’t know how scenarios are supposed to be structured, so even the published examples that DMs used to be able to learn from are degenerating.

Which brings us to Descent Into Avernus: The designers don’t actually have a functional scenario structure. They’ve instead flailed themselves into a sort of malformed scenario structure which consists entirely of:

  1. An NPC tells the PCs where to go.
  2. The PCs go there.

The entire campaign is just this one “structure” repeated infinitely: An NPC tells you where to go. You go there and you find another NPC who tells you where to go.

So when it comes to the kenku, the designers aren’t designing a situation; they aren’t thinking of the game world as a real place. They aren’t even thinking about what the players’ actual experience will be (what they’ll be thinking, what they’ll want, etc.). They’re thinking of the kenku strictly as another McGuffin in a long string of McGuffins: They needed a mechanism to move the PCs from Elturel to Fort Knucklebones. The kenku were that device. The PCs are now at the Fort. Therefore, the kenku are done.

And, thus, the kenku are immediately dropped.

Furthermore, because this malformed structure is apparently ALL THEY HAVE, it seems to have become a kind of cargo cult for them:  They know that NPC A has to give some sort of “explanation” for why the PCs need to go to NPC B, but they frankly don’t care what the explanation is.

And they assume the players won’t care either. The presumption is that the players are onboard; that the players share their understanding that “the NPC tells me where to go and then I go there” is the one and only way that things work.

The designers expect that players to immediately transition to the “make Mad Maggie happy” mini-game they’ve designed without ever questioning the kenku about the thing they came here to question the kenku about because they literally never gave a shit about the ostensible reason the PCs were looking for the kenku.

I call this the Kenku Problem. And once you’ve seen it, you really can’t unsee it. It explains A LOT of the problems Descent Into Avernus has:

  • Why do they keep putting Must Have Encounters™ behind secret doors? Because if the PCs haven’t found the NPC to tell them where to go next, clearly the players will know to keep looking until they find them!
  • Why are the PCs told to go talk to people without being given any reason for doing so? Because the REASON is irrelevant. It’s white noise surrounding the operative phrase of “go talk to <insert name>.”
  • Why are the PCs told what will be inside the puzzlebox by the same guy who tells them to “go talk to <insert name> to have the puzzlebox opened” (thus murdering the pay-off for doing so)? Because they don’t care about the mystery and they don’t think you’ll care either. The only reason the “mystery” exists is so that you’ll go talk to <insert name>.
  • Why does the adventure assume the PCs will simply plane shift to Hell without having any reason to do so? Because an NPC told them to! (Why not have the NPC give them a coherent reason? Because it doesn’t matter!)

This superficially makes it seem as if the NPCs are all-important! But, ironically, they’re not. They’re just cogs in the machine; their sole function to point you to the next cog. This is why the adventure doesn’t care enough about Kreeg’s history to make it consistent. Nor Zariel’s. Nor Lulu’s. Nor Ravengard’s. Nor the kenku. Nor… well, anybody.

Ravengard tells you to talk to the kenku. The kenku tell you to talk to Mad Maggie.

Nothing else matters.

Note: There are twenty-nine (!) writers credited in Descent Into Avernus. It is quite plausible that when I’m ascribing creative decisions to the “designers” here what I’m actually doing is anthropomorphizing artifacts from whatever development process was used to create and stitch together all of those contributions. By the same token, the book still managed to get to press without anybody saying, “Hey… What do those kenku know about Lulu? Isn’t that the whole reason the PCs came here?” And it won’t stop a DM from getting wrong-footed by the adventure-as-written in actual play.

THE KNUCKLEBONES PROBLEM

Fort Knucklebones itself suffers from a common problem I see in adventure design: Interstitial content that’s not supported by the main line of activity.

The fort is filled with encounters that all start with some variation of, “While the PCs are here…”

  • “At some point during their visit, the characters see the kenku…”
  • “Characters who witness this can…”
  • “As events play out in Fort Knucklebone, the characters notice…”

And so forth.

There’s absolutely nothing wrong with interstitial content: The world should not be strictly reactive (the PCs do something and the world reacts); it should also be proactive (stuff happens in the world and the PCs can react to it).

But for interstitial content to work, there MUST be enough stuff for the PCs to actively engage with so that there’s enough time for the interstitial encounters to be triggered. And this is not the case here. Instead, as soon as the PCs enter Fort Knucklebones this happens:

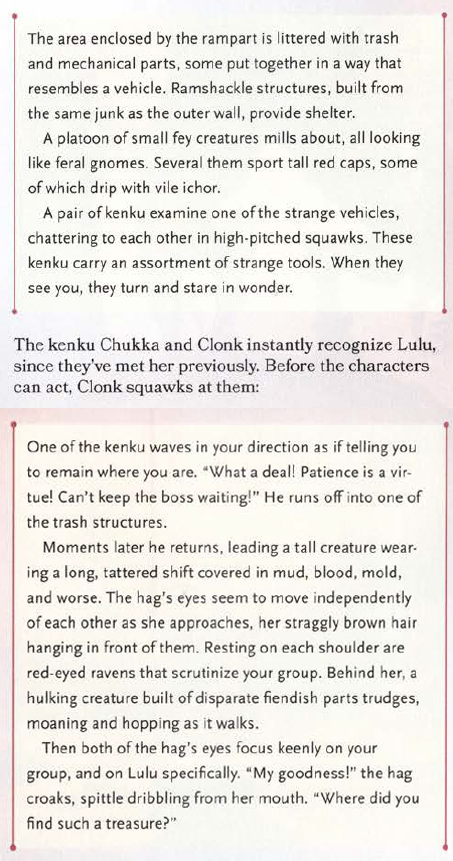
Descent Into Avernus - Arrival at Ft. Knucklebones

They immediately meet Mad Maggie. They tell her what they want. She immediately takes them to a dream machine and recovers Lulu’s memories. Lulu immediately declares she knows where the Sword is. The PCs will then immediately leave. (Why wouldn’t they?)

No narrative space is given for the PCs to just hang out at Fort Knucklebone, which means that all of the “hanging out at Fort Knucklebone” encounters will never happen.

It’s possible that the fort was originally intended to be some sort of hub or home base for the PCs so that these interstitial encounters would play out over the course of several visits, but as written it isn’t. In any case, the encounters as written are supposed to play out before Maggie gives them supplies (because their outcome is supposed to influence that), even though there’s a continual stream of uninterrupted interaction with Maggie from the moment they enter the base until she gives them the supplies.

You can kind of half-ass a solution by simply injecting extra time into the main line of Maggie’s activities. For example:

  • Instead of immediately meeting the kenku and having them immediately bring Maggie to the PCs, the PCs have to find the kenku and then go to Maggie (so that they explore the fort a bit and meet some of the people there before meeting her).
  • It will take Maggie some time to assemble the dream machine. Probably a few hours should suffice, during which time the PCs can do all the other things.

If you want to full-ass a solution, though, you’ll want to figure out some sort of active agenda the PCs could be pursuing at the fort while waiting for Maggie to finish the machine. Otherwise they’re just twiddling their thumbs. Instead of Maggie automatically giving them supplies, for example, maybe they need to get properly outfitted for Avernus here.

As described in Part 6C: Quest of the Dream Machine, the Remix will, in fact, make Fort Knucklebones a de facto hub that the PCs are likely to make their homebase and return to multiple times.

THE CHOOSE YOUR RAILROAD PROBLEM

Let’s be blunt: Choose Your Railroad is a terrible scenario structure.

It’s almost an oxymoron. You recognize that choice is important, but then you immediately discard it in favor of a long string of Kenku Problem interactions lightly spiced with meaningless fetch quests.

(A quick digression on fetch quests: A fetch quest is any time an NPC tells a PC to get a Plot Coupon and return it to them; or, vice versa, when the NPC gives the PC a Plot Coupon and tells them to take it some place else. A meaningful fetch quest is one where the PCs care about the Plot Coupon and its disposition. A meaningless fetch quest is one where only the NPC cares about the Plot Coupon and the only reason the PCs are delivering it is because they want the NPC to do something else for them; as a result, the actual Plot Coupon and what you’re doing with it is inconsequential and could easily be swapped out for any other arbitrary items/locations.)

This is very much a variation of the broken Choose Your Own Adventure design technique, and it’s particularly painful here because Descent Into Avernus actually promises to deliver this incredible, open-ended exploration of Avernus before yanking it away.

But the problems with the adventure’s Choose Your Railroad go much deeper than the fact that it’s just a bad idea in principle. It’s actually difficult to explain how poorly this is done.

So the PCs have Mad Maggie use her dream machine on Lulu. Lulu wakes up and says, “The sword! The sword! I know where it is!”

(Spoilers: She doesn’t.)

Her “dreams lead the characters on a wild goose chase to Haruman’s Hill.”

First: There’s no clear reason given for why Lulu thinks Haruman’s Hill is where the sword is.

Second: Given the timeline, it’s fairly clear that Haruman’s Hill did not and could not exist when Lulu was in Avernus.

But, OK. Fine. This thing that makes no sense happens. The PCs go adventuring at Haruman’s Hill for a little while, they figure out that Lulu took them to the wrong place, and Lulu says:

“I’m so sorry! My memory is a little hazier than I thought! Having pondered my dreams further, I think there are two sites in Avernus that are important to finding the sword! Choose between a place where demons manifest and one where demons are destroyed.”

These are, of course, the two railroads.

But, once again, there’s no reason given for why Lulu thinks either of these locations have anything to do with the Sword.

And that’s because they don’t.

They have nothing to do with the Sword. They have nothing to do with Lulu’s memories.

THERE IS NO REASON FOR LULU TO SAY YOU SHOULD GO TO THESE TWO LOCATIONS.

And this becomes abundantly clear as soon as the PCs go to them.

The first one is a harvesting station for abyssal chickens. Four (presumably redneck) devils are harvesting the chickens and bullying another devil who is mentally impaired. These guys explicitly know absolutely nothing about what the PCs are trying to do, but if the PCs bribe them they can tell them where to find a guy who MIGHT know something that can help them.

Okay. What about the other location?

Here the PCs meet a devil who knows absolutely nothing about what they’re trying to do, but if they go on a meaningless fetch quest for him he’ll give them a letter of introduction to another guy who MIGHT help them do a thing that they’re NOT doing.

So to briefly recap here:

  1. Lulu takes you to the wrong location.
  2. Lulu tells you two more locations to go to, but can give no reason why you should.
  3. If you go to those locations, it is immediately clear that there’s no coherent reason for you to be there.

So Lulu:

  1. Demonstrates she can’t be trusted to give accurate directions.
  2. Fails to give accurate directions AGAIN.
  3. Descent Into Avernus than assumes the PCs will just continue along the “Path” they’ve “chosen,” even though there’s no discernible reason for them to do so.

And obviously this is a “reasonable” assumption because there are, after all, NPCs telling the PCs where to go and this is a Kenku Problem.

Fixing this was non-trivial. I wasn’t sure there WAS a fix without starting over from scratch, because the adventure had really backed itself into a corner here.

If I hadn’t solved it, of course, then we wouldn’t be doing this Remix at all.

The actual railroads themselves are filled with a plethora of problems (as railroads always are), but since we’re defenestrating the whole structure there’s not a lot of value in breaking it down point by point. Our alternative structure will be laid out in Part 6C: Quest of the Dream Machine, and Part 7: Exploring Avernus will look at how to run Avernus as a true exploration campaign.

Go to Part 6B: The Avernian Quest


JUSTIN ALEXANDER About - Bibliography
Acting Resume

ROLEPLAYING GAMES Gamemastery 101
RPG Scenarios
RPG Cheat Sheets
RPG Miscellaneous
Dungeons & Dragons
Ptolus: Shadow of the Spire

Alexandrian Auxiliary
Check These Out
Essays
Other Games
Reviews
Shakespeare Sunday
Thoughts of the Day
Videos

Patrons
Open Game License

BlueskyMastodonTwitter

Archives

Recent Posts

Recent Comments

Copyright © The Alexandrian. All rights reserved.