The Alexandrian

Posts tagged ‘descent into avernus’

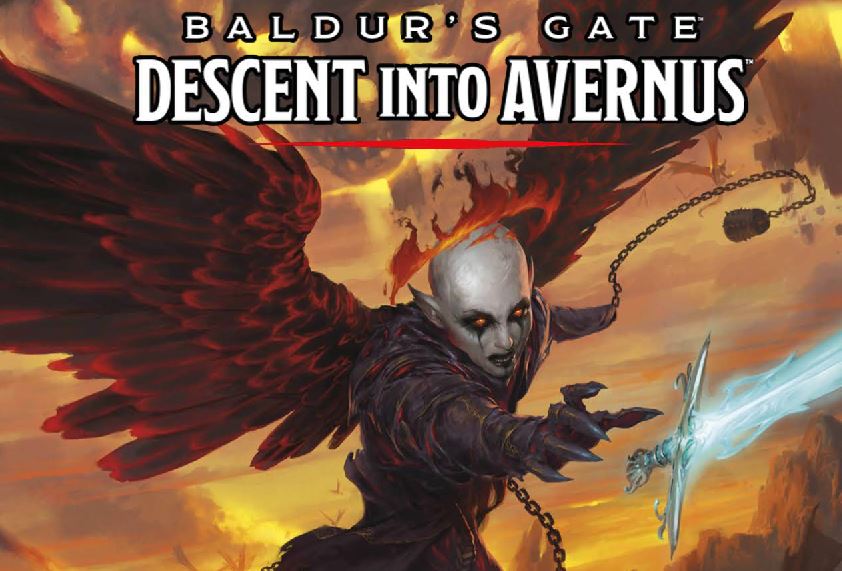
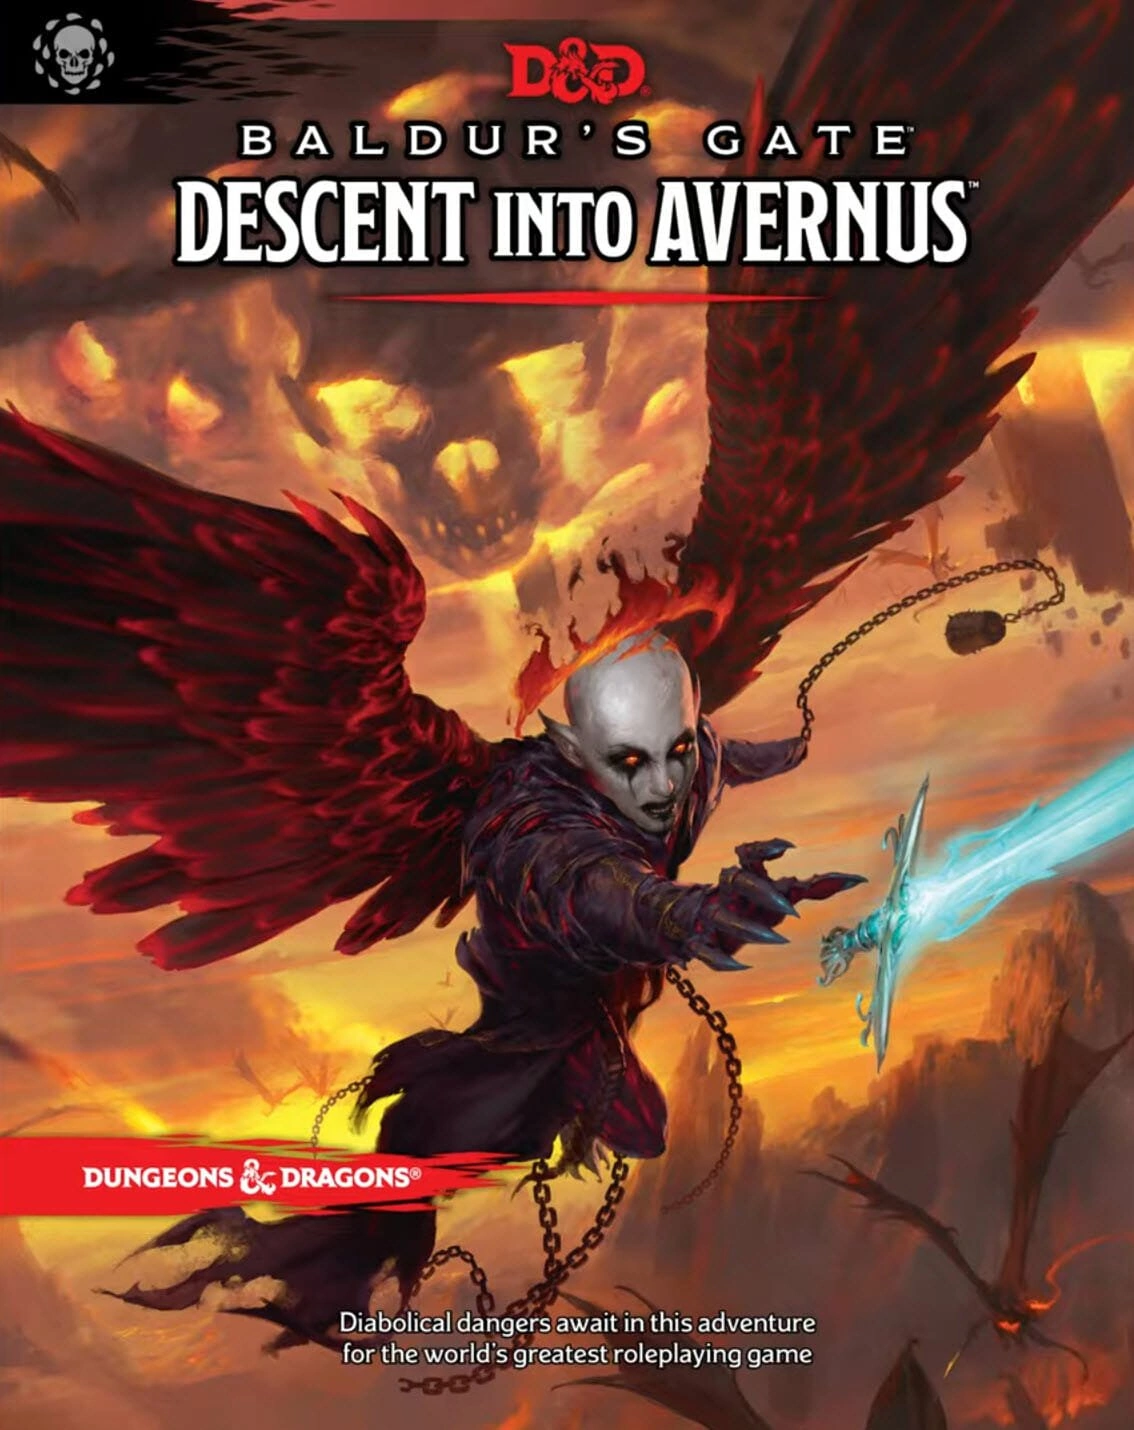
Review: Descent Into Avernus

March 23rd, 2022

Descent Into Avernus - Wizards of the Coast

SPOILERS FOR DESCENT INTO AVERNUS

Descent Into Avernus begins by having the PCs stand around doing nothing while the GM describes an NPC doing awesome stuff.

If then proceeds to “if they don’t do what you tell them to do, the NPCs automatically find them and kill them.”

It’s not an auspicious start.

EVERYBODY INTO THE HANDBASKET!

Although titled Baldur’s Gate: Descent Into Avernus, this adventure has very little to do with Baldur’s Gate.

It does begin in the city, however, with Baldur’s Gate being overrun by refugees from Elturel, a city further up the River Chionthar which has mysteriously vanished from the face of Toril. The PCs will spend a couple of days investigating Zarielite cultists in the city, discovering that they may have something do with Elturel’s disappearance. They will then be sent to Candlekeep to research an infernal puzzlebox they’ve recovered during their investigation, and Baldur’s Gate is never seen again.

A scholar at Candlekeep opens the infernal puzzlebox for them, revealing that Elturel has been taken to Hell as the result of a pact signed between the High Observer of Elturel and Zariel, the Archduchess of Avernus. The PCs are then sent to a different wizard, further down the road from Candlekeep, who can take them to Hell.

Arriving in Hell, they discover that Elturel is floating above the hellish plains of Avernus and slowly sinking into the River Styx. Jumping through a number of hoops, with NPCs sending them hither-and-yon, they eventually encounter an NPC who tells them that he’s had a vision from the god Torm, and the PCs are supposed to go forth and find the Sword of Zariel if they want to save the city.

So where is the Sword of Zariel?

Well, back in Candlekeep they were also introduced to a small, golden, flying elephant (technically an angelic being known as a hollyphant) named Lulu. Lulu came with them to Hell and it turns out she used to be Zariel’s warmount, but she’s lost all of her memories. She does remember one thing, though: She was at a place called Fort Knucklebones, and she met a couple of kenku there.

So the PCs leave Elturel and journey across Avernus to Fort Knucklebones. It turns out the kenku don’t know anything, but by a stroke of luck the hag who runs Fort Knucklebones has a machine that can restore Lulu’s lost memories. So Lulu gets strapped into the machine, she recovers her memories, and remembers where the Sword is!

… or, at least, that’s what Descent Into Avernus claims will happen. We’ll come back to this, but the reality is that Lulu has no idea where the Sword. Fortunately the PCs can jump through some more hoops and eventually claim it.

With the Sword in hand, they can confront Zariel and either redeem her, make a deal with her, or decide to join her. The last of these is rather unlikely (although good show to the book for considering the possibility), while either of the former two result in Elturel being saved and the PCs escaping from Hell triumphant!

THE REST OF THE BOOK

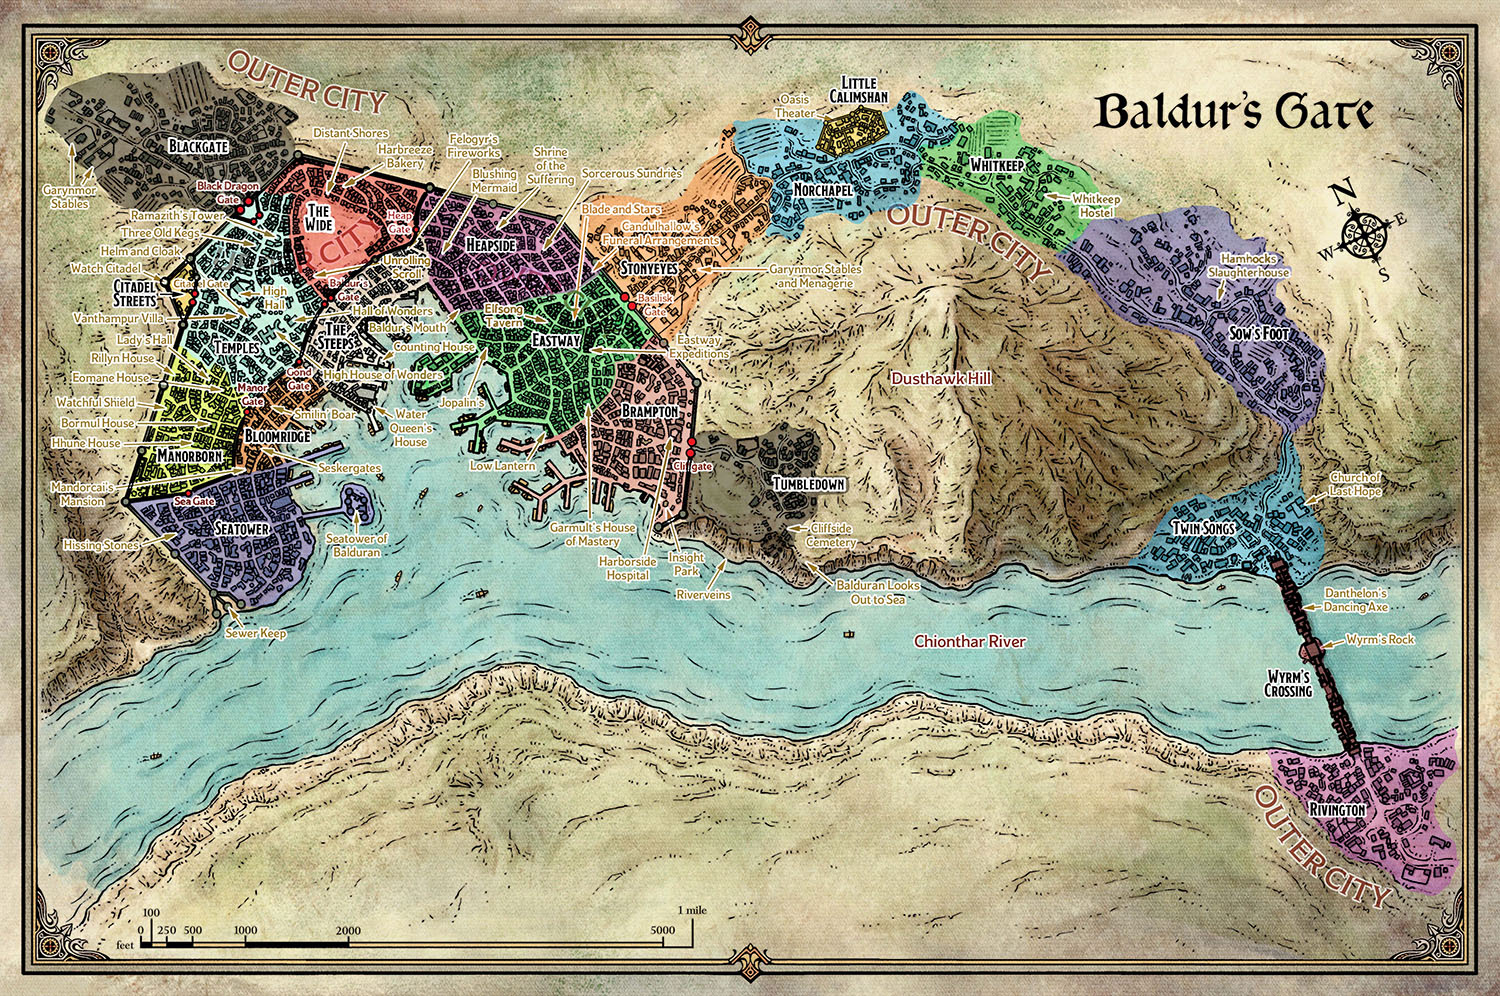
Baldur's Gate - Mike Schley

While the adventure may not be overly concerned with Baldur’s Gate, however, the same is not strictly true for the book. About fifty pages are given over to the Baldur’s Gate Gazetteer, detailing the city as it exists in 1492 DR. (Oddly, the campaign itself is described as taking place two years later in 1494 DR. There have been some recent indications that the campaign is canonically being moved back to 1492 DR in order to maintain continuity with Baldur’s Gate III… so we’ll just mark this down as “thoroughly confused.”)

The Gazetteer itself is quite serviceable, although much like the gazetteer of Waterdeep found in Dragon Heist, it pales in comparison to previous sourcebooks detailing the city. It notably includes a number of player-facing options, including customized backgrounds for characters from Baldur’s Gate.

The oddity here is that the discordance between the focus of the background material and the actual content of the campaign (in which the PCs are likely to only spend 48 or maybe 72 hours in Baldur’s Gate) renders the gazetteer largely useless for anyone actually running Descent Into Avernus.

It can also actively mislead DMs and put them on a bad footing. For example, the gazetteer includes a section on Dark Secrets:

During character creation, once players have developed their characters, they should collectively choose a dark secret shared by the entire party. Every member of the party is entangled in this dark secret, regardless of how new they are to the city or how incorruptible their morals. Maybe they’re merely witnesses, maybe they’re covering for a friend’s crimes, or maybe they’re deep in denial. Regardless, in the eyes of the law, they’re guilty. Each dark secret shares a number of elements. Players should work with you, the DM, to customize these particulars to the group.

These dark secrets include Conspiracy, Murder, Theft, and a Failed Coup. Each type of secret has multiple versions, and also details the PCs’ roles in the secret, the consequences of what they did, and who in Baldur’s Gate knows their secret.

This is a really cool concept and, for any campaign set in Baldur’s Gate, it’s a fantastic way of giving the PCs deep and meaningful ties to the city (and to each other).

The problem, of course, is that Descent Into Avenus ISN’T set in Baldur’s Gate.

So you get the players invested in these connections to Baldur’s Gate and lay down the seeds of what seems like an epic campaign. (For example, you want to overthrow the patriars and lead an egalitarian revolution.) Then, after just a couple sessions, the PCs blow town and leave all that stuff just dangling in the wind.

And some Dark Secrets are completely incompatible with the campaign. For example, the primary campaign hook is the PCs getting hired by the Flaming Fist to investigate some cult-related murders. One of the Dark Secrets is, “The Flaming Fist is corrupt. You turned against your commanding officer, seeking to take the Fist in a new direction. Now you’re branded a traitor.”

AMAZING IDEAS, FAILED EXECUTION

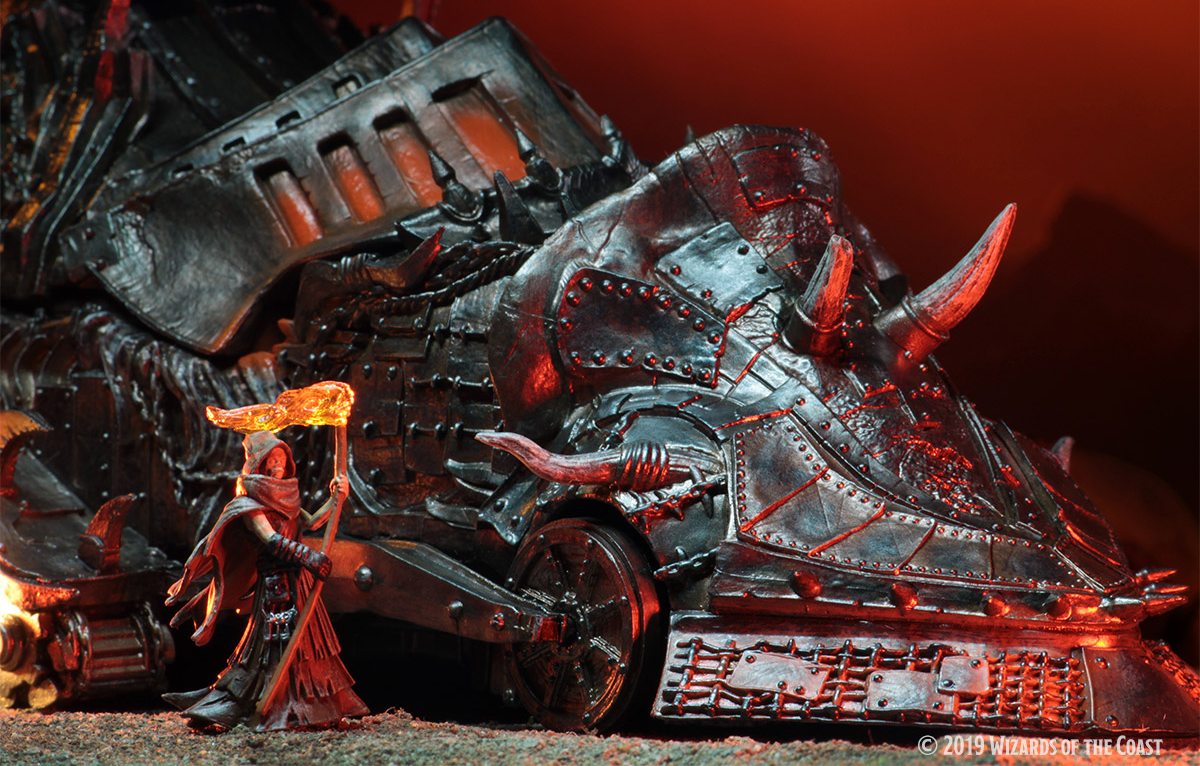
Infernal Warmachine - Wizkids

Unfortunately, a lot of Descent Into Avernus is like this: There’ll be an amazing idea, incredibly cool concept, or breathtaking revelation, but then the execution of that idea will be broken or simply lackluster.

For example:

DIA: Do you want to play MAD MAX IN HELL with infernal muscle cars fueled by the souls of the damned?

Me: Fuck yes, I do!

DIA: Just kidding. We’re not doing that.

Me: …

These infernal war machines were actually hyped quite a bit in the pre-launch marketing for Descent Into Avernus. In the book itself, there are two and a half pages which are just straight up the introduction to a Warlords of the Avernian Wastelands campaign. It is straight up cooler than anything else in the entire book.

And then it just… vanishes.

There are a couple of scenes where an infernal motorcycle is parked nearby because that’s how an NPC showed up.

That’s it.

It’s really weird.

My best guess is that this was a really cool idea that somebody had really late in the development of the book and they just couldn’t integrate it?

But maybe not. Because, like I said, this is kind of a pervasive problem for the book.

DIA: Do you want to explore HELL ITSELF ON THE WAR-TORN PLAINS OF AVERNUS?

Me: Fuck yes, I do!

DIA: Just kidding. We’re not doing that.

Me: … stahp.

The book frequently talks about how the PCs are going to be “exploring” Avernus. But then it goes out of its way to stop them from doing that in almost every way possible.

For example, it’s impossible to make a map of Avernus. Apparently the Lawful Evil plane of Avernus is so chaotic and ever-shifting that anyone trying to map it goes insane.

(This is, it should be noted, something that was made up specifically for this adventure. It not only doesn’t make sense — read my lips: Lawful — it explicitly contradicts preexisting lore.)

The reason they don’t want you making a map is because navigation is meaningless. If you want to go somewhere, it’s completely random whether you get there or not:

Using the map to chart a course from one location to another is unreliable at best… When charting a course through Avernus, ask the player whose character is overseeing navigation to roll two dice:

  • Roll 2d4 if the characters are traveling to an unvisited destination marked on their map.
  • Roll 2d8 if the characters are returning to a destination they’ve visited previously.
  • Roll 2d10 if a native guide is leading the characters to their destination.

If the rolls of both dice don’t match, the characters arrive at their destination as intended. If the dice match, they wind up somewhere else: pick one of the other locations.

Despite maps being both impossible and useless, the adventure nevertheless gives the players a poster map. It’s unlabeled and, again, the spatial relationships it depicts don’t actually exist, so it’s utterly useless for literally anything you might actually use a map for. But it is very pretty, so it has that going for it.

(Astonishingly, neither Elturel nor Fort Knucklebones — the two places the PCs would start navigating from — are depicted on the map. The DM is told that they can put them anywhere on the map they want, but — once again! — this is pointless and has no meaning.)

The one thing the map does do is magically talk to the PCs: Every time they go somewhere, the map tells them exactly what it is and where they are before they have a chance to explore and find out.

“Okay, we’ve made sure it’s impossible to run an exploration scenario on Avernus.”

“But what if the players nevertheless accidentally discover something for themselves and feel a momentary frisson of delight at exploring the unknown?”

“Oh shit! We gotta put a stop to that!”

Without actually seeing it in the book, I think it’s difficult to really believe the lengths Descent Into Avernus goes to in order to make sure that the players absolutely cannot explore Avernus in any possible way.

Even the smaller cool ideas in the book are often mucked up. For example, there’s a Zarielite cultist in the first part of the adventure whose dying words are, “See you in Hell!”

Which is so goddamn clever, right? Because the PCs are going to go to Hell later on and then — presto! — there she is.

… she doesn’t show up in Hell.

THE WEIRD RAILROAD

DIA: Do you want to play a nice game of CHOOSE. THAT. RAILROAD?!

Me: Fuck no!

DIA: All aboard! Let’s GO!

Me: Goddammit.

The problem with shouting, “It’s time to explore Avernus!” but then blocking any and all attempts to actually explore Avernus is that you’ll need some other mechanism to move the campaign forward. Descent Into Avernus chooses to do this by presenting the players with the choice of two different railroads they can follow.

It’s difficult to explain how poorly this is done.

We start with Lulu getting her memories back. She wakes up from the procedure and shouts, “The sword! The sword! I know where it is!”

Spoiler Alert: She doesn’t.

Instead, her “dreams lead the characters on a wild goose chase to Haruman’s Hill.”

There are a couple problems with this. First, there’s no clear reason given for why Lulu thinks Haruman’s Hill is where the Sword of Zariel is. Second, given the timeline presented in the book, it’s fairly clear that Haruman’s Hill did not and could not exist when Lulu was in Avernus.

But, OK. Fine. This thing that makes no sense happens.

So the PCs go adventuring at Haruman’s Hill for a little while, they figure out that Lulu took them to the wrong place, and then Lulu says: “I’m so sorry! My memory is a little hazier than I thought! Having pondered my dreams further, I think there are two sites in Avernus that are important to finding the sword! Choose between a place where demons manifest and one where demons are destroyed.”

But, once again, there’s no reason given for why Lulu thinks either of these locations have anything to do with the Sword of Zariel.

And that’s because they don’t.

They have nothing to do with the Sword. They have nothing to do with Lulu’s memories. There is absolutely no reason for Lulu to say that the PCs should go there. And if you do go to either location, it becomes immediately and abundantly clear that this is the case.

Despite Lulu telling the PCs to go to the wrong place and then immediately doing it again, the book assumes that the PCs will just continue blithely along the “path” they’ve “chosen,” even though there’s no discernible reason for them to do so.

This is not the only example of weird scenario structures in Descent Into Avernus. At the beginning of the campaign, for example, the PCs have followed a lead to the Dungeon of the Dead Three. In order to the adventure to continue, they have to speak with a specific NPC. But:

  • The NPC is located behind a secret door. (Which the designers bizarrely go out of their way to make difficult to find, even going so far as specifying that a normal rat will absolutely NOT reveal its location if someone randomly casts speak with animals on it.)
  • The NPC immediately identifies himself as the serial killer they’re here to kill.
  • The NPC, having just confessed that he’s the serial killer they’re here to kill, says, “Hey, can you help me take revenge on the people who tried to kill me?”

Assuming the PCs agree to help this guy for some reason (and, remember, they have to in order for the adventure to continue), he tells them that they should kidnap his brother so that they can use him as leverage while negotiating with their mother.

But negotiating with their mother to do… what?

Descent Into Avernus doesn’t seem to know. And promptly forgets the idea except to briefly tell you it definitely won’t work (because their mother will “happily watch any of her sons die before consenting to ransom demands”).

The failure of the scheme doesn’t bother me. (“Go ahead and kill him, I don’t care,” is a perfectly legitimate moment and builds pretty consistently from her known relationship with her kids.) What bothers me is that there doesn’t seem to BE a scheme.

The PCs are, once again, told to do a thing, but given no coherent reason for doing it.

This happens again when an NPC tells them they should teleport to Hell and save Elturel. They’re 5th level characters who have no special abilities, knowledge, or resources teleporting to a city which has been established to be filled with high level arcanists, clerics, and warriors who obviously haven’t solved the problem. What are they supposed to do, exactly? And why does that make more sense than investigating the Elturel crater or seeking a cure for Lulu’s amnesia?

Later Lulu tells them that she remembers meeting some kenku at Fort Knucklebones. Maybe they’ll know about her lost memories?

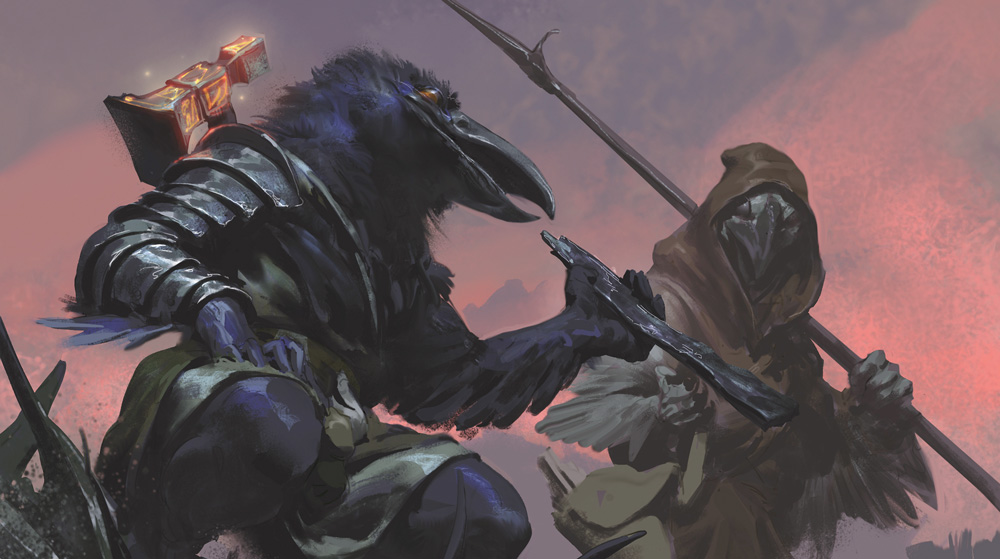
So the PCs go to Fort Knucklebones, they meet the kenku, and the adventure says, “The kenku Chukka and Clonk instantly recognize Lulu, since they’ve met her previously.”

And then… nothing. Literally nothing. The kenku remembering Lulu is never mentioned again.

What is going on here?

It’s a cargo cult.

THE CARGO CULT

Kenku - Descent Into Avernus

Let’s take one step back: RPG adventures are built using scenario structures. A dungeoncrawl is one type of scenario structure. A mystery is another. There are many others, including things like heists, hexcrawls, raids, etc.

A significant problem in RPG design is that these scenario structures aren’t really talked about. DMs and even designers just kind of pick them up (often imperfectly) by osmosis. Most of them are limited to just dungeoncrawls, mysteries, and railroading.

What’s happened with Descent Into Avernus is that the designers have sort of flailed their way into a malformed scenario structure which consists of, “An NPC tells the PCs where to go and then the PCs go to there.”

Once you realize that, you can’t unsee it: The entire campaign is just that one structure repeated infinitely. An NPC tells you where to go, you go there, and you find another NPC who tells you where to go.

Because this malformed structure is apparently the only thing they have, it seems to have become a kind of cargo cult for them: They know that NPC A has to give some sort of “explanation” for why the PCs need to go to NPC B, but they don’t actually care what that explanation is.

And they assume the players won’t care either. The presumption is that the players are onboard and the words coming out of the NPC’s mouth are just, “Blah blah blah Vanthampur Villa blah blah blah.”

So why do they put essential encounters behind secret doors? Because if the PCs haven’t found the NPC to tell them where to go next, clearly the players will know to keep looking until they find them!

Why are the PCs told to go talk to people without being given any coherent reason for doing so? Because the reason is irrelevant. It’s just white noise around the person’s name.

Why does the adventure assume the PCs will plane shift to Hell without having any reason to do so? Because an NPC told them to!

Why doesn’t the adventure tell you what the kenku remember about Lulu? Because the writers don’t care. “The kenku might remember Lulu” was just the blah-blah-blah dropped around “Fort Knucklebones.” Once the kenku tell the PCs that they should “blah blah blah talk to Mad Maggie blah blah blah,” the writers assume that you will no longer care about the previous blah blah blah.

It’s a cargo cult because the designers have seen PCs talking to an NPC and then going where that NPC tells them to go. But this interaction has become ritualistic. The designers repeat the form, but with none of its semantic content. It’s a hollow shell lacking meaning and seemingly ludicrous to anyone seeking to rationally understand it.

CONCLUDING THOUGHTS

So what is Descent Into Avernus, exactly?

First, it’s a pretty good gazetteer for Baldur’s Gate.

Second, it’s a big ol’ bundle of cool concepts studded with memorable moments, evocative lore, and epic stakes.

  • Mad Max in Hell
  • The redemption of the Archduchess of Avernus
  • The secret history of the Hellriders
  • The fall of an entire city into Hell (and its possible salvation)
  • Machinations among the dukes and duchesses of Hell
  • Thrilling political stakes in both Baldur’s Gate and Elturel

Along with a gaggle of vivid dungeons crammed with flavor and featuring unique gimmicks (sewer temples, ghost prisons for damned souls, floating hellwasp nests, a crashed Avernian warship, etc.).

We should also not discount the huge cast of varied, larger than life characters (broken families, nefarious cultists, magical shields, maniacal scholars, proud leaders, pitiful victims).

Third, it’s a couple of pretty fantastic poster maps.

Unfortunately, all of this is wrapped up in a completely dysfunctional package. The intriguing characters and big ideas are hopelessly morassed in the broken logic of the campaign and crippled by a careless disregard for continuity. The cool set pieces are sapped of meaning, frequently broken by poor execution, and almost universally left as hollow disappointments of unrealized potential.

Would I recommend it?

Unfortunately, no. The amount work required to salvage Descent Into Avernus is, sadly, staggering in its scope. Despite its potential, there are simply so many better adventures out there that do not need to be completely revamped from the ground up to make them work that it’s impossible to say that you should spend your time grappling with this one.

(Unless, of course, some hopeless fool has already done a bunch of that work for you.)

Style: 4
Substance: 2

Story Creators: Adam Lee (lead), James Introcaso, Ari Levitch, Mike Mearls, Lysa Penrose, Christopher Perkins, Ben Petrisor, Matthew Sernett, Kate Welch, Richard Whitters, Shawn Wood
Story Consultants: Joe Manganiello, Jim Zub
Writers: Bill Benham, M.T. Black, Dan Dillon, Justin Donie, James J. Haeck, James Introcaso, Adam Lee, Chris Lindsay, Liane Mersiel, Shawn Merwin, Lysa Penrose, Christopher Perkins, F. Wesley Schneider, Amber Scott, James Sutter
Developers: Jeremy Crawford, Dan Dillon, Ben Petrisor, Kate Welch

Publisher: Wizards of the Coast
Cost: $49.95
Page Count: 256

Descent Into Avernus: The Alexandrian Remix

Descent Into Avernus - Wizards of the Coast

A Legion Marching - Liu Zishan

Go to Table of Contents

ELTUREL’S RETURN

Into this turmoil, Elturel returns.

But, of course, this is not Elturel as it was. At best, its population has been decimated, its political leadership has been wiped out, and its military strength is depleted. So it’s not going to magically wave a wand and return everything to the status quo.

The effect it will have is going to depend a lot on what the balance of power is in the city upon its return, and that will probably have a lot to do with the choices the PCs have made and what they’ve managed to accomplish. Broadly speaking, though, it seems likely that the city will be:

  • Controlled by Ravengard’s Peacekeepers.
  • Controlled by High Rider Ikaia.
  • Controlled by both of them, either in an agreed alliance or a de facto division (e.g., Ravengard is currently in control of the west half of the city and Ikaia is in control of the east).
  • Controlled by the PCs.

The PCs, of course, will chart their own course. We’ll look at the other two in more detail below.

The other thing to consider are the lingering hostiles in the city. They might include:

  • Ikaia and/or his sons and daughters, if they ended up on the losing end of the stick but weren’t completely wiped out.
  • Demon raiders, who could have easily been carried to the Material Plane along with the rest of the city.
  • Zarielite cultists, who will undoubtedly start trying to make alliances and seek aid from other Zarielites still active in the region.
  • Hell Knights, some of whom could make a propaganda play of, “I was transformed by my travails in Hell, but I remain the most legitimate authority of Elturgard’s government and I hereby declare myself High Observer.”

Alternatively, don’t be afraid to declare any/all of these lingering problems completely solved by Elturel’s return: the demons and/or hell knights return to their respective planes, Ikaia and his offspring burn up in the sun or retreat back into the depths below the city, the cultists all go scurrying away to other cities in the region, etc. It’s okay to open up some space for the stuff in the next phase of the campaign, turning the focus away from the city and towards the whole region.

THE POLITICS OF IKAIA

If Ikaia has somehow managed to gain control of Elturel, he’ll likely recognize that his position is extremely tenuous and will seek to consolidate what he has rather than trying to reassert Elturel’s regional claims.

Given Ikaia’s history, his rhetorical and diplomatic sales pitch will probably be something along the lines of, “I was wrongfully deposed by someone who literally sold the entire city to Hell. All I seek is to return Elturel to its rightful place, with its rightful ruler.” (Some may recall that Elturel’s imperial ambitions were alive and well during Ikaia’s reign, but that’s water under the bridge, right?)

Ikaia’s realpolitik is likely to be hunkering down, repairing Elturel’s defenses as quickly as possible, and hoping to weather out the current chaos while still being in control of the city. His best bet will probably be to play Scornubel and Berdusk and Soubar off each other to make that happen, a strategy the Zarielite cabal will be perfectly happy with because it will allow the Elturian Wars to continue unabated.

Is Ikaia pure evil with a gilded smile, completely reformed and earnest, or somewhere in between? That’s up to you.

THE POLITICS OF RAVENGARD

Before we can look at Ravengard’s position in Elturgard, we first have to consider the politics in Baldur’s Gate. The circumstances during Act I of the campaign are detailed in Part 3:

  • The position of Grand Duke is open.
  • At least two of the four ducal seats are open, and probably a third after Duke Portyr’s assassination.
  • The position of Marshal of the Flaming Fists is up for grabs.

In the time the PCs have been gone, it seems likely that at least some of this political turmoil will have resolved. And the most interesting thing that should be resolved is the selection of a new Grand Duke on the assumption that Ravengard is dead, because then when Ravengard comes back alive it instantly creates all kinds of juicy drama.

Who should be Grand Duke?

Well, the most effective answer is probably one of the Portyrs, because the PCs already have a relationship with them. If Duke Portyr survived, then I’d suggest that he becomes Grand Duke and arranges for Liara Portyr to become Marshal of the Flaming Fists, solidifying the family’s control of the city.

If Duke Portyr was assassinated, have Liara ascend to his position and claim the title of Grand Duke, as well. I’d recommend that she hasn’t been able to duplicate Ravengard’s trick of also becoming Marshal, but it’s possible she’s been able to keep the position open for the moment so that she can continue wielding significant influence on the Flaming Fists in the interim.

In either case, I’d leave at least one of the ducal seats still open, which will leave some hefty political stakes on the table to spur intrigue. (And maybe one of the PCs will end up in it.)

The point of all this is that Ravengard’s return is going to be contested. He will, of course, expect to resume his positions of Grand Duke and Marshal. But if one or both of those are no longer available, expect pushback from the new office holders.

How this plays out will depend on a lot of factors, not least the PCs. Some things to consider:

  • A political compromise might be negotiated. (For example, Liara resigns as Marshal so Ravengard can resume that role, but she gets the open ducal seat, so there are now two Portyr dukes.)
  • Or things might rapidly decay into blood in the streets, as the loyalties of the Flaming Fist (and the PCs?) split and Baldur’s Gate falls into civil war.
  • What role does the large population of Elturian refugees play in these political maneuverings? How do the politicians vie for their loyalty? What do the Elturians want?
  • Does the political system in Baldur’s Gate survive this chaos? Having three of the four ducal seats open simultaneously, for example, is unprecedented. Does someone seize that opportunity to consolidate power and become a tyrant? Alternatively, do the compromises resulting from Ravengard’s return result in a fifth ducal seat being created?

Meanwhile, if Ravengard has emerged from Hell as the top dog in Elturel, he’ll try to hold onto that dominion as well.

This might hinder him in the politics of Baldur’s Gate (“don’t be ridiculous; you can’t have the High Observer of Elturel serving as the Grand Duke of Baldur’s Gate”), but it could also give an immense power base of reputation and manpower to re-coalesce his power in Baldur’s Gate. (This can be literally in the form of soldiers, but also propaganda stuff like appealing to the Elturian refugees as the “savior of their city.”)

Whether Ravengard holds onto Baldur’s Gate or Elturel or both, he’s going to pursue imperial designs in the ruins of Elturgard. With the PCs’ help, he might even succeed. Outcomes might include:

  • A new Chionthar Empire that brings peace and prosperity to the region.
  • A strong alliance between Baldur’s Gate and Elturel, while the rest of Elturgard nevertheless fractures back into separate city-states.
  • Ravengard fails utterly, succeeding only in deepening the animosity between Baldur’s Gate and Elturel.

However it plays out, Ravengard will almost certainly contribute to the ongoing chaos of the Elturian Wars.

WHITHER ZARIEL?

One thing we haven’t touched on yet is what happens with Zariel.

There are a couple obvious scenarios: If the PCs kill her (presumably with help), she’s dead. If they negotiated with her to break the pact (or found a different solution that left her alive and unredeemed), then she still rules in Hell.

Of course, the most likely outcome is probably that the PCs help to redeem Zariel.

Homework: Descent Into Avernus almost certainly results in the power structures of Avernus being disrupted just as much as those of Elturgard. If Zariel is no longer Archduchess, who rises to take her place? What effect does that have on the Blood War? And even if Zariel is still in charge, it’s likely that other major players have been significantly affected by whatever deal the PCs made.

If the PCs have made allies in Hell and put schemes into motion, it’s possible they’ll want to return and continue pursuing their goals (or just to check in with their friends). Consider having the upheaval of power in Hell echo the upheaval occurring in the remnants of Elturgard. On Earth as it is in Hell, so to speak.

With Zariel redeemed, she likely returns with the PCs and Elturel to the Material Plane. There are a few ways this can then play out.

First, you can bring her story to a close. Assuming the players have invested in her story, frame a final scene with her before she departs for Mount Celestia in a beam of holy light. It worked. The PCs have helped to restore something beautiful to the multiverse and saved the soul of an angel.

Alternatively, maybe Zariel chooses to stay involved in the region. For example, she might try to reach out to the Zarielite cultists and convince them to join her and walk the path of redemption. The result might be a Second Zarielite Crusade (hopefully with more reasonable goals and/or happier outcomes).

Or maybe Zariel, even redeemed as she is, remains grandiose and a little self-important. “Elturel is mine!” she says. “And I will make right what I have wronged!” She’s likely to be opposed by Ravengard or Ikaia or both. Will the PCs help her? Oppose her? Either way, she will make her presence felt during the Elturian Wars.

And one final question: Whatever happens with Zariel… does Lulu go with her?

Or does she choose to remain with her new friends?

Either way, there are likely to be tears.

THE END…
…HAS YET TO BE WRITTEN.

Addendum: Rumors of Elturel
Addendum: Corpsedamp Zombies
Addendum: A Textual History of Elturel
Addendum: Playing Gargauth
Addendum: Streetcrawling Tools
Addendum: Elturian Names
Addendum: Hellturel Map Patches
Addendum: Soul Coins
Addendum: A Textual History of Zariel
Addendum: Player Hexmaps
Addendum: Avernus Map Patch
Addendum: The Ranks of Hell
Addendum: The Grand 5E Devil Index

Addendum: DMs Guild Capsule Reviews
Addendum: DMs Guild Capsule Reviews II
Addendum: DMs Guild Capsule Reviews III
Addendum: DMs Guild Capsule Reviews IV
Addendum: DMs Guild Capsule Reviews – Rhodarin Avernus
Addendum: Capsule Reviews – Adventurers League

The Destroyed City - Liu Zishan

Go to Table of Contents

So Elturel has been returned to the Material Plane.

(Probably.)

This is an epic conclusion to the campaign, and a triumphant note on which to finish. Everyone will probably be perfectly happy to see things wrap up.

But what if you want to keep playing?

To answer that question, we need to take a look at what’s been happening while Elturel was missing. And what’s likely to happen now that it’s returned. Whether you continue with high-level characters, likely to be dealing with the major political powers, or boot up a new campaign with low-level characters coping with these crises on the ground, there are rich opportunities for adventure.

ELTURGARD’S FATE

When Elturel vanished, it left a gaping wound in the earth. Tunnels that once connected to the dungeons beneath the city now opened into the crater, providing access to the dark dangers of the Underdark. (If you’re starting up a new campaign with 1st level characters, consider running the first few sessions in The Crater to set the stage for Elturel’s abrupt return.)

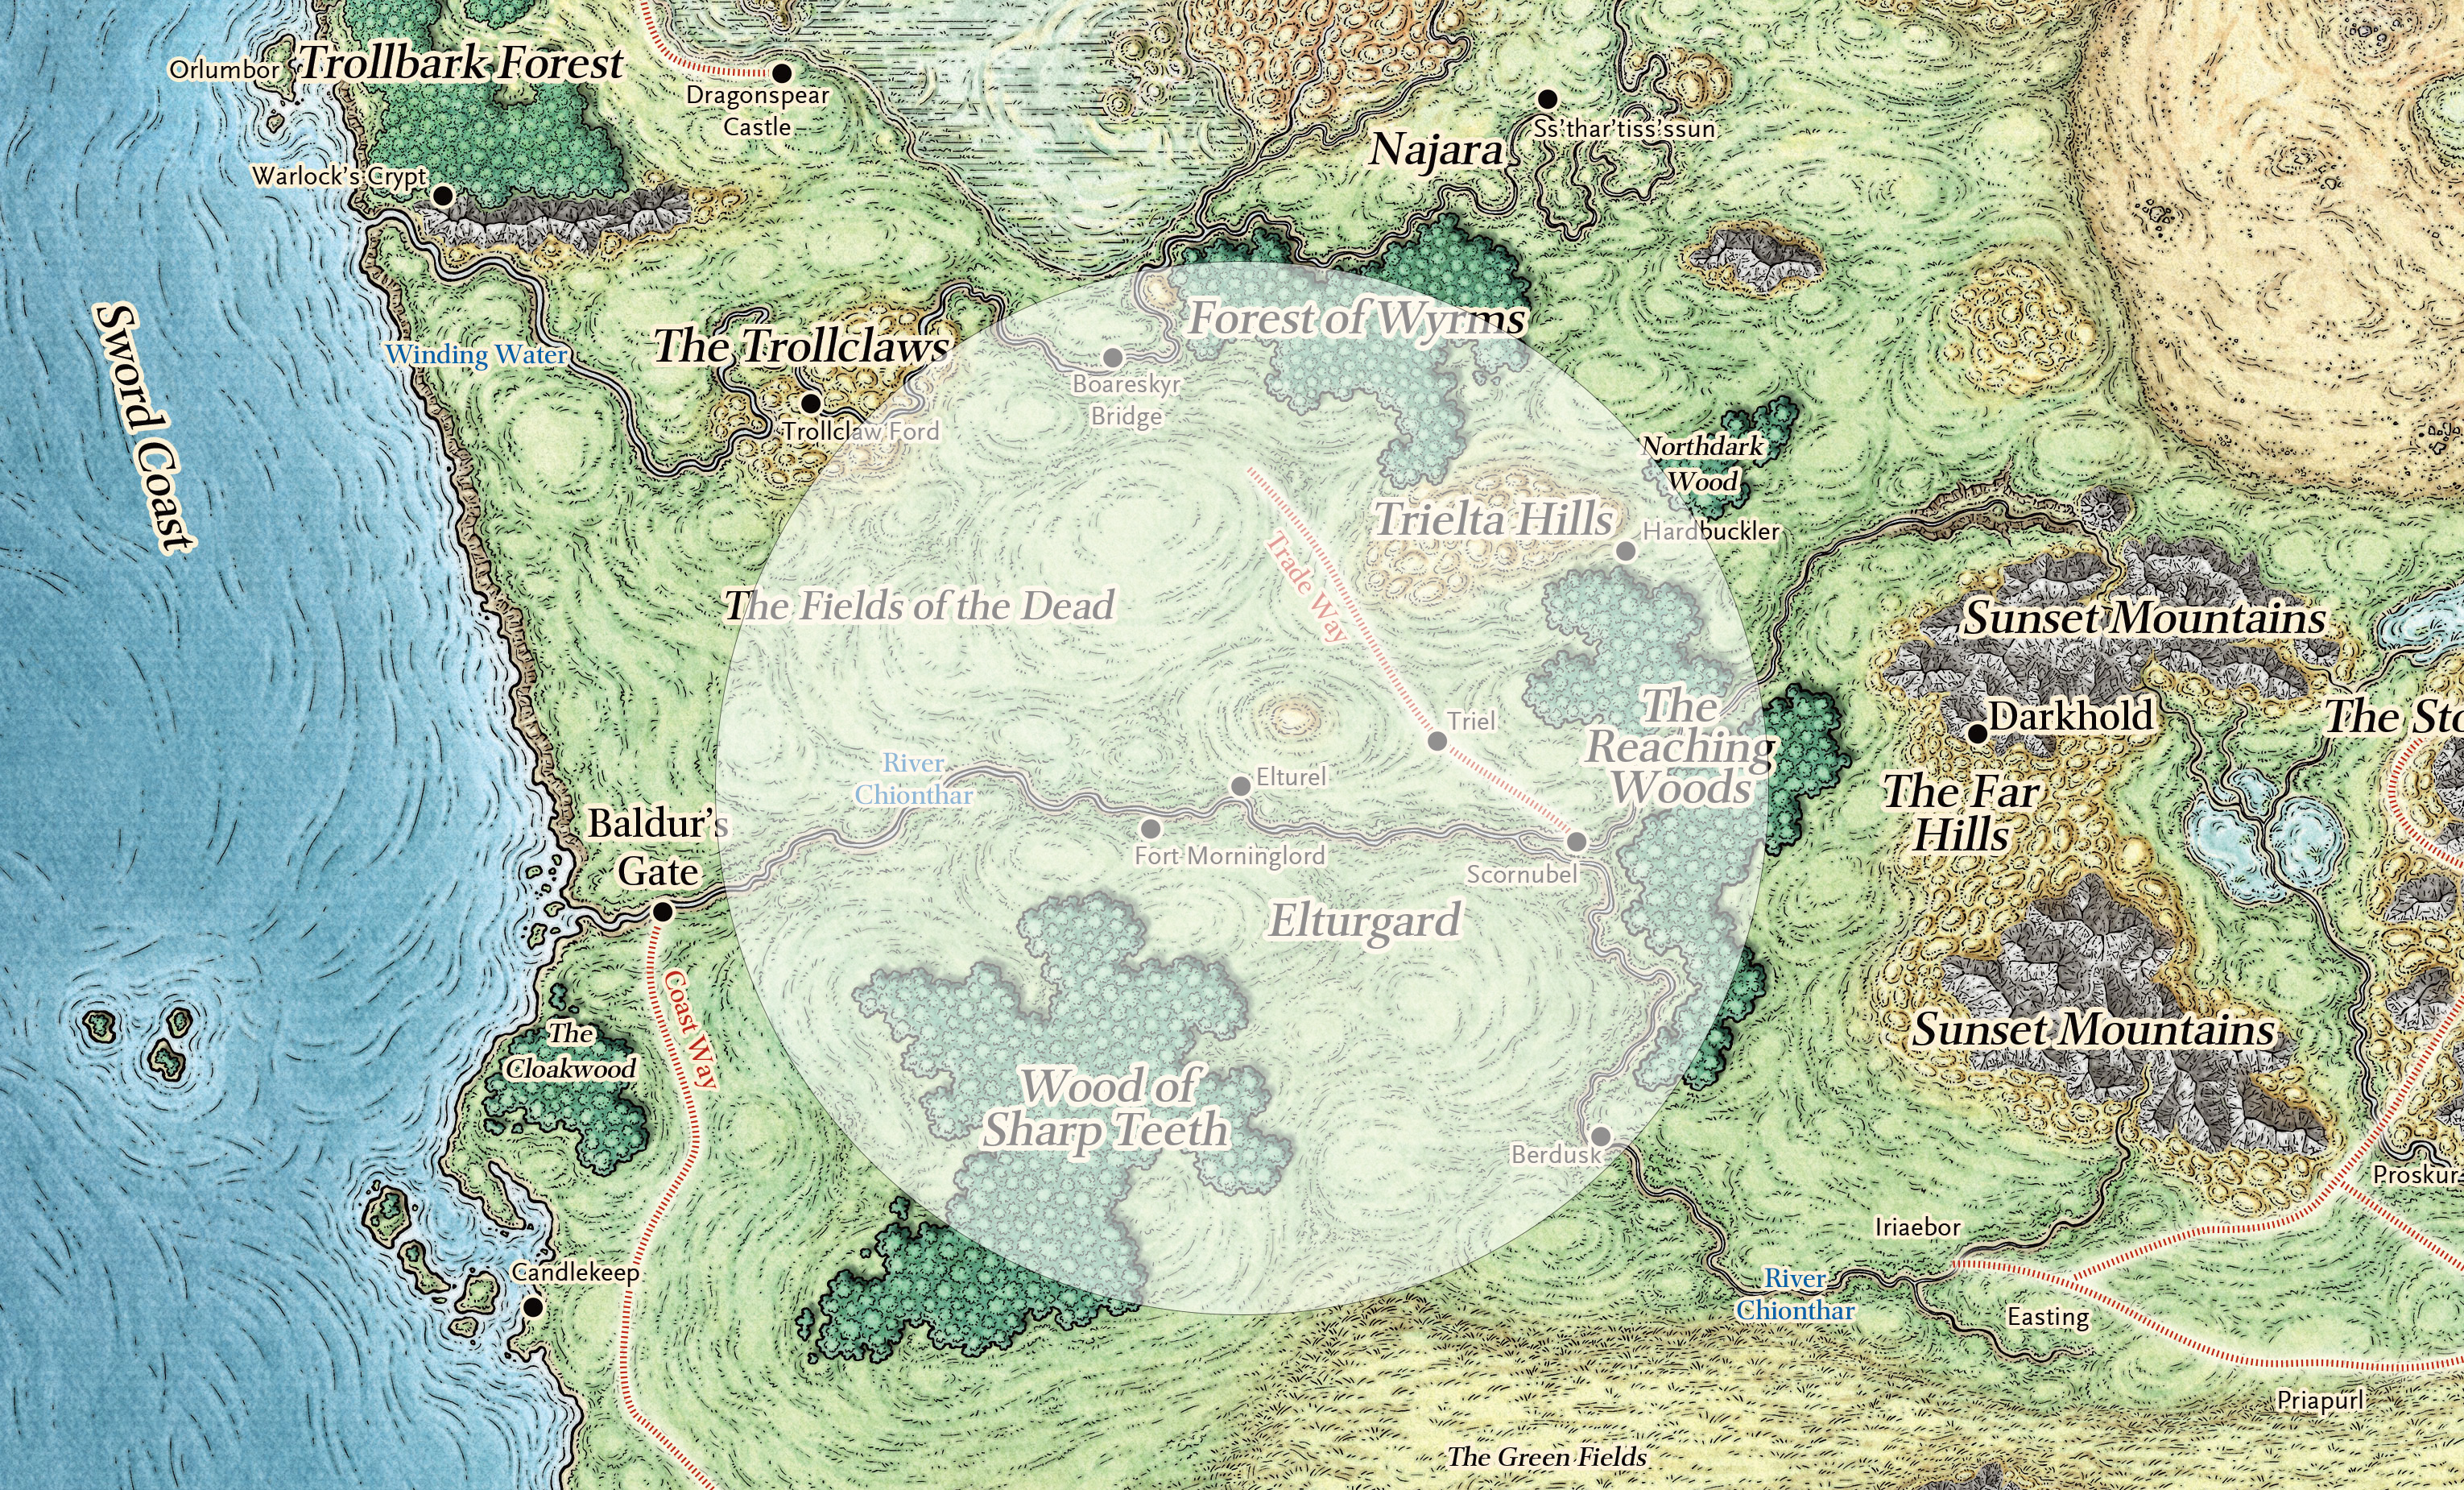
Even with Elturel’s return, Elturgard is shattered. For nearly a century, Elturel had expanded its empire, laying claim to all the lands touched by the light of the Companion. They referred to this “protectorate” as Elturel’s Shield, which extended as far away as Berdusk and Boareskyr Bridge (where the Companion could be seen as an unmoving star near the horizon):

Map of Faerun - Elturel's Shield / Light of the Companion

Note: This means that the Companion could be seen at least 175 miles away from Elturel. If you do the math, this means that the Companion must have been located 20,000 feet above Elturel. This doesn’t seem to match the lore, so it may be best to say, “It was magic,” if this should be interrogated.

The grandiose claims of Elturel’s Shield were unpopular with local polities, but were often more welcomed by local villages and farmers threatened by the trolls, orcs, and foul beasts that emerged from the Trollclaws, the Wood of Sharp Teeth, and the Forest of Wyrms. Over time, the claims became less boastful and more reality as one local power after another fell to Elturgard.

As we’ve seen, the disappearance of Elturel created a refugee crisis in the region. This was initially due to survivors of the catastrophe who had escaped the city or lived on its outskirts, but the crisis rapidly worsened as the threats once kept in check by the Hellriders began raiding and razing smaller settlements throughout the region.

Things worsened again as multi-polar wars broke out between the powers once aligned under Elturgard. These conflicts are heavily influenced by the Zarielites who had, of course, infiltrated the Elturgardian governments. They want never-ending, meat-grinder wars to chew up the corrupted military orders they’ve compromised and happily capitalize on the chaos left in Elturel’s wake.

(This is somewhat standard operating procedure for the Cult of Zariel: They target and hollow out martial orders and military organizations. Those they can’t convert directly to Zariel’s worship they corrupt by issuing immoral orders and fostering a culture of glorified violence and evil. Then the violence itself chews up the lives of those who have tainted their souls, speeding them on their way to Hell.)

THE ELTURIAN WARS

Scornubel declared itself the “Elturgard government in exile,” naming the citadel built by the Elturians in the city center as the new capital. Altaer Ambermantle was named High Observer.

This was most likely a sincere effort to stem the growing chaos, particularly as the government in Scornubel had purged the Zarielite attempt to infiltrate it due to an alliance between the Ambermantles and a band of daring adventurers in the 1480’s. In Scornubel, the Zarielites instead sunk their talons into the thieves’ guild, which they now used to destabilize Ambermantle’s neophyte administration.

Soubar was the first Elturgardian polity to openly declare independence. A small walled city ruling over a cluster of farming communities, there are rumors that the Banite priests who have recently reinhabited the Black Abbey, the ancient temple of Bane in the city, have performed a secret coup, but this may be nothing more than opportunistic propaganda.

Berdusk, the Jewel of the Vale, denounced Scornubel’s “coup,” effectively declaring themselves as the “true” capital of Elturgard.

Berdusk is ruled by the Twilight Hall. Originally a bardic college founded by the Harpers, Twilight Hall evolved into the native nobility known as the First Folk. When the city-state was conquered by Elturel (becoming the “second city” of the newly minted Elturgard), the First Folk made a great show of their piety, with heirs and scions joining and becoming high-ranking priests in the new religious orders of Torm established by High Observer Restat. This tradition of the First Folk to join holy orders eventually spread to the older churches in Berdusk, as well — the Inner Chamber of Deneir, Helm’s Ready House of the Right Strong Hand, Milil’s Evensong Tower, Oghma’s Seat of Lore, and minor orders dedicated to Leira, Lliira, Tempus, and Waukeen.

The problem is that the religious order of Torm was basically a front for Zarielite cultists. Under that guise, the First Folk were subverted, and then Zarielites spread into the leadership of the other religious orders, too. The First Folk are not all cultists, of course, but their ranks are riddled by them.

Triel, a small town northeast of Elturel, found itself choked with refugees, which have caused its population to increase five-fold. A former farmer named Sarika Fortune has, much to her own surprise, found herself leading a rag-tag volunteer militia. They recently (and controversially) assisted some of the independent gnome and halfing communities in the Trielta Hills, and there are some preliminary discussions of a Trieltan defensive alliance of some sort.

Representatives from both Berdusk and Scornubel have recently arrived to determine where Triel’s loyalty lies.

Najara, the serpent kingdom of nagas, yuan-ti, and lizardfolk which lies north of Elturgard, has seized advantage of the chaos. An army of serpents has moved south along the Winding Water and seized Boareskyr Bridge and Fort Tamal. As such, they now control the river crossing of the Iriaebor-Waterdeep Trade Way and de facto expanded their sphere of influence into the northern reaches of the Fields of the Dead.

King Jarant of Najara has sent ambassadors to the major powers of the Sword Coast, declaring his actions “necessary for the stability of trade and for the good of establishing peace in the region.” It remains to be seen whether Najara will settle for what they have gained or if they’ll seek further expansion into the former realms of Elturgard. (It may depend on whether or not they see a good opportunity.)

No one, however, is under any illusions that they’ll be giving up Fort Tamal without a fight.

The Second Fall of Fort Morninglord. In 1476 DR the entire garrison of Fort Morninglord, which lies west of Elturel along the River Chionthar, disappeared overnight. The site had been contaminated by some unknown evil and the High Observer ordered it sealed.

A new fortified encampment was established nearby and garrisoned. After the fall of Elturel, this fort was the only significant concentration of surviving Elturian paladins and Hellriders. It became the sanctuary for a large number of refugees.

When news of Fort Tamal being besieged by Najara reached Morninglord, an expedition of knights rode north to relieve them. In their absence, Zarielite cultists within the fort summoned a pit fiend. The fiend was eventually defeated, but dozens of knights were slain, hundreds of refugees were massacred, and the fort itself burned to the ground.

This sent a fresh wave of refugees down river to beleaguered Baldur’s Gate and broke the last bastion of Elturgard that was not dependent on one of its constituent parts.

The expeditionary force, unable to reach Fort Tamal in time, remains active-but-itinerant within the Fields of the Dead.

Zhentarim. Darkhold, the citadel of the Zhentarim, lies just to the east of Elturgard. The Black Network’s influence had been kept out of the region for decades by the strength of Elturgard, but the current situation is ripe for them to gain long-term strategic advantage. And even if that wasn’t the case, the Zhents are mercenaries. And if there’s one thing mercenaries love more than a good war, it’s LOTS of wars.

When King Jarant declared Najara’s sovereignty to the powers of the Sword Coast, the Zhentarim were early supporters of his regime. They have remained on good terms since, making it likely that Zhentarim mercenaries will be available to pursue Najara’s interests in the region. (They may have already fought at Fort Tamal.)

As the conflict worsens, Berdusk, Soubar, and Scornubel will all become highly motivated to seek Zhentarim contracts. The Zhentarim know this, of course, and have already sent diplomatic missions to each city. These missions serve a dual purpose, as their embedded spies seek out any hidden opportunities for the Black Network. (The Zhentarim are not, of course, above claiming a chunk of territory for themselves if the opportunity presents itself.)

One way or another, the Black Network and its mercenary armies are going to get involved.

Go to Epilogue – Part 2: Elturel’s Return

Furious Angel - warmtail

Go to Table of Contents

So how does this all end?

Because we’ve created an open-ended campaign where the PCs’ choices and actions matter, I can’t really tell you how your campaign is going to end. I can’t just script a big, dramatic scene, because all the details of that scene will depend on what’s happened at your table. Ultimately, the end of your campaign will be unique. It will belong to you and your players. You’ll have built it together, and what you experience will be something your group and only your group will experience.

But here are a few key things to think about as you’re crafting your ending.

First, the broad outlines of this ending were laid out in Part 6B: The Avernian Quest. In order to save Elturel:

  • Bellandi’s pact with Zariel must be broken.
  • The chains holding Elturel must be severed.
  • Elturel must be returned to the Material Plane. (Or, alternatively, the people of Elturel can be evacuated.)

There are many different ways for the PCs to achieve these goals, but this does mean that the finale of your campaign will almost certainly be the moment at which the PCs free the planetar from the Companion and the planetar literally lifts the entire city out of the Nine Hells.

As you’re figuring out what this scene looks like, think about:

  • What’s going on in Elturel? Is the city stable or is it about to sink into the Styx? Have the PCs forged an alliance between the city’s factions or have things boiled over into a civil war?
  • Who might oppose whatever it is that the PCs are doing? That might be an unredeemed Zariel. It might be Yeenoghu showing up with a demon army to confront Zariel once more. It might be Bel betraying the party and seeking to strike down Zariel to demonstrate to Asmodeus that he should once again rule in Avernus.
  • What’s happening with the allies the PCs have made? Do they have favors they still owe, so that the PCs might choose to remain in Hell to fulfill their oaths, watching the city disappear into the heavens above? Is Tiamat flying nearby, having just severed the chains?

The trick to a good ending is, first, to tie off the important loose ends (although it can be okay if a few are left dangling) and, second, to reincorporate elements from throughout the campaign to make it feel a like a cohesive whole. The Avernus Remix roughly breaks down into three acts:

  • Baldur’s Gate and the Vanthampur conspiracy
  • Elturel in Hell
  • Exploring Avernus

Look back at what happened in each of those acts in your campaign and think about ways in which those events can be reflected in your finale. You’ll also want to think about the important themes which have been established in your campaign and find ways to put those themes in the crucible one last time.

For example, maybe themes of betrayal vs. loyalty have particularly resonated with your group. Is there someone who can betray the PCs at the eleventh hour? Or, more powerfully, is there a way that the PCs will be forced to choose between remaining loyal to one of their allies or betraying them in order to save the city?

WHAT IF THE PCs ABANDON ELTUREL?

The goal of Descent Into Avernus is to save Elturel, but the Alexandrian Remix is flexible and robust enough that it’s fully possible that the PCs might set a completely different goal for themselves. Maybe they’ll conclude that saving Elturel is impossible; or that it’s not worth saving. Or maybe they’ll never really think of Elturel as being their responsibility; or they’ll feel that their responsibility ended once they delivered the crucial information about Bellandi’s pact to Ravengard.

Or maybe they’ll just find personal goals that they think are more important. It’s a campaign set in Hell, after all. Amorality and cruel disregard for the suffering of others isn’t exactly outside of the purview here.

If this is the direction your campaign goes, I’m afraid I’ll be of even less use to you in shaping an ending. When the campaign concludes (if it ever does), the ending you’ll find will obviously be focused on whatever the new goals of your group have become.

But even as the campaign shifts focus, don’t let everything that came before drop away.

For example, what happens when Elturel falls?

This should be the beginning of a significant shift of power. The ranks of Zariel’s army will swell, and the front lines of Blood War will shift. (Either because of a massive, preemptive assault by the demons; or the inevitable advance of Zariel’s legions with their new strength. Or both.)

  • Troop movements will begin altering your hex key.
  • What opportunities are created for the factions in your game? For example, warlords might start running magical weapons stolen from the front lines. Or they might go on missions to scavenge from bloody battlefields.
  • In addition to open war, espionage will also increase. Add demon spies and quisling devils.
  • What happens in the Purple City? Does it fall to a surprise attack? Become besieged? Swell with the wealth of war profiteering?

And so forth.

A GUIDE TO MILESTONES

If you’re using level advancement milestones, I recommend the following milestones.

ACT I – BALDUR’S GATE:

  • Reaching Baldur’s Gate
  • Completing the Poisoned Poseidon OR Amrik Vanthampur (whichever they do first)
  • Completing the Dungeon of the Dead Three
  • Completing the Vanthampur Estate

PCs will be 5th level as they leave Baldur’s Gate and head to Candlekeep (and, subsequently, Avernus).

Design Note: A number of DMs have found that the Dungeon of the Dead Three is potentially very deadly for 2nd level characters. These milestones conveniently give PCs an extra level before tackling the dungeon.

ACT II – HELLTUREL: The PCs will be 5th level when entering Avernus.

  • The end of the streetcrawl in Elturel (when the PCs discover that the city is floating in Hell).
  • When forming an alliance in Elturel OR when completing the Grand Cemetery (whichever they do first).
  • Leaving Elturel.

ACT III – AVERNUS: The PCs will be 8th level when they leave Elturel and begin to explore the Avernian plains.

  • Once for each of the four dream machine component recovered.
  • Claiming the Sword of Zariel.
  • Saving Elturel.

These milestones, which will see the PCs complete the campaign at 14th level, assume that the PCs are pursuing the Quest of the Dream Machine. This is not, however, the only way to complete the Avernian Quest. If the player pursue alternative paths, you’ll want to set milestones accordingly. Something like this might work:

  • Making an alliance with a local power. (Warlords, Maggie, etc.)
  • Making an alliance with an Avernian powerhouse (Bel, Tiamat, released Gargauth, etc.).
  • Retrieving the adamantine rods.
  • Completing a raid on the flying fortress OR
  • Breaking Bellandi’s pact.
  • Saving Elturel.

Once again, this will see the PCs complete the campaign at 14th level.

Go to Epilogue: The Elturian Wars

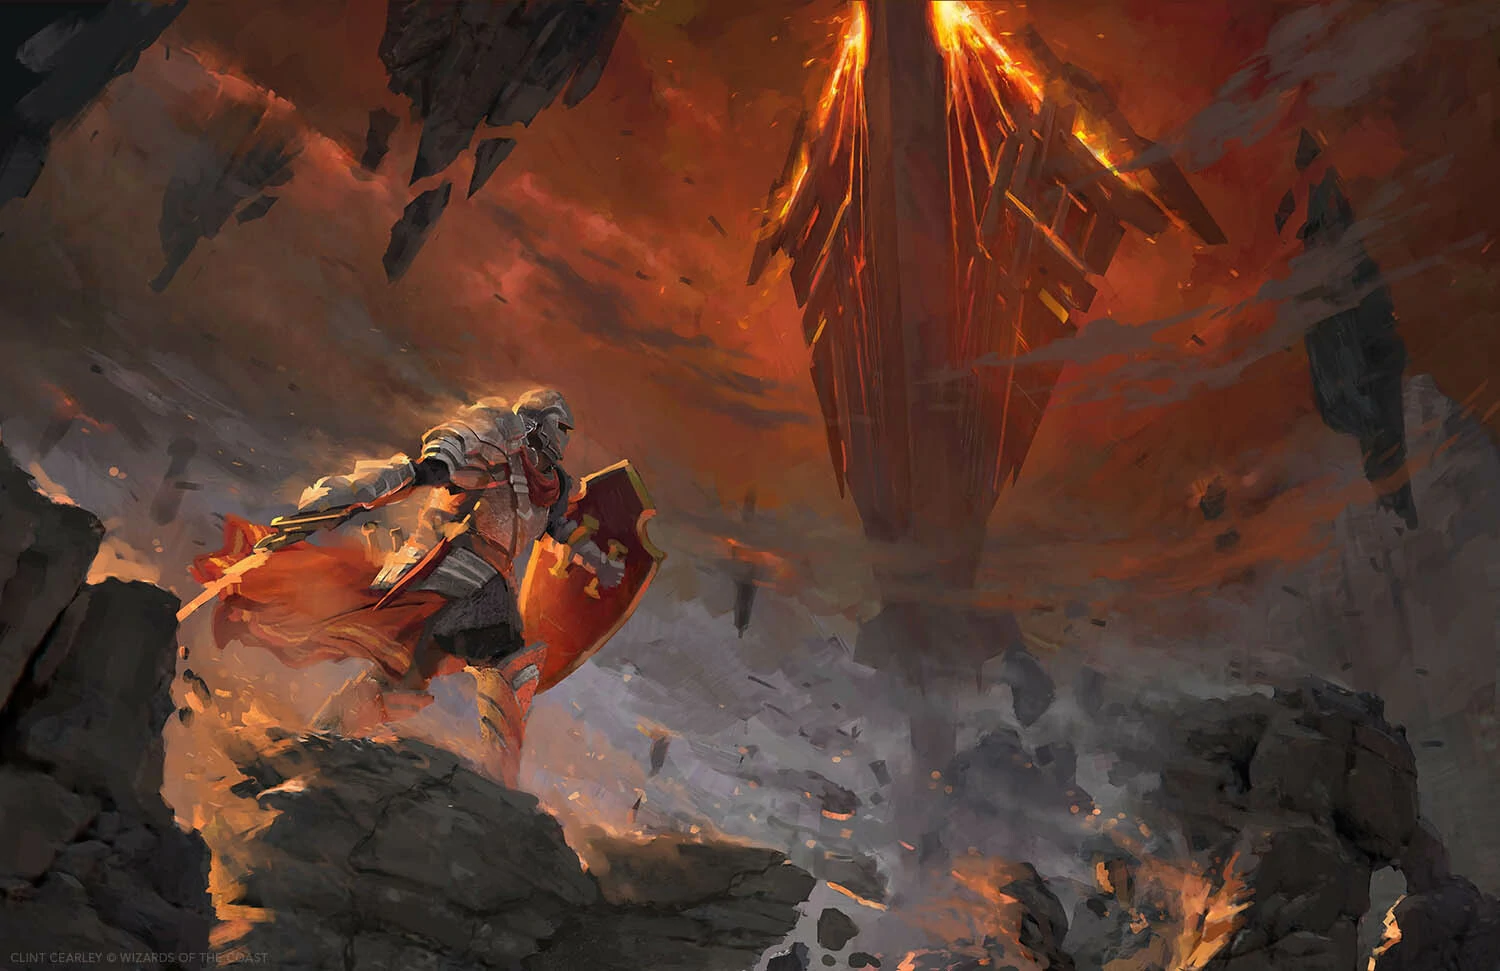
Paladin vs. the Flying Fortress

Go to Table of Contents

ABJURATION GENERATOR: A pair of matching bronze poles extend from the ceiling and floor of this prism-shaped room. In the middle of the three-foot gap between them is a large, black diamond which is suspended in an energy field.

Energy Field: The field operates as a forcecage spell.

Black Diamond: Each facet of the diamond is inscribed with an arcane rune. A DC 20 Intelligence (Arcana) check reveals that the diamond is the focus for a powerful abjuration effect which, when triggered using a telepathic password, blocks all teleportation and scrying effects within the flying fortress.

The diamond is connected to the bronze poles with astral wires.

The abjuration effect can be turned on or off using the telepathic password. The abjuration effects can be canceled by severing the astral wires, removing the diamond from the energy field, and/or destroying the bronze poles.

Defenses:

  • 1 bearded devil (knows the telepathic password)
  • 2 barlguran slaves

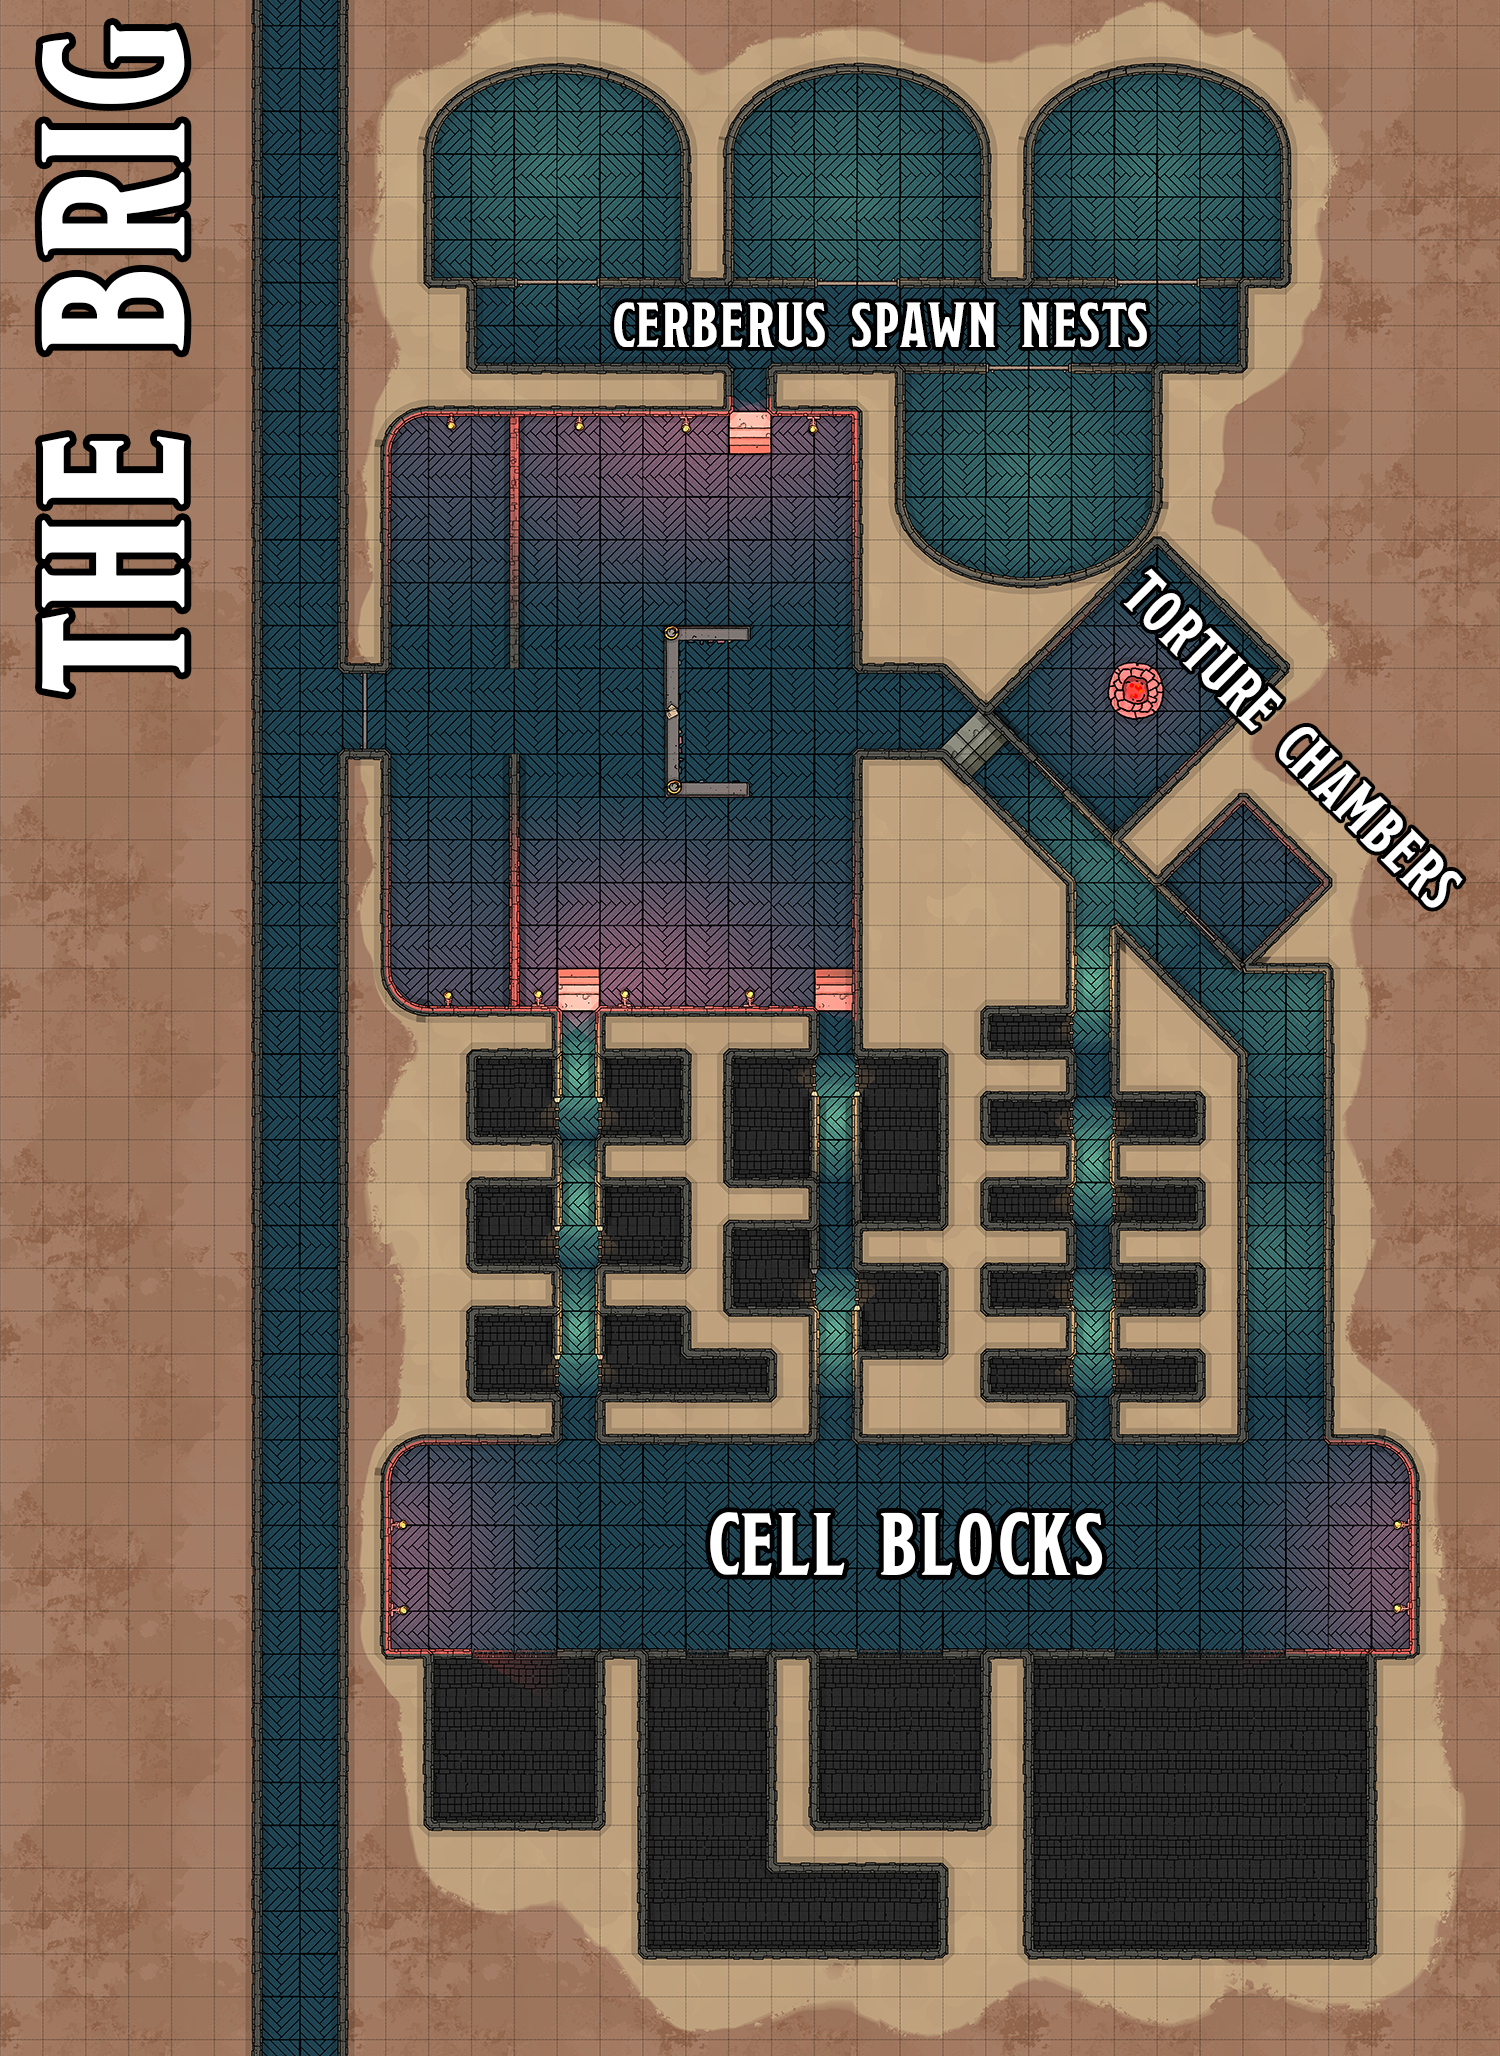
BRIG: The brig contains four cell blocks, one of which features big cells designed for larger demons. Antimagic fields can be selectively raised and lowered for individual cells from a central console. The cells also have symbols written on the wall which prevent teleporting into and out of the cell.

Zariel's Flying Fortress - The Brig

  • 5 cerberus spawn are the jailers.
  • 2 cranial wretches (Book of Fiends, p. 150) are latched onto the skulls of prisoners in the torture chambers, sucking out their memories while slowly consuming their brains.

The doors throughout this area are security gates and there are demon detectors in each room and the hallways.

The cerberus spawn nest in several large chambers in one wing of the brig. One of these chambers is shared by an alpha pair.

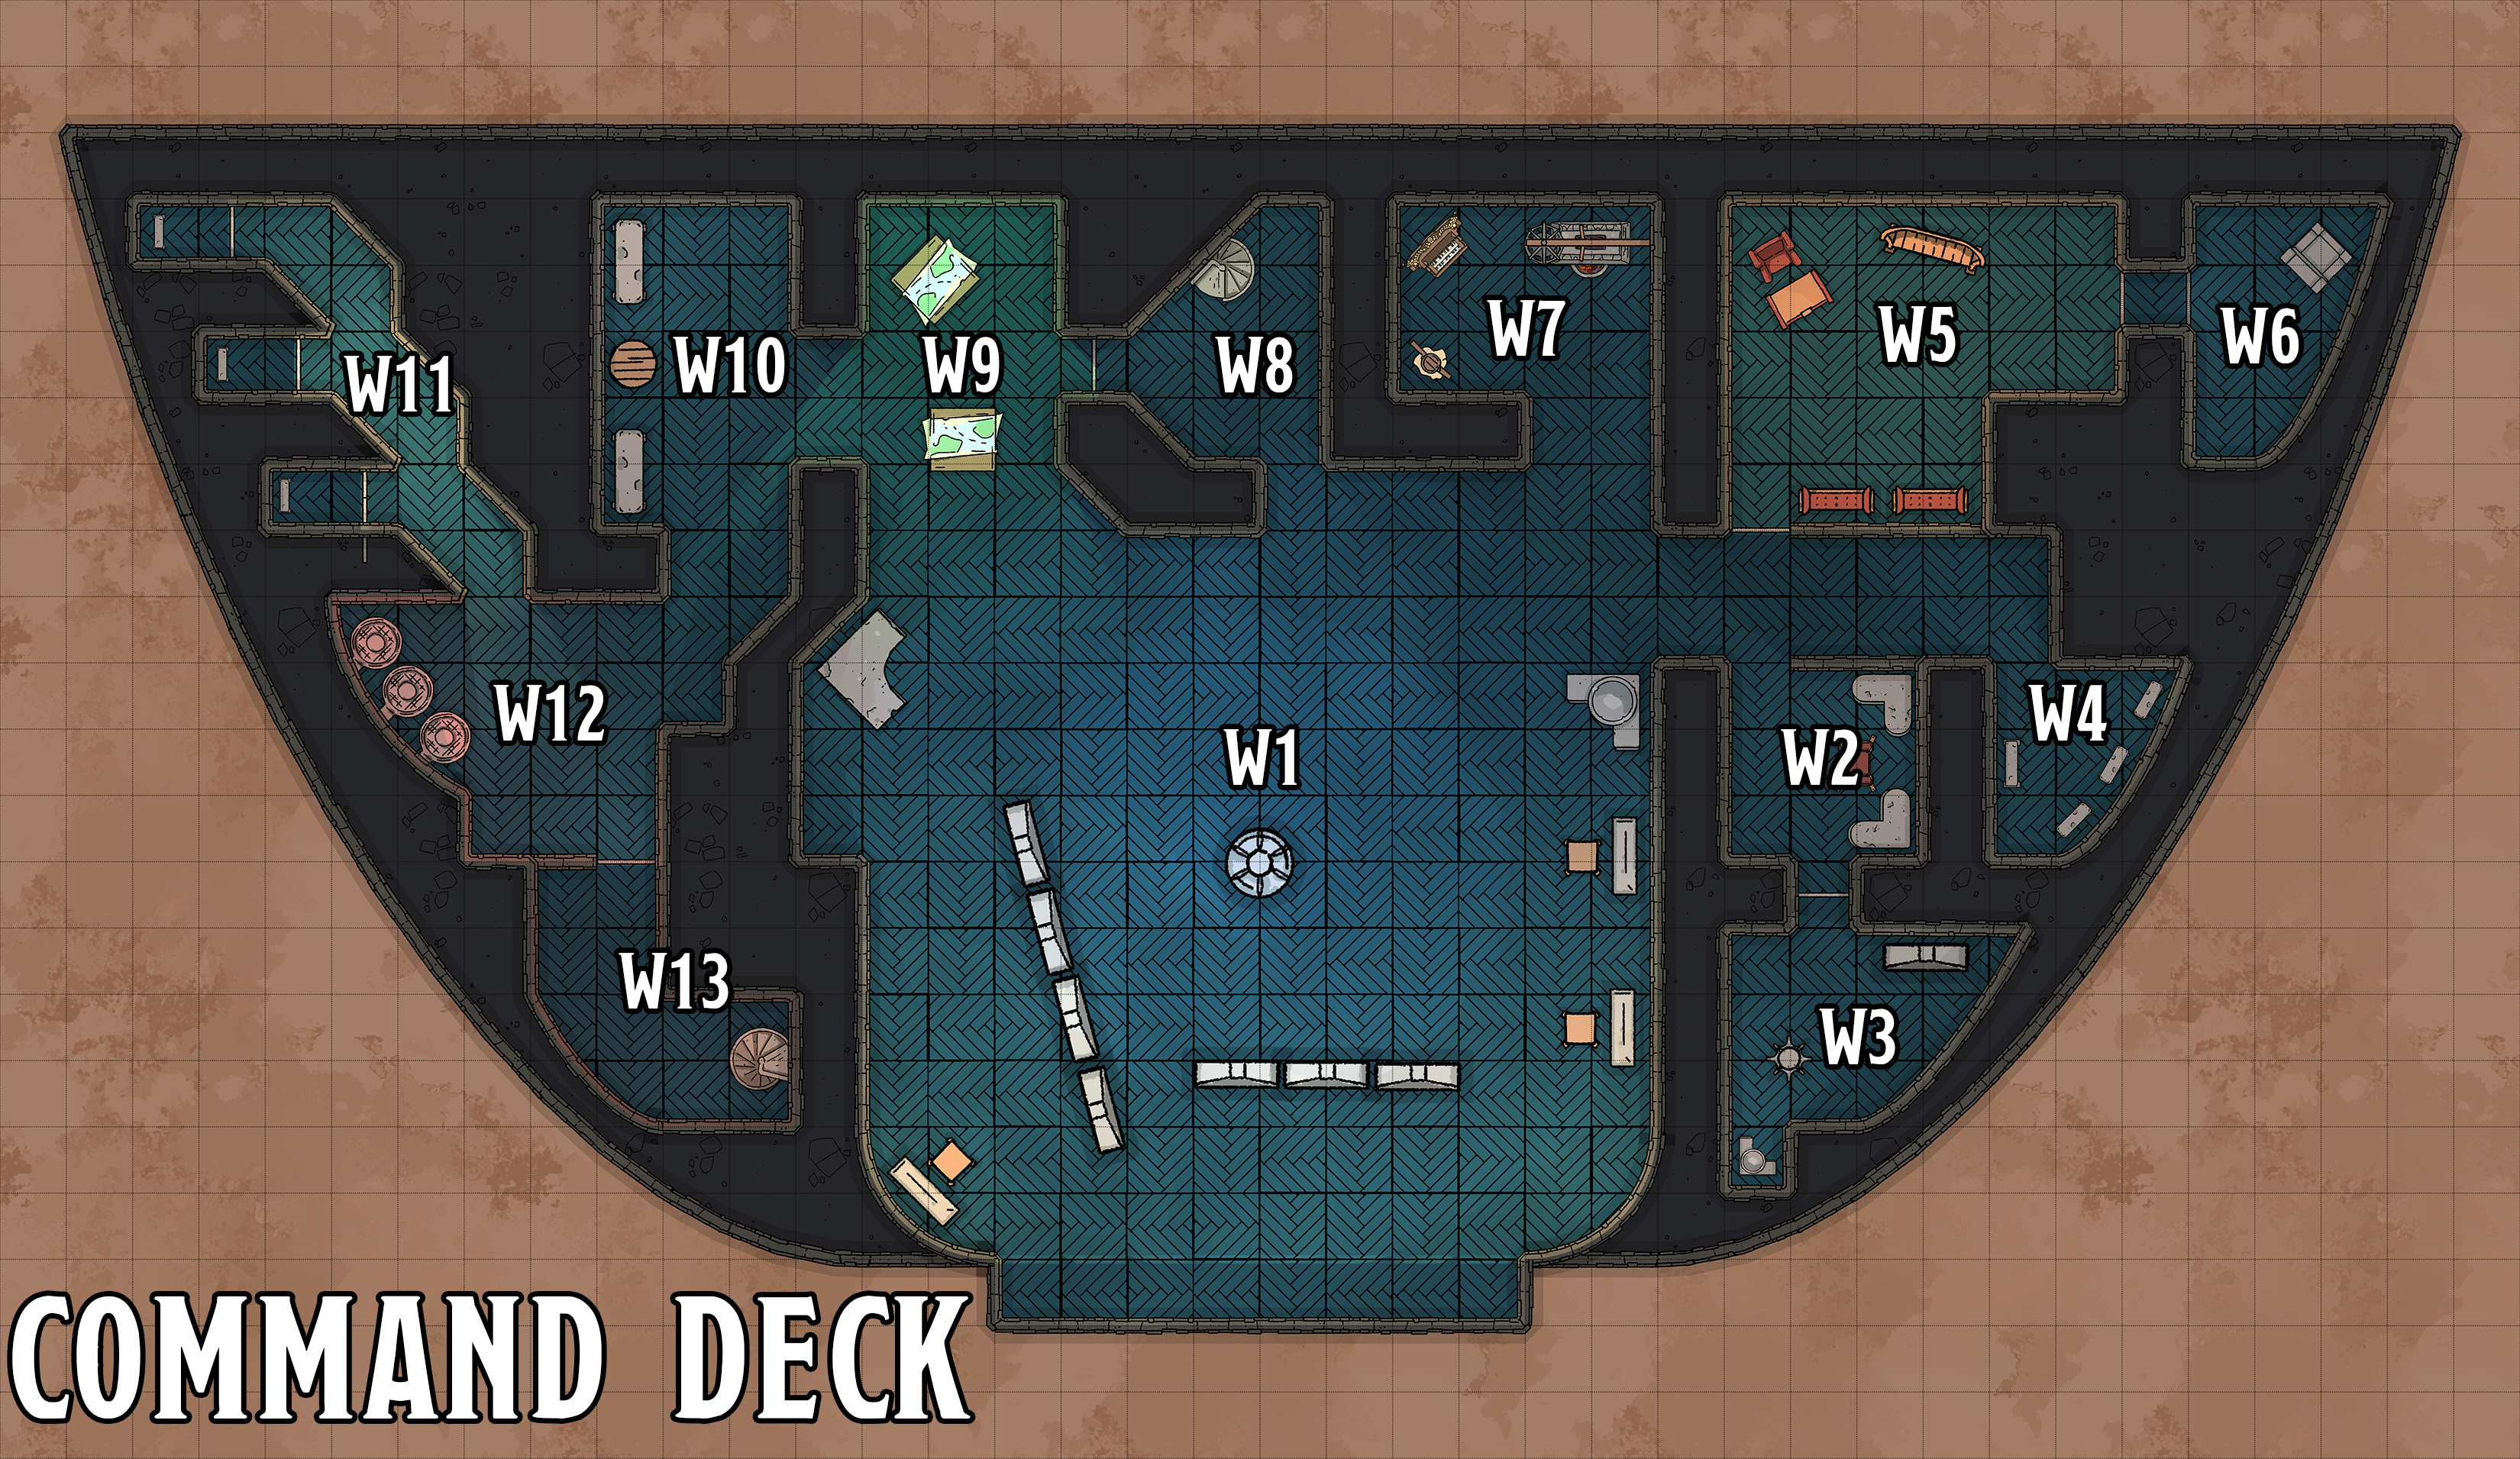
COMMAND DECK: The control center of the flying fortress.

Defenses:

  • 2 optio squads, stand guard at each entrance (W8 and W13)
  • 1 primus squad, providing security on the Bridge (W1).

Commanding Officers:

  • Zariel (01-70) chance) or Iseddon (71-90, her ice devil XO) or both (91-00).
  • 25% chance of corps commander being present — Signifier Uxatarthus (01-40), Principia Hathastus (41-80), or both (81-00)
  • 10% chance of Legate Siccatrax Augustus (pit fiend)

Bridge Crew:

  • 2d6+6 imps
  • Efrarta, a chain devil navigator
  • 1d4+2 spined devils
  • 1d4+2 bearded devils

Zariel's Flying Fortress - Command Deck

W1 – Bridge. The ship is primarily controlled from here. There are a variety of consoles, including a central control station for piloting the fortress.

W2 – Alarm Console. This console monitors the internal security systems and reports on triggered alarms.

W3 – Backup Control Systems. This room is usually empty; it’s used if the primary control interfaces in area W1 are damaged. There’s a hatch hidden in the floor here which leads to service tunnels that can be access from (among other places) the Engine Room.

W4 – Damage Control. Damage reports from across the fortress are routed here and response crews and repair teams are dispatched.

W5 – Zariel’s Ready Room. A compartment Zariel uses for her personal work and for briefing (or dressing down) senior officers.

W6 – Safe. The safe is made from a three-foot block of infernal iron and stuck to the deck with sovereign glue. It uses a three-digit combination lock and requires three knock spells to open. If the combination is attempted unsuccessfully three times, it triggers an alarm in W2.

W7 – Divination Stations. The equipment in this room uses a variety of divination effects to monitor the area around the flying fortress.

W8 – Entrance. The stairs here go up and are primarily used by the officers corps (although reports form the Upper Perch also come this way).

W9 – Navigation Charts. Tables here have navigation charts of the immediate area laid out with the current location of the flying fortress indicated.

W10 – Commissary. A variety of food appropriate for devils is available here, including a number of rare delicacies.

W11 – Signal Desks. Behind each door is a closet with a miniature console and chair bolted to the floor. These consoles have keys and function like Infernal typewriters. An imp stationed at each console types orders from superiors on small slips of paper before delivering them to their intended recipients. Rigged above each desk is a long, slender horn through which bridge officers can dictate orders.

W12 – Imp Access. Three circular hatches on the floor connect to the imp signal tubes (some leading to interior locations; others to the Imp Roosts and, from there, to the exterior signal vents).

W13 – Entrance. The stairs here go down, providing primary access to the lower decks.

DEVIL DENS: The barracks of the bearded devils of the 7/5. The devils’ “bunks” are actually exuded foam “nests” with a spongy interior and a hard, shell-like exterior. The devils leave their heads exposed while sleeping, and then break out of the nest when rising. During the next rest period they’ll crawl into the remnants of the previous night’s nest and exude a fresh foam, creating over time a strange and alien structure. These nests are often infested with maggots (which the devils find comforting), who can feed on the foam. (This also results in the dens being filled with large, red-black biting flies.)

In addition to the dens themselves, there are a number of storerooms, common rooms, bog-rooms, and the like.

Alarm: If an alarm is sounded in the devil dens, there’s an essentially limitless number of nearby troops. During a fight, reinforcements arrive every 1d4 rounds. Roll 1d8 to determine the reinforcements.

d8Reinforcements
1-5Security Patrol (2-4 bearded devils)
6-7Optio Squad (4-6 bearded devils, including optio)
8Primus Squad (4-6 bearded devils + 1 horned devil)

In addition, each time reinforcements appear there is a 1 in 6 chance that the security response will escalate. When the security response escalates, roll twice for the current and all future reinforcements. Continue checking for additional escalations, the effects of which stack.

DOCK OF FALLEN CITIES CONTROL ROOM: An oval-shaped chamber with a sunken floor. In the center of the chamber illusion spells create a projection of the Dock of Fallen Cities (including, at the moment, Elturel) that floats in mid-air. There’s a ring of strange mechanisms – dials, switches, levers, and the like – around the perimeter of the sunken oval.

Bel’s Forgemark: The equipment is marked with Bel’s forgemark, indicating that it was built at Bel’s Forge (Hex H2).

Status Readings: A character can attempt to understand the dizzying array of readouts with an Intelligence (Arcana) check.

  • DC 15: The character discover the true nature of the Companion (a prison containing and harnessing the power of a planetar).
  • DC 20: There’s a release mechanism that can free the planetar, but the readouts indicate that it requires the insertion of nine adamantine “lockout” rods.
  • DC 24: Monitors indicate that a huge charge of negative energy was released by the Companion when Elturel was brought to Hell. However, it appears the release of that energy caused an equal and opposite charge to be passed into the planetar within the Companion (where it is dissipating, but only very slowly).
  • DC 28: The negative energy was an etheric charge that was built up in Elturel’s buildings, streets, and even people as a result of being bathed in the Companion’s light. The negative energy release occurred when the “polarity” of the Companion was flipped and was the actual mechanism by which Elturel was brought to Avernus. It seems likely that the only way to return Elturel to the Material Plane is a similar energy release.

Controls: A DC 15 Intelligence (Arcana) check indicates controls for releasing the chains holding Elturel, but they are “pact-locked.” As long as Bellandi’s pact remains in effect, Elturel cannot be released until the pact is nullified or destroyed.

ENGINE ROOM: The engine room is a large complex with three levels arranged around a central chamber that extends up through all three levels.

  • Central Chamber: Suspended in the middle of the engine room is an iron, bell-shaped contraption painted black (Large object, AC 19, damage threshold 10, 45 hit points, immunity to poison and psychic damage). A DC 20 Intelligence (Arcana) check reveals that the bell is responsible for keeping the fortress aloft and level with the ground.
  • Bottom Level: There is a maintenance hatch allowing access to the cistern beneath the engine room which holds necrotic-infused soul fuel. (See Entrances, above.)
  • Middle Level: On this level, the central chamber is surrounded by several “control bulbs” — roundish rooms filled with gauges, monitors, and controls (big switches, small dials, etc.). Various service hatches can be popped, revealing service tunnels that twist throughout the flying fortress, leading to (among other places) the Bridge.
  • Upper Level: There are storage rooms on this level, as well as hallways connecting the engine room to the rest of the ship.

Defenses:

  • The chief engineer is a kere (Book of Fiends, p. 167) named Athaxial. She crawls around the engine room using her spiders legs.
  • Athaxial is assisted by a small team of six imps (MM, p. 76) and two chain devils (MM, p. 72).

IMP ROOSTS: The quarters of the imps who serve as couriers for the Blood Legions. Although well-connected, the trick is that the passages and chambers of the roosts are all imp-sized: they can only be accessed by Tiny or gaseous creatures.

Imp sleeping quarters are domed chambers in which clusters of imps hang upside down from the ceiling, like bats.

Alarm: If an alarm is sounded in the roosts, the imps will generally prefer to avoid combat. Instead, they’ll try to invisibly track the PCs’ movements while alerting nearby security patrols who will respond quickly (or be waiting to ambush them) when the PCs leave the roost tunnels.

If the imps become aware that the PCs have killed an imp, however, they will swarm with 2d4 imps arriving every 1d4 turns. In addition, each time these reinforcements appear there is a 1 in 6 chance that the security response will escalate, doubling the number of imps appearing in each wave. Continue checking for additional escalations, the effects of which stack.

LOOKOUT DECK: A lookout deck located on the very top of the fortress is manned by 4 spined devils.

Rooftop Hatch: 10-foot-square hatch on the rear top of the fortress.

PERCH, LOWER: Located below the command deck, the lower perch is a set of five hangar bays, allowing flying devils, infernal war machines, and other aerial assault teams to launch during battle.

  • Cargo Platforms: The two cargo perches have semi-circular silver platforms that can be slowly levitated to and from the ground when the flying fortress is stationary. They are operated by means of a copper pedestal attached to the platform. These platforms are generally used for cargo loading, but can also be used to bring non-flying, non-teleporting passengers into the fortress.
  • Perch Access: It’s not unusual for one or two of the perches to be open during flight to allow flying devils to come and go, so it’s often possible for the PCs to simply fly in (if they can somehow avoid being detected by the devil legionnaires on security duty and also actively working throughout the perch).

Defenses:

  • 2 optio squads
  • 6 barlguran slaves
  • 2 demon-detectors

PERCH, UPPER: Also known as the Crow’s Nest, the Upper Perch is located near the top of the fortress. It’s a single, small hangar bay from which flying scouts are deployed.

  • The Three-Eyed Kenku: The taxidermied head of a three-eyed kenku hangs in the center of the perch. The devils think of it as a good luck charm. If you pat it on the head, it utters cryptic “prophecies” in a multitude of voices which may (or may not) be complete nonsense. (It does have a faint aura of divination magic.)
  • Perch Access: The Upper Perch is generally not open except during an actual deployment. The doors can be raised or lowered from a control room at the back of the bay.

Defenses:

  • 1 optio squad
  • 4 barlguran slaves
  • Scorpion Guns: The perch entrance is guarded by two small scorpion blasters (see Ventral Battery, below), which are used to prevent enemy flyers from breaching the perch during combat deployments.

ROOKERY: The Upper and Lower Rookeries are the barracks of the spined devils of the 3/5. In addition to perch-like “bunk” rooms, the rookeries include a number of storerooms, common rooms, armorers, and wing-pollers (basically cosmetologists for wings).

Alarm: If an alarm is sounded in a rookery, there’s an essentially limitless number of nearby troops. During a fight, reinforcements arrive every 1d4 rounds. Roll 1d8 to determine the reinforcements.

d8Reinforcements
1-5Security Patrol (2-4 spined devils)
6-7Optio Squad (4-6 spined devils, including optio)
8Primus Squad (4-6 spined devils + 1 erinyes)

In addition, each time reinforcements appear there is a 1 in 6 chance that the security response will escalate. When the security response escalates, roll twice for the current and all future reinforcements. Continue checking for additional escalations, the effects of which stack.

Design Note: If the PCs can find a way to pass undetected through the rookeries, devil dens, roosts, or officers’ quarters of the flying fortress, it can often provide a more direct route to their objectives. But it’s also very risky, and getting into an armed conflict in the place where all the bad guys sleep is a really bad idea.

TELEPATHY STATION: A large, semi-circular control panel in the center of this chamber resembles a pipe organ that has had most of its ivory keys replaced with switches of blood red jasper. The brassy walls of the chamber are filled with roundels.

Roundels: Each roundel is a cylindrical chamber which can be extracted from the wall with a successful DC 12 Intelligence (Arcana or Investigation) check. Each chamber contains a magically preserved brain. (These brains, which are actually networked together and through the other machinery in this room via astral wires, are the mechanism by which the telepathic functions of the station operate.)

Telepathic Jamming: The station can (and almost always is) scrambling telepathic communications within 1 mile of the fortress.

Telepathic Transmission: If the jamming is dropped, the station can instead transmit a telepathic message to all devils within 1 mile of the fortress.

VENTRAL BATTERY: The ventral battery consists of several weapons bays.

Scorpion Array: Scorpion guns fire lightning bolts. Small scorpion guns deal 45 (10d8) lightning damage, while the six large guns deal 110 (20d10) lightning damage.

Firebomb Bays: The bomb bays drop ordnance that deals 35 (10d6) fire damage in a 40-foot-radius sphere. Some firebombs are rigged as missiles. They move 80 feet per round and are guided by integrated soul coins.

Firing Crews: Each weapons bay is manned. (Deviled?)

  • 1 primus squad
  • 1 optio squad
  • 1d8-2 barlguran slaves

ZARIEL’S QUARTERS: The walls of Zariel’s opulent quarters are an ever-shifting mosaic of obsidian-black slabs limned with crimson light. Notable features include:

  • A bath filled with blood.
  • A collection of soul coins.
  • Lighting provided by golden glow globes that float randomly through the suite.
  • A demon’s skull hung on the wall.
  • Beneath the demon’s skull there are two brackets for hanging a sword which stand empty.

There is a 25% chance that Zariel is present.

Entrance: There is an honor guard consisting of one erinyes and one horned devil outside the door to Zariel’s quarters.

Fractal Vault: A DC 20 Intelligence (Investigation) check can locate a concealed keyhole – a fixed point in the ever-shifting walls. The only key for this lock is carried by Zariel at all times, but it can be opened with a DC 25 Dexterity (Thieves’ Tools) check, which causes the wall to peel back, revealing a small vault.

The vault is empty except for another vault door (see below). If this vault door is opened, it reveals another small vault with another vault door, which leads to another vault door and another and another.

To access the real vault you need to enter one of the fractal vaults, turn around, and close the door you just came through. If you then open this vault door (requiring a DC 30 Dexterity (Thieves’ Tools) check) you will reveal a huge vault filled with infernal contracts:

  • Countless drawers filled with paper.
  • Calligraphic scrolls hung upon the black walls.
  • Stone slabs stacked like paving stones.
  • Several plinths on which particular contracts are displayed like pieces of art.
  • A small series of linked statuettes displaying a sequence of sign language.

Zariel’s half of Bellandi’s Pact is located here. (Remember that infernal contracts can only be destroyed if you have both parts, so the PCs won’t be able to just go on a contract-destroying spree. At least, not easily.)

Fractal Vault Doors: The base DC for opening each fractal vault door is 25. Each vault door is also a little bit unique, featuring both a trick and a trap. Determine tricks and traps randomly using the tables below. All traps require a DC 18 Wisdom (Perception) or Intelligence (Investigation) to locate, and an appropriate DC 20 check to disable.

d12Trick
1Multiple locks. There are 1d4+1 locks instead of just one.
2Illusion-hidden lock. The lock is hidden as per a silent image spell, requiring a DC 18 Intelligence (Investigation) check to locate. Unless dispelled, the illusion imposes disadvantage on attempts to pick the lock.
3Arcane locked. In addition to the lock, the door is also affected by an arcane lock spell.
4Animated lock. The lock is an animated object that will bite (+10 to hit, 1d4 damage) or demand the answer to a riddle or refuse to open its mouth or (falsely) claim to be a polymorphed paladin or engage in similar antics.
5Really tough lock. +5 DC.
6Motile lock. The lock drifts across the surface of the vault door. The DC to open the lock is +2.
7Light averse. The lock only appears if the vault is in darkness.
8Personal touch. The lock only appears if someone touches the door. (Touching the door will trigger the door’s trap, if any, unless it has been disabled.)
9Door above. The vault door is on the ceiling instead of the far wall, making it more difficult to access.
10Roll twice on the Traps table.
11Roll twice on the Tricks table.
12No trick.
d12Trap
1Lightning bolt. As per the spell. 100 feet long, 5 feet wide, in direct line from door; DC 18 Dexterity saving throw for half damage; 52 (15d6) electricity damage.
2Fireball. Fills current vault and the immediately preceding vault. DC 18 Dexterity saving throw for half damage; 52 (15d6) electricity damage.
3Acid-laced. he door is coated in an oily-sheen which is actually a nasty acid. Anyone touching the door suffers 22 (4d10) acid damage. The door also deals this damage to any Thieves’ Tools used to pick the lock.
4Adhesive door. Anyone or anything touching the door is immediately stuck to it. It requires a DC 20 Strength check to pull free, which also inflicts 1d6 damage.
5Fire door. When touched or the lock opened, the door lights on fire. Anyone within 5 feet of the door suffers 22 (4d10) fire damage. DC 14 Dexterity saving throw for half damage (or a Constitution saving throw if you’re deliberately not moving away from the flames; e.g., if you’re picking the lock).
6Scourge ooze door. When the vault door opens, it reveals a scourge ooze door blocking passage to the next room.
7Alarm. If trigged, an alarm spell notifies Zariel.
8Morph spikes. When triggered, the surface of the door morphs to shoot out long, needle-sharp spikes to a distance of 5 feet. +10 attack bonus, 55 (10d10) piercing damage.
9Hellwasps. A swarm of 2d4+6 hellwasps are released from the ceiling.
10Roll twice on the Traps table.
11-12No trap.

Go to Part 7E: Warlords of Avernus

Archives

Recent Posts


Recent Comments

Copyright © The Alexandrian. All rights reserved.