The Alexandrian

Posts tagged ‘rpg scenarios’

Go to Table of Contents

In Phase 2 of Storm King’s Thunder, the PCs travel to one of three cities: Bryn Shander, Goldenfields, or Triboar. Each of these cities will be attacked by giants shortly after the PCs arrive, and in each of these cities there are six “Special NPCs” that the DM is supposed to give to the players to play during the attack:

In this chapter, each player runs not only a player character but also an NPC who has ties to the settlement that the characters are defending. Once you’ve determined where the adventure begins, make photocopies of the six NPCs corresponding to the location you’ve chosen.

(…)

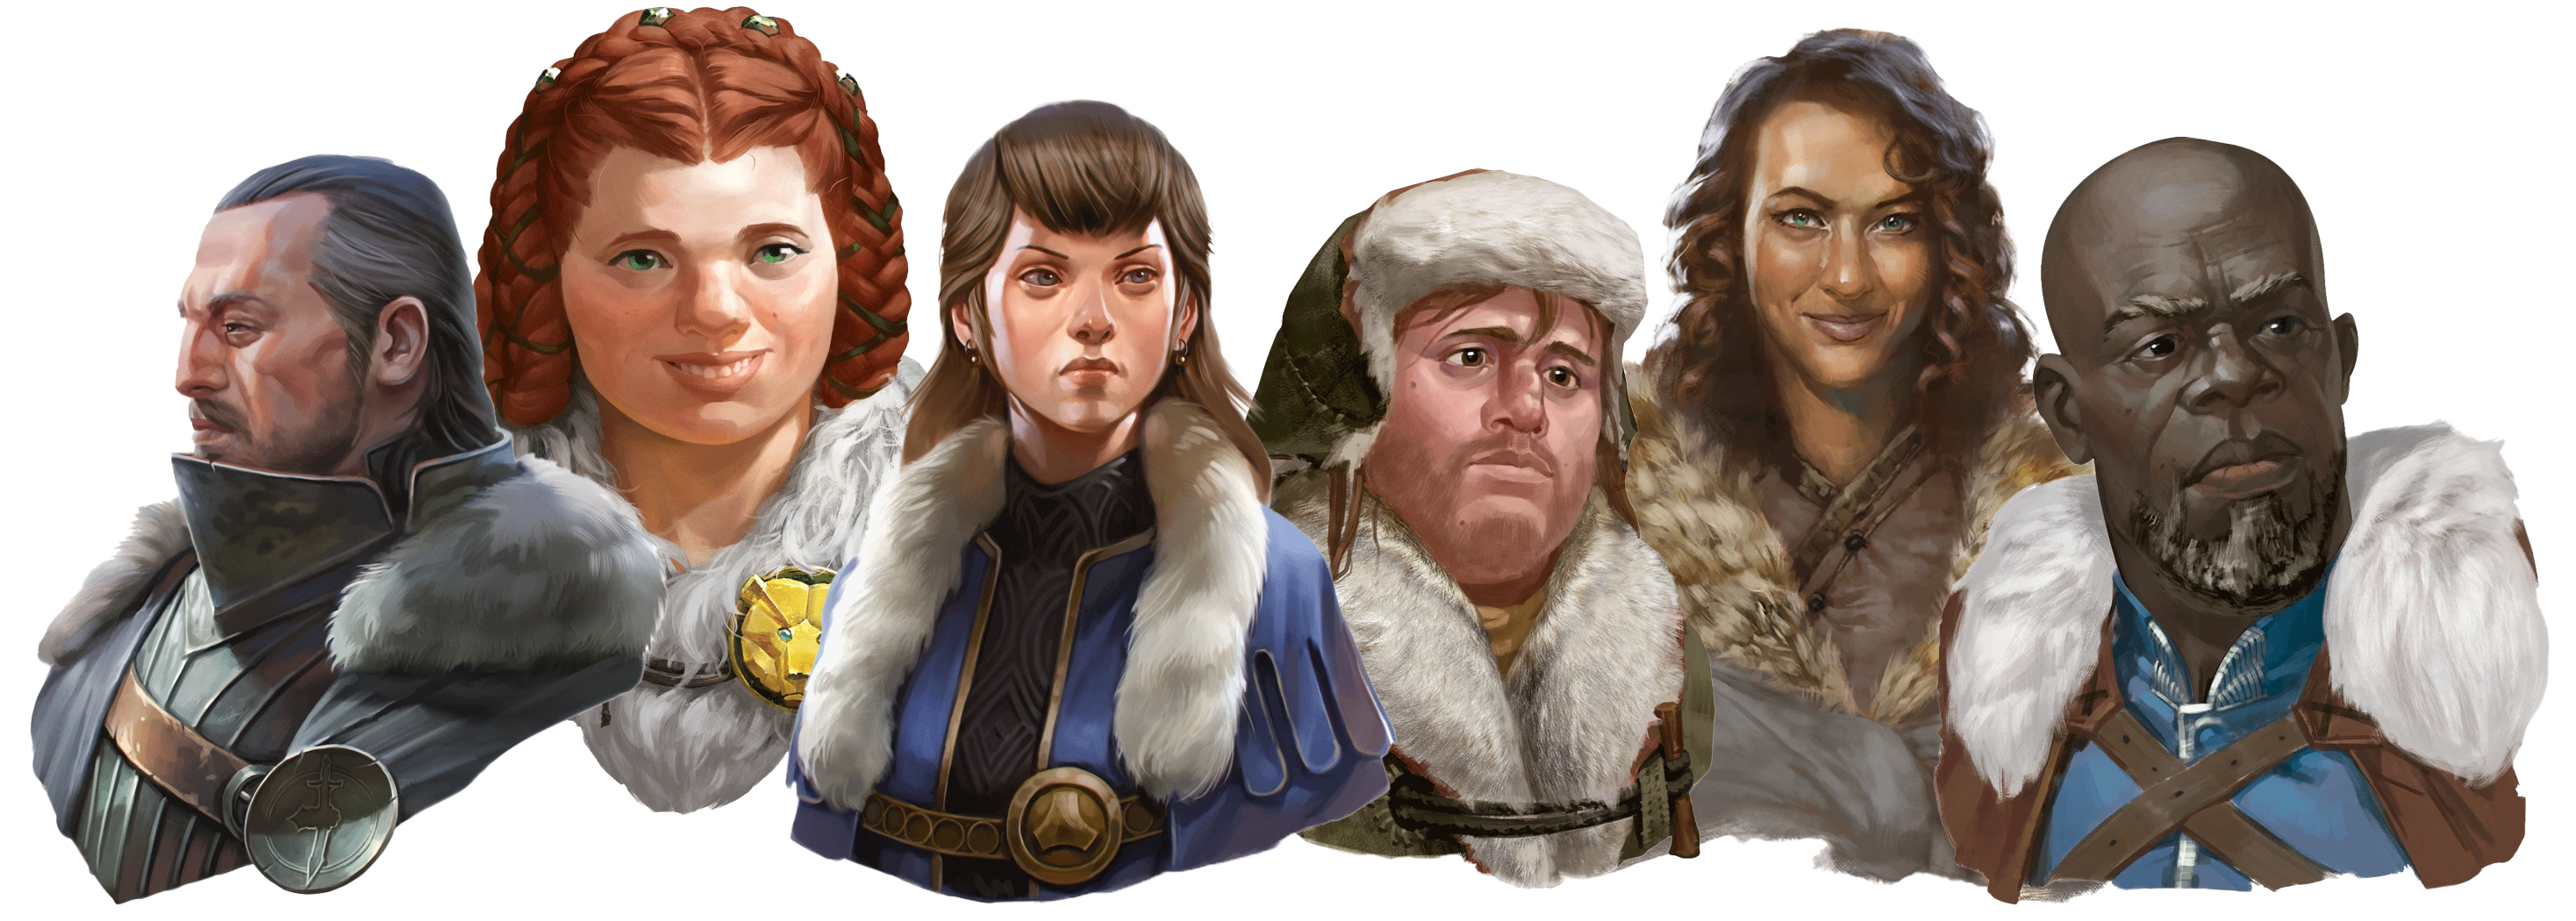
Each NPC comes with a brief description, personality traits (a bond, an ideal, and a flaw), and a stat block. When the giant attack begins, give one NPC to each player and tell the player where the NPC is at the start of the encounter, as noted in the encounter description.

The structural concept here is that each Special NPC who survives the giant attack will deliver a Special Quest. The DM is supposed to spell this out to the players, by reading the following boxed text aloud:

In addition to your character, each of you has received a special nonplayer character with ties to the location where the adventure begins. Take a moment to review your NPC’s personality traits and statistics. One of your goals in this part of the adventure is to keep your special NPC alive. For each of these NPCs that survives, your party will receive a special quest that yields a reward upon its successful completion. The details of these special quests won’t be revealed until the end of this part of the adventure.

These Special Quests are the scenario hooks that propel the PCs from Phase 2 into Phase 3 of the campaign. The point, obviously, is for the PCs to exit Phase 2 of the campaign with a fistful of scenario hooks pointing in a whole bunch of different directions. In Bryn Shander, for example, you can get hooks pointing to:

  • Ironmaster
  • Waterdeep (x2)
  • Hundelstone
  • Neverwinter
  • deeper into Icewind Dale

Looking at this section of the campaign, I really like the Special NPC dossiers and the gimmick of taking on these additional roles during the giant attack can be quite effective in lending an epic scope to these events.

What I DON’T like is that “explicitly explain the structural conceit” thing. It pierces the veil in a way that makes the game world feel less like a real place by popping a yellow exclamation mark over the NPCs’ heads. It’s also a little awkward to hand the players brand new characters to play just as a major combat is breaking out, because the pace of events will get bogged down in the procedural aspects of passing out the dossiers, explaining what they’re doing, figuring out the stat blocks, etc.

RUNNING THE PROXIES

Instead of waiting for the giant attack, give the Special NPCs to the players as they’re approaching the city limits. For example:

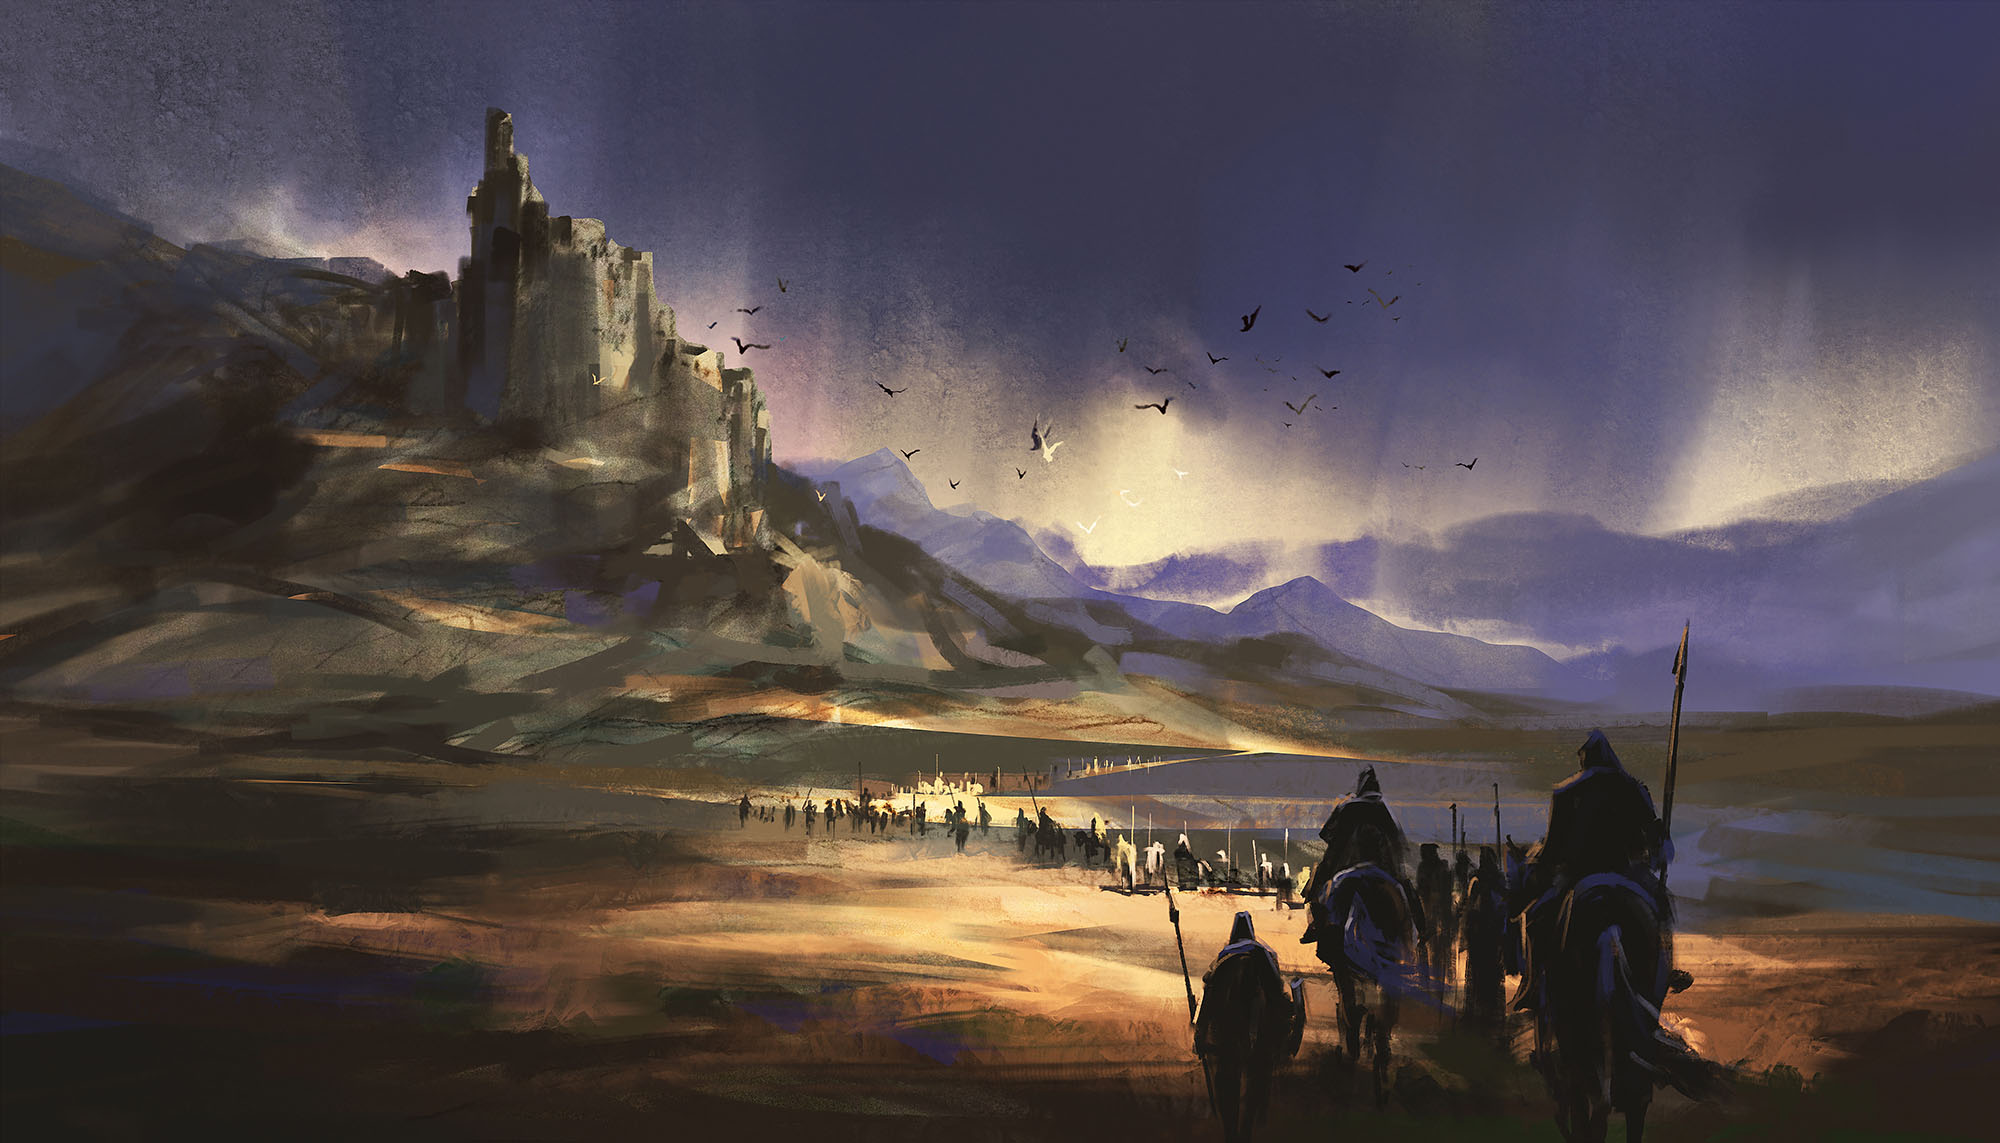
You see Bryn Shander on a hill rising from the wind-swept tundra. The sun is lowering in the sky and the chill of the wind is taking on a vicious edge. Ahead you can see two 30-foot-tall cylindrical towers flanking the gate.

CUT TO: Six people living in Bryn Shander.

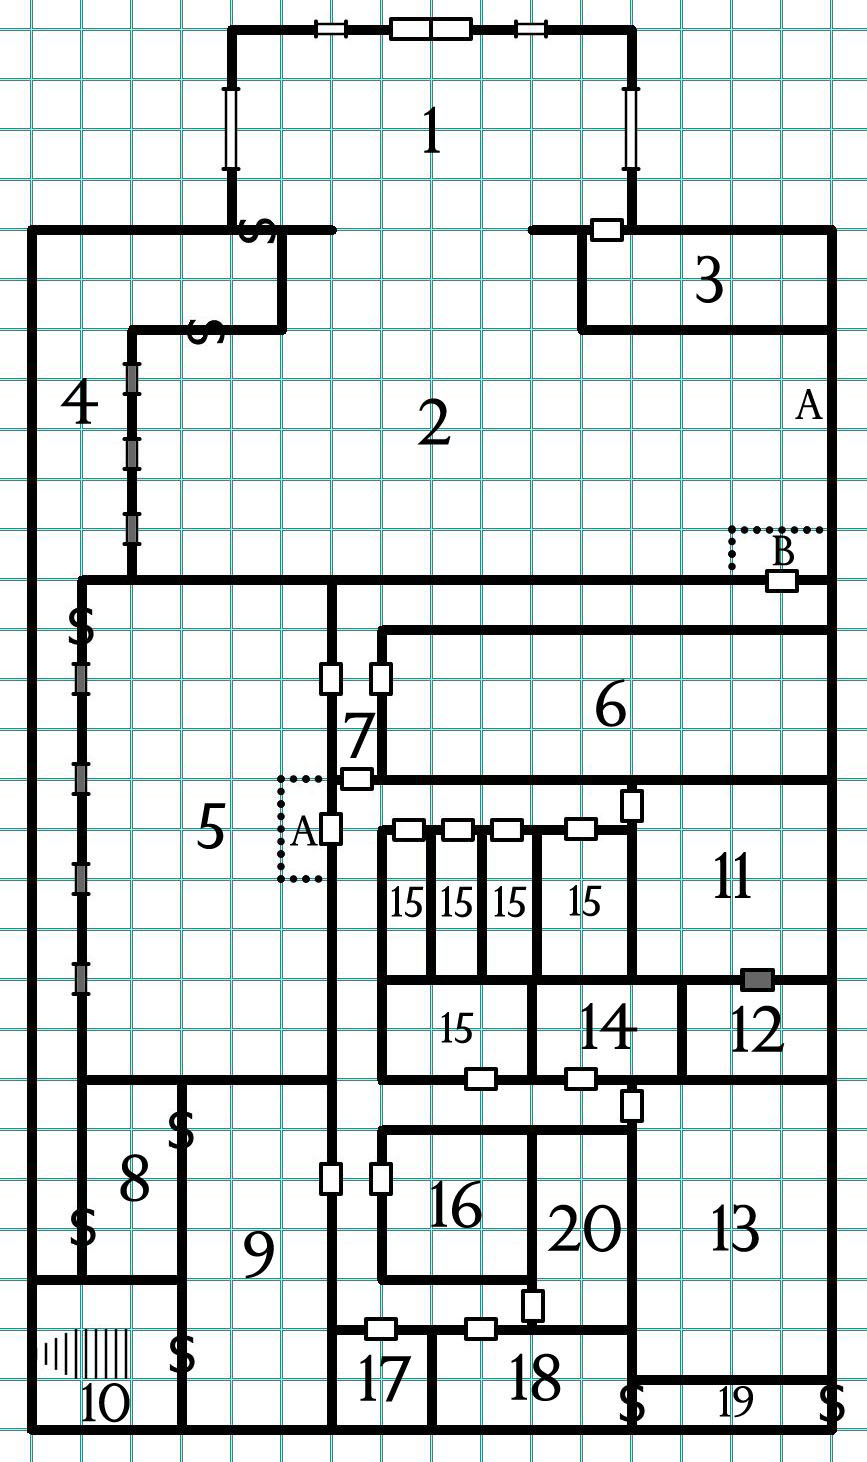
At this point, distribute the NPC dossiers to the players and give them a minute to look things over. Put a copy of the Bryn Shander map on the table for the players to reference. Then prompt each player to frame a simple scene:

  • What is something Augrek does every day?
  • Where is Sirac right now?
  • Markham is in Rendaril’s Emporium. What is he looking for?
  • Duvessa Shane is having an argument. Who is she arguing with?
  • Beldora is following someone. Who?
  • Sir Baric, give me a Perception check to see if you catch the pickpocket taking your purse.

Briefly play through these scenes. Then cut back to the PCs entering the town.

Your goal here is to very quickly make the town come to life and get the players invested in it. When the giants attack later, the players now have a reason to really care about the community AND they’re already oriented to the Special NPCs and their lives, so they can jump straight in.

BEFORE THE GIANT ATTACK

The PCs will now go about their business. (Shopping, finding lodging, following up on whatever scenario hooks brought them to this city in the first place.) As they’re doing this, reincorporate the NPCs whenever you can:

  • The PCs meet Sirac when they look for someone to give them directions.
  • Markham is, conveniently, who they’re looking for.
  • Duvessa comes in while they’re talking to Markham. She wants to talk to him about the argument she just had.
  • As they head to the general store for supplies, they run into Sir Baric who is just finishing that pickpocketing scene.
  • At the store, they meet Beldora.

And so forth. Whatever feels right for your group, based on how those first scenes played out.

The PCs don’t need to coincidentally meet every Special NPC. (No reason to force it.) But if that happens naturally… great!

Then, suddenly, in the middle of one of these scenes: GIANTS ATTACK!

AFTER THE GIANT ATTACK

In addition to the NPC dossiers, you’ll also want to have prepped a short handout for each scenario hook they can offer to the PCs. After the giant attack is complete, hand these to the appropriate players and let them frame up the scenes where they give the hooks to the PCs.

(You can give these out over time instead of all at once if that feels more appropriate. The pacing here is more art than science.)

The text from Storm King’s Thunder can serve as a good base for these briefing sheets, but you may want to tweak them a bit. For example, Beldora’s reads:

Beldora urges the characters to head southwest and take Ten Trail through the mountains to the mining settlement of Hundelstone. She suggests they make contact with a gnome named Thwip Ironbottom, who lives there year-round. If one or more of the party members are Harpers, she tells them that Thwip serves as the organization’s eyes and ears in Hundelstone. Beldora uses her sending stone to inform Thwip that the characters are coming.

This is very scripted and will likely feel awkward to the player. Shift the phrasing to give the player more leeway in playing the scene:

Beldora is impressed by the actions of the party and would like to recruit them as Harpers. If they’re interested, she’ll direct them to make contact with Thwip Ironbottom in the mining settlement of Hundelstone (which lies to the southwest and can be reached by following the Ten Trail through the mountains).

It’s a small shift, but hopefully the effect is fairly clear.

EXTENDING THE GIMMICK

In the Storm King’s Remix, you’ll repeat this same structure three times. This is good: Each time you do it, the players will feel more comfortable with what they’re expected to do, and the results will grow stronger as a result. You might worry that it will become repetitive, but in practice this won’t happen because the NPCs are unique and the circumstances distinct. The result will play out very differently each time.

Having done so, you might think about how this gimmick could be extended. (Particularly if it seems to be well-received by the players.) There are several ways to do this:

  • When the PCs return to one of the three cities, take the time to once again frame up day-in-the-life scenes with the Special NPCs.
  • Even if the PCs don’t return to one of the cities, perhaps one or more of the Special NPCs could be encountered elsewhere. (Beldora, for example, might be reassigned by the Harpers.)
  • If the players seem really attached to their Special NPCs, you might use some light bluebooking to allow them to stay connected to the characters and follow up on what’s happening with them. (You could also use this as a vector for establishing the scope of the crisis affecting Faerûn; you might even have these NPCs maintain some form of correspondence with the PCs, allowing them to be conduits for additional information or scenario hooks as the campaign continues.)

You might also consider keeping an eye out for opportunities to use a similar technique in other locations during the campaign. (You would, of course, have to write up the appropriate NPC dossiers.) For example, what if the players took on the roles of various giants in Maelstrom when visiting the storm giant court for the first time?

Go to Storm King’s Remix

The White House - Ptolus - TM and © 2021 Monte Cook Games, LLC.

TM and © 2022 Monte Cook Games, LLC

SPOILERS FOR PTOLUS: NIGHT OF DISSOLUTION

In the Night of Dissolution, a campaign for 4th to 9th level characters by Monte Cook set in the city of Ptolus, the investigations of the PCs bring them to the Mrathrach Machine, a huge structure of chaositech which has been assembled in a cavern beneath the White House, a gambling establishment owned by the lich Aggah-Shan in the Oldtown district.

In the original adventure, the PCs are led to the Mrathrach Machine via an underground tunnel. But whether they come at the complex from above or below, they may nevertheless find themselves exploring the White House or the catacombs of Aggah-Shan.

The White House and Aggah-Shan’s Catacombs are briefly described in Ptolus, p. 310-312. The Mrathrach Machine is described in Night of Dissolution. The material here is designed to enhance this material for your campaign.

These notes were developed for use in my Ptolus: In the Shadow of the Spire campaign. They’ve been adapted to 5E for use with the newly adapted release of the Ptolus sourcebook and campaigns.

Part 1: The White House
Part 2: Aggah-Shan’s Catacombs
Part 3: Mrathrach Machine
Part 4: The Balacazar Job
Part 5: Mrathrach Table Raids

THE WHITE HOUSE

Note: This map is based on the map found on p. 311 of Ptolus, but has been modified to include additional details.

LOCATION OF THE WHITE HOUSE

The White House is located on Fetch Street in Oldtown.

 TM and © 2021 Monte Cook Games, LLC.

ADVERSARY ROSTER

Area 12 Guards
Area 46 Guards + Guard Captain
Area 71 Guard
Area 81d4 Guards
Area 114 Advanced Guards
Area 134 Advanced Guards
Area 16Barras Noven*

The adversary roster only lists the armed force the PCs are likely to meet if they cause trouble. The White House is filled with patrons, dealers, table managers, moneychangers, etc. Of particular note is Thurman Rees (steward, Ptolus, p. 613), the day-to-day manager who can usually be found in his office (Area 16). (Note that Aggah-Shan is currently out of town.)

The White House is open 24-hours per day. The guards rotate, but the general staffing doesn’t shift between day and night.

GUARDS: Veteran (MM, p. 350)

ADVANCED GUARDS: Knight (MM, p. 347)

GUARD CAPTAIN: Master Thief (Ptolus, p. 612)

BARRAS NOVEN: Barras Noven is Thurman Rees’ brother. He normally hangs out at the Onyx Spider (Ptolus, p.203). Rees hires him if the White House is experiencing any trouble (e.g., if the PCs or other adventurers raid the place or the Balacazars perform a heist). Once hired, Barras stays in Area 16 unless trouble arises. Barras doesn’t want trouble with the city watch, however, and if the authorities are involved he’ll try to slip out the secret back door (Area 19).

EXTERIOR

  • White marble façade. Entrance flanked with massive columns.
  • There are a half dozen messengers hanging around outside, waiting to service the late-night crowd.

AREA 1 – ENTRANCE

The White House is fashioned to emphasize a youthful, exuberant luxury. (Some might describe it as “gaudy.”) It lavishes its patrons with pleasures.

STAINED GLASS WINDOWS: Large, stained glass windows flank the chamber, depicting the patron saints of Luck and Grace.

CLOAKROOM DOOR: A man at the door of the cloakroom (Area 3) will check bags and weapons for 1 sp per item. All weapons must be checked.

COMPANIONS: “Companions” are available for rent in the corner of the room.

AREA 2 – PUBLIC GAMBLING HALL

A dozen or so tables, sporting the highest stakes. Games include:

  • Green Dragonscales
  • Wheels
  • Poker
  • Orcsnout

MRATHRACH WHEEL (A): The White House’s Mrathrach installation. A large crowd surrounds it.

MONEY CAGE (B): For the purchasing and exchange of chips. Contains 1,500 gp in various coins.

MIRRORS: Large, floor-to-ceiling mirrors line the walls, making the room feel much larger than it is. A DC 15 Wisdom (Perception) check identifies them as one-way mirrors (looking out from Area 4).

AREA 3 – CLOAK ROOM

  • Contains a variety of common weapons, cloaks, etc.
  • Contains 1d6-3 magic weapons.

AREA 4 – FLOOR GUARDS

The White House doesn’t want a bunch of armed guards harshing the vibe on the gambling room floor, but they wait here where they can respond quickly through the secret door.

  • One-way mirrors look out onto the public gambling hall (Area 2).
  • There are comfortable chairs for the guards to sit in while others walk up and down the length of the wall looking through the windows into gambling halls (Area 2 and Area 5).

SECRET DOORS: DC 15 Intelligence (Investigation) check. DC 20 Dexterity (Thieves’ Tools) to pick the lock.

AREA 5 – PRIVATE GAMBLING HALL

A private gambling room for VIPS, who are brought in through the secret doors in Area 4.

MONEY CAGE (A): Contains 9,000 gp in various coinage.

AREA 6 – PRIVATE LOUNGE

“Companions” or a concierge will bring high-rollers back here. There are a dozen or so prostitutes/exotic dancers lounging or performing here.

AREA 7 – EMPLOYEE-ONLY DOOR

There’s always a guard standing on duty here. Only employees are allowed into the rear of the building.

AREA 8 – GUARD’S LOUNGE

A few chairs and a cot.

Most of the guards are NOT aware of the secret door leading to Aggah-Shan’s office (Area 9); only the Guard Captain and Advanced Guards.

SECRET DOORS: DC 15 Intelligence (Investigation) check. DC 20 Dexterity (Thieves’ Tools) to pick the lock.

AREA 9 – AGGAH-SHAN’S OFFICE

A huge, lavish office.

  • An imposing, dark-stained oak desk.
  • A plush rug that your feet sink luxuriously into.
  • A series of weapons hanging on the paneled walls.

RUG TRAP: Anyone approaching within 5 feet of the desk who doesn’t say the current verbal passphrase must make a DC 20 Dexterity saving throw or be restrained by the rug, which becomes sticky and also starts drawing trapped characters down into it. (You’re literally sinking into the rug!) Restrained characters have 1d4 rounds to succeed at a DC 16 Strength saving throw to free themselves. If they don’t, they vanish completely into the rug and begin to suffocate. In addition, they suffer 1d6 points of damage per round from constriction. Once fully “submerged,” they can still escape with a DC 20 Strength saving throw.

  • Magical trap
  • DC 20 Wisdom (Perception) check or DC 15 Intelligence (Investigation) check to note the subtle prehensile movement of the rug (in an activated area).
  • DC 15 Intelligence (Arcana) to identify the nature of the trap.
  • A dispel magic spell will suppress the trap for 2d6 rounds (also freeing anyone trapped inside the rug).

Aggah-Shan and the Guard Captain also know a set of command words which can activate the trap in any section of the rug, or the entire floor. (Or, alternatively, end the effect.)

DESK: The desk is surprisingly sparse, containing no written matter at all. It does have a secret drawer (DC 16 Intelligence (Investigation) check to find) which contains a stolen Balacazar ledger and a key to the lockbox in Area 20.

Balacazar Ledger: Details payments, transactions, shipments, and other information that implicates the Balacazar crime bosses in Midtown, South Market, and North Market.

WEAPONS: Inspecting the weapons hanging on the walls notes that each one has dried blood on its blade.

SECRET DOORS: DC 15 Intelligence (Investigation) check. DC 20 Dexterity (Thieves’ Tools) to pick the lock.

AREA 10 – TO AGGAH-SHAN’S LAIR

These stairs lead down to Area 1 of Aggah-Shan’s Catacombs.

AREA 11 – VAULT GUARD ROOM

This is the antechamber to the White House’s vault.

HALL DOOR (Steel-Cored): AC 19, 40 hp, DC 18 Dexterity (Thieves’ Tools)

VAULT DOOR (10-in. iron): AC 19, 300 hp, DC 24 Dexterity (Thieves’ Tools)

AREA 12 – VAULT

The vault itself is teleport-indicted. (You cannot teleport in or out.)

COIN: Coffers of copper, silver, and gold collected from the gambling floors.

  • 19,400 cp
  • 25,800 sp
  • 6,000 gp

JEWELS: 24,000 gp. 14,000 spread across 65 incredibly rare jewels; the rest in small diamonds, rubies, and pearls.

ART: 50,000 gp in rare art.

Design Note: The expectation here is that if the PCs liberally loot the vault, Aggah-Shan will track them down and make them pay for it for the rest of their (likely very short lives). He’s also, at least for the moment, a legal business owner — so he’ll simultaneously send the City Watch after them. Removing the bulky wealth, particularly the art, should also be non-trivial (and fencing it even moreso).

AREA 13 – MRATHRACH CONSTRUCTION AREA

Several long workbenches run down the length of this room, each covered in bizarre equipment of a vaguely biological nature.

Half-completed Mrathrach tables lean up against the far wall.

WORKBENCHES: The workbenches have several chaositech modules under construction, as well as a variety of papers including the Modified Mrathrach Tower Plans and Chaositech Module Shipping Manifest.

  • DM Note: The “warehouse off Flamemoth Way” belongs to the Surgeon in the Shadows (see Night of Dissolution, p. 39). The Modified Mrathrach Tower Plans reveal that Aggah-Shan is planning to betray his cultist allies and seize control of the Mrathrach Machine.

CHAOSITECH MODULE SHIPPING MANIFEST

This final delivery completely our supply of 25 bones of steel in paired, syncrotic modules customized to your requested specifications.

Deliver the payment of 5,000 platinum coins to the warehouse off Flamemoth Way.

MODIFIED MRATHRACH TOWER PLANS

Aggah-Shan–

I have enclosed the plans necessary for modifying the Mrathrach receptor modules within the Tower. The partial overlaying of your cerebral patterns onto the final matrix should reward you with the control you desire.

I am destroying my copies of these records, so that any potential leaks down here won’t get back to the Tolling Bell.

Caldor

Modified Mrathrach Plans

AREA 14 – TAINT VICTIM

A victim of chaositech taint is strapped to the bed. Flesh of the nose has rotted away. There’s bleeding from the eyes and fingernails. A greasy, yellow sweat. The victim is incoherent and semi-conscious (moaning softly).

  • DM Note: This room is normally use das a prostitution suite (see Area 15).

WHITE HOUSE HEALER’S REPORT: Located on the bedside table.

  • DM Note: Mala Cathord can be tracked down with a DC 12 Charisma (Investigation) check asking around Ptolus. She’s working on the case quietly because her brother owes a great deal of money to Aggah-Shan.

WHITE HOUSE HEALER’S REPORT

Notes taken by Mala Cathord, Healer of the Sacred Heat.

Patient’s Name: Haffe Brin

Patient collapsed while serving as an operator at the White House.

Symptoms are resisting treatment.

There is a fundamental corruption of the flesh; none of my efforts are having any effect. The corruption seems to be feeding upon itself.

Fingernails are chalky and weak. Sweat is beginning to manifest the inner corruption.

AREA 15 – PROSTITUTION SUITE

A private room for use by the White House “companions.” They take their johns back here (through or from Area 6).

The larger chamber keyed as Area 15 is a lavish suite. The others are fairly basic affairs with a simple bed.

50% chance that any given room is currently occupied.

AREA 16 – THURMAN REES’ OFFICE

Thurman Rees is the day-to-day manager of the White House. He has keys to all doors in the White House, as well as the lockbox in Area 20.

AREA 17 – PRIVY

Pretty much what you’d expect.

AREA 18 – FAKE OFFICE

This appears to be an office, but it’s actually maintained as a fake front to disguise the presence of the emergency bolt hole (Area 19).

A DC 12 Intelligence (Investigation) check notices an unusual coating of dust and other signs that the office isn’t actually used.

SECRET DOOR: DC 15 Intelligence (Investigation) check to find, DC 18 Dexterity (Thieves’ Tools) to unlock.

AREA 19 – EMERGENCY EXIT

A short hallway, mostly undecorated.

The secret doors are obvious from inside this hall.

BOLT DOORS: DC 15 Intelligence (Investigation) check to find, DC 18 Dexterity (Thieves’ Tools) to unlock.

AREA 20 – GAMBLING RECORDS

A relatively bare office. There’s a large, double-locked box sitting on a table.

BOX: DC 20 Dexterity (Thieves’ Tools), contains the Gambling Records. (It takes some time to piece out the details revealed by these records.)

  • GM Note: Lomwell’s refers to Lomwell’s Office (Ptolus, p. 209). The other locations are detailed in the Mrathrach Table Raids.

GAMBLING RECORDS

These records detail massive payments to Aggah-Shan from various gambling establishments around town, including:

  • Cock Pit (in South Market)
  • Urdoch’s “Mrathrach Holes” in the Warrens (some sort of collective operation)
  • Temple of the One-Eyed God
  • Broken Spine (in the Docks)
  • Hell’s Door (in Midtown)
  • Lomwell’s (in Midtown)

Business is brisk and healthy, with one exception: Most or all of Aggah-Shan’s establishments are accepting large losses on Mrathrach games.

There’s also a complaint from a local boss about his dealers falling ill and the difficulty of finding replacements. “Figure this out. We’re sick of it down here.”

Go to Part 2: Aggah-Shan’s Catacombs


Go to Table of Contents

We’ve analyzed the revelation lists of Storm King’s Thunder and we’ve revised those revelation lists by adding and enhancing clues throughout the campaign.

Before we move on, I want to talk for a moment about the fact that what we’ve seen so far is not what my typical revelation list looks like. In the middle of a session, of course, you don’t want to have to remember that there’s a clue on the revelation list that you need to inject into a particular scene or location. You want that information to be at your fingertips and ready to go.

So although we’ve been detailing what our revised clues will be on the Remix’s revelation lists, what I would do in actual practice is:

  • Work the clues into the actual key of the adventure.
  • Write up a much more streamlined revelation list to serve as a combination of index and checklist during play.

The revelation lists that we’ve presented here in the Remix, therefore, are best thought of as worksheets or to-do lists. The expectation here is that you’ll add this material to your prep notes, develop it where necessary, and distill a final revelation list for use in actual play (that isn’t bloated with the now extraneous details).

MAKING THE REVELATION LIST

Let’s consider the revelation list for Deadstone Cleft. In Part 3B of the Remix, our worksheet list for this revelation looked like this:

DEADSTONE CLEFT – CANYON OF THE STONE GIANTS

  • Uthgardt Blessings (Stone Stand). Members of the Blue Bear tribe, which has recently formed an alliance with Kayalithica of Deadstone Cleft, seek blessings from the Grandfather Oak at Stone Stand for their efforts. They do so by describing their endeavor on the tanned hide of a bear, which is then tied with blue gut-string in ceremonial knots and left within the clefts between the old oak’s roots. One of these was left by Kriga Moonmusk (p. 66) seeking blessing for her alliance with Kayalithica. The document includes a reference to Deadstone Cleft as Kayalithica’s fortress. (The PCs should be able to make inquiries to identify the location of Deadstone Cleft.)
  • Silixia (Grayvale), p. 88. This young brass dragon will point the PCs towards Deadstone Cleft.
  • Grudd Haug – Area 13: Prisoner. Gryhawk, the Uthgardt prisoner here, is from the Blue Bear tribe (instead of the Elk tribe). He was a spy sent by Kayalithica, but was captured by the giants. If freed, he will thank the PCs (as described on p. 144) and tell them that he is certain they will also have the thanks of the greater giants that he serves when he returns to Deadstone Cleft.
  • Svardborg – Area 1G: Throne Room. Jarl Storvald has correspondence from Kayalithica, in which she proposes, with the Ordning dissolved, an alliance between them — one in which her giants will “tear apart all that the little ones have built, restoring Ostoria to its glory” under her rule, while Storvald’s reavers will “rule the seas.” Her letter notes that she has traveled to consult the oracles of Deadstone Cleft in the Graypeak Mountains, and it has suggested that the All-Father and fortune alike would smile on such an alliance.
  • Questioning/Backtracking Giants. Grayvale Run (p. 88), Llorkh (p. 96), Orlbar (Zorkh, p. 103). The origins of the giants in Grayvale Run and Llorkh are not indicated in the text, but are from Deadstone Cleft.
  • Eye of the All-Father, p. 151. Oracle gives them directions.

Ultimately, in my prep notes for the campaign this revelation list would look like this:

DEADSTONE CLEFT – CANYON OF THE STONE GIANTS

  • Uthgardt Blessings (Stone Stand)
  • Interrogating Silixia (Grayvale), p. 88.
  • Uthgardt Prisoner (Grudd Haug, Area 13)
  • Kayalthica’s Letter to Jarl Storvald (Svardborg, Area 1G)
  • Questioning/Backtracking Giants. Grayvale Run (p. 88), Llorkh (p. 96), Orlbar (Zorkh, p. 103).
  • Directions of the Eye of the All-Father, p. 151.

It’s not difficult, obviously, to see the rather radical difference between these two lists, and how much easier it would be to reference and use the latter during play. (For more details on this, check out Using Revelation Lists.)

ADDING THE CLUES

In How to Prep a Module, I discuss how I prepare my notes for a published adventure like this. The short version is that, rather than rewriting entire locations, my notes usually consist of a diff doc (which simply notates what changes or new elements are added to the published key).

For example, Area 13 of Grudd Haug (STK, p. 144) reads:

13. PRISON

In the area north of the pigpen, rivulets of water trickle down the north wall and carve shallow ruts in the floor as they snake their way across the room and through openings in the opposite wall. Five wooden cages are arranged about the room. Their doors are situated on top, with heavy rocks placed on them. A creature can use an action to attempt a DC 15 Strength (Athletics) check to knock off a rock or open a cage door that has a rock pressing down on it. The sound of a rock hitting the cave floor alerts the guards in this area.

Three of the five cages contain prisoners destined for Guh’s gullet. Two bugbears guard the prisoners. These bugbears can’t be surprised once the alarm sounds or if they hear combat in area 12.

PRISONERS

Unless otherwise noted, all the adult prisoners are commoners. Child prisoners are unarmed noncombatants with AC 10 and 2 hit points each.

One cage contains human farmers: a father, a mother, and their three children (a teenage girl and two boys).

A second cage holds an unarmed tribal warrior of the Elk tribe, Gryhawk (CN male Uthgardt human). He fights alongside his liberators. If he makes it out of Grudd Haug, he bites the palm of his hand and tries to smear his blood on the faces of those who freed him. Anyone who succeeds on a DC 13 Intelligence (Religion) check realizes that this gesture is a sign of gratitude. Gryhawk leaves to return to his tribe whether the characters accept his gratitude or not.

A third cage holds an unarmed prisoner: Emerald Enclave member Ghalvin Dragonmoor (CG male half-elf scout). If freed, he asks the characters to escort him to Goldenfields, so that he can report to the Abbot what he has seen.

In my prep notes I would simply write:

AREA 13 – PRISON

Gryhawk: Blue Bear tribe member.

  • Spy sent by Kayalithica.
  • If freed, tells PCs that he is certain they will also have the thanks of the greater giants that he serves when he returns to Deadstone Cleft.

And that’s it. Super simple.

When running adventures like this, my procedure is simply to check my prep notes first to see if there are any modifications to an area and then refer to the printed adventure. (This means that I have the changes I need to make in mind as I scan the text, and can easily apply them as I go.)

On rare occasions, an area or scene may need to be so completely redesigned that it’s easier to just rewrite the whole thing. If that’s the case, I indicate this in my prep notes (with a tag like [REVISED]) and then I know I can just ignore the printed adventure entirely for this bit.

I also recommend paying attention to opportunities to prep physical props. Kayalithica’s letter to Jarl Storvald is a perfect example of this: Actually writing out the letter will take a little extra effort, but it will be a big value-add for the campaign and pay dividends as the PCs explore the sprawling twists and turns of Storm King’s Thunder.

Go to Part 4: Hekaton is Missing!

Storm King's Thunder: The Alexandrian Remix

SPOILERS FOR STORM KING’S THUNDER

I’ve done a couple previous remixes of 5E campaigns. The first was Dragon Heist: The Alexandrian Remix. The second was Remixing Avernus. Those were more or less intentional. This one is a bit more accidental.

Before we dive in, let’s briefly discuss what an adventure remix is and why we’re doing one for Storm King’s Thunder. I discuss this at more length in How to Remix an Adventure, but broadly speaking a remix will seek to either expand the adventure (by adding lots of cool new stuff to it) or restructure the adventure (usually seeking to fix the structure of the adventure so that it will be more robust and/or interesting in play) or both.

This particular remix is, I think, mostly going to be of the latter variety. In my review of the adventure, I delved into a number of the structural defects I think Storm King’s Thunder has, and we’ll breaking those down in more detail and building them back up.

This may prompt the question: Why remix a “broken” adventure instead of just designing something new?

Generally, because the adventure has something really cool about it (or, more likely several things). The many Storm King's Thunder - Wizards of the Coaststrengths of Storm King’s Thunder are ALSO something that I discuss in my review, and our goal in restructuring the adventure is to make it easier to bring all those cool things to your gaming table and to share them confidently with your players.

As I mentioned above, it was not my original intention to do a full remix of Storm King’s Thunder. I started out by writing what I believed would be a short series of articles with a fairly narrow focus on analyzing and then revising the revelation lists which form the core structure of the campaign.

This work remains the core focus of the Remix, and you’ll find it in Part 2 and Part 3. But while working on that material, I had two key insights.

  • The Hekaton mystery which comes at the end of Storm King’s Thunder as published is not just inadequately structured and fragile, it’s impossibly broken. In Part 4 of the Remix, therefore, we’ll be redesigning this mystery more-or-less from scratch. (This task also required a deep dive into the Kraken Society, which now forms one of the major expansive portions of the Remix.)
  • The published adventure doesn’t have a proper ending. We’ll discuss the specific reasons for this in Part 2, but the short version is that you can either (a) do a quick-and-dirty patch job which, unfortunately, has the side effect of making the entire campaign much less interesting or (b) create a whole new ending to the campaign. For better or worse, the new ending which is both a logical extension of the campaign and also provides an epic conclusion is… non-trivial. We’ll be working on that in Part 5 of the Remix.

And now that we’re fully committed to doing a complete Remix, we’ll round things out by strengthening the opening of the campaign, too.

Review: Storm King’s Thunder

Part 1: A Strong Beginning
Part 1B: Nightstone Conclusions
Part 2: Revelation Lists
Part 2B: Revising the Revelations
Part 3A: The Three Cities
Part 3B: The Giant Lairs
Part 3C: The Eye of the All-Father
Part 3D: Concept Revelations
Part 3E: Implementing the Revelations
Part 4: Hekaton is Missing!
Part 4B: The Path to Hekaton
Part 4C: Expanding the Path
Part 4D: The Hekaton Revelations
Part 5: The Final Act
Part 5B: Solutions
Part 5C: Running the Final Act
Part 5D: Making Alliances
Part 5E: Waging War

Addendum: Kraken Society
Addendum: Faction Reference
Addendum: Three Cities Proxies

If you’re new here at the Alexandian, you might find it useful to dive into these articles before the remix kicks off, as they include deep discussions of topics we’ll be visiting here:

There are many more articles at Gamemastery 101 that you might also enjoy! Please also consider becoming a patron if you’d like to support this type of work in the future!

A Legion Marching - Liu Zishan

Go to Table of Contents

ELTUREL’S RETURN

Into this turmoil, Elturel returns.

But, of course, this is not Elturel as it was. At best, its population has been decimated, its political leadership has been wiped out, and its military strength is depleted. So it’s not going to magically wave a wand and return everything to the status quo.

The effect it will have is going to depend a lot on what the balance of power is in the city upon its return, and that will probably have a lot to do with the choices the PCs have made and what they’ve managed to accomplish. Broadly speaking, though, it seems likely that the city will be:

  • Controlled by Ravengard’s Peacekeepers.
  • Controlled by High Rider Ikaia.
  • Controlled by both of them, either in an agreed alliance or a de facto division (e.g., Ravengard is currently in control of the west half of the city and Ikaia is in control of the east).
  • Controlled by the PCs.

The PCs, of course, will chart their own course. We’ll look at the other two in more detail below.

The other thing to consider are the lingering hostiles in the city. They might include:

  • Ikaia and/or his sons and daughters, if they ended up on the losing end of the stick but weren’t completely wiped out.
  • Demon raiders, who could have easily been carried to the Material Plane along with the rest of the city.
  • Zarielite cultists, who will undoubtedly start trying to make alliances and seek aid from other Zarielites still active in the region.
  • Hell Knights, some of whom could make a propaganda play of, “I was transformed by my travails in Hell, but I remain the most legitimate authority of Elturgard’s government and I hereby declare myself High Observer.”

Alternatively, don’t be afraid to declare any/all of these lingering problems completely solved by Elturel’s return: the demons and/or hell knights return to their respective planes, Ikaia and his offspring burn up in the sun or retreat back into the depths below the city, the cultists all go scurrying away to other cities in the region, etc. It’s okay to open up some space for the stuff in the next phase of the campaign, turning the focus away from the city and towards the whole region.

THE POLITICS OF IKAIA

If Ikaia has somehow managed to gain control of Elturel, he’ll likely recognize that his position is extremely tenuous and will seek to consolidate what he has rather than trying to reassert Elturel’s regional claims.

Given Ikaia’s history, his rhetorical and diplomatic sales pitch will probably be something along the lines of, “I was wrongfully deposed by someone who literally sold the entire city to Hell. All I seek is to return Elturel to its rightful place, with its rightful ruler.” (Some may recall that Elturel’s imperial ambitions were alive and well during Ikaia’s reign, but that’s water under the bridge, right?)

Ikaia’s realpolitik is likely to be hunkering down, repairing Elturel’s defenses as quickly as possible, and hoping to weather out the current chaos while still being in control of the city. His best bet will probably be to play Scornubel and Berdusk and Soubar off each other to make that happen, a strategy the Zarielite cabal will be perfectly happy with because it will allow the Elturian Wars to continue unabated.

Is Ikaia pure evil with a gilded smile, completely reformed and earnest, or somewhere in between? That’s up to you.

THE POLITICS OF RAVENGARD

Before we can look at Ravengard’s position in Elturgard, we first have to consider the politics in Baldur’s Gate. The circumstances during Act I of the campaign are detailed in Part 3:

  • The position of Grand Duke is open.
  • At least two of the four ducal seats are open, and probably a third after Duke Portyr’s assassination.
  • The position of Marshal of the Flaming Fists is up for grabs.

In the time the PCs have been gone, it seems likely that at least some of this political turmoil will have resolved. And the most interesting thing that should be resolved is the selection of a new Grand Duke on the assumption that Ravengard is dead, because then when Ravengard comes back alive it instantly creates all kinds of juicy drama.

Who should be Grand Duke?

Well, the most effective answer is probably one of the Portyrs, because the PCs already have a relationship with them. If Duke Portyr survived, then I’d suggest that he becomes Grand Duke and arranges for Liara Portyr to become Marshal of the Flaming Fists, solidifying the family’s control of the city.

If Duke Portyr was assassinated, have Liara ascend to his position and claim the title of Grand Duke, as well. I’d recommend that she hasn’t been able to duplicate Ravengard’s trick of also becoming Marshal, but it’s possible she’s been able to keep the position open for the moment so that she can continue wielding significant influence on the Flaming Fists in the interim.

In either case, I’d leave at least one of the ducal seats still open, which will leave some hefty political stakes on the table to spur intrigue. (And maybe one of the PCs will end up in it.)

The point of all this is that Ravengard’s return is going to be contested. He will, of course, expect to resume his positions of Grand Duke and Marshal. But if one or both of those are no longer available, expect pushback from the new office holders.

How this plays out will depend on a lot of factors, not least the PCs. Some things to consider:

  • A political compromise might be negotiated. (For example, Liara resigns as Marshal so Ravengard can resume that role, but she gets the open ducal seat, so there are now two Portyr dukes.)
  • Or things might rapidly decay into blood in the streets, as the loyalties of the Flaming Fist (and the PCs?) split and Baldur’s Gate falls into civil war.
  • What role does the large population of Elturian refugees play in these political maneuverings? How do the politicians vie for their loyalty? What do the Elturians want?
  • Does the political system in Baldur’s Gate survive this chaos? Having three of the four ducal seats open simultaneously, for example, is unprecedented. Does someone seize that opportunity to consolidate power and become a tyrant? Alternatively, do the compromises resulting from Ravengard’s return result in a fifth ducal seat being created?

Meanwhile, if Ravengard has emerged from Hell as the top dog in Elturel, he’ll try to hold onto that dominion as well.

This might hinder him in the politics of Baldur’s Gate (“don’t be ridiculous; you can’t have the High Observer of Elturel serving as the Grand Duke of Baldur’s Gate”), but it could also give an immense power base of reputation and manpower to re-coalesce his power in Baldur’s Gate. (This can be literally in the form of soldiers, but also propaganda stuff like appealing to the Elturian refugees as the “savior of their city.”)

Whether Ravengard holds onto Baldur’s Gate or Elturel or both, he’s going to pursue imperial designs in the ruins of Elturgard. With the PCs’ help, he might even succeed. Outcomes might include:

  • A new Chionthar Empire that brings peace and prosperity to the region.
  • A strong alliance between Baldur’s Gate and Elturel, while the rest of Elturgard nevertheless fractures back into separate city-states.
  • Ravengard fails utterly, succeeding only in deepening the animosity between Baldur’s Gate and Elturel.

However it plays out, Ravengard will almost certainly contribute to the ongoing chaos of the Elturian Wars.

WHITHER ZARIEL?

One thing we haven’t touched on yet is what happens with Zariel.

There are a couple obvious scenarios: If the PCs kill her (presumably with help), she’s dead. If they negotiated with her to break the pact (or found a different solution that left her alive and unredeemed), then she still rules in Hell.

Of course, the most likely outcome is probably that the PCs help to redeem Zariel.

Homework: Descent Into Avernus almost certainly results in the power structures of Avernus being disrupted just as much as those of Elturgard. If Zariel is no longer Archduchess, who rises to take her place? What effect does that have on the Blood War? And even if Zariel is still in charge, it’s likely that other major players have been significantly affected by whatever deal the PCs made.

If the PCs have made allies in Hell and put schemes into motion, it’s possible they’ll want to return and continue pursuing their goals (or just to check in with their friends). Consider having the upheaval of power in Hell echo the upheaval occurring in the remnants of Elturgard. On Earth as it is in Hell, so to speak.

With Zariel redeemed, she likely returns with the PCs and Elturel to the Material Plane. There are a few ways this can then play out.

First, you can bring her story to a close. Assuming the players have invested in her story, frame a final scene with her before she departs for Mount Celestia in a beam of holy light. It worked. The PCs have helped to restore something beautiful to the multiverse and saved the soul of an angel.

Alternatively, maybe Zariel chooses to stay involved in the region. For example, she might try to reach out to the Zarielite cultists and convince them to join her and walk the path of redemption. The result might be a Second Zarielite Crusade (hopefully with more reasonable goals and/or happier outcomes).

Or maybe Zariel, even redeemed as she is, remains grandiose and a little self-important. “Elturel is mine!” she says. “And I will make right what I have wronged!” She’s likely to be opposed by Ravengard or Ikaia or both. Will the PCs help her? Oppose her? Either way, she will make her presence felt during the Elturian Wars.

And one final question: Whatever happens with Zariel… does Lulu go with her?

Or does she choose to remain with her new friends?

Either way, there are likely to be tears.

THE END…
…HAS YET TO BE WRITTEN.

Addendum: Rumors of Elturel
Addendum: Corpsedamp Zombies
Addendum: A Textual History of Elturel
Addendum: Playing Gargauth
Addendum: Streetcrawling Tools
Addendum: Elturian Names
Addendum: Hellturel Map Patches
Addendum: Soul Coins
Addendum: A Textual History of Zariel
Addendum: Player Hexmaps
Addendum: Avernus Map Patch
Addendum: The Ranks of Hell
Addendum: The Grand 5E Devil Index

Addendum: DMs Guild Capsule Reviews
Addendum: DMs Guild Capsule Reviews II
Addendum: DMs Guild Capsule Reviews III
Addendum: DMs Guild Capsule Reviews IV
Addendum: DMs Guild Capsule Reviews – Rhodarin Avernus
Addendum: Capsule Reviews – Adventurers League

Archives

Recent Posts

Recent Comments

Copyright © The Alexandrian. All rights reserved.