SPOILER WARNING!
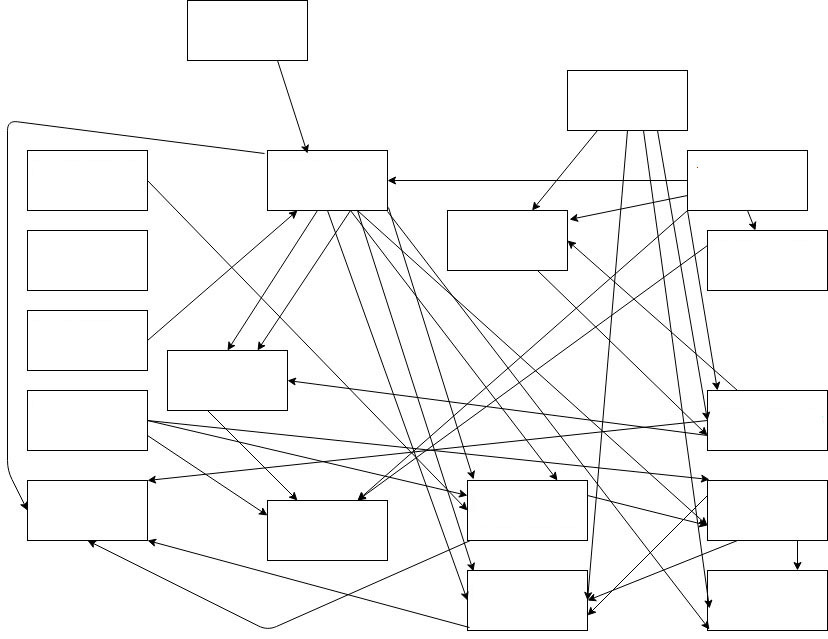
If you click the image above, you will see the entire scenario structure for the Severn Valley scenario I designed for the Alexandrian Remix of the Eternal Lies campaign. If you do not wish to be spoiled on this scenario, DO NOT CLICK THE IMAGE. Its specific content is not essential for understanding the rest of this essay, and this essay contains no other spoilers for the Severn Valley scenario or the Eternal Lies campaign.
But I did want to show an example of an actual scenario structure that’s been used in actual play, and not just some deliberately over-the-top example.
What this image is specifically showing is a visual representation of the node structure of the Severn Valley scenario. If you’ve read Node-Based Scenario Design, you may recall that the essay features a number of explanatory diagrams that look like this:
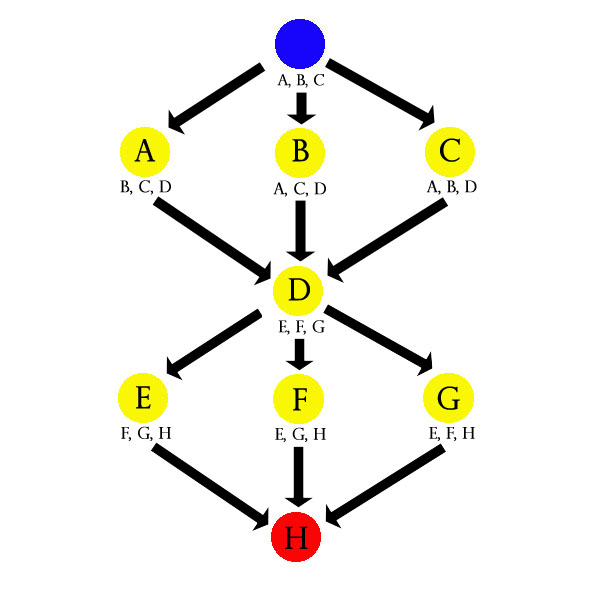
This has, for better or worse, created the misapprehension that I design scenarios using this visual motif. This is, almost without exception, not the case. (I do occasionally, during the outline stage for certain scenarios, sketch out a high-level organization to clarify the location of funnels.) And the primary reason I don’t bother with visual node diagramming is, in fact, overloaded diagrams like the one at the top of this post: That’s the structure of what I would consider a medium-complexity scenario, and the visual diagram for it is just noise… I can’t really process any meaningful data out of it and I’m the one who wrote it.
So how do I organize these scenarios?
Text-based revelation lists.
I discuss revelation lists in the Three Clue Rule: For each conclusion that you want the PCs to make, list the clues you’re including in the scenario for it. This functions as a checklist which allows you to track their progress and (importantly!) a diagnostic tool during actual play to make sure they’re on track.
In my scenarios, they look like this:
SCENE 1: ELVEN CORPSES
– The Duke’s Map (Scenario Hook)
– Encountering Mutilated Corpses (Adventure 3:The Old Forest)
– Reports of Mutilated Corpses (Adventure 2 – Scene 4)SCENE 2: THE BLACK TREE
– Tracking Drow Scouts (Proactive 1: Drow Scouts / Scene 1)
– Map to the Black Tree (Scene 3: The Drow Camp)
– Elven Retaliation Scrolls (Proactive 2: Elven Retaliation Squad)SCENE 3: THE DROW CAMP
– Tracking Drow Scouts (Proactive 1: Drow Scouts)
– Elven Retaliation Scrolls (Proactive 2: Elven Retaliation Squad)
– Map of the Old Forest (Scene 4: Drow Citadel)
– Questioning Prisoners (Scene 2: The Black Tree)SCENE 4: DROW CITADEL
– Questioning Prisoners (Scene 2: The Black Tree)
– Subverting the Crystal Ball (Scene 3: The Drow Camp)
– Following the Slave Train (Scene 3: The Drow Camp)
CLUE LIST vs. REVELATION LIST
There’s basically two ways to organize lists like this: You can list all the clues a node contains or you can list all the clues that point to the node. For the sake of clearer discussion, I’m going to refer to the latter as a revelation list (like the sample above) and to the former as a clue list.
I’ll often use a clue list when outlining or developing a scenario. After coming up with the “big concept” for a scenario, my design process generally consists of writing down cool ideas for various nodes. Then I’ll think about what kind of information a node might naturally contain to point at the other nodes. For example, I might jot down:
SCENE 2: THE BLACK TREE
– Questioning Prisoners (to the Drow Citadel)
– Questioning Prisoners (to the Drow Camp)
– Drow Scouts might show up here (track to Scene 1 or Scene 3)
Once I’ve done that for all the nodes, I’ll do a quick audit for each node to make sure I’ve included three clues. If I haven’t, I’ll get proactive figuring out how I can creatively include more clues. As I actually write up the full version of each node, however, I’ll assemble the revelation list: Each clue I include in the full write-up gets listed in the revelation list under the node it’s pointing to (with a cross-reference back to where it’s found).
This allows me to double-check my design process to make sure I’ve got all the clues I need. But it’s also important because, when it comes time to actually run the scenario, it’s the revelation list that’s essential. (I’ll have long since thrown out the clue list.)
(1) I generally don’t care if the PCs have missed the clues in their current location, but I do care intensely about whether or not they’ve missed all the clues that would enable them to find a particular node. That’s what I need to track during actual game play, and it’s also the information that’s more difficult to glean on-the-fly without a properly organized list because…
(2) The information about which clues exist in a given node is already encoded in the text. The clues are listed in the description of the node, right? Because that’s where they are.
In terms of grokking how a particular scenario “works”, though, the revelation list can feel confusing if you’re not familiar with it. For some people, it’s simply more intuitive to look at the list of clues a node contains and then follow where they lead. (This is, after all, how the PCs will conceptually work their way through the scenario.) This is one reason why, when developing the design standard for Infinity scenarios of this type, I included the requirement for both a Revelation List and an Operational Summary (which would explain the sort of “guiding principle” of how the scenario was supposed to function in play).
You don’t necessarily need the Operational Summary, though. You can get the same basic effect from a revelation list: You just need to work backwards.
Look at a node and ask, “How would the PCs get there?” In other words, follow one of the clues on the revelation list back to its source node. Then repeat the process there.
For example, how would the PCs get to the Drow Citadel in the scenario above? Well, let’s pick a random clue: Following the Slave Train from Scene 3: The Drow Camp. So we look at Scene 3 and pick a random node there: Tracking Drow Scouts from their proactive scene. Since that’s a proactive scene, it’s essentially a scenario origin point. It’s the trail head, so to speak, and from the trail we’ve followed we can see that “tracking bad guys through the Old Forest” is one approach to the scenario.
Do it again: You can also get to the Drow Citadel by questioning prisoners from Scene 2: The Black Tree. You can get to the Black Tree by talking to (or stealing intelligence from) the Elven retaliation squads operating in the area. So here we have a path that follows a trail of demihuman misery.
Do this two or three times (or more for more complex scenarios) and you’ll get a pretty good feel for the contours of the scenario structure.

