SPOILERS FOR DESCENT INTO AVERNUS
Descent Into Avernus begins by having the PCs stand around doing nothing while the GM describes an NPC doing awesome stuff.
It then proceeds to “if they don’t do what you tell them to do, the NPCs automatically find them and kill them.”
It’s not an auspicious start.
EVERYBODY INTO THE HANDBASKET!
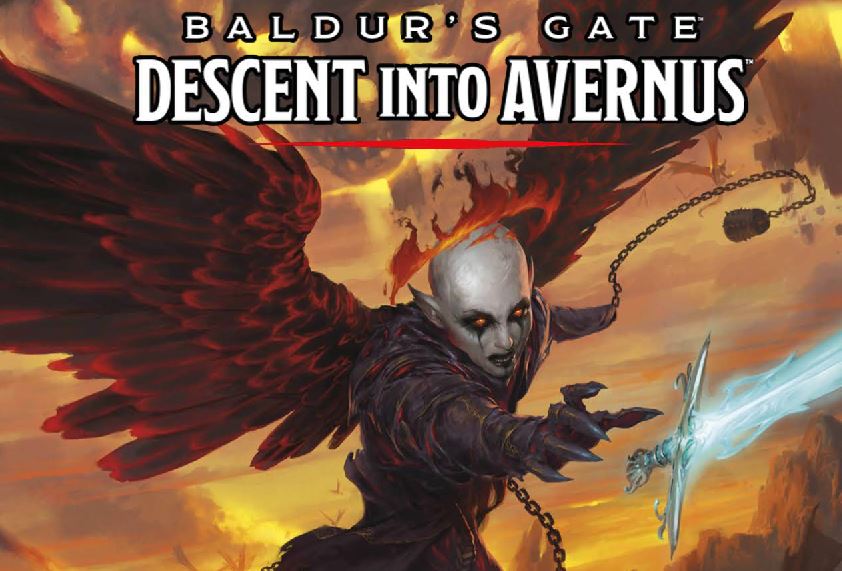
Although titled Baldur’s Gate: Descent Into Avernus, this adventure has very little to do with Baldur’s Gate.
It does begin in the city, however, with Baldur’s Gate being overrun by refugees from Elturel, a city further up the River Chionthar which has mysteriously vanished from the face of Toril. The PCs will spend a couple of days investigating Zarielite cultists in the city, discovering that they may have something do with Elturel’s disappearance. They will then be sent to Candlekeep to research an infernal puzzlebox they’ve recovered during their investigation, and Baldur’s Gate is never seen again.
A scholar at Candlekeep opens the infernal puzzlebox for them, revealing that Elturel has been taken to Hell as the result of a pact signed between the High Observer of Elturel and Zariel, the Archduchess of Avernus. The PCs are then sent to a different wizard, further down the road from Candlekeep, who can take them to Hell.
Arriving in Hell, they discover that Elturel is floating above the hellish plains of Avernus and slowly sinking into the River Styx. Jumping through a number of hoops, with NPCs sending them hither-and-yon, they eventually encounter an NPC who tells them that he’s had a vision from the god Torm, and the PCs are supposed to go forth and find the Sword of Zariel if they want to save the city.
So where is the Sword of Zariel?
Well, back in Candlekeep they were also introduced to a small, golden, flying elephant (technically an angelic being known as a hollyphant) named Lulu. Lulu came with them to Hell and it turns out she used to be Zariel’s warmount, but she’s lost all of her memories. She does remember one thing, though: She was at a place called Fort Knucklebones, and she met a couple of kenku there.
So the PCs leave Elturel and journey across Avernus to Fort Knucklebones. It turns out the kenku don’t know anything, but by a stroke of luck the hag who runs Fort Knucklebones has a machine that can restore Lulu’s lost memories. So Lulu gets strapped into the machine, she recovers her memories, and remembers where the Sword is!
… or, at least, that’s what Descent Into Avernus claims will happen. We’ll come back to this, but the reality is that Lulu has no idea where the Sword. Fortunately the PCs can jump through some more hoops and eventually claim it.
With the Sword in hand, they can confront Zariel and either redeem her, make a deal with her, or decide to join her. The last of these is rather unlikely (although good show to the book for considering the possibility), while either of the former two result in Elturel being saved and the PCs escaping from Hell triumphant!
THE REST OF THE BOOK
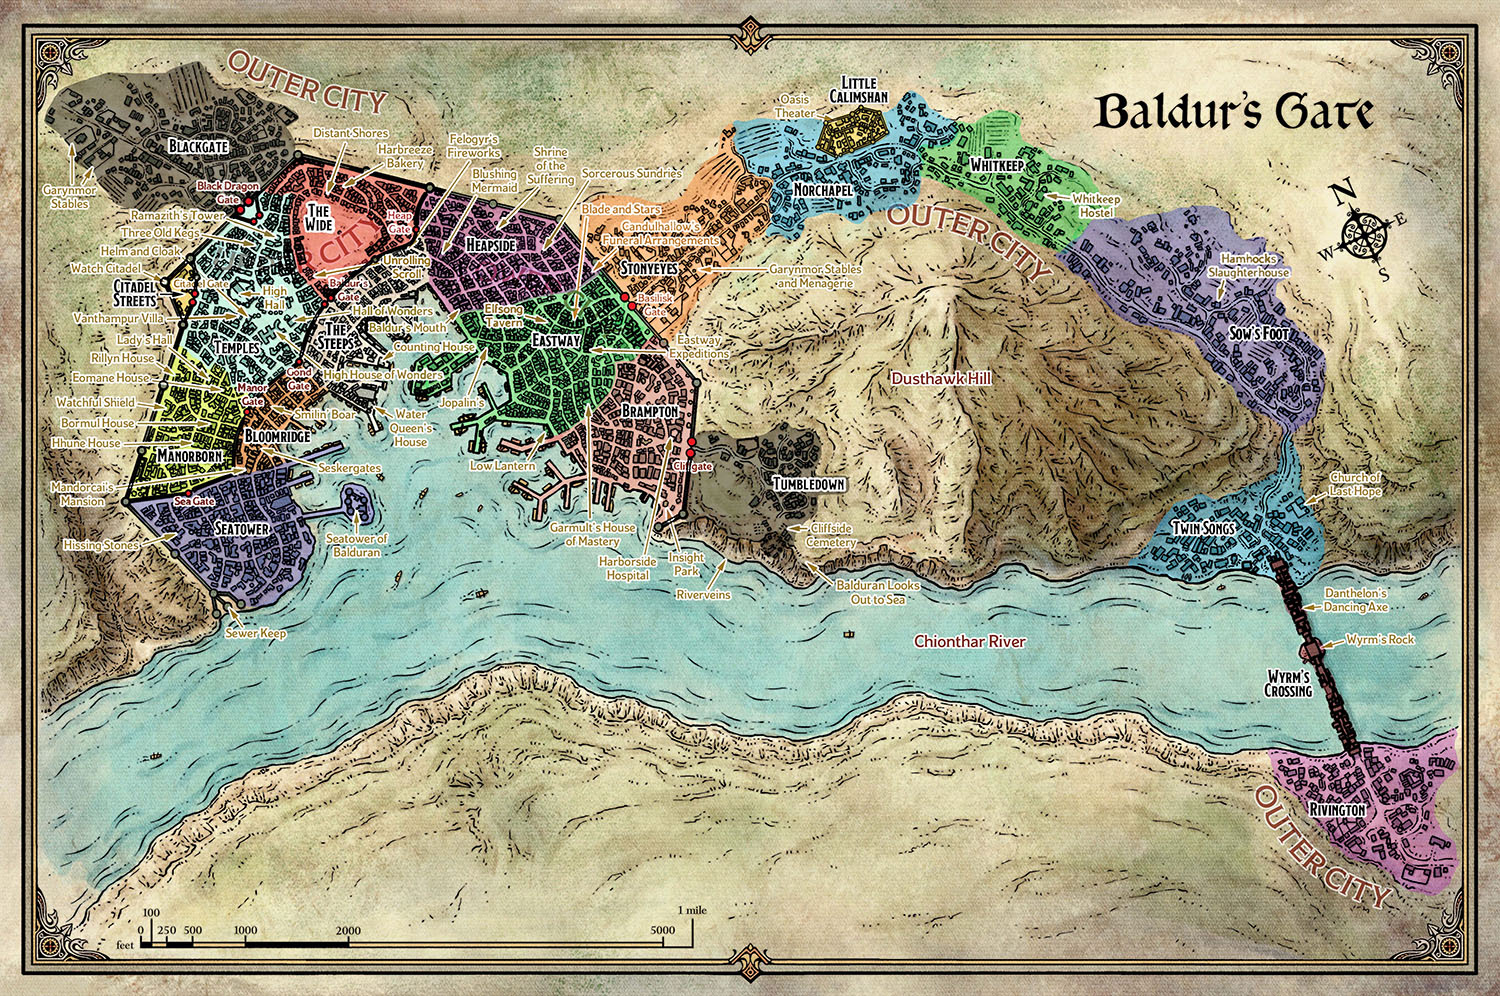
While the adventure may not be overly concerned with Baldur’s Gate, the same is not strictly true for the book. About fifty pages are given over to the Baldur’s Gate Gazetteer, detailing the city as it exists in 1492 DR. (Oddly, the campaign itself is described as taking place two years later in 1494 DR. There have been some recent indications that the campaign is canonically being moved back to 1492 DR in order to maintain continuity with Baldur’s Gate III… so we’ll just mark this down as “thoroughly confused.”)
The Gazetteer itself is quite serviceable, although much like the gazetteer of Waterdeep found in Dragon Heist, it pales in comparison to previous sourcebooks detailing the city. It notably includes a number of player-facing options, including customized backgrounds for characters from Baldur’s Gate.
The oddity here is that the discordance between the focus of the background material and the actual content of the campaign (in which the PCs are likely to only spend 48 or maybe 72 hours in Baldur’s Gate) renders the gazetteer largely useless for anyone actually running Descent Into Avernus.
It can also actively mislead DMs and put them on a bad footing. For example, the gazetteer includes a section on Dark Secrets:
During character creation, once players have developed their characters, they should collectively choose a dark secret shared by the entire party. Every member of the party is entangled in this dark secret, regardless of how new they are to the city or how incorruptible their morals. Maybe they’re merely witnesses, maybe they’re covering for a friend’s crimes, or maybe they’re deep in denial. Regardless, in the eyes of the law, they’re guilty. Each dark secret shares a number of elements. Players should work with you, the DM, to customize these particulars to the group.
These dark secrets include Conspiracy, Murder, Theft, and a Failed Coup. Each type of secret has multiple versions, and also details the PCs’ roles in the secret, the consequences of what they did, and who in Baldur’s Gate knows their secret.
This is a really cool concept and, for any campaign set in Baldur’s Gate, it’s a fantastic way of giving the PCs deep and meaningful ties to the city (and to each other).
The problem, of course, is that Descent Into Avenus ISN’T set in Baldur’s Gate.
So you get the players invested in these connections to Baldur’s Gate and lay down the seeds of what seems like an epic campaign. (For example, you want to overthrow the patriars and lead an egalitarian revolution.) Then, after just a couple sessions, the PCs blow town and leave all that stuff just dangling in the wind.
And some Dark Secrets are completely incompatible with the campaign. For example, the primary campaign hook is the PCs getting hired by the Flaming Fist to investigate some cult-related murders. One of the Dark Secrets is, “The Flaming Fist is corrupt. You turned against your commanding officer, seeking to take the Fist in a new direction. Now you’re branded a traitor.”
AMAZING IDEAS, FAILED EXECUTION

Unfortunately, a lot of Descent Into Avernus is like this: There’ll be an amazing idea, incredibly cool concept, or breathtaking revelation, but then the execution of that idea will be broken or simply lackluster.
For example:
DIA: Do you want to play MAD MAX IN HELL with infernal muscle cars fueled by the souls of the damned?
Me: Fuck yes, I do!
DIA: Just kidding. We’re not doing that.
Me: …
These infernal war machines were actually hyped quite a bit in the pre-launch marketing for Descent Into Avernus. In the book itself, there are two and a half pages which are the introduction to a Warlords of the Avernian Wastelands campaign. It is straight up cooler than anything else in the entire book.
And then it just… vanishes.
There are a couple of scenes where an infernal motorcycle is parked nearby because that’s how an NPC showed up.
That’s it.
It’s really weird.
My best guess is that this was a really cool idea that somebody had really late in the development of the book and they just couldn’t integrate it?
But maybe not. Because, like I said, this is kind of a pervasive problem for the book.
DIA: Do you want to explore HELL ITSELF ON THE WAR-TORN PLAINS OF AVERNUS?
Me: Fuck yes, I do!
DIA: Just kidding. We’re not doing that.
Me: … stahp.
The book frequently talks about how the PCs are going to be “exploring” Avernus. But then it goes out of its way to stop them from doing that in almost every way possible.
For example, it’s impossible to make a map of Avernus. Apparently the Lawful Evil plane of Avernus is so chaotic and ever-shifting that anyone trying to map it goes insane.
(This is, it should be noted, something that was made up specifically for this adventure. It not only doesn’t make sense — read my lips: Lawful — it explicitly contradicts preexisting lore.)
The reason they don’t want you making a map is because navigation is meaningless. If you want to go somewhere, it’s completely random whether you get there or not:
Using the map to chart a course from one location to another is unreliable at best… When charting a course through Avernus, ask the player whose character is overseeing navigation to roll two dice:
- Roll 2d4 if the characters are traveling to an unvisited destination marked on their map.
- Roll 2d8 if the characters are returning to a destination they’ve visited previously.
- Roll 2d10 if a native guide is leading the characters to their destination.
If the rolls of both dice don’t match, the characters arrive at their destination as intended. If the dice match, they wind up somewhere else: pick one of the other locations.
Despite maps being both impossible and useless, the adventure nevertheless gives the players a poster map. It’s unlabeled and, again, the spatial relationships it depicts don’t actually exist, so it’s utterly useless for literally anything you might actually use a map for. But it is very pretty, so it has that going for it.
(Astonishingly, neither Elturel nor Fort Knucklebones — the two places the PCs would start navigating from — are depicted on the map. The DM is told that they can put them anywhere on the map they want, but — once again! — this is pointless and has no meaning.)
The one thing the map does do is magically talk to the PCs: Every time they go somewhere, the map tells them exactly what it is and where they are before they have a chance to explore and find out.
“Okay, we’ve made sure it’s impossible to run an exploration scenario on Avernus.”
“But what if the players nevertheless accidentally discover something for themselves and feel a momentary frisson of delight at exploring the unknown?”
“Oh shit! We gotta put a stop to that!”
Without actually seeing it in the book, I think it’s difficult to really believe the lengths Descent Into Avernus goes to in order to make sure that the players absolutely cannot explore Avernus in any possible way.
Even the smaller cool ideas in the book are often mucked up. For example, there’s a Zarielite cultist in the first part of the adventure whose dying words are, “See you in Hell!”
Which is so goddamn clever, right? Because the PCs are going to go to Hell later on and then — presto! — there she is.
… she doesn’t show up in Hell.
THE WEIRD RAILROAD
DIA: Do you want to play a nice game of CHOOSE. THAT. RAILROAD?!
Me: Fuck no!
DIA: All aboard! Let’s GO!
Me: Goddammit.
The problem with shouting, “It’s time to explore Avernus!” but then blocking any and all attempts to actually explore Avernus is that you’ll need some other mechanism to move the campaign forward. Descent Into Avernus chooses to do this by presenting the players with the choice of two different railroads they can follow.
It’s difficult to explain how poorly this is done.
We start with Lulu getting her memories back. She wakes up from the procedure and shouts, “The sword! The sword! I know where it is!”
Spoiler Alert: She doesn’t.
Instead, her “dreams lead the characters on a wild goose chase to Haruman’s Hill.”
There are a couple problems with this. First, there’s no clear reason given for why Lulu thinks Haruman’s Hill is where the Sword of Zariel is. Second, given the timeline presented in the book, it’s fairly clear that Haruman’s Hill did not and could not exist when Lulu was in Avernus.
But, OK. Fine. This thing that makes no sense happens.
So the PCs go adventuring at Haruman’s Hill for a little while, they figure out that Lulu took them to the wrong place, and then Lulu says: “I’m so sorry! My memory is a little hazier than I thought! Having pondered my dreams further, I think there are two sites in Avernus that are important to finding the sword! Choose between a place where demons manifest and one where demons are destroyed.”
But, once again, there’s no reason given for why Lulu thinks either of these locations have anything to do with the Sword of Zariel.
And that’s because they don’t.
They have nothing to do with the Sword. They have nothing to do with Lulu’s memories. There is absolutely no reason for Lulu to say that the PCs should go there. And if you do go to either location, it becomes immediately and abundantly clear that this is the case.
Despite Lulu telling the PCs to go to the wrong place and then immediately doing it again, the book assumes that the PCs will just continue blithely along the “path” they’ve “chosen,” even though there’s no discernible reason for them to do so.
This is not the only example of weird scenario structures in Descent Into Avernus. At the beginning of the campaign, for example, the PCs have followed a lead to the Dungeon of the Dead Three. In order to the adventure to continue, they have to speak with a specific NPC. But:
- The NPC is located behind a secret door. (Which the designers bizarrely go out of their way to make difficult to find, even going so far as specifying that a normal rat will absolutely NOT reveal its location if someone randomly casts speak with animals on it.)
- The NPC immediately identifies himself as the serial killer they’re here to kill.
- The NPC, having just confessed that he’s the serial killer they’re here to kill, says, “Hey, can you help me take revenge on the people who tried to kill me?”
Assuming the PCs agree to help this guy for some reason (and, remember, they MUST do this in order for the adventure to continue), he tells them that they should kidnap his brother so that they can use him as leverage while negotiating with their mother.
But negotiating with their mother to do… what?
Descent Into Avernus doesn’t seem to know. And promptly forgets the idea except to briefly tell you it definitely won’t work (because their mother will “happily watch any of her sons die before consenting to ransom demands”).
The failure of the scheme doesn’t bother me. (“Go ahead and kill him, I don’t care,” is a perfectly legitimate moment and builds pretty consistently from her known relationship with her kids.) What bothers me is that there doesn’t seem to BE a scheme.
The PCs are, once again, told to do a thing, but given no coherent reason for doing it.
This happens again when an NPC tells them they should teleport to Hell and save Elturel. They’re 5th level characters who have no special abilities, knowledge, or resources teleporting to a city which has been established to be filled with high level arcanists, clerics, and warriors who obviously haven’t solved the problem. What are they supposed to do, exactly? And why does that make more sense than investigating the Elturel crater or seeking a cure for Lulu’s amnesia?
Later Lulu tells them that she remembers meeting some kenku at Fort Knucklebones. Maybe they’ll know about her lost memories?
So the PCs go to Fort Knucklebones, they meet the kenku, and the adventure says, “The kenku Chukka and Clonk instantly recognize Lulu, since they’ve met her previously.”
And then… nothing. Literally nothing. The kenku remembering Lulu is never mentioned again.
What is going on here?
It’s a cargo cult.
THE CARGO CULT
Let’s take one step back: RPG adventures are built using scenario structures. A dungeoncrawl is one type of scenario structure. A mystery is another. There are many others, including things like heists, hexcrawls, raids, etc.
A significant problem in RPG design is that these scenario structures aren’t really talked about. DMs and even designers just kind of pick them up (often imperfectly) by osmosis. Most of them are limited to just dungeoncrawls, mysteries, and railroading.
What’s happened with Descent Into Avernus is that the designers have sort of flailed their way into a malformed scenario structure which consists of, “An NPC tells the PCs where to go and then the PCs go to there.”
Once you realize that, you can’t unsee it: The entire campaign is just that one structure repeated infinitely. An NPC tells you where to go, you go there, and you find another NPC who tells you where to go.
Because this malformed structure is apparently the only thing they have, it seems to have become a kind of cargo cult for them: They know that NPC A has to give some sort of “explanation” for why the PCs need to go to NPC B, but they don’t actually care what that explanation is.
And they assume the players won’t care either. The presumption is that the players are onboard and the words coming out of the NPC’s mouth are just, “Blah blah blah Vanthampur Villa blah blah blah.”
So why do they put essential encounters behind secret doors? Because if the PCs haven’t found the NPC to tell them where to go next, clearly the players will know to keep looking until they find them!
Why are the PCs told to go talk to people without being given any coherent reason for doing so? Because the reason is irrelevant. It’s just white noise around the person’s name.
Why does the adventure assume the PCs will plane shift to Hell without having any reason to do so? Because an NPC told them to!
Why doesn’t the adventure tell you what the kenku remember about Lulu? Because the writers don’t care. “The kenku might remember Lulu” was just the blah-blah-blah dropped around “Fort Knucklebones.” Once the kenku tell the PCs that they should “blah blah blah talk to Mad Maggie blah blah blah,” the writers assume that you will no longer care about the previous blah blah blah.
It’s a cargo cult because the designers have seen PCs talking to an NPC and then going where that NPC tells them to go. But this interaction has become ritualistic. The designers repeat the form, but with none of its semantic content. It’s a hollow shell lacking meaning and seemingly ludicrous to anyone seeking to rationally understand it.
CONCLUDING THOUGHTS
So what is Descent Into Avernus, exactly?
First, it’s a pretty good gazetteer for Baldur’s Gate.
Second, it’s a big ol’ bundle of cool concepts studded with memorable moments, evocative lore, and epic stakes.
- Mad Max in Hell
- The redemption of the Archduchess of Avernus
- The secret history of the Hellriders
- The fall of an entire city into Hell (and its possible salvation)
- Machinations among the dukes and duchesses of Hell
- Thrilling political stakes in both Baldur’s Gate and Elturel
Along with a gaggle of vivid dungeons crammed with flavor and featuring unique gimmicks (sewer temples, ghost prisons for damned souls, floating hellwasp nests, a crashed Avernian warship, etc.).
We should also not discount the huge cast of varied, larger than life characters (broken families, nefarious cultists, magical shields, maniacal scholars, proud leaders, pitiful victims).
Third, it’s a couple of pretty fantastic poster maps.
Unfortunately, all of this is wrapped up in a completely dysfunctional package. The intriguing characters and big ideas are hopelessly morassed in the broken logic of the campaign and crippled by a careless disregard for continuity. The cool set pieces are sapped of meaning, frequently broken by poor execution, and almost universally left as hollow disappointments of unrealized potential.
Would I recommend it?
Unfortunately, no. The amount work required to salvage Descent Into Avernus is, sadly, staggering in its scope. Despite its potential, there are simply so many better adventures out there that do not need to be completely revamped from the ground up to make them work that it’s impossible to say that you should spend your time grappling with this one.
(Unless, of course, some hopeless fool has already done a bunch of that work for you.)
Style: 4
Substance: 2
Story Creators: Adam Lee (lead), James Introcaso, Ari Levitch, Mike Mearls, Lysa Penrose, Christopher Perkins, Ben Petrisor, Matthew Sernett, Kate Welch, Richard Whitters, Shawn Wood
Story Consultants: Joe Manganiello, Jim Zub
Writers: Bill Benham, M.T. Black, Dan Dillon, Justin Donie, James J. Haeck, James Introcaso, Adam Lee, Chris Lindsay, Liane Mersiel, Shawn Merwin, Lysa Penrose, Christopher Perkins, F. Wesley Schneider, Amber Scott, James Sutter
Developers: Jeremy Crawford, Dan Dillon, Ben Petrisor, Kate Welch
Publisher: Wizards of the Coast
Cost: $49.95
Page Count: 256