IN THE SHADOW OF THE SPIRE
SESSION 27B: SIGHTS OF VENOM
September 7th, 2008
The 15th Day of Kadal in the 790th Year of the Seyrunian Dynasty
LIGHT OF A FALSE DAWN
Tee followed a long and winding path back to the Ghostly Minstrel, eager to shed any possibility of being followed. By the time she arrived, the sun was just beginning to rise past the edge of the Spire.
In the common room, Tee saw her companions sleeping around a table. Tee’s short missive had not specified when she would be returning, and so the others had waited up for her… Or, at least, waited up for as long as their stamina could endure.
After a moment’s thought, Tee decided not to disturb them yet. Instead she made her way upstairs, changed into a fresh set of clothes, and then came back down. Stretching heartily on the stairs he yawned, “Oh! That was a wonderful night’s sleep!”
She woke the others. “What are you all doing down here?”
Agnarr instantly realized what she was doing. “Huh… I must have had too much to drink.”
The others played along as well, fostering the illusion – in case there were any eavesdroppers in the inn itself – that they had all spent the evening here.
Tee, meanwhile, was trying to figure out her next step. Reaching a resolution, she made some polite farewells and then headed for the front door.
But Dominic stopped her. “Oh! Tee! What about that book you were going to loan me? You know the one… I think it was called What Happened Last Night? It sounds really interesting, but I don’t know anything about it…”
Tee smirked and all of them made their way upstairs to Elestra’s room, where they hoped they might have a bit more privacy. Once there, Tee quickly briefed them on what had happened the night before.
Once they had been satisfied, Tee made her farewells again and left the inn.
A FRUITLESS INTERLUDE WITH TEE
Tee turned out of Delver’s Square and headed up Tavern Row towards Emerald Hill. Once there, she went straight to Iridithil’s Home and Doraedian’s office.
As she entered, Doraedian looked up with surprise in his eyes. “Tee! What are you doing here? Your lesson isn’t until tomorrow.”
“I know,” Tee said. “But there’s something I need to talk to you about.”
But now that she was here, she wasn’t sure exactly what she wanted to say. She still wasn’t sure what Doraedian would think if he knew the full scope of what she had been doing, and she couldn’t bear the thought of his harsh judgment.
So she chose her words carefully, laying out – with the slightest possible amount of detail – the discovery of the apartment building in Oldtown, the involvement of the cultists, and her suspicion that they were trying to finish what Helmut had started by assassinating the Commissar. She was particularly hoping that Doraedian would know something useful about the centaur named Dilar, but he did not.
In fact, on some level, Tee had hoped that Doraedian could tell her what to do. She was overwhelmed by the enormity of what she had gotten herself involved in. But while Doraedian promised to take her concerns to the Commissar, he wasn’t sure that anything would be done about it. “You’re not giving me much to work with, Tee.”
Feeling somewhat dejected, Tee returned to the Ghostly Minstrel. She found the others gathered in Elestra’s room.
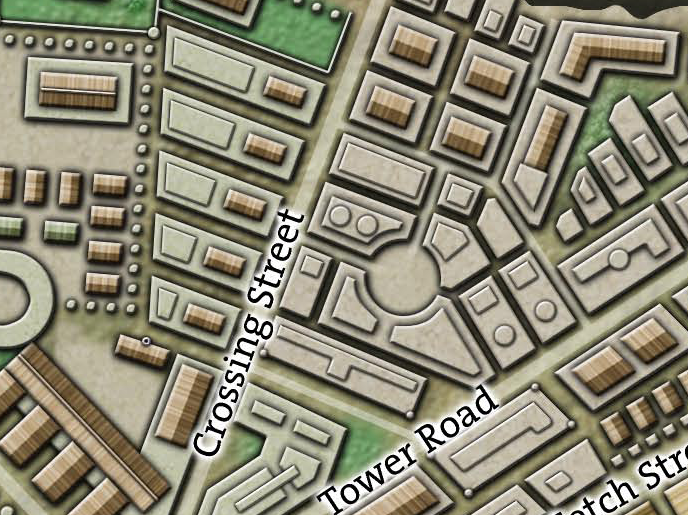
SCOUTING ON CROSSING STREET
Tee looked at them. “I think we’re on our own with this one.”
Since it looked as if the authorities weren’t going to get involved, the conversation turned to what they were going to do about it.
“Let’s kick down the front door,” Agnarr said.
Elestra, however, pointed out that Tee knew the pass-signs for the site – they could just walk right through the front door (assuming all of the watchers were as ignorant as Tee was). And the others weren’t even sure they should get involved. Or that they would be able to accomplish anything if they did.
And so, in the end, they decided to take a gentler approach. Ranthir revealed that his arcane researches had recently yielded the perfection of a spell allowing for the remote viewing of nearby locations. If they could get close enough to the apartment complex, he would be able to – at least briefly – peek inside.
Since they didn’t know who – or what – might be keeping an eye on the apartment building, they decided that it was important to keep as low a profile as possible. And since a large group would attract more attention than a smaller one, Tee and Ranthir found themselves heading up into Oldtown while the others remained behind at the Ghostly Minstrel.
The apartment building being used by the cultists was one of several similar buildings lining Crossing Street. Since Ranthir would only be able to target two specific locations with his spells, they decided to scout out the other buildings to get a better sense of what the layout might be like inside the cult’s building.
What they discovered was that all of the buildings were owned by the Vladaam merchant house. The residents were all part of the Vladaam estate and each building was run by a separate collective. Most of the people they talked to, however, proved surly and unhelpful, and it quickly became apparent that the residents of the other buildings knew little or nothing about the building being used by the cultists.
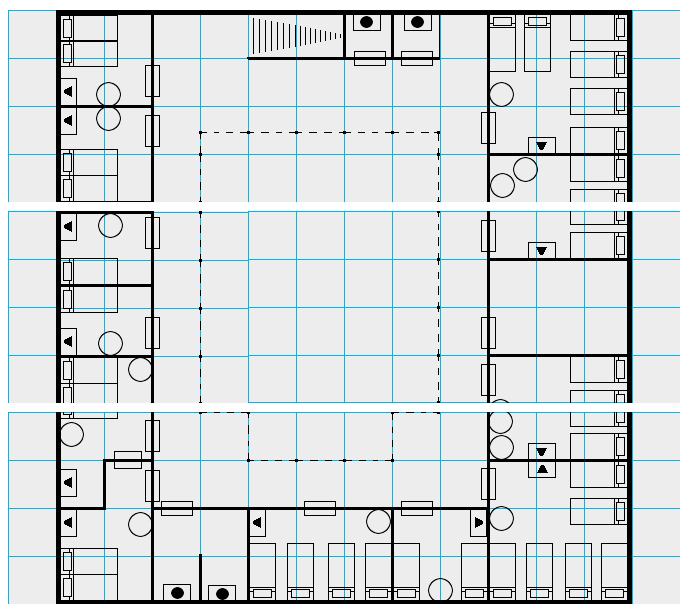
Each building was two stories tall, with a single entrance on the front opening onto a central hall with various doors leading to a dozen or so apartments. Encouraged by these similar layouts, they decided to break into an apartment in the building directly adjacent to the “project site”.
With Tee’s skills this proved to be quite simple. Going to the window they were able to look across the narrow alley between the buildings. There was a thick curtain hanging in the window on the opposite side, but Ranthir was able to use a minor cantrip to jerk it aside – causing it to flutter as if caught in a breeze.
This revealed nothing except an empty room… except that Ranthir was left with the impression that something large had moved rapidly out of his line of sight just as the curtain started to move.
Thus convinced that there might be something more interesting to see, Ranthir used his more powerful spell of clairvoyance to peer into the room… and there, standing in the midst of wrecked furniture and miscellaneous debris, he saw two massive, insectoid creatures.
At the sight, he blanched.
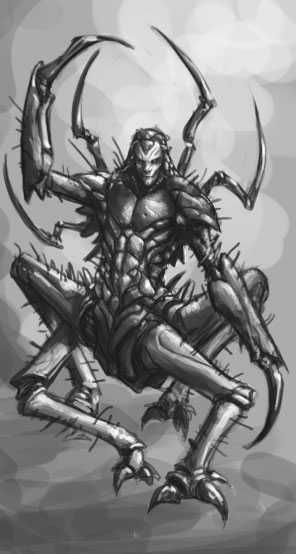 As he watched, one of the creatures reached out with its sharp talon and literally drilled the still-drafting curtain into the wall, pinning it in place.
Ranthir kept his arcane gaze focused there for awhile, but the strange and disturbing creatures did nothing more than scuttle back towards the center of the room and settle themselves down on the floor.
When it seemed clear the creatures weren’t going anywhere, Ranthir pulled his perception out of the spell and pondered the problem of where to place his second (and last) clairvoyance.
Using a different divination, Ranthir was able to pinpoint several magical auras within the building – all of them concentrated in a room on the second floor. That seemed potentially interesting, so Ranthir placed his second point of clairvoyance and peered through…
There were three men standing in another ruined room. He quickly noted that all of them wore the broken square rings of the cultists. Two of them wore coiled viper amulets, and they appeared to be arguing – vociferously – with the third man, who had a black palm print tattooed onto his forearm.
Unfortunately, Ranthir could only look into the room. He couldn’t hear anything.
“Can you read their lips?” Tee asked.
“Perhaps…” Ranthir looked doubtful.
“Is there any way you can let me see it, too?” Tee asked. She’d often practiced reading lips as a little elfling.
“I’m afraid not.”
Ranthir could make out little of what they said, but he was able to pick out a few key phrases here and there: “The Ebon Hand won’t stand for this—“ “—the Brothers of Venom knew—“ “Wuntad will hear of this!”
Ranthir was repeating all of this to Tee. At the mention of Wuntad, she blanched. They’d known that they were almost certainly dealing with chaos cultists, but the confirmation that Wuntad was directly involved was disconcerting nonetheless. In many ways, she was terrified of him.
The argument was clearly growing hotter. The cultists were pacing around each other, shouting with red-faced rage. It became more difficult for Ranthir to make out what they were saying. And then, just before his spell came to an end, he saw one of the serpent cultists – a Brother of Venom? – begin casting a spell. He barely had time to recognize it as an enchantment of paralysis before the final strands of the clairvoyance unraveled.
He turned to Tee. “Let’s get out of here.”
NEXT:
Running the Campaign: Improvising Floorplans – Campaign Journal: Session 27C
In the Shadow of the Spire: Index