Session 13B: The Tragedy at the Door
To cross mountains follow the valleys, search out tenable ground, and occupy the heights. If the enemy holds the heights, do not climb up to engage them in battle. This is the way to deploy an army in the mountains.
The army likes heights and abhors low areas, esteems the sunny [yang] and disdains the shady [yin]. (…) You must quickly get away from deadly configurations of terrain such as precipitous gorges with mountain torrents, Heaven’s Well, Heaven’s Jail, Heaven’s Net, Heaven’s Pit, and Heaven’s Fissure. Do not approach them. When we keep them at a distance, the enemy is forced to approach them. When we face them, the enemy is compelled to have them at their rear.
When on the flanks the army encounters ravines and defiles, wetlands with reeds and tall grass, mountain forests, or areas with heavy, entangled undergrowth, you must thoroughly search them because they are places where an ambush or spies would be concealed.
I was originally going to write that a lot of emphasis has been given recently to creating “dynamic terrain” or “tactically rich environments” or “interesting areas” or whatever other term somebody has decided to hang on the concept (all of which are just euphemisms for “two guys standing next to each other in an open field beating on each other is really boring”). But then I realized that this emphasis has actually been going on for like 10-15 years, which I suppose means it doesn’t really qualify as “recent” any more.
(Get off my lawn.)
What I will say to all you whippersnappers is that I think this has become significantly over-emphasized. This includes My Precious Encounter™ design where GMs become obsessed with creating the “perfect” encounter terrain, filled with all kinds of pre-programmed tactical features. It also includes the strange, Rube Goldbergian edifices that I’ve seen spring up where you need to mechanically “tag” the battlefield like some kind of amateur graffiti artist so that the characters can use a whole ‘nother set of mechanics in order to “invoke” the tags in order to (usually) gain some prepackaged, generic effect. Or, worse yet, you custom-build mechanical interfaces into every tag so that the players can dock into them with keywords or some such.
Gah.
.jpg)
Basically, what I’m saying is that if this is how you’re achieving dynamic terrain in your games, then you’re really over-thinking the whole thing.
Just create realistic, detailed locations and then have your bad guys use them logically. (Or insanely awesomely depending on circumstance and genre.)
You don’t need to drape mechanics over it. The staircase can just be a staircase. You don’t need to pre-tag it with the “Banisters” property so that people can slide down them. And I’d argue that you shouldn’t spend a lot of time pre-planning the stunts your Triad martial artist mooks are going to be performing, because the fight might just as easily happen in the next room or the PCs might just blow them all up with a grenade before the fight even starts.
In fact, rather than trying to nail everything down and covering it with an encrustacean of extruded mechanics, I tend to embrace the largely opposite approach as championed by Robin D. Laws:
In Feng Shui, you want to be able to decide on the spur of the moment that there just happen to be awnings hanging over that walkway between buildings, or there is indeed a ledge big enough for that hoodlum to jump off of. (…)
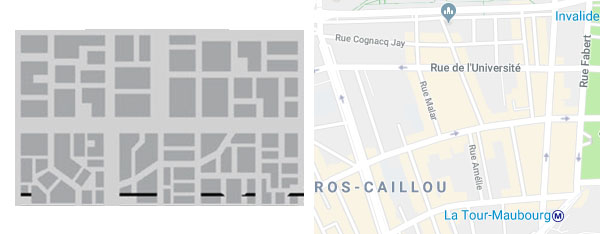
An alternative to maps are color pictures from magazines. Travel or architectural magazines often have excellent photos which you can use as the basis of your set design. You can show these to your players to help visualize where their characters are, and they will stimulate the imaginative process instead of hampering it.
If a player says they want to slide down the banister, then unless the staircase was explicitly established as not having a banister, then it almost certainly does now. (And if that’s case, why would I need to not only spell that out in my notes, but also dump a bunch of mechanics into it? See what I’m saying?)
EASIER SAID THAN DONE
It is, of course, really easy to just say, “Describe terrain and then be awesome with it!” And with thirty years of experience, maybe I am overestimating how easy it is to do this in practice for people who haven’t done it before.
 But I will say this: It’s a skill and it will improve with practice. And all that mechanical over-engineering? It’s not practice for this skill. It’s a completely different thing.
And here’s my super secret technique for creating dynamic terrain:
- Try not to describe empty spaces.
- Think about how the space is actually used.
- Make sure to include the third dimension. (Both up and down.)
- Create chokepoints.
- During the actual fight, think about the unintended ways in which characters can affect the environment and vice versa.
That’s basically it. If you find that you’ve jotted down an empty, featureless room in your notes (or conjure up that visual while improvising on-the-fly during play), second guess that impulse.
If you’re looking for inspiration, think about why the room exists: What purpose is it currently being used for? (Or was being used for if the area has been abandoned.) What furniture would be there? What physical shape would the space possess? What decorations or accoutrements would people put here?
Finally, remind yourself that your map may be two-dimensional, but the game world isn’t.
This last point, almost entirely by itself, can carry a lot of the heavy weight when it comes to dynamic terrain. You can see an example of that in this session, when the PCs get trapped trying to descend and ascend the sinkhole. That one tactical reality pretty much defines the entire encounter (which is one of the most memorable of the entire campaign for the group). There was a similar example back in Session 11, actually, where there was a short ten or fifteen foot drop down into the fungal garden corrupted by sickstone.
“Okay,” you say, “but what if the group is outside and there are no walls and they’re in the desert or the prairie or some other vast, wide open space?”
Well, in that case the point of interest is the vast, wide-open space. What does that distance do to the combat (particularly the initial encounter range) compared to the claustrophobic knife fights that most RPG combat tends towards?
Just don’t do it all the time, because anything repeated often enough will become boring. Find a box canyon or something. Or just throw a couple of hills up. (Ask Paullus and Varro what can be done to you with a couple of hills.)