The A-series of modules were classics back in the day… But do they have anything to offer to the modern gamer?
Originally Published March 16th, 2002
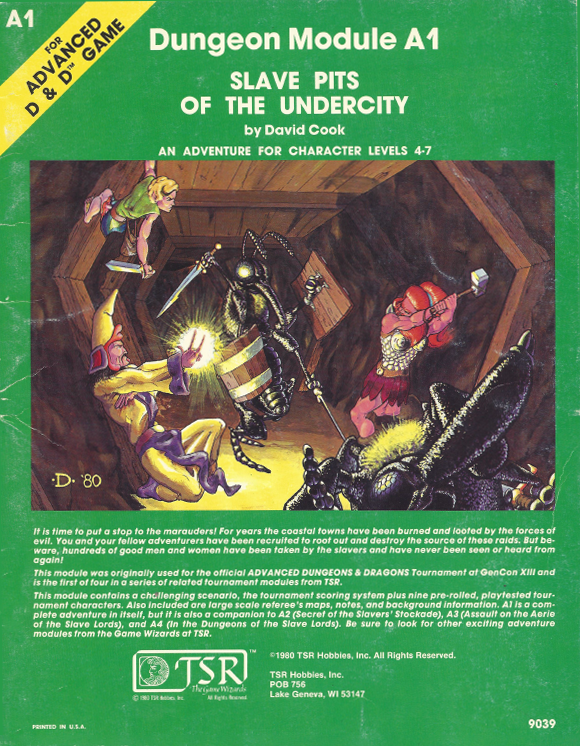
The A-series of modules was released in 1980 and 1981. Also known as the Slavers series, the Slave Lords series, and the Scourge of the Slavelords (after the omnibus edition released by TSR in the mid-‘80s), it comprised four modules: A1: Slave Pits of the Undercity, A2: Secret of the Slavers Stockade, A3: Assault on the Aerie of the Slave Lords, and A4: In the Dungeons of the Slave Lords. The modules were originally used for the AD&D Tournament at GenCon XIII, and evidence of that remains (in the form of a complete tournament scoring system as well as the design of the adventures themselves – although a few token efforts have been made to make them more flexible). The entire series is currently available in electronic form through Wizard’s website.
These modules are industry classics. By modern standards, of course, the primitive artwork of Jeff Dee (and others) is almost laughable; and the sparse, almost constrained presentation of the material by David Cook (later famous for his work as the primary designer on the second edition of AD&D) little more than quaint.
But as classics they demand our attention: There is a reason these modules earned a reputation for greatness in the gaming community. Whether that bygone glory rests upon a foundation which is still worthy of your consideration today is something this review is going to take a closer look at.
CONCEPT
Warning: This review will contain spoilers for the A-series of modules. Players who may find themselves playing in these adventures should not read beyond this point.
The entire A-series of modules is based around a central conceit: A far-flung network of slavers has been founded, guided by the mysterious conspiracy of the Slave Lords. Finally, the local nobility – spurred on by the recent burning and looting of coastal towns by the slavers – have set aside their own petty differences to take collective action… Enter the PCs.
A1: Slave Pits of the Undercity sets the adventurers down outside a ruined temple compound. (Remember that these modules were originally designed for four rounds of tournament play. As a result, their use in an actual campaign will generally require the DM to fill in all of the details which surround the actual dungeon crawls themselves.) The interior of this temple compound was largely gutted by fire many years ago, but is now being used by the local slaver sect as a base of operations – or, more accurately, the access point for their base of operations.
The PCs need to fight their way through the compound to gain access to the sewers beneath it. There they will most likely need to make their way through a colony of aspis (a variety of giant insect) before entering the underground slave pens. Once they’ve found the pens, the PCs need to free the slaves and kill the local Slave Lord.
WEAKNESSES
Let’s start with the weaknesses.
First, there is a major flub in the design of the temple compound: As far as I can tell, there is absolutely no way to get from the left half of the compound to the right half of the compound. The very first thing you should do before running this adventure is figuring out where you want to insert a doorway. (I’d suggest a gateway leading through the wall from Area 9 to Area 16A.)
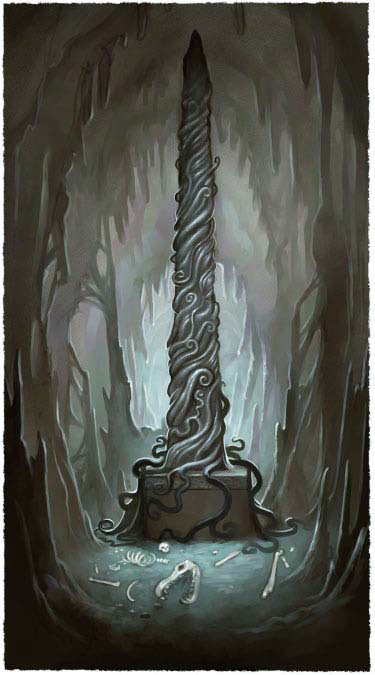
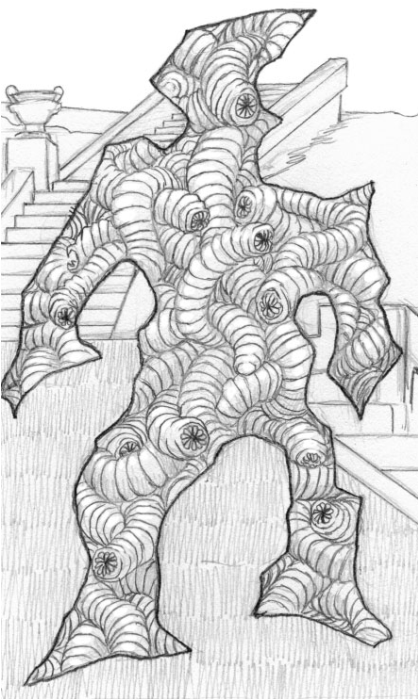
Second, the aspis encounters don’t make any sense: Why would the slavers build their slave pens here, where the aspis pose a potential threat? Why wouldn’t the slavers drive these creatures out? And why is there a tunnel leading from the aspis hive straight to the underground office of the local Slave Lord?
Third, I must confess that I have little tolerance for the Gygaxian style of adventure design in which the entire game world has been structured into a giant puzzle which the PCs must solve. As written, this module plays like an old Infocom text adventure game: Enter room 5A. Pick up barrel of stale vinegar. Go to room 5B. Throw vinegar at glue-like creature in 5B.
STRENGTHS
All that being said, A1: Slave Pits of the Undercity gives you a rock solid foundation. The scenario is engaging; the structure is sound; the maps are well done; the descriptive text is evocative; the character concepts have a lot of potential; and the encounters are generally memorable and of high quality. There are a few caveats here and there, but once you’ve stripped out some of the silliness which lurks in the corners Slave Pits of the Undercity is a great little adventure.
CONCLUSION
Despite its weaknesses, it’s actually trivial to modify A1: Slave Pits of the Undercity into a highly enjoyable adventure. Here’s the few quick steps I followed:
1. As detailed above, I added a gateway between Area 9 and Area 16A (so that the two halves of the compound were no longer segregated.)
2. I removed the aspis tunnels (and the aspis) entirely from the adventure. Their loss was barely felt. In the same vein, I also removed the goblin caverns in the sewers, too. This requires some remapping, but results in a far more utilitarian (and logical) slaver base in the sewers.
3. The Gygaxian puzzles are removed. Just plain removed. The sundew in Area 5B (the glue-like creature mentioned above) becomes a tendriculus, set there specifically to guard against unauthorized access to the temple compound. Beyond that, some basic logic and sense was applied to the slaver activities throughout the entire compound.
4. I also removed the silliness of automated slave pens with remote-control doors. Your mileage may vary, but that type of thing has always been an atmosphere killer for me.
For those looking to adapt these adventures to a D&D3 campaign, the process can be relatively simple or extremely difficult, depending on which approach you take. In general, once you’ve gotten rid of the aspis and the sundew, all of the monsters in Slave Pits of the Undercity can be found in the Monster Manual — simply grab the stats from there (and redesign the NPCs using D&D3 classes) and you’re ready to go.
Of course, if you’re looking to balance the adventure according to the principles described in the DMG, things become slightly more difficult. Fortunately, its relatively easy to make this module fit just about any desired level by modifying the number of creatures in an encounter and/or giving them additional class levels.
So what’s the final word here? Is this worth it?
Yes.
No doubt about it. This is a diamond in the rough, and it may take a little bit of work on your part to clean it up and present it in its best light – but once you do, you’ll have a real jewel on your hands.
Style: 2
Substance: 4
Author: David Cook
Publisher: TSR, Inc.
Price: $4.99
ISBN: 0-935696-25-3
Product Code: TSR9039
Pages: 24
Year Published: 1980
My disparagement of Jeff Dee’s art in A1 will likely be met with great outrage from some, but while Dee matured into a truly great artist, I think anyone honestly looking at this work in 1980 would have to concede he had not yet reached the height of his skills. (Although the raw creativity and fantastical cleverness of his compositions — along with the technical detail of his backgrounds — was already evident. Take, for example, the cover of A1: Not only the halfling clinging to the ceiling, but the multi-limbed fighting techniques of the aspis.)
Next: A2 Secret of the Slavers Stockade
For an explanation of where these reviews came from and why you can no longer find them at RPGNet, click here.