One of the principles of the Alexandrian Hexcrawl is that you key geography. In other words, your hex key features locations, not encounters. (Encounters are handled separately.) The distinction between a “location” and an “encounter” can get a little hazy if you stare at it for too long, but in practice it’s usually pretty obvious: If your key reads “an ogre walking down the road,” then the next time the PCs pass along that road the ogre will presumably be gone (particularly if they’ve killed it). If your key instead reads “an ogre living in a shack,” then even if the PCs kill the ogre, the shack will still be there.
Of course, one might argue that the PCs could do some quick demolition work on the shack and make it disappear, too. (That would be an excellent example of staring at the distinction for too long.) But the general point remains: You’re looking to key permanent geography, not ephemeral events.
Another key principle is that every hex is keyed. This can be a daunting prospect. When I created my Thracian Hexcrawl, for example, I started with a 16 x 16 hex map. That meant I needed to key 256 individual hexes.
My experience with that hexcrawl taught me that you can (and almost certainly should!) start with a smaller map. I generally recommend a 10 x 10 hex map, for a total of 100 hexes, with the PCs’ home base in the center of the map. The key thing, though, if you’ll pardon the pun, is that you want enough hexes so that the PCs can head in any direction and NOT fall off the edge of your map in the first session. Based on my practical experience, that distance appears to be roughly 5 hexes.
In the Avernian Hexcrawl, for example, I used a 10 x 6 map. I could get away with this because:
- There were mountains on the northern and southern edges of the ‘crawl, acting as natural obstacles that would tend to focus PCs on the large valley between them; and
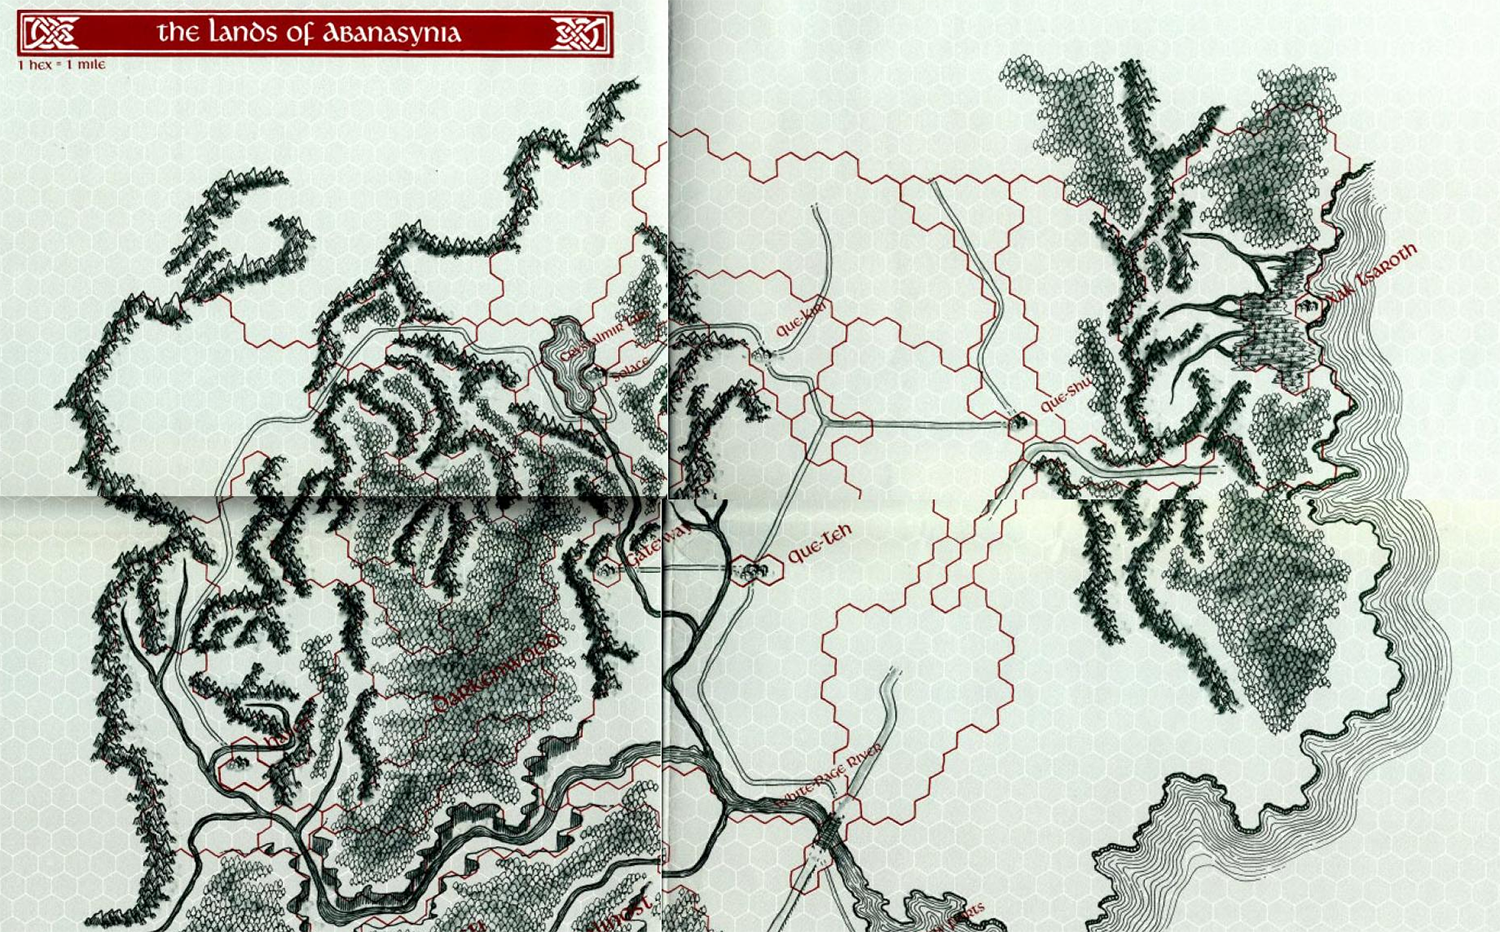
- This hexcrawl features a map of the region which is given to the PCs. Although the PCs are not prohibited from moving beyond the edge of the map, such maps tend to also focus the PCs’ explorations.
The advantage, of course, is that I only needed to prep 60 hexes.
Similarly, Ben Robbins’ West Marches campaign featured an explicit limit: The home base was located on the western edge of civilization, and the PCs could go anywhere they wanted… as long as it was west into the unknown. If you used a similar set up for your campaign, you could effectively halve the number of hexes you need to key.
But whether we’re talking about 50 or 60 or 100 or 256 hexes, that’s still a lot of hexes. How can you get all of them prepped? It seems like a lot of work!
First, to be brutally honest, it is a lot of work. The prep for a hexcrawl is frontloaded: It’s a structure that requires you to put a lot of work in up front, with the pay-off that it requires very little prep to keep the campaign in motion once you start playing. (For example, with my Thracian hexcrawl I spent 2-3 intense weeks prepping the hex key, but then ran dozens of sessions with no additional prep beyond 5-10 minutes at the beginning of each session. Your mileage may vary.)
Second, because of that frontloaded prep, you should make sure that a hexcrawl is really the right structure for what you’re trying to do. There is a perception that “wilderness travel = hexcrawl” and that’s not really true. The hexcrawl structure is designed for exploration, and is really only appropriate if you expect the PCs to be constantly re-engaging with the same region. (This can make them ideal for an open table, where you’ll have multiple groups engaging the same region.) If the PCs are only traveling through a region or exploring it once or twice, then you’re going to end up prepping lots and lots of hexes that never get used, and that’s not smart prep.
Third, with all that being said, it may not be as much work as you might think. There’s a couple secrets to that.
The first secret is that, when you’re prepping material for yourself, polish is overrated. (Details are also overrated, with the proviso that essential details and awesome details should always be jotted down.) For example, if I were writing up a dungeon behind a waterfall for someone else to use, I’d probably take the time to mention how wet and slick the stairs leading down into the dungeon are; the damp moistness in the air of the first chamber (providing a slight haze that can be burnt away dramatically by a fireball trap); and the way the dampness gives way to a chilled condensation that hangs in glistening drops from the rough hewn walls as you descend into the dungeon.
But since I’m prepping this for myself, I don’t need to write that down.
Trust your own voice as a GM. During play, based on your intrinsic understanding of the scenario and the environment, it will provide the logical and evocative details you need to flesh things out. And by placing trust in yourself, you can save yourself a ton of prep time.
The second secret is that the amount of detail required to key a hex can vary quite a bit. You can use minimal keys. Just because something is geography, it doesn’t mean that it has to be elaborate. Something can be brief without being ephemeral. There can be a perception that every hex “should” have a 20-room dungeon in it. But remember that ogre’s shack? Your key doesn’t have to be any more complicated than that. Some times, it can be even less complicated!
SAMPLE HEX KEYS
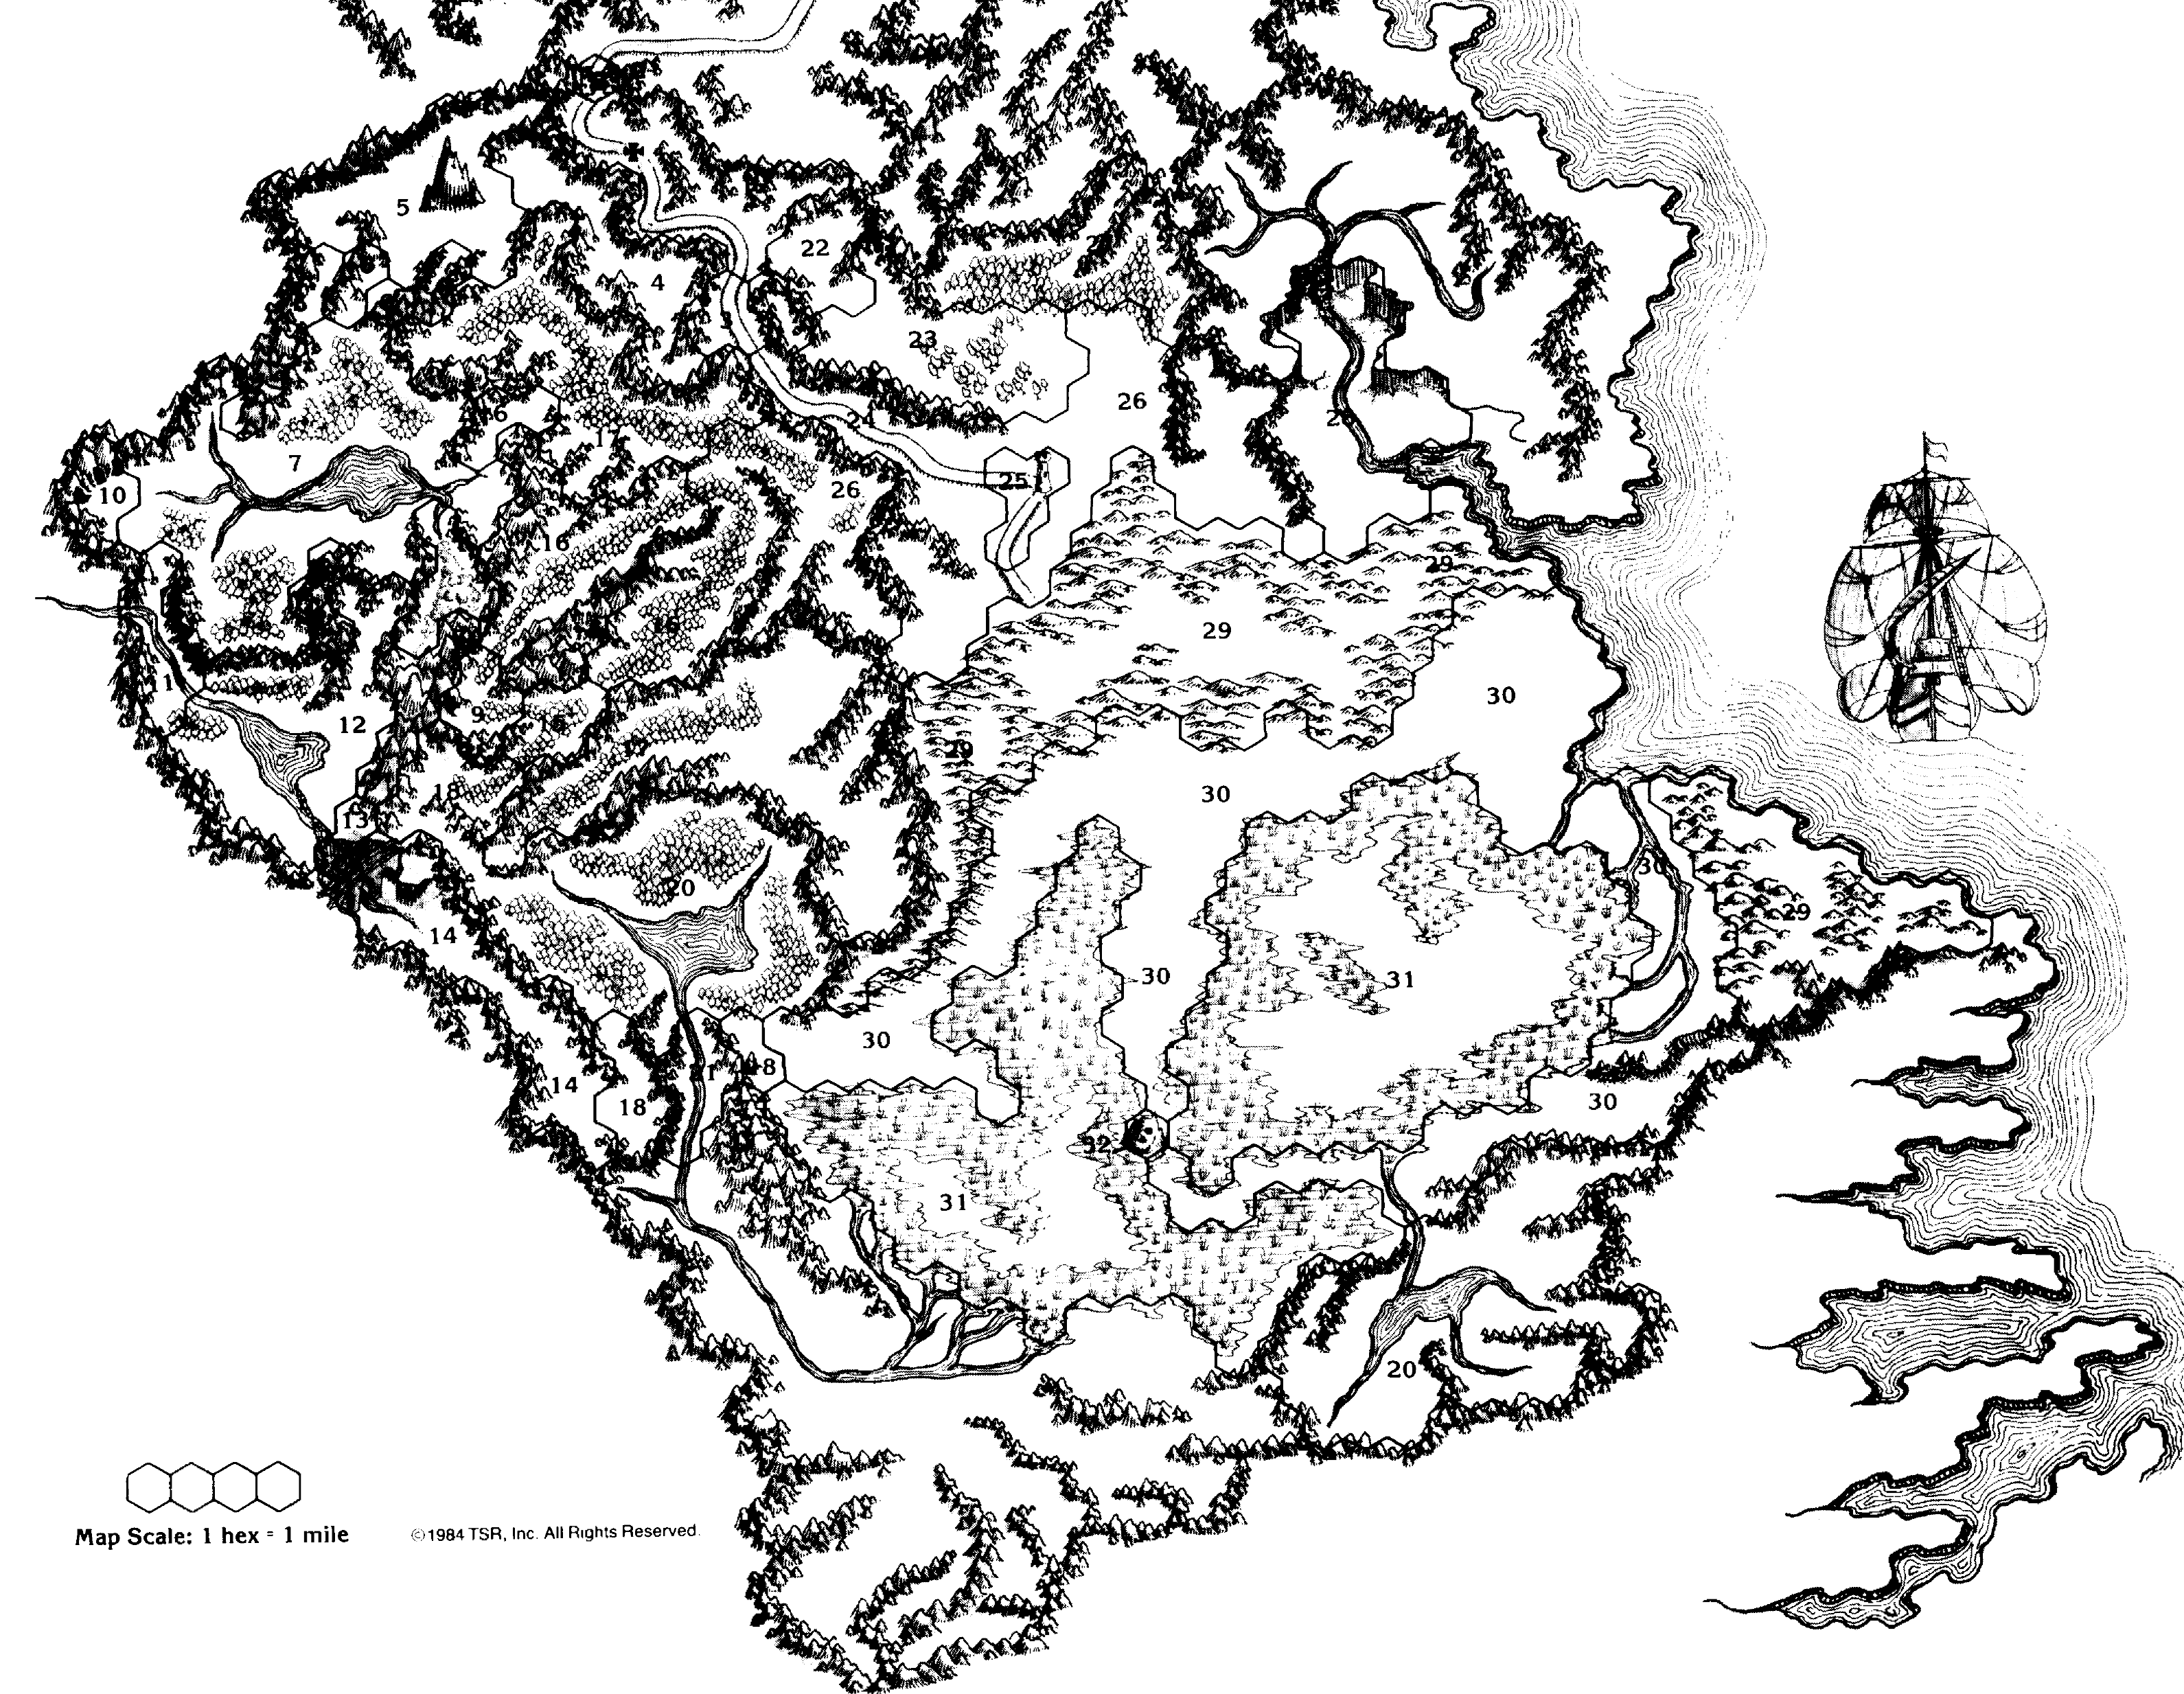
We’re going to take a look at some actual hex keys I’ve prepped for my own hexcrawls. The goal here is to demonstrate the range of different key types that I use, so let’s start with the shortest:
B4. RED RUTH’S LAIR (Descent Into Avernus, p. 107)
Red Ruth has a heartstone.
This one is pretty simple: I’ve grabbed a location from a pre-existing adventure (in this case, Descent Into Avernus) and plugged it straight into the hexcrawl. If the PCs encounter this hex, I can just pull out the appropriate book and start running it.
In this case, I’ve also included a short note modifying the original adventure. (The NPC named Red Ruth has a heartstone.) You may not need such notes at all. In other cases, you might have several such notes. Whatever works.
Here’s another simple one:
K13 – RUINED TEMPLE OF ILLHAN
See hex detail.
This location was too detailed to include in my primary hex key. (Generally, I’ll bump anything longer than a single page out of the primary hex key. In my experience, it keeps the hex key cleaner and much easier to use.)
Much like the published adventure, I’m telling myself to go look somewhere else for the detailed adventure. In this case, it’s an adventure I wrote myself.
I keep these detailed adventure notes in a separate file folder, labeled and organized by hex number. For shorter published adventures, I’ll keep print outs of the adventures in the same file folder.
The details of the Ruined Temple of Illhan were previously posted here on the site. They can be found here. (The presentation there is slightly more polished than what would have been found in my original notes, but is substantially similar.)
B5 – BONE CRATER
A large meteor impact formed by a huge skull (more than ten feet across) that’s partially embedded in the center of the crater.
This is an example of what I think of as a landmark. Sometimes these landmarks are more involved or have hidden features to them, but generally they’re just single points of interest distinct from the surrounding wilderness. Regardless of their other characteristics, they’re almost always useful for PCs trying to orient their maps.
N15 – RECENT FOREST FIRE
Landscape is scorched. No foraging is possible in this hex.
Another short one. This is basically similar to a landmark, but it covers a vast swath of territory. (In this case, an entire hex.)
C2 – WYVERN SHAFT
60 foot deep shaft that serves as the lair of a wyvern. The wyvern has dug an escape tunnel that emerges from a hill a quarter mile away.
Wyvern: Has a large scar on its left side from a spear wound; has preferred to stay away from intelligent prey ever since. (MM, p. 303)
Treasure: 7,000 sp, 5 zircons (50 gp each)
A simple monster lair. I usually don’t bother with maps for this sort of thing: It’s easy enough to improvise a cave or shack or, in this case, a shaft. In fact, many smaller complexes with a half dozen rooms or less can also be managed without difficulty. (Assuming there’s nothing radically unusual about them, of course.) Alternatively, you might use a random floorplan generator or similar tool.
(Note the page reference. I know Wizards of the Coast is terrified of page numbers on the off-chance that they get changed in a future printing, but why not make life a little easier for your future self?)
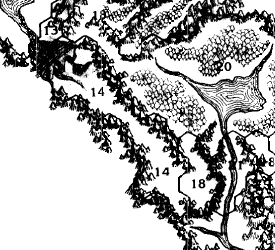
F15 – SKULL ROCK (on river)
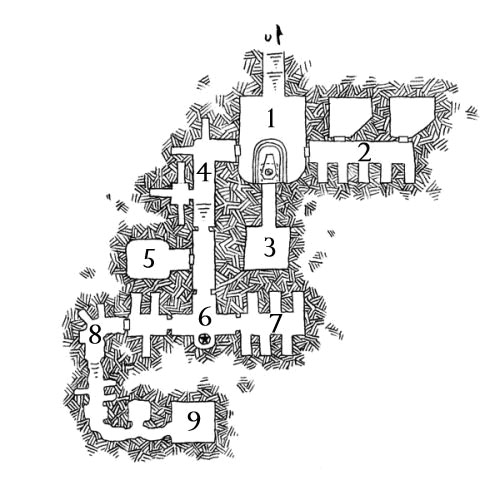
A rock shaped like a skull thrusts out of the river. Crawling through the mouth leads to a crypt.
AREA 1: Mummified red dragon’s head (huge). Breathes flame that fills most of the room (fireball, DC 14). Secret entrance to treasure chamber lies under the head.
AREA 2: 5 wights, 50% in lair (MM, p. 300). The two rooms off this area have been pillaged.
AREA 3 – BURIAL OFFERINGS: 3000 gp, 3 golden spinels (200 gp each)
AREA 4: Trapped hallway. Arrows shoot from wall and alchemist’s fire from nozzles in the ceiling. (Chamber to the left has an incense burner in the shape of a squat, fat man worth 70 gp.)
AREA 5: Wight (MM, p. 300), no life drain but can detect magic, life, and invisibility. (Sniffs out magic and lusts for it.)
AREA 6: Bas relief skull. Insane. Asks incredibly bad riddles. (“What flies in the air?” “A bird.”), but then blasts those who answer with 1d6 magic missiles regardless.
AREA 7: Slain wights.
AREA 8: Staked vampires.
AREA 9: A lich (MM, p. 202) has been chained to the wall. Arcs of purple electricity spark off him in eternal torment. (Stripped of spellcasting and legendary actions.)
Notice the “on river” designator next to the key title here. That indicates that this location is on the river flowing through this hex on the map: If the PCs are following the river, they’ll automatically encounter this location.
This sort of fully-keyed “mini-dungeon” represents pretty much the upper limit of what I’ll handle in a hex key entry before bumping it into a separate document.
The map here is taken from Dyson Logos’ website. His site has repeatedly proven invaluable to me when stocking hexcrawls.