In the Open Table Manifesto, one of the pillars I discuss for running a successful open table is fast character creation: When any or every session you run might have a new player sitting down for the first time, it’s essential that they can create a character and start playing as quickly as possible.
 Back when open table-style games were far more common – and, arguably, the default mode of play for D&D – you can find all kinds of stories from people whose first experience with a roleplaying game was wandering past a table where people were playing and being invited to sit down and join the game already in progress.
(I don’t think it’s really a coincidence that D&D had its first – and arguably biggest – boom at precisely the time that it was designed for a style of play which was so conducive to being spread virally. But I digress.)
To a modern audience, these stories can sound almost absurd. That would basically never happen with an RPG today – including the 5th Edition of D&D – because there’s no way you could generate a new character for the player and immediately drop them into the action.
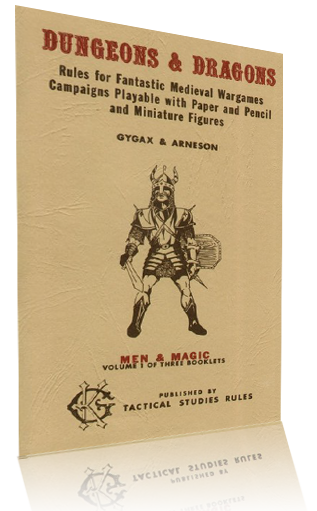
But in OD&D, the original 1974 edition of D&D, I can get you a character in five sentences:
- Roll 3d6, total them, and write them down in these six boxes in order.
- Are you a human, an elf, a dwarf, or a hobbit?
- Are you a fighting-man, magic-user, or cleric? (If they picked a dwarf or elf you can skip this step. Randomly roll hit points and the magic-user’s spell.)
- What’s your character’s name?
- You have a sword, chain armor, a shield, 8 rations, a small silver mirror, 2 torches, flint and steel, a bedroll, and 16 gold pieces. (Customize equipment list appropriately.)
Let’s play!
It’s an incredibly streamlined system that’s built on a powerfully modular base. (Which is why people have been adding new classes and races to D&D ever.)
Is this the One True Way™ of character creation in roleplaying games? Of course not. There can be a lot of advantages to multiplying the number, complexity, and even opacity of the choices players make during character creation. (Note how all of the decisions in OD&D’s character creation are immediately accessible and comprehensible to a new player who has zero understanding of how the game works. Compare to the mechanical knowledge you need for even something as straightforward as point-buying attributes in newer editions.)
But the speed with which OD&D goes from, “Do you wanna play?” to stabbing orcs in the face can be a huge feature in its own right. And it’s not one that I think should be so casually dismissed.
(Rolling ability scores can, in my experience, also enhance this. See, players new to D&D associate “rolling dice” with “playing the game.” So when the first thing I say to a new player is, “Okay, let’s roll your ability scores,” they feel like they’re already playing the game. It consistently engages them in a way that pure-build systems just… don’t.)
Note: Hey… what about alignment and languages? I find these non-essential for jumping into play, but you can include them and still have character creation wrapped up in just seven sentences.
THE PROBLEM: BUYING EQUIPMENT
The one place where character creation in OD&D can still bog down is in purchasing equipment: The player rolls 3d6 x 10 to determine their starting gold pieces and then they need to spend that budget on individual items.
In practice, there are steps you can take to mitigate and streamline this. (For example, making sure you have enough copies of the equipment list so that everyone can buy their equipment simultaneously without needing to pass the book back and forth.) But in my experience, it still results in equipment buying taking three to five times longer than the rest of character creation put together.
This is why, in my example of fast-paced five sentence character creation, I leverage my own expertise in the system to effectively buy the equipment for them. Players can also get through this step very quickly once they’ve similarly mastered the equipment available and know what they should be buying.
What would be ideal, though, is if we could find a way to systemically mimic this mastery so that new players could buy their own equipment without bogging down here. To do that, we can split buying equipment into its own sub-process and literally package up our expertise.
STARTING EQUIPMENT PACKAGES
Note: These specific packages tacitly assume that you’re using my house rules for OD&D, which you can also find conveniently summarized in the Blackmoor Player’s Reference. But they should be broadly useful for any OD&D game regardless. The general equipment list has also be lightly amended with some items not found in the original 1974 books.
STEP #1: ROLL FOR STARTING GOLD
Roll 3d6 x 10 to determine your starting gold pieces.
STEP #2: BASE ADVENTURER KIT
Spend 15 gp to purchase the base adventurers kit.
- Large sack (2 gp)
- 1 week of standard rations (5 gp)
- Water skin (1 gp)
- 6 torches (1 gp)
- Flint and steel (1 gp)
- Suit of clothes (2 gp)
- Bedroll (3 gp)
STEP #3: ARMOR
Pick one type of armor.
- Leather Armor (15 gp)
- Chain-type Armor (30 gp)
- Plate (50 gp)
Optionally, pay for any or all of the following:
- Shield (10 gp, +1 AC)
- Helmet (10 gp, without helmet suffer -1 AC)
- Gorget (10 gp, +1 AC vs. vampires)
STEP #4: MELEE WEAPONS
Choose a melee technique:
- Sword & Board
- Dual-Wielding
- Two-Handed
(If you select sword & board, but don’t buy a shield, you’re just fighting one-handed.)
Sword & Board: 1d6 damage unless otherwise noted.
- Dagger (3 gp, 2d6 take lowest damage)
- Hand Axe (3 gp, 2d6 take lowest damage)
- Mace (5 gp)
- Sword (10 gp)
- Battle Axe (7 gp)
- Morning Star (6 gp)
- Flail (8 gp)
- Spear (1 gp, provides reach)
Dual-Wielding: Pick any two Sword & Board weapons.
Two-Handed: 2d6 take highest damage.
- Pole Arm (7 gp, provides reach)
- Halberd (7 gp, provides reach)
- Pike (5 gp, provides reach)
- Two-Handed Sword (16 gp)
- Lance (4 gp, must be riding horse)
STEP #5: MISSILE WEAPONS
You can optionally select a ranged weapon in addition to your melee technique:
- Sling (1 gp, 2d6 damage take lowest)
- Light Crossbow (15 gp, 1d6 damage, fire one-handed but requires two hands to reload)
- Heavy Crossbow (25 gp, 2d6 take highest damage, fire one-handed but requires two hands to reload)
- Short Bow (25 gp, 1d6 damage)
- Long Bow (40 gp, roll 2d6 damage take highest)
Ammunition: Sling stones can be gathered from the wilderness at no cost.
- 20 arrows (5 gp) + Quiver (5 gp)
- 30 quarrels (5 gp) + Case (5 gp)
STEP #6: ADDITIONAL EQUIPMENT PACKAGES
Optionally select one or more additional equipment packages. You can also roll 1d6 to select one randomly.
| d6 | Package | Price |
|---|---|---|
| 1-2 | Delving | 50 gp |
| 3-4 | Prepared Adventurer | 25 gp |
| 5 | Wilderness | 30 gp |
| 6 | Basic Mount | 75 gp |
Delving Package:
- Lockpicks (30 gp)
- 20’ spool of wire (10 gp)
- 6 sticks of chalk (1 gp)
- 12 iron spikes (6 gp)
- 6 wooden stakes (1 gp)
- Mallet (2 gp)
Prepared Adventurer Package:
- 10 sheets of paper (2 gp)
- Silverpoint (5 gp)
- 50’ rope (1 gp)
- Lantern (10 gp)
- 3 flasks of oil (6 gp)
- 10’ pole (1 gp)
Wilderness Package:
- Bedroll (1 gp)
- Small tent (4 gp)
- 1 week iron rations (15 gp)
- Leather Backpack (5 gp)
Basic Mount Package
- Light Horse (40 gp)
- Saddle (25 gp)
- Saddle Bags (10 gp)
Note: A silverpoint is an historically accurate writing instrument. The scribe drags the silver stylus across the surface of the paper. Specially prepared paper can make the lines even clearer, but this “underdrawing” can also later be inked.
ADDITIONAL READING
Reactions to OD&D
Running Castle Blackmoor
On the Importance of Character Creation
Character Creation in 7 Sentences: Magical Kitties Save the Day