Smart prep is generally about targeting the highest value prep while seeking to avoid prep that’s wasted (i.e., never used at the game table). Maximum bang for your buck, in other words. Which is not, of course, a radical insight. The devil is in the details here, so here are three general principles that can help you zero in on the high-value prep.
DON’T DUPLICATE IMPROVISATION
Compared to a “zero prep” scenario (where you literally prep nothing), smart prep is always going to add quality. Because smart prep, by definition, is adding elements that cannot be improvised at the table.
 Technically, of course, everything in the game world can be hypothetically improvised during play. So what you want to focus on is the stuff that adds value by virtue of being prepped. This can vary a lot depending on the premise, the system, the GM, and the players involved, but what you want to look for is stuff that is:
- Time-consuming to create
- Requires special tools
- Benefits from considered thought
- Difficult for you to run off-the-cuff
Particularly valuable prep targets are the things that can never be improvised on the fly. Props and handouts are perhaps the most obvious example of this.
What you can improvise effectively also depends on your own strengths as a GM. It will change over time and it will vary based on the system you’re running. I talked about one facet of this in The Hierarchy of Reference, but it applies across the board. Maybe you struggle with having dynamic battles featuring clever tactics, so you spend a little effort prepping Tucker’s Kobolds. Maybe you find it easier to run Pathfinder monsters if you make a point of highlighting feats you’re unfamiliar with and jotting down a note about what they do. Personally, I know that I get too tight-lipped with NPCs revealing the deep secrets and conspiracies of the campaign (because I once ruined a campaign by getting too loose-lipped with those secrets and it’s a Pandora’s Box you can’t close – if the PCs don’t know something they can always learn it later; if they learn too much they can’t forget it), so personally I focus a certain amount of effort on prepping exactly what NPCs know and what clues they can supply.
It can also be useful to keep in mind that some stuff you find hard to improvise can be made easy to improvise if you prep the right tools. Procedural content generators are an obvious example of this, but it can also include stuff like “if you’re bad at coming up with names on the fly, prep a list of names”.
Beware, however, the temptation of believing that something has value simply because it requires prep. If you build something that has no (or little) value to you and your players, the fact that you couldn’t improvise it during play is irrelevant, and the amount of work you put into something doesn’t create value.
For many GMs, I find that stat blocks fall into this category. In many systems, creating stat blocks on the fly can be quite difficult (particularly if you don’t have a high level of expertise in using the system), and so customized stat blocks clearly fall into the category of things which can’t be improvised at the table. As a result, GMs will sink huge amounts of time into carefully building and tweaking every single stat block in their scenarios.
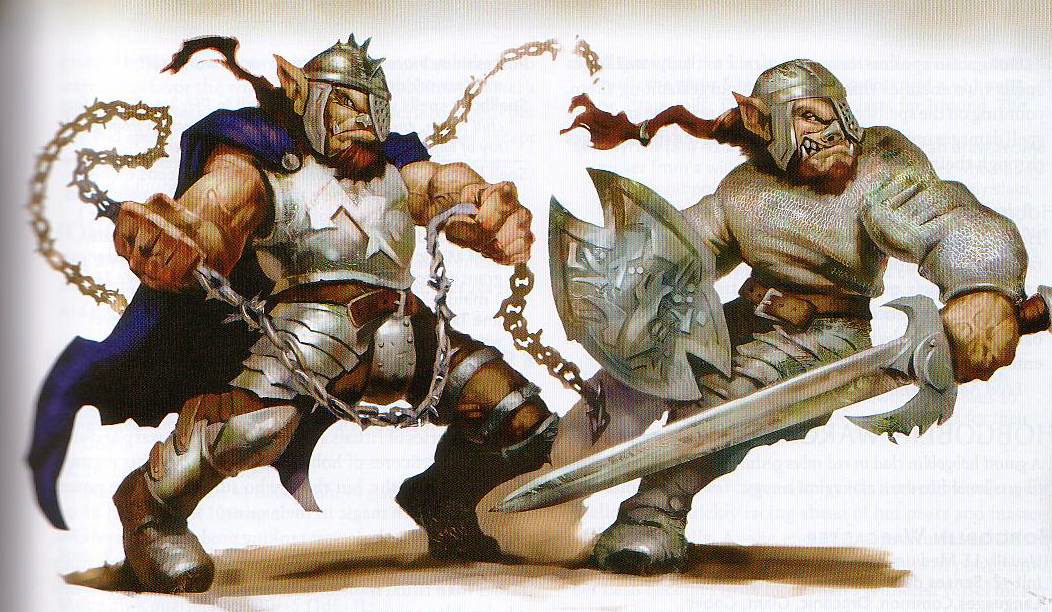
The question you have to ask yourself is how much value you and your players are really gleaning from these stat blocks. How much is giving the ogre in Area 5 a unique stat block compared to the ogre in Area 6 really improving play? Frequently, the answer is “not at all”; in fact, the players may not even notice the distinction. I’ll go so far as to argue that having an unnecessary panoply of different stat blocks can actually have a negative value compared to re-using familiar stat blocks, as the quality, pace, and tactical creativity of combat encounters can see significant improvement as the GM learns and masters what the “ogre stat block” is capable of doing.
Which is not, of course, to say that you should never customize a stat block. Well-designed stat blocks can create unique gameplay and tactical opportunities that are exactly the sort of thing that requires prep to realize at the table. They’re a good example of the sort of balancing act and constant self-diagnosis you have to engage in as a GM to make sure your prep is on point.
AVOID WASTE
Smart prep also means that you work to minimize the amount of material you work on that never makes it to the table. It doesn’t matter how potentially awesome something is; if your players never experience it, then its effective value is zero. The more wasted prep you have, the more it will drag down the average value of your prep overall. Or, to put it another way, every minute you spend working on stuff your players never see is a minute you could have spent working on stuff that they do.
Something I think is almost universally a waste of time is prepping a lot of specific contingencies based on hypothetical choices the PCs might make. (“If the PCs enter from the north, then the goblins will… If the PCs enter from the south, then the goblins will… If the goblins can see a spellcaster, then they will…”) Even if it’s not material which can be trivially improvised at the table (and it almost always is), you’re still basically guaranteed to end up prepping a bunch of contingencies that will never be used. You’ll gain a much higher quality-to-prep ratio from virtually anything else you choose to prep.
(See Don’t Prep Plots – Tools, Not Contingencies for a more in-depth discussion of this.)
The mistake some GMs make, however, is trying to eliminate waste at the table by forcing their players to experience the content they’ve prepared. (Railroading, in other words.) That’s the wrong way to do it. Where you need to work at eliminating waste is when you prep, which you can do by controlling what you prep.
Ironically, the fear of railroading can lead some GMs astray by convincing them that they aren’t “allowed” to prioritize their prep: “I don’t want to assume that the PCs will go somewhere specific, so I need to prep everywhere that they could even potentially think about going!”
But, as I said in the Railroading Manifesto:
It’s often quite trivial for an experienced GM to safely assume that a specific event or outcome is going to happen. For example, if a typical group of heroic PCs are riding along a road and they see a young boy being chased by goblins it’s probably a pretty safe bet that they’ll take action to rescue the boy. The more likely a particular outcome is, the more secure you are in simply assuming that it will happen. That doesn’t mean your scenario is railroaded, it just means you’re engaging in smart prep.
A large part of avoiding waste is, in fact, about learning how to identify the likelihood of a particular outcome by:
- Discerning what the PCs are likely to affect vs. what they won’t affect
- Predicting the choices your players will make
The caution, of course, is that this is only valuable insofar as your predictions are accurate. Otherwise you can end up committing all-out to a course of prep that will all end up on the waste heap.
The reality, though, is that this is a skill which you can learn and improve. Particularly if you focus on doing so. There are also techniques you can use to increase your hit rate, perhaps the most valuable of which is a simple question:
What are you planning to do next session?
It’s a simple question, but the answer obviously gives you certainty. It lets you focus your prep with extreme accuracy because you can make very specific predictions about what your players are going to do and those predictions will also be incredibly likely to happen.
Even this isn’t infallible, though. The worst example I’ve had of wasted prep in the last decade or so was when the PCs said they were interested in going to explore a dungeon at the end of one session, but half of the party wasn’t firmly committed and at the beginning of the next session they managed to convince the others that it wasn’t a good use of their time and resources. Unfortunately, in the interim I had written a really nifty 70 page dungeon that I then had to toss out. (That dungeon is the Lost Laboratories of Arn.)
And this is where we end up looping back to Tools, Not Contingencies. Because the other way to avoid waste is to prep a toolbox. As I wrote in Don’t Prep Plots:
You can think of this as non-specific contingency planning. You aren’t giving yourself a hammer and then planning out exactly which nails you’re going to hit and how hard to hit them: You’re giving yourself a hammer and saying, “Well, if the players give me anything that looks even remotely like a nail, I know what I can hit it with.”
“The players have ruined my adventure!”
If you ever catch yourself thinking that with anything other than glee, it usually means that your players have done something that you didn’t expect and now you’re at a loss for what to do next. It’s also usually a pretty good indicator that something has gone awry with your prep.
In practical terms, it should be very easy for your players to do something that you hadn’t anticipated. But it should be very difficult for them to do something that you have absolutely nothing prepared for. Most of the time you should be able to just keep doing what you were doing before: Selecting the tools built into the scenario and actively playing them. They did something unexpected and now the guy you thought was going to be their patron is, in fact, their arch-enemy. But you still had the guy prepped, right?
In some cases, the PCs will end up tumbling into a section of the scenario that was prepped for a completely different type of interaction. (Common variations include “I didn’t think I’d need a stat block for that character” in relatively complex systems where stat blocks are time-consuming or “this will involve several dozen pieces moving in directions I didn’t anticipate.”) If this happens, call for a 5 or 10 minute break so that you can juggle the pieces into place smoothly.
In extremely rare cases, the PCs will manage to perform a complete scenario exit. When that happens, you can usually bring the current session to a close and spend the time necessary to prep the new scenario. Whatever action they took to exit the scenario is usually the answer to the question, “What do you want to do next session?” but it never hurts to double check. You can also ad lib along the new path for a certain distance until the new frame is both clear and the PCs have clearly committed to it. (If you imagine that the campaign is currently in Houston and the PCs decide to go to Dallas, you can probably get a fair distance down the freeway or all the way to the city limits of Dallas as you wind things down for the night. Partly because it will help focus your prep, but also because the players will sometimes abruptly reverse course and head back to Houston.)
With all that being said, remember that some waste is unavoidable. That’s okay. Your goal is simply to minimize it.
MAXIMIZE UTILITY
You may have already noticed how these principles of smart prep blend together: You avoid waste by prepping for improv. Keeping yourself open to improvisation means you don’t prepare material that’s likely to be wasted.
The same is true of our last principle.
Maximize the utility of what you prep by developing material that:
- Can be recycled
- Has flexible use
- Is multi-use
By maximizing the utility of what you prep, you avoid redundant prep. You can also generally reduce your overall prep while actually increasing the amount of quality play you get from your prep at the same time.
For example, imagine that you’re prepping a goon squad for Baron Destraad. If you spend a lot of time figuring out exactly how to position them in Room 16B and the tactics they’ll use in Room 16B, then you’re limiting the utility of that goon squad to Room 16B. (You could, of course, simply ignore that prep, but that means you’ve wasted that work.)
Here you can see the principle of not duplicating improvisation directly feeding into the principle of maximizing utility, but it’s more than that. Maximizing utility inverts that equation: It’s not enough to just avoid stuff that you could improvise; you also want to look at how your prep improves your improvisation. Building a goon squad that’s specialized to Room 16B gets you a different goon squad (and a less useful goon squad) than a goon squad that is prepared so that Baron Destraad can use it in any number of nefarious ways.
This idea of “using Baron Destraad’s goon squad in many different ways” can also be expanded to “using this goon squad to be many different goon squads”. This is what I mean by recycling  material: Ten sessions after the PCs have dealt with Destraad’s goons, the PCs tee off on the Dragon Mafia and the Mafia decides to send them a message in the form of some thugs. Rather than generating all-new stats for the thugs, you can just grab the stats for the goons, maybe tweak them a little bit, and throw them back into play.
You can also design material specifically to make it more recyclable. You can also recycle material simultaneously instead of sequentially (within the context of a single encounter, for example). In my Ptolus campaign, I needed to design a squad of twelve knights who would act as allies of the PCs. Giving them all the exact same stat block proved a little too bland for recurring characters working in concert with the PCs, so I decided I wanted two different stat blocks (one for each half of the group). Rather than designing two completely different stat blocks, however, I used the same stat block and just swapped out the list of maneuvers (from the Book of Nine Swords) that each bloc of knights had.
A quick word of caution here, however: A quagmire that can be easily mistaken for recycling material is the “quantum ogre”, a common form of railroaded illusionism in which the GM forces the players to experience a particular encounter no matter what choice they make. If they go to the forest, they encounter the ogre. If they go to the mountains, they encounter the ogre. The ogre is what the GM prepped, and so the ogre is what they are going to fight!
The distinction between responsibly recycling material and quantum ogre illusionism can be difficult to precisely define, but it’s a really important distinction and one which radically transforms the form of gameplay at the table.
If you’re trying to figure out the difference for yourself, a lot of it just boils down to being aware of your own motivations: Are you trying to force a goon squad encounter on the PCs? Or are the actions of the PCs logically resulting in them running into a goon squad and you’re just looking for a way to quickly get a goon squad into play?
Another good, albeit not perfect, self-check: Would you be equally likely to recycle this goon squad even if the PCs had, in fact, encountered the first goon squad? If so, your recycling is probably not being motivated by a desire to enforce a preconceived outcome.
The process of recycling is really no different than using a goblin stat block from the Monster Manual. You’re simply turning your own body of pre-existing prep into a resource for continuing to build the game world, rather than relying on something designed and published by a third party.
Closely related to recycling material is reincorporating material: Instead of taking material you’ve already developed and using it in a different form, you take the material you’ve already developed and just literally use it again.
The term “reincorporating” comes from improv, where it refers to building on bits that have been previously established instead of creating all-new bits. By reincorporating material, you build depth into your game – depth of background, depth of relationships, depth of knowledge. You’re also saved the hassle of creating something entirely new from scratch.
This is something I discuss in more depth in Juggling Scenario Hooks in the Sandbox, but it’s a technique that can be used in any campaign. For example, in my Ptolus campaign there’s an abandoned castle which has been used as a cultist’s lair, a hideout for the PCs, a safehouse for someone the PCs were protecting, and as the headquarters for a group of religious freedom fighters. And every single time this castle comes back into play, not only do the players become a little more emotionally attached to it, but I also get to reuse the amazingly detailed floorplans I have for it.
(To be fair, my players have been almost wholly responsible for the reincorporation of this particular castle.)
Need a tavern? Use one you’ve already created. Need a villain? What if it’s an old foe coming back instead of a new face? Need someone to hire the PCs? Make it a patron they’ve worked for before.
Not everything should be rooted in the familiar, obviously, but reincorporating material is not only a great way to maximize the value of your prep; it can also maximize your players’ engagement with the game world.
CONCLUSION
I’m not going to pretend that this is the be-all or end-all of smart prep. What I’ve tried to provide here are some fairly broad principles that you can hopefully use in guiding your own prep.
Because, ultimately, these are very specific and very personal decisions: The stuff you value and the stuff your players value may not be the same thing other groups value. Maybe your group finds detailed floorplans are valuable and evocative visual aids. Another group might not. Heck, the same group might not find them as useful in a different game, or even just in a different session. Stuff that’s useful for one type of scenario might be useless for another.
With that being said, assuming there’s interest, I’m hoping to continue this series in the future, sharing with you a few of the more unusual tools and strategies I use in my own smart prep.


