The Alexandrian

Posts tagged ‘rpg scenarios’

Go to Part 1

These lengthy reports, which can be discovered within the various facton lairs, are designed to be given to the players as handouts. They provide the PCs an opportunity to peer deeper into the machinations of the Grand Game, and can also serve as a reference for the GM to figure out what knowledge each faction currently has (and which its agents might surrender under questioning).

The reports here do not necessarily reflect the knowledge held by each faction at the very beginning of Dragon Heist. They have been written to reflect the state of the reports at the time the PCs are most likely to encounter them (during the Eye Heists). During earlier events, the factions may still be trying to piece together some of this information. (Most notably, if the PCs stage a heist at the Sea Maidens Faire without tipping off Jarlaxle about the Grand Game, there won’t be any report as he will not yet be involved in the Grand Game.) As the events of the campaign develop, you may also want to update these reports to reflect ongoing events (including explicit or implicit references to the activities of the PCs).

You’ll note that each faction refers to the Eyes using a different nomenclature. This complicates things slightly for the players (who need to figure out which names equate to which names), but not significantly. The real point of this is to deepen verisimilitude: These factions don’t all compare notes. Each faction has a unique perspective on the Grand Game, and allowing the players to see that in practical ways will make it clear that the game world is a dynamic, interactive place, not a monolithic entity.

As a quick reference, when the PCs get drawn into the Grand Game:

  • The Stone of Golorr was stolen by Xanathar. It was taken from Xanathar by Dalakhar, and taken from Dalakhar by the Gralhunds.
  • Xanathar’s Eye was originally stolen by the Zhentarim from the Protector’s Enclave in Neverwinter. Xanathar slew a Zhentarim embassy and took the Eye.
  • The Zhentarim Eye was taken from Renaer’s mourning locket.
  • The Cassalanter Eye was taken from the crypt of Lady Alethea Brandath.

The reports are presented in both plain text and also as PDFs with fancy handwriting fonts.

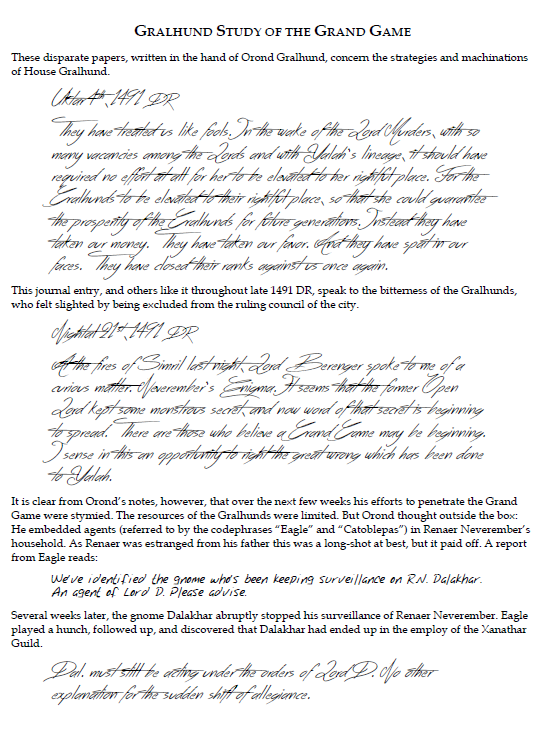
GRALHUND STUDY OF THE GRAND GAME

Dragon Heist - Gralhund Report on the Grand Game

These disparate papers, written in the hand of Orond Gralhund, concern the strategies and machinations of House Gralhund.

Uktar 4th, 1491 DR

They have treated us like fools. In the wake of the Lord Murders, with so many vacancies among the Lords and with Yalah’s lineage, it should have required no effort at all for her to be elevated to her rightful place. For the Gralhunds to be elevated to their rightful place, so that she could guarantee the prosperity of the Gralhunds for future generations. Instead they have taken our money. They have taken our favor. And they have spat in our faces. They have closed their ranks against us once again.

This journal entry, and others like it throughout late 1491 DR, speak to the bitterness of the Gralhunds, who felt slighted by being excluded from the ruling council of the city.

Nightal 21st, 1491 DR

At the fires of Simril last night, Lord Berenger spoke to me of a curious matter. Neverember’s Enigma. It seems that the former Open Lord kept some monstrous secret, and now word of that secret is beginning to spread. There are those who believe a Grand Game may be beginning. I sense in this an opportunity to right the great wrong which has been done to Yalah.

It is clear from Orond’s notes, however, that over the next few weeks his efforts to penetrate the Grand Game were stymied. The resources of the Gralhunds were limited. But Orond thought outside the box: He embedded agents (referred to by the codephrases “Eagle” and “Catoblepas”) in Renaer Neverember’s household. As Renaer was estranged from his father this was a long-shot at best, but it paid off. A report from Eagle reads:

We’ve identified the gnome who’s been keeping surveillance on R.N. Dalakhar. An agent of Lord D. Please advise.

Several weeks later, the gnome Dalakhar abruptly stopped his surveillance of Renaer Neverember. Eagle played a hunch, followed up, and discovered that Dalakhar had ended up in the employ of the Xanathar Guild.

Dal. must still be acting under the orders of Lord D. No other explanation for the sudden shift of allegiance.

Contemporary notes from other sources allowed Orond to begin piecing certain facts about the Grand Game and Neverember’s Enigma.

There are Three Eyes with which Neverember’s Enigma may be seen. The First Eye is held by Xanathar, and lies somewhere within his lair. Bulette’s report that this lair can be accessed from teleportal sites within X’s sewer hideouts provides a potential means by which this Eye could seized, but in the absence of a synchronized key these teleportal sites are useless.

A later note states:

The Second Eye has almost certainly been taken from R.N by the Zhentarim. It is more important than ever that we discover where M has hidden his head.

And then, this:

Xanatharians are riled. Word on the street is that something was stolen from them. But not the First Eye. The stone of Golorr.

This report is attached to analysis written be Orond.

What if the “Key to Neverember’s Enigma” which Xanathar was known to hold in his possession is not, as I have suspected, the Eye? But instead the Stone of Golorr?If so, then what better thief than an agent of Dagult’s? Perhaps even sent there for that purpose. The gnome has taken the Stone, I am certain of it. If we can find Dalakhar, then we can seize the Key. We can take the Stone.

JARLAXLE’S REPORT ON THE GRAND GAME

Dragon Heist - Jarlaxle's Report on the Grand Game

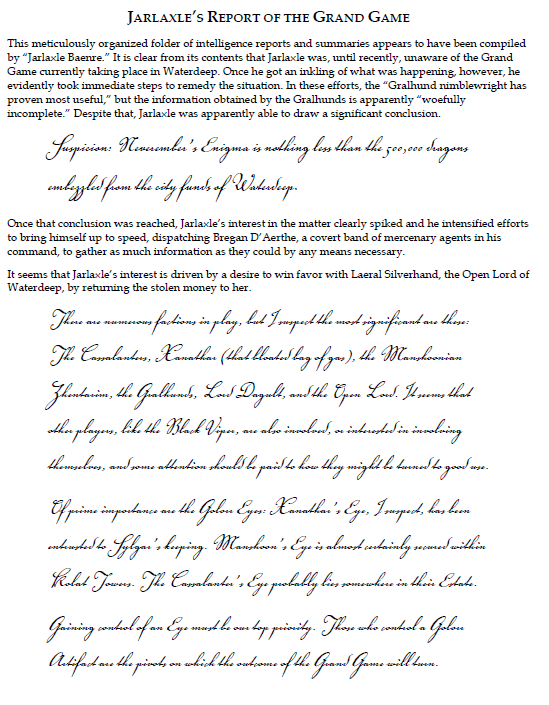
This meticulously organized folder of intelligence reports and summaries appears to have been compiled by “Jarlaxle Baenre.” It is clear from its contents that Jarlaxle was, until recently, unaware of the Grand Game currently taking place in Waterdeep. Once he got an inkling of what was happening, however, he evidently took immediate steps to remedy the situation. In these efforts, the “Gralhund nimblewright has proven most useful,” but the information obtained by the Gralhunds is apparently “woefully incomplete.” Despite that, Jarlaxle was apparently able to draw a significant conclusion.

Suspicion: Neverember’s Enigma is nothing less than the 500,000 dragons embezzled from the city funds of Waterdeep.

Once that conclusion was reached, Jarlaxle’s interest in the matter clearly spiked and he intensified efforts to bring himself up to speed, dispatching Bregan D’Aerthe, a covert band of mercenary agents in his command, to gather as much information as they could by any means necessary.

It seems that Jarlaxle’s interest is driven by a desire to win favor with Laeral Silverhand, the Open Lord of Waterdeep, by returning the stolen money to her.

There are numerous factions in play, but I suspect the most significant are these: The Cassalanters, Xanathar (that bloated bag of gas), the Manshoonian Zhentarim, the Gralhunds, Lord Dagult, and the Open Lord. It seems that other players, like the Black Viper, are also involved, or interested in involving themselves, and some attention should be paid to how they might be turned to good use.

Of prime importance are the Golorr Eyes: Xanathar’s Eye, I suspect, has been entrusted to Sylgar’s keeping. Manshoon’s Eye is almost certainly secured within Kolat Towers. The Cassalanter’s Eye probably lies somewhere in their Estate.

Gaining control of an Eye must be our top priority. Those who control a Golorr Artifact are the pivots on which the outcome of the Grand Game will turn.

Go to Part 6E: Faction Reports Continued

Sea Maidens Faire - Waterdeep: Dragon Heist

Go to Part 1

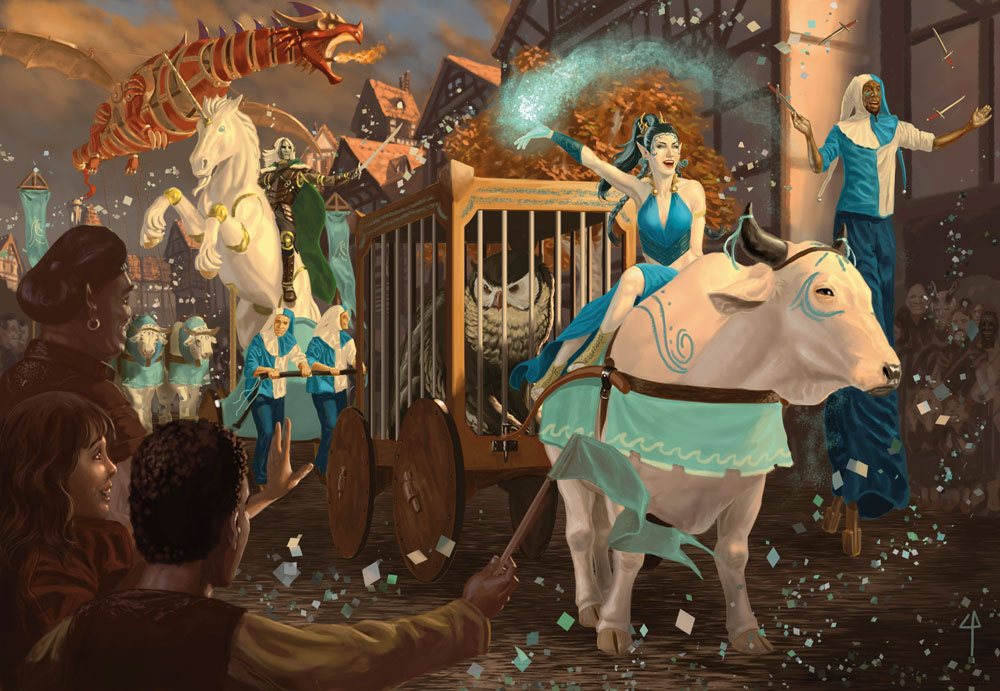
CHES 21 – SELUNE SASHELAS: A celebration of Selûne, goddess of the moon and navigation, and Deep Sashelas of the Seldarine, elven god of the sea. It is supposedly based on a mangled legend dating back to the time when the elven city of Aelinthaldaar stood where Waterdeep does today and telling of a time when the elves of the sea said farewell to their brethren upon the land and moved into the deep ocean. The elves largely declare this to be a bunch of hogwash, but nevertheless the “historical event” is commemorated by the Twin Parades: A huge line of ships (varying greatly in size) proceeds from the harbor, loops up the coast, and returns. Simultaneously, a land-based parade proceeds from the Docks and through the streets of Waterdeep.

As described in Part 4 of the remix, I’m setting Dragon Heist during the back-to-back festivals of Fleetswake and Waukeentide. This prolonged festival season more or less kicks off with Selûne Sashelas, a holiday most notable in Waterdeep for the Twin Parades. (Although there’s also the Fey Day celebration of the Spring Equinox on Ches 19th.)

I used the parade to more or less signal the end of Chapter 2: On the 22nd, the fireball explodes and the Nimblewright Investigation beings. As noted in the remix of that investigation, the Temple of Gond’s nimblewright can be seen performing during the Twin Parades. Furthermore, rather than simply having some NPC say, “Hey! I remember seeing an automaton like that at the parade yesterday!” it can be much more effective if the PCs actually attend the parade themselves.

One simple way of doing that: Route the parade past Trollskull Manor. The PCs (and their neighbors) can simply watch the parade literally pass them by.

Unfortunately, it’s rather difficult to justify why the parade route would go past Trollskull Manor. So it may make more sense to bring the PCs to the parade rather than vice versa.

THE FACTION MISSION

The solution is to simply set a faction mission to take place during the parade. For this I selected the 2nd level Bregan D’Aerthe mission (Dragon Heist, p. 34): The PCs need to steal a perfumed handkerchief from Maester Roderick Bartlethorpe in the audience at the parade and deliver it to a tiefling girl who lives in a crate at the corner of Net Street and Dock Street.

My players weren’t members of Bregan D’Aerthe, but the mission was easily reassigned to the Harpers: In this context, rather than being a test of loyalty, the mission became simply an opaque inexplicability. Whatever higher purpose is being served by this odd mission is completely obscured by the compartmentalization and secrecy of the Harpers.

The mission itself is not particularly laborsome: The PCs’ contact can even tell them roughly where on the parade route it is expected that Maester Roderick will be standing. All they need to do is zero in and pick his pocket.

PARADE ROUTE

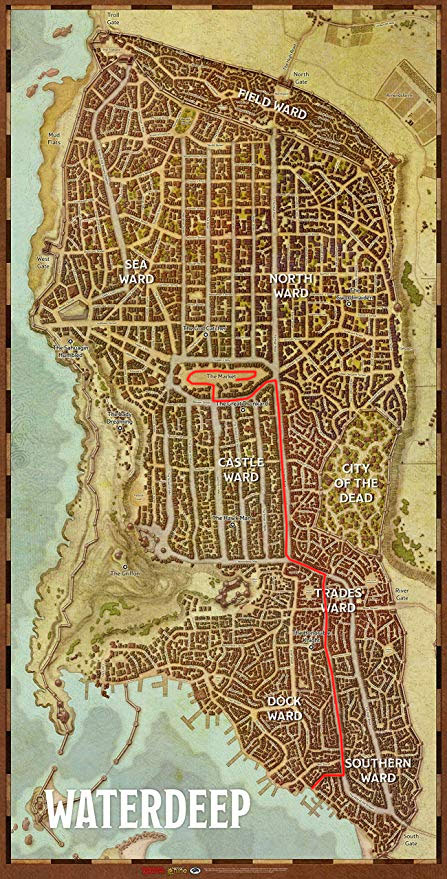
The parade starts at the docks and then goes:

  • UpCity of Waterdeep - Route of the Twin Parade Spices Street.
  • Turns left on The Way of the Dragon.
  • Heads north to the High Road.
  • Turns left on Bazaar Street.
  • Enters the Market and circles in a grand promenade before coming to rest.

I placed Maester Roderick on Bazaar Street in the “shadow of the Great Drunkard.” It’s a location that gives the PCs a variety of options: The market. A wide street. Tall, tightly packed buildings on the south side of the street. Mostly single-storey structures on the north side (lining the Market). The courtyard surrounding the Great Drunkard. The Great Drunkard itself. This gives the PCs a lot of options coming up with a plan for their op: How is the surveillance going to work? How will they make their approach? How will they escape after the handkerchief has been taken?

(If you’re thinking: Hey! That makes it sound like a heist in miniature! You’re correct. For a new group that hasn’t played together before, beats like this also let them get a feel for how they’re going to collaborate, plan, and take action before the big, complicated heists with the extremely high stakes start happening.)

This location also requires the PCs to journey back down towards the wharfs in order to deliver the handkerchief. As they do so (or shortly thereafter), they’ll be able to see the ships of the other half of the Twin Parades circle back into the docks, providing a nice button on the mini-scenario.

SEEN AT THE PARADE

Okay, this is the meat of the scenario: The displays and pageantry of the parade openly serves as the backdrop for the faction mission, but also lays two important pieces of pipe (cleverly disguised amidst other moments of beauty or wonder without additional significance).

The March of the City Watch: Marching eight abreast and fifteen ranks deep in their green-and-gold uniforms, the parade is led by an impressive phalanx of the City Watch.

Sea Maidens Faire: Marshalled by the swashbuckling Captain Zardoz Zord, who leads from the back of a rainbow-feathered diatryma, the Sea Maidens Faire:

  • Leads with a procession of exotic animals — a caged owlbear, a unicorn stamping its feet proudly, a woman with three legs leading leucrotta doing tricks.
  • Jugglers and stilt-walkers. The latter lean out far over the crowd, handing out advertising bills for a carnival on the “Pier of Wonders” in the Dock Ward.
  • They roll up a cannon, which shoots a dwarf forwards to be caught by two of the stiltwalkers holding a net.

A Pageant Wagon: Performing The Pirate Lovers. This popular musical tells of a human woman who is, improbably, the daughter of a dwarf-king and, even more improbably, falls in love with a dark elf. Various ballads are sung from the “deck” of the ship which the pageant wagon opens to reveal.

The Mechanical Beholder: It hovers over the crowd and glares about menacingly.

A Joint Presentation of Temple Gond and the House of Wonders: Members of the Academy at the House of Wonders have summoned huge ribbons of water and are moving them down the street. Within the ribbons of water swim giant, clockwork fish of bronze. The fish appear to be controlled by a mechanical man made of both burnished copper and wood; its clockwork mechanisms visible constantly whirring and pistoning under its rune-etched skin-plating as it “commands” the fish to perform tricks – flipping from one stream to another. Eventually the mechanical man leaps up, perches atop the snout of one of the fish, and is launched high into the air, where he does a double-flip before splashing back down through one of the water ribbons.

Prancing Pegasi: An aerial dance troop composed of avariels (winged elves) and pegasus riders.

If the PCs have moved away from the parade (having seized the handkerchief and wanting to leave the scene), they might see the Prancing Pegasi twirling above the roofs of the buildings behind them as they make their way south to make the rendezvous.

When I ran this mini-scenario in my campaign, the PCs ended up leaving before the nimblewright’s display actually reached them. C’est la vie. They enjoyed the parade nevertheless, and smacked themselves in the head later when they learned what they’d missed by ducking out early.


The Yawning Portal - Dungeon Master's Guide

Go to Part 1

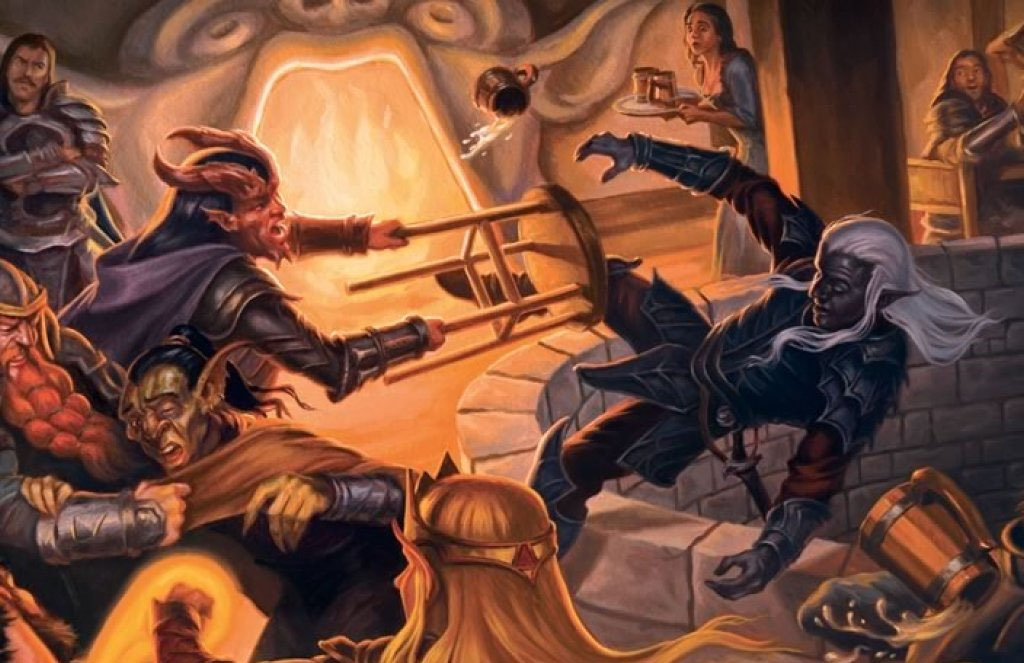
In Part 5B: Finding Floon, I focused on restructuring the investigation into Floon’s disappearance starting with Volo hiring the PCs to find his missing friend. But that actually picks up the thread just after the Dragon Heist campaign begins. The action actually kicks off with a short sequence in which the PCs witness some Xanatharian NPCs pick a fight with a Zhentarim and then, three rounds into that altercation, a troll erupts out of the portal in the Yawning Portal with a nest of stirges clinging to its back.

It’s a good moment. Nothing wrong with that scene.

But when, thanks to the ingenuity of the wider Dragon Heist DM community, I was able to find a minor restructuring and enhancement of the sequence that, when I launched my own run of the campaign, worked really, really, really well. So I’m offering it as an addendum to the Dragon Heist remix.

STEP ONE – FIRST STEPS: During character creation, let your players know that they’re aiming to create characters who are already working together as a group. (They may have just come together for the first time, but they have, in fact, decided to work together.) You might even tell them that the first moment of the campaign will be as they step through the doors of the Yawning Portal looking to meet with their contact: They need to figure out how to weave their backgrounds together to reach that point.

In my campaign this took the form of Pashar, whose mother had been captured by pirates, and Kittisoth, a tiefling pirate who was a part of that crew, but became friends with Pashar while he was in captivity. Pashar had been released to bring back a 30,000 gp ransom for their mother and Kittisoth accompanied him. On their way to Waterdeep, they had run into Theron, a wild elf in the Ardeep Forest, who was touched by their plight and agreed to help them.

(Slight wrinkle here: Pashar been told that the ransom was “600 harvest moons.” Failing to realize that a harvest moon is worth 50 gp, he was under the impression he was seeking a 600 gp ransom… not a 30,000 gp ransom. Those who agreed to help him before the truth came out were somewhat nonplussed.)

Upon reaching Waterdeep, Kittisoth decided that a great way to make money would be to compete in the seeding brackets for Xanathar’s underground fighting tournaments. She sought out Edana, the fourth PC, who set her up with a fight, but she was then badly injured during the fight. Edana was able to make introductions to the fifth and final PC, Kora Marwood, who was both a cleric of Mystra (and could heal the injured would-be fighter) and a Harper agent who had been looking to form a crew of her own. She told them that, if they were looking for fast coin, she had a job they could all attempt together, and they headed for the Yawning Portal.

STEP TWO – FRIENDLY FACES: Show them the “Friendly Faces” handout on p. 221 of Dragon Heist and ask them to choose one of the characters pictured there. That’s the contact they’re coming to meet. You can chat a little bit about how they know them, or just jump into it.

STEP THREE – GANG TROUBLE: Before they have a chance to really start talking with their contact, however, the conflict between Yagra Stonefist and the Xanatharians begins at the table next to theirs. (Unless they picked Yagra Stonefist, in which case the trouble comes straight at them.) This is detailed on p. 21 of Dragon Heist.

Add a black flying serpent tattoo to the back of Yagra’s neck. (Note: She isn’t a Manshoonian Zhentarim; she’s with the Doom Raiders.)

Note: If they’ve selected Bonnie or Threestrings as their contact, then they’re working. Perfect excuse for them to say, “Get a table and I’ll come see you in a minute.”

STEP FOUR – A BRIEF DISCUSSION: The bar brawl resolved, the PCs have a chance to briefly talk with their contact. Turns out they’re just brokering a meeting with someone who needs the PCs’ services, and their contact hasn’t shown up. They buy the PCs a round of drinks while they wait, and that’s when—

STEP FIVE – DIP! DIP! DIP! DIP! DIP!: A chant of, “Dip! Dip Dip!” starts up in one corner of the bar and quickly spreads through the whole crowd. A young man stands up, goes to the bar, and slaps down a gold piece. Durnan nods, slides the coin off the bar, and then gives him a wooden cup and a silver bell.

The young man strips down to his underwear as the dipping song begins:

THE DIPPING SONG
Deep and dark down below,
where only fools and braggarts go,
where monster roam and dangers mortal,
few survive the Yawning Portal,
stand your ground or ring the bell,
and hope you make it up the well!

Then the young man goes over to the portal. At the edge of the portal he quaffs a beer, throws the cup down the portal, and grabs the rope. His friends begin lowering him.

Betting: Instantaneously the betting strats. (“Two silver he stays down for three minutes!” and “A copper he comes up with the cup!” That sort of thing.)

Return: After one minute, people start grumbling unhappily and others cheer; coins are exchanged as bets begin getting resolved. Two minutes pass; maybe there’s a chance for the PCs and their contact to exchange a few more words. (“So that is this all about?” “I’m not sure. But it might have something to do with this Zhent-Xanathar gang war that’s been flaring up.”)

At almost three minutes, the sound of the bell echoes up from the hole. There are groans from those who almost won their 3 minute bets. The rope is pulled up.

Troll: The young man appears over the lip of the portal — one hand holding the rope, the other triumphantly holding the cup above his head. He alights on the side of the portal and begins walking away.

He’s ten feet away from the portal when the troll clambers up from below. The PCs can see that there’s something wrong with the troll’s back; the flesh there seems to writhe. Roll initiative!

1st Round:

  • The troll attacks the dipper.
  • Durnan pulls a greatsword from below the bar, vaults over the bar, and charges forward.
  • The Zhents who attacked Yagra (if they’re still around) make a break for the door (along with many others).

2nd Round:

  • The flock of 12 stirges on the troll’s back explode into a frenzied flight.
  • If the PCs are involved, Durnan shouts, “You focus on the stirges! The troll is mine!”
  • Yagra (if she’s still around) joins Durnan in fighting the troll.

Wrapping Up the Fight: As the PCs finish mopping up the stirges, Durnan will ram his shoulder into the troll, causing it to plunge backwards into the Yawning Portal and vanish from sight. Durnan shouts, “A round of drinks on the house! Troll special!” Cheers from those who braved it out erupt!

STEP SIX – VOLO: That’s when Volo comes over. He’s the colleague the PCs’ contact was waiting for. If the PCs interceded with the trolls/stirges, Volo saw the whole thing and he’s very impressed.

If they didn’t, it doesn’t matter. (It might even be funny to have him come in and say something like, “What did I miss?” or “Just another boring day at the Yawning Portal.”) He was already planning to hire them for the job based on their contact’s recommendation, right?

And you can pick up straight from there with Part 5B: Finding Floon.

CREDIT

On reddit, Busboy80 came up with the basic concept of the Dip and RVAthrowaway38 created the Dipping Song. I may have refined the sequencing, but this is a fantastically clever idea and my players loved it. Chants of, “Dip! Dip! Dip! Dip!” have become a running joke.

And thanks to my players: Heather, Peter, Chris, Sarah, and Erik.

The Vault - Waterdeep: Dragon Heist

Go to Part 1

The entries here modify or replace those found on p. 94-97 of Dragon Heist. They reference the map on p. 95.

THE HALL OF SECRETS

About 15 feet down the sloping hallway, the stone construction changes. To anyone knowledgable about such things, the lower portion of the hall is clearly dwarven construction.

Roughly 50 feet beyond that, the walls of the hall are covered with what appear to be dwarven graffiti — some painted on the walls, others carved. Each records a secret, most of them banal (“my beard quivers for Lorlai of the stonecutters,” “I tasted pixy dust in the third hall,” “I use rotgrub paste to dye my beard”).

This continues for another two hundred feet before the hall ends in Area V1.

DOOR OF THE CEREMONIAL VAULT

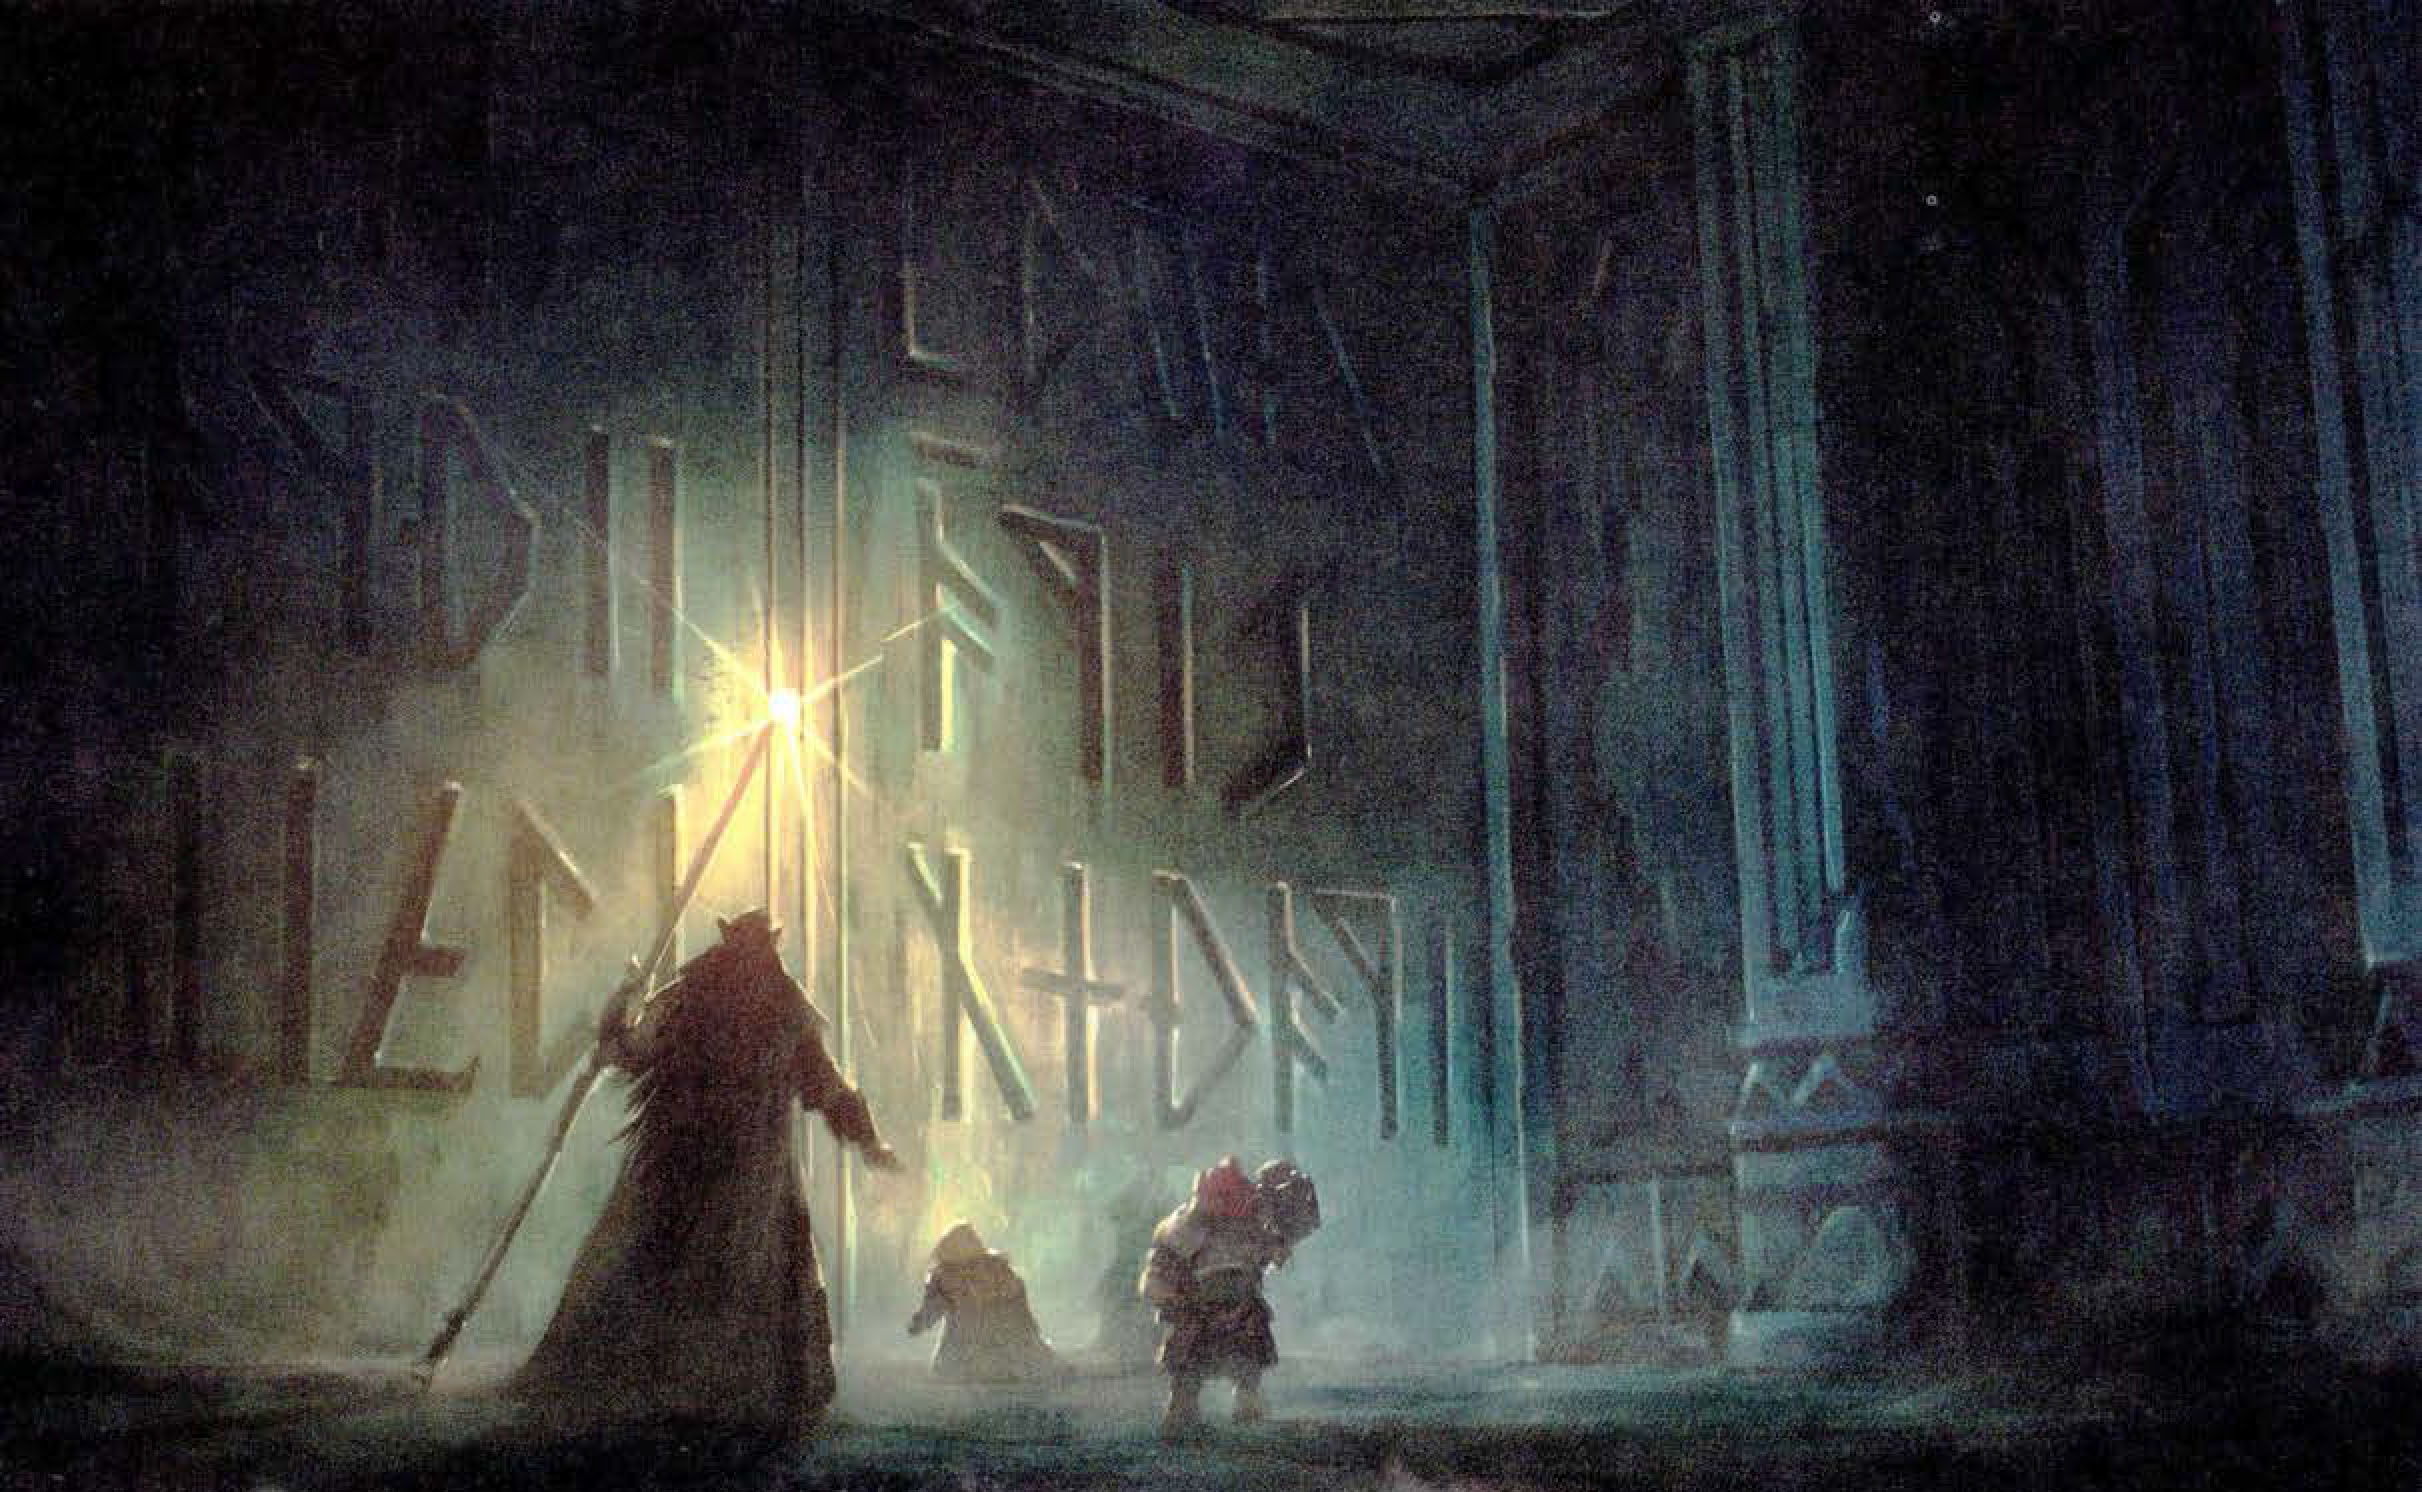
AREA V1 – ANTECHAMBER: The antechamber is twenty feet wide and twenty feet high. It seems to resonate with a silent stillness, suggestive of its great age. The far wall is dominated by a massive pair of adamantine doors bearing dwarvish runes taller than a grown man. In the center of the floor there is a bronze bas relief of a stylized sun, six feet across. Words have been carved into the floor in a circle around the bas relief.

  • The Doors: The dwarvish runes read, “All that lies within belongs to the Silent Keeper.” The doors cannot be forced open or damaged in any way, and attempts to circumvent them with magic short of a wish spell fail automatically.
  • The Sun: The script running around the sun is in Chondathan (the local human tongue) and, upon inspection, clearly a more recent addition to the antechamber. The inscription reads, “Know ye the hidden truth.” It’s repeated three times.
  • Opening the Doors: It’s a ceremonial vault and opening the doors requires the performance of a ceremony: A single dragonscale must be laid upon the bas relief of the sun and then struck while lit by sunlight. Once that is done, the doors slide back into the walls and remain open for 15 minutes before sliding shut again. (They can be opened from the inside by simply placing a hand upon them.)
  • GM Note: The “Silent Keeper” is a title belonging to Dumathoin. The Chondathan inscription was placed here be the Maroon Brotherhood.

SUNLIGHT? Certain magical effects can bring sunlight here (the sunbeam spell, for example, or Manshoon’s sunglobe). PCs could also set up a series of mirrors; this requires twenty large steel mirrors (20 gp each) and 2d4+2 hours of work get their alignment just right.

DRAGON SCALES? The type of scale doesn’t matter. They’re rare on the market, but can be found in specialty shops for 1d6 x 300 gp. The PCs might also recall running into sources for dragon scales at various points during the campaign (Zelifarn, Jarlaxle’s bedroom, the Cassalanters’ study).

MITHRAL HAMMER? Doesn’t have to be a particularly large one. It can be commissioned from local craftsmen for 150 gp.

LEARNING THE CEREMONY: Clever PCs may be able to guess the necessary ritual from the vision granted by the Stone of Golorr when they asked for the Vault’s location. If they cast an additional legend lore specifically pertaining to the doors, they’ll be told, “Three keys ye seek. Strike scale of wyrm in light of day. As the vault bears witness, so shall it ope to mithral’s strike.” The notes pertaining to the Melairkyn vault held by Kalain (see Part 5C) also reveal the necessary ritual. Alternatively, the PCs may be able to get information from the Cassalanters.

RESEARCHING THE VAULT DOOR: Researching Dumathoin with a DC 15 Intelligence (History) test reveals the existence of the ceremonial vaults and the ceremony the Melairkyn dwarves would perform to open the doors.

RESEARCHING THE MAROON BROTHERHOOD: Researching the Maroon Brotherhood’s symbols or the phrase “Know ye the hidden truth” will provide a general precis of the Brotherhood’s history:

  • They were a secret brotherhood, primarily centered in Waterdeep and most likely founded during the 12th century (although they often obfuscated that date in order to present themselves as a more ancient lineage).
  • In the early 14th century they became caught up in the Shadow Thief Affairs, their members were implicated in an assassination attempt, and the group was broken up by Open Lord Lhestyn.
  • Rumors persisted for the better part of a century that the Brotherhood of the Maroon Pin had actually survived the purge and were secretly controlling Waterdeep (or even all of the newly formed Lords’ Alliance), although these claims eventually faded into legend and conspiracy theory.
  • Court records from the time period indicate that a large number of the brotherhood’s members were part of the Brandath family.
  • The rituals of the brotherhood largely remained secret even after – or perhaps because – their end was so precipitous. It is clear, however, that the brotherhood had accumulated any number of arcane rituals, symbols, and the like. These included the namesake pins of alexandrite, dwarven compasses (often hidden within works of art), a serpent’s forked tongue (representing the telling of secrets), scarab beetles, and the like. They seemed particularly fond of appropriating imagery from ancient or exotic civilizations.
  • One example of this, found beneath the picture of a broken arrow, is the enigmatic phrase: “In beam of sun, strike dragon’s scale with mithral true upon the anvil sun.” Mid-14th century scholars exhausted great amounts of work trying to puzzle out what the imagery of “anvil sun” alluded to, with most concluding it must refer cryptically to a site somewhere within Calimshan, possibly dating back to the lost empire of Coramshan. Debates raged endlessly about exactly which site (or sites) the passage might refer to, until Maroon Brotherood conspiracy scholarship faded away by the end of the 14th

INSIDE THE VAULT

GENERAL FEATURES: Hidden somewhere within each room of the vault (except V6, V7, and V8) is a cartouche bearing the dwarven runes “HN” (see, also, Area V5).

AREA V2 – ENTRANCE FOYER: The three niches on the far wall (instead of holding fake doors) contain chipped frescoes of:

  • Dumathoin placing glowing gems into a range of mountains (which appear to be a primeval representation of the Sword Mountains).
  • Dumathoin visting the Illithid god Ilsensine (manifested in its form as a disembodied emerald brain) and bathing with it in the greenish psionic energy of the maze-like Caverns of Thought.
  • Dumothoin, Ilsensine (in the form of an Illithid avatar), and Laduguer, the god of the duergar, with hands clasped in a circle of friendship.

AREA V5 – THE SECRETS ROOM OF HARLSNOD DARKSHINE: Dwarven runes upon the wall read, “In these halls which his craft has wrought, the master architect Harlsnod Darkshine lays his secrets.”

  • GM Note: Harlsnod Darkshine designed and built the ceremonial vault. The treasure represents his own personal “secret offerings” to Dumathoin; whether the practice of sealing secrets into such offerings is literally true (and those secrets can somehow be extracted or simply whisper into the wind if the treasure is removed from the vault) is up to you. Harlsnod’s tomb can be found on p. 183 of Dungeon of the Mad Mage.

AREA V6 – HAMMER AND ANVIL:

  • Frescoes: The frescoes in this room depict the construction of the Temple of Dumathoin and the Heart of the Mountain (Level 6, Areas 15 and 16 of Undermountain, see p. 86-87 of Dungeon of the Mad Mage). In addition to the hammer inset into the wall, there is a secret compartment behind that hammer (DC 12 Intelligence to find if you’ve removed the hammer, DC 17 otherwise). The compartment contains maps of Level 6 of Undermountain, along with detailed notes showing the calculations used to determine the location of the Heart of the Mountain and the divinatory properties which resulted from “the whisper of the Keeper of Secrets Under the Mountain”.

AREA V8 – DUMATHOIN’S TRUTH: This entry replaces the original room key.

  • Set into the floor is an adamantine trap door with a pull ring.
  • The walls are covered with frescoes depicting Dumathoin, Ilsensine, and Laduguer working together on some arcane project; not only are they surrounded by papers covered in dwarven runes, but strange, glowing diagrams fill the air around them. Dumathoin has turned from the work and seems to stare into the center of the room.
  • Trapdoor: The trapdoor is false and cannot be lifted. Anyone who touches the trapdoor or its pull ring must succeed on a DC 18 Dexterity saving throw or be struck by rays of magical fire that spring from the painted Dumathoin’s eyes, dealing 4d10 fire damage. The trap doesn’t trigger if the target has total cover.
  • Frescoes: A DC 15 Intelligence test reveals that work depicted in the frescoes seems to focus on dwarven anatomy.

DESIGN NOTE: THE MAIN VAULT

You can run the main vault exactly as written. Personally, I found the back story of Aurinax and the dragonstaff of Aghairon to be a fairly convoluted bit of continuity to introduce at literally the last moments of the scenario. I considered trying to drop some lore into earlier sections of the scenario regarding Aurinax and his relationship with Lord Dagult, but it still ended up feeling like an unneeded complication. So when I run the campaign I’ll simply be dropping a red dragon down there. A straight, uncomplicated dragon fight to end Dragon Heist!

If your players are familiar with the Idle Champions of the Forgotten Realms video game, however, they might get a kick out of the familiar face.

THE BROKEN CIRCLE OF GODS

The images found throughout the vault, if revealed to (and believed by) the dwarven public, would be like dropping a fireball into the doctrine of the Morndinsamman (the council of dwarven gods). The events they depict predate the falling out between Laduguer and Ilsensine, and the breaking of the friendship these three gods once shared.

In the official lore, both the strange concord between Dumathoin and Ilsensine as well as the exact details of the falling out between Ilsensine and Laduguer are mysteries. Introducing these images into your campaign will peel back one layer of this mystery, although it may only result in even more questions being asked.

If you (or your players) choose to pursue this, this is my rough canon for this history:

  • When the world was much younger than it is today, Dumathoin and Laduguer explored the roots of the world together. There they met Ilsensine. Or, at least, one of his ganglia – the “tentacles of infinite length” that stretch from Ilsensine throughout the many worlds.
  • In doing so, they may (or may not) have been responsible for mind flayers coming to Faerûn for the first time.
  • In any case, the three of them became friends, joined by a common interest in the secret paths of knowledge, the hyper-mental patterns by which knowledge itself is birthed into the world, and the deep places of the world.
  • At a much later point in time, Laduguer approached his two friends with thoughts on how the dwarves Moradin had created could be improved. To perfect these ideas still needed much work, and the three friends fell to work.
  • When the Morndinsammar discovered what they were doing, however, they were outraged. Laduguer covered for Dumathoin, but he and his daughter, Duerra, were cast out of the Morndinsammar.
  • Laduguer continued his work, straining his relationship with Dumathoin. Things fell apart completely, however, when Laduguer discovered that Ilsensine had appropriated “his” work and actually begun having his illithids experiment on captured populations of dwarves. (This would eventually lead to the creation of the duergar.)
  • Laduguer felt betrayed, the gods fell to war, and the acrimony between them became irreparable. During their conflict, Duerra was secretly captured by the illithid and became part of the duergar experiments.

The history which followed, in which the duergar became a slave race only to eventually lead at least one rebellion against their illithid overlords (one of which may or may not have involved Deep Duerra leading an army which captured an illithid city, see Polyhedron #110), is a mixture of legend and truth which I leave to someone else to untangle according to their need.

DESIGN NOTE

GM Tip: Encourage any players creating dwarf PCs to choose Dumathoin as their god. It’ll let the revelations of the Vault land heavily.

AFTER THE VAULT

The total hoard of 500,000 gold coins weighs 10,000 pounds. Transporting it out of the Vault is not a simple task. And, if the PCs are planning to keep it, the question of where to store it is not an insignificant one. (The sum will raise eyebrows and call a lot of attention if they simply try to deposit it at a bank, for example.)

If the PCs are working for the Cassalanters, their noble patrons are able to literally throw a mass of manpower at the problem. They arrange for a dozen carts loaded with empty barrels and several dozen trusted servants to arrive at the Brandath Mausoleum, rapidly load the gold into the barrels, and then cart it back to their estate.

If all else goes quiet in the Grand Game, the remaining response teams are likely to be assigned to watch the PCs. Whatever plan they came up with for moving the gold (whether it involves the Cassalanters or not), don’t be afraid to use whatever response teams are remaining to complicate their scheme. A running battle through the streets of Waterdeep sounds like a lovely way to wrap the campaign up.

On that note, if the PCs do something to alert Laeral Silverhand that they have the money (and she knows or can easily conclude where it came from), she will politely ask them to return it in exchange for a 10% finder’s fee. But she’ll only ask once.

The PCs might strike on the idea that the vault is perfectly safe where it is, and they’ll just make small withdrawals whenever they find themselves in need of funds. They might even use the Stone of Golorr to make it even more secure by wiping out everyone’s memory of the Grand Game and/or the embezzled gold and/or the PCs’ involvement. That sounds incredibly clever, and unless they make some mistake to draw considerable attention to themselves you should probably let them get away with it.

Which is my final note here: The published adventure advises the DM go to extraordinary lengths to strip the treasure away from the PCs. My recommendation is not do that: Enforce logical consequences. Have people ask the PCs for help if they become aware that they have a windfall. But if the PCs get away with the ultimate heist… well, that’s just awesome.

Go to Part 6D: Faction Reports on the Grand Game

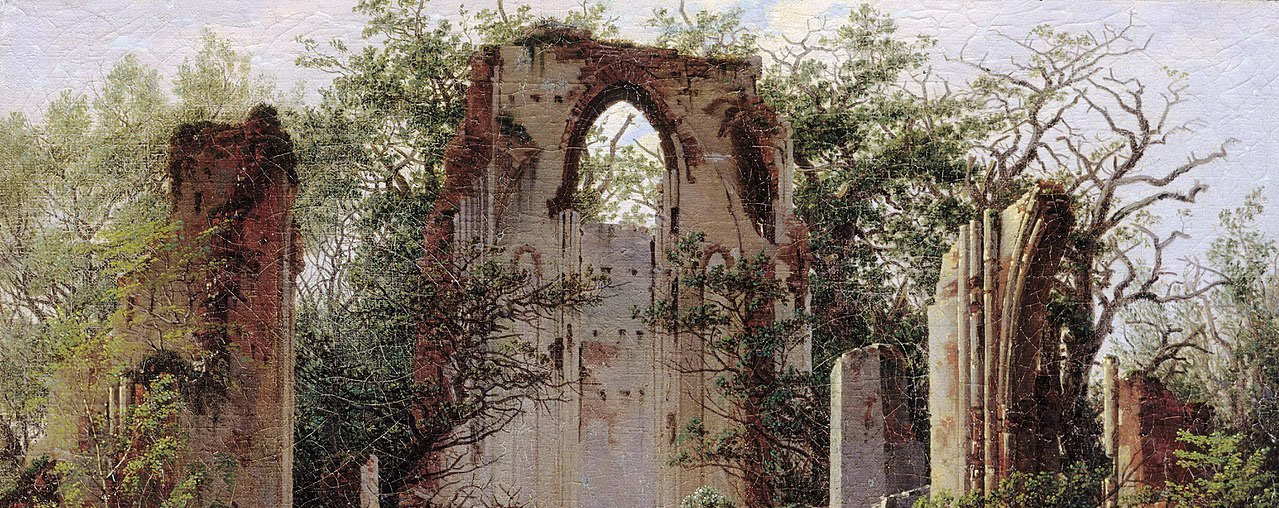
Ruins of Eldena near Greifswald (Edited) - Caspar David Friedrich (1825)

Go to Part 1

The vault in which Lord Neverember hid his stolen wealth was, in fact, constructed by the Melairkyn dwarves thousands of years ago and, today, lies beneath the Brandath family crypts.

Clan Melairkyn were the first to begin excavating beneath what is now Waterdeep. The earliest portions of Undermountain were, in fact, the Underhalls in which they made their homes and wrought their mithral-craft.

Near the Underhalls, the also built a ceremonial vault. The Melairkyn were worshippers of Dumathoin, the Keeper of the Mountain’s Secrets. Their cult believed that Dumathoin encoded his secrets in the veins of ore and precious stones he placed in the mountains he raised from the earth for the dwarven people. In their mining, the dwarves released Dumathoin’s secrets into the world. This angered Dumathoin and there was a period of discord beween the dwarves and the Mordinsamman (the council of dwarven gods). In order to appear Dumathoin and to protect his secrets, the cult would mystically bind the “secrets of the mountain” into items of finely-wrought dwarfcraft and then make offering of it to Dumathoin by securing them within ceremonial vaults.

After the Melairkyn civilization fell before an invasion of dark elves, the vault was looted and abandoned, its secrets – whatever they may have been – scattered to the corners of the world. The entrance was eventually buried by the passage of time. Nearly a millennia passed before the city of Waterdeep was founded, and the area near the vault became used as a burial ground which would expand to become the City of the Dead.

The Brandath family eventually constructed a mausoleum on the site. A hundred years later, as the mausoleum was being expanded, the excavations broke through into antechambers of the Melairkyn vault. Struck by the grand and mysterious beauty of the vault, the Brandaths of the time concealed the vault’s existence and used it as a site for performing ritual mummery based loosely on the original Melairkyn rituals as part of a secret fraternal order known as the Brothers of the Maroon Pin. A scandal eventually saw the Maroon Brotherhood shut down, and the vault lay largely forgotten under the Brandath mausoleum.

When Lady Alethea Brandath died, however, her husband, Lord Neverember, discovered the existence of the vault while making preparations for her internment in the old mausoleum. Gaining access to the inner vault, he realized it would be a perfect place to store the money he was embezzling from the city.

Once the money was safely ensconced, Neverember concealed the location of the vault using the Stone of Golorr. After blinding the Stone, he hid one of the Eyes in a crypt near his wife’s. His logic was that no one knew where the Vault was located except him, so no one would look there.

Lord Dagult, however, had not counted on the perseverance of the Cassalanters.They performed an exhaustive survey of sites associated with Lord Neverember, including his wife’s tomb. There they discovered the hiding place of the Eye and took it. (Ironically, they never realized they were standing almost directly above the vault.)

THE CITY OF THE DEAD

In 1250 DR, when Waterdeep’s graveyard had become hopelessly congested with the dead, the city began constructing public mausoleums and the character of the City of the Dead was permanently changed. Today much of it is a public park, dotted with mausoleums and crypt-complexes. (See Dragon Heist, p. 179.)

DUSK: At dusk, hundreds of driftglobes make their way from the inhavited part of the city and congregate in the City of the Dead. They spend the night here and then disperse, returning to the waking city at dawn. No one knows the reason for this.

NIGHT: At night, the City of the Dead is closed. Two city guards are stationed at each entry gate. It requires a DC 15 Dexterity (Stealth) check to slip over the walls.

GUARDIANS

SIR AMBROSE EVERDAWN (LG male human Tethyrian knight): An aging servant of Kelemvor (god of the dead), patrols the cemetery from sunset to sunrise, chasing off grave robbers and making sure the dead stay buried. Characters who creep around the cemetery in the dark have a 30 percent chance of running into him. If that happens, he escorts them out and alerts the City Guard if they refuse to leave.

BRANDATH TREANT: The largest tree growing by the main entrance to the Brandath Mausoleums is a treant. It awakens when one or more creatures approach and growls, “Only those of Brandath blood are welcome here! Begone!”

If someone other than a Brandath attempts to enter a mausoleum, the treant will animate two trees and attack. The treant and its animated allies are too big to enter all but the main chambers of Mausoleum C.

If Renaer Neverember (of Brandath blood) is present, the treant allows him and his companions to pass unmolested. It says to Renaer in passing, “Your mother was a lovely person.”

MAUSOLEUMS

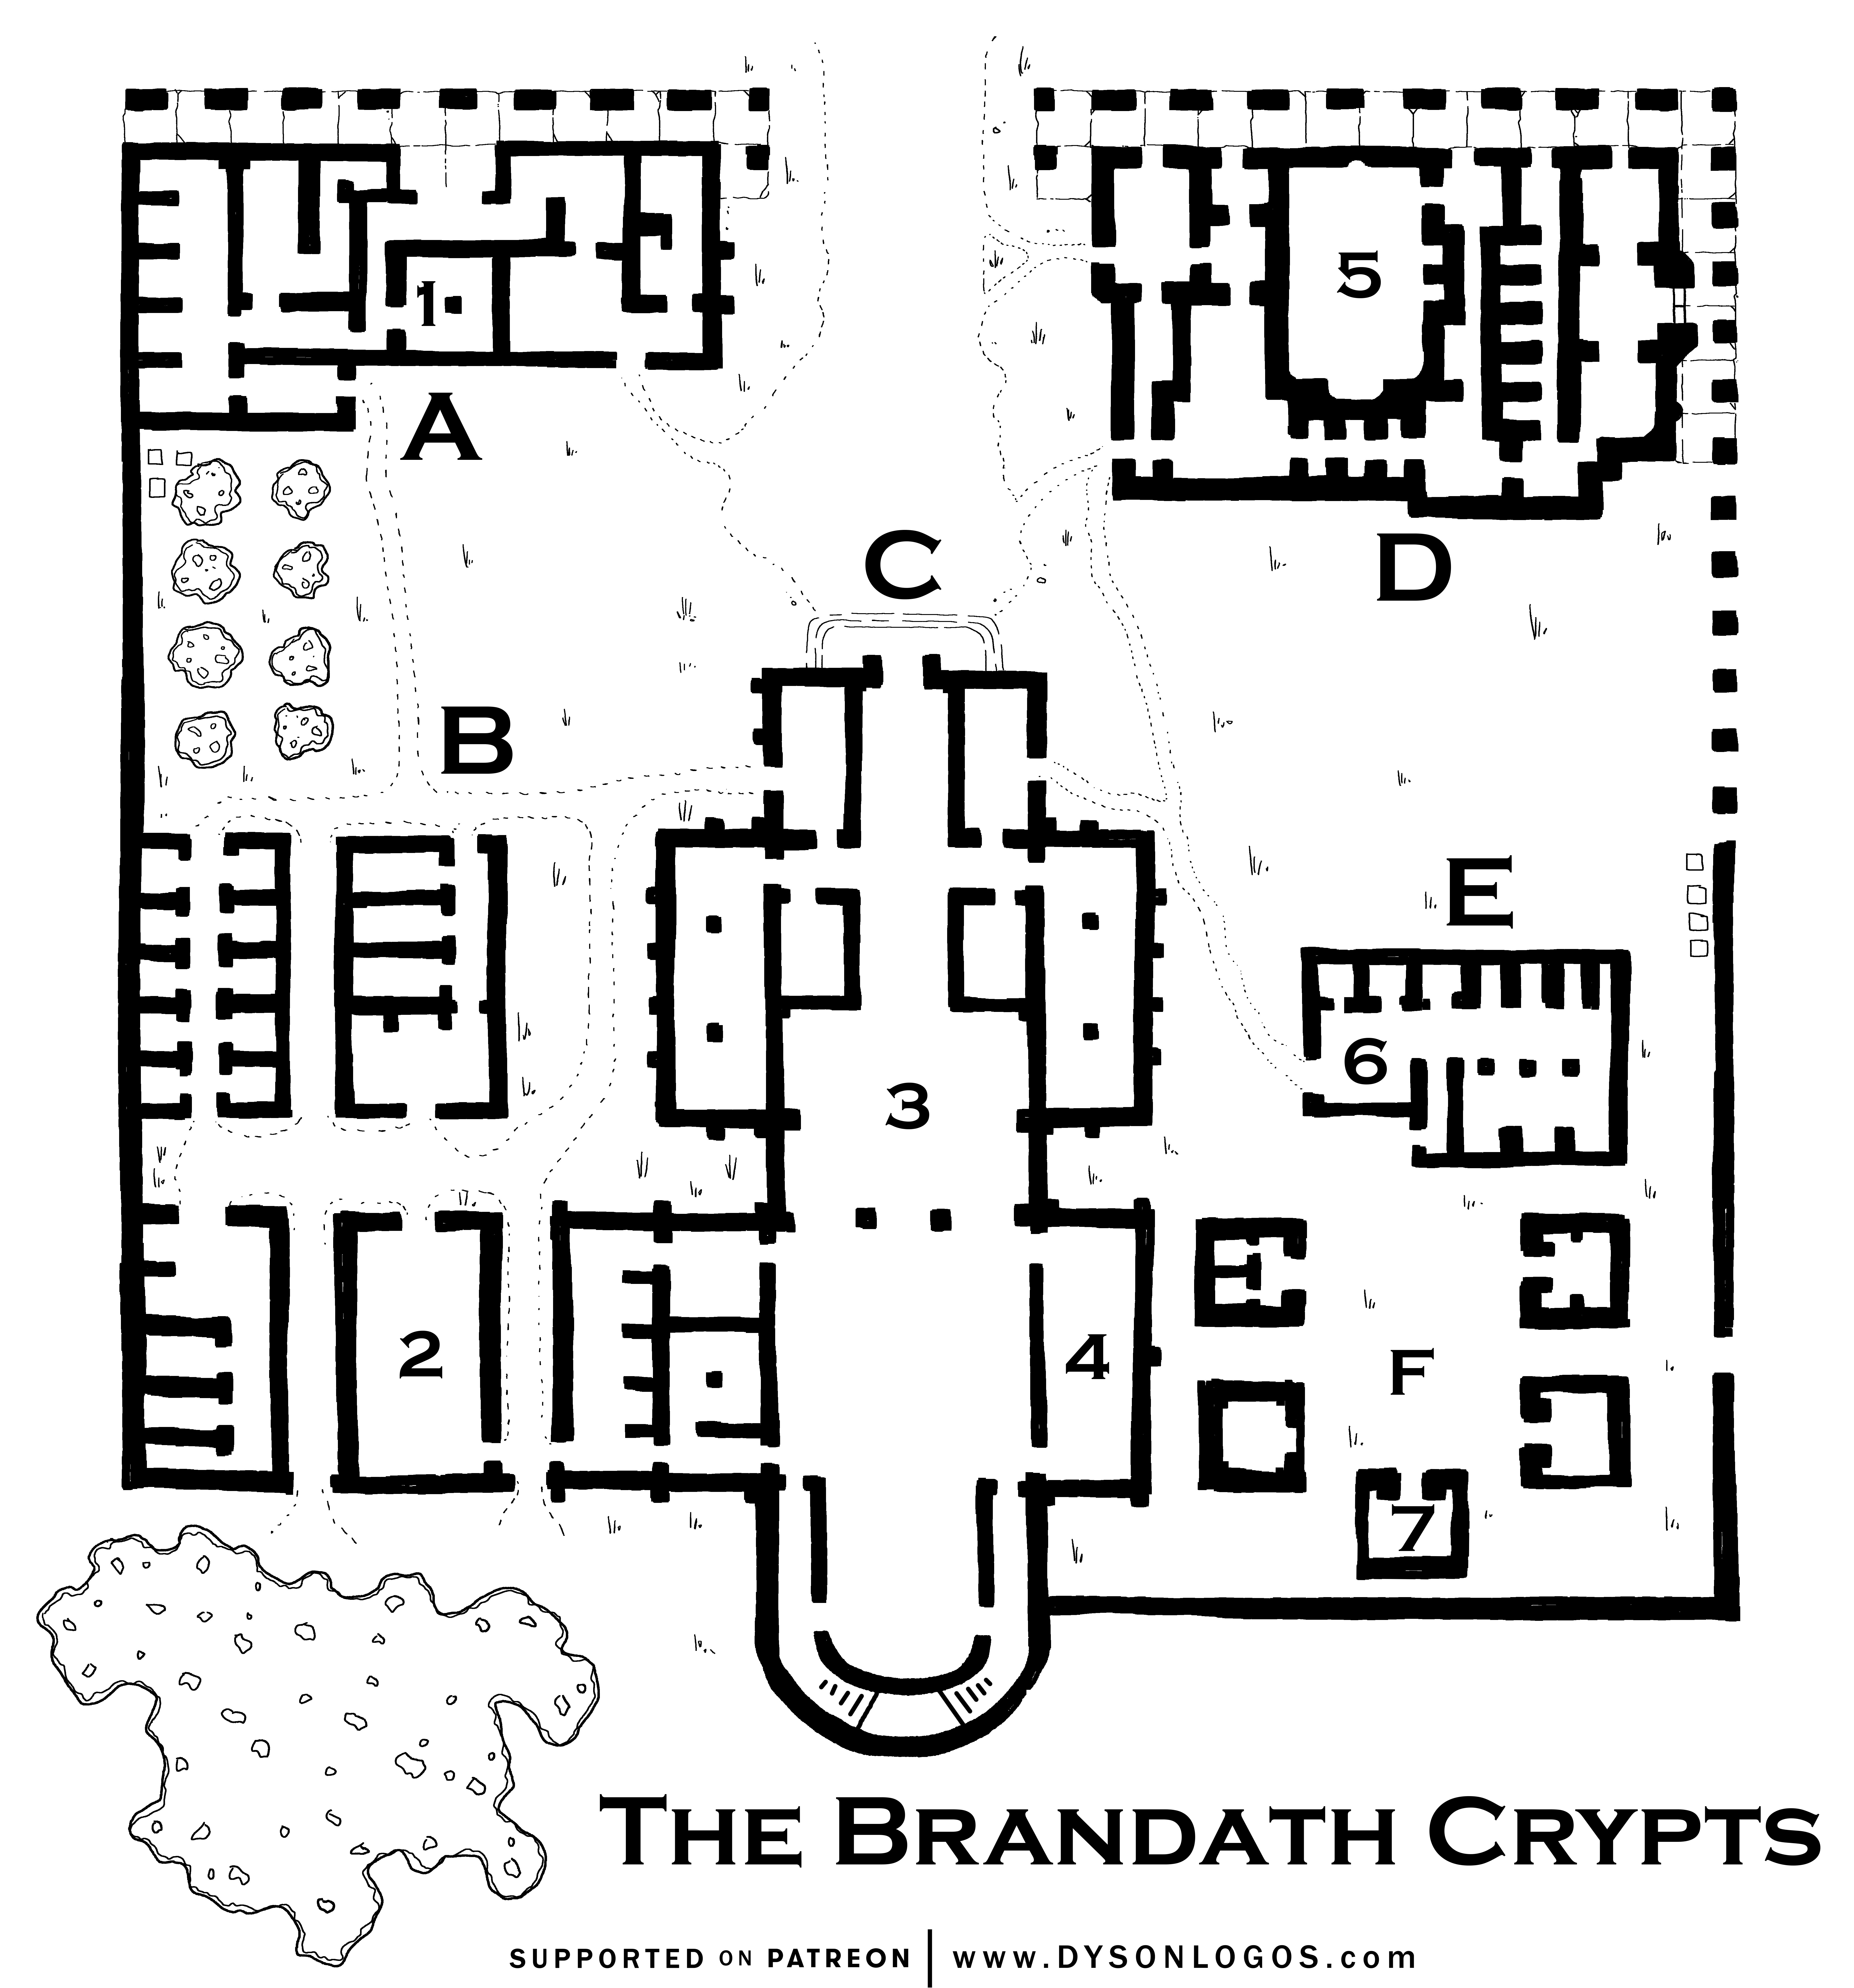
The Brandath Crypts - Dyson Logos

The first small mausoleum built on this site was expanded with various antechambers and new crypts to hold additional members of the Brandath family. Other single-occupant mausoleums were added around the original structure, although many of these were subsequently razed to make way for the larger structures which now form the rambling crypt-complex of the Brandath family.

GENERAL FEATURES:

  • Doors: The stone doors of the mausoleums are generally locked (DC 15 Dexterity check to pick the lock; DC 25 Strength (Athletics) check to force it).
  • Coat of Arms: The Brandath coat of arms can be found upon the floor of each mausoleum. An DC 15 Intelligence (History) check can determine, based on the variations and progression of the heraldry, which of the buildings is oldest. (D is the oldest, followed by F, B, A, C, and E.)

MAUSOLEUM A – CELESTIAL STATUES: When this mausoleum was built, the popular style was for each grave to be marked with a statue of the deceased rendered as if they had been reborn as a celestial: Wings, glowing eyes (by way of persistent spells), and halos are common. One is carved as if they were an Empyrean – although the statue is life-size, it is surrounded by faceless, miniature people suggesting that its trues scale is much larger. Others are accompanied by couatl, pegasi, and the like.

  • AREA 1: The statue in this chamber was enchanted to sing when mourners drew near. Over the centuries, however, this enchantment is fading and the voice fades and cuts, creating an unsettling and atonal melody.

MAUSOLEUM B – THE OSSUARIES: These four buildings in the southwest corner of the crypt-complex have been transformed into (or were built as) ossuaries. Some were “buried” by having their bones directly placed in these ossuaries, but in other cases bodies were moved here in order to make room for new arrivals elsewhere in the crypt-complex.

  • AREA 2: The floor-to-ceiling shelving that once held the bones in this ossuary has collapsed, filling the entire building with tumbled piles of bone. 6 crawling claws (MM, p. 44) scurry among and tunnel through the bones (leaping out from unexpected angles).

MAUSOLEUM C – THE GRAND CRYPT: This two-storey tall building was built at the height of the Brandath family’s power and influence. Constructed of marble and porphyry, its Doric architecture is redolent of 13th century Illuskan revivalism. The name BRANDATH is carved in Thorassian (common) letters above the doors.

  • AREA 3: The vaulted main hall of the grand crypt is perpetually lit by three chandeliers with blue everburning candles. Plaques upon the floors and walls indicate where dozens of people have been laid to rest seemingly behind every wall. Bas reliefs serve as strange death masks.
  • AREA 4: This side chamber is taken up almost entirely by the tomb of Sir Jom Shiaon Brandath, a half-giant. Carvings around his titanic sarcophagus indicate that he died seeking vengeance again “Lord Bombur,” who had “cruelly butchered” Sir Jom’s family with a cowardly assault upon his keep while Sir Jom was on campaign in the First Dragonspear War (1356 YD).
  • SECOND FLOOR: The stairs at the south end of the building lead up to a second floor of tight, claustrophobic passages lined with crypts.

MAUSOLEUM D – THE FIRST CRYPT: This building is the oldest in the crypt-complex. BR_N__TH CRY_TS is carved in faded letters of the Dethek alphabet above the eastern doors. Age-worn stone can be seen everywhere, along with clear signs of repeated renovation. Individual crypt sites have been renovated, moved, and even removed over hundreds of years.

  • AREA 5: This room was the original mausoleum on this site. See “Lady Alethea’s Tomb,” below.

MAUSOLEUM E – ULD’S CRYPT: Despite being the newest construction in the crypt-complex, this mausoleum is in very poor repair. Part of the roof has caved in, crushing several of the tomb sites within.

  • AREA 6: A gravemarker identifies the sarcophagus here as belonging to Uld Brandath, a Waterdhavian magister who died in a freak accident years ago. (A gargoyle broke off the corner of a government building and fell on Uld, crushing him.) One corner of his sarcophagi has been staved in by the collapsed ceiling. Uld’s skeletal corpse wears a headband of intellect.
  • CRAWLING CLAWS: Six crawling claws (MM, p.44), made from the hands of murderers who were sentenced to death by Uld, escaped from his sarcophagus and now infest the building.

MAUSOLEUM F – SMALL MAUSOLEUMS: Originally there were several dozens of these smaller mausoleums located in the Brandath crypt-complex, each containing a single body (or perhaps a small family unit). Many were raised in order to build the Grand Crypt and, more recently, Uld’s Crypt.

  • AREA 7: One of the small mausoleums is obviously of much newer construction than the others. The name “LORD ANRI BRANDATH” is carved above the door. On the relatively plain sarcophagus inside, two dice appear to have been carelessly tossed (reading snake eyes). Lord Anri is, in fact, buried here. Lord Dagult had this mausoleum built and transferred Lord Anri’s body here when he renovated Lord Anri’s original resting place (see “Lady Alethea’s Tomb”).
  • GM Note: Combined with the vision granted by the Stone of Golorr, this will likely function as a red herring for PCs who believe the Vault lies beneath Lord Anri’s tomb.

LADY ALETHEA’S TOMB

This room was actually the first Brandath mausoleum and it was the burial site of Lord Anri, who rested here undisturbed for many hundred years while his descendants lived, died, and were buried around him.

The ego of Lord Dagult Neverember, however, manifests in myriad ways. When his wife, Lady Alethea Brandath, died, Lord Dagult wished to exult her in death. Lady Alethea, however, had requested a simple tomb in the Brandath Crypts. Nevertheless, Lord Dagult got what he wanted by refurbishing Lord Anri’s tomb and burying her there, giving her a place of primacy.

LADY ALETHEA’S SARCOPHAGUS: Clearly newer than the rest of the crypt, a bouquet of wilted flowers lies atop her sarcophagus (which is sculpted in her likeness).

  • GM Note: The flowers were left by Renaer.

PORTRAIT ON THE CEILING: A faded, chipped portrait of Lord Anri adorns the the plaster ceiling. He is identified in the portrait with a labeled banner. Fresh script around the perimeter of the painting reads, in four languages, “The beauty of our age, in death, is watched over by the spirits of her ancestors.”

  • DC 14 Intelligence (History): The portrait was actually added to the crypt several centuries after Lord Anri’s time. In the portrait, he is wearing an alexandrite-tipped pin and is holding a distinctive dwarven compass in his left hand. (DC 17: These are symbols of the Maroon Brotherhood, an obscure fraternal order that was once active in Waterdeep but not longer exists.)
  • GM Note: Lord Anri was not a member of the Maroon Brotherhood; the painting was commissioned by the brotherhood and added the symbolism retroactively.

SECRET PASSAGE: A DC 15 Wisdom (Perception) test discovers that the southern wall of the crypt is false, disguising the staircase leading to the old crypts beneath the mausoleum.

THE OLD CRYPTS

See the map on p. 71 of Dragon Heist.

STAIRS DOWN: Sconces for torches are placed on the walls, but there are no torches within them. The airy is dry. There is a thick coating of dust, but a large amount of fairly recent traffic has disturbed it up and down the main hall.

  • DC 12 Intelligence (Investigation): The top step is scorched by a recent explosion. A DC 12 Intelligence (Arcana) check identifies this as the remains of a triggered glyph of warding. (GM Note: Triggered by the Cassalanter team that removed the Eye.)

AREA M2: One of the sconces has been ripped from the wall here and tossed to the floor.

  • DC 14 Intelligence (Investigation): The remnants of a glyph of warding can be found on the floor here. It’s been rendered inactive by someone blotting out several key strokes of the glyph.
  • Sconce: There was a secret compartment behind the sconce. It’s empty now. (GM Note: This is where Lord Neverember hid the Third Eye, which the Cassalanters then stole.)

TO THE VAULT: The collapsed eastern end of the tunnel is actually an illusion that conceals an intact archway filled with a heavy door of steel.

  • The Arch: The keystone of the arch is decorated to appear like a mountain with a purple alexandrite gemstone in the middle of it (a variation of Dumathoin’s holy symbol). The voussoir have various symbols carved in them in alternation with dwarven runes: A dwarven compass, a serpent’s forked tongue, a scarabaeus, a brain with two tentacles (Ilsensine’s holy symbol), a broken arrow (Laduguer’s holy symbol). (GM Note: These are all symbols of the Maroon Brotherhood.)
  • The Door: Obviously much more recent than the surrounding stonework (it was installed by Lord Dagult to provide some actual physical security for the vault), and has actually damaged some of the ancient symbols on the arch. It’s a 2-foot-thick vault door, with a DC 22 lock. There’s an alarm spell on the door, but it’s keyed to Lord Dagult and, assuming he’s still in Neverwinter, he’s too far away to get the ping.
  • Beyond the Door: A 10-foot-wide hallway that slopes down to the Vault (see Part 6C). A glyph of warding has been placed so that it triggers on anyone stepping through the door.

DESIGN NOTES

Pretty much everything I’m doing here is aimed at giving the conclusion of the campaign enough weight to feel meaningful. Exploring the mausoleums and their history isn’t a particularly meaty interaction, but it invests the player into a specific place with specific meaning before they crack open the Vault. It also provides a nice thematic loop with the beginning of the campaign, which started with the PCs rescuing Renaer Neverember and getting drawn into his family’s drama.

Go to Part 6C: The Vault

Archives

Recent Posts

Recent Comments

Copyright © The Alexandrian. All rights reserved.