The Alexandrian

Posts tagged ‘rpg scenarios’

More DM's Guild Capsule Reviews - Descent Into Avernus

Go to Part 1

As with our previous installment of these capsule reviews, my goal is to just give a very high overview of my thoughts/impressions of each book. These reviews were written as part of my survey of Descent Into Avernus-related material on the Dungeon Masters Guild while working on the Alexandrian Remix of the campaign. Unless otherwise noted, the material has not been playtested.

You may also want to review this Guide to Grades at the Alexandrian. The short version: My general philosophy is that 90% of everything is crap, and crap gets an F. I’m primarily interested in grading the 10% of the pile that’s potentially worth your time. Anything from A+ to C- is, honestly, worth checking out if the material sounds interesting to you. If I give something a D it’s pretty shaky. F, in my opinion, should be avoided entirely.


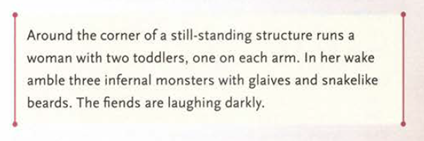
WARLORDS OF AVERNUS: This supplement caught my attention particularly because I’m hoping to beef up the warlords of Avernus (we have title!), and it delivers quite nicely with four new warlords with very cool concepts supported by a full suite of stat blocks. I would have perhaps liked just a touch Warlords of Avernus - Rodrigo Kuertenmore flavor (more fully drawn personalities for the gang members in addition to those given for the warlords themselves), but Rodrigo Kuerten has presented a really great, tight package with high utility. Warlords of Avernus is very much worth $2.

  • Grade: B-

BALDUR’S GATE – CITY ENCOUNTERS: When I was running Dragon Heist, I got a huge amount of quality play from Waterdeep: City Encounters (lead design by Will Doyle). That book contains 75 different encounter types, most of which have 3-6 variations, and a random table that splits them up across the different neighborhoods of the city. Borrowing a technique I brainstormed while writing Thinking About Urbancrawls, whenever the PCs went somewhere in the city I would just roll a random encounter for the neighborhood they were going to. It filled the city with life.

So when I saw that there was a Baldur’s Gate: City Encounters book, I snapped it up right quick. Unfortunately, this book (lead design by Justice Arman and Anthony Joyce) is considerably less useful than the Waterdeep version. It includes two sets of encounters: Neighborhood Encounters and Tension Encounters.

The Neighborhood Encounters consist of one encounter for each neighborhood in the city, which is just enough, in my opinion, to not be particularly useful. If I sort of squint at it sideways I can sort of see how you could theoretically have a one-encounter-per-neighborhood structure where the first time PCs enter or pass through a neighborhood you’d use the encounter, which would establish the tone/environment of that neighborhood for the group. (But the encounters here don’t really do that.)

Baldur's Gate - City EncountersThe Tension Encounters are potentially more interesting: They present a five step scale modeling the current level of “tension” in the city and then support this scale with different encounters that can be had at each tension level. How the PCs choose to resolve the encounters can then affect whether the city tips more towards chaos or order!

Conceptually this sounds great, and could provide a great contrapuntal development as the PCs are pursuing their investigation and getting tangled up in Portyr politics. But there are significant problems in practice: First, the scale is supposedly between Order and Chaos, but the actual scale has Pandemonium on one side (with the Cult of the Dead Three performing blood sacrifices in the streets) and Martial Law on the other side (with a corrupted Flaming Fist declaring martial law and instituting pogroms while politicians are assassinated in the streets). It’s thematically incoherent, largely negating the whole point of the exercise.

Second, while promising a system by which the tension meter would change over time, the effort to provide such a system apparently ran aground, with the designers ultimately just throwing their hands up and saying “the DM decides what impact, if any, the encounters in aggregate had on the level of tension in Baldur’s Gate.”

Third, a lot of the tension encounters are kind of nonsensical. Like, there’s one where the PCs are walking down the street when Liara suddenly draws up next to them in a chariot, gives a speech declaring herself Grand Duke of Baldur’s Gate (not how that works), and then offers a ludicrously paltry 250 gp bounty to anybody in the crowd who assassinates any remaining dukes in town.

On that note, the biggest problem I have with the book is that many of the encounters aren’t encounters: They’re scenario hooks to much larger scenarios that the GM would then need to design. (Random encounters spawning unintended scenarios and digressions is a thing that can happen, but they shouldn’t be half-baked into the design.)

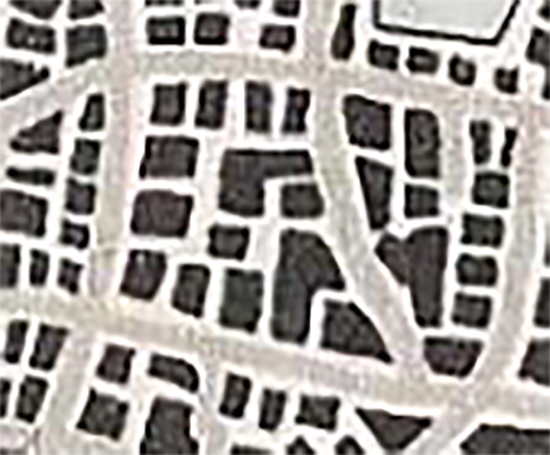
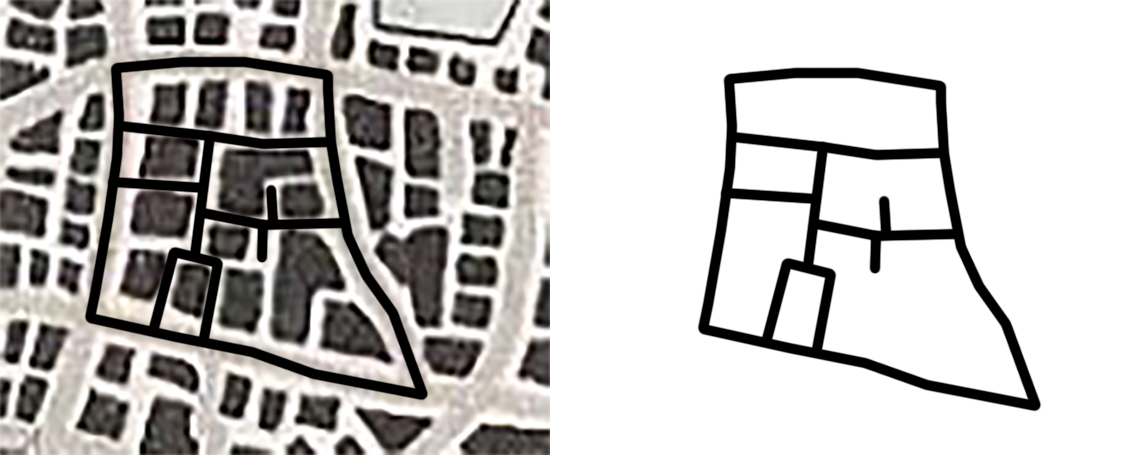
The book also includes a neighborhood map of Baldur’s Gate which, for reasons I don’t really understand, doesn’t match any other extant maps of Baldur’s Gate.

  • Grade: D

Baldur's Gate: Monster Loot - Descent Into AvernusMONSTER LOOT – DESCENT INTO AVERNUS: I snagged Monster Loot: Descent Into Avernus because it seemed to directly address something that I feel is, in fact, generally lacking in the 5th Edition adventures I’ve seen: Loot. In short, Anne Gregersen supplies a loot listing for every encounter in the campaign.

The book includes two major new mechanics for equipment: First, the option to harvest body parts from foes. Second, broken items that don’t work until you repair them. Unfortunately, it’s largely on the shoals of these two mechanics that the book runs aground.

The problem with the broken mechanic, primarily, is that it’s just massively overused. Virtually every single weapon and piece of armor listed has been broken. On the one hand, this is relatively easy to just ignore. On the other hand, it feels indicative of a certain skittishness in letting the PCs get “good loot” that’s kind of antithetical to what I wanted the book for.

With a book specifically dedicated to customizing loot lists for every NPC, I was really hoping to see some unusual, eclectic, and flavorful stuff. Instead, in almost every case, it’s just “the weapons they’re carrying, the armor they’re wearing, and it’s all broken.” Which, frankly, I don’t really need. That stuff is already in the stat block.

Where Monster Loot: Descent Into Avernus really unleashes, though, are those harvesting rules: You can skin flesh, yank teeth, and cut off tails that do all kinds of crazy stuff. I was actually really interested in this because I find hunter-based play interesting in my open tables and I’m always wishing I had better support for it. But in this specific instance I found the result slightly… distasteful.

The book says that “harvesting body parts, such as hide and flesh, from humanoid creatures is not something this document covers because we don’t encourage adventurers to tear into the bodies of people.” But it means that in the most literal sense of the humanoid monster type. The book happily provides you the details on skinning angels and all kinds of intelligent creatures (including bipedal intelligent creatures).

At just $2.95 I flirted with giving this one a D, but ultimately I think I’m not going to bother having this at the table when I run the campaign. So, unfortunately…

  • Grade: F

The Hellriders' KeepTHE HELLRIDERS’ KEEP: This supplement adds a new location to Elturel. Conceptually it’s great. Not only does making Elturel a richer location for the PCs to explore make a lot of sense, but Carter VanHuss very astutely notes that the published adventure doesn’t cleanly clue the PCs into the true history of the Hellriders and designs this scenario to remedy that. The descriptions of the environment are really good, with lots of little details that are not only specific, but also packed full of lore. Exploring this space will immersively draw players into the world.

Unfortunately, the book does get a little hamstrung by a couple of structural issues. First, the hook is just another, “NPC tells the PCs to go some place, the PCs go there” affair. To some extent, I can see how his hands were tied by the published campaign itself, but it feels like with a little extra effort several hooks could have been more organically woven into the campaign to make PCs aware of the Hellriders’ Keep.

The more significant problem is the lack of a map: The entire structure of the adventure is exploring the castle, but the two maps in the product are instead battlemaps. Individual areas are keyed and an effort is made to describe how they relate to each other, but without a map it’s all needlessly confusing.

Despite this, I think it’s worth grabbing a copy of this if you’re going to run Descent Into Avernus (even if you will end up needing to draw a map).

  • Grade: C

Monster Hunts: AvernusMONSTER HUNTS – AVERNUS: This book promised to be a bunch of plug ‘n play side quests for use with Descent Into Avernus. I thought this would be a slam dunk in terms of usefulness, providing all kinds of awesome content for fleshing out a hexcrawl of Avernus.

Unfortunately, not one of the one-page scenarios is actually set in Avernus. In this case, “for use with Descent Into Avernus” means that it uses the stat blocks from the appendices of Descent Into Avernus.

Ignoring the disappointing bait ‘n switch (which renders the book completely unusable for what I wanted it for), the scenarios themselves are also very poorly designed (so that I wouldn’t want to use them for anything): For example, most of the dungeon maps, instead of being keyed, are described in rambling, unfocused paragraphs. The text is frequently filled with prima facie nonsense (like a claim in the first scenario that it will take PCs forty minutes to walk two city blocks). And it’s almost impressive how many times they try to force a railroad on PCs even when they’re just exploring a simple dungeon.

The book also promises an “easy to use hunting system,” but I can find nothing of the sort. Instead, the majority of the scenarios lead off with some form of “make this skill check to find tracks or skip the rest of this adventure.”

  • Grade: F

Hellturel - James IntrocasoHELLTUREL: James Introcaso has really hit the nail on the head with Hellturel. This 32-page supplement presents four new locations for Elturel, nicely fleshing out the city for PCs who want to explore it. Not only are the locations well-designed, they are connected using node-based scenario design so that exploring one location will provide leads pointing to the others.

The only thing I would have liked to have seen would be some guidance for how clues could be added to the locations described in Descent Into Avernus in order to also link them to the locations in Hellturel. That creates a little bit of extra lifting. There are also some minor continuity glitches (for example, the first location says the Order of the Gauntlet has moved to the second location, but at the second location there’s only one member of the Order of the Gauntlet and, as far as I can tell, no indication of what happened to the rest of them) that probably needs to be cleaned up.

But, as I say, really good stuff. Recommended.

  • Grade: B-

More DMs Guild Capsule ReviewsGo to the Avernus Remix

Go to Table of Contents

These tools are designed to augment the streetcrawling scenario structure used in Part 5B of the Remix. Most of them are procedural content generators that will help you fill in details of the city as the PCs crawl through it.

RANDOM BUSINESSES

The Random Businesses table is not designed to generate every single building in the city. Instead, roll on the table once per street and use the result to contextualize the street as the PCs move down it (e.g., “You turn right at the corner. On the next street you see the remains of a goldsmith’s shop on the right. A fire has gutted it.”). You might interpret the result as a single notable business, or as characterizing the type of business done on the street (e.g., a street with several blacksmiths).

Make sure to record the results on your map, in case the PCs double back.

The table found here is a fairly crude tool. It most notably excludes businesses likely to be found in specific areas of the city (like the Docks) that the PCs aren’t starting out in. (You won’t find chandlers or fishermen here.) You could also improve it by:

  • Expanding the table to include more types of businesses.
  • Customizing the results by neighborhood.
  • Adjusting the results to more accurately model the likelihood of encountering different types of businesses.
  • Perhaps biasing the results of your next roll by the previous roll. (So that, for example, the tanneries are less likely to be crowded in right next to the perfumers.)

I recommend checking out Midkemia Press’ Cities or Chaosium’s Thieves’ World as premiere resources if you want more sophisticated tables while having someone else do the work for you.

d%Business
01-20No Businesses
21-25Baker
26-30Tavern/Inn
31-35Butcher
36-40Market
41-43Blacksmith
44-46Cartwright
47-49Public Bath
50-52Weaver
53-55Cobbler
56-58Dyer
59-61Fishmonger
62-64Potter
65-67Rope/Net-Maker
68-70Stable
71-72Stonecutter
73-74Miller
75-76Chiurgeon
77-78Bowyer/Fletcher
79-80Tannery
81-82Scribe/Notary
83-84Carpenter
85-86Glassblower
87-88Tinker
89Scholarium
90Alchemist
91Theater
92Painter/Sculptor
93Goldsmith/Silversmith
94Jeweler
95Spice Merchant
96Cartographer
97Perfumer
98Religious Chapel
99Distiller
00Moneylender

No Businesses: This usually means a purely residential street. It could also mean a green space of some kind.

Alternative: For a busier and more cosmopolitan feel, continue rolling on the table until you generate a “No Businesses” result.

BUILDING DAMAGE: Roll on the Building Damage table to determine the condition of a building. You can roll on a table whenever the PCs enter or inspect a particular building. You should also roll on the table when generating a street.

d8Building Damage
1-4No Damage
5-6Fire
7Looted
8Boarded Up / Fortified

When generating a street, you can additionally roll a d6 to determine if the damage generated on the Building Damage table applies to the specific business you generated, a separate building on the street, or if the entire street has been effected. (If the original building generation roll resulted in a residential street with no businesses, then any result of 1-5 means that a specific residence has been damaged.)

d6Extent of Damage
1-3Specific Business
4-5A residence on the street
6The entire street

Tip: I specifically designed these tables to use different types of dice. This makes it easy to generate an entire street in a single throw of the dice: Simply roll a d%, d8, and d6 simultaneously and then walk through the results using the appropriate die type for each table.

RANDOM FLOORPLANS

One of the challenges of running a streetcrawl is that the PCs may decide at any time to enter a random building. Here’s a quick method for generating simple floorplans on the fly.

ROLLING THE DICE: As with the street generator, this is a tablemat system. Take a handful of d4’s and roll them onto a sheet of paper. Most buildings are square, so you can just consider the edges of the paper to be the outer walls of the building.

The location where each die lands is a corner with a number of walls extending from that corner equal to the number rolled on the dice. The more dice you roll, the more complicated the interior of the building will be (and complexity generally equates to size). For simple cottages, a single d4 is often sufficient. Here’s an example using 3d4:

Random Floorplan - Rolling Dice

Tip: If a die rolls outside the “walls” of your building, you can ignore it, reroll it, or use it as an indicator of an irregularity in the otherwise square profile of your building. Whatever works.

After drawing your walls, you can remove the dice and add doors wherever it seems appropriate. For example:

Random Floor Plans - Adding Doors

I placed the doors here while imagining a residence (with a short entry hall leading from the front door and a master suite in the upper left corner; you can fill in the other rooms easily). But we could imagine randomly rolling a 77 on the Random Businesses table and then needing to generate the layout for a bowyer:

Random Floor Plan - Bowyer Doors

Here you can see how the same randomly generated walls can just as easily give us a shopfront with a door leading into a private residence at the back of the building. The master suite remains in the upper left, but here we find a bedroom with a large closet in the lower right. (Or maybe your imagination might make that a kitchen with attached larder.)

STAIR DICE: Roll a six-sided die as a d3 in addition to the intersection dice to determine the number of floors in the building. If there are multiple floors, where the die lands can be treated as the location of the staircase. If the raw number on the d6 is odd, then the building has a basement (included in the total number of floors). If it is even, then it does not.

You can increase the maximum number of floors, of course, by increasing the size of the die used and interpreting the results in the same way. (Rolling a d8 as a d4, a d10 as a d5, a d12 as a d6, and so forth.)

Rolling 2d3-1 produces a nice bell curve for the number of floors and a building with multiple stairs. (You can limit the number of buildings with multiple stairs by including multiple stairs only if the dice roll doubles, and otherwise placing the stairs at whichever die rolled higher.)

Rolling 2d3-2 (min. 1) produces the homes found in a mid-20th century American suburb if you assume there’s always a basement.

RANDOM NPCs

If you need a random NPC:

  1. Roll on the Random Businesses table to generate their profession.
  2. If you get a result of “No Businesses,” roll on the Other Jobs table below.
  3. Pull a name from the Elturian Names list.

Tip: This is, once again, a fairly crude tool. If you want the gold standard for this sort of thing, try to track down a copy of Central Casting: Heroes of Legend by Jennell Jaquays.

d20Other Jobs
1-4Farmer
5-7Servant
8-9Fisherman
10-11Street Vendor
12-13Beggar
14Sailor
15Soldier
16Spy
17Assassin
18Thief
19Courtier
20Lawyer

GENERATING A CRISIS: Roll on the NPC Crisis table below to see what type of crisis the NPC is facing (if any) due to Elturel’s fall into Hell. If the PCs run into an entire group of NPCs, you can probably just roll once to determine the entire group’s need.

d12Crisis
1-4No Current Crisis
5Food
6Water
7Injured
8Trapped
9Escort
10Under Attack
11-12Roll Again Twice

No Current Need: The NPC probably isn’t happy, but they have a place of safety and they’re well-supplied.

Food & Water: Self-explanatory.

Injured: The NPC has been injured by collapsing structures, fires, looters, devils, or some other form of misadventure.

Trapped: Most likely due to a building collapsing on or around them.

Escort: The NPC needs to get some place (a place of sanctuary, to rejoin their family, etc.) and wants the PCs to escort them there safely. If in doubt, use one of the locations in Part 5C (the NPC effectively becomes a hook for that location).

Under Attack: The NPC is currently being attacked (or hunted) by criminals, devils, or something else.

Roll Again Twice: I’d recommend against stacking this result.

Tip: Structurally, these crises are a way of drawing the PCs deeper into the city. The more need they see, the more important what they’re doing becomes. The more people they help, the more emotionally invested they become. And the act of solving these problems will force them to explore the city and draw them towards the major locations.

FRACTAL STREET LAYOUT

An advanced technique while streetcrawling is to treat the system as having fractal complexity.

By default, you can just think of the system as generating and navigating specific streets. But you could also use it to generate the “major streets” of a larger neighborhood. (For example, this could be useful when the PCs are navigating towards a Distant Goal, as described in Part 5B.) Within each of these “major blocks” you can imagine myriad side streets, and, in fact, you can drill in and generate those side streets by treating each major block as the boundaries of a locality.

For example, you might start by generating a street map that looks like this:

Fractal Street Generator - Major Blocks

You could then select one of those major blocks and generate the local side streets:

Fractal Street Generator - Side Streets

And you can take this even further, using the same system to generate footpaths, alleys, or even the outlines of specific buildings on an individual block. (The latter is a great way of getting non-standard building outlines that you can then use as a seed for random floor plans.) If you did that here, it might look like this:

Fractal Street Generator - Footpaths

When I demonstrate this system for new GMs, I’m sometimes told that this fractal approach isn’t realistic. “Cities don’t work like this,” one gentleman told me. If you’re feeling the same way reading this, then you might want to know that I pulled a fast one here. Although these are street layouts which could be trivially created using the street generator, in this case I didn’t actually use the generator: I just traced the streets for Morningside Heights in Manhattan.

Fractal Street Generator - Morningside Heights

And you can see, looking at that map, how the other individual blocks have similar levels of detail hidden away inside of them. (And that’s even before we crack open the satellite view and street views and really start looking at the details.) This is a good reminder that the real world is always an endless font of inspiration, even for our most audaciously fantastical creations.

Go to the Avernus Remix

DM's Guild - Avernus Titles

Go to Table of Contents

The Dungeon Masters Guild is a truly fantastic resource for 5th Edition games, and when it comes to supporting published campaigns utterly unique in the annals of the RPG industry. The ability to draw from and tap directly into Wizards of the Coast’s books is incredibly powerful, and it means that every time a new campaign comes out a whole flood of well-developed and professionally presented support material springs up.

While working on Descent Into Avernus, I made it a point to periodically survey the available material on the Guild and grab anything that looked interesting or potentially useful. (This was made possible by both my Patreon patrons and also those who click on the DriveThruRPG affiliate links here at the Alexandrian. I wouldn’t be able to justify this cash outlay without you, and as a result you’re supporting not only me, but also these other creators!)

Many of these books I have already recommended or referenced in the Remix itself. But I thought it might be useful to also offer up some capsule reviews of the various books and other products I looked at.

A few quick provisos before we begin:

  • I’m generally aiming for a capsule review, which means just a very high overview of my thoughts/impressions of the book.
  • Unless otherwise noted, none of these reviews represent actually playtesting the material.
  • I was reading these books with a specific agenda: Can I use this in the Remix? I’ve not specifically reviewed or graded them with that in mind, but it’s probably worth your while to keep that bias in mind.

You may also want to review this Guide to Grades at the Alexandrian. The short version: My general philosophy is that 90% of everything is crap, and crap gets an F. I’m primarily interested in grading the 10% of the pile that’s potentially worth your time. Anything from A+ to C- is, honestly, worth checking out if the material sounds interesting to you. If I give something a D it’s pretty shaky. F, in my opinion, should be avoided entirely.


Elminster's Candlekeep CompanionELMINSTER’S CANDLEKEEP COMPANION: The Candlekeep Companion is great. Ed Greenwood himself does some writing on the book and served as a Creative Consultant, giving it a very impressive imprimatur. But where the Companion really excels is relentlessly keeping the focus on play-oriented material. In Part 4A: The Road to Candlekeep, I already described how the book’s delightful random tables can be used to instantly bring the PCs’ journey through the Castle of Tomes to life, and really the whole book is like that. It is constantly about what the PCs can do (or will want to do) in Candlekeep, what the DM needs to do to run those things at the table, and a nice set of tools to empower the DM while they’re doing it.

M.T. Black presents a “Director’s Cut” of the Candlekeep chapter from Descent Into Avernus that was actually what got me excited about buying the book, but I was ultimately underwhelmed by it. The scenario ends up just being a bunch of NPCs dragging the PCs around by the nose to little effect. There are a couple of ideas here (using the Prophecies of Alaundo to push the PCs towards Avernus and using the original gateway used for the Charge of the Hellriders to reach Avernus), but they both need a bit of TLC.

The book is rounded out with some PC character options that look very interesting to me (albeit with maybe a few too many dissociated divination mechanics for my taste) and a rich selection of original spells and magic items that just beg to be used ASAP.

Also of note is the absolutely gorgeous poster map of the castle by Marco Bernardini. The book is probably worth buying for this poster map all by itself, and I’ll almost certainly be hanging a copy of it on my wall when the PCs head to Candlekeep.

  • Grade: B

Shield of the Hidden Lord - M.T. BlackSHIELD OF THE HIDDEN LORD: Written by M.T. Black, one of the co-authors of Descent Into Avernus, Shield of the Hidden Lord tweaks the continuity so that the Vanthampurs are still looking for the Shield. Following leads from Vanthampur Villa, the PCs can go racing to an abandoned temple beneath Hhune Villa and grab the shield first. I don’t really grok this hook: Since the PCs don’t find out about the Shield until the Villa, they won’t go looking for it until after the Villa… which mean the Vanthampurs have probably been eliminated and there’s no urgency in their search for the Shield. It would make a lot more sense, in my opinion, to seed the clues into the Dungeon of the Dead Three and then have the PCs race the Vanthampurs to get the Shield. (This would even allow you to add a Vanthampur delving team to the adventure.)

The design of the sealed temple is pretty good. The key is filled with a lot of evocative ideas. But it can be tricky to do a dungeon that’s been sealed up for a hundred years, and this unfortunately becomes clear as the adventure becomes overly dependent on creatures who have, totally coincidentally, all managed to accidentally stumble into the place within the last few weeks just before the PCs arrive.

I really don’t like the fact that the maps are only located as separate files (and not included in the PDF layout), but including versions both with and without numbers gets two huge thumbs up from me. (Hard to believe in an era of virtual tabletops people are still getting this wrong.)

Since the Remix gives the Shield of the Hidden Lord a different history, you’d obviously have some continuity issues here. With a little elbow grease (and some problem-solving) you could swap out the Shield in this adventure for the Tiamat relics.

  • Grade: D

Baldur's Gate: The Fall of ElturelBALDUR’S GATE – THE FALL OF ELTUREL: The Fall of Elturel provides an alternative starting point for either Descent Into Avernus or Tyranny of Dragons. Conceptually it’s not bad: You start in Elturel, head out into the wilderness to deal with Tiamat cultists and Dead Three cultists, and go back to find Elturel a smoking crater in the ground. Along the way they stage several encounters with Elturgardians so that the PCs will have at least a light personal connection to the city’s inhabitants.

But there’s just nothing terribly exciting about the content, and the structure is problematic. The initial hook is weak and the adventure immediately saddles you with Reya Mantlemorn as a GMPC who constantly tells the PCs what they’re supposed to be doing at every single step (right down to prompting them for specific skill checks). If you’re going to use Reya later it makes sense to introduce her here, but doubling down on her as a railroading GMPC obviously doesn’t work.

It should also be noted that the adventure’s alternate hooks into Descent and Tyranny skip significant chunks of both campaigns. (The hook for Descent is only intended to skip a small chunk of material, but it missteps by immediately identifying Duke Vanthampur as being behind the Dead Three cultists, completely short-circuiting and/or deflating the whole first act.) These hooks are also completely incompatible with the Alexandrian Remix, so if you’re using the Remix I’d definitely skip this one.

  • Grade: D

Lulu's Guide to HollyphantsLULU’S GUIDE TO HOLLYPHANTS: Written by Kienna Shaw & Donathin Frye, I already recommended Lulu’s Guide to Hollyphants in the Remix because it includes a playable PC hollyphant race that will let one of your players take up the role of Lulu. The rest of the book is a little thin (although it does have a good selection of hollyphant NPC stats, including an evil variant, so you can easily add more of them to your campaign). The interpretation of hollyphants is quite twee and full of sparkles, which may limit the utility for you.

  • Grade: D+

CHARACTER SHEET BY SHELBY ROSMYTH: Shelby Rosmyth designed a really nice Avernus-themed character sheet. I wouldn’t use it until the PCs actually head to Hell, but once there I think it will offer a really nice thematic feel at the table. The major drawback is the lack of equipment and spell list support, but the package does include a form-fillable PDF.

  • Grade: B-

Marisa's Blades - Justin M. ColeMARISA’S BLADES: Marisa’s Blades by Justin M. Cole came to my attention as being a tie-in for both Waterdeep: Dragon Heist and Descent Into Avernus, potentially serving as a bridge between those two campaigns. This turns out to not actually be the case, so the adventure was somewhat wrong-footed for me from the start. Cole does a very interesting job of taking elements from a lot of other DM’s Guild supplements and mixing them together into an original adventure (an approach which, in my opinion, enhances the value of both Marisa’s Blades and the other material). Unfortunately, the actual adventure itself is somewhat incoherent: Marisa’s brother has made a deal with a devil, so she arranges for their whole gang to be arrested by the PCs to “solve” this problem… only it’s not at all clear how it would solve anything. The tone is set early with one of the hooks: “Laeral Silverhand walks up to the party on the street.” That doesn’t quite work does it? Multiple hooks, though! That’s smart! Cole has a lot of potential, but this is, unfortunately, unusable.

  • Grade: F

Abyssal IncursionABYSSAL INCURSION: The basic concept of Abyssal Incursion is that Avernus is the front line of the Blood War; thus demonic armies should constantly be pressuring the defensive lines of the Styx and occasionally making deep raids onto the Avernian plains. Thus we have three such demonic incursions designed to be injected into an Avernus-based campaign. Where the supplement excels is Introcaso’s creativity: A gargantuan, demonic worm that serves as a living troop transport/tank. A war barge that carries maze-gates linked to the Abyss which can spit out demon strike forces onto the banks of the Styx.  These are fantastic concepts.

Where Abyssal Incursions comes up a bit short for me is its actual utility: Billed as a supplement for Descent Into Avernus (a campaign for 1st to 13th level characters), both Baphomet’s battle barge and Yeenoghu’s worm feature impossibly difficult demon armies. Despite this, they are both primarily (and almost exclusively) presented through the lens of combat. For example, the notes for roleplaying the CR 23 Baphomet (who is accompanied by a literal horde of demons and can summon even more three times per day) are: “Unless the characters find a way to gain the upper hand, the Horned King attacks them on sight.” and the story hooks include things like, “The characters want to kill … Baphomet.”

(And if the PCs do kill Baphomet, it causes the battle barge to immediately spit out three more demon hordes.)

This would be very useful for a higher level campaign in Avernus, however. (Or perhaps scenarios in which the PCs can gather a horde of their own to go demon hunting.) And, as of this writing, I’m planning to use the third incursion (a crashed elemental galleon from Eberron that’s crashed on the banks of the Styx) in my Avernian hexcrawl. So very much recommended.

  • Grade: B-

More DMs Guild Capsule ReviewsGo to the Avernus Remix

Burning Uden Church - Gert Jan Dergroot

Go to Table of Contents

We’re going to use a game structure called streetcrawling. You rarely want to track movement in an urban environment street by street (see The Art of Pacing), but there are occasions where the city is perilous, confusing, difficult, and/or treacherous enough that the PCs have to crawl through the streets (in much the same way that they might crawl through a dungeon or explore a hexcrawl). Lost in a post-apocalyptic city trapped in Hell definitely counts.

STEP 1 – SET GOAL: Establish the goal the PCs are trying to reach. This goal can be either specific (e.g., Helm’s Shieldhall) or generic (e.g., ‘someone who knows what’s going on’ or ‘a source of clean water’).

STEP 2 – GENERATE STREETS: Use the Street Generator (below) to determine the local street layout and the relationship between where the PCs are and where their goal is located.

STEP 3 – ORIENT: The PCs need to figure out how to go to where their goal is located. Options include:

  • Their goal can be spotted from a distance. (For example, if they look around for a high tower to climb, they’ll probably be able to spot one.)
  • They can ask the locals for directions.
  • They can attempt an appropriate skill check to make an educated guess.
  • They could use magic (like a locate object spell).
  • They know the city (or have a map) and they know where their goal is.

If they can’t figure out how to go to their goal, then their first goal is actually going some place where they CAN figure that out. Or they’re randomly wandering (see below) and just hoping to stumble across something that will point them in the right direction.

STEP 4 – RANDOM ENCOUNTER: Check for a random encounter (see below).

STEP 5 – ARRIVAL: The PCs arrive at their goal.

If their goal was figuring out a way to get their bearings, then this will likely conclude the streetcrawling and transition to pointcrawling (see Part 5C: Pointcrawl in Elturel).

Design Note: What if the players don’t make orienting themselves a priority? What if they want to achieve some other goal? That’s fine. Use the streetcrawl structure to resolve whatever goal or goals they set for themselves.

In the process of pursuing other goals, they may unintentionally get their bearings. (For example, one of them might fly up into the air for some completely unrelated reason and see the city spread out below them.) That’s great. An equally likely outcome is that they’ll get frustrated trying to navigate the city when they really don’t know where they’re going and eventually figure out that they need to do something to get their bearings.

STREET GENERATOR

If you have a highly detailed map of your city, you can just grab a chunk of the streets depicted on the map and use those for your crawl. If you don’t have a map of the city or if that map is not particularly detailed, however, you can use this simple system to generate local street maps. (For a lengthier discussion of this, check out Random GM Tip: Visualizing City Block Maps.)

In the case of Elturel, the maps we have for the city arguably straddle the line between these two types of depiction. For example, look at this chunk of map:

Elturel - Locality Map

You might look at that and clearly see streets, like this:

Elturel Locality Map

If you do, great. You can just sketch those local streets out on a sheet of paper and use that for your crawl.

For the sake of argument, however, I’m going to instead focus on the shape of the major streets which define the borders of this particular locality and sketch that onto a sheet of paper:

Eltural Locality Map

If you don’t have a city map at all to base these outlines on, you can either arbitrarily sketch the major streets bordering the area or just treat the edges of the current sheet of paper as the locality’s edge.

ROLLING THE DICE: This is a tablemat system, so you are now going to take a handful of street dice and location dice and roll them directly onto the sheet of paper. The locations where these dice land on the paper are as important (or more important) than the numbers they roll. If a die rolls off the paper, you can either re-roll it or ignore it.

Tip: You generally want to have the dice spread out across the available space, not clustered together.

STREET DICE: Take an arbitrary number of d4’s to be street dice. The larger the number of street dice, the larger the number of streets and the more convoluted the street plan you’ll generate. I’ve generally found that rolling 4d4 produces a good result.

The location where each die lands is an intersection and the number of streets attached to that intersection is equal to the number rolled on the dice.

LOCATION DICE: Location dice are d10’s. You roll a number of location dice equal to the number of locations where the PCs’ goal can be achieved in the current locality. If this is the beginning of the streetcrawl, add an additional location die (and the lowest die rolled will be the PCs’ starting location).

Tip: Streets can curve. Adding a curve when one is necessary for a street to intersect with a location die is a good prompt for adding a little variety to your street map.

For example, using the block outline from above to start our streetcrawl, we’re going to roll four street dice and two location dice (one for a goal location and one for the PCs’ starting location):

Elturel Locality Map - With Dice Rolls

That’s not the only set of streets that could have been generated from that particular die roll. There is no “right answer.” The point is to be able to very quickly generate local street maps during the session by tossing some dice on the table and sketching out a few lines.

Here’s what the final locality map looks like with the dice swept aside (and surrounding streets added for context):

Elturel Locality Map - Streetcrawl Version

RANDOM ENCOUNTERS

If you’re familiar with using random encounters in dungeons, you’ll want to make a mental adjustment for streetcrawls for several reasons:

  • Cities are usually filled with a lot more activity and encounters should be more common.
  • Navigational choices in the city are usually trivial or random, which makes them less inherently interesting.
  • There are no rooms keyed with interesting content in a streetcrawl; the encounters need to carry more of the weight.

For example, in an old school dungeon a random encounter often happens 1 in 6 times per check. In a streetcrawl, you might want to have encounters 1 in 4, 1 in 2, or even 2 in 3 times.

Tip: For a short, simple streetcrawl like the one we’re most likely using for the PCs’ arrival in Elturel, I’d recommend just automatically slotting in an encounter. You might actually want to take the initial “woman running from devils” encounter (DEVILS!) and use it as the encounter for their initial streetcrawling move.

ELTUREL RANDOM ENCOUNTERS: I’m going to discuss the random encounters we’ll be using for Elturel in more detail in Part 5C.

DISTANT GOALS

If the goal the PCs are trying to reach is not local, then the immediate goal is actually ‘move one chunk of city closer to the goal.’ When generating streets, only roll one location die to determine the PCs’ starting location. Their immediate goal can obviously be achieved by reaching the appropriate edge of the current crawl map. (You’ll want to determine the number of chunks necessary to reach the locality of their goal.)

Note: When dealing with distant goals it will often be more appropriate to exit the streetcrawling structure while the PCs travel to the general vicinity of their goal and then resume crawling. (Imagine the PCs in a city they’re familiar with. If they’re in Oldtown and know that Old Tom is hiding somewhere down by the Docks, they don’t need to crawl their way across the whole city: They can just go to the Docks and then start crawling to find Old Tom.) In the case of Elturel, the point where this would become appropriate is likely also the point where we’ll be switching to a pointcrawl structure (see Part 5C). But it is possible for the PCs to strike out before getting their bearings (for example, they might head straight towards the High Hall after spotting it towering above the city).

CRAWLING WITHOUT A GOAL

If the PCs don’t have a goal:

STEP 1: Use the street generator to determine the local street layout, rolling a location die only to determine the PCs’ starting location.

STEP 2: The PCs choose a direction to walk. (Presumably at random.)

STEP 3: Check for a random encounter on each street they walk down.

If they reach the edge of the local map, use the street generator again to extend the map and continue crawling.

Generally speaking, this style of play should not persist for long. Context should prompt the PCs to begin setting goals. (Even if they’re just “wandering around looking for something to do,” the random encounters or street descriptions should eventually give them something to do or become interested in pursuing.)

RANDOM WANDERING

If the PCs are hoping to find something but have no idea where it might be or how they might get there, they are randomly wandering. Follow the same procedure as crawling without a goal, but roll location dice normally to determine the location(s) of what they’re looking for.

At any time, of course, they may be able to figure out how to orient themselves (running into an NPC they can ask for directions, etc.), at which point they’ll no longer be randomly wandering.

Note: Wandering randomly is generally a terrible way of finding a specific location. (Since you can easily go in completely the wrong direction and never find it.) It works better if they’re looking for a generic type of thing, since even if they miss one such thing they can stumble across another. (For example, there are any number of hardware stores you could hit up for supplies during a zombie apocalypse.)

WANDERING THE CITY: Some goals can be found almost anywhere you look in a city (e.g., someone to talk to). Other goals might be rare or found in only certain locations of the city. As the GM you can arbitrarily decide this based on your understanding and knowledge of the city (there’s one local alchemist nearby; the alchemists are over in the Dewberry neighborhood and they’ll have to crawl there; etc.). Alternatively, you can make a ruling for how likely they are to find the thing they’re looking for in a particular chunk of city and then roll to randomly determine if there’s one local to them. Examples include:

  • 1 in 100 chance (for perhaps a specific location that they know is somewhere in the city, but have no idea where or if they’re even close to it).
  • 1 in 6 chance (for something that is known to be “around here somewhere”; or that’s relatively rare in the city)
  • 1 in 4 chance (for something that’s fairly common in the city, like a public fountain)
  • 1d4-1 per locality (for something that can be found almost anywhere in the city, like bodegas in Manhattan)

And so forth.

CONCLUSION

I’ve dropped an entirely new scenario structure on you. That may be a lot to process, so let’s take a step back and do a quick recap on how this is likely to work out in play:

  • The PCs show up in Elturel.
  • They look around for a high place to get their bearings from.
  • You generate a local street map.
  • As they walk from their current location to the location of the tower they’ve spotted, you trigger the “woman running from devils” encounter (contextualizing the encounter based on the street map you’ve generated).
  • After that (likely a fight) scene, they continue on their way, reach the tower, climb the tower, look around (WE ARE FLOATING IN THE GODDAMN AIR!), receive the poster map, and transition to pointcrawling (see Part 5C).

That’s it.

So what’s the deal with the whole streetcrawling structure? Isn’t it overkill? Couldn’t we just prep a locality street map of the area where the PCs appear with the location of the tower indicated? Possibly. But the reason we want the structure is because this might NOT be the way it goes in play: Players are fickle and unpredictable generators of random chaos. As we’ve already discussed, they might go in any number of unexpected directions.

This structure can easily generate the likely outcome described above, but it can just as easily handle anything that the players choose to throw your way.

Without this kind of structure (either formal or informal), your only option would be to have a GMPC tell the PCs what to do. (And then get frustrated when they don’t.)

Go to Addendum: Streetcrawling Tools Part 5C-A: Pointcrawl in Elturel

Hellturel / Map Slice - Descent Into Avernus

Go to Table of Contents

The PCs are plane shifting into Elturel blind: They know the city has been sent to Hell, but they have no way of really knowing what the situation on the ground is (so to speak).

Let’s talk about the use of maps in RPGs. Actually, that’s too broad a topic. Let’s talk about the use of city maps in RPGs. Broadly speaking, there are two scenarios: First, you have diegetic maps. Like the map of pre-Fall Elturel that I mentioned the PCs might want to grab in Part 4C, diegetic maps are those actually possessed by the characters. They can be:

  • Not represented in the real world. (The map is something your character possesses and references, presumably to some effect, but you, as the player, cannot see it.)
  • Given as a prop in the real world which attempts to accurately represent exactly what the map would look like to your character.
  • Given as a prop in the real world which is analogous to what your character would see, but not the same thing they’re actually looking at.

In practice, this is more of a spectrum than distinct categories. For example, even Thror’s Map from The Hobbit ultimately makes concessions to the reader by being an English “translation” of the diegetic map:

Thror's Map - The Hobbit (J.R.R. Tolkien)

Second, there are non-diegetic maps. These are maps which the players can see, but not their characters. For example, when I was running Dragon Heist I put a huge map of Waterdeep up on the wall. This didn’t represent a map that the characters were carrying around with them; it was a reference that existed purely in the physical game space (along with a Harptos calendar and a map of Faerûn).

Non-diegetic maps may represent character knowledge (i.e., the map they have in their head). But they can also simply be a concession for easy reference. In much the same manner that handing the players a picture of an NPC can be the quickest way to distinguish them (even though their characters don’t have a pocket portrait of them in hand), so, too, have I found that the most efficient way to conjure up a cross-town trek in the minds of the players is to simply point the laser pointer at the poster map on the wall and trace the route with brief descriptions.

Which, finally, brings us to the poster map of Hellturel included in Descent Into Avernus. When should you give this map to the players?

ARRIVING IN ELTUREL

First, a brief digression. By and large, we are not going to be changing the initial beats of what happens in Elturel:

  • The PCs arrive.
  • They get a first impression of the city.
  • The person who brought them to Avernus (probably Traxigor) panics and abandons them.
  • A woman with two toddlers comes running around the corner, pursued by a couple of bearded devils.

But we are going to finesse them a bit.

Let’s start with this chunk of boxed text from the book:

A hot, stinging air assaults your senses. The city street in which you stand is lined with buildings that are crumbling, if not already collapsed. The ground shudders beneath your feet. In the red, smoky sky, a 400-foot-diamater sphere of darkness discharges strokes of bluish-white lightning that strike the city at irregular intervals. Perched atop a distant bluff, overlooking the rest of the city, is a crumbled fortress. Traxigor gazes up at the black orb nervously, utters a few arcane syllables, and disappears in the blink of an eye.

When looking at a BIG MOMENT like this, it can be tempting as a GM to just pile the whole thing up on the players. That can work, but I’ve found that it’s often more effective to break the BIG MOMENT into its distinct parts — each major detail, each revelation, each meaningful moment — and then space them out (even if only a little).

This is partly about pacing, but it’s also about slowly building up a mental image for the players over time. By layering in additional details sequentially over time, in my experience, it’s easier for the players to really immerse into the environment. You get more buy-in.

I’ve been doing this long enough that I kind of do this instinctively. But in breaking down the arrival in Elturel, I identified these moments:

  • Arriving in the street. Hot air. Crumbling buildings. The sky of Hell and the transformed Companion above you.
  • Traxigor is nervous.
  • Spotting the High Hall on a distant bluff.
  • Huge clouds of smoke to the east; the city is on fire.
  • DEVILS!
  • Traxigor panics and flees.
  • The first earthquake.
  • WE ARE FLOATING IN THE GODDAMN AIR!

(That last beat probably happens much later. We’ll come back to it.)

Note that there’s nothing sacred about this sequence. For example, you could easily rearrange and remix the middle beats:

  • Spotting the High Hall on a distant bluff.
  • DISTANT EXPLOSION! to the east. There’s huge clouds of smoke. The city is on fire. Traxigor panics and flees.
  • DEVILS!

And in actual play the players could easily shift these things around. For example, if they immediately look up into the sky and try to get their bearings you can immediately mention them seeing the High Hall and the huge clouds of smoke to the east before mentioning Traxigor getting nervous or triggering the distant explosion. The basic idea, in fact, is to give the players at least a couple of beats to react to what’s happening.

This might be even clearer if we look at the next block of boxed text (which actually happens in the middle of this sequence):

Around the corner of a still-standing structure runs a woman with two toddlers, one on each arm. In her wake amble three infernal monsters with glaives and snakelike beards. The fiends are laughing darkly.

Although all glommed up as one moment here, imagine it lightly restructured as:

  • You hear a scream from around the corner.
  • [Players have a chance to quickly declare one thing they do in response.]
  • A woman with two toddlers runs around the corner.
  • [Players have another chance to quickly declare their response to this. Maybe the woman can shout out something to them in response.]
  • Devils come around the corner.
  • [Ask the players to roll for initiative.]
  • Traxigor panics and flees.

I think you can see how this draws the players into the scene: By the time the devils actually show up, they’re already involved and invested in the actions that are playing out.

Here’s the key thing: When the PCs arrive in Elturel they are confused, disoriented, and need to get their bearings. Traxigor abandoning them should escalate that feeling, isolating and trapping them. They should feel simultaneously claustrophobic and overwhelmed by the vast unknown which surrounds them.

The take-away here is that simply whipping out the Hellturel map as soon as they arrive would cause most or all of these distinct moments to collapse into each other, simultaneously undercutting the emotional tension of the situation.

GETTING THEIR BEARINGS

So when should they get the Hellturel map?

First, this is obviously a non-diegetic map. (Nobody is doing cartographical surveys in the middle of the apocalypse.) Second, we’ve framed the PCs into a situation where they’re effectively lost and need to get their bearings. So the real question is: What is the meaning of the map? And the meaning of the map is that the PCs have gotten their bearings.

So when the PCs have gotten their bearings, you should give the players the map.

How can they do that? Well, I can think of a few options (and your players might come up with something else):

  • They could seek out a tall building and climb to its top, allowing them to look out over the city.
  • They could use magic to similar effect (a clairvoyance spell, for example).
  • They could question NPCs in Elturel. (The initial woman they run into is clueless about the wider state of the city, but others might be well-informed enough to give them a briefing on the current situation.)
  • They could use their diegetic map of Elturel (if they have one) to attempt to figure out where they are in the city.

What constitutes enough knowledge for them to be considered to have gotten their bearings? Well, it probably depends on their approach. On the one hand, we want to look at the type of information the map is giving them: Have they gotten that information in-character? On the other hand, while the map does contain information on every single block in the city, it’s overkill to withhold the map until they’ve somehow gained that block-by-block knowledge.

What I would do is look at the key revelation: Remember how “WE ARE FLOATING IN THE GODDAMNED AIR!” was the final moment we identified above? Well, the map is going to reveal that. So we want to make sure that the characters have experienced that moment before revealing the map. (And that could happen by them climbing a building and seeing out over the edge of the city, being told the situation by an NPC, etc.) That moment might be simultaneous with them getting their bearings, or it might happen before they get their bearings (so they don’t get the map until later) depending on how it plays out.

Go to Part 5B-B: Streetcrawl in Elturel

Archives

Recent Posts

Recent Comments

Copyright © The Alexandrian. All rights reserved.