Staff Location
Vladaam Guard Area 1
1d3 Hostesses + Bartender Area 2/3
Peacock (Vladaam Advanced Guard) Area 3
Cook Area 4
Vladaam Advanced Guard Area 6
Vladaam Advanced Guard Area 9
1d4 Hostesses Area 10
2 Hostesses Area 11
Vladaam Mage + Journeyman Alchemist Area 14 (75%)
Den Master Corellius1 Area 14 (75%)
1d3 Hostesses Each room on 2nd Floor
2 Vladaam Guards Patrolling 2nd Floor
1 Carries key for the safe in Area 14.
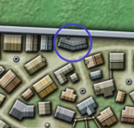
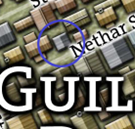
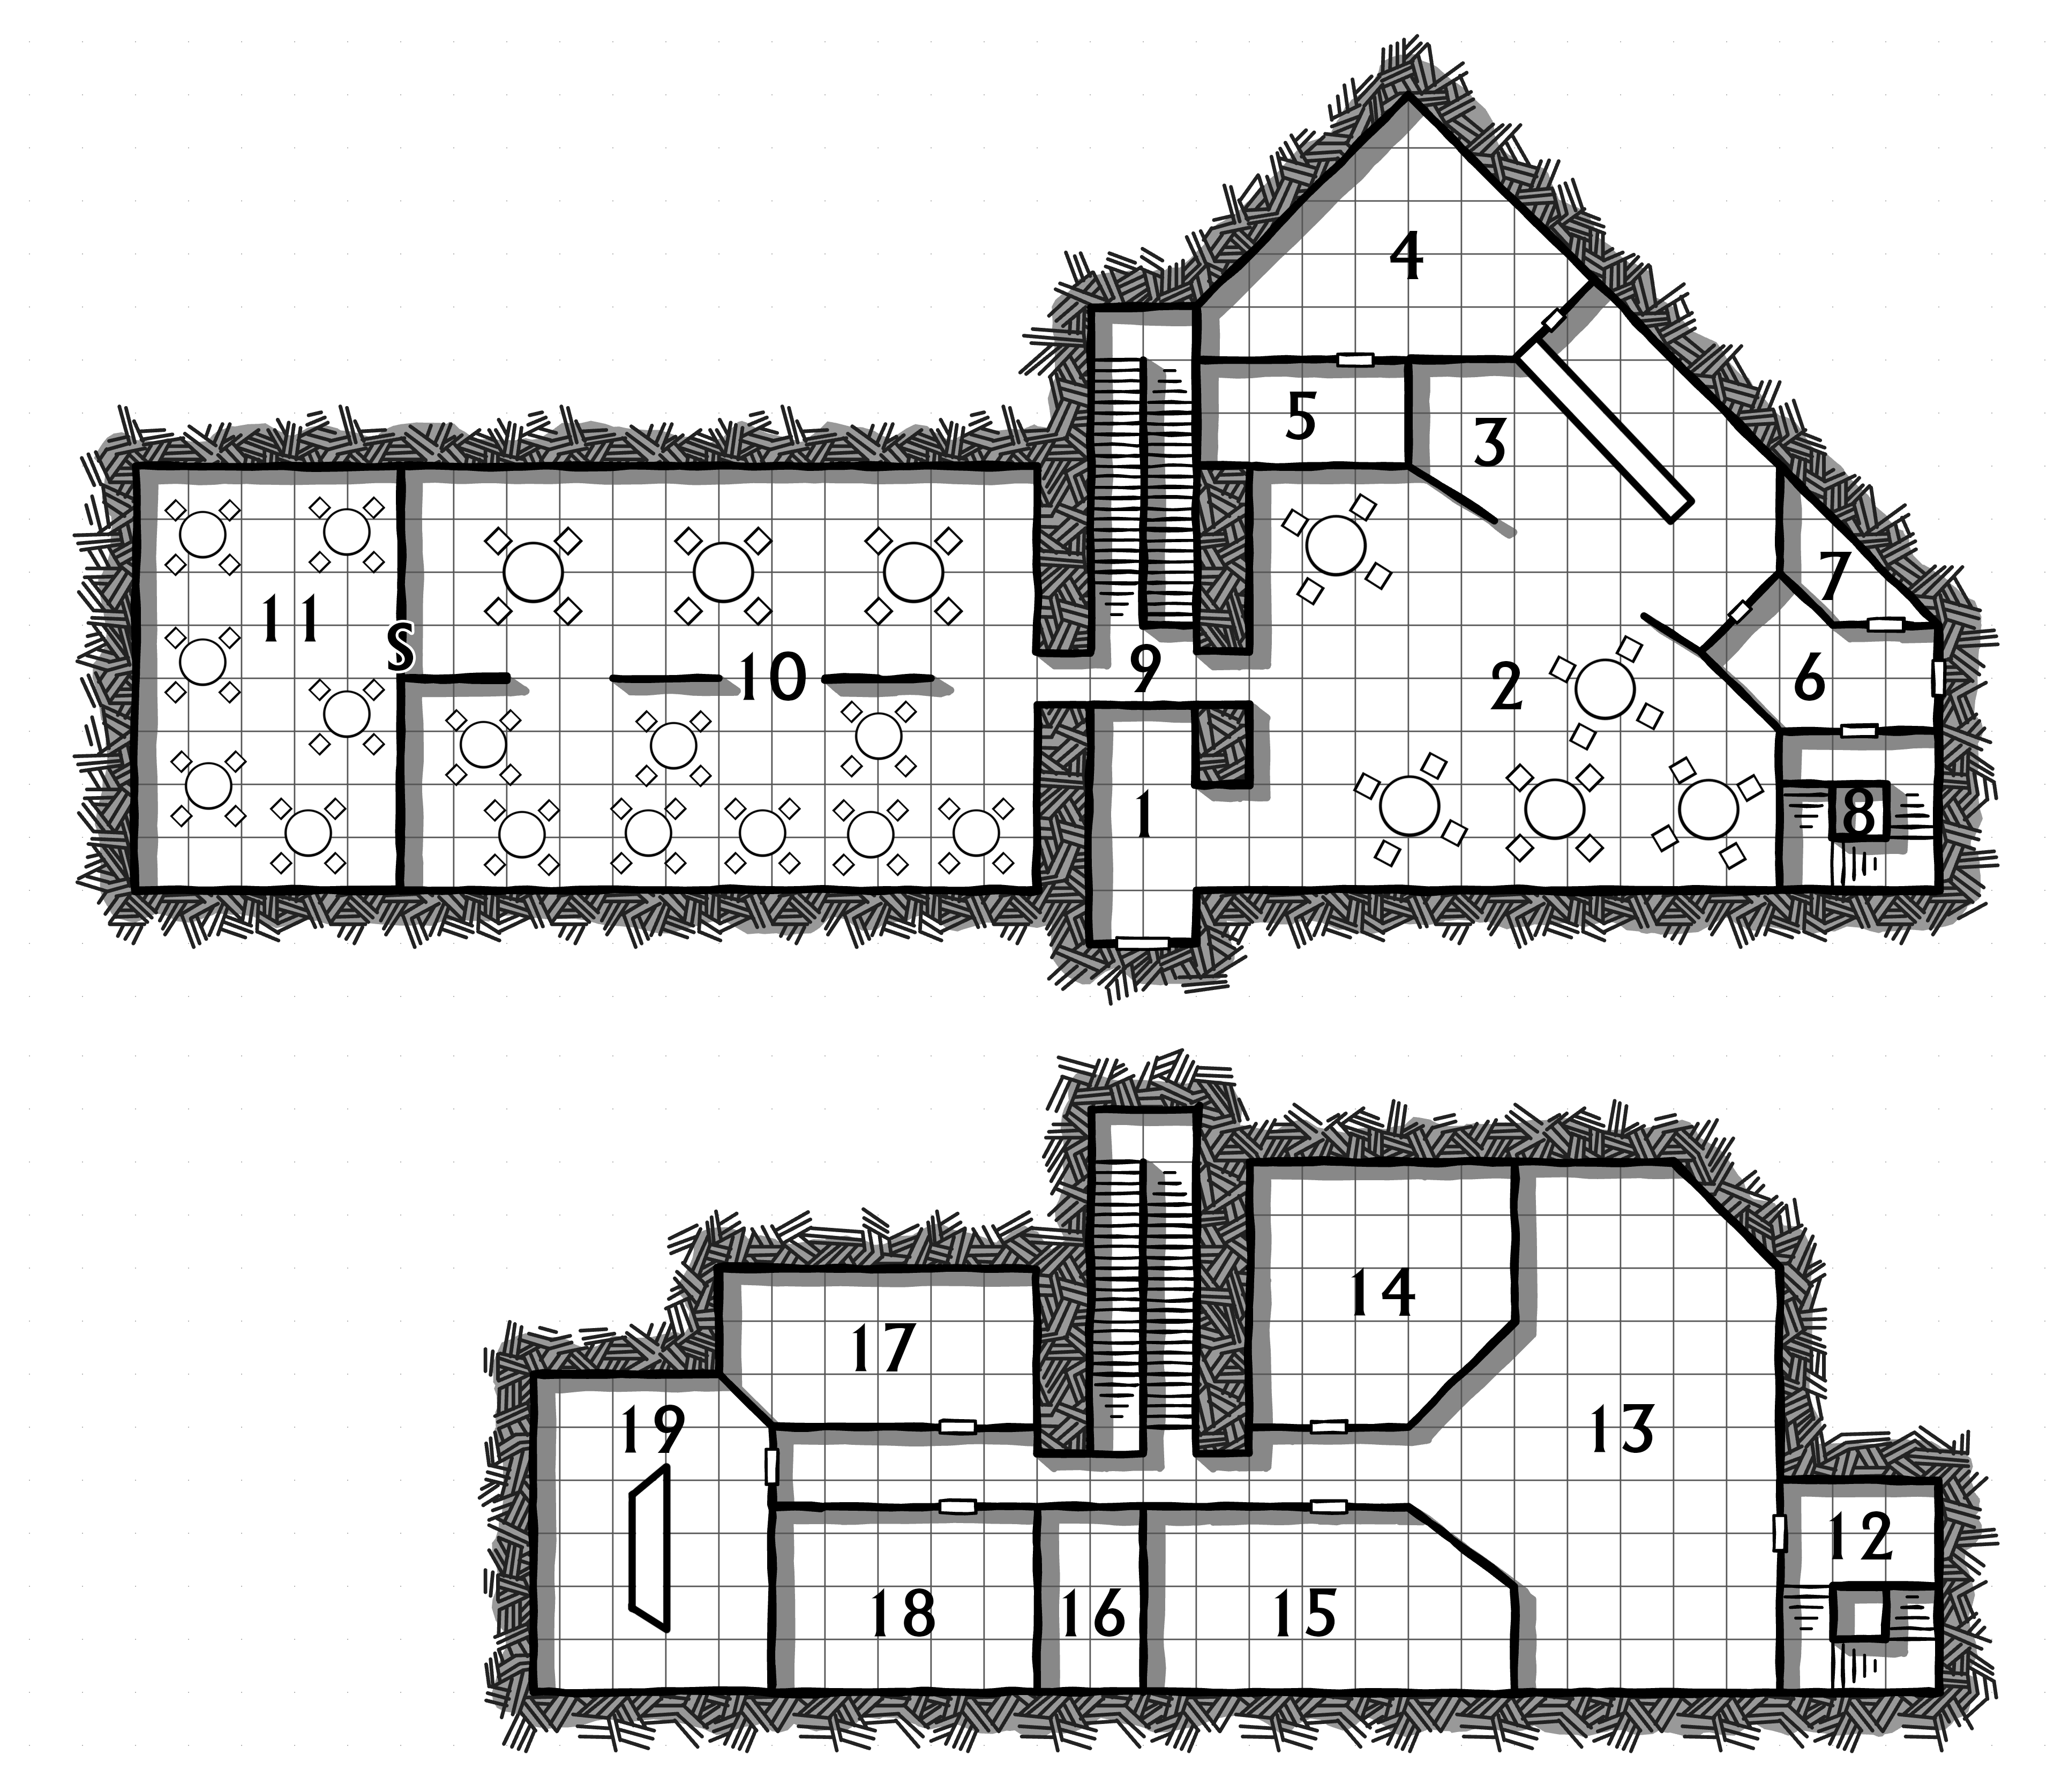
Curse Den – Rivergate
Outer Ring Row – E2
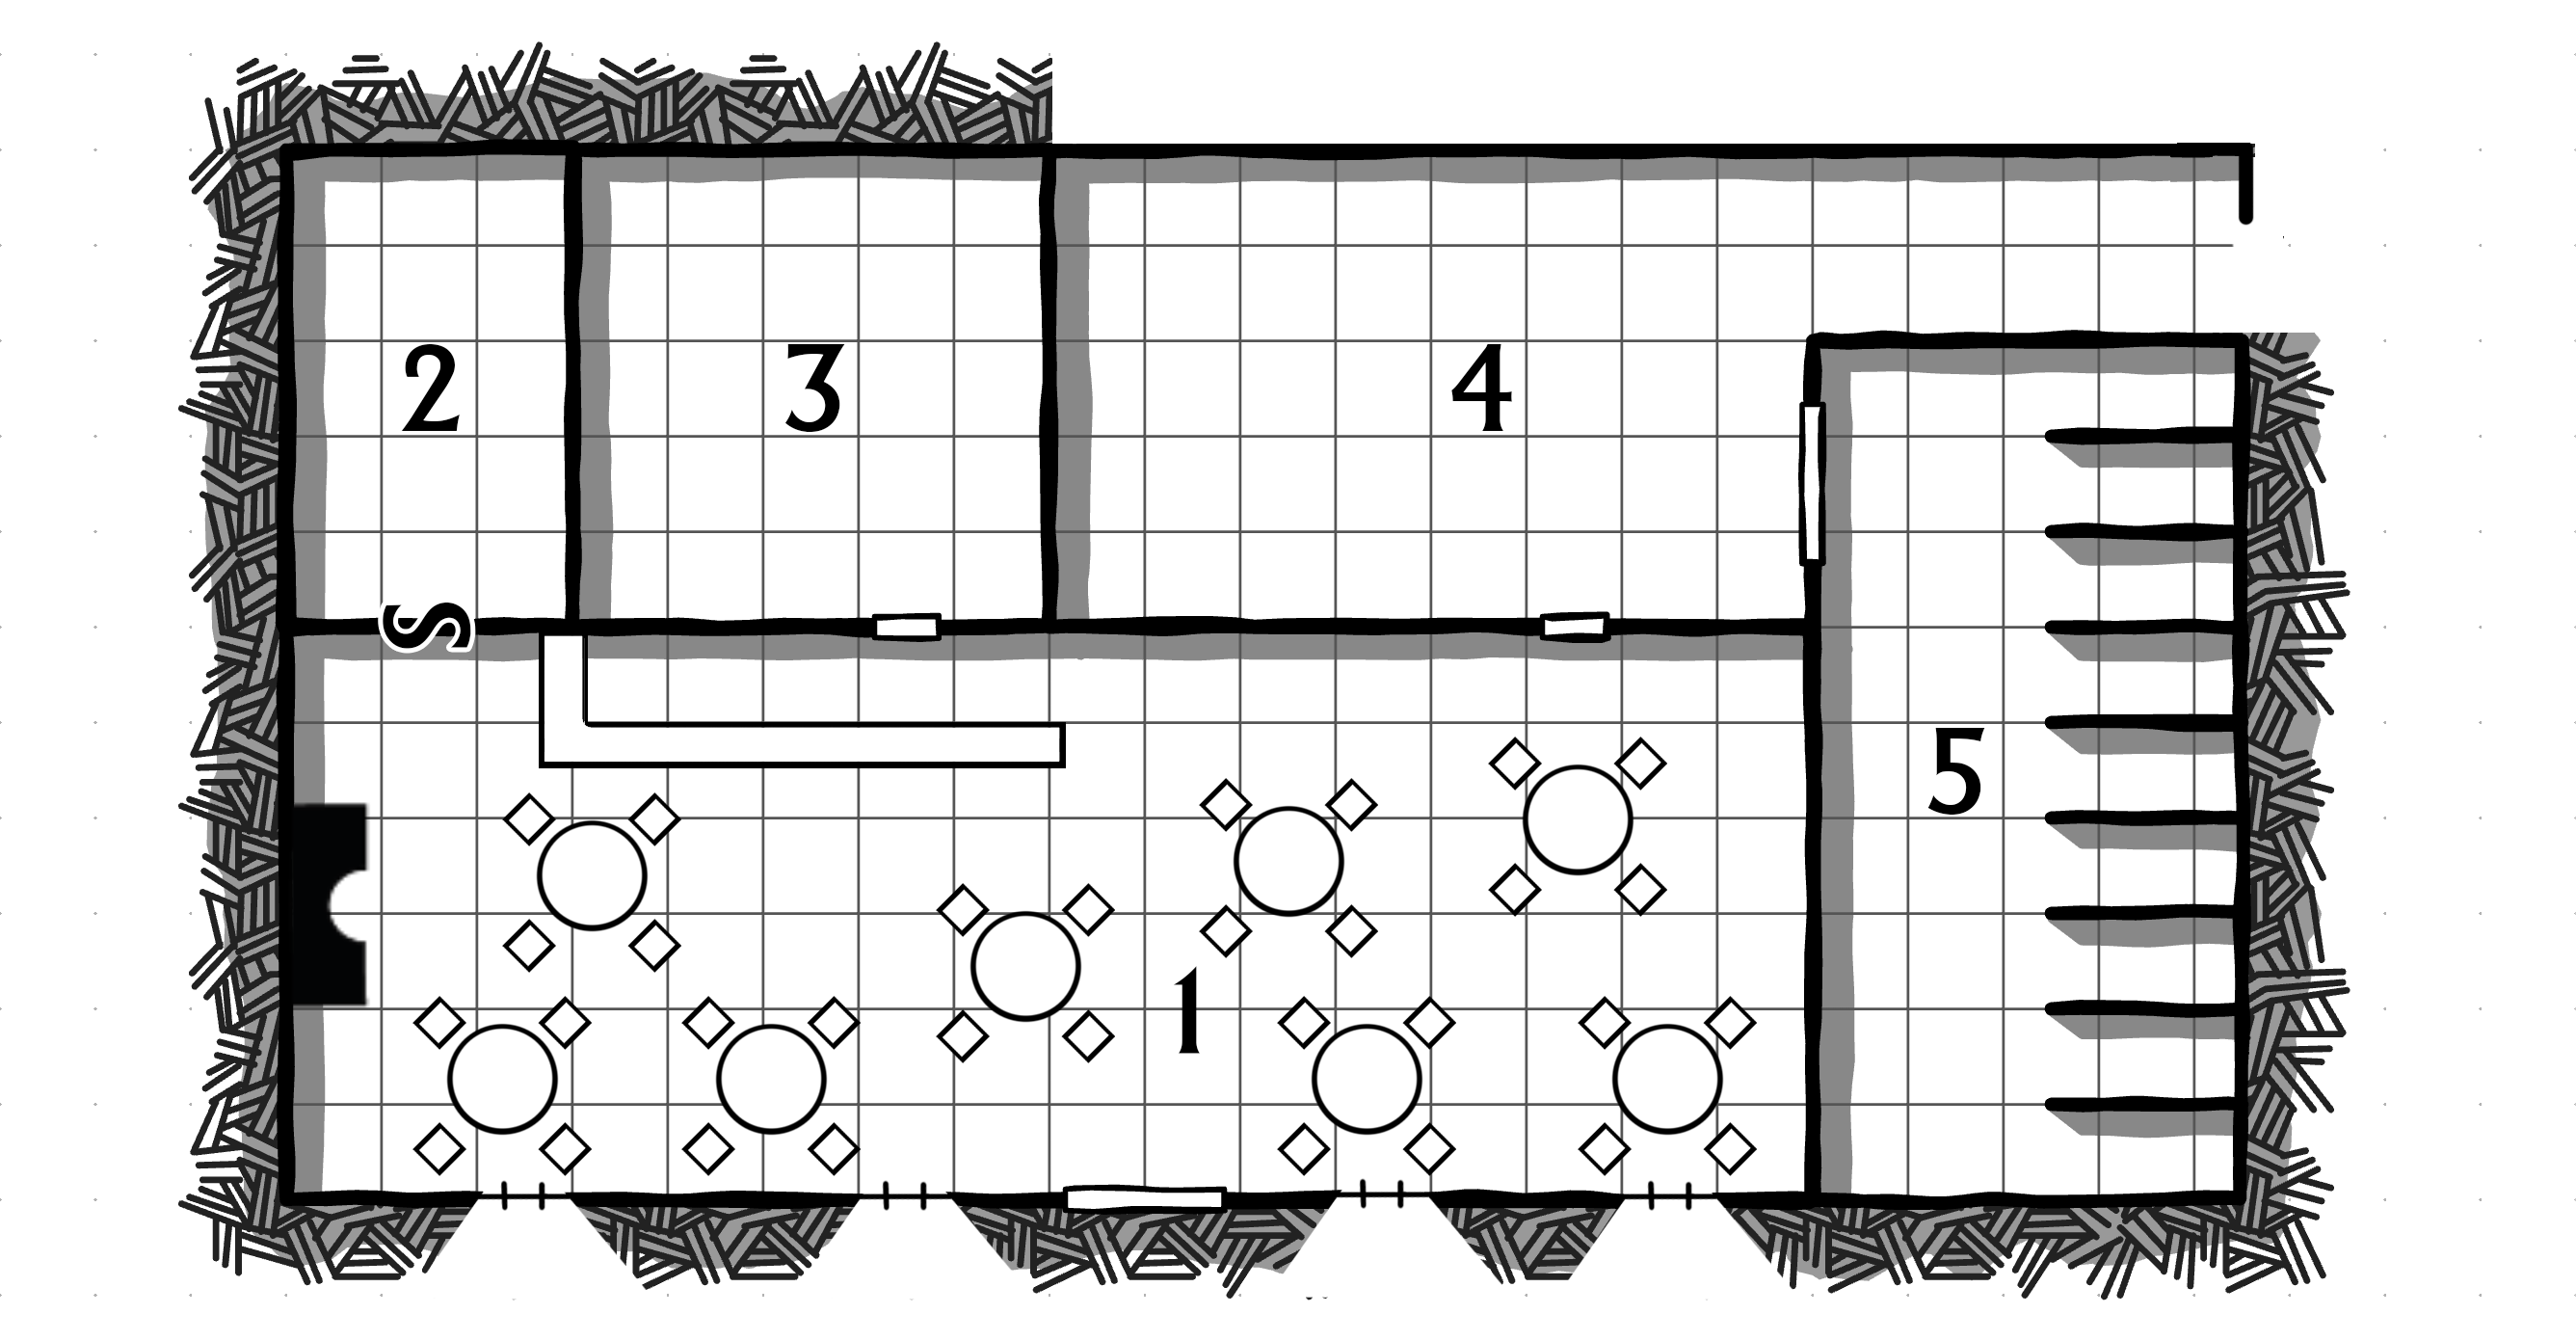
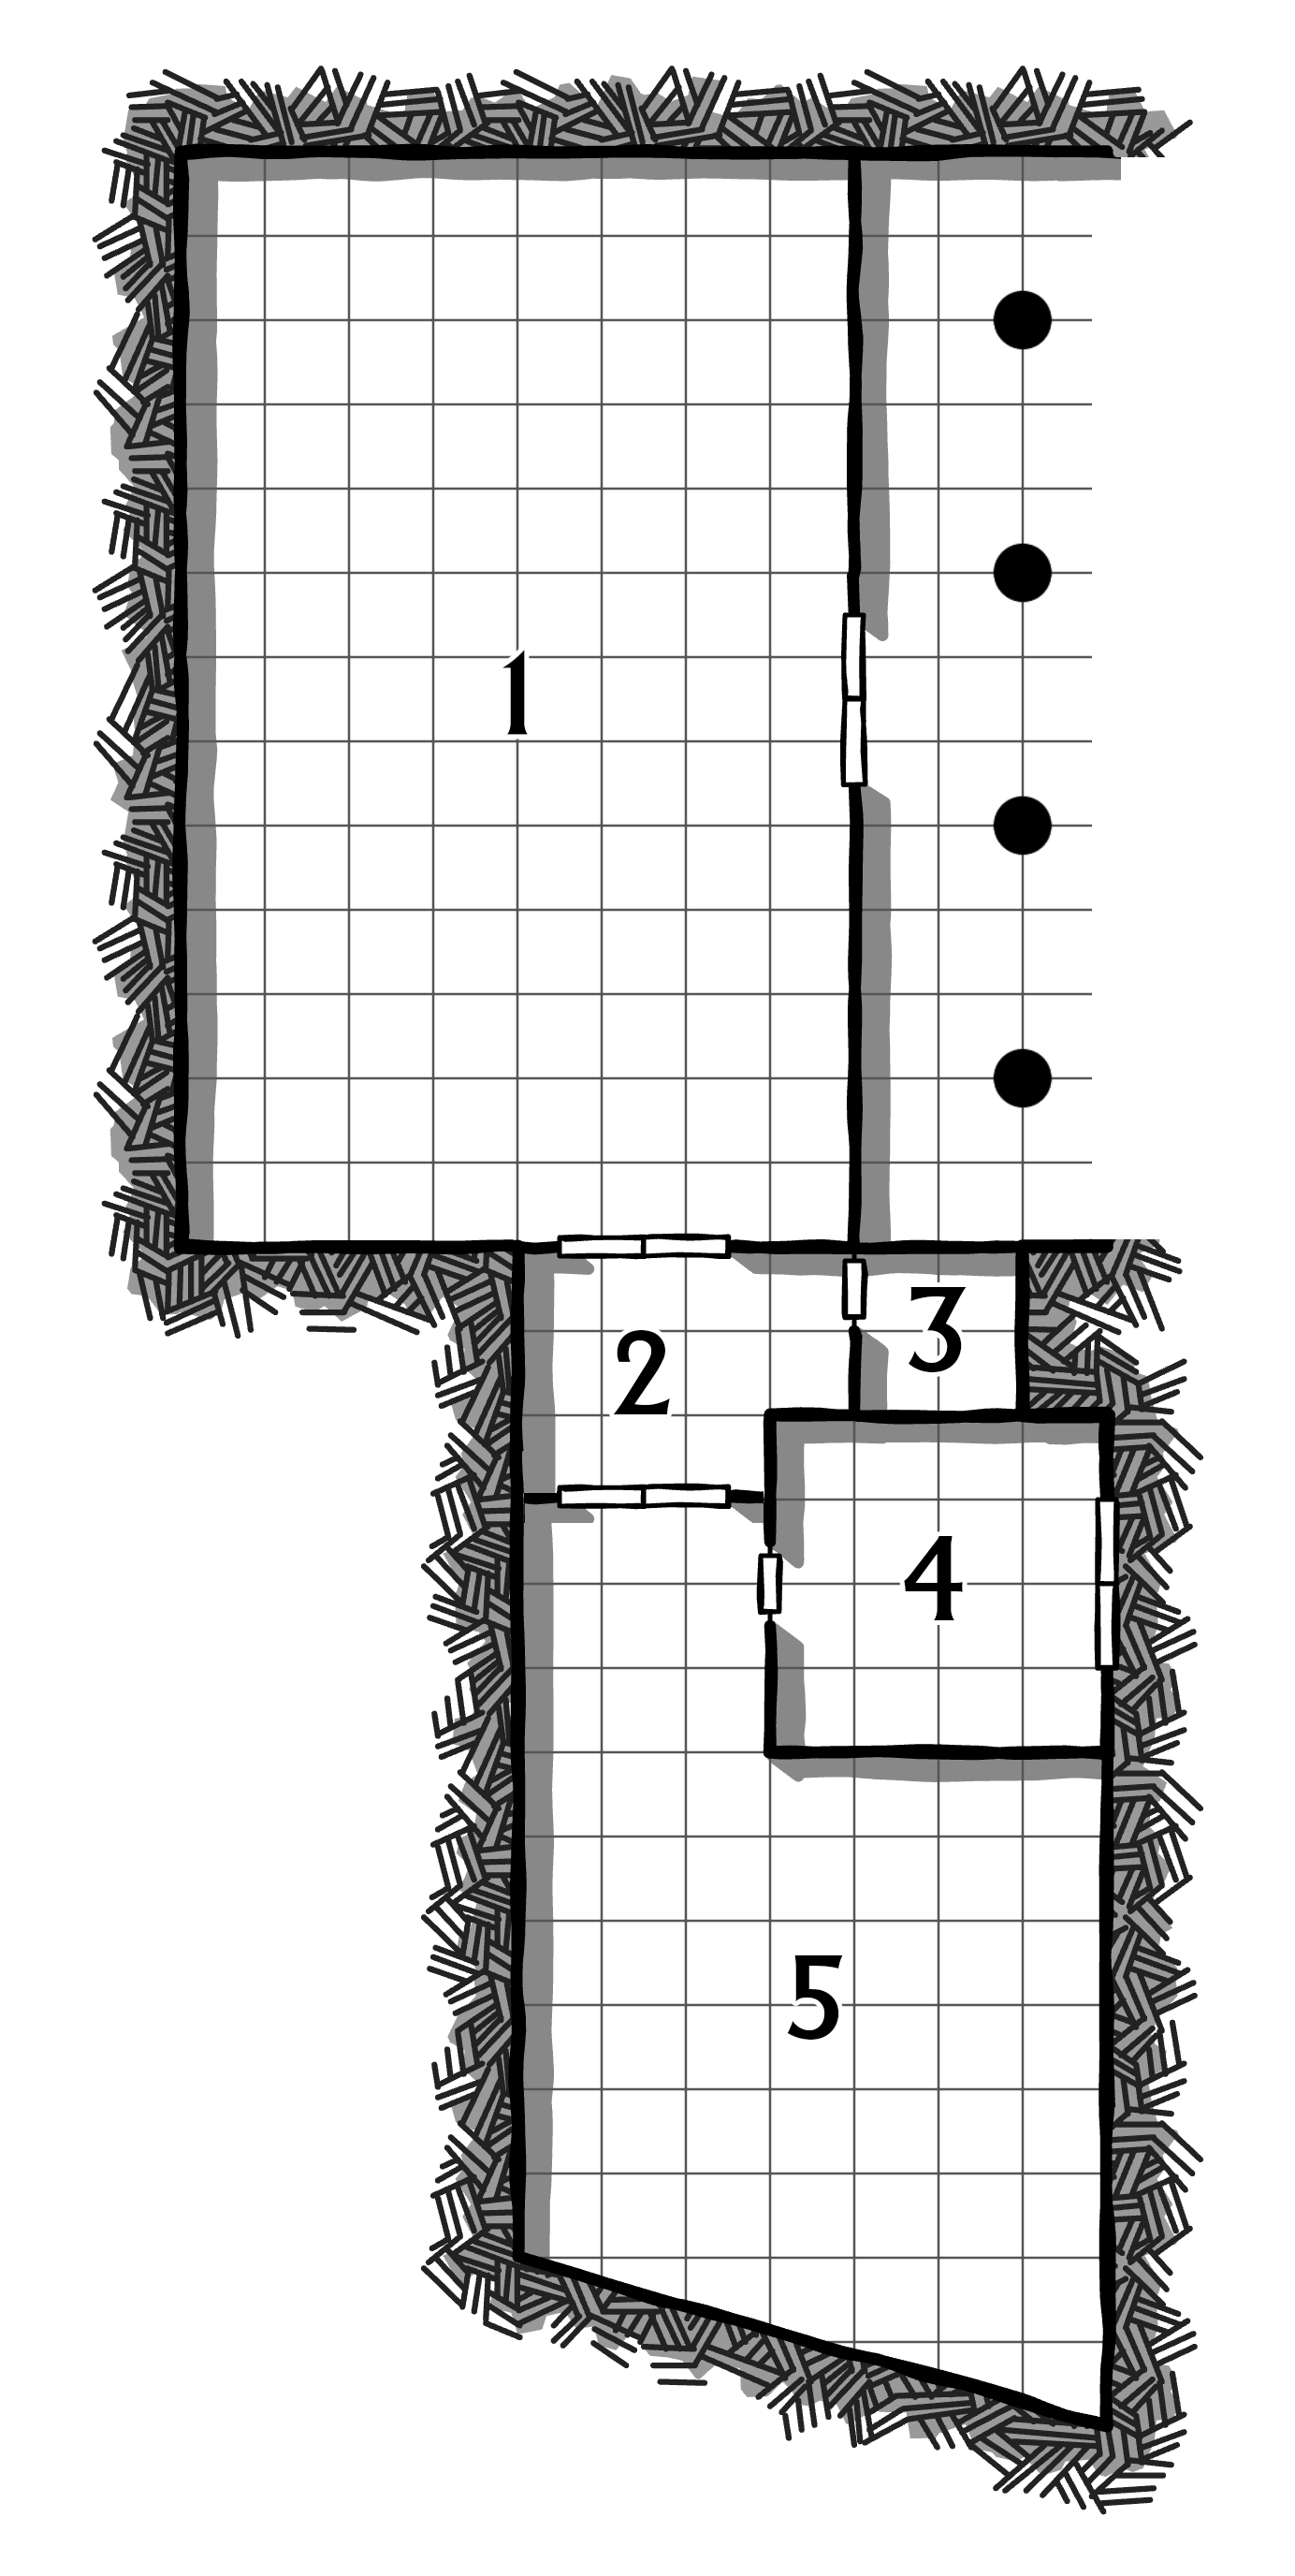
AREA 1 – ENTRANCE
Stairs of blue marble lead through doors ornately carved in a yin-yang composition of a dragon and unicorn pursuing each other.
AREA 2 – SALOON
A cluttering of chairs around a handful of low tables. The warm, dark glow of polished mahogany gleaming from every surface.
TO AREA 10: A bouncer stand guard at the archway leading to the short hall past Area 9: The Main Stairs or into Area 10: Snakeweed Lounge. Passing requires approval and the payment of a 10 gp cover. (Or no approval and a large bribe.)
AREA 3 – BAR
A well-stocked bar, mostly focused on ales.
THE PEACOCK: A pet peacock roosts on the bar here. It spreads its tail in a beautiful display whenever someone tips.
The peacock is actually a Vladaam agent who has been polymorphed. In this form, the agent can eavesdrop surreptitiously on conversations, gleaning potentially valuable intel from bar chatter.
AREA 4 – KITCHEN
A well-stocked kitchen.
AREA 5 – FOOD & LIQUOR STORAGE
Pretty much what it says on the tin.
AREA 6 – REAR ENTRANCE
The rear entrance is primarily used by those interested in the more exclusive upstairs lounges. It also allows access to the curse den “after hours.” It requires a password or a 100 gp fee.
AREA 7 – DRUG STORAGE
REINFORCED DOOR: AC 19, 300 hp, DC 25 Dexterity (Thieves’ Tools)
Neatly organized in small wooden boxes on shelves:
- 15,000 doses of snakeweed
- 5,000 doses of shivvel
- 75 doses of agony
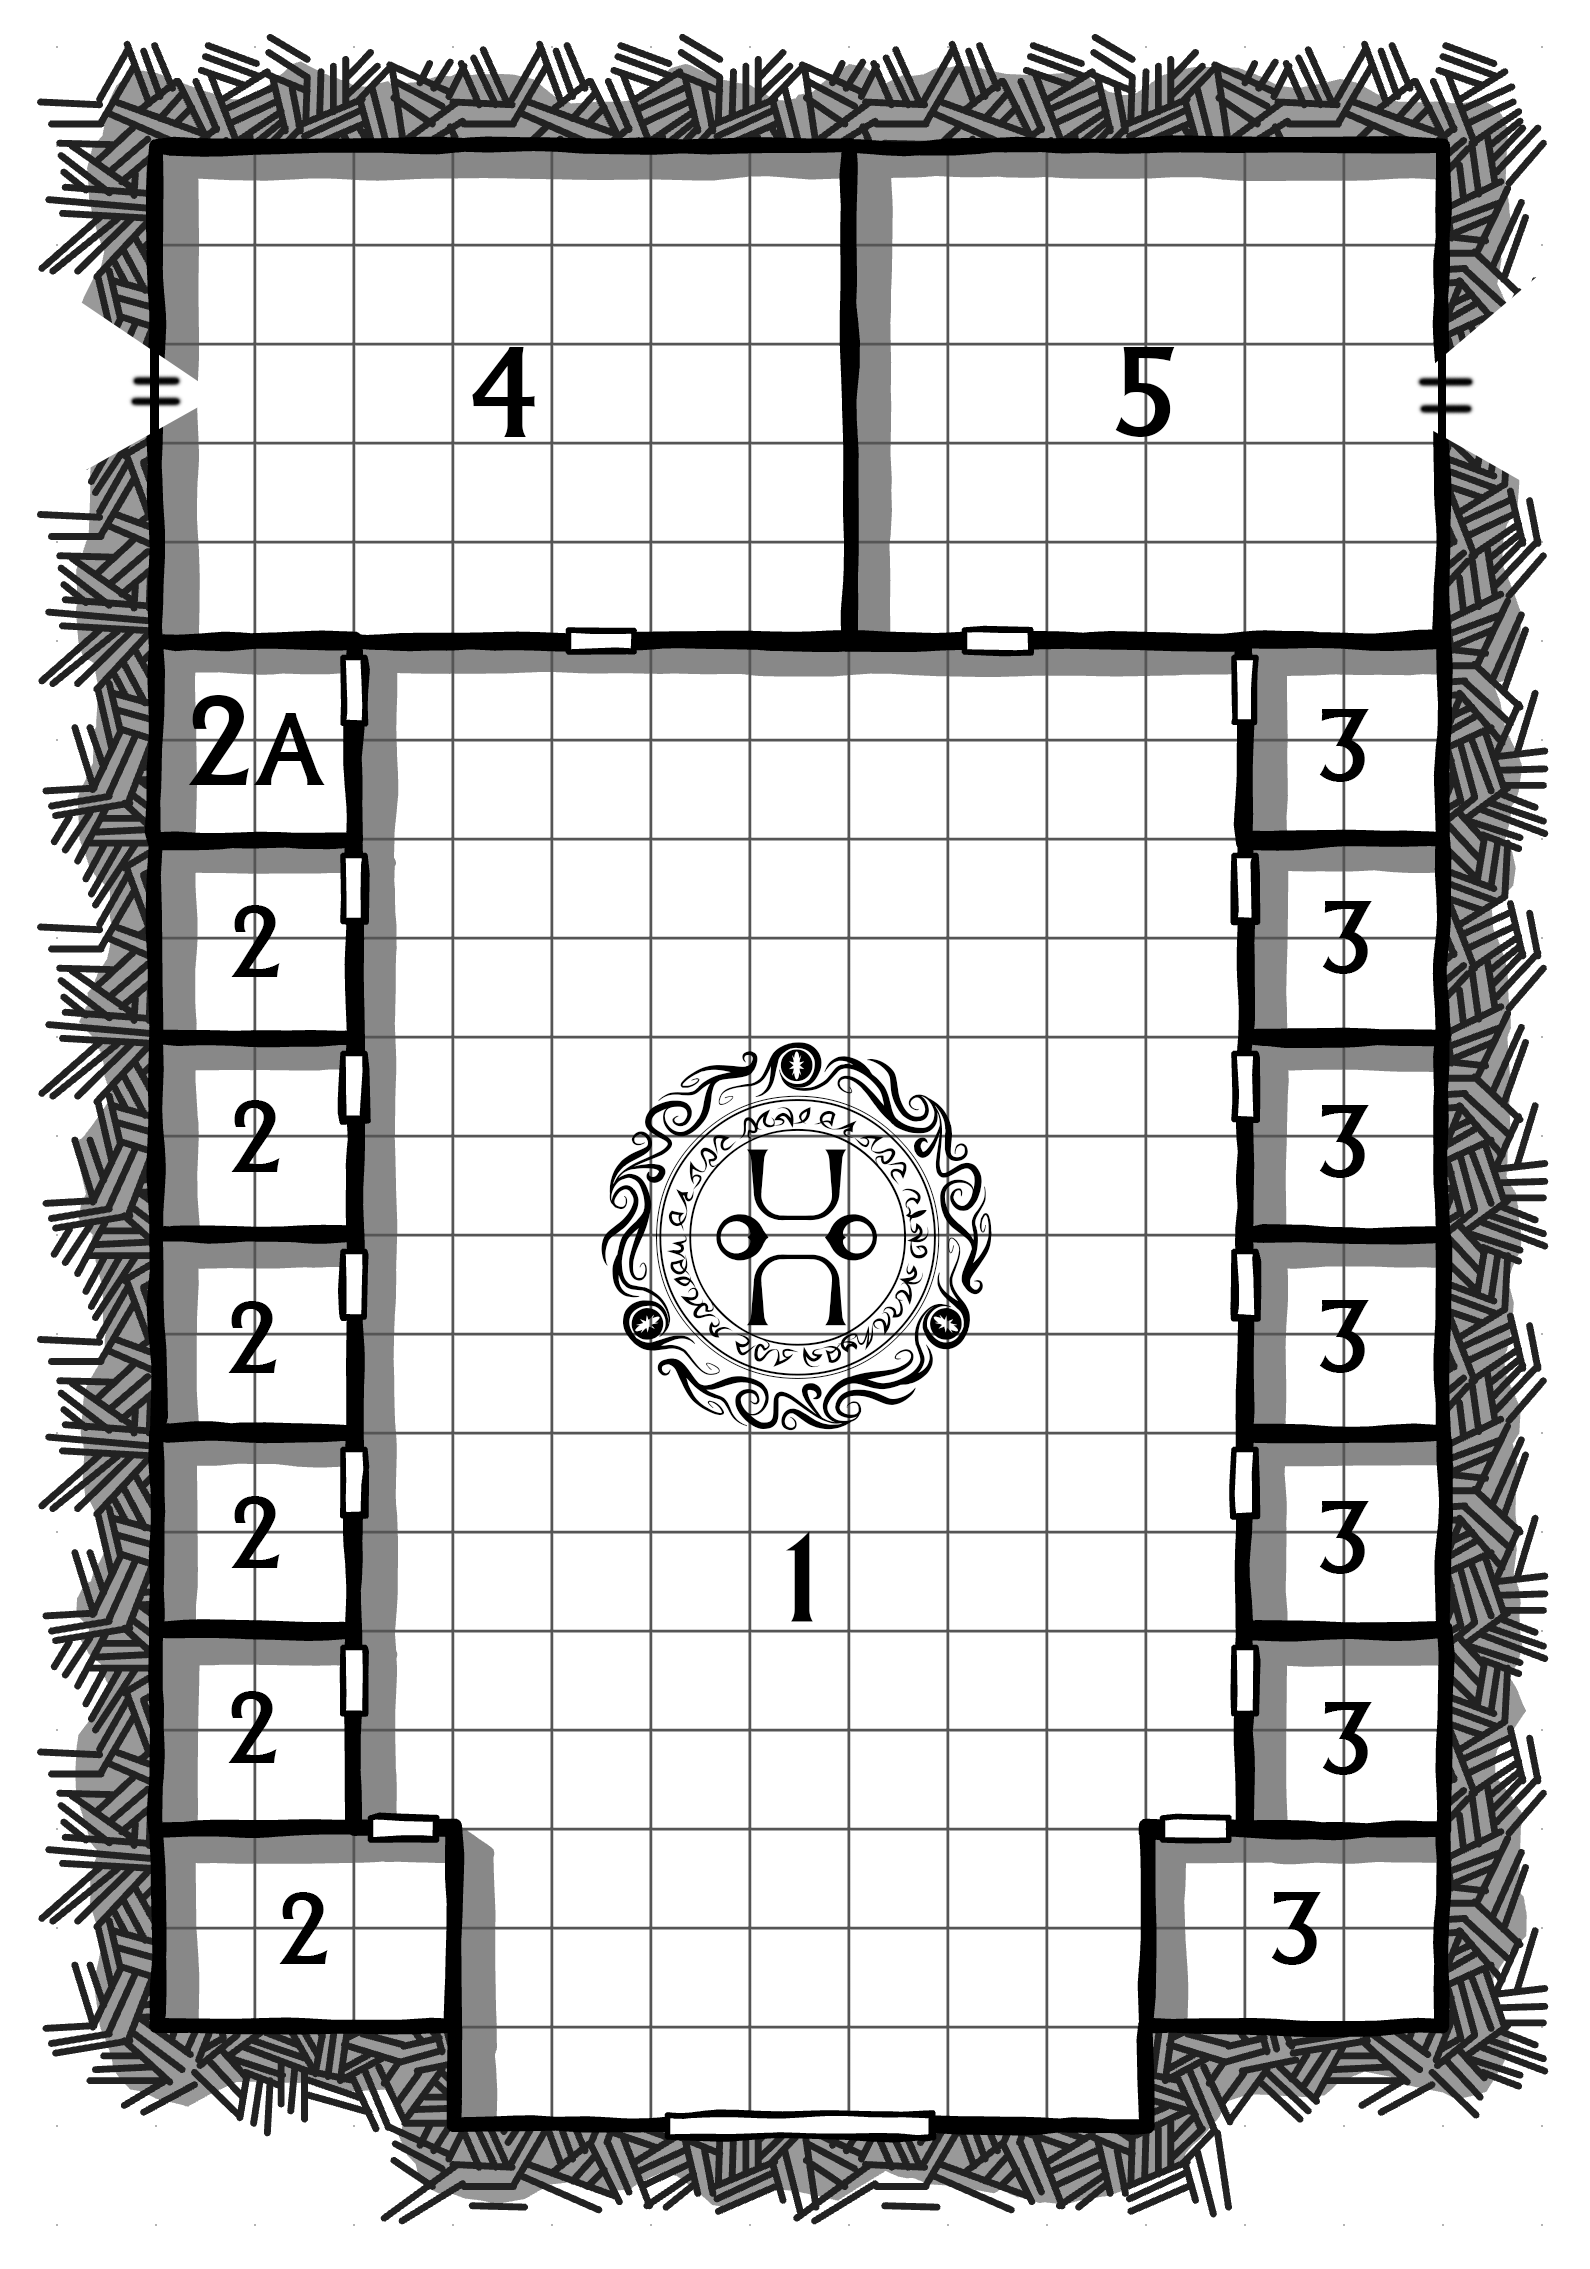
AREA 8 – REAR STAIRS
These stairs go up to Area 12. They’re used by staff and the “rear entrance” clientele (see Area 6).
AREA 9 – MAIN STAIRS
The walls of the main stairs have a marvelous set of Ascent of Dragons murals. (Similar to the “Ascent of Man,” but showing a red dragon progressing from a wyrmling to an ancient dragon atop his treasure horde.) The final image of the treasure horde is on the wall opposite the top of the stairs in Area 17.
DC 18 INTELLIGENCE (INVESTIGATION): There are a pair of small amethysts set into the stairs about halfway up. These are the focal points for a pair of alarm spells that are activated after hours. (Audible alarm. Cast at a higher level in order to increase its volume.)
AREA 10 – THE SNAKEWEED LOUNGE
Filled with snakeweed smoke. A number of magical, ceramic sculptures resembling slowly writhing masses of tentacles also a serve as standing hookahs from which anyone can take a hit of snakeweed smoke.
SKULLRATTLE: The tables in the northern chamber are set up with several low-stake skullrattle games using a variety of young dragon skulls.
BETRANT TABLES: The tables in the southern chamber host low-stakes bertrant games.
SECRET DOOR: DC 12 Intelligence (Investigation). A simple secret door spins around to grant access to the high-stakes bertrant tables. (Any observation of the chamber during business hours will notice hostesses and high-roller coming and going through this door.)
AREA 11 – HIGH-STAKES BERTRANT
These are all high-stakes bertrant games. Minimum bets at most tables are 100 gp, but there’s also a 1,000 gp bet table.
AGONY HOSTESSES: Agony is available for sale in this room. Hostesses carry 1d6 doses each.
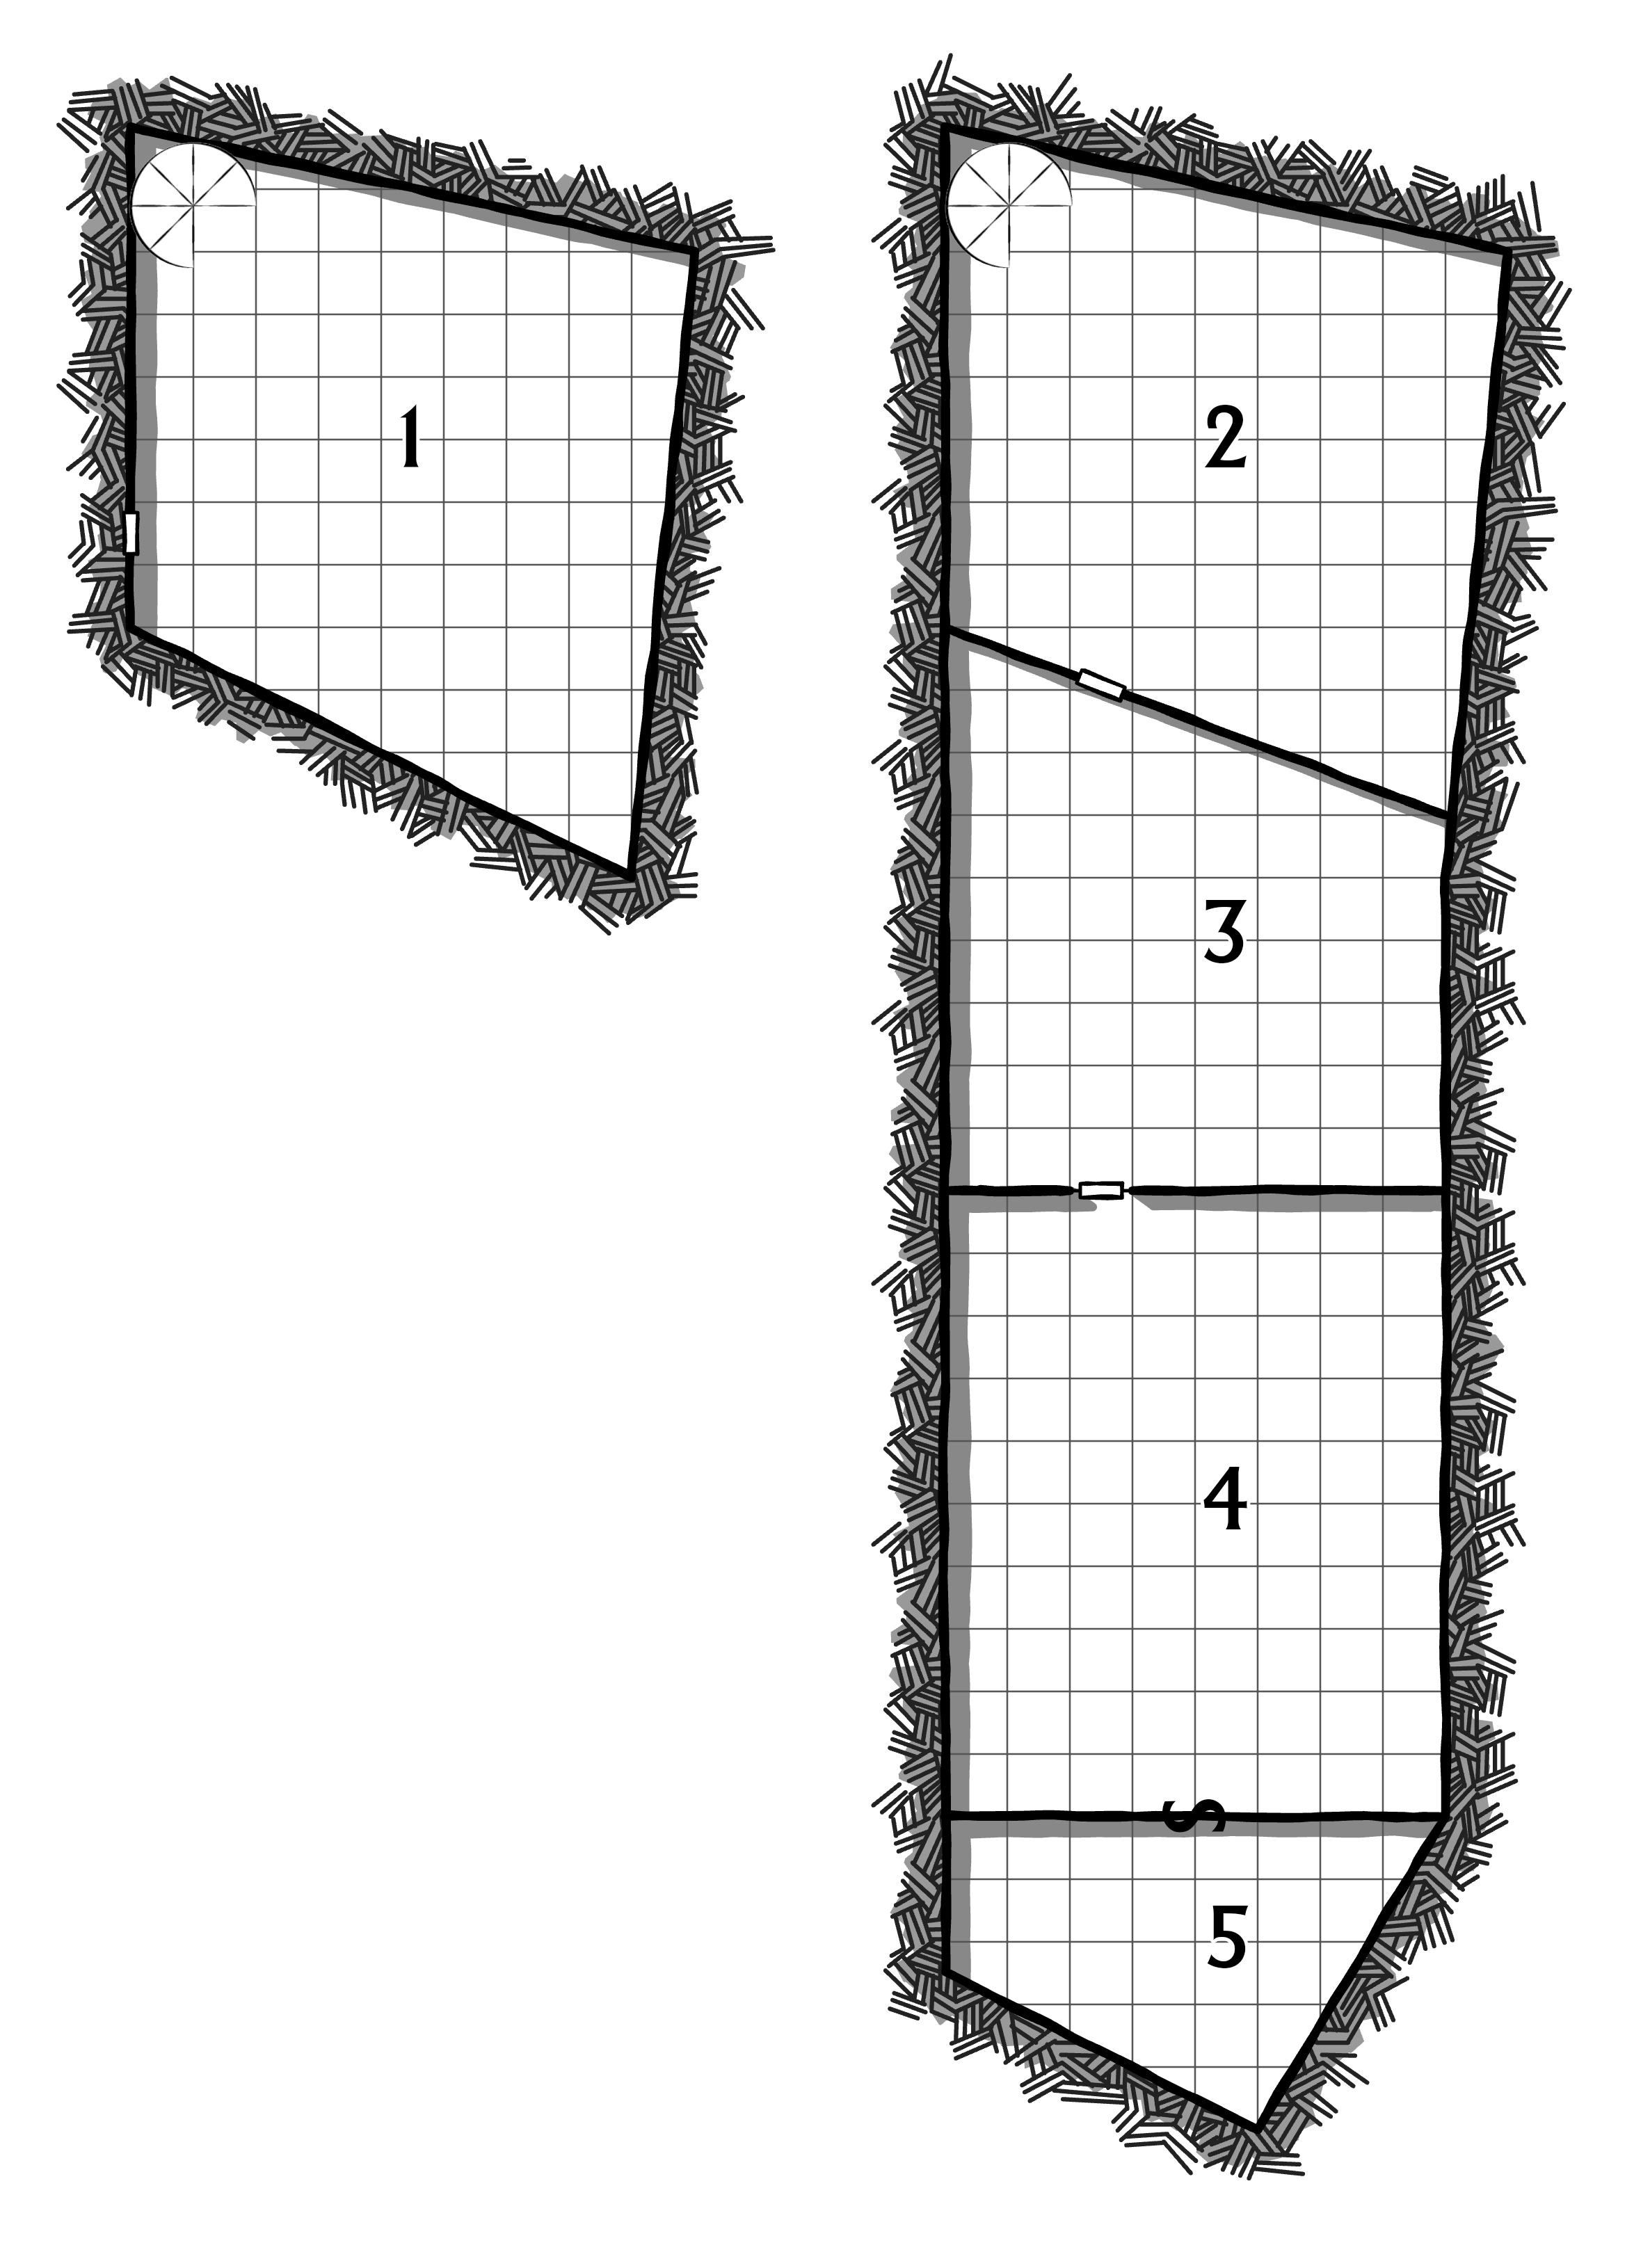
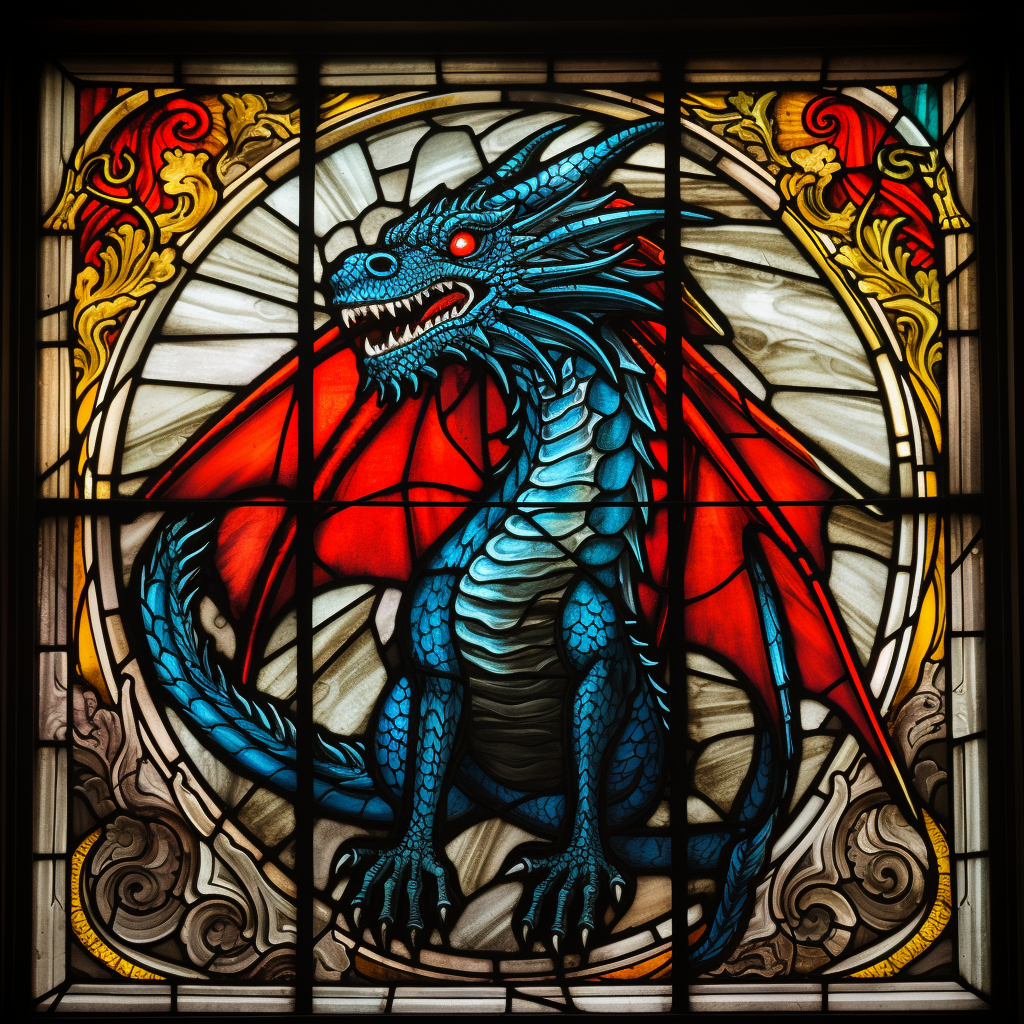
AREA 12 – STAIN-GLASSED WINDOW
The window at the top of the rear stairs is a beautiful piece of stained glass depicting a black dragon. A plaque beneath the window reads, “THE WYRM ORACTHON.”
AREA 13 – SHIVVEL LOUNGE
A number of comfortable chairs where shivvel smokers congregate.
AREA 14 – CURSE JEWEL WORKSHOP
DOOR: Oak-veneer over iron core. AC 19, 300 hp, DC 24 Dexterity (Thieves’ Tools)
WINDOW: The window is made of diamond crystal. AC 19, 300 hp.
A desk of dark-stained oak is positioned near the center of the room with a chair angled to look out the window. A workshop for creating magical items is arrayed around the perimeter of the room.
DESK: Includes Report on the Debts of Dilar. (The “CS” referred to in the letter is Celadore Silverwood of Dark Leaf. The Runshallot warehouse is the Vladaam’s slave trade warehouse, see Part 16: Slave Trade.
WORKSHOP: Includes Instructions for Creating Curse Jewels and a set of jeweler’s tools.
- DC 15 Intelligence (Arcana): Provide players with the properties of a curse jewel.
HIDDEN SAFE: Located in the floor. DC 22 Intelligence (Investigation), DC 30 Dexterity (Thieves’ Tools).
- 15d10 x 10 platinum pieces, mostly in gold and silver coins.
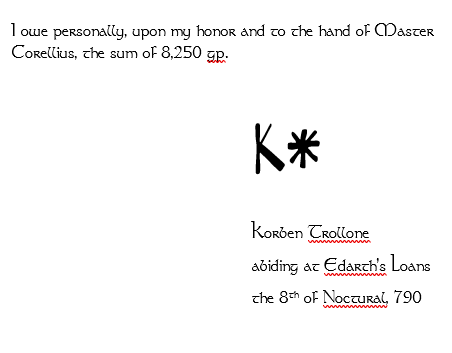
- IOU from Korben Trollone.
IRON COFFER (10% chance): If present, contains 500 gp, 40,000 sp, and 50,000 cp with instructions to have the Ithildin couriers ship it to the Red Company of Goldsmiths on Gold Street.
AREA 15 – CURSE JEWEL LOUNGE
A richly-accoutered lounge, with rounded divans of red velvet circling a central area raised in a dais. A bulging aumbry with dragon’s claw feet stands against one wall.
AUMBRY: Contains 10 doses of agony, 40 doses of abyss dust, and 4 curse jewels.
SECRET DOOR: DC 18 Intelligence (Investigation).
DAIS: DC 20 Intelligence (Investigation) to discover a secret compartment in the dais. Pushing a concealed button causes a panel to slide aside and a curse globe to rise into view.
DM Background: This room is rented by individuals or small groups. Slaves are led in from Area 16 and curse jewels are used on them.
AREA 16 – SLAVE CHAMBERS
This room has a permanent silence spell cast on it. It contains 1d4+1 slaves, usually beautiful young women.
SLAVES: These slaves were originally brought to Ptolus aboard the Sarathyn’s Sail (see Part 9: Fleet of Iron Sails) and then sold through the Ennin slave market (Ptolus, p. 399).
AREA 17 – DRAGONSCALES TABLE
Three tables, each set up with a set of dragonscales tiles.
DRAGONSCALES: All three tables have gold dragonscales sets. A trained eye can price two of the sets at 1,500 gp each. At a casual glance, the third set is just as nice, but is actually slightly cheaper in its craftsmanship (and is only worth 250 gp).
- The cheaper dragonscales set has the word “Yarrow” carved into the edge of its board.
- DM Background: A dragonscales set was stolen from this curse den several months ago. It was replaced with a set from the Oldtown curse den (on Yarrow Street) until a permanent replacement set is procured.
DM Background: This chamber is rarely used, but very exclusive.
AREA 18 – HIGH-STAKES SKULLRATTLE
This table has the skull of an ancient red dragon accoutered for skullrattle. It’s a high-stakes game requiring 500 gp minimum bets. The entire room is under the effects of an antimagic field to prevent magical cheating.
AREA 19 – SNUFF CHAMBER
The mahogany table in the center of this room is equipped with large manacles designed to bind someone firmly to its surface.
AUMBRY: Contains 20 doses of agony, 100 doses of abyss dust, and 12 curse jewels.
TABLE – DC 20 INTELLIGENCE (INVESTIGATION): The table has a hidden compartment where a slave manacled to its surface can be quickly dropped out of sight. (The compartment has a permanent silence spell cast on it.)
DM Background: Groups (or, more rarely, individuals) will employ this room to use curse jewels on a single slave bound to the surface of the table. This often results in the death of the slave and the groups pay extra for their murderous delights. The “ritual” is often accompanied with doses of agony.
This particular snuff chamber is rarely used. Those looking for this sort of “entertainment” are more likely to use the curse den in Oldtown, but the relative privacy and exclusivity attracts a very particular type of client.
HANDOUTS
REPORT ON THE DEBTS OF DILAR
Den Master Corellius—
I understand your concern, but Dilar’s affiliation with the Dark Leaf doesn’t offer him immunity. These debts you’re describing from the Oldtown Curse Den are disturbing and simply cannot be tolerated. In fact, this only contributes to a pattern of irregular behavior which is particularly alarming in light of his duty to provide security at the warehouse on Runshallot.
If you deem it wise, set spies upon him. It’s possible his loyalties have become divided and this matter may give us fair excuse to investigate without raising any possible alarm if other eyes have been placed on him.
In any case, if the matter of the debt is not resolved, you should feel empowered to contact CS directly and resolve it permanently.
Godfred V.
IOU FROM KORBEN TROLLONE