The Alexandrian

Posts tagged ‘night of dissolution’

Ptolus: The Mrathrach Table Raids

TM and © 2022 Monte Cook Games, LLC

Go to Part 1

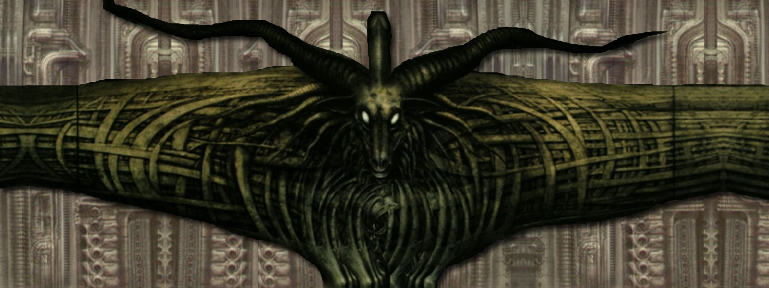
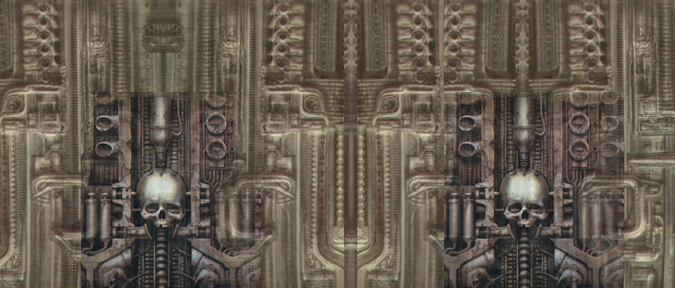
Aggah-Shan has been building Mrathrach tables and distributing them to gambling establishments throughout Ptolus. The Mrathrach Machine operates by harvesting small amounts of chaos from nodules placed within these Mrathrach tables. As a result, the Mrathrach game (Ptolus, p. 331) becomes less random than it should be, generally rewarding higher payouts (which, conveniently, makes the game more popular, resulting in more plays, and more chaos being harvested). On the other end of the interaction, the Mrathrach Machine gathers that chaotic potential, using it to forge a connection to the Pit of Mrathrach (Ptolus, p. 78).

In my Ptolus campaign, I fleshed out the clues for this revelation of the true purpose of Mrathrach. My goal was to give the PCs a better understanding of what was happening with the Mrathrach Machine.

Unexpectedly, however, my players decided to attack the problem from both ends: Not only would they assault the Mrathrach Tower; first they would target and destroy all of the Mrathrach tables.

They had been working with the Commissar’s Men at this point. Once they had gathered enough evidence of what Aggah-Shan was doing, they were able to flex those muscles and assemble an official task force. If your players end up going after the Mrathrach tables in the same way, I’ve included information on the task force below.

The other thing you’ll find here is a Report on the Mrathrach Tables of Ptolus. My players engaged in an extended task to gather this information, and I gave them the Report as a handout. They were able to use the Report to plan their raids, and I was able to use it as the basis for running the raids.

As I’ve described, this scenario was very much an idiosyncratic response to a goal formulated more or less entirely by the players. If you want to increase the odds of being able to use it in your own games, you may want to add additional clues pointing the PCs more clearly in the direction of the Mrathrach tables. (For example, perhaps a list of locations the tables have been shipped to could be added to the workshop in the White House.)

Even if your campaign never ends up including the Mrathrach table raids, however, you may still find this a useful reference guide for gambling establishments in Ptolus.

THE TASK FORCE

WHITE HOUSE INFORMATION: The City Watch’s can be checked regarding Aggah-Shan and the White House.

Ptolus: The Commissar's Men (Monte Cook Games)Thirty years ago, an informant told the City Watch that Aggah-Shan had extensive catacombs beneath the White House. The informant disappeared and the case went with her. Aggah-Shan has kept his nose clean (publicly any way) since then, but it’s likely those catacombs have only been expanded.

CAPTAIN SARTH: The task force is led by Captain Sarth of the Commissar’s Men (Ptolus, p. 141).

COMMISSAR’S MEN: 75 commissar’s man (Ptolus, p. 141).

GOLDSHIELDS: 3 goldshields (Ptolus, p. 144), using arcanist stat blocks (Ptolus, p. 605).

RAIDING THE CATACOMBS: The Commissar’s Men and the City Watch both hate delving into the dungeons beneath the city. Their standard operating procedure is to seal and burn the entrance. Their strong preference will be to leave exploring the catacombs to the PCs.

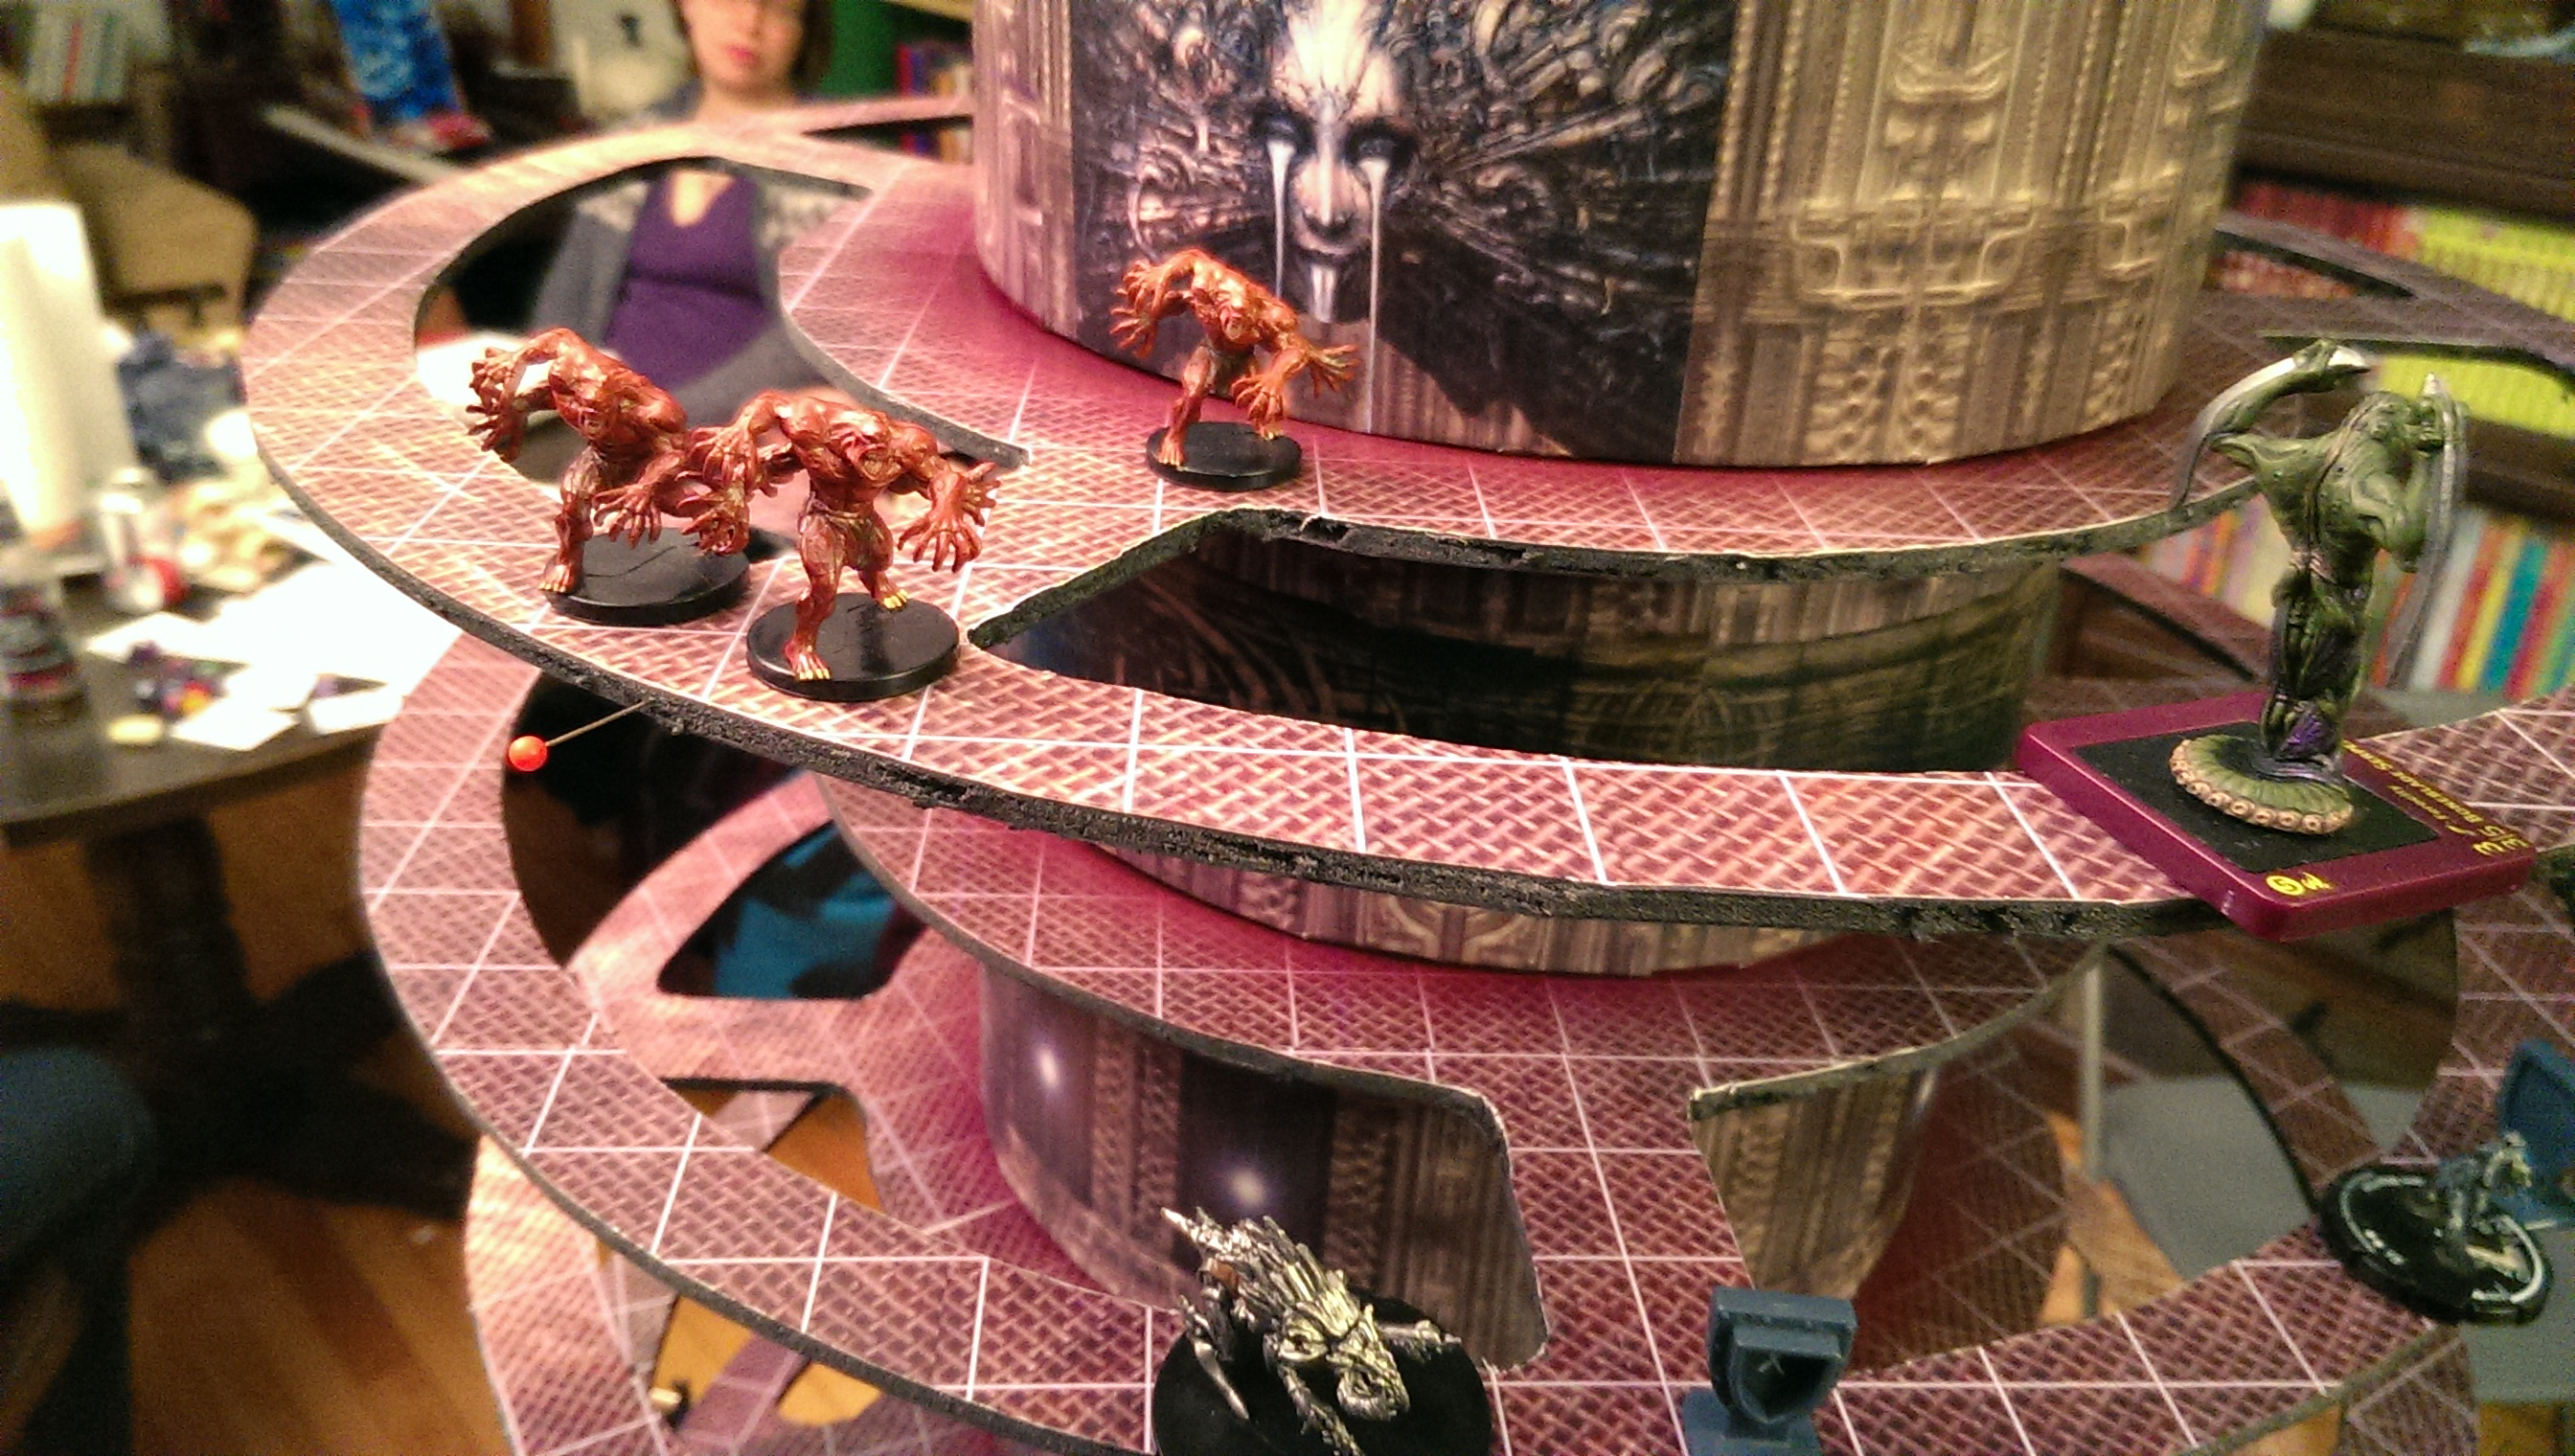
Playtest Tip: If at all possible, give these resources to the players and let them work with Captain Sarth (and any other contacts they might have) to create a plan. That might be simultaneous raids on all of the Mrathrach table sites (with the Commissar’s Men splitting up to hit them simultaneously) while the PCs head into the catacombs. Or it might be the PCs assisting the Commissar’s Men sequentially hit the raid locations. Or maybe the PCs split up, with each PC accompanying one of the raid squads. Or any number of other possibilities.

My players ended up using teleportation and a potion of giant’s strength, to enable one of the PCs to teleport into a location after the Commissar’s Men secured it, lift the Mrathrach table, and then teleport it to a secure location for destruction.

REPORT ON THE MRATHRACH TABLES OF PTOLUS

AGGAH-SHAN’S ESTABLISHMENTS

Mrathrach tables are being operated at essentially all of Aggah-Shan’s gambling establishments (both legal and illegal) around the city.

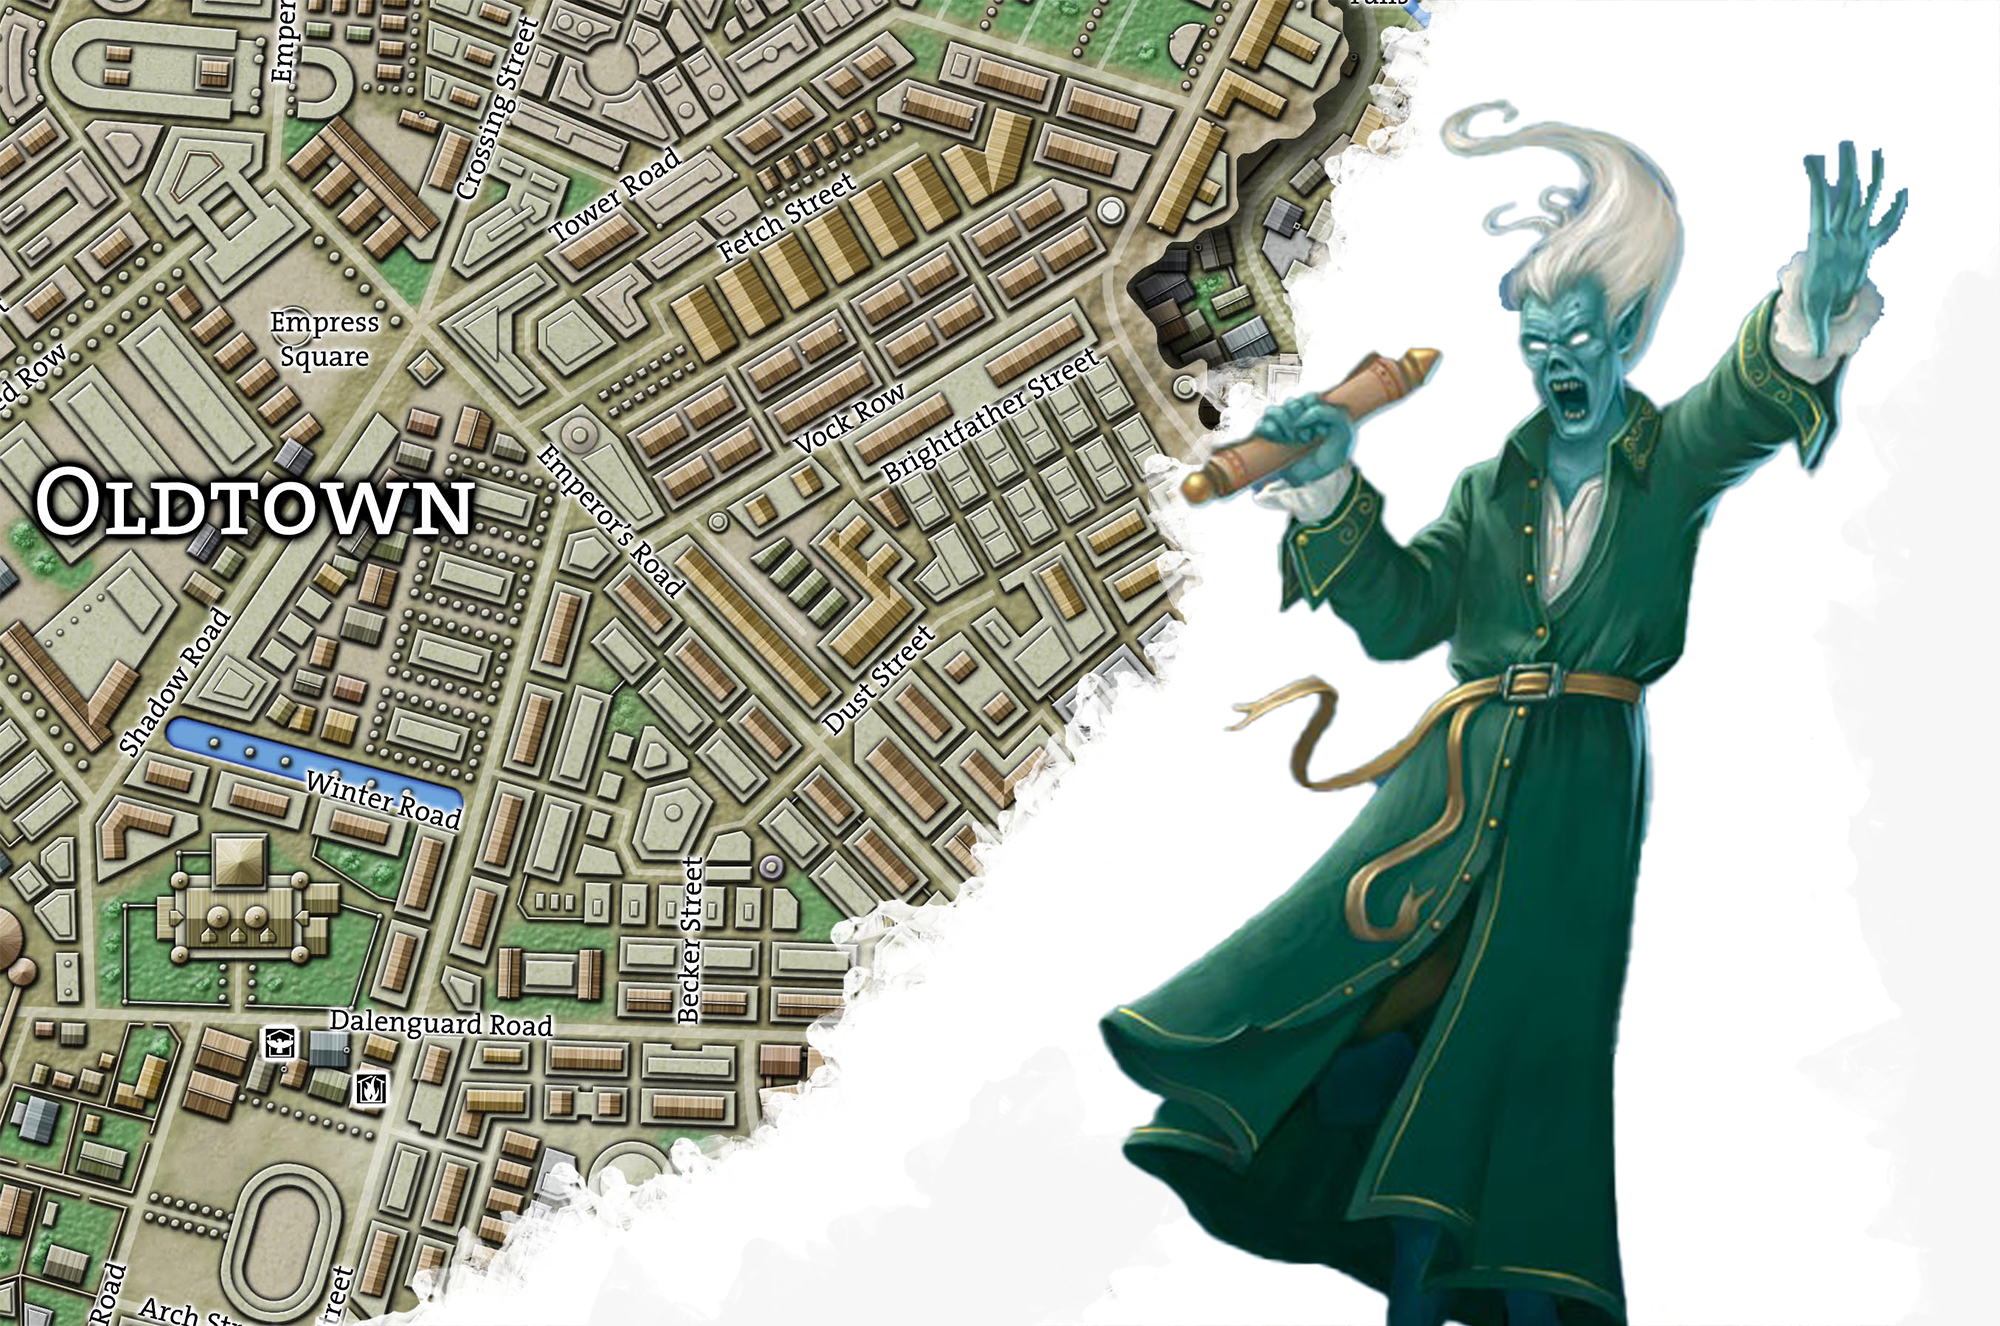
WHITE HOUSE (Oldtown): The White House has recently expanded to house three Mrathrach wheels, which are increasingly popular due to their lucrative pay-outs.

  • The White House has also been hiring an unusually large number of new operators and dealers over the past two weeks.

COCK PIT (South Market): Started as an underground cock-fighting arena in the South Market, the Cock Pit has grown into one of the largest illegal gambling dens in Ptolus. (The arena has also been expanded to include gladiator duels.)

  • It’s operated by a half-orc named Naosh.
  • There’s an expansive basement which services the arena and its gladiators.
  • There are two Mrathrach tables: One on the sunken portion of the main floor and another in an exclusive gambling room.

Cock Pit (H8)

YELLOW PIGEON (Guildsman District): In an alley running between Carriage Row and Gem Street in the Guildsman District there’s a set of sunken stairs leading down to an iron door. Above the door is the faded painting of a yellow pigeon. The door leads to stairs that lead to a section of Ghul’s Labyrinth that’s been converted into an illegal gambling den serving mostly guild workers.

  • There are guards on the door and in the gambling den below.
  • The Watch has tried to raid the place a couple of times, but there are multiple bolt-holes leading through the labyrinths into the sewers.
  • There is one Mrathrach table.
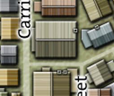
Yellow Pigeon (H8)

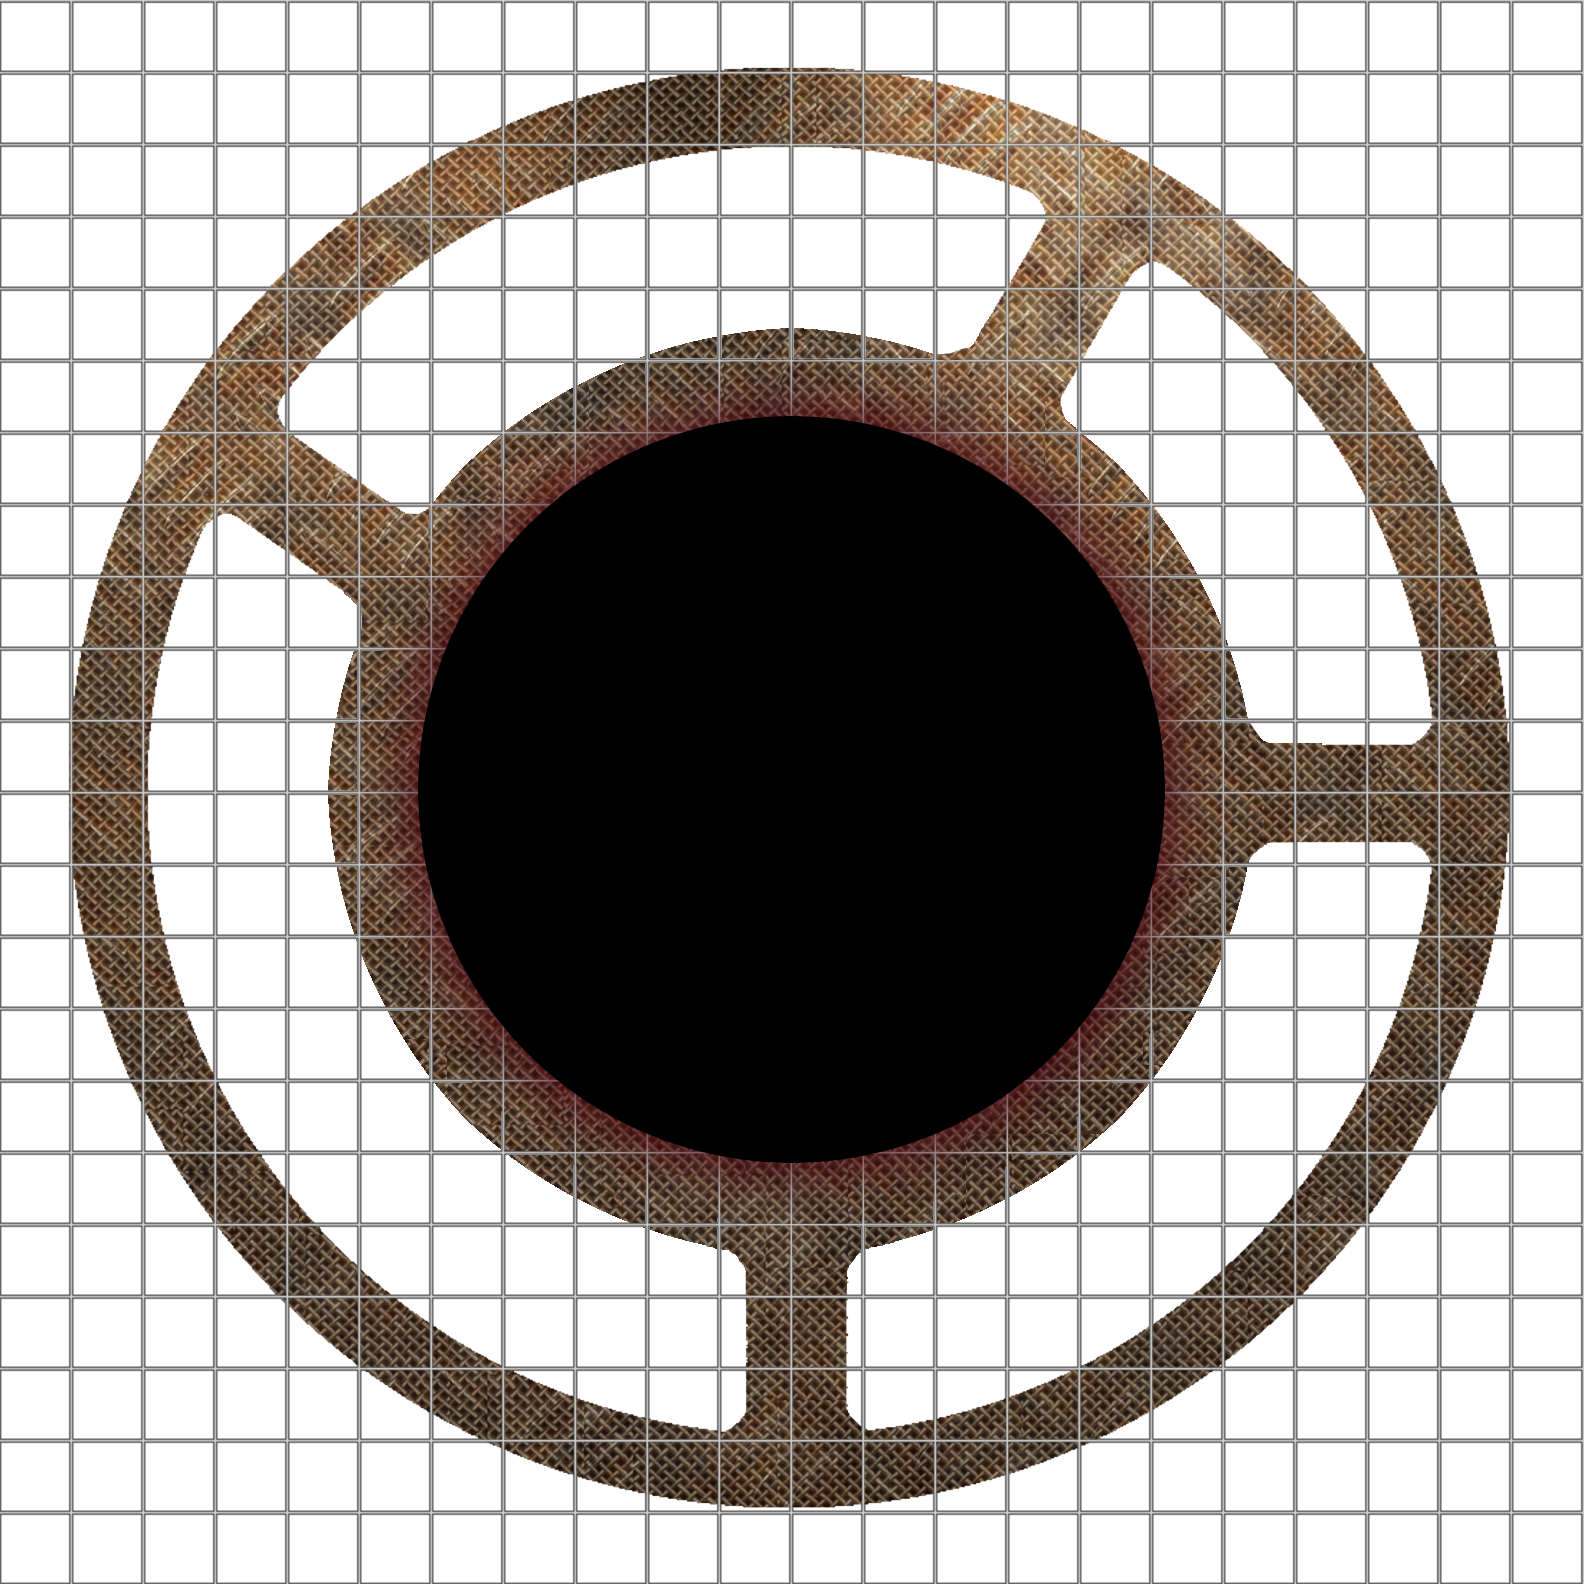
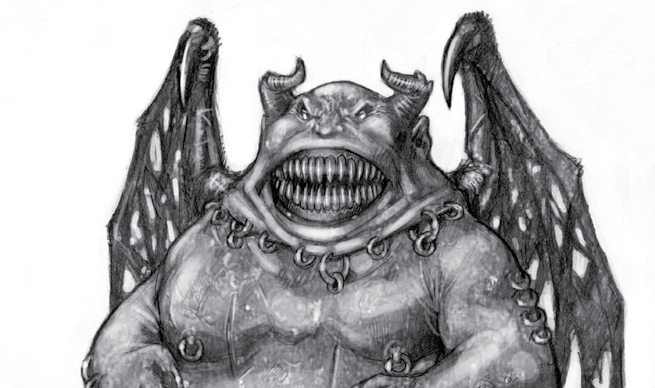
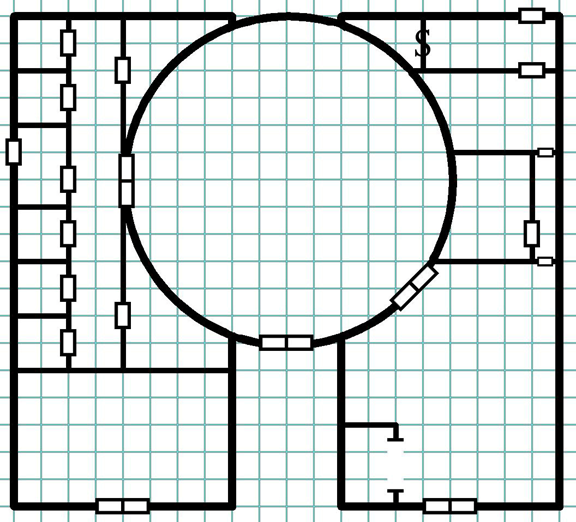
TEMPLE OF THE ONE-EYED GOD (Temple District): A temple based around the veneration / idolization of a mummified beholder’s corpse. While it may have once been a legitimate house of worship, its primary purpose now is to provide a semi-legitimate gambling establishment for Aggah-Shan. (They pay their taxes, but at a substantially reduced rate because the gambling is officially part of their religious beliefs.)

  • The western wing of the temple has been converted into a gambling hall, including a Mrathrach table that was installed two days ago.
  • The eastern wing houses the “priesthood”.
  • The central dome still holds the “One-Eyed God”.

Temple of the One-Eyed God (G4)

BROKEN SPINE (Docks): The Broken Spine is a squalid tavern that ran an illegal gambling operation out of a secret basement for a number of years. It somehow got a reputation for being a place that young heirs of Merchant Houses would slum in. Fifteen years ago, Aggah-Shan muscled his way into the establishment. Ten years ago, he created a separate “basement” catering specifically to the “slumming” merchant princes: This basement is actually a lavishly decorated “bubble” that looks out into the waters of the Docks. Four years ago the place was raided and Aggah-Shan publicly “took it over” and started paying taxes on it, making the place legitimate in the eyes of the law.

  • There are two Mrathrach tables here. One in the original sub-basement that still caters to sailors and other dock-crawlers; the other in the bubble.
  • Three days ago there was a minor ruckus at the Broken Spine when Caraniss Erthuo, a daughter of a secondary line of the Erthuo Merchant House, fell ill in the Broken Spine and collapsed. She was taken to the Daykeeper’s Chapel in Midtown, but her condition has not improved. Her symptoms include a general fever, telepathic confirmation of nightmares, and fingernails which have turned chalky and weak.
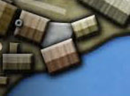
Broken Spine (M6)

HELL’S DOOR (Midtown): In Pipe Row Court, there is a door painted crimson with garish red flames. Nicknamed “Hell’s Door”, it leads to a long corridor containing multiple private rooms. The décor is red velvet and the general pastime are illegal card games.

  • One of the private rooms has recently been converted to hold a Mrathrach table.
  • A dreamspeaker named Godam Martinelli, who lives a couple blocks away on Farther Street, has been loudly protesting Hell’s Door, claiming that something catastrophic is going to happen there.
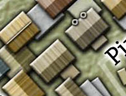
Hell’s Door (F7)

URDOCH’S MRATHRACH HOLES (Warrens): Three Mrathrach tables are being run by an agent of Aggah-Shan named Urdoch in the Warrens. They’re set up in various abandoned buildings and occasionally moved around as necessary.

OTHER GAMBLING HOUSES

Mrathrach tables have also been sold or leased to gambling establishments around Ptolus which are not directly owned by Aggah-Shan.

AJACK’S TENT: Located in Tent City (located outside Market Gate), a litorian named Ajack operates a semi-legal gambling operation out of a large tent. (Technically he’s outside the city limits, so he doesn’t owe gambling taxes.)

When Mrathrach was introduced, Ajack was reportedly very excited about how popular it was and leased a table. Unfortunately, he’s been losing considerable amounts of money. He’s borrowed a large amount of money from either the Balacazars or the Killravens and now he’s having difficulty paying it back.

And now it sounds like the stress of it has caused him to fall ill.

Tent City (E9)

BAZAAR OF 1,000 SINS (South Market): One of several large markets scattered around the South Market district, the Bazaar of 1,000 Sins has earned a reputation as being the place to go for illegal, illicit, or simply questionable goods. Drugs, diabolic items, and the like are common.

  • A Mrathrach wheel has been installed in one of the elaborate, silk-shrouded gambling tents of the bazaar.

Bazaar of 1,000 Sins (E7)

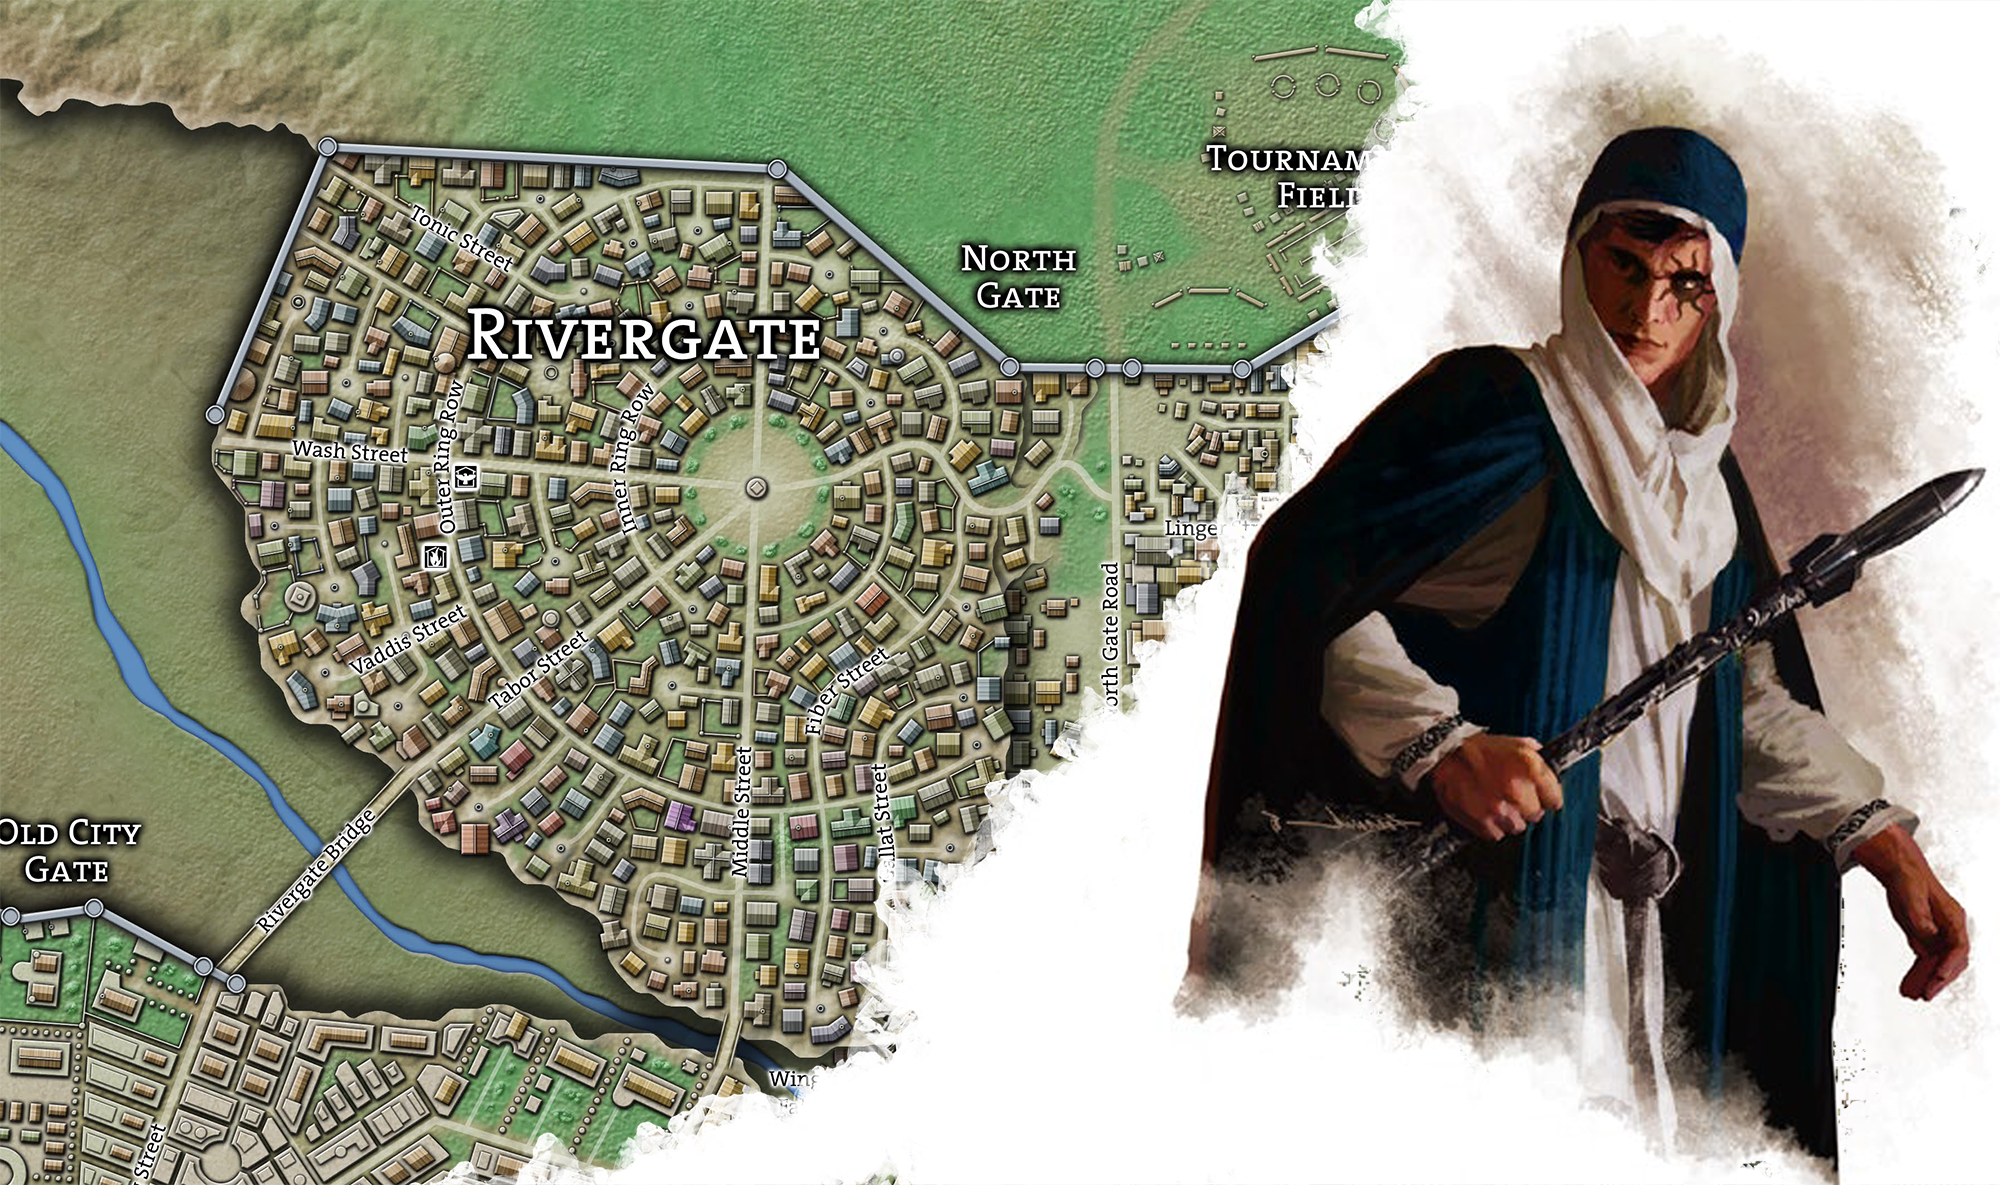
SILVER WHEEL (Rivergate): Perched at the top of the Great Ramp leading into Rivergate, the Silver Wheel is a legal gambling house catering to the expensive tastes of both Rivergate residents and the merchants passing through the North Gate. It finished construction just six months ago.

  • A Mrathrach wheel was installed here three weeks ago. It was decommissioned a week ago, apparently due to the heavy losses it was sustaining.
  • During its construction, the Silver Wheel was targeted by a firebomb. Rumor on the street is that the Vladaams were angry about the Wheel interfering with the custom at their Curse Den in Rivergate. It’s believed that the owners of the Silver Wheel agreed to ban Skullrattle and offer a cut of the Wheel’s proceeds from Dragonscales in order to settle the dispute without further bloodshed.
  • Recently, however, there are reports that the Killravens are trying to apply pressure.

Silver Wheel (F3)

GILDED PHOENIX (North Market): Located along Argent Street, the Gilded Phoenix is operated by the Killravens. Notable for the nine “Phoenix Wheels”, the establishment recently added a Mrathrach wheel rebranded as a Phoenix Wheel two weeks ago.

  • The arrival of the “Tenth Wheel!” was celebrated with a major social event as the latest “rebirth of the phoenix”.
  • Reports are that the Killravens are less than happy with the performance of the Tenth Wheel, but since the losses are subsidized across the other wheels in the Phoenix Cycle they’re riding it out for now.

Gilded Phoenix (J3)

THE ARENA (Oldtown): The Ptolus Arena is more than 600 years old. It was built during the 2nd century as part of the wave of free arenas which became popular throughout the Five Empires.

In addition to gladiatorial combat, a large number of other entertainments and events have been established at the Arena. A legal Mrathrach table was recently installed in one of the entertainment suites circling the concourse.

Arena (D6)

VLADAAM REJECTION

Aggah-Shan’s agents made a concerted effort to get the Vladaams interested in the Mrathrach wheels, possibly for installation in the Vladaam curse dens. The Vladaams, however, rejected Aggah-Shan’s proposals out of hand. The word “sacrilege” was apparently used.

Numenera, the Cypher System, No Thank You, Evil!, Invisible Sun, and their respective logos are trademarks of Monte Cook Games, LLC in the U.S.A. and other countries. All Monte Cook Games characters and character names, and the distinctive likenesses thereof, are trademarks of Monte Cook Games, LLC. Content derived from Monte Cook Games publications is © 2013-2022 Monte Cook Games, LLC.

Ptolus: The Balacazar Job

TM and © 2022 Monte Cook Games, LLC

Go to Part 1

Aggah-Shan has stolen a ledger which belongs to the Balacazar crime family (Ptolus, p. 102). He’s been using the ledger to blackmail and manipulate them, and they want it back. But if they just send their own agents and something goes wrong, Aggah-Shan will be able to cause them a lot of trouble. What they need are patsies who can take the blame (and bear Aggah-Shan’s wrath).

Enter the PCs.

GROUNDWORK

In my own Ptolus campaign, the PCs came to the attention of the Balacazars when they flubbed the “Smuggler’s Daughter” adventure (Ptolus, p. 563) and woke in chains as Malkeen Balacazar’s prisoners. The PCs became very intimidated by the Balacazars as a result, and vowed to (a) avoid them as much as possible and (b) stay on their good side if at all possible.

This laid the original foundtation for this side adventure, which was designed to (a) foreshadow the White House, (b) possibly reveal Aggah-Shan’s involvement with the chaos cultists, and/or (c) provide an alternative vector for discovering the Mrathrach Machine.

Having your PCs similarly get entangled with the Balacazars and/or their thugs is a great way to set up the groundwork for this mission, but it’s not required: If the PCs have any sort of reputation in Ptolus as either heroes or hired help, that’s more than enough justification for the Balacazars to select them for the gig.

ADVENTURE HOOK: THE MISSIVE

Maystra Balacazar sends a messenger to the PCs. The messenger carries a sending token. When he spots the PCs, he’ll use the sending token to send a message to Maystra, wait fifteen minutes, and then deliver Maystra’s Note (in order to give Maystra and Fesamere time to reach the Yellow Wall ahead of the PCs).

PCs who succeed on a DC 16 Wisdom (Perception) check notice the man watching them (from across the street, at the bar, etc.). If they succeed on DC 18, they notice the messenger wears a Balacazar family ring.


MAYSTRA’S NOTE

We have a sphere of mutual interest.

You have talents I would find useful.

I have an offer you need to hear.

Come to the Yellow Wall.

M. Balacazar


THE YELLOW WALL

The Yellow Wall is a tavern located in the Rivergate District (Ptolus, p. 323). It’s built up right against the city wall, and the wall above it has been painted yellow, off-setting the grain paint and trim of the restaurant itself. The tavern is owned by Fallaster Nobrand.

WATCHER: A Balacazar master thief (Ptolus, p. 612) lounges near the door of the Yellow Wall. When he sees the PCs approaching, he’ll head into the tavern and give a head’s up to everyone inside. A DC 17 Wisdom (Perception) check notices the man eye them up and then slip into the tavern.

ENFORCERS: Six Balacazar thugs are mixed into the crowd. DC 15 Wisdom (Perception) or Wisdom (Insight) checks to notice them.

ARKHALL: Arkhall Vaughn (Ptolus, p. 105), the Balacazar’s archmage, is sitting at the bar. He uses detect magic to scope out the PCs, noting any magical items or abilities they have. He’s particularly looking for anything that might allow them to spot invisible intruders. (If he does, Fesamere will be careful to keep her distance during the heist. If not, there’s a 50% chance she’ll get too close and probably be automatically spotted.)

If the PCs have previously interacted with Arkhall, he’ll be using a disguise self spell to conceal his identity.

THE PROPOSAL

Maystra Balacazar sits with her sister Fesamere at a table along the wall of the tavern. A DC 12 Wisdom (Insight) check notes that the tables nearest them are conspicuously empty. (They’ve been cleared out to prevent eavesdropping.)

THE BRIEFING:

  • Aggah-Shan stole a porcelain doll that was a gift to the Balacazar girls from their mother. (Lie)
  • The doll itself is not particularly valuable, but they belief Aggah-Shan is using it to target them for scrying spells. (Lie)
  • They need someone to break to the White House and steal the doll for them. (True, from a certain point of view)
  • If Aggah-Shan caught Balacazar agents trying to infiltrate the White House, he’d cause a lot of trouble for the family. (True)
  • They need someone to do the job who has no connection to the Balacazars, so that they can be plausibly denied if anything goes wrong. (True)
  • Aggah-Shan has temporarily left town. For how long, they’re not sure, but it’s created a window opportunity. The PCs need to do the job tonight. (True)
  • They are offering to pay 5,000 gp to break into the White House’s vault and retrieve the doll. (True)

They don’t care if the PCs steal other material, too. (That might even be for the best, since it will hide the true target of the heist.) But they will caution the PCs that the more they take, the more resources Aggah-Shan is likely to put into tracking them down.

MAYSTRA BALACAZAR

Appearance: Tall and lithe, with dark hair and olive skin.

Roleplaying Notes:

  • Impatient and distrustful, but willing to hide it.
  • Fiery temper if provoked.

Quote: “Enough! I am a daughter of the Balacazars. I am not to be trifled with.”

Background: Ptolus, p. 104

FESAMERE BALACAZAR

Appearance: Dark, olive-colored skin. She dyes her hair golden blond. A slight build and very fit.

Roleplaying Notes:

  • A calming influence.
  • Playful; perhaps even flirtatious.
  • Decadent and self-absorbed.
  • Fiercely loyal to her family, but has no interest in the family business.

Quote: “Let’s not all rush to a hasty judgment. I think we’d all prefer a softer touch. I know I do.”

Background: Ptolus, p. 104

Key Info: She’s at the meeting primarily so that she’ll be able to clearly ID the PCs during the heist.

THE REAL PLAN

THE PORCELAIN DOLL: The doll never belonged to the Balacazars, they’re just aware that it exists. The doll actually contains an idol of madness (see below).

FESAMERE’S GAMBIT: When the PCs break into the White House, Fesamere will follow them invisibly. Her goal is to retrieve the Balacazar Ledger in Area 10 of the White House and then leave, preferably with neither the PCs nor the White House guards ever knowing she was there.

The ideal is that the PCs will (a) clear a path and (b) draw attention. Whether they get spotted or just leave evidence behind, it will take heat off the Balacazars.

PAYMENT: If the PCs steal the doll, the Balacazars will happily pay them the agreed to price. (The idol of madness is valuable in its own right, after all.)

IDOL OF MADNESS

Wondrous item, rare

A small, humanoid statue of violet stone. The head seems oddly enlarged and its arms and legs are both longer than the porportions of a human would suggest. (It depicts a Titan Spawn of Lithuin.)

One holding the idol hears a constant, maddening mumur of voices coursing through their mind. The statue opens the bearer’s mind to the mad whispers of the Tainted Dreaming. The bearer gains advantage on Dreaming Arts, Chaositech, and Chaos Surgery checks.

Anyone benefiting from this advantage or sleeping with the idol must make a DC 20 Wisdom saving throw or suffer a long-term madness. If they fail the save by 10 points or more, they instead suffer an indefinite madness.

Go to Part 5: Mrathrach Table Raids

Mrathrach Tower - Night of Dissolution (Monte Cook Games)

Go to Part 1

Do you want to build a four-foot-high Mrathrach Tower for your Ptolus campaign?

Of course you do.

Below you’ll find a graphics package. This package uses resources shared by users of the old Okay You’re Turn forums on Monte Cook’s website, most notably those created by Eric of Ptolus, but I significantly remixed these into the form you’ll find here.

In addition to the graphics, you will also need to purchase supplies:

(1) Foamboard that is at least 20” x 20”. You’ll need 10 pieces, one for each level of floor. I recommend getting black foamboard, which will significantly enhance the visual quality of the finished piece.

(2) A concrete form with a 10” diameter. The one I’m linking here should work (unless the dimensions have changed in the years since I purchased it). For reference, the dimensions you’re looking for are:

  • Inner Diameter: 10”
  • Thickness: 3/8”
  • Outer Circumference: 32.6”

(3) Glue for attaching the printed graphics to the foamboard and concrete form.

(4) Approximately 4” high ladders for connecting the tower levels. (The ones I used are no longer available for sale, but you can probably make something like this work.)

DOWNLOAD THE GRAPHICS PACKAGE

FLOOR DISCS

Mrathrach Floor Disc

All nine levels of floor are identical. The graphics package contains the following floor files:

  • A 3-page PDF which has been pre-tiled for printing on letter paper. The pages deliberately overlap in order to make assembly easier.
  • The original Photoshop (PSD) file.
  • An alternative 24-inch PSD file (which I abandoned because I wasn’t able to find foamboard wide enough to accommodate it).

To assemble the floor discs:

  1. Print nine copies of the floor graphics.
  2. Glue them to the foamboard and wait for them to dry.
  3. Cut them out. For stability, do NOT cut out the inner circle (in black above).

The foamboard gives enough rigidity to support your miniatures.

LEVELS

Mrathrach Tower - Wicker Rhodintor

Each level of the Mrathrach Tower has a PDF file (for printing) and a PSD file (the original graphics). The PDF files are once again prepared for printing on letter paper.

To assemble the levels:

  1. Print a copy of each layer strip. (Note that layers 3 and 6 as well as layers 4 and 8 are identical, so make sure to print out a copy of each.)
  2. Cut out each layer strip.
  3. Cut ten 4”-tall circular sections from the concrete form. (Do NOT divide the form evenly into ten sections. The layer strips won’t fit.)
  4. Glue each layer strip to one of the circular sections. Each layer strip includes a red border which is designed to fold over the top and bottom of the section for a clean finish.
  5. From your tenth piece of black foamboard, cut out a circular “cap” for the top of Level 1. Attach the cap to the top of Level 1. (You do NOT need a cap for each circular section. Just Level 1.)

You may want to label each circular section by writing its level number on the INSIDE of the section. This may make it easier to assemble the tower.

ASSEMBLING THE TOWER

Alexandrian Mrathrach Tower - Night of Dissolution (Monte Cook Games)

You should now have:

  • 9 floors
  • 10 levels

To assemble the tower:

  1. Place Level 10 on the floor or tabletop.
  2. Place a floor disc on top of the Level 10 cylinder.
  3. Place Level 9 on top of the floor disc, lining it up so that it appears continuous with Level 10.
  4. Place a second floor disc on top of Level 9, rotating it so that it doesn’t line up with the floor level below.
  5. Continue this process all the way to the top of the tower.

Ladders: Attach one or two ladders to each level.

The method that I found worked well was to insert two pins or needles into the edge of a floor piece and then hang the ladder from them. I found that varying their positions on each level, but having one or two places on the tower where they lined up so that you could ascend or descend two levels in the same place was both aesthetically pleasing and created great gameplay.

Cavern Connections: The Mrathrach Tower has been erected in a tall, vertical cavern with intersecting cavern levels. You can indicate the locations of these cavern entrances (on Levels 1, 3, 4, 7, and 8) with flag pins. (These caverns can then be mapped on a nearby table.)

Level 10 Cavern: The base of the tower rests on the floor of the cavern, with a passage leading to the Rhodintor Nests. You could prepare these maps separately and print them out. I just set the Tower on top of a Chessex battlemat and sketched in the relevant caverns.

Permanent Assembly: You could hypothetically use tape or glue to permanently attach the floors and levels together. I, personally, found it easier to simply stack the tower. It’s large enough to remain stable while stacked, and it’s much easier to disassemble and store between sessions.

Go to Part 4: The Balacazar Job

Go to Part 1

The following handouts are found throughout the Mrathrach Machine and worksite. Note that chaos lorebooks will be collected in a separate post.


ANALYSIS OF THE HOLOGRAPHIC PROJECTOR

The holographic notations appear to be an effort to analyze the Face on the machine’s tower. The person making the notations appears to be intimately familiar with the machine’s construction, but the appearance of the Face seems to have not been anticipated by its builders.

The bulk of the text is an almost impenetrable mass of esoteric arcane formulas, most of them solving to nothing but confusion. A few preliminary conclusions are perhaps more comprehensible:

“The sympathetic synchronization of the discontinuity may be more powerful than we anticipated.”

“There are extraordinary spikes of potentiated chaos in the immediate vicinity of the extrusion. The ethereal solidification is permeating across the planar barrier.”

“The spirit of the Vested made manifest?”

“It’s an extrapolation of inertial compensation excess, allowing the energy left un-transubstantiated across the permeable mediation membranes to express itself through a retrogradal echo.” (The accompanying calculations indicate that this may be only partly accurate, as the retrogradal calculations aren’t resolving properly.)


CALDOR’S PERSONAL JOURNAL

This is a personal journal kept by a chaostechnician named Caldor. It seems clear from a quick perusal that the writer is deliberately not including any details of their work, although there are a few references to such details being included in a separate “work journal.”

Most of the journal is filled with inconsequential personal details:

  • Dwarven poetry, most of it written about a cat named Sprocket.
  • A frequent complaint regarding chaffing from a “metallic harness,” along with long descriptions of various lotions and unctions being used in an attempt to alleviate it.
  • A week-long complaint about a sunburn apparently contracted while journeying aboveground in the Guildsman’s District.
  • Several pages dedicated to the artistic drawing of various dwarven runes:

One particular entry stand outs:

Although Wuntad places great trust in the rhodintor demons, my distrust of them grows as I work daily by their sides. They claim to have been drawn from their Vaults to serve in the House of Dissolution and to be bound by ancient oaths to serve those who bring about the greatest times of chaos. And there is no denying their great mastery of the arts of chaositech, belying a lore of ages. But I suspect some deeper agenda. As Wuntad turns the lich to his purposes, so I think the rhodintor turn us all to theirs.

And later:

As I feared, Hao is utterly enamored by the rhodintor. But I think I shall speak to Legire about these matters. He serves the Destroyer, and has little sentiment for these earthbound pups, I think.


CALDOR’S WORK JOURNAL

This work journal contains an essentially eclectic collection of practical problem-solving which appears to be associated with the development and maintenance of the Machine. Most of the notes appear to refer back to more detailed and comprehensive design schematics, which are — unfortunately — not present.

Ethereal Solidification Effects: “We are beginning to see violent disturbances within the Ethereal Plane similar to those observed at the Pit.”

Update: As anticipated, the disturbances within the ether are cycling up into solidification events.

Update: Near crisis. The local discontinuity was dissociating from the primary discontinuity, threatening a complete dissociation which would have resulted in the creation of a unique event horizon. Rhodintor succeeded at using the ethereal solidification effects to create a binding matrix.

Update: Enter interior of the machine has solidified on the Ethereal Plane. Connection of discontinuities has collapsed into a unity.

Sympathetic Resonance Balance: “The grounding principles of the project’s inherent structure and order are beginning to spread throughout the Mrathrach network.”

Update: I have temporarily prevented the desynchronization of the discontinuities by randomizing the activation of the Mrathrach nodules, but the chaotic potential is equalizing and the randomization is suffering from a normalizing rendition.

Update: Have permanently resolved the chaotic grounding issues by intertwining the twin networks of sympathetic resonance. The bloodsand ruby focal lenses forming resonance with the Pit and the resonance of the Mrathrach collectors effectively destabilize each other and prevent discontinuities from dissociating.

Proto-Biological Protrusion: I am turning over all of my case notes on the proto-biological protrusion on the upper level to Hao. It has become his particular obsession. He is receiving extraordinary assistance from the rhodintor on this matter. As it does not seem to be affecting — and perhaps may even be assisting — the primary function, I am no longer concerned by it.


EXCERPTED REPORT FROM THE PIT

This is an extensive geologic and geographic survey which appears to have been excerpted from some larger report (the details of which are unclear). It describes with precise detail the location of a landmark referred to as “Mrathrach’s Pit,” initially using details from “aboriginal myths” to place it somewhere within the Cold Desert in southern Palastan.

Physical Properties of the Pit: “The visible portion of the Pit is vast — a funnel of frost-rimed sand nearly half a kilometer in diameter — but I suspect that the physical distortions may extend for miles beneath the surface, and the ethereal distortions may be greater yet.

“I have found it impossible to enter the core funnel of the Pit. The air is beyond frigid; indeed, it seems as if the temperature drops by an ever-increasing amount. Other attempts to penetrate the area via magical means have been ripped apart by the powerful forces coruscating through the area. For now, I will have to content myself with exploring the fringes of this phenomena.”


LETTER FROM WUNTAD TO CALDOR

Most Worthy Caldor—

I offer you all thanks for the assistance you have given in the construction of the holy vessel for the Blood of Gellasatrac. I shall arrange for its transport to the Haven of Gisszaggat within the week. Know that when I have partaken of the Feast and the ritual has been completed that the hands of such a master craftsman shall not be forgotten nor the debt go unpaid.

I wish you the best of speed in completing Aggah-Shan’s Tower. It shall serve our ends more than his, I think. Send word to Wulvera at the House of Porphyry if you have any need of my attention or aid.

Wuntad


DM Note: The House of Porphyry is a reference to another cult operation in Ptolus. The Haven of Gisszaggat refers to “The Final Ritual” from Night of Dissolution.


CALDOR’S SPELLBOOK

1st level—burning hands, charm person, comprehend languages, detect chaositech, detect taint, disguise self, expeditious retreat, false life, feather fall, grease, hideous laughter, identify, mage armor, magic missile, protection from evil and good, resist chaotic contamination, shield, silent image, unseen servant

2nd level—arcane lock, false life, magic mouth, mirror image, ray of enfeeblement, scorching ray, see invisibility, spider climb, suggestion

3rd level—chaos siphon, dispel magic, fly, lightning bolt, major image

4th level—confusion, detect scrying, locate creature, maddening insight, stoneskin

Detect Chaositech: Ptolus, p. 628

CHAOS SIPHON
2nd level transmutation

Casting Time: 1 action
Range: Touch
Target: 1 chaos storage cube
Components: V, S
Duration: Instantaneous

You transfer raw chaos within a storage cube into a chaositech device, refueling and restoring it. You can safely touch both the cube and the device when you cast the spell. After the casting, the device is fully charged. The cube has a 10 percent chance of being empty, at which point it collapses into a corrosive puddle (like a pool of acid).

DETECT TAINT
1st level divination (ritual)

Casting Time: Standard action
Range: Self
Target: Self
Components: V, S
Duration: Concentration, up to 10 minutes

For the duration, you sense the presence of taint within 30 feet of you (which appears as a faint aura around tainted characters and objects). If you sense taint in this way, you can use your action to determine the severity of the taint — faint or fully tainted for an object, and the number of taint points a person has.

MADDENING INSIGHT
4th level transmutation

Casting Time: 1 minute
Range: Self
Target: Self
Components: V, S, M
Duration: 1 hour
This spell opens your mind to the warped irrationality of pure, primal chaos. It grants you advantage on Chaos Surgery checks and checks using chaositech tools, but carries with it a risk. If you fail a Wisdom saving throw, you suffer insanity in the form of a confusion spell for the duration of the spell.

Material Component: Three drops of mercury

RESIST CHAOTIC CONTAMINATION
1st level abjuration

Casting Time: 1 action
Range: Touch
Target: A creature
Components: V, S, M
Duration: 24 hours (creature) or 1 week (object)

You give a creature or object advantage on saving throws against taint.

Material Component: Three drops of pure water


Go to Part 3D: Building the Machine

Go to Part 1

CAVERNS

This is a diff key. To run these areas, you need to refer to the original key in Night of Dissolution (pgs. 82-85) and then either add or alter the elements listed here.

AREA 1 – THRALL QUARTERS

CHAOS PROPHECY: Scrawled on the wall of each of these areas (tapped out by the claws of the thralls, who don’t comprehend what they’re writing) is the Prophecy of the Saint of Chaos:

The Saint of Chaos shall return and the Banewarrens shall ope their maw. And the name of doom shall be Tavan Zith.

Not all of these are complete. Many instances are only random assortments from the middle of the prophecy.

DM Background: This prophecy refers to the scenario hook for the Banewarrens campaign.

AREA 5 – CHAOS STORAGE CUBES

SECRET COMPARTMENT: The secret area is a small shrine. The Prophecy of Black Rain is written on the wall, with black candles on a small altar in front of it:

Mrathrach Machine - Night of Dissolution (Monte Cook Games)And there shall come a night of black rain. And the arts of magic shall have no power against it. And the Gods shall be silenced. And the rain shall wash away the world that we have known and end all bonds.

  • DC 16 Intelligence (Investigation): Caldor’s Personal Journal and a chaositech siphon is hidden inside the shrine.

AREA 7 – SARYCAL MEDITATION CHAMBER

(This entry replaces the full key from the adventure.)

Three sarycal prepare the meditation rituals necessary to replace their brethren within the Machine (see Level 2). Three mock meditation chambers — looking like lozenges of steel thrusting up through the floor — stand at various points within an ornate arcane circle.

These meditation chambers are similar to those found within the Machine itself, but are not fully functional (nor linked to the Machine).

  • DM Note: The intention here is that investigating this chamber should allow clever players to intuit the fact that sarycal rhodintor are sealed inside Level 2 of the Machine.

AREA 8 – LEGIRE’S CHAMBER

CHAOS LORE: The disheveled mess of notebooks, formulae, diagrams, and ranting includes:

  • Excerpted Report from the Pit
  • Greater Book of Chaos (chaos lorebook)

AREA 9 – HAO’S CHAMBER

CHEST: In addition to the other items in the chest, the PCs find:

  • Oath of the Divided Eye (chaos lorebook)
  • Skull of the Metal Eye

SKULL OF THE METAL EYE: A strange technomantic device is surgically grafted onto a skull. It includes an array of three crystals around a larger crystal in a plate on the skull’s forehead.

  • This device is designed to be surgically grafted to one who has taken the Third Eye of the Destroyer feat (see Oath of the Divided Eye) to harness the energy of their darkvision and make it blindsight 60 ft.
  • DM Note: Hao hasn’t perfected the Third Eye of the Destroyer, but keeps this device — still grafted to its former owner’s skull — for his personal use once he has done so.

AREA 10 – WORKSHOP

There is a chaos nodule from Level 5 being repaired here. There is also a chaos storage cube.

AREA 12 – THE MACHINE MAGE

DESK: Among the books and papers carefully arranged here are:

  • Caldor’s Spellbook
  • Caldor’s Work Journal
  • Letter from Wuntad to Caldor
  • Greater Book of Chaos (chaos lorebook)
  • Vested of the Galchutt (chaos lorebook)
  • Book of Mrathrach (chaos lorebook)

AREA 13 – ENTRANCE FROM THE CATACOMBS

The entrance of Area 13 opens onto the Machine directly facing the Face of Mrathrach.

Face of Mrathrach

LEVEL 1 – THE FACE OF MRATHRACH

A living extrusion of proto-biological thrust out from the metal of the Machine. Streams of frozen tears hang from its pain-haunted eyes.

COLD AURA: Anyone starting their turn on the top level must make a DC 12 Constitution saving throw, suffering 2d6 cold damage on a failure.

ETHEREAL HOWL: Those on the Ethereal Plane can hear the Face of Mrathrach’s screams. Non-chaotic creatures hearing the scream must make a DC 15 Wisdom saving throw or suffer an ill effect:

  • < Level/CR 5: Knocked unconscious for 1d10 minutes. Deafened for 3d6 hours.
  • Level / CR 6-10: Stunned. Deafened for 1d4 hours.
  • Level/CR 10+: Deafened for 1 hour.

DESTROYING THE FACE: AC 15, 300 hp. The face regenerates 5 hit points per round.

  • Chaos Hammer: When reduced to 100 hp, the Face of Mrathrach hurls a multicolored explosion of leaping, ricocheting energy from its mouth. Non-chaotic creatures suffer 22 (5d8) psychic damage
  • Prismatic Spray: When destroyed, the Face releases a prismatic spray that affects the top two levels of the Machine. (DC 17 saving throws. If the violet ray teleports a character, there’s a 90% chance they emerge from a random energy portal on Level 3 or Level 9; otherwise, they are teleported to a random location in Ptolus.

HOLOGRAPHIC ANALYSIS PROJECTOR

On the catwalk in front of the Face of Mrathrach a tripod with seven crystals surrounded by chaositech machinery has been set up.

ACTIVATING: A DC 15 Wisdom (Chaositech tools) check or DC 23 Intelligence (Arcana) check.

When the device activates, the crystals spin up and are struck by coruscant, plasmic light which refracts into a translucent projection before the surface of the tower where the Face extrudes itself.

The light forms a perfect image of the surface of the tower. In a somewhat jerky progression, you can see a disruption of the twisted pieces of machinery in the projection as the Face slowly emerges. As the projected Face comes to mirror the Face on the tower itself, additional beams of information sprout around and through the image: Lances of light join projection to reality, and strange garbled strings of text twist and resolve around various facets.

ANALYZING: After the projector is activated, an Intelligence (Chaositech tools) check can decipher the notation. Give the players the Analysis of the Holographic Projector handout.

Wicker Rhodintor

LEVEL 2- WICKER RHODINTOR

The three wicker rhodintor are spiritual foci for three sarycal rhodintor who are forming a sympathetic meditation circle inside this level of the Machine. (These rhodintor are welded and sealed inside; inaccessible unless someone were to physically hack open the Machine.)

SARYCAL SPELLS: Each wicker rhodintor can manifest sarycal spells (Ptolus, p. 594) while drawing on the Machine’s power to remove daily limits. The range of the spells is limited to the first three levels of the tower.

  • Initiative +2
  • Spell Save DC 16
  • At Will: magic missile
  • Once per 1d3 roundshold person, levitate, ray of enfeeblement
  • Once per 1d6 roundsdispel magic, lightning bolt, slow

DESTROYING A WICKER RHODINTOR: AC 15, 150 hp. Vulnerable to fire.

Mrathrach Machine - Energy Portals

LEVEL 3 – ENERGY PORTALS

CHAOTIC TELEPORT: Jumping through a portal on Level 3 allows one to emerge from a portal on Level 9 (and vice versa). Creatures without teleport stabilizers suffer chaotic disruption during teleport (2d6 points of necrotic damage, DC 16 Constitution saving throw negates).

ENTRANCE TO MUTATED THRALL CHAMBERS: Opening in the side of the shaft leads to Areas 1-3. This opening is not directly connected to the shaft, requiring characters to jump a 5 foot gap.

LEVEL 4 – ENTRANCE FROM THE LONG PASSAGE

DISABLE LEVEL: This is a complex skill check requiring 5 successes before 2 failures. DC 14 Wisdom (Chaositech tools) or DC 18 Intelligence (Arcana) checks.

LEVEL 5/6/7 – EBON MACHINES

EBON MACHINES: These machines serve as both collectors and amplifiers of the chaotic energies being gathered by the Mrathrach tables. They are also energy regulators and channelers.

CHAOS NODULES: Inside each ebon machine are ten oblong, silvery gray nodules roughly the length of a forearm.

  • These are virtually identical to the ones found in the White House (Area 13), but careful examination will reveal that they are three-dimensional negatives of the nodules installed into Mrathrach tables around the city.

DESTROYING AN EBON MACHINE: AC 17, 100 points of damage.

LEVEL 7: Has an entrance to the Storage Level (Areas 5-7).

LEVEL 8 – CHAOSTECHNICIAN LEVEL

DISABLE LEVEL: This is a complex skill check requiring 5 successes before 2 failures. DC 14 Wisdom (Chaositech tools) or DC 18 Intelligence (Arcana) checks.

ENTRANCE TO CHAOSTECHNICIAN LEVEL: This level is connected to the Chaostechnician quarters (Area 8-10).

LEVEL 9 – ENERGY PORTALS

CHAOTIC TELEPORT: Jumping through a portal on Level 3 allows one to emerge from a portal on Level 9 (and vice versa). Creatures without teleport stabilizers suffer chaotic disruption during teleport (2d6 points of necrotic damage, DC 16 Constitution saving throw negates).

Mrathrach Machine - Skull Foci

LEVEL 10 – SKULL FOCI

SKULL FOCI: A wide variety of humanoid skulls have been embedded into the machinery on this level of the Machine. Removing or destroying a skull foci opens a passage into the interior of the Machine. If all skull foci are removed or destroyed, it destabilizes this level.

  • Destroy: AC 15, 10 hp
  • Remove: DC 16 Intelligence (Chaositech tools) or DC 23 Intelligence (Thieves’ Tools)

RHODINTOR NESTS: A passage at the bottom of the shaft leads to the Rhodintor Nests (Areas 11-12).

INSIDE THE MACHINE

Zaug - Ptolus (Monte Cook Games)

TM and © 2022 Monte Cook Games, LLC

The inside of the Mrathrach tower is accessible from Level 10 (by removing or destroying the skull foci). It’s a hollow cylinder, but crisscrossed with pipes, wiring, gearworks, etc.

SEALED LEVELS: The interior of Level 2 is sealed and cannot be accessed from below. (It contains sarycal rhodintor.) The interior of Level 1 is just a solid mass of chaositech machinery.

ETHEREAL PLANE: The interior of the Mrathrach Machine has solidified on the Ethereal Plane.

INTERNAL RESONANCE: Each interior level of the Machine has 3d20+10 bloodsand rubies taken from Mrathrach’s Put. (These serve as sympathetic foci.)

  • Disabling: Removing at least 10 bloodsand rubies from each level will disrupt the internal resonance of the Machine.

BLOODSAND RUBIES

A dark red in color, with murky depths like coagulated blood. The surface of a bloodsand ruby glitters with a multitude of facets and is gritty to the touch.

CONDITIONS:

  • Difficult terrain due to the uneven floors, pipes, unstable paneling, etc.
  • Ruby Beams: Shooting between the bloodsand rubies on each level. There’s a 1 in 6 chance per level of a beam strike, targeting a random character. If struck, a character suffers 4d6 force damage (DC 18 Constitution saving throw for half damage).
  • Moving Between Levels: DC 16 Dexterity (Athletics) check to climb the interior walls. (There are lots of gaps between the pipes and the like, but also a lot of moving machinery which makes it quite difficult to maneuver thorugh.)

THE ZAUG: Located on Level 8. The zaug is hooked into the Machine with various tubes, etc. and cannot move. Killing the zaug destabilizes the machine.

Go to Part 3C: Mrathrach Handouts

Archives

Recent Posts


Recent Comments

Copyright © The Alexandrian. All rights reserved.