The Alexandrian

Posts tagged ‘d&d’

Go to Part 1

In part 6, we made it easier to run G1 Steading of the Hill Giant Chief by putting a room key on the map — a sort of cheat sheet for quickly orienting yourself geographically while running the adventure. As part of that discussion, I talked about the dire wolf encounter in area 22 and asked an important question:

“Who might hear this?”

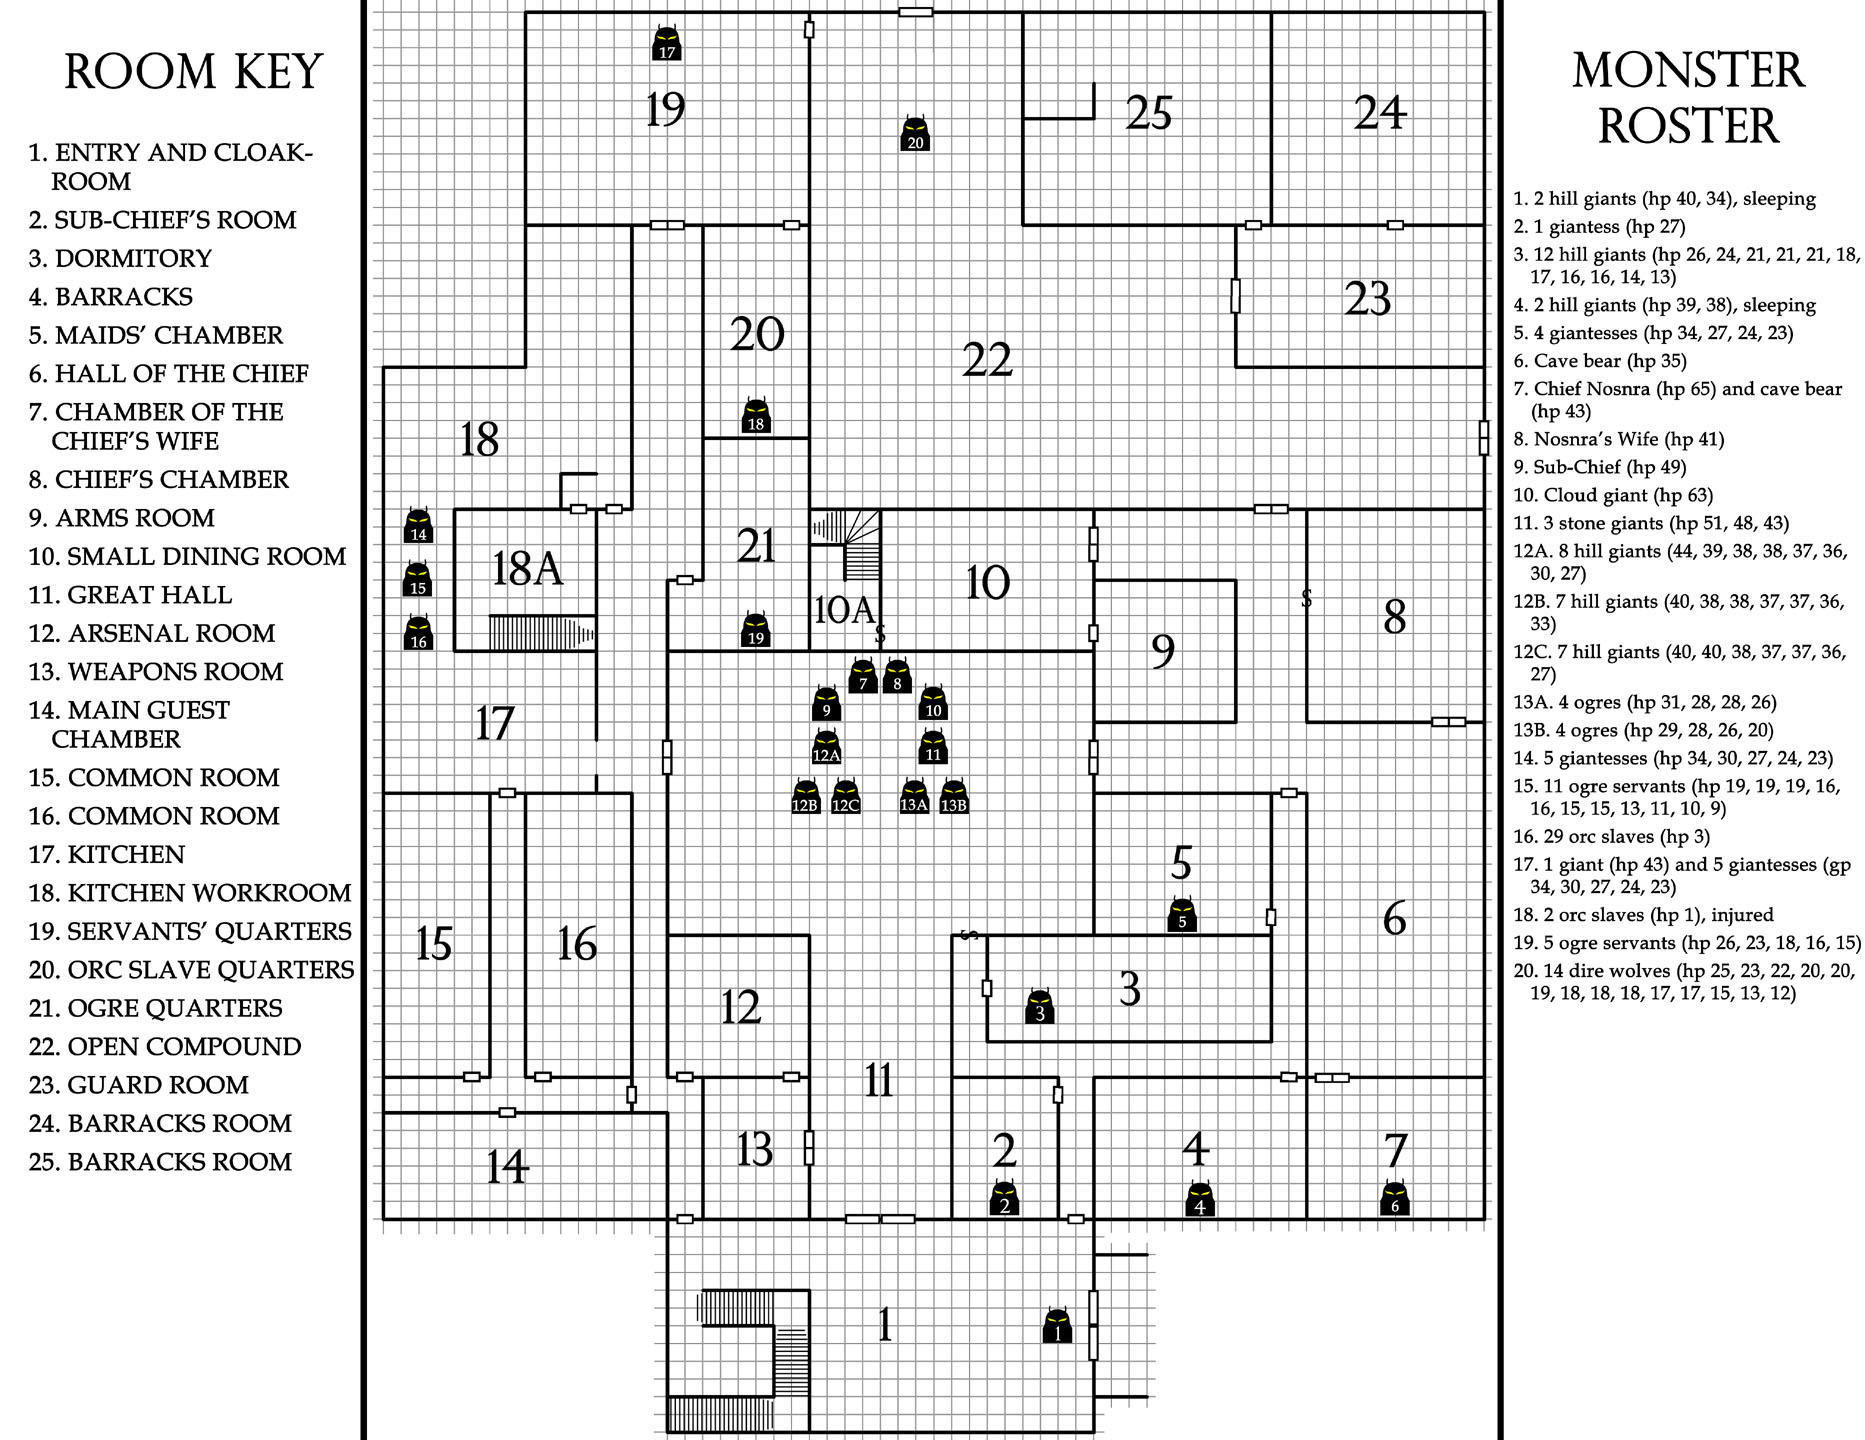
The layout of the complex gives us some clue to this, but wouldn’t it be even easier if we could look on the map and actually see where the monsters are?

To do this, we’ll need a symbol. Let’s try something like this:

Symbol - Monster

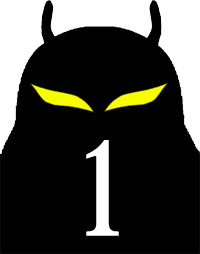
Using this symbol we can quickly indicate “Here There Be Monsters!” But let’s say we wanted to include more information than that. It’s pretty easy to numerically key the symbol:

Symbol - Monster Keyed

We could use that number to simply indicate the number of monsters present, but I think it would be more useful to use the number as a reference to a roster of monsters. And we can put that on the dungeon map right next to the room key:

G1 Map - Room Key and Monster Roster

(click for a larger version)

For this, I’ve basically just grabbed the info from the module. But it wouldn’t be too hard to tap the Monster Manual and include stat lines.

If we wanted to get a lot fancier, we could also use double-encoding here by preparing a different silhouette for each type of monster. They would let us tell in a glance where, for example, all the goblins are located.

Another option would be to color code the monster symbol to represent factions within a dungeon. (This could be really great for something like the Temple of Elemental Evil, for example.)

In any case, the “life” of the complex almost immediately jumps out at you. You could almost play the adventure from this single sheet alone (although you’d miss out on a lot of the detail to be found in the full key), and it shouldn’t be hard to see how a map like this makes it virtually unnecessary to look at any key except for the room the PCs are currently exploring.

THE GM’S TABLEMAT

I coined the term “GM tablemat” to refer to “roll-on” tables. But for years now I’ve been using dungeon maps as tablemats in combination with monster rosters to run truly living dungeon complexes.

Before explaining what I mean by that, let me back up for a second.

In prepping the monster roster shown above, I simply listed every single creature in the steading. If I were prepping G1 for my home campaign, however, there are several monsters I would have skipped:

  • #5: The giantess maids are unlikely to leave their chambers during an assault.
  • #6: The pet cave bear isn’t going anywhere unless someone fetches him.
  • #14, 15, 16: The cooks and servants in the kitchen are unlikely to go anywhere.
  • #17: Iffy. Based on the description in the module, these guys are unlikely to go anywhere. But they might (particularly if loud noises attract their attention from area 22). I’d probably list ’em just to be on the safe side.
  • #18: The injured orcs definitely aren’t going anywhere.
  • #20: Iffy. The dire wolves won’t go anywhere on their own, but they’re more likely to be fetched to aid in the defense of the steading. Again, I’d probably list ’em.

As you can probably tell, my methodology is simple: If a monster will never be encountered outside of a specific keyed location, I won’t bother including them on the roster. (Like the other details of that keyed location, I’ll notice ’em when the PCs reach that area.)

When I’m prepping my own adventures, I’ll actually go one step further: Monsters that appear on the roster won’t appear in the encounter key at all. That way, if I see a monster in the encounter key I know that it’s definitely there and nowhere else. (Meanwhile, I’m keeping track of the rostered monsters independently.)

At this point, we’ve got the steading down to a fairly manageable 14 roster groups. When it comes time to run the adventure, this is what you want to do:

  1. Lay the adventure map out as a tablemat in front of you.
  2. Take counters numbered 1-14 and place them on the map in the “starting location” for each roster group.
  3. You are now ready to manage your monsters in real time. Just move them around the map as the situation demands.

(Note: Numbered counters are easy to find on the cheap. It’s also pretty easy to make your own by printing out the numbers and then affixing them to washers or quarters or something of the like.)

This is why the monsters in area 11 were broken into several smaller groups: To make them more manageable if the giants need to split up.

The rostered approach also makes it really easy to re-arrange the denizens of a compound on a cycle. For example, you could prep one roster for the day and a different roster for the night.

Personally, however, my limit for this sort of thing is usually around 12-15 roster groups. Larger complexes can sometimes be broken down into smaller sections to make them manageable, but if that doesn’t work then that’s the point where I’ll swap from a “living complex” approach and start using random encounter tables to simulate a compound’s life.RPG Blog Carnival

This post is part of the RPG Blog Carnival for Cartography.

Go to Part 1

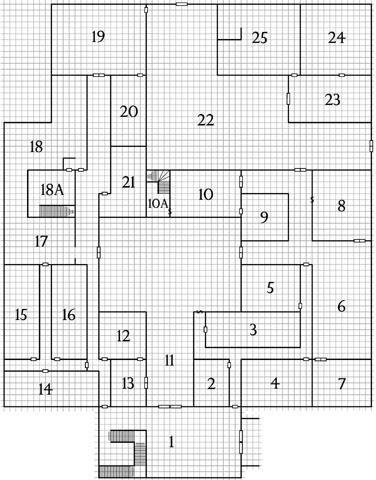
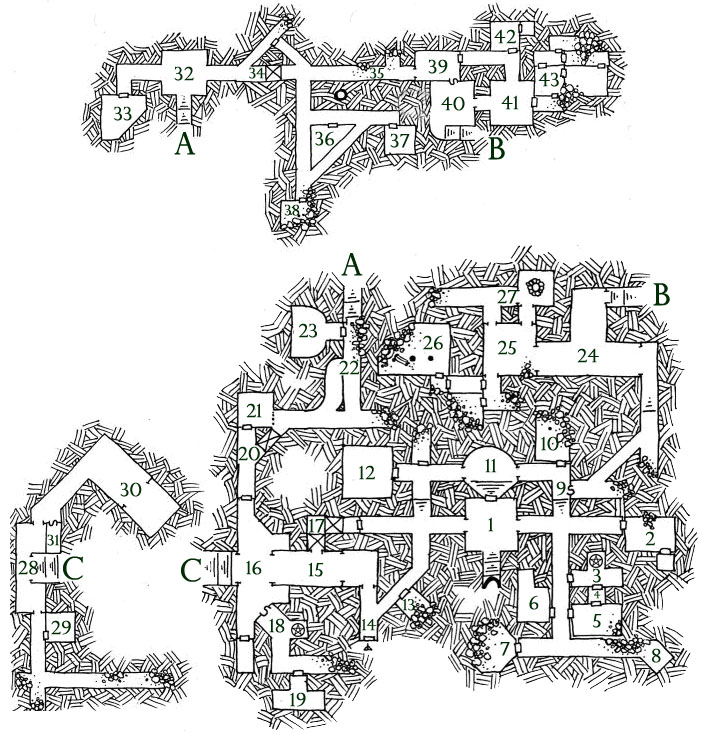
Let’s step aside from the map itself for a moment and spend a moment talking about how the map is actually used at the gaming table. For reference I’m going to use this redrawn version of the map from G1 Steading of the Hill Giant Chief:

G1 Steading of the Hill Giant Chief

(The only substantial difference is that I haven’t included the fireplaces that appear on the original map.)

Imagine, for a moment, that your PCs have just entered area 22 on this map. You flip to page 5 of the module and check the key:

22. OPEN COMPOUND: 14 dire wolves run free here (HP 25, 23, 22, 2 x 10, 19, 3 x 18, 2 x 17, 15, 13, 12), and they will immediately attack any non-giant or non-ogre entering their area. Note that if they see the whip (room 19), however, they cower and make no sound, but otherwise they howl and bite!

Easy enough. What else might you want to know once the dire wolves start howling and biting?

We can probably start with, “Who might hear this?”

So we’d take a quick peek at neighboring rooms: 8, 10, 10A, 19, 20, 21, 23, and 25. Crap. Now I’m trying to look at multiple pages of the module simultaneously to figure out how, at a fundamental level, this compound “works”. In a lot of modules you can actually find yourself trying to look at a half dozen pages just to figure out everything that the PCs can actually see from a particular area.

The problem, of course, is that the map itself is largely a cipher: It’s a bunch of rooms, some doors, and some keyed numbers.

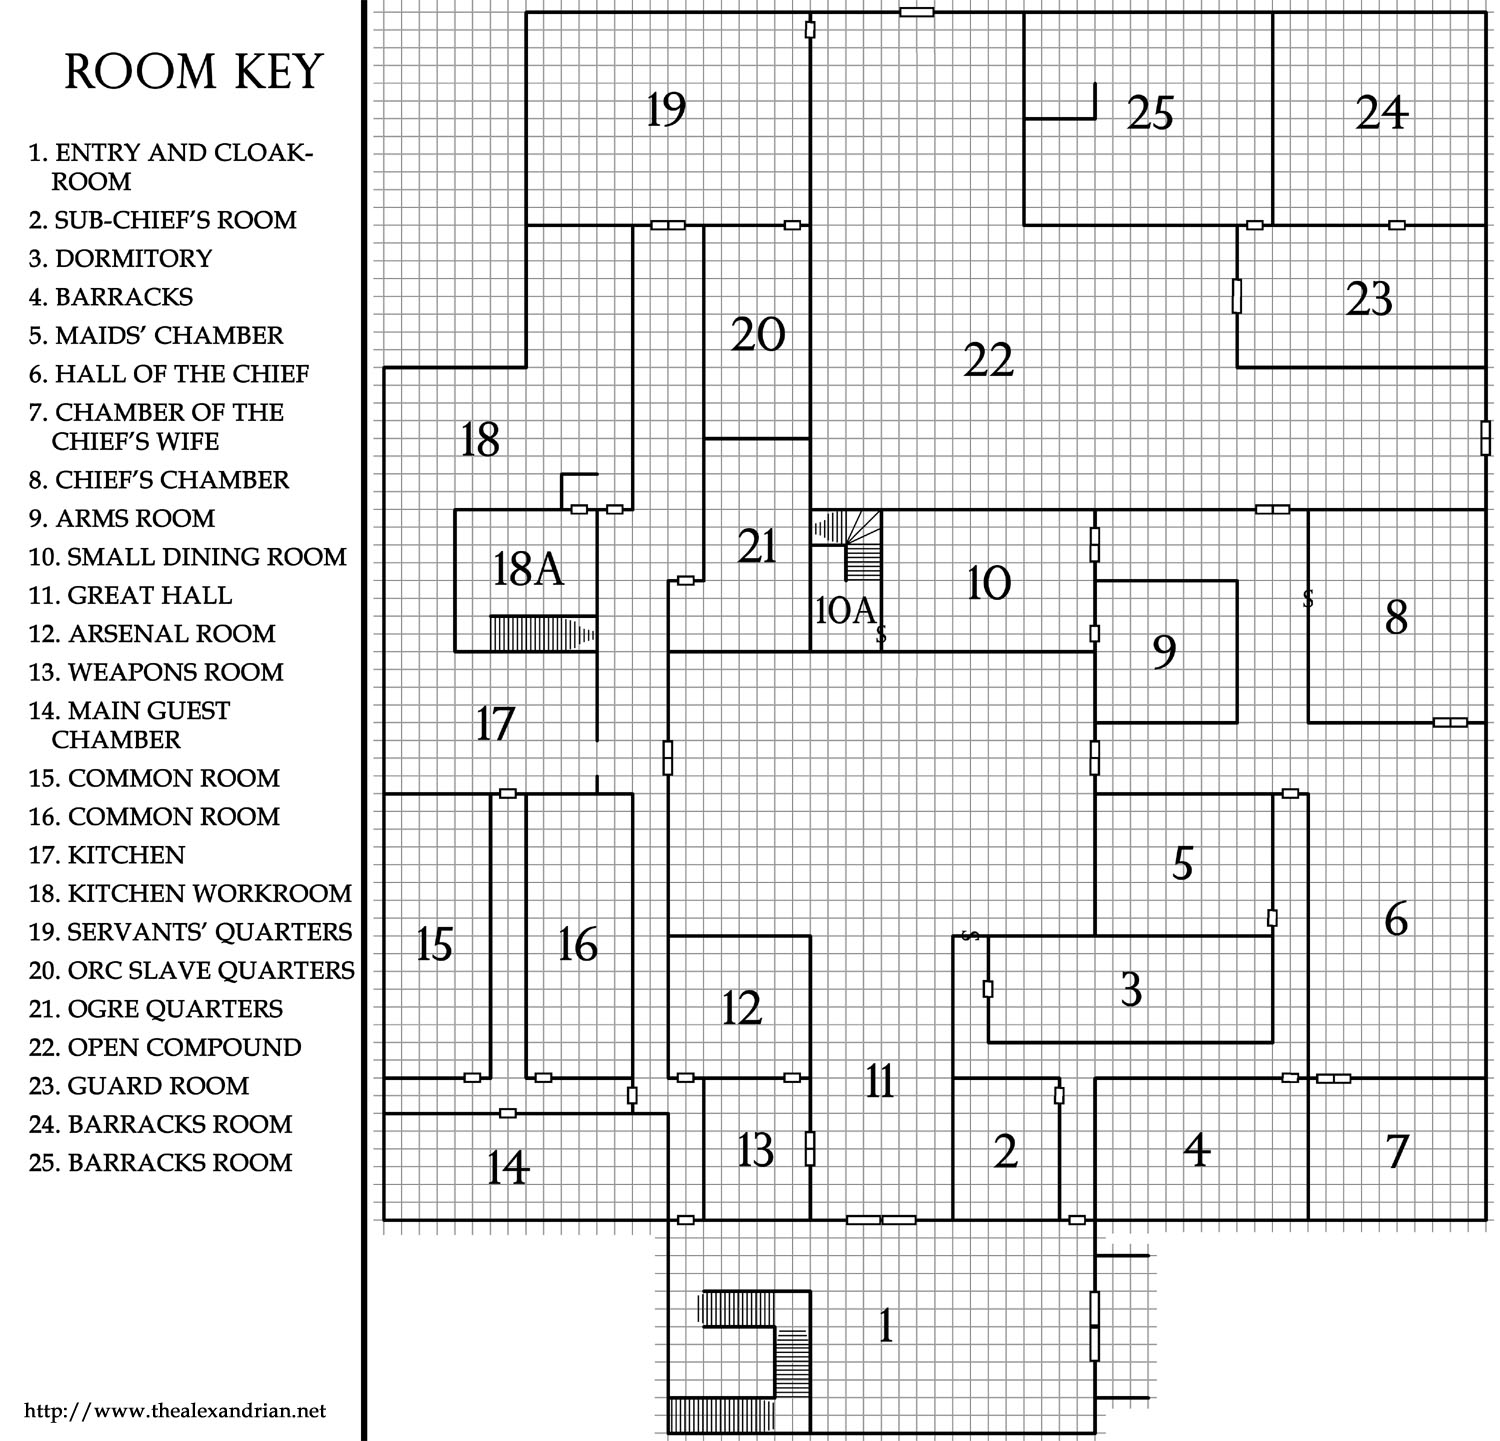
There are a lot of ways we could make it easier to figure out what we’re looking at. An easy one is to simply list a room key:

G1 Steading of the Hill Giant Chief - Room Key

(click for a larger version)

Now I can tell in a glance that area 23 is the Guard Room (I’m guessing the dire wolves will attract some attention from there). Area 19 is a servants’ quarters (they’re unlikely to come out, but might flee out the other exit and down the hall looking for help; or maybe they’ll need to keep the orc slaves from area 20 in line if they start panicking).

And  so forth.

Obviously this doesn’t entirely eliminate the need to reference the map key. But it does let us eliminate a lot of key references, cutting down on the page-flipping and allowing us to stay focused on the keyed information that’s most immediately important. This is particularly important when it comes to referencing important, non-localized information (the type of information we want about a location even when the PCs aren’t in that location).

What other non-localized information could be usefully pulled up onto the map?

More on that in Part 7.RPG Blog Carnival

Go to Part 7: The Monster Roster

This post is part of the RPG Blog Carnival for Cartography.

Go to Part 1

Pit traps are as old as the game itself, and their iconography is familiar to anyone who’s spent time gazing at dungeon maps. A little less familiar, perhaps, is the symbol for an open pit, but it’s not exactly a stranger to the dungeon, either.

Symbol - Pit Trap Symbol - Open Pit

If you’re in need of a circular pit, it’s pretty easy to modify these familiar symbols to suit:

Symbol - Circular Pit Symbol - Open Circular Pit

This leads us pretty comfortably to a discussion of trapdoors which are designed to be traversed (usually taking you to another level of the complex). These, too, have an established iconography:

Symbol - Trapdoor in Ceiling Symbol - Trapdoor in Floor

With “C” indicating a trapdoor in the ceiling and “F” indicating a trapdoor in the floor.

But here things get a little confused, because you will also find some maps keying the “C” to mean “concealed trapdoor”. (Which matches the use of “C” to indicate concealed doors in general.) This matches the use of an “S” to consistently mean both “secret trapdoor” and “secret door”:

Symbol - Secret Trapdoor

So what I’m going to suggest is that our map symbols for trapdoors instead look like this:

Symbol - Trapdoor Down Symbol - Trapdoor Up

And it’s now relatively simple to use “S+”, for example, to indicate a secret trapdoor going up. Or even a +/- to indicate trapdoors in both the floor and ceiling at the same spot.

The other argument for this is that it conveniently matches the UIS’s key for indicating the difference between pits in the floor and chimneys in the ceiling:

UIS Pits and Chimneys

Which looks pretty useful to me.

Final thought: Would it be useful to indicate the depth of a pit?

Symbol - Pit with Depth

The meaning seems fairly clear, but it might be muddier if we were dealing with a closed pit. What if we invert our symbol for ceiling height and use it to indicate depth?

Symbol - Open Pit with Depth Symbol - Closed Pit with Depth

It looks perhaps a trifle redundant on the open pit, but I’m guessing the consistency of iconography is worth it. Particularly since this same design can be used for pits and chimneys as desired.

And as a bonus, here’s a thought on indicating a spiked pit:

Symbol - Spiked Pit

What other common features do pits have that it might be useful to include on the map?RPG Blog Carnival

Go to Part 6: The Room Key

This post is part of the RPG Blog Carnival for Cartography.

Go to Part 1

One of my goals with this series of brainstorming posts is to find ways to encode as much data as possible onto the dungeon map itself. This is partly to supplement the map key, but it’s also about removing some types of information from the map key in order to make the key itself easier to use.

One example of that would be ceiling height. Although this information is often forgotten about entirely (which becomes increasingly problematic as the PCs start levitating and flying), if it were to be habitually included in the key it would become an extra bit of clutter to parse.

On the dungeon map, however, I think it adds clarity and can be easily referenced. Assuming, of course, that we have a clear method for doing it.

On cave maps, differences in elevation and height will often be indicated by simply listing numbers. For gaming maps, however, I’ve found that this approach – mixed with a numbered room key – often results in a confusing map. Different font sizes and/or text colors can aid in comprehension, but the layout still often comes across as fairly muddy to me.

Consider this solution adapted from Aeons & Auguries, however:

Ceiling Height Symbol

The symbol clearly sets off the number and allows quick identification for what this number (in a potential myriad of others) is referring to.

More generally, if we combine this with our symbol for light sources, I would argue that we have the basic workings for giving each room a “detail legend”. Let’s try it out:

Ceiling Height - Sample Map

Probably needs some tweaking on the starburst symbol in either size, design, or font to make it more legible. But the basic principles seem pretty sound and easy to read: At a glance I can tell that all three rooms are lit with candle-strength lights (20′ radius), while the ceiling in area 12 rises to a high vault 40′ above the heroes’ heads.

If the map allows, it would probably also be pretty easy to place the detail legend for a room next to the room, possibly with some kind of grouping iconography to make it clear which room the legend belongs to:

Ceiling Height - Sample Map 2

CEILING FORMS

What about unusual ceiling shapes? any way to get those on the map?

Here’s how the UIS keys ceiling forms for cave maps:

UIS Ceiling Forms

We could probably use a simple version of the same, keying from our ceiling height legend:

Ceiling Form - Sample Map

Not something you need for every room, but potentially useful for when those sorts of details become important.RPG Blog Carnival

Go to Part 5: Pit and Chimneys

This post is part of the RPG Blog Carnival for Cartography.

Savage WorldsSavage Worlds uses playing cards for initiative: Each round, everybody is dealt a playing card and the rank of the cards determines the order in which characters take their actions. The system has the advantage of being quick, intuitive, and transparent. (It’s very easy to glance around the table and immediately see when people will be taking their actions.)

Here’s a variant of the same idea designed for D20 or D20-like systems.

PLAYING CARD INITIATIVE

THE DEAL: Each round, deal each PC and each group of NPCs a playing card. Characters with an initiative bonus are dealt extra cards equal to their bonus and get to keep the best card dealt to them. Characters with an initiative penalty are dealt extra cards equal to their penalty and must keep the worst card dealt to them.

(For example, Peter the Brave has a+2 initiative bonus. He is dealt three cards — the single card that everyone receives automatically, plus two bonus cards from his initiative: A ten, a nine, and a jack. He keeps the jack.

Brazz the Slow, on the other hand, has a -1 initiative penalty. He’s dealt two cards: An eight and a six. He must take the six.)

THE COUNTDOWN: Once the cards are dealt, the GM simply counts down from Ace to Deuce with characters taking their turns when their card comes up. In the case of a tie, actions can be resolved simultaneously. If the tie must be broken, resolve by suit order in reverse alphabetical order: Spades, then Hearts, then Diamonds, and then Clubs.

JOKERS: Jokers are wild. When you’re dealt a joker you can keep it even if you have an initiative penalty. A joker allows you to go whenever you want in a round, even if it means interrupting another character’s action with your full turn! In addition, you gain a +2 bonus to all checks and damage rolls for the round.

SHUFFLING: Reshuffle the deck after any round in which a Joker was dealt.

VARIANTS

TRADITIONAL VARIANT: Instead of drawing each round, you can simply draw once for the full combat. When characters take a readied or delayed action that changes their initiative, it’s recommended that players fish out a card of the correct value.

UTILITY VARIANT: Designate one of the players as the dealer. The GM can just tell them how many cards he needs and let them handle the actual dealing of the cards. Alternatively, if you’re all right handling simultaneous action resolution, there’s no reason the GM and players couldn’t have separate decks.

POKER VARIANT: For completely dissociated wackiness, let the players form poker hands by taking collective actions with various bonuses depending on the hand formed. Many poker hands, of course, would require some of the players to delay their actions for the round. (For example, two players with a pair attacking the same target could each deal double damage. What might a royal flush be worth?)

Archives

Recent Posts

Recent Comments

Copyright © The Alexandrian. All rights reserved.