The Alexandrian

Archive for the ‘Roleplaying Games’ category

Go to Table of Contents

The Pride of Morrain is named after a former scion of House Vladaam. Morrain was arrested for piracy during the War of Black Sails, escaped from the gallows in Trolone, and returned to Ptolus before being killed by Freeport assassins (who had been sent by a powerful pirate captain whose daughter Morrain had raped and murdered).

The prow of the ship is fashioned to resemble the head of a red dragon. The crew of the ship will tell tales of how the cunningly craft wooden head contains the mummified heart of a dragon slain by Morrain himself. It’s possible that many or all of them actually believe this tale, but it’s not true.

CAPTAIN BOASTIA: Use stats for pirate captain (MM 2024, p. 242).

SHIP’S MAP: The map of the Pride of Morrain is based on the Duskbringer battlemap published by Elven Tower. The original map can be found here, but the version seen above has been heavily modified. Patrons of the Alexandrian have exclusive access to a high-resolution version of the modified map, suitable for printing or VTTs.

AREA 1 – THE WHEEL

The brass wheel of the ship has a plaque attached to it, explaining that it was taken from the original Pride of Morrain and was wielded by the hand of Prince Morrain during the War of Black Sails.

AREA 2 – MAIN DECK

At first glance, a fairly typical ship’s deck.

AFT DOOR: The aft door, leading below decks, is surprisingly sturdy and can be secured with two locks and a bar from the outside. (This is a final defensive measure against the potential of slave uprising.)

  • AC 19, 40 hp, DC 18 Dexterity (Thieves’ Tools)

CARGO HATCH: Similarly, the cargo hatch is secured with a pair of hefty padlocks.

  • AC 19, 7 hp, DC 18 Dexterity (Thieves’ Tools)

AREA 3 – BALLISTAS

The upper deck ballistas are mounted on swivels.

SEARCH — DC 10 Wisdom (Perception): 6 of the bolts at each ballista tipped with alchemist’s fire.

  • DC 14 Intelligence (Wisdom): To find a slip of paper under the alchemist’s fire bolts at the prow of the ship billing for various supplies which were delivered to an address on Wayfarer’s Street. (This address belongs to Alchemical Lab — Shadowworks, which created the fire bolts.)

ALCHEMIST’S FIRE BOLTS: 3d10 piercing damage. Target takes 1d10 fire damage at the start of each of their turns.

AREA 4 – GRAPPLER BALLISTA

The lower ballista is secreted within the open mouth of the ship’s red dragon prow. The bolts shot by this ballista are tethered and a powerful, steam-powered mechanism under the deck can be used to drag pinioned ships into boarding range.

AREA 5 – SUPPLIES & ARMORY

In addition to hard tack, barrels of water, rope, and other necessary supplies, this room contains an unusual number of weapons:

  • scimitars & dragon pistols (Ptolus, p. 522), enough to arm the sailors
  • dragon rifles (Ptolus, p. 522) to arm the Advanced Vladaam Guards

STAIR DOORS: The doors at the bottom of the stairs are steel-cored and securely locked.

  • AC 19, 40 hp, DC 18 Dexterity (Thieves’ Tools)

AREA 6 – WATER PURIFIER

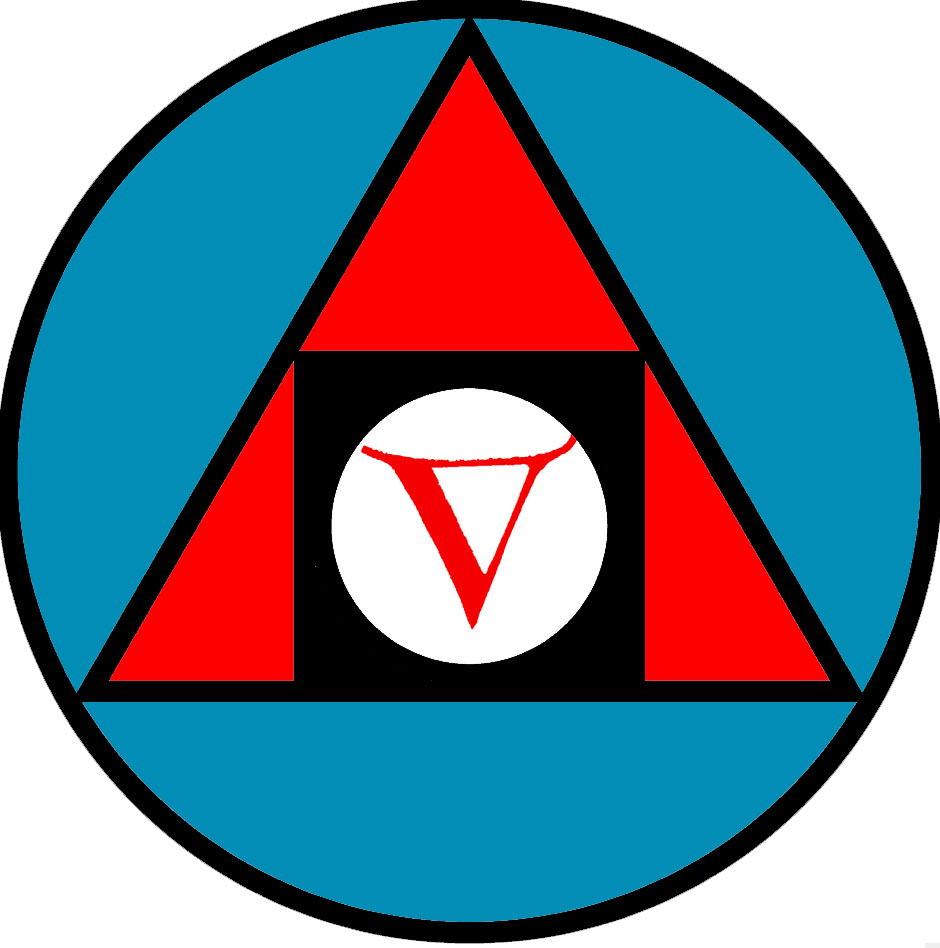
A technomantic device in this compartment siphons ocean water and purifies it for human consumption… but only imperfectly. The result is potable, but still has a slightly salty and unpleasant aftertaste. It’s good enough for the slaves, though.

SIGIL: The device is marked with the Vladaam alchemy sigil:

Vladaam Alchemy Sigil

AREA 7 – UPPER HOLD

The upper hold generally contains mundane cargo.

CARGO HATCHES: Cargo hatches lead to both the upper deck (Area 2) and the slave hold below (Area 12). Both are secured from above with a pair of hefty padlocks unless in use.

  • AC 19, 7 hp, DC 18 Dexterity (Thieves’ Tools)

AREA 8 – CREW QUARTERS

These chambers are filled with crisscrossing hammocks and where most of the crew sleep.

AREA 9 – VLADAAM MAGE’S QUARTERS

The Vladaam Mage assigned to the ship keeps their quarters here. Their personal belongings include their spellbook and A Missive Regarding Slaves.

  • GM’s Background: The sigil on the missive belongs to Aliaster Vladaam.

A MISSIVE REGARDING SLAVES

Guildmaster Arzan tells me you have a sharp eye. I expect you to practice it now. We are conducting crucial experiments in the apartments on Crossing Street and are in need of experimental stock. We are particularly in need of those with an affinity for metamorphic compounds while also possessing the physical endurance to withstand the experimental techniques. If you observe any such during your service, flag them to my attention immediately.

Vladaam Affair - Aliaster's Arcane Sigil

AREA 10 – SLAVE CELLS

These cabins are secured with locks from the outside and have been outfitted to secure rare and valuable slaves. They are generally empty, but there’s a 10% chance of occupation for each cell, in which case roll 1d8 to determine the CR of the inhabitant and use a random encounter table of your choice to determine who/what it is.

AREA 11 – CAPTAIN’S QUARTERS

Captain Boastia gets an actual bed! It’s nothing too fancy, but it’s pleasant enough.

The captain’s logs can be used to reconstruct the frequency and number of slaves being transported by the Pride of Morrain.

AREA 12 – SLAVE HOLD

The Vladaam Mages assigned to these ships regularly cast prestidigitation to clean out the holds, but it’s not enough to purge the sickening stench that clings to the slave holds – a mix of filth, excrement, blood, and putrescence.

GM Note: If the Pride of Morrain is not currently hauling slaves, this cargo hold may be converted to hold additional goods.

AREA 13 – LOWER HOLD

This area is generally used for standard trade goods and cheap rations for the slaves. If the ship is carrying a particularly large full load of slaves, the overflow may also be held in here.

AREA 14 – OFFICER’S MESS

Close inspection reveals that the officer’s mess is covered in a thin layer of dust, suggesting that it’s rarely used. The close proximity to the slave hold has rendered the mess an unpleasant place.

GM Note: There have been some discussions of converting the space into additional cargo space, but Captain Boastia has been hesitant to abandon the tradition.

Next: Vladaam Slave Ship – Myliesha’s Sail

Go to Table of Contents

The Vladaam drug-running operations are woven through their deot and, thus, throughout The Vladaam Affair. This brief summary is designed to tie these disparate elements together, providing both an overview for the GM and some basic guidance if the PCs decide to pursue these leads.

Note: The drug trade also offers myriad opportunities for PCs to get involved with The Vladaam Affair for the first time. Addicts and dealers can be found throughout the city and in every walk of life, making it easy to drop clues into almost any scenario.

DRUGS HANDLED BY THE VLADAAMS

The Vladaam drug trade focuses on three specific drugs:

  • Abyss Dust
  • Snakeweed
  • Liquid Pain (Agony)

ABYSS DUST: Abyss dust is alchemically distilled from snakeweed (see below), although few associate the innocuous effects of snakeweed with this powerful narcotic. Abyss dust looks like ashes, with a rich black and gray color. It is administered through inhalation or smoking. Some hardcore users like to mix their abyss dust with snakeweed, claiming the snakeweed “takes the edge off” of some of the more extreme hallucinations.

LIQUID PAIN: This thickish red liquid, also known as Agony, liquid pain is distilled from the living pain of tortured souls. Through an alchemical law of antagonism it creates a feeling of intense pleasure in addition to its other effects. Recreational users use small, ceremonial knives to cut themselves and deliver the drug. It’s said that the recipe was perfected by demons and stolen from them by a Dark Warrior. (Who may, or may not have been a member of House Vladaam.) It is difficult to say how much truth there is in such tales, as opposed to salesmanship.

SNAKEWEED: The sunburst flower is found growing in many ancient ruins throughout the Serpent Islands. The trances produced by smoking the dried leaves and flowers of the plant became a popular, casual intoxication among the pirates of Freeport and spread to ports throughout the Whitewind Sea. When dried, the stuff is simply called snakeweed by most, and while it can be psychologically addictive it is relatively harmless by itself. When smoked, snakeweed produces a feeling of serene calm, a deadening of pain, and slight euphoria. Heavy doses produce an incapacitating euphoric stupor, and sometimes inspire dreams of shadowy, serpentine forms and vast cities beneath the waves. In Freeport, it is commonly used by the poorer citizens and sailors as an escape from the drudgeries of everyday life.

See Appendix: 5E Drugs for the mechanical details of these drugs.

SOURCES

  • Abyss Dust and Snakeweed are purchased in Freeport.
  • Liquid Pain is manufactured at the Vladaam Slave Warehouse (Part 16).

RUNNERS

FLEET OF IRON SAILS: The Fleet of Iron Sails (Part 9) smuggle abyss weed and snakeweed out of Freeport.

SURVEYOR APPRENTICES: The apprentices of the Red Company of Surveyors (Part 14), are used to run drugs. Small quantities or secret messages can be placed within the hollow rachis (stems) of their diamond-feathered badges.

SPICE SHIPMENTS: It’s not unusual to mix illegal drugs into shipments of legitimate spices, take the cargo to the Spice Market, and then separate out the illegal drug.

RECIPIENTS

In Ptolus, the Vladaams deliver drugs to both their own Curse Dens (Part 8) and independent dealers.

INDEPENDENT DEALERS:

  • Skull & Sword (Guildsman District; Ptolus, p. 180)
  • Spice Market (South Market; Ptolus, p. 340)
  • Dark Market (Midtown — Undercity; Ptolus, p. 399)
  • Vistor Krun (Warrens; Ptolus, p. 381)

TRACKING

If the PCs want to gather information on the Vladaam’s drug trade or put drug-related facilities under surveillance, there are two likely discoveries.

First, runners carrying drugs can be observed coming from any ship in the Fleet of Iron Sails. They can be followed to either the Rivergate curse den or one of the independent dealers listed above.

GM Note: These drugs are taken to the curse den in Rivergate and then distributed to the other curse dens from there.

Second, drug runners can be observed leaving the Vladaam Salve Warehouse and going to a curse den. (1 in 4 chance per day of a drug runner. Determine which curse den they’re heading to randomly.)

Go to Table of Contents

Mothership - Cheat Sheet by Justin Alexander

(click for PDF)

Mothership is a sci-fi horror RPG. Think Alien, The Thing, Pitch Black, or Annihilation.

Its calling card is an old school approach wedded to red hot innovation:

  • Blazing fast character creation.
  • Brutal systems for Combat and Stress.
  • Tons of sandbox support and tools in the Warden’s Operation Manual (the GM book).
  • An overwhelming amount of adventure support, including both first party books and a deluge of third-party support.

This last point, in particular, convinced me to make Mothership the basis for my current open campaign. Not only is there a ton of adventure support, a lot of it is designed so that you can spend 15 minutes reading through it and — presto! — you’re ready to go. My expectation is that I’ll be able to rapidly build a stable of adventures that will easily let me run the game with minimal or no prep.

I previously shared an alpha version of this cheat sheet. I’ve made a number of corrections based on your feedback, added additional rules (notable the rules for spaceships), and refined the content and presentation to reflect usage at the table.

WHAT’S NOT INCLUDED

These cheat sheets are not designed to be a quick start packet: They’re designed to be a comprehensive reference for someone who has read the rulebook and will probably prove woefully inadequate if you try to learn the game from them. (On the other hand, they can definitely assist experienced players who are teaching the game to new players.)

The Mothership cheat sheet, in particular, works very well in conjunction with the GM screen(s) for the game, which are excellent. (There’s both a standard screen and a larger deluxe screen, which each come with the respective boxed sets.)

The cheat sheets also don’t include what I refer to as “character option chunks” (for reasons discussed here). In other words, you won’t find the rules for character creation here.

HOW I USE THEM

I usually keep a copy of the cheat sheet behind my GM screen for quick reference and also provide copies for all of the players. I have two copies of the Mothership rulebook at the table, too, but my goal is to summarize all of the rules for the game. This consolidation of information eliminates book look-ups: Finding something in a dozen pages is a much faster process than paging through hundreds of pages in the rulebook.

The organization of information onto each page of the cheat sheet should, hopefully, be fairly intuitive.

PAGE 1: Basic Mechanics and Violent encounters. (Most of the core game play loops are covered here.)

PAGE 2: Violent Encounters and the Threat System. (See below.)

PAGE 3: Survival. (Most of the miscellaneous rules in the game.)

PAGE 4: Ports & Medical Care. (Stuff to do in your downtime.)

PAGE 5: Ship Stats & Space Travel. (All the rules for operating ships except for ship-to-ship combat.)

PAGE 6: Ship Repairs & Contractors. (Not a big fan of these two sharing the same sheet, but they ended up being two half-pages without good companion pieces.)

PAGE 7: Ship-to-Ship Combat.

Having run character creation for Mothership a couple of times, the sheer speed at which it happens turns the limited number of rulebooks at the table into a significant choke point. I’m going to continue experimenting with how that should be handled, and probably trying to figure out which pages from the PDF need to be printed out to help everyone zip through. (I’ll report back when I know more.)

CRUXES

This cheat sheet has not quite reached its final form. There are still several elements I’m experimenting with. A few things to note:

First, these sheets include my personal house rules. With the exception of the Threat system (which I’ll discuss in a moment), these are marked in blue. Some of these are original rules, others overwrite the published rules. When I release the final version of the sheets, I may or may not do a version which is strictly the published rules of the game, but for now this is my working document and what I’m using at the table. If you want to strip these house rules out on your own, here’s a copy of the Microsoft Word file I used to create the cheat sheet so that you can easily edit it:

Mothership Cheat Sheet – Microsoft Word

Note that you’ll need to track down the relevant fonts.

Second, the sheet includes the Threat system, which I first discussed in Mothership – Thinking About Combat. Based on actual play, the system as presented here has received some refinement (and I’m still tinkering with it).

For the moment, this has also resulted in the “Violent Encounters” section of the cheat sheet appearing on both the first page (paired with Basic Mechanics) and the second page (where it appears with the Threat system for a complete combat reference). Partly this is because I’m still experimenting with the Threat system. Partly because I’m still trying to figure out the final layout of the sheets. And partly so that those not interested in the Threat system can simply remove that page of the cheat sheet and still have a fully functional packet.

I previously discussed an additional crux:

Androids & Oxygen: The rules state that androids don’t consume oxygen when life support systems fail, but there are separate rules for vacuums and toxic atmospheres (which require rebreathers or oxygen supplies). Should androids be affected by exposure to vacuum or toxic atmospheres? My ruling is No.

I have not included a resolution to this particular conundrum on the sheet. In my personal campaign, we’ve been developing a wide variety of androids and I’m still figuring out if different types will have different features and, if so, how they interact with things like the Atmospheres rules and hyperspace travel.

MAKING A GM SCREEN

These cheat sheets can also be used in conjunction with a modular, landscape-oriented GM screen (like the ones you can buy here or here).

Personally, I use a four-panel screen and use reverse-duplex printing in order to create sheets that I can tape together and “flip up” to reveal additional information behind them. (This simple sheet, however, will simply fit directly into the four-panel screen.)

Mothership - Sci-Fi Horror RPG (Tuesday Night Games)

I’ve been thinking about jump travel in Mothership. Here’s a quick summary, as described in the core rulebooks:

  • Jump points are rated from Jump-1 to Jump-9.
  • Utilizing a jump point requires a jump drive of equal to higher rating.
  • For the crew of the ship, the jump always takes 2d10 days.
  • Jumps usually seem to take the same amount of time for the rest of the universe, but each jump carries the risk of an unusual time dilation: Ships might disappear for months or even years instead of days.
  • The longer/higher rated the jump, the more dangerous and severe the time dilation appears to be. It’s possible that some of the Jump-9 deep space exploration vehicles that have gone missing will reappear a thousand years in the future.

The rulebooks, however, leave these time dilation effects up to the GM’s discretion. I thought it might be useful to instead resolve the mechanically.

TIME DILATION

When a ship performs a jump, roll 1d10 per Jump rating (e.g., if a ship is making a Jump-3, roll 3d10).

For each 1 rolled on a d10, the actual trip duration increases by one step:

  • days
  • weeks
  • months
  • years
  • decades
  • centuries

If you’re making a standard Jump-1, you have a minimal risk of the trip taking 2d10 weeks instead of 2d10 days. If you attempt a Jump-3, on the other hand, there is a 1-in-1000 risk that you’ll roll three 1’s and return 2d10 years later.

Note: This does not change the subjective time experienced by the ship. For the crew, a jump trip seems to take 2d10 days, regardless of how much time passes in the wider universe.

Other Chaotic Effects: At the GM’s discretion, each 1 rolled on the time dilation check instead triggers a different chaotic effect. Examples might include:

  • a crew member is replaced by a completely different person
  • time dilation is inverted (the trip takes minutes or seconds instead of days) or reversed (they arrive before they left)
  • subjective time experienced by the crew is dilated instead
  • strange hallucinations or manifestations
  • crew is unexpected awoken from cryosleep during the voyage
  • the ship arrives in the wrong place

ASTRONAVIGATION

Calculating a jump requires an Intellect (Hyperspace) check. This check is made with [+} if the astronavigator remains awake during the jump, monitoring the astronavigation computers.

Success: You made it!

Critical Success: Roll one fewer d10 when making the time dilation check for the jump. For a Jump-1 trade route, roll 2d10 and only have the ship experience time dilation if both dice roll a 1.

Failure: Something goes wrong! The GM chooses one:

  • Double the number of dice rolled for the time dilation check.
  • The ship arrives in the wrong place. (1 in 10 chance you arrive back where you started after 4d10 days, having traversed a Calabi-Ricci spacetime loop.)
  • The ship is damaged by jump turbulence, roll a Repair (SBT, p. 39).

Critical Failure: You could have killed us all! All three consequences of Failure happen simultaneously.

TRADE ROUTES

According to the Shipbreaker’s Toolkit, “regular Jump-1 trade routes seem to wear down the chaotic effects” of jump travel. Navigational calculations become more precise with each additional jump that’s recorded along a route, and ships traveling through the jump point can effectively wear a “groove” into spacetime.

At the GM’s discretion, ships jumping along a route which has been “worn” by regular travel reduce the number of d10s rolled for the time dilation check by one. For a Jump-1 trade route, roll 2d10 and only have the ship experience time dilation if both dice roll a 1.

UNCHARTED JUMPS

Most interstellar travel happens along charted jump routes: Jump points that have well-plotted navigational solutions (even if they shift slightly due to stellar drift) and are known to be stable.

These are not the only jump points in space, however. Once you’re away from planets, asteroids, and stations, it turns out there are many unstable points in the fabric of space which are constantly being created, destroyed, and shifting according to complex spacetime geometries.

The GM determines the base Jump rating of the uncharted route. (This can usually default to the total value of all Jump-ratings along the known path from the current system to the destination system. For example, if you could normally get to the other system through a known Jump-1 route, the base Jump rating for an uncharted route would also be Jump-1. If you would normally need to make a Jump-1 followed by a Jump-3, then the base Jump rating for the route would be Jump-4.)

Plotting the uncharted jump requires an Intellect (Hyperspace) check. This includes identifying the location of the jump point you need to use, which you will then need to travel to (as shown on the table below). If you’re in the Inner System or in orbit around a planet, increase the time required by one step. (Weeks become months.)

Success: Add 1d2 to the base Jump rating. This is the Jump rating of the uncharted route, which is then resolved normally.

Critical Success: -1 to the base Jump rating (minimum 1). In addition, roll 1d10. On a roll of 1, the jump path you’ve discovered is a new stable route. (Depending on the value of the route, selling the location of this new jump point might be worth thousands or millions of credits.)

Failure: Add 1d5 to the required jump rating. If you roll 5, roll again and add the result to the jump rating. If the result is 10 or higher, you have been unable to find any jump points leading to your desired destination.

Critical Failure: You thought you could get from here to there via a safe jump, but you were very wrong. Your Astronavigation check automatically fails. In addition, determine the jump rating as per a Failure, but you attempted the jump no matter what the result is. If the result was higher than the rating of your Jump drive, your ship suffers 1d2 MDMG and emerges from hyperspace in a completely random and unexpected location. (This is a good way to end up adrift in interstellar space.)

Dark Leaf mercenary with a bow

Go to Table of Contents

The slave trade in Ptolus is a gray market: It’s illegal to sell a slave within the city limits, but not illegal to own one (although more and more people disapprove or outright loathe the practice). The local trade is dominated by the Ennin, whose operations extend far beyond Ptolus and openly use the city as a distribution center while also maintaining a surreptitious black market.

The Vladaam don’t directly trade slaves, per se, but have deeply entwined themselves with the Ennin’s operations. There are some who consider the Ennin little than a front for the Vladaam, but this is not accurate. The Ennin are actually, unbeknownst to the Vladaams, a front for the Pactlords of the Quaan (Ptolus, p. 125). Most of the Ennin’s leadership are, in fact, Pactslaves.

For their part, the Vladaams are involved with the slave trade in two ways:

  • The Vladaams maintain a warehouse as a place where the Ennin can temporarily store slaves who are going to be sold at the Ennin Slave Market (Ptolus, p. 399)
  • The Fleet of Iron Sails – specifically the Pride of Morrain, Eye of the East, and Sarathyn’s Sail – are regularly used to transport slaves for the Ennin. These ships collect slaves from the Serpent’s Teeth and deliver them to the Ennin Headquarters (Ptolus, p. 168).

The Vladaam operations are detailed below, while details of the Ennin facilities can be found in the Ptolus sourcebook, as indicated above.

VLADAAM SLAVE WAREHOUSE

Map of the Vladaam Slave Warehouse

As noted, this facility can temporarily store slaves who are going to be sold at the Ennin Slave Market. It’s used as either an overflow storage facility or as a place where the current stock of the Slave Market can be evacuated if the market is threatened by law enforcement. The Vladaams offer this service gratis in exchange for being allowed to use the slaves to process Liquid Pain (in area 9).

DARK LEAF: In order to distance the facility from the Vladaams, the security is managed by Dark Leaf mercenaries (Ptolus, p. 108) overseen by a centaur named Dilar.

DILAR: Dilar is a captain in Dark Leaf and in charge of the mercenaries here, but he is also deeply in debt as a result of gambling at the Oldtown curse den. Unknownst to either the Vladaams or Dark Leaf, Dilar is also involved with the chaos cults. (He appears in Night of Dissolution, p. 37, overseeing a meeting at a secret meeting hall just across the street from this warehouse.)

MALAR: Malar is lieutenant in Dark Leaf. He and the centaur used to be friends, but tensions and suspicions surrounding Dilar’s debts and cult activity have driven them apart. Malar would either like to supplant Dilar in Dark Leaf or make the hop to a better position with either the Vladaams or Ennin.

DENIZENS OF THE WAREHOUSE

DENIZENSLOCATION
2 Dark Leaf MercenariesEntrance
2 Dark Leaf MercenariesArea 1
2d6 unskilled laborersAreas 1 & 2 (day only)
6 Dark Leaf MercenariesArea 7
2 Vladaam Mages + 50% chance of 1d4 slavesArea 9

DILAR (d100)

  • 01-25: Area 1
  • 26-75: Area 7
  • 76-00: Not present

MALAR (d100)

  • 01-50: Area 7
  • 51-75: Area 9
  • 76-00: Not present

Dilar: Use veteran stats (MM, p. 350) with centaur traits.

  • +1 greatsword: Melee Weapon Attack: +6 to hit, reach 5 ft., one target. Hit: 11 (2d6+4) slashing damage.
  • Alignment: Chaotic Evil
  • Equipment: splint armor, +1 greatsword, ring of jumping, broken square ring, coiled viper amulet worth 10 gp, Vladaam house ring, 1 gp, 14 sp
  • Languages: Common, Elven

Centaur traits:

  • Charge: If Dilar moves at least 30 ft. straight toward a target and then hits them with a melee attack on the same turn, they target gains an extra 10 (3d6) piercing damage.
  • Multiattack: Dilar makes two attacks, one with his sword and one with his hooves.
  • Hooves: Melee Weapon Attack: +6 to hit, reach 5 ft., one target. Hit: 11 (2d6+4) bludgeoning damage.

Dark Leaf Mercenary: Use veteran stats (MM, p. 350) with wood elf traits.

  • Speed 35 ft.
  • darkvision 60 ft.
  • Spells: druidcraft, detect magic (1/day)
  • Fey Ancestry: Advantage on saving throws vs. Charmed condition.
  • Trance: Immune to sleep. Finish Long Rest in 4 hours.
  • Equipment: Vladaam house ring
  • Languages: Common, Elven

Malar: Use master thief stats (Ptolus, p. 612).

  • Malar has a Balacazar fiendish slave amulet (Ptolus, p. 398) which allows him to summon a Shoggti (Book of Fiends 5E, p. 199). The shoggti emerges by having its tentacles erupt through the surface of the amulet. There is an ornate B stamped on the back of the amulet, certifying it as a creation of the Balacazars.
  • Equipment: Vladaam house ring

Unskilled Laborer: Use commoner stats (MM, p. 353).

Vladaam Mage: Use mage stats, MM p. 347. See Part 13: Red Company of Magi.

Street map with the location of the Vladaam Slave Warehouse

Ptolus Map – H6

AREA 1 – WAREHOUSE

This front area operates as a legitimate warehousing business, run by the Vladaams and servicing various local businesses and markets. The ceiling is 50 feet high.

AREA 2 – UPPER WAREHOUSE

This area is basically a very large “ledge” about ten feet above the level of Area 1.

GM Background: This elevated area exists only to make room for the lower storerooms (Areas 4-6). Architecturally this doesn’t make much sense, though. The unintuitive layout exists only to obfuscate the existence of the slave warehouse below.

AREA 3 – STAIRS

These stairs lead down to Area 4.

ALARM: The head of an antlered buck has been hung on the wall of the landing. It has an alarm spell that sends a mental alarm to Dilar. The alarm is triggered by anyone who doesn’t wear a Vladaam house ring.

GM Note: The laborers never use these stairs.

AREA 4 – LOWER HALLWAY

This stone hallway is rarely used.

AREA 5 – LOWER STOREROOMS

These storerooms have the appearance of being used for legitimate storage (barrels, casks, boxes, crates, etc.). Any inspection, however, reveals that there’s a thick coating of dust on everything. Opening the crates reveals that they contain mostly garbage and miscellaneous junk.

GM Background: These storerooms exist only to provide a pleasant fiction masking the entrance to the slave warehouse in Area 6.

AREA 6 – ENTRANCE TO THE SLAVE WAREHOUSE

At first glance, this area is identical to Area 5.

DC 20 Intelligence (Investigation): Several crates along the back wall are fastened together. They can be unlatched from the wall and then slid away to reveal the stairs leading down to Area 7.

AREA 7 – SLAVE WAREHOUSE

A floor of bare stone, worn smooth with a single trap door in it to the right of the stairs. A board with various papers and bills of sale pinned to it has been placed on the wall next to the stairs. A bank of ten levers on the wall to the left. Multiple cell doors line the far wall, extending down a hallway to the right.

LEVERS: A bank of ten levers. They require a key (which is held by someone in this room; with a duplicate held by Dilar) and open the nine cell doors and the secret door.

TRAP DOOR: A spiral stair below the trap door leads down to Area 9.

SECRET DOORDC 20 Intelligence (Investigation): The secret door to the east leads to a section of old sewer that was capped and bypassed during a sewer renovation long ago. A section of this sewer breaks through into a portion of Ghul’s Labyrinth, which provides access to the Ennin Slave Market.

POSTED BILLS: Includes the Business of the Vladaam Slave Warehouse handout.

IRON COFFER (10%): There’s a 10% chance an iron coffer is present containing 500 gp, 40,000 sp, and 50,000 cp with instructions to have the Ithildin couriers ship it to the Red Company of Goldsmiths on Gold Street.

AREA 8 – SLAVE CELLS

The facility typically holds 2d20 slaves as an overflow facility from the Ennin Slave Market.

  • 75% chance per ship that some of the slaves here were shipped in on the Pride of Morrain, the Eye of the East, or the Myliesha’s Sail. (See Vladaam Slave Ships, below.)

BIG CELL: 25% chance that the large cell holds a special creature/slave. If this is the case, double the number of mercenaries in this room. Examples of such “special guests” could include:

  • 1d4 cockatrices
  • 1d4+1 ogres
  • 1d2 hippogriffs
  • Giant Ant Queen

AREA 9 – LIQUID PAIN FACILITY

The main area of this chamber is outfitted as a high-end alchemy laboratory.

COTS: Two eastern niches contain cots on which Vladaam Mages sleep. Small trunks slid under each cot contain (see handouts):

  • Vladaam Slaver Mage Spellbooks
  • Instructions for the Apparatus of Liquid Pain

LIQUID PAIN APPARATUS: The western niche contains four upright glass cylinders, each large enough to hold an erect man or woman. Shackles suspended from the ceiling allow the Vladaams to string up slaves upside down within each cylinder, while various tubes, syringes, and metallic attachments can be fastened onto someone so hung.

  • Liquid Pain: The apparatus allows one to withdraw 2d8 doses of agony (“liquid pain”) from a person suspended within one of the glass cylinders. The procedure lasts for ten minutes and the victim must make a DC 18 Wisdom saving throw or suffer 2d6 Constitution damage. (This is treated as psychic damage for the purposes of immunity and resistance.) On a successful save both the damage and the yield are halved.

Next: Vladaam Slave Ships

Archives

Recent Posts

Recent Comments

Copyright © The Alexandrian. All rights reserved.