The Alexandrian

Archive for the ‘Roleplaying Games’ category

Dagger's End - Skyrim

Go to Part 1

BACKTRACKING DALAKHAR

Once the PCs identify Dalakhar as the primary target of the explosion, they may want to try backtracking his activities.

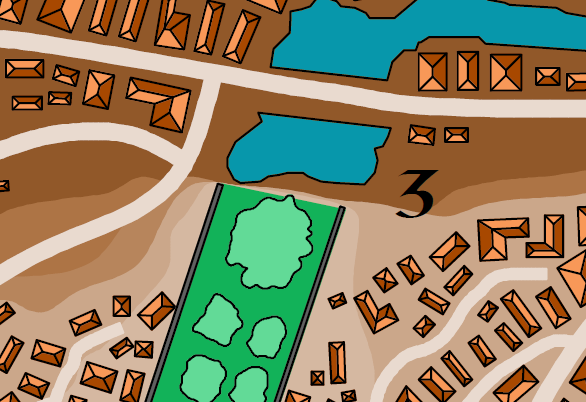
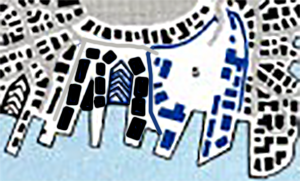
A successful Charisma (Investigation) check can track him back to the Inn of the Dripping Dagger, located in the Trades Ward (location T3 on the 3rd Edition City of Splendors map). He rented his room for one night and then left.

HIS ROOMS: Inspection will reveal that his room was scrubbed clean in a very professional fashion. A DC 12 Intelligence (Investigation) check will reveal ash in the base of the room’s oil lamp suggesting that a piece of correspondence was burned. (It can’t be reconstituted through non-magical means, but was Renaer’s response to Dalakhar’s original missive setting up the meeting at Trollskull Manor.)

Laying out in plain sight on the pillow, however, is a round disk of black stone painted with Xanathar’s stylized beholder sigil. It’s a death mark, left here as a threat after Xanathar’s minions tracked Dalakhar here.

XANATHAR RESPONSE TEAM: The room is also being watched by a Xanathar response team (see Part 3C). If they see the PCs enter the room, they’ll most likely accost them and see what they know about Dalakhar.

If it’s been more than a day since Dalakhar was killed, the response team has been briefed on that and is also aware that “the boss knows a guy name Floxin – one of those Zhent bastards – was following that gnome dungbag; the boss has got eyes on Floxin now”.

(This might give the PCs an alternative route to the Gralhunds by tracking down and following Urstul Floxin. Putting in some more legwork might discover that Floxin is currently operating out of Yellowspire (see Part 3B), and they might be able to follow him from there to the Gralhund Vila.)

If it’s been more than three days since Dalakhar’s death, the response team is pulled from this location.

THE LETTER: Four days after Dalakhar’s death, a letter arrives at the Inn of the Dripping Dagger for him.

Dalakhar,

I had to give considerable thought to your request. But you were always kind to me even when your demonic master was not. If you are still in need of my aid, you may claim whatever sanctuary I can offer.

Kalain of the Nine Waters

Before he was killed, Dalakhar was thrashing around trying to find whatever aid he could. He was even desperate enough to contact Kalain, a former mistress of Lord Dagult’s. Inquiries can identify Kalain’s place of residence in the Sea Ward.

DESIGN NOTE

The late arrival of the letter is designed to push a clue to PCs after their initial visit: Those who leave their names with the owners of the Dripping Dagger, particularly those who specifically ask the owners to contact them if any new information crops up, will be rewarded with a proactive follow-up. (Alternatively, but probably less likely, it can reward PCs who follow-up on old leads.) Since the clue is non-essential for the current investigation, the slightly heightened risk of them missing the clue is offset by the benefit of adding depth to the game world: Little details like this make the players feel as if the game world is a fully functional, living environment that persists beyond their immediate line of sight. (Largely because that is, in fact, what you’re doing.)

KALAIN’S TOWER

Kalain lives in a dilapidated tower in the Sea Ward. See Dragon Heist, p. 88, although the Vault is not secretly located there.

AREA W8 – KALAIN’S STUDIO: Here are Kalain’s most recent paintings, documenting her descent into madness.

  • DOCUMENT LOCKBOX: A document lockbox with three drawers sits on one of the tables (DC 13 Dexterity check to unlock). One of the drawers contains love letters she exchanged with Lord Dagult. Another drawer contains similar letters, but these have been torn to confetti. (She periodically removes a letter from one drawer, rips it to shreds, and deposits it in the other.) The third drawer contains a number of work papers left behind by Lord Dagult (see below).

KALAIN

Appearance: A beauty ruined by tragedy; lines of sadness are etched into her face. Long black tresses are streaked with silver turning to gray.

Roleplaying:

  • Believes everyone is secretly an assassin sent by Dagult Neverember to murder her.
  • Loses track of the conversation and abruptly starts talking about completely different subjects.
  • Rubs her cheek with her hand with increasing vigor as she becomes distressed.
  • Will activate creatures from her smaller, older, more peaceful paintings to assist her (fetching small objects, etc.).
  • Sees Dagult, Waterdeep, and the monsters of he newer paintings as all being the same thing; will refer to them interchangeably.
  • Speaks of Neverwinter as if she were a red-headed maiden who seduced Lord Dagult from her arms. Occasionally confuses Neverwinter and Alethea Brandath.

Background: Kalain, a famous Waterdavian painter, was commissioned to paint a portrait of Lord Dagult Neverember, then Waterdeep’s Open Lord, in 1475 DR. Her meeting with Neverember marked the beginning of a torrid affair that lasted over a year.

Their relationship faltered as Dagult’s visits to Neverwinter became more frequent and extended. He made promises to Kalain that he failed to keep, and when she raised the subject of a faithful commitment, he treated her poorly, for his true love was Neverwinter. Kalain became enraged after Dagult’s rejection and turned to painting monsters that, in her mind, represented him. Her power to harness the Weave clings to the fabric of her works, giving her the ability to bring these monsters to life on her command.

Ultimately Neverwinter left Kalain a little over four years ago. He used his influence to ruin Kalain and divorce her from Waterdeep’s high society. She was allowed to keep her home, but her works and her reputation were destroyed, slowly and methodically. Kalain’s spirit was broken, leading to the onset of madness. Now she locks herself away, content to let time erode the last of her conscience.

Key Info:

  • She knows that Dalakhar was a spy working for Lord Dagult Neverember. He sent a letter requesting her help, but she waited several days before replying due to her bitter history with Neverember.
  • If told that Dalakhar was killed, she will blame the PCs for killing him on Neverember’s orders and then rapidly escalate to concluding they’re here to kill her (unless they quickly talk her down)!
  • During their final days together, Lord Neverember was obsessed with a “Melairkyn ceremonial temple or religious vault or something like that. He was always more focused on anything else rather than me. Rather than us.” If questioned, she can provide the papers described above.
  • If asked if she knows where the “vault” is located, she will become quite distressed: “I should know this. He was fixated on it. It would make me so angry… so very, very angry… And now I can’t remember why.” (She was irrationally jealous because it was his ex-wife’s tomb, but because of the Stone of Golorr she can’t remember that any more. No one can.)
  • If specifically asked, she will recount speaking with the Lord Victoro Cassalanter about Lord Neverember and the vault a few weeks ago, but she won’t otherwise volunteer the information.

Stat Block: CE half-elf bard (DH p. 195).

  • Art Imitates Life: Kalain touches one of her paintings and causes its subject to spring forth, becoming a creature of that kind provided its CR is 3 or lower. The creature appears in an unoccupied space within 5 feet of the painting, which becomes blank.The creature rolls initiative when it first acts. It disappears after 1 minute, when it is reduced to 0 hit points, or when Kalain dies or falls unconscious.

LORD DAGULT’S PAPERS

These papers mostly concern minor (and now thoroughly outdated) affairs of the city. There are a few pieces of unusual interest, however:

  • A list of otherwise banal, crossed out tasks includes “move the dragon to the Melairkyn ceremonial vault.”
  • Correspondence with Hammond Kraddoc of the Vinterners’, Distillers’, and Brewers’ Guild making it clear that Kraddoc gave Lord Dagult large bribes to cover up a scandal involving contaminated liquor in the Dock Ward.
  • Notes apparently pertaining to a “ceremonial vault” built by the Melairkyn dwarves beneath Waterdeep centuries ago. The notes detail that such vaults were built by worshippers of Dumathoin, the Keeper of the Mountain’s Secrets. The dwarven cult believed that Dumathoin encoded his secrets in the veins of ore and precious stones he placed in the mountains he raised from the earth for the dwarven people. In their mining, the dwarves would release Dumathoin’s secrets into the world. This angered Dumathoin and there was a period of discord between the dwarves and the Mordinsamman (the council of dwarven gods). In order to appease Dumathoin and to protect his secrets, the cult would mystically bind the “secrets of the mountain” into items of finely-wrought dwarfcraft and then make offering of it to Dumathoin by securing them within ceremonial vaults. Such vaults, according to an ancient source, can be opned by “standing before Dumathoin’s doors and striking the scale of a dragon with a mithral hammer in the place where the sun’s light should fall.”
  • An unsigned letter written to Lord Neverember four years ago stating that “the last of the three Eyes has been secured.”
  • A letter from Dalakhar also dating to four years ago, reporting on his unsuccessful efforts to infiltrate the Enclave of Red Magic in the Castle Ward. (GM Note: This is literally a red herring. Dalakhar’s assignment four years ago has nothing to do with present events. The Red Wizards of Thay use the Thayan embassy as a cover for their local operations; it’s connected to the Thayan enclave in Skullport via a portal.)

DESIGN NOTE

I found Kalain to be a really fascinating character. For a long time, unfortunately, I couldn’t figure out how to fit her into the Remix. I eventually struck on the idea of having Dalakhar write to her for assistance so that the PCs could backtrack him and find a trail to her. Originally, I thought this would be a dead end: The PCs would meet an interesting character and get filled in a little bit more on the back story of the scenario, but there was nothing Kalain could offer towards their current investigation.

And then, in one of those glorious instances where creative thoughts heap one atop the next, I realized that there WAS a way that Kalain could contribute materially to the scenario. (It also allowed me to link to her from the Cassalanters, too, making it more likely that any given group will encounter her.)

Go to Part 5E: Outpost and Lair Revelation Lists

Volothamp Geddarm - Volo's Guide to Waterdeep

Go to Part 1

Dragon Heist launches with the PCs being hired by Volothamp Geddarm to find his missing friend Floon Blagmaar. Unfortunately, the scenario structure for this investigation is quite fragile, being formed from long sequences of linear clue-finding. There are also several continuity problems that we’re going to straighten out.

VOLO’S HIRING SPEECH

There are several problems here.

First, if the PCs don’t fight the troll or stirges that emerge from Undermountain, Volo has no reason to hire them. So if the PCs decide that discretion is the better part of valor here, the whole campaign never happens. (This is relatively low risk, but something you might want to give some thought to.)

Second, the adventure oddly claims, “Volo is embarrassed to admit he might have gotten his friend Floon in trouble, and he resists providing all the details of what happened the night Floon disappeared.” That must be some vestige from a previous version of the scenario, because in the published version of the scenario he does, in fact, tell the PCs everything that happened and has absolutely no reason to think he’s responsible for Floon’s disappearance. (Just ignore this continuity error.)

Third, when Volo hires the PCs, his hiring speech sets up a timeline of events which doesn’t line up well with the events described in the rest of the chapter. (According to Volo, Floon was kidnapped by the Zhentarim two nights ago, but “before the interrogation could begin”, the Xanathar Guild kidnapped him from the Zhentarim, and when the PCs arrive at the Xanathar sewer hideout, their interrogation of Floon has just begun. Where did the missing day go?) We’re going to clear this up (and prelude a later clue) with two new chunks of boxed text:

The figure who approached you strokes his mustache, adjusts his floppy hat, and tightens his scarf. “Volothamp Geddarm, chronicler, wizard, and celebrity, at your service. I am most impressed by your derring-do, and the truth is that I fear I have misplaced a friend amid the odious violence which has recently been seizing the streets of this fair city, and I could use your assistance in finding him. You’d be well paid, of course.”

PAYMENT: 100 gp per character, with 10 gp per character up front.

DC 10 Wisdom (Insight): Volo is stretching the truth about how much he can pay immediately. (Currently low on cash, Volo is awaiting royalty payments from Volo’s Guide to Monsters and he’s currently endeavoring to finish Volo’s Guide to Spirits and Specters, for which he is certain receive a handsome advance.)

FLOON: Once the job is taken, Volo identifies his missing friend.

My friend’s name is Floon Blagmaar. He’s got more beauty than brains, but he’s a great drinking companion. Last night he accompanied me to the Skewered Dragon, a dark, bawdy tavern in the Dock Ward. I called it an early night, but Floon remained – drinking and merrymaking.

His wife tracked me down here in the Yawning Portal half an hour ago and told me that Floon never came home last night. This was doubly surprising, as I had not previously been aware that he was married.

Floon is a handsome man in his early thirties with wavy red-blond hair. He is not difficult to pick out of a crowd, however, for he insists on always wearing a gaudy, 6-inch bas relief of a unicorn’s head on a chain of blue pearls around his neck.

(The necklace is a holy symbol of Lurue. It was Floon’s mother’s, but he’ll tell any of a dozen different stories for how he got it.)

TO THE ZHENTARIM WAREHOUSE

Kenku - Waterdeep: Dragon Heist

Tracking Floon from the Skewered Dragon to the Zhentarim warehouse is restructured as a two-part investigation.

BLOOD IN THE STREETS: Make sure to frame the “Blood in the Streets” incident on the way to the Skewered Dragon.

  • Mention that the three men who have been arrested each have a black tattoo of a flying snake (one on the hand, two on their arms).

REVELATION #1: Floon was kidnapped by men with flying black snake tattoos.

  • Canvassing the Neighborhood: Several people saw Floon and another man (Renaer) waylaid in front of the Old Xoblob Shop (see Dragon Heist, p. 23). Xoblob the Gnome can describe the attack (see Dragon Heist, p. 24). Searching outside Xoblob’s shop will turn up a gaudy, 6-inch bas relief of a unicorn lying in the gutter (see below).
  • Questioning at Skewered Dragon: As the PCs arrive, the evening regulars are probably rolling back in. Several of them will remember Floon and be able to describe how he drank with Volo, Volo left, and then he was joined by another man, a “spoiled, rich noble who likes to rub our noses in it!” (Note: Berca, the bartender, knows that the other man was Renaer Neverember, the son of Waterdeep’s previous Open Lord, Dagult Neverember, but she won’t be free with that information.) Floon and the other man left around midnight. They were followed out by several men, one of whom had a tattoo of a flying black snake on his neck.

(Note: Contrary to the published scenario, the patrons of the Skewered Dragon do NOT know that the “flying black snake” men can be found on Candle Lane. Some of them may be able to identify them as Zhentarim gangsters at the GM’s discretion.)

REVELATION #2: Floon was taken to the Zhentarim warehouse on Candle Lane.

  • Canvassing the Neighborhood (Looking for Tattoos): Several locals have seen men with flying black snake tattoos “up by the candle on Candle Lane” (see Dragon Heist, p. 24). Surveying the lane identifies the correct warehouse because it had a black winged snake painted above the front door’s handle. Asking workers at the other warehouses along Candle Lane can also point them at the right warehouse, and may also reveal that there was some kind of “ruckus” over there early this morning, with large groups of people coming and going.
  • Questioning the Prisoners: The PCs may backtrack to the “Blood in the Streets” crime scene and figure out a way to talk to the Zhentarim agents being held by the city watch. (They’re likely to speak with Captain Staget, see Dragon Heist, p. 27). If they can convince these agents to talk, they’ll learn that they aren’t local, but were told to report to the warehouse as a safe haven after performing the hit on the Xanatharians.
  • Tracking Floon’s Beads: Floon kept his wits about him as he and Renaer were being kidnaped. Breaking the necklace around his neck, he let the blue beads drop into the streets and alleys as they were carried to the warehouse. PCs who find the unicorn’s head in the street outside Xoblob’s may be able to track the trail of beads back to the Zhentarim warehouse.

PROACTIVE FAILSAFES: If the PCs’ investigation is running aground, consider using these proactive elements.

  • Zhentarim hear that the PCs are asking questions about Zhentarim agents, safe havens, or both. A number of Zhent thugs (MM, p. 350) equal to half the number of PCs comes to intimidate them into going away. (Adroit PCs can turn the tables, question them, and learn the location of the warehouse.)
  • A small squad of Zhentarim agents arrives at the Zhentarim warehouse. The kenku lying in ambush attack them, and the fight spills out into the street right in front of the PCs.

AT THE WAREHOUSE

As initially described in Part 1, after he lost his Eye to Xanathar, Manshoon needed to get back in the game. His agents eventually concluded that Neverember’s son, Renaer, might have another of the Eyes. They were right, although Renaer didn’t know it: His father had given him an elaborate, ivory mourning locket in honor of his mother. The Eye was hidden inside it.

The full dynamic in the first chapter, therefore, is this:

  • Zhentarim agents snatch Renaer Neverember and his friend Floon Blagmaar.
  • While questioning Renaer in Area Z5, they realize that the Eye is in the mourning locket and take the locket from Renaer.
  • Renaer is hauled back down to Area Z2 and tied up next to Floon. Upstairs, the Zhentarim break open the locket (it can still be found in Area Z5), remove the Eye, and give it to a courier to carry to Manshoon.
  • Floon is then hauled upstairs for questioning (the Zhentarim want to see if he might be worth a ransom).
  • Xanathar’s agents storm the warehouse. They immediately find “the prisoner” (i.e., Floon), assume he’s Renaer, and several of their agents hustle him out to their sewer hideout. Meanwhile, Renaer takes advantage of the confusion downstairs to slip his bonds and hide in Area Z2.
  • Xanathar’s agents do a perfunctory sweep of the warehouse and then take off, leaving the kenku behind to kill any Zhents who show up.

DEAD SNAKE: A black flying snake lies dead in the lower yard, pierced by an arrow. (GM Note: The Zhentarim tried to send it as a messenger during the attack, but a Xanatharian watcher shot it down.)

RENAER: Renaer will be able to tell the PCs that he was questioned by the Zhents about the half million dragons his father stole from the city; then they ripped off a locket that was very precious to him. If they find the locket and see the (now empty) secret compartment inside it, Renaer can also tell them that he had no idea that the compartment existed or what was stored inside it.

TO THE XANATHAR GUILD HIDEOUT

Once the PCs realize that Floon was taken by members of the Xanathar Guild, they’ll need to track them back to the Xanathar Guild Hideout in the sewers.

TRACKING: The Xanatharians exited the warehouse through the yard on the lower level and accessed the sewer half a block away down the alley. A DC 11 Wisdom (Survival) check easily tracks them that far.

Once in the sewers, it requires three successful DC 13 Wisdom (Survival) checks. On a failure, the PCs waste considerable time needing to backtrack and pick up the trail. If the PCs fail the test three times, they’ve wasted too much time: When they arrive at the hideout, they find it abandoned except for the goblin watchers in Q2 and Zemk, the usual keeper of the hideout, in Q5. Floon’s dead body lies in Q7. (Zemk will toss it into the sewer later in the day when he gets around to it.)

However, each time the PCs roll a tracking check, whether it’s successful or not, they can also make a DC 13 Wisdom (Perception) test to notice the guildsign (see below).

(Note: Even if the PCs only manage to recover Floon’s dead body, Volo, albeit a little disappointed with them, will still reward them for completing their mission.)

QUESTIONING THE KENKU: As described on page 25 of Dragon Heist, questioning the kenku may reveal the existence of the guildsign in the sewers (see below). Beyond that, the kenku are largely incapable of describing where the hideout is located. However, they can lead the PCs there (although they’ll be looking for opportunities to lead them into traps or otherwise betray them).

GUILDSIGN: Symbols scrawled in yellow chalk – a stylized representation of Xanathar – is marked at each tunnel intersection in the sewers, indicating the path which should be followed by the direction the main eye is looking. Once the PCs are aware of the guildsign, they can simply follow it back to the hideout.

To Part 5C: The Nimblewright Investigation

Waterdeep: Dragon Heist

Go to Part 1

In this penultimate section of the Remix, we’re going to use the principles of node-based scenario design to retrofit the campaign’s fundamental structure. This work can broadly be divided into three parts:

  • Strengthening the Three Clue Rule for Finding Floon (Chapter 1)
  • Heavily revising the Nimblewright Investigation that leads to the Gralhund Villa (Chapter 2)
  • Linking together all of the elements of the Grand Game (primarily the faction outposts and lairs)

This will primarily consist of revelation lists, the use of which is discussed in the original Three Clue Rule essay.

Where the clues on these revelation lists can be integrated into the material we’ve treated at length in the Remix, I’ve done so. In these cases, the revelation lists can be used strictly for their normal function: As a reference for helping the GM to understand and track the structure of the scenario.

In some cases, however, clues are added to other sections of the campaign which we haven’t visited in detail as part of the Remix. (This is particularly true for the material in Part 5B: Finding Floon, for example.) These clues will be called out, and the GM will need to use the revelation lists to make sure that this material is properly incorporated into those sections of the campaign.

THE REFERENCE TIMELINE

Before diving into the revelation lists, however, we’re going to organize all of the back story of the campaign (revised and otherwise) into a single reference timeline. This partly exists in order to eliminate the myriad continuity errors found in the original campaign, but mostly to provide an easy reference for the GM while they’re actually running the campaign.

RISE AND FALL OF LORD NEVEREMBER

  • 1451 DR: Lord Dagult NeveremberNeverwinter is destroyed when a small adventuring party (including Jarlaxle Baenre) awoke the primordial Maegera beneath Mount Hotenow.
  • 1467 DR: Lord Dagult Neverember, Open Lord of Waterdeep, proclaims himself ruler of Neverwinter and begins the New Neverwinter movement to rebuild the city.
  • Lord Neverember begins embezzling money from the Waterdeep treasury.
  • Lord Neverember discovers the Stone of Golorr in Neverwinter.
  • When Lady Alethea Brandath (Lord Neverember’s wife) dies, Lord Neverember learns of the existence of an ancient dwarven vault beneath the Brandath Mausoleum.
  • Lord Neverember gains access to the old Melairkyn Vault beneath the Brandath Mausoleum. He begins storing the embezzled money (eventually totaling half a million gold dragons) in the Vault and uses the Stone of Golorr to hide its existence.
  • As an additional security precaution, Lord Neverember blinds the Stone of Golorr: Leaving the Stone in Waterdeep Palace, he keeps one of the Eyes with him in Neverwinter, secretly gives one to his son (hidden inside a mourning locket), and hides the last within the Brandath Mausoleum.
  • During this time, various factions become aware that Lord Neverember is engaged in some grand scheme, of which only the contours are known. The phrase “Neverember’s Enigma” is coined.
  • 1489 DR: Laeral Silverhand returns to Waterdeep and Lord Neverember is deposed.
  • In the confusion of the transition of power, Lord Neverember sends agents to retrieve the Stone of Golorr from the palace. As those agents leave the city, they are ambushed by Xanatharian agents who steal the Stone.

THE GRAND GAME

  • The Cassalanters retrieve what they believe to be Neverember’s Enigma — but is actually just one of the Eyes — from the Brandath Mausoleum. Their research quickly reveals that it is part of the Stone of Golorr.
  • Lord Neverember sends a network of agents into Waterdeep. Many of these agents are attempting to locate the Stone. One of them, Dalakhar, is assigned to keep a watchful eye on Dagult’s son, Renaer. (Dalakhar isn’t told this, but Lord Neverember’s primary concern is that the Eye unwittingly carried by Renaer is kept safe until he can regain the Stone.)
  • Manshoonian Zhentarim steal the Eye from the Protector’s Enclave in Neverwinter.
  • Laeral Silverhand’s auditors discover Lord Neverember’s embezzlement. The news soon leaks.
  • Zhentarim go to Xanathar to propose an alliance. Xanathar kills the embassy and takes their Eye. A gang war breaks out between the Guild and the Black Network.
  • Lord Neverember discovers that Xanathar stole the Stone. Dalakhar is sent to infiltrate Xanathar’s organization and steal the Stone back. (At this point Lord Neverember believes that Xanathar has the Stone and that the Zhentarim still have the Eye they stole from him. To maintain the original siloing of information, Dalakhar is not told about the Eyes and doesn’t know to look for the one Xanathar now holds.)
  • Jarlaxle Baenre arrives in Waterdeep and begins selling nimblewrights.

DRAGON HEIST BEGINS (1492 DR)

  • With Dalakhar’s network removed from watching over Renaer, he’s exposed. The Zhentarim kidnap Renaer and take the Eye hidden in his mourning locket. (The PCs then presumably rescue Renaer.)
  • Ches 20th: Dalakhar successfully steals the Stone from Xanathar.
  • Ches 22nd: Dalakhar’s attempts to leave town are unsuccessful. (Xanathar tracked down and killed his extraction team before he could rendezvous with them, and he has agents surrounding Renaer Neverember’s house.) Dalakhar attempts to meet Renaer at Trollskull Manor, but by this time he’s being actively tracked by the Gralhund, Zhentarim, Cassalanters, and possibly others. Dalakhar is killed by the Gralhund Nimblewright. (See Part 2 and Part 5C.)

REVELATION LIST: THE STONE OF GOLORR

The first part of Dragon Heist is procedurally driven by investigations which are, structurally, unrelated to the Stone of Golorr: The PCs can solve the mysteries of Floon’s kidnapping and Dalakhar’s assassination without necessarily understanding what the ultimate motivation behind those crimes was.

Thus, the key turning point in the campaign is when the PCs realize what’s truly at stake and, importantly, begin to proactively drive the Grand Game.

REVELATION: DALAKHAR WAS CARRYING THE STONE OF GOLORR

  • Casting speak with dead on Dalakhar or the dead Zhentarim (see Dragon Heist, p. 46, but note that we’re specifically adding that the Zhentarim knew that Dalakhar was carrying the “Stone of Golorr”).
  • Questioning any number of people involved in the Grand Game (Urstul Floxin, the Gralhunds most likely, but also members of Xanathar’s Crime Guild or, later, Bregan D’Aerthe lieutenants).
  • Observing Jarlaxle’s nimblewright recordsings. (Sea Maidens Faire)
  • A Directive from Jarlaxle (Gralhund Villa – Arthen Manor)

REVELATION: WHAT IS THE STONE OF GOLORR?

  • Researching the Stone of Golorr (see Part 6A)
  • Any significant player in the Grand Game (lieutenant or up within any faction) will know that the Stone of Golorr is they key to finding Lord Neverember’s Enigma
  • Faction Reports on the Grande Game (see Part 6D)

REVELATION LIST: THE THREE EYES

The PCs need to figure out that (a) the Stone of Golorr is missing three Eyes and (b) where those Eyes are being held, so that (c) they can go steal them. This is basically the core structure of the campaign.

REVELATION: THERE ARE THREE MISSING EYES

  • Studying the Stone of Golorr
  • Gralhund Study of the Grand Game (Gralhund Villa)
  • Jarlaxle’s Report on the Grand Game (Sea Maidens Faire)
  • Cassalanter Report on the Grand Game (Cassalanter Villa)
  • Xanathar’s Report on the Grand Game (Xanathar Lair)
  • Manshoon’s Report on the Grand Game (Kolat Tower)
  • Letter to Lord Neverember (Kalain)

REVELATION: CASSALANTERS’ EYE

  • If the PCs are working for them, the Cassalanters provide their Eye once they have the other two.
  • Jarlaxle’s Report on the Grand Game (Sea Maidens Faire)
  • Manshoon’s Report on the Grand Game (Kolat Tower)
  • Seffia’s Ritual & Seffia’s Note (Converted Windmill / Response Team: Seffia)

REVELATION: XANATHAR’S EYE

  • Gralhund Report on the Grand Game (Gralhund Villa)
  • Jarlaxle’s Report on the Grand Game (Sea Maidens Faire)
  • Cassalanter Report on the Grand Game (Cassalanter Villa)
  • Manshoon’s Report on the Grand Game (Kolat Tower)

REVELATION: ZHENTARIM’S EYE

  • Gralhund Report on the Grand Game (Gralhund Villa)
  • Jarlaxle’s Report on the Grand Game (Sea Maiden’s Faire)
  • Xanathar’s Report on the Grand Game (Xanathar’s Lair)
  • Questioning Samara (Xanathar’s Lair)

REVELATION LIST: THE VAULT KEYS

  • Examining and researching the vault entrance (The Vault)
  • Cassalanter’s Report on the Grand Game (Cassalanter Villa)
  • Vision of the Vault (Stone of Golorr)
  • Questioning Kalain (Backtracking Dalakhar)

Go to Part 5B: Finding Floon

Technoir: Kepler Station

February 10th, 2019

Technoir - Kepler Station

WRITING & DESIGN: Justin Alexander

It takes just over a full day for one of the massive climbers to claw its way up the ‘stalk from the peaks of Kilimanjaro fifty thousand kilometers below. Steiner Technology keeps twelve of them in rotation, but you’ve got to space ‘em out to control the oscillations and with only one ‘stalk in operation they all have to arrive before you can turn them around. That means ten days of backbreaking labor for the orbitmen on Kepler Station, followed by two days off while Kilimanjaro does its turn-around.

Try to steer clear of the machinations of the Methuselah Families — cryo-preserved scions overseeing vast corporate wealth from beyond a frozen almost-grave — and dance through the back-corridors 30,000 miles up with Patthar Black Baggers and the Over-Under Gang.

This is Kepler Station. Where diamonds are cheap, but oxygen is the price of life.

MORE TECHNOIR @ THE ALEXANDRIAN
Technoir System Cheat Sheet
Untested Technoir: Fleeting Relationships
Technoir: The Untouched Core
Technoir and PvP
Technoir and the Three Clue Rule
Technoir: Sequences vs. Skill Challenges

Kolat Towers - Waterdeep: Dragon Heist

Go to Part 1

Although Manshoon lost the original Eye he had obtained, as Dragon Heist begins the Zhentarim seize possession of the Eye unwittingly carried by Renaer Neverember. This Eye is then immediately taken back to Kolat Towers and secured.

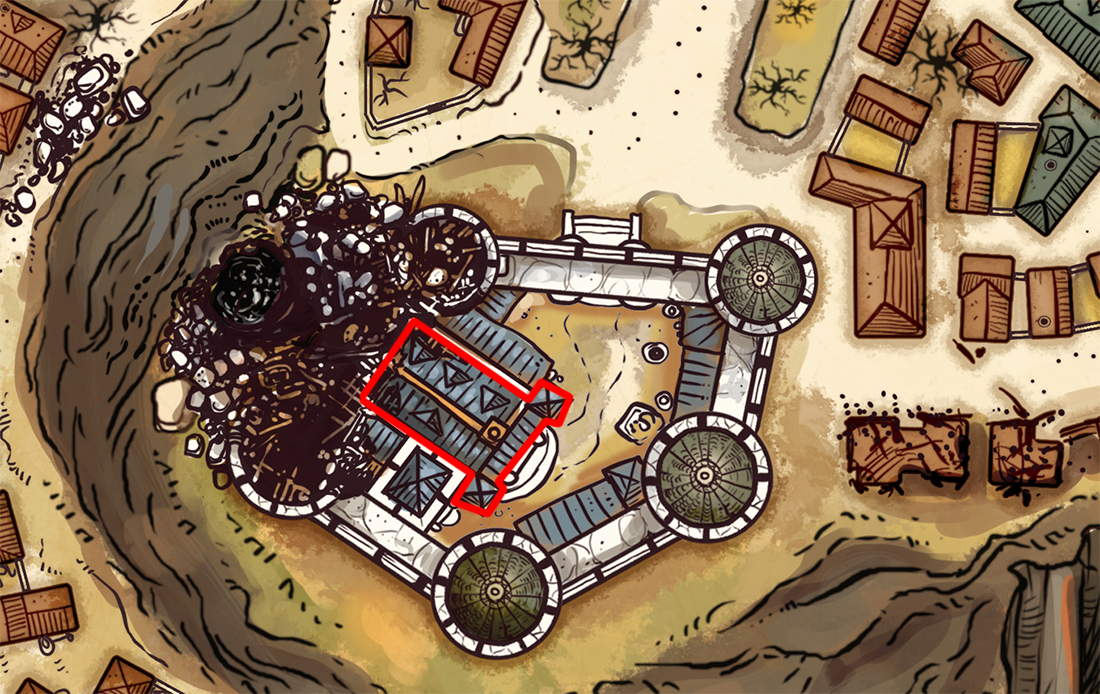
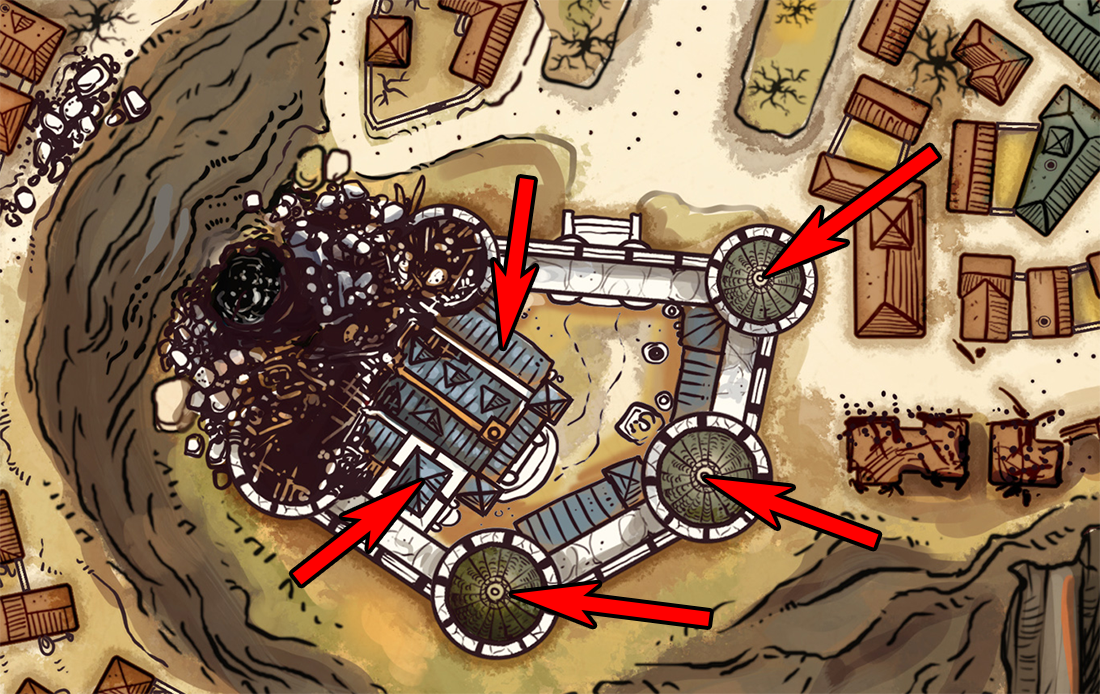
Unlike the other lairs in Dragon Heist, Kolat Towers operates more like a fortified bunker. This creates a very non-typical heist scenario which, in some respects, will play more like a raid or dungeoncrawl scenario. The primary heist-like aspect of the scenario, in fact, is simply gaining access to the Towers in the first place.

Kolat Towers is structured like an onion:

  • You need to obtain a pass-amulet in order to pass through the force field surrounding Kolat Tower. A pass-amulet is a silver disc with the initials “DK” (for Duhlark Kolat) written in Espruaran runes on either side of a small, central blue gemstone. Someone holding a pass-amulet, or touching someone holding a pass-amulet, can simply walk through the force field as if it wasn’t there. (Other methods for bypassing the force field are described on pages 148-149 of Dragon Heist.)
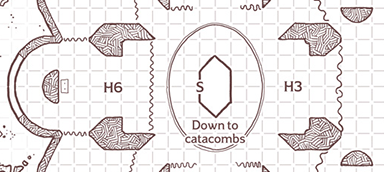
  • You need to obtain a teleporter signet ring in order to reach the inner sanctum., as described on page 157 of Dragon Heist. These brass signet rings have a stylized M. written upon them.

SURVEILLANCE OPPORTUNITY

Barring unusual circumstances or out of the box thinking, the PCs are unlikely to have a surveillance opportunity inside Kolat Towers.

More traditional surveillance (i.e., simply watching the Towers from a nearby building) reveals the crucial point of data required, however: The use of pass-amulets by anyone entering or leaving the tower. (They may glimpse some taking them out from their shirts and holding them aloft, although that’s not strictly necessary. They may also note the strange habit of those accompanying pass-amulet holders of touching them as they move through the force field.)

In addition, most of the Towers’ inhabitants will simply assume that anyone who has bypassed the force field must have a pass-amulet and, therefore, must have legitimate business there. Their incredible security system has, ultimately, made them somewhat lax when it comes to actual security, and PCs who are smart enough to lean into that assumption can effectively seize a surveillance opportunity for themselves mid-heist.

BLUEPRINT NOTES

Kolat Towers - Waterdeep: Dragon Heist

The original tower which stood on this site was a small library owned by the Watchful Order of Magists & Protectors. The Kolat brothers purchased the site, altered the original tower, and built a second tower. Buried deep in its records, the Watchful Order still has copies of the original plans drawn up when they acquired the tower as part of a deceased wizard’s estate. These plans, however, only show the Tower as it existed before the Kolat brothers began their renovations. It:

  • Consists of only of the Main Tower.
  • Does not include areas K7, K8, K12, K13, or K14.
  • Level 6 is a single room.

It should be noted that Xanathar has a superior set of blueprints for the Towers, obtained by his agents (see Part 4D).

THE TOWERS

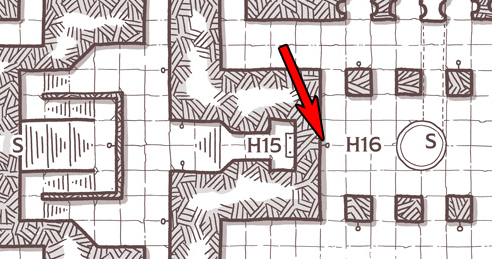
Area K14 – Servants’ Quarters: Sidra Romeir also bunks in this room (in a larger bed opposite the four bunk beds used by the thugs she bunks with). She keeps her teleporter signet ring in the locked drawer in the bedside table.

Area E9 – Library: Alabaster shelves line the porphyry walls and jut out into the center of the room. On one wall, an arcane rune has been carved into the porphyry and filled with some form of bright green metal.

  • Books: 10 particularly rare books have bookplates identifying them as belonging to Duhlark Kolat are laid out on a small table with a notebook nearby showing that someone has been studying them and taking notes; they are worth 50 gp each. The entire collection is worth 5,000 gp.
  • Rune: This rune is the keymark for an astral vault bloodlocked to Manshoon. By design, Manshoon (and only Manshoon) can trace a specific set of patterns on the rune, causing the wall to temporarily phase out of existence and grant access to a small astral vault. In practice, dispel magic can disable the bloodlock or a disguise self (or similar illusion) can fool it, while an Intelligence (Arcana) or Dexterity check can figure out the pattern (defeating it like any other lock).
  • Inside the Astral Vault: The vault contains the Eye, 5 pass-amulets, a dozen teleporter signet rings, and Manshoon’s Report on the Grand Game (see Part 6D).

Area E10 – Audience Chamber: This room is lit by a sunglobe which levitates in midair near the ceiling. (On command, a sunglobe glows with the light of the sun itself. It can be commanded to maintain its current position, levitating in mid-air until grasped.)

ADVERSARY ROSTER

Sidra Romeir + 2 thugsArea K2 - Dining Room(playing Three-Dragon ante)
Manafret Cherryport*Area K3 - Kitchen
2 gargoylesArea K4 - Musty Library(stationary)
Yorn the Terror*Area K7 - Reading Room
Lady GondafreyArea K13 - Holding Cell(stationary)
4 thugsArea K14 - Servants' Quarters
3 apprentice wizards* + barlguraArea K15 - Summoning Chamber(chanting ritual; cannot be disturbed)
animated armorArea K16 - Construct Workshop(stationary)
spectator + 4 flying snakesArea K22 - Teleportation Circle(stationary)
Kaejva Cynavern*Area E3 - Guard Station(can see into area E1)
Urstul Floxin*Area E5 - Laboratory
Manshoon Simulacrum*Area E7 - Simulacrum
Vevette Blackwater* + Agorn Fuoco*Area E8 - Reading Room
Havia Quickknife* + Mookie Plush*Area E10 - Audience Chamber
Area E11 - Zhent Quarters(Kaevja, Vevette, Agorn, Havia, Mookie)
Manshoon (01-50%)Area E12 - Manshoon's Quarters
Manshoon (51-00%)Area E13 - Manshoon's Study

* Has a teleporter signet ring.

STAT REFERENCE

Sidra Romeir (LE female Callishite human) – veteran, MM p. 350
Manafret Cherryport – lightfoot halfling mage, MM p. 347; see DH p. 149
Manshoon - Waterdeep: Dragon HeistYorn the Terror – half-orc thug, MM p. 350; see DH p. 150
Lady Gondafrey – gargoyle, MM p. 140; see DH p. 152
Kaejva Cynavern (female Mulan human) – mage, MM p. 347; see DH p. 158
Urstul Floxin – assassin, MM p. 343; see DH p. 216
Vevette Blackwater (CE female Tethyrian human) – swashbuckler, DH p. 216
Agorn Fuoco (NE male Turami human) – bard, DH p. 195

Havia Quickknife / Mookie Plush (LE lightfoot halfling) – martial arts adepts, DH p. 209

  • Lawful Evil
  • 49 (11d6+11) hit points
  • Racial Traits: Small, walking speed 25 ft., move through the space of a Medium or larger creature, advantage on saving throws vs. being frightened.
  • Speak Common and Halfling.

Manshoon Simulacrum – DH p. 209
Manshoon – DH p. 209

Thugs – MM p. 350
Apprentice Wizards – DH p. 194

Animated Armor – MM p. 19
Barlgura – MM p. 56
Spectator – MM p. 30
Flying Snakes – MM p. 322

QUESTIONING THE ZHENTARIM

Thugs know the general layout of the tower:

  • They’ve been told not to enter the Outer Tower or go above the third level of the Main Tower.
  • Manshoon’s lieutenants wear special rings that let them access Manshoon’s sanctuary atop the Outer Tower (although they don’t know that this is actually an extradimensional space; they think he just lives up there).

Apprentice wizards know the same, but also know:

  • That Manshoon lives in an extradimensional sanctum.
  • He protects his valuables in an astral vault hidden somewhere in the sanctum. His former fourth apprentice tried to gain access to it and was disintegrated when Manshoon caught him.
  • That the Stone of Golorr was blinded and Manshoon is attempting to find its three Eyes. He already has one. He once had another that was stolen by Xanathar. And he has recently identified that a local noble family has the third. (They don’t know the identity of the noble family.)

Manshoon’s lieutenants know what the apprentice wizards know, but also:

  • The layout of the extradimensional sanctum, including the location of the astral vault.
  • That the Cassalanters are the noble family who possess the third Eye.

THE DEMON

If the PCs encounter the summoning ritual in Area K15 and don’t disrupt it, then eventually the apprentice wizards succeed in binding the barlgura and Manshoon is able to send it on a mission. Options to consider might include:

  • Attacking the PCs at Trollskull Manor.
  • Sending it as part of an operation to steal back “his” Eye from Xanathar, possibly inflicting damage in Xanathar’s Lair. (This could easily happen in the middle of the PCs attempting their heist there.)

Go to Part 5: Clues and Timelines

Archives

Recent Posts


Recent Comments

Copyright © The Alexandrian. All rights reserved.