The Alexandrian

Archive for the ‘Roleplaying Games’ category

Xanathar and His Fish - Waterdeep: Dragon Heist

Go to Part 1

Xanathar stole the Stone of Golorr from Lord Neverember and he stole one of the three Eyes from the Zhentarim. Then he lost the Stone when Dalakhar took it from him.

As a result, once the PCs become truly involved with the Grand Game, it is likely that Xanathar is on a level playing field with Manshoon and the Cassalanters, holding but a single Eye.

EVENT SCHEDULE & SURVEILLANCE OPPORTUNITY

Throughout the festival season, Xanathar hosts gladiatorial games every 2-4 days. As noted in Part 3B, those interested in attending the fights must learn the secret pass phrases and go to gladiatorial gathering points throughout the city.

In addition to the arena itself (X6), those attending these fights are allowed to congregate in areas X2, X17, and X18. Servants circulate through these areas, serving drinks and food. Additional guards are placed in the entrance to hallways X21 and X22, however, to turn guests away. (See the Tournament adversary roster, below.)

Panopticus Dwarves: The panopticus dwarves in Area X16 keep the following areas constantly under surveillance:

  • Area X2 – Entrance Hall
  • Area X6 – Arena
  • Area X18 – Audience Chamber
  • Area X23 – Antechamber of Madness
  • Area X32 – Downstairs Hallway

Identifying the function of the ghostly eyes during onsite surveillance is probably crucial to carrying out an effective heist. Their function can be determined with a DC 14 Intelligence (Arcana) check, making it clear that there must be a panopticus circle somewhere nearby being monitored by a number of watchers equal to the number of ghostly eyes. A detect magic spell combined with a DC 14 Intelligence (Arcana) check will allow the caster to follow the magical lines of force between the eyes and the panopticus circle, effectively triangulating the location of the circle if they can observe at least two eyes.

In addition, as described in Area X16 below, the panopticus circle can be suborned.

DESIGN NOTE

Note that the list of areas surveilled by the panopticus dwarves is deliberately altered. The easiest access to Xanathar’s Sanctum (X19) is through the door in Area X18. By placing a scrying sensor there, it more or less forces the PCs to either suborn the panopticus or find an alternative route to Area X19.

BLUEPRINT NOTES

Xanathar's Lair - Waterdeep: Dragon Heist

There are no blueprints of Xanathar’s Lair to be found. Questioning Xanatharian agents might give the PCs an opportunity to piece out information, but convincing them to do so when the consequence is Xanathar’s displeasure is not an easy task.

Far easier is contacting one of the many people who have attended the gladiatorial games to describe what they’ve seen. In general their recollections will be limited to the “public” areas listed above, but:

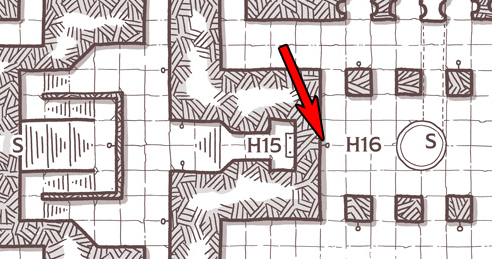
  • There’s one halfling who remembers seeing some of Xanathar’s personal guard come through the secret door between X17 and X16 (“I was looking at this fresco of a leafless tree that had lidless eyes embedded in its branches and suddenly – presto! – the whole wall swung back and some of those shifty-eyed bugbears came through”). She didn’t see how the door operates.
  • If they get particularly lucky, they might track down a foolhardy couple who snuck through the door from the Audience Chamber (X18) into Xanathar’s Sanctum (X19) and can describe what they saw there.

OTHER OPPORTUNITIES

As described on p. 101-102 of Dragon Heist, there are a number of other powerful factions throughout the city that are aware of Xanathar’s Lair and can reveal the secret entrance to Area X1.

There is a magical portal to Xanathar’s Lair in the Guild Sewer Hideout in Chapter 1: Finding Floon. It’s possible (although unlikely) that the PCs already gained access to the lair at that time. If not, they could theoretically put the hideout under surveillance, ambush Nihiloor, and use his amulet to activate the portal and enter the lair.

If Ott Steeltoes is rescued from the Zhentarim (see Part 3B), he may also be gulled into leading the PCs to this secret entrance.

PLAYER TWO ENTERS THE GAME

Whenever the PCs choose to launch their actual heist, it turns out that Jarlaxle is simultaneously attempting to do the exact same thing.

The Team: Jarlaxle’s team consists of himself, one of his lieutenants, and a Bregan D’Aerthe response team (see Part 3C).

Entrance: Generally speaking, there are three methods of entry to Xanathar’s Lair. You can come in the secret entrance (X1), you can try to sneak in from Skullport (X4),Jarlaxle Baenre or you can be brought in as part of the audience for the gladiatorial games (also via X4, but almost certainly arriving in X6 before you’ll have a chance to slip away).

I recommend having Jarlaxle’s team use a method of entry which the PCs didn’t. So if the PCs came in through X1, for example, then Jarlaxle’s team arrived from either Skullport or as part of the crowd for the gladiatorial tournament.

Jarlaxle’s Plan: The ace in the hole for Jarlaxle is that he’s aware of the secret passage (X14) leading to Xanathar’s Sanctum. How, exactly, he gains access to the passage is heavily dependent on the circumstances in which the heist takes place. (And, dramatically speaking, the DM should ideally make it cross the path of the PCs’ heist as much as possible: Seeing Jarlaxle or his lieutenants from across a crowded room or at the far end of a deserted hallway about their business will be a satisfying complication. This will also be easier to do if Jarlaxle’s team includes someone the PCs have seen before during the Grand Game, if that’s not Jarlaxle himself.)

Jarlaxle’s modus operandi will generally be using secondary teams to create distractions in order to draw people (including Xanathar) away from where he wants his primary team to be. For example, if the heist is going down during a gladiatorial match, Jarlaxle’s plan might look something like this:

  • One of his men picks a fight with the guards blocking entrance to hallway X21. This draws the guards preventing entry to X22 away from their posts.
  • Jarlaxle’s lieutenant and two more of his men slip into X22 and down the stairs to X32. They make their way to the Recreation Hall (X28) and throw smoke bombs through the door.
  • Men from X28 rush to the Audience Chamber (X18), causing the guards on the door there to rush out to X8. Jarlaxle and his remaining men slip through the door behind them and then through the secret door to X19.
  • After locating the Eye, they go down the emergency escape route to X21. Jarlaxle uses his hat of disguise to don the appearance of Ahmaergo, orders the guards to assist in the commotion downstairs, meets up with the rest of his team as they emerge back up the stairs and through Area X22, and then heads for the exit.

Nar’l Xibrindas: N’arl is an agent of Bregan D’Aerthe, but his ability to directly assist Jarlaxle during the heist is limited due to the presence of the grell bodyguard Xanathar has placed on him. Jarlaxle would also prefer to keep him in situ as a valuable source of intel until the Grand Game has concluded.

However, once the distractions start causing turmoil, Nar’l might contribute to Jarlaxle’s plan in subtler ways. (For example, by ordering key guards out of the way on plausible pretexts at the right moment.)

Effect on the PCs: The presence of Jarlaxle’s team will almost certainly cause complications for the PCs’ plans, but the PCs’ actions are also likely to cause complications for Jarlaxle. It will be most satisfying if you let both those things play out naturally, and keep in mind that it’s equally possible for the PCs to benefit from security holes Jarlaxle opens for his own team (and vice versa).

DESIGN NOTE

Competing with a second crew trying to pull of the same job is a really exciting situation that opens up a lot of unique tactical choices and dramatic situations. But there’s another reason for including Jarlaxle’s crew here: Xanathar’s Lair is probably the hardest nut to actually crack. If things get out of hand, the presence of Jarlaxle’s crew gives the DM a tool to either (a) easily pull heat off of the PCs or (b) steal the Eye, prompting an easier heist at the Sea Maidens Faire.

THE LAIR

Panopticus - Waterdeep: Dragon Heist

X7 – Cell Block: See Dragon Heist for full description.

  • Questioning Samara: Samara was part of the original delegation sent to Xanathar to negotiate a Golorr-related allegiance. The rest of her team was killed, but she was thrown in here and has been fighting for her life ever since. Her information is dated, but she believes that Xanathar holds the Stone of Golorr (which is the key to Neverember’s Enigma, although she doesn’t know that’s half a million gold coins) and that he’s taken Manshoon’s Eye. She also knows that there are two other Eyes. She can tell PCs that Manshoon is based out of Kolat Towers, and that the Towers can be accessed from Yellowspire.

X12 – Ahmaergo’s Quarters: In addition to the normal entry for this room, the chest contains A Briefing for Xanathar Concerning the Grand Game.

X16 – Panopticus Station: In addition to the normal entry for this room, it is possible to suborn the panopticus network. A DC 16 Intelligence (Arcana) check can determine that altering two specific runes in the circle will create an “echo” in the vision provided by the ghostly eyes. (In other words, yes, they can loop the video feed.) Doing so will require sneaking past the dwarves, but that’s not too hard because they’re only half-aware of their immediate surroundings.

X18 – Audience Chamber: In addition to the normal entry for this room, there is a ghostly eye scrying sensor.

X19 – Xanathar’s Sanctum: In addition to the normal entry for this room, Xanathar keeps the Eye in Sylgar’s fishbowl.

X28 – Guild Recreation Hall: In contradiction of the normal entry for this room, there is no scrying sensor in this room.

X35 – Nar’l Xibrindas’ Office: In addition the normal entry for this room, the desk contains a Report on the Seven Masks Theater.

  • Report on the Seven Masks Theater: A letter Rostrum Feilcook of the Fellowship of Innkeepers, a guild which also oversees local theaters, confirms “your exalted suspicion” regarding the new ownership of the Seven Masks Theater, insofar as the purported owner – “Rongquan Mystere” – is actually being funded by another source, most likely with money originating from outside Waterdeep. A second letter, dated two days later, reports that Rostrum has identified Rongquan’s mysterious patron as “Captain Zord of the Sea Maidens Faire” with his money “originating from Luskan”.
  • GM Note: Nar’l Xibrindas stole these letters and hid them before Xanathar could see them.

ADVERSARY ROSTER

XANATHAR’S LAIR

beholder zombie + 4 gas sporesArea X2 - Watched Hall(stationary)
animated armorArea X5 - Horror's Alcove(stationary, telepathically summonable by X)
Xanathar (01-25%)Area X6 - Arenaif X present, see A Private Fight
Noska Ur'gray (01-25%) + PrisonersArea X7 - Cell Blocksee p. 104 for prisoner list
10 banditsArea X9 - Guild Barracksnot present during A Private Fight
Noska Ur'gray (25-50%) + Rust MonsterArea X10 - Noska's Quarters
Ahmaergo (01-50%)Area X11/X12 - Ahmaergo's Quarters
Thorvin TwinbeardArea X13 - Thorvin's Workshop
Panopticus DwarvesArea X16 - Panopticus Station(stationary, observe through ghostly eyestalks)
Xanathar (25-50%)Area X18 - Audience Chamberif X present, see A Public Audience
Xanathar (51-75%, with Ott Steeltoes)Area X19 - Xanathar's Sanctumtalking to his fish
Xanathar (75-00%, sleeping)Area X19 - Xanathar's Sanctum
1 kuo-toa whip + 6 kuo-toaArea X23 - Antechamber of Madness
Nihiloor (01-50%) + drow prisonerArea X24 - Extraction Chamber
Nihiloor's PrisonersArea X25 - Food for Thought(stationary)
Nihiloor (51-00%) + 4 intellect devourersArea X26 - Spawning Pool(prisoners stationary, see DH p. 111 for list)
3 kuo-toa whips + prisonersArea X27 - Nihiloor's Prison
10 bandits +1 two goblinsArea X28 - Recreation Hall(prisoners stationary)
2 gazers + 7 chefsArea X30 - Gourmet Kitchen
Halfling CookArea X31 - The Other Kitchen(civilian)
Nar'l Xibrindas + Grell bodyguardArea X35 - Nar'l's Office

RANDOM ENCOUNTERS: When entering any public area, there is a 1 in 10 chance of having a random encounter.

d4Encounter
1Flutterfoot Zipswiggle (see DH p. 104)
2Ahmaergo (conducting a routine inspection)
3N'arl Xibrindas + Grell bodyguard
4Ott Steeltoes

A PRIVATE FIGHT

  • Xanathar (invisible in southeast alcove)
  • Ahmaergo
  • Noska Ur’gray
  • 10 bandits + 5 bugbears as an audience
  • 2 goblins serving salted rat intestines and stirge meat pies
  • 1d4 random combatants from Area X7

A PUBLIC AUDIENCE

  • Xanathar, using psychedelic light display to deliver an incoherent, self-aggrandizing speech to a group of sycophantic underlings who have never seen his true form
  • Nar’l Xibrindas
  • Grell Bodyguard
  • 10 bandits
  • 2 duergar

ADVERSARY ROSTER – TOURNAMENT

During a tournament, there will be gathered an audience of 30-60 people. This crowd will either by in the Arena (X6) or congregating socially in Promenade (X17) and Audience Chamber (X18).

Guards: Xanathar’s bandits act as guards. (These numbers are included in the adversary roster below.)

  • X6: 2 guards at either end of the audience.
  • X17: 2 guards are stationed at the exits to X2, X21, and X22.
  • X18: 2 guards on all three doors.

Xanathar: Xanathar enters the Audience Chamber (X18), gives a short speech extolling how wonderful it is that he’s doing this for everyone, and then floats through the Promenade (X17) to the Arena (X6), where he sets up court in the southeast corner.

The Arena Crowd:

  • Xanathar
  • Ahmaergo
  • Thorvin Twinbeard (01-50%)
  • Nihilor (01-50%)
  • Ott Steeltoes
  • Nar’l Xibrindas (01-50%)

In the Arena: See Dragon Heist, p. 114 for details on participating in the tournament.

XANATHAR’S LAIR – DURING A TOURNAMENT

beholder zombie + 4 gas sporesArea X2 - Watched Hall(stationary)
animated armorArea X5 - Horror's Alcove(stationary, telepathically summoned by X)
Arena Crowd + 4 banditsArea X6 - Arena
Noska Ur'gray + PrisonersArea X7 - Cell Blocksee p. 104 for prisoner list
Noska's Rust MonsterArea X10 - Noska's Quarters(stationary)
Thorvin Twinbeard (51-00%)Area X13 - Thorvin's Workshop
Panopticus DwarvesArea X16 - Panopticus Stationobserve through ghostly eyestalks
6 banditsArea X17 - Promenade
6 banditsArea X18 - Audience Chamber
1 kuo-toa whip + 6 kuo-toaArea X23 - Antechamber of Madness
Nihilor (51-75%) + drow prisonerArea X24 - Extraction Chamber
Nihiloor's PrisonersArea X25 - Food for Thought(stationary)
Nihiloor (76-00%) + 4 intellect devourersArea X26 - Spawning Pool
3 kuo-toa whips + prisonersArea X27 - Nihiloor's Prisoners(prisoners stationary, see DH p. 111 for list)
4 bandits + 2 goblinsArea X28 - Recreation Hall
2 gazers + 7 chefsArea X30 - Gourmet Kitchen
Halfling CookArea X31 - The Other Kitchen(stationary)
Nar'l Xibrindas (51-00%)Area X35 - Nar'l's Office

STAT REFERENCE

Nihiloor - Waterdeep: Dragon HeistAhmaergo – DH p. 193
Flutterfoot Zipswiggle – DH p. 104
Thorvin Twinbeard – dwarven commoner, MM p. 345 (DH p. 216)
N’arl Xibrindas – drow mage, MM p. 129 (DH p. 211)
Noska Ur’gray – shield dwarf thug, MM p. 350 (DH p. 213)
Ott Steeltoes – dwarf cultist, MM p. 345 (DH p. 214)

Bandits – MM p. 343
Bugbears – MM p. 33
Duergar – MM p. 122
Grell – MM p. 172
Kuo-toa / Kuo-toa whip – MM p. 199-200

Chefs – kobolds, MM p. 195
Halfling Cook – commoner, MM p. 345

QUESTIONING THE HENCHMEN

Any member of the Xanathar Guild will be fairly familiar with all of the public spaces in the lair.

  • Xanathar is even more paranoid than usual right now and hasn’t left his lair in weeks. That isn’t likely to change as long as the gang war with the Zhentarim is ongoing.
  • Xanathar has some kind of machine that “wakes him up in emergencies”. (GM Note: This is a mangled version of what his dream machine (X20) is actually for.)
  • Virtually all of the Xanatharians steer clear of the mind flayer’s demesne (X23-X27). It’s not unheard of for even loyal members of the Guild to disappear over there. As a result, they don’t know much about the layout or what’s there (although they know prisoners are delivered over there). Conniving Guild members might try to convince the PCs that this is where whatever it is they’re looking for is located (with the expectation that Nihiloor will eat their brains).
  • Xanathar doesn’t allow anyone to enter the Area X33 and most don’t even know what’s in there, but some know that there’s a secret door connecting the Arena (X6) and “whatever Xanathar has hidden down there”.

N’arl Xibrindas knows more than most. He’s even snuck into the Crypt of Xanathars Past (X33). But he’ll also suspect that anyone questioning him is actually an agent of Xanathar trying to reveal him as a double agent.

To Part 4E: Zhentarim – Kolat Towers

Cassalanter Villa - Waterdeep: Dragon Heist

Go to Part 1

As Dragon Heist begins, the Cassalanters control one of the Eyes. (They stole it from the crypt of Lady Alethea Brandath, Renaer’s mother.) If the PCs are working with the Cassalanters, however, it is quite likely that they will have no need of performing a heist to obtain this Eye: If the Cassalanters are kept apprised of the PCs’ progress, they’ll inform them that they possess one of the Eyes and turn it over to them once they’ve secured the other two.

The Cassalanters will want the Stone of Golorr once the PCs have used it to locate the Vault. If the PCs turn it over and later come to regret that action, they may need to carry out a belated heist at a later date.

BLUEPRINT NOTES

Cassalanter Villa - Waterdeep: Dragon Heist

As the PCs discovered when renovating Trollskull Manor, nothing gets done without the guilds getting involved. This very much includes the construction of expensive villas by noble families, and many of those guilds will have the original construction on file. (Getting access to them may require some fast-talking, a few well-placed bribes, or perhaps a little mini-heist in its own right.)

Guilds that are likely to have useful plans:

  • Carpenters’, Roofers’, and Plasterers’ Guild
  • Cellarers’ and Plumbers’ Guild
  • Guild of Stonecutters, Masons, Potters, and Tile-makers
  • Surveyors’, Map-, and Chart-makers’ Guild

If it would be interesting, feel free to split up the useful plans across multiple guilds: The Stonecutters might have the outer walls and first floor (where detailed carvings were done). The Roofers might have a detailed plan of the upper floor. The cellar might only appear in the records of the Cellarers. And the Surveyors’ might have a very old map of the region showing that there was a sizable underground construction on the site before the Cassalanter Villa was constructed (suggesting the presence of the Temple of Asmodeus without providing any meaningful detail of it).

In preparing blueprints for your players to obtain, I recommend the following alterations:

  • The hatch between C22 and C23 was not initially concealed and will likely appear on any blueprints the PCs obtain.
  • C28 and C29 were not part of the original construction. They are unlikely to appear on any blueprints the PCs obtain.
  • It is quite likely that C27 will be prominently identified as a highly secure VAULT.

EVENT SCHEDULE

CHES 30th – HIGHCOIN BALLS: See surveillance opportunities, below.

TARSAHK 1st – CARAVANCE: During this gift-giving holiday, the Cassalanters give most of their staff the night off. Presents are hidden throughout the house and the Cassalanters celebrate with their children by hunting the presents down. (The Cassalanters are taking one last chance to share joy with their children before possibly losing them forever.)

The only people left in the Villa during this time, beyond the Cassalanters themselves, are:

  • The guards
  • Willifort Crowell
  • The imps guarding Osvaldo Cassalanter

This makes it an excellent opportunity to perform a heist onsite, particularly if the PCs can learn that it’s happening ahead of time from the servants.

Later in the evening, however, after the Cassalanter children go to bed, Asmodean cultists arrive onsite for a ritual in the Temple. (See the Cult Gathering roster below.)

TARSAHK 9th – LEIRUIN FEAST: This is the feast at which the Cassalanters poison 99 guests and perform the ritual necessary to save their children’s’ souls (assuming they’ve managed to secure the gold from the Vault). If they haven’t secured the Vault and are, thus, unable to rescue their children, their plans for this feast are abruptly canceled.

TARSAKH 11th – THE TWINS’ BIRTHDAY: The twins’ ninth birthday, on which Asmodeus will claim their souls.

SURVEILLANCE OPPORTUNITY

Skull Masquerade - Carlations (Edited)

The PCs will have an opportunity to observe some of the household’s regular routine when they are first invited to the Villa to hear the Cassalanters’ plea for help. And they may be able to conduct similar surveillance on future meetings with the Cassalanters (which are likely to take place in different areas of the house).

The best general surveillance opportunity, however, is the Highcoin Ball. The house will be swarming with upper class guests, and if the PCs can somehow swing an invitation, join the retinue of someone who has an invitation, or otherwise slip their way in, they’ll be able to get a good sense of the place.

 THE VILLA

Area C4 – Reading Room: A black dragon’s head is mounted on the wall as a hunting trophy.

Area C6 – Victoro’s Office: In addition to the normal entry for this room, the Eye is secured in the hidden compartment in Victoro’s desk. The locked drawer also contains a Report from Seffia Naelryke.

  • Report from Seffia Naelryke: “Milord—There are fresh eyes everywhere. We had a watcher keeping an eye on the Coachlamp Lane windmill, but I sent a message by way of arrow. They survived, and I think we can be fairly certain they work for Xanathar, as Arn followed them back to Terasse’s house on Elsambul’s Lane. – Seffia Naelryke”

Area C22 – Ammalia’s Private Study: In addition to the normal entry for this room, the desk contains the Cassalanter Report on the Grand Game (see Part 6D).

ADVERSARY ROSTERS

CASSALANTER VILLA

Willifort Crowelle (75%) or ServantArea C1 - Entrance Hall
1 guardArea C2 - Garden Mudroom
Victoro Cassalanter (01-25%)Area C4 - Reading Room
2 guardsArea C4 - Reading Room
Victoro Cassalanter (26-50%)Area C6 - Victoro's Office
Jandar Chergoba + 6 chefsArea C10 - Kitchen
Victoro Cassalanter (51-75%) + 1 guardArea C12 - Smoking Room
MimicArea C15 - Banquet Hall(stationary)
Laiba "Nana" Rosse (01-25%)Area C17 - Playroom(or with the children)
Tissina KhyretArea C19 - Sitting Room(attendant to Lady Cassalanter)
Victoro (75-90%) + Ammalia (01-25%)Area C21 - Master Bedroom
Ammalia Cassalanter (26-65%)Area C22 - Ammalia's Study
Victoro (91-00%) + Ammalia (91-00%)Area C24- Osvaldo's Prison
2 imps + Osvaldo CassalanterArea C24 - Osvaldo's Prison(locked up)
Ammalia Cassalanter (66-90%)Area C25 - Butterfly Garden
4 servantsGuest House

TEMPLE OF ASMODEUS (CULT GATHERING)

1 bearded devilArea A3 - Anterior Vestibule
5 cultistsArea A6 - Secret Vestry(up to 1 hour before gathering)
3d10 cultists + All Named NPCsArea A7 - Ceremonial Hall

MEALTIME:

  • Cassalanters are all located in Area C9 (Dining Room).
  • 10 servants located in Area C8 (Covered Porch).

THE CHILDREN: Roll 1d6 to determine where Terenzio and Elzerina are. (They are generally accompanied by Nana Rosse, unless she is determined to be in Area C17 on the roster above.)

1Area C3, playing on sliding ladders.
2Area C16, practicing piano.
3Area C17, playing with toys while Nana Rosse knits.
4Area C18, playing make-believe in costumes (see area description).
5Area C25, playing in the garden.
6Children are in two different areas; roll again twice ignoring this result.

STAT REFERENCE

Imp - Monster Manual (5th Edition)Cooks – commoners, MM p. 345
Cultists – MM p. 345
Guard – MM p. 347
Servants – commoners, MM p. 345

Imps – MM p. 76
Oslando Cassalanter – chain devil, MM p. 72

Jandar Chergoba (Head Chef) – tiefling cult fanatic, MM p. 345 (DH p. 117)
Laiba “Nana” Rosse (Tutor/Caretaker) – tiefling cult fanatic, MM p. 345 (DH p. 117)
Tissina Khyret (Chief Housemaid) – tiefling cult fanatic, MM p. 345 (DH p. 117)
Willifort Crowelle (Head Butler/Agent) – doppelganger, MM p. 82 (DH p. 116)

Victoro Cassalanter – DH p. 218 (has gold key which opens desk in his office)
Ammalia Cassalanter – DH p. 193

QUESTIONING STAFF

The risk of questioning the Cassalanter’s staff is that there is a 10% chance that they’re asking someone who is a secret member of the cult. Cult members are virtually certain to report the questioning to their masters as soon as possible, and may also mislead PCs by providing false information.

Likely information that can be provided by servants, however, include some subset of:

  • A general layout of the areas of the villa they’re familiar with (generally the first three floors).
  • Victoro keeps valuables locked in the desk in his office.
  • There’s a vault in the basement.
  • When working on the third floor once, they heard horrible screams coming from above them on the roof. (GM Note: That was Oslando on a particularly bad day.)
  • The servants are periodically asked to gather in one area of the house or another; it’s an open secret that this is done so that the Cassalanters can host secret guests.
  • Ammalia is worried sick about her children, although they seem in perfect health.
  • They once saw a number of people go down into the wine cellar. They waited around for twenty minutes before Willifort shoed them away, but nobody came back up.
  • There’s a secret orgy room under the guest house. (False)

Go to Part 4D: Xanathar’s Lair

Sea Maidens Faire - Waterdeep: Dragon Heist

Go to Part 1

As the PCs become embroiled in the Grand Game, Jarlaxle does not control an Eye. Nevertheless the Sea Maidens Faire and his ships are likely to become a target for a heist before the campaign is done:

  • As noted in Part 1 and Part 5, Jarlaxle sold the nimblewright which murdered Dalakhar and can identify the purchasers. PCs may break into the ships in order to steal his shipping records or to access the crystal ball connected to the nimblewrights.
  • The Bregan D’Aerthe team at Gralhund Villa (Part 2) successfully take possession of the Stone of Golorr.
  • Jarlaxle’s agents may come into possession of an Eye at a later date, either by stealing it from the PCs or by beating them to the prize in Xanathar’s Lair (see below).

Therefore, we’re going to break down the heist structure for this lair, just like all the others.

It’s also an unusual lair because it really consists of four distinct areas:

  • The docked ships Hellraiser and Hellbreaker
  • The Sea Maidens Faire carnival which is erected on the pier between the two ships
  • The flagship Eyecatcher anchored in the harbor

BLUEPRINT NOTES

Jarlaxle's Ships - Waterdeep: Dragon Heist

Unlike a city building, there won’t be any plans of Jarlaxle’s ships readily available. However, it’s relatively easy to keep them under surveillance. I recommend preparing a player’s copy of the ship maps which includes the upper decks and the portholes on the lower decks.

EVENT SCHEDULE

CARNIVAL PARADES: The Sea Maidens Faire carnival goes on five different parades during its stay in Waterdeep.

  • Ches 10th, announcing its arrival
  • Ches 21st, participate in the Twin Parades of Selûne Sashelas
  • Ches 25th, parade to Shipwrights’ House and then set up local attractions for the evening as part of the Shipwrights’ Ball (Jarlaxle’s agents happily use the occasion to infiltrate this important social event)
  • Tarsakh 1st, join the Caravance holiday parade
  • Tarsakh 5th, a special midnight parade during Goldenight

During the parades, the Sea Maidens Faire attractions are shut down and the ships themselves are depopulated (see the Parade adversary roster, below).

ZORD’S BUSINESS: At irregular intervals, Jarlaxle (as “Captain Zord”) will leave the Eyecatcher. On these occasions his rowboat can be seen docking at the Sea Maidens Faire pier, and then he and his group will move off into the city on various errands (often splitting up).

During these times, the following characters should be stricken from the Eyecatcher’s adversary roster:

  • Jarlaxle
  • Margo Verida & Khafeyta
  • Any lieutenants who would otherwise be present on the ship
  • 1d3 mates
  • 1d6+2 sailors

Although these expeditions cannot be easily planned for, when they occur the Eyecatcher will be substantially less guarded than under normal circumstances.

END OF THE SEA MAIDENS FAIRE: On Tarsakh 20th, the Sea Maidens Faire packs up and sails out of Waterdeep harbor. (If the business of the Grand Game has not been concluded, then it’s likely that Jarlaxle will remain behind with a team of operatives.)

SURVEILLANCE OPPORTUNITY

The drow generally don’t bring strangers onto the ship, and although it may seem like there’s a lot of chaos where the carnies are concerned, the truth is that they’ve been journeying together long enough that everyone pretty much knows each other on sight. Other than becoming one of Jarlaxle’s “romantic” conquests, the PCs are unlikely to get onboard any of the ships under any sort of legitimate pretenses in order to conduct surveillance. However, there are a couple of options which can offer comparable information.

SEA MAIDENS FAIRE: The carnival itself, operating on the pier between the ships, runs from mid-morning until late into the night. This provides the perfect cover for those interested in keeping the Heartbreaker and Hellraiser under surveillance. This surveillance position is able to:

  • Identify the total number of crew on each ship — 1 captain, 3 mates, 17-18 sailors, 16 carnies (when they’re not working on the dock; a handful onboard taking breaks at any given time when the carnival is operating)
  • Find opportunities to peer in through portholes and get some knowledge of the interior layout of the ship(s)
  • Intuit that the Heartbreaker and Hellraiser are virtually identical in layout, suggesting that the same is also likely true of the Eyecatcher
  • Note that the Eyecatcher goes on full alert when a local yacht steers too close, but has no reaction to rowboats from the Heartbreaker or Hellraiser approaching

THE DRAGON ZELIFARN: As described in Dragon Heist on p. 145, the dragon Zelifarn is a curious young bronze dragon who wants the PCs to investigate the submarine attached to the bottom of the Eyecatcher and learn nothing in particular about it for no particular reason.

Young Bronze Dragon - Monster Manual (5th Edition)We’re going to swap that up a bit: If Zelifarn spots the PCs surveilling Jarlaxle’s ship, he’ll approach them with a request for help. (If the PCs spot Zelifarn watching Jarlaxle’s ship without being detected themselves, they might also choose to approach the dragon.)

Zelifarn’s mother was, in addition to being a dragon, a master crystalmancer. Jarlaxle and his agents killed his mother, Asphosis, and stole from her the special crystal ball that he uses to spy through the nimblewrights. Zelifarn doesn’t know exactly what the crystal ball does, but he wants it back so that he can restore his mother’s horde. Zelifarn knows that Jarlaxle keeps it in the Scarlet Marpenoth, but hasn’t been able to figure out a way to get it by himself.

By default, Zelifarn would prefer to pay the PCs to do the work for him. They may be able to convince him to actively assist in their raid on the Eyecatcher with a Charisma (Persuasion) check.

(This counts as a surveillance opportunity because the PCs can learn about the existence of both the submarine and the crystal ball from Zelifarn.)

SPECIAL EVENTS: These events may be observed if the PCs are keeping the Sea Maidens Faire under long-term surveillance.

  • Escaped Bear (DH p. 146) – evening
  • Lieutenants Meet with Laeral (DH p. 145) – night

THE SHIPS

Eyecatcher - Waterdeep: Dragon Heist

Area J18 (Eyecatcher Only) – Nimblewright Storage: Each of these cabins contain 4 deactivated nimblewrights.

  • GM Note: These are the nimblewrights which Jarlaxle has not yet sold. The process for activating them can be intuited with 5 minutes of work and a DC 18 Intelligence (Arcana) test. Jarlaxle and his lieutenants all know the procedure and can activate one of the nimblewrights with a single action.

Area J29 (Eyecatcher Only) – Guest Cabin: A small bag of multihued dragon scales has been strewn across the bed (or is kept in a small bag in the bedside table). Jarlaxle uses them like other people might use rose petals.

Area J30 – Zardoz Zord’s Cabin: In addition to the normal entry for this area, a small desk contains a variety of papers. Among these is the Ledger of Nimblewright Sales (see Part 5) and, if Jarlaxle has become involved in the Grand Game, A Report on the Cultists of Asmodeus and Jarlaxle’s Report on the Grand Game.

  • Report on the Cultists of Asmodeus: This report compiles information from a number of different sources – most contemporary, although a few surprisingly historical – exploring indications that there is a well-established cult of Asmodeus “which has infiltrated the highest strata of Waterdhavian society”. After what appears to be a considerable amount of legwork, the report identifies a house on Aveen Street in the North Ward as being a secret front for one of the cult’s shrines. This does not appear to be the center of worship, however. That distinction, according to references in some of the documentation captured from the Asmodean cultists over a century ago, appears to belong to an ancient site of worship located below the Sea Ward. A recommendation is made that gaining access to the records of the Suveyors’, Map-, and Chart-makers’ Guild might prove useful in identifying this site, although likely only if its location could be narrowed down.
  • GM Note: The house on Aveen Street is the Asmodean Shrine (a Cassalanter outpost). The “ancient site of worshgip” lies beneath Cassalanter Villa.

Area U3 – Soluun’s Stateroom: The footlocker contains A Letter from N’arl.

  • A Letter From N’arl: “Brother—I hope this letter finds you in good spirits. Thank you for the evening at the Seven Masks last tenday. A delightfully bloody affair. I think it wonderful that Jarlaxle has decided to purchase the theater, even if his intentions are not purely artistic. It was quite a joy to escape from Xanathar’s lair for a few hours and remember who I truly am. It’s a pity that we can’t do it more often, but the risk of X discovering my true allegiance is simply too great. On that note, I have taken some pains to arrange assurances for myself. When the time comes, I’ll be able to bring this whole wretched ant’s nest down on that floating fool’s head. – N’arl Xibrindas”

Area U4 – Jarlaxle’s Stateroom: In addition to the normal entry for this area, a crystal ball sits upon a plush cushion of black velvet on a pedestal at the foot of the bed. This is the Nimblewright Crystal Ball (see Part 5).

ADVERSARY ROSTERS

HEARTBREAKER (CARNIVAL ANIMALS)

1 mate + 3 sailorsArea J1 - Main Deck
2 matesArea J3 - Mates' Cabin(off-duty, unarmored)
4 sailorsArea J4 - Crew Cabins(1 per cabin, off-duty, unarmored)
Cook (Commoner)Area J5 - Gallery
6 sailors + 1d4 carniesArea J7 - Dining Cabin
2 sailorsArea J9 - Aft Castle (Lower)
Captain* + NimblewrightArae J10 - Captain's Cabin
2 sailorsArea J11 - Aft Castle (Upper)
1d8 carniesArea J14 - Carnies' Cabins(resting, 16 sleeping at night)
1 sailor (25%)Area J15 - Brig(in cell)
1d2 Animal Handlers (Commoners)Area J20 - Creature Pens(animals present only at night)
2 drow gunslingersArea J23 - Gunslingers' Hold

HELLRAISER (PARADE FLOATS)

1 mate + 3 sailorsArea J1 - Main Deck
2 matesArea J3 - Mates' Cabin(off-duty, unarmored)
4 sailorsArea J4 - Crew Cabins(1 per cabin, off-duty, unarmored)
Cook (Commoner)Area J5 - Gallery
6 sailors + 1d4 carniesArea J7 - Dining Cabin
2 sailorsArea J9 - Aft Castle (Lower)
Captain* + NimblewrightArae J10 - Captain's Cabin
2 sailorsArea J11 - Aft Castle (Upper)
1d8 carniesArea J14 - Carnies' Cabins(resting, 16 sleeping at night)
1 sailor (25%)Area J15 - Brig(in cell)
2 drow gunslingersArea J23 - Gunslingers' Hold

EYECATCHER (FLAGSHIP)

1 mate + 3 sailorsArea J1 - Main Deck
2 matesArea J3 - Mates' Cabin(off-duty, unarmored)
4 sailorsArea J4 - Crew Cabins(1 per cabin, off-duty, unarmored)
Cook (Commoner)Area J5 - Gallery
6 sailorsArea J7 - Dining Cabin
4 giant spidersArea J17 - Lower Cargo Hold MM p. 328
2 sailorsArea J9 - Aft Castle (Lower)
Captain* + NimblewrightArea J10 - Captain's Cabin
2 sailorsArea J11 - After Castle (Upper)
Random response team (25%)Area J14 - Cabins(resting)
1 sailor (25%)Area J15 - Brig(in cell)
8 NimblewrightsArea J18 - Storage(deactivated)
Margo Verida + Khafeyta + Jarlaxle (25%)Area J29 - Guest Cabin
Jarlaxle (26-50%) + NimblewrightArea J30 - Zardoz Zord's Cabin
5 attack mannequinsArea J31 - Training Area
Jarlaxle (51-00%)Area J32 - Jarlaxle's Sauna

SCARLET MARPENOTH

Soluun Xibrindas (50%)Area U3 - Soluun's Stateroomwith a half-elven torture victim (25%)
Fel'Rekt Lafeen (50%)Area U5 - Fel'Rekt's Stateroom
Krebbyg Masq-il'yr (50%)Area U6 - Krebbyg's Stateroom
3 gnome engineers + 2 matesArea U7b - Command Center
4 gnome engineersArea U8 - Engineers' Staterooms

* Has key to captain’s trunk and all doors on their ship.

ADVERSARY ROSTER – DURING PARADE

HEARTBREAKER (CARNIVAL ANIMALS)

1 mate +1 sailorArea J1 - Main Deck
2 matesArea J3 - Mates' Cabin(off-duty, unarmored)
4 sailorsArea J4 - Crews' Cabins(1 per cabin, off-duty, unarmored)
Cook (commoner)Area J5 - Gallery
2 sailorsArea J9 - Aft Castle (Lower)
Captain* + NimblewrightArea J10 - Captain's Cabin
2 sailorsArea J11 - Aft Castle (Upper)
1 sailor (25%)Area J15 - Brig(in cell)
2 drow gunslingersArea J23 - Gunslingers' Hold

HELLRAISER (PARADE FLOATS)

1 mate + 1 sailorArea J1 - Main Deck
2 matesArea J3 - Mates' Cabin(off-duty, unarmored)
4 sailorsArea J4 - Crew Cabins(1 per cabin, off-duty, unarmored)
Cook (Commoner)Area J5 - Gallery
2 sailorsArea J9 - Aft Castle (Lower)
Captain* + NimblewrightArea J10 - Captain's Cabin
2 sailorsArea J11- Aft Castle (Upper)
1 sailor (25%)Area J15 - Brig(in cell)
2 drow gunslingersArea J23 - Gunslingers' Hold

EYECATCHER (FLAGSHIP)

1 mate + 3 sailorsArea J1 - Main Deck
2 matesArea J3 - Mates' Cabin(off-duty, unarmored)
4 sailorsArea J4 - Crew Cabins(1 per cabin, off-duty, unarmored)
Cook (Commoner)Area J5 - Gallery
4 giant spidersArea J17 - Lower Cargo HoldMM p. 328
2 sailorsArea J9 - Aft Castle (Upper)
Captain* + NimblewrightArea J10 - Captain's Cabin
2 sailorsArea J11 - Aft Castle (Upper)
Random response team (25%)Area J14 - Cabins(resting)
1 sailor (25%)Area J15 - Brig(in cell)
8 NimblewrightsArea J18 - Storage(deactivated)

SCARLET MARPENOTH

Soluun Xibrindas (50%)Area U3 - Soluun's Stateroomwith a half-elven torture victim (25%)
Fel'Rekt Lafeen (50%)Area U5 - Fel'Rekt's Stateroom
Krebbyg Masq-il'yr (50%)Area U6 - Krebbyg's Stateroom
3 gnome engineers + 2 matesArea U7b - Command Center
4 gnome engineersArea U8 - Engineers' Staterooms

* Has key to captain’s trunk and all doors on their ship.

STAT REFERENCE

Jarlaxle Baenre – DH p. 206
Margo Verida – female Amnian human bard (DH p. 195)
Khafeyta – female Mulhorandi human swashbuckler (DH p. 216)

Captain – drow mage, MM p. 129 (prepare sending instead of fly)
Drow Mage - Monster Manual (5th Edition)Mates – drow elite warrior, MM p. 128
Sailors – drow, p. 128
Carnies – commoners, MM p. 345

Gnome Engineers – apprentice wizards, DH p. 194

  • NG, Small, 7 (2d6) hp
  • Racial Traits: Advantage on Int, Wis, Cha saving throws vs. magic. Walking speed 25 ft. Darkvision 60 ft. Speak Common and Gnomish.
  • Names: Lorella Middenpump, Tervaround Waggletop, Anverth Levery, Cockaby Fapplestamp, Ellywick Fiddlefen, Gerbo Reese, Zaffrab Horcusporcus

Nimblewright – DH p. 212
Drow gunslingers – DH p. 201

QUESTIONING CREW

  • Captains: Dragon Heist, p. 132
  • Sailors: Dragon Heist, p. 132
  • Carnies: Dragon Heist, p. 132
  • Margo / Khafeyta: Dragon Heist, p. 140
  • Gnome Engineers: Dragon Heist, p. 141-142

Go to Part 4C: Cassalanter Villa

Revelry - Waterdeep: Dragon Heist

Go to Part 1

After hiding the secret of the Vault’s location in the Stone of Golorr, Lord Neverember chose to further secure it by blinding the Stone: He removed the Stone’s three eyes, robbing it of the ability to both see and communicate its secrets, and hid those Eyes in different places.

In order to discover the location of the Vault, someone needs to restore the Eyes to the Stone of Golorr. (Which is simply a matter of having both in the same location and placing an Eye within an empty socket.) As described in Part 1, the Eyes are currently held by the Cassalanters, Manshoon, and Xanathar. Each of these Eyes have been secured in their respective lairs, and if the PCs want to restore the Stone of Golorr, discover the location of the Vault, and end the Grand Game, then they’re going to have to go into those lairs and get them.

HEIST STRUCTURE

This part of our remix, therefore, restructures the four villain lairs so that the PCs can run exciting and successful heists in them. This includes providing adversary rosters and explicit heist frames for each lair, along with minor tweaks and the like where necessary.

Before we dive in, let’s take a moment to discuss the structure of a heist scenario. It superficially resembles the location-crawl (usually featuring a room-and-key design), but with the – very important! – distinction that the PCs are expected to know the floor plan and some (or all) of the defensive measures present before the actual heist begins. In this it also closely resembles the raid structure, but the difference is that, whereas in the raid scenario the PCs can quickly figure out the floorplan and defensive measures largely through observation in the immediate moment, in the heist discovering these elements usually requires additional effort during the prep phase of the heist.

The heist structure is heavily player-driven, but if the players haven’t done proper heists before, they can prove unusual enough that the DM should let the players know that they have opportunities they might not normally consider viable. (This is particularly true specifically because of the heist’s similarity to the dungeon crawl: Players may assume that they’re “supposed” to engage the heist in the same way that they engage a traditional dungeon.)

The heist structure consists of five steps.

STEP 1: IDENTIFY THE SCORE. For the purposes of Dragon Heist, this means identifying where the Eyes are (i.e., the lairs of the villains). Part 5 will have the revelation lists with all the clues the PCs can follow to figure this out.

STEP 2: GATHER INFORMATION. The next step is for the PCs to gather information on their target. This should include being able to gain access to some or all of the blueprints and defensive measures in the targeted complex. It may also include an event schedule, which will often feature one or more opportunities for performing the heist (by either providing unique access to the target and/or providing cover for the operation).

The descriptions of the lairs below will include brief descriptions of what form the Gather Information phase might take for each lair, but the GM should always remain open to alternative thinking from the PCs.

Re: Blueprints. You may benefit from high-quality player versions of the maps. These are not, unfortunately, available in the book as printed, and due to copyright reasons I’m not going to produce them here. They are available in the Fantasy Grounds pack for Dragon Heist, and I believe they’re also available from D&D Beyond.

You may want to prepare:

  • A full blueprint (i.e., the entire player’s map).
  • A version with secret areas removed.
  • Partial versions, particularly reflecting the limited knowledge of certain underlings who might be questioned. (Although it may be easier to simply sketch these out ad hoc as they come up during play.)

Be aware of the lack of windows in all of these maps. Place them logically or be prepared to tell the players where they’re located.

It’s important for the DM to remember that, in a heist scenario, the expected outcome is for the PCs to succeed in getting this information. That doesn’t mean it’s guaranteed: The expected outcome of combat in D&D is for the PCs to win, but that doesn’t mean it always happens. But DMs can sometimes get a little too enamored of keeping their cards close to their chest, and you may need to consciously remind yourself to fight that instinct: 90% of the fun in a heist scenario comes from seeing a problem and coming up with a solution for it. Only about 10% comes from being surprised by the unknown in the middle of the heist (and that’ll usually arise organically as the heist plays out).

STEP 3: ONSITE SURVEILLANCE. After the initial gathering of information, most heist stories will give the protagonists an opportunity to conduct onsite surveillance before the heist happens. This surveillance allows them to gain information they missed or were unable to gather earlier, clarify the information they already have, and/or discover that some of their information was inaccurate or outdated (and now they have a whole new set of problems to solve!).

One really easy division is to make it easy to obtain floor plans of the target, but to only be able to ascertain limited information about the security measures in place without onsite surveillance.

Each lair will detail at least one surveillance opportunity that the PCs can take advantage of.

STEP 4: PREP WORK. Possibly running in tandem with the onsite surveillance, the team will also need to make preparations for the job. Prep often takes the form of altering the information the PCs have received — creating new entrances, blinding security cameras, subverting guards, etc. It may also involve creating bespoke resources (or simply shopping for necessary supplies).

STEP 5: THE OPERATION. Finally, the operation itself. The PCs try to carry out their plan.

In running the operation, there may be one or more pre-planned twists: Unexpected circumstances that the PCs didn’t anticipate or that they missed in their research. These will often evolve organically from earlier missed checks. Lean into those. Gotchas that the PCs had no way of anticipating and which create unexpected complications for the job (“Oh crap! Mrs. Johnson came home early!”) are also great in moderation, but gotchas that automatically scuttle the entire job and negate all the PCs’ planning generally suck and should be avoided.

Successfully executing a heist will usually involve a series of skill checks. A single failed check should not cause the entire plan to immediately fail. Use fail forward techniques that generate complications on failed checks.

These complications on failed checks are also why you can get away with giving the PCs perfect information during Step 2 and Step 3: Among other things, you can use complications to introduce “oh fuck, he got a new safe” obstacles that effectively alter or reveal gaps in the information the PCs acquired on-the-fly.

(The difference between a gotcha and a complication is that the former are things which you, as the DM, plan to have happen before the heist starts. The latter arise as the heist is happening.)

THE FESTIVALS

Festivals - Waterdeep: Dragon Heist

As a final note here, this remix is set in the Springtime, during the back-to-back festivals of Fleetswake (Ches 21st thru 30th) and Waukeentide (Tarsakh 1st thru 10th). There are a couple reasons for this.

First, these festivals are filled with gold- and wealth-filled events, which is very thematically appropriate for the dragon-fueled pursuit of Lord Neverember’s Vault.

Second, and more importantly, these festivals provide wide opportunities for social events – parties, galas, gladiatorial games, etc. – to take place at each of the villains’ lairs. These provide both surveillance opportunities and access for the operations themselves.

The broad date range (and multiple events) give us a lot more flexibility in terms of how this section times out: If we instead aimed for just Trolltide on Klythorn 1st, for example, and the PCs do things a little slower than we anticipate, then we could easily miss the holiday entirely. If they go a little slower in our case, then we just slide into the next slate of events during the dual festivals.

This long festival season can also explain why Jarlaxle has chosen this moment to appear in town with the Sea Maidens’ Faire: It’s the perfect cover for his traveling carnival.

FLEETSWAKE: This festival is the beginning of the Spring Social Season in Waterdeep. Celebrating the sea, maritime trade, and the gods of the sea, navigation, and weather, it spans the last tenday of Ches, and includes a series of boat races and guild-sponsored galas at the Copper Cup festhall. According to custom, the winners of the various competitions don’t keep their trophies and earnings, but deliver them to the priests of Umberlee at the Queenspire, her temple on the beach by the east entrance to the Great Harbor, at the conclusion of the festival (see below).

  • Ches 21 – Selûne Sashelas: A celebration of Selûne, goddess of the moon and navigation, and Deep Sashelas of the Seldarine, elven god of the sea. It is supposedly based on a mangled legend dating back to the time when the elven city of Aelinthaldaar stood where Waterdeep does today and telling of a time when the elves of the sea said farewell to their brethren upon the land and moved into the deep ocean. The elves largely declare this to be a bunch of hogwash, but nevertheless the “historical event” is commemorated by the Twin Parades: A huge line of ships (varying greatly in size) proceeds from the harbor, loops up the coast, and returns. Simultaneously, a land-based parade proceeds from the Docks and through the streets of Waterdeep.
  • Ches 25 – Shipwrights’ Ball: Held at the Shipwrights’ House, what was once a guild celebration has turned into one of the biggest social events of Fleetswake.
  • Ches 29-30 – Fair Seas Festival: Much feasting on seafood, the harbor is strewn with flower petals, and the City Guards go from tavern to tavern to collect offerings for Umberlee. Collection boxes also appear at large festival gatherings. Upon sunset of the final day, the collected coin is placed in chests and dumped into the deepest part of the harbor. (See Dragon Heist, p. 185 for anyone who thinks they should try to loot it.)
  • Ches 30 – Highcoin Balls: When Lord Peirgeiron was High Lord of Waterdeep, he threw the Highcoin Ball on the 30th of Ches which would last all through the last day of the Fair Seas Festival. It was considered the absolute necessity for those intending to be on the scene that season, and those who missed it became an afterthought for the rest of the year. After Lord Peirgeion’s passing, a number of noble families tried to pick up the tradition. The result are the Highcoin Balls, which now generally begin after sundown (when the ceremonies of Umberlee’s Cache take place). It’s not unusual for guests to wander from one party to the next.

WAUKEENTIDE: This festival has long gathered a number of older holidays under one name, stretching those celebrations and rituals into a holiday season that lasts a tenday in homage to Waukeen, the goddess of wealth and trade.fs

  • Tarsahk 1 – Caravance: This gift-giving holiday commemorates the traditional arrival of the first caravans of the season into the city. Many parents hide gifts for their offspring in their homes, telling the children that they were left by Old Carvas – a mythical peddler who arrived with the first caravan to reach Waterdeep, his wagon loaded down with toys for children to enjoy.
  • Tarsahk 5 – Goldenight: This festival celebrates coin and gold, with many businesses staying open all night, offering midnight sales and other promotions. Some celebrants and customers decorate themselves with gold dust and wear coins as jewelry.
  • Tarsahk 7 – Guildsmeet: On this holiday, guild members gather in their halls for the announcement of new policies and a celebration of business concluded for the year. These gatherings culminate in a gala festival and dance sponsored by several guilds, which lasts from dusk till dawn and overruns the Market, the Cynosure, the Field of Triumph, and all areas in between.
  • Tarsahk 10 – Leiruin: In times long past, Waukeen caught Leira, the goddess of illusions and deception, attempting to cheat her in a deal, and buried her under a mountain of molten gold as punishment. A commemoration of that event, Leiruin is the day for guild members to pay their annual dues and for guildmasters to meet with the Lords of Waterdeep and renew their charters for another year. In the evening, the Leiruin Feasts are held, in which gold coins (and other golden treasures) are baked into random items of food to be won by those who are lucky enough to receive them.

HOLIDAYS AT THE TAVERN: See the notes on hosting the Deadwinter Day Feast at Trollskull Manor on page 162 of Dragon Heist for some light, adaptable notes on how the various holidays of Fleetswake and Waukeentide can come home to roost.

DESIGN NOTES

The Highcoin Balls are derived from this wiki. I’ve sought for an original source in all the Waterdeep lore I own and have been unsuccessful, leading me to suspect that it may be an original creation of Joseph D. Carriker, Jr. for his campaign.

NOTES ON THE LAIRS

The notes on the various lairs below include revisions made to some of the keyed areas in those lairs. After years of doing this, I’ve discovered that, rather than attempting to simply annotate the changes to an area, it is usually easier to just “overwrite” the entire area. (That way, as the GM, you only need to check to see if any area has been updated. You don’t have to simultaneously try to combine and interpolate text across multiple sources.)

Therefore, that’s the approach I’ve taken below. If an area appears in the notes below, you can simply ignore the original key entry in Dragon Heist and use the entry as found here. (Unless noted otherwise.)

Remember that NPCs now appear on the adversary roster and should be ignored when they appear in the Dragon Heist room keys.

Go to Part 4B: Bregan D’Aerthe – Sea Maidens Faire

Go to Part 1

GRALHUND RESPONSE TEAM

Depending on how Part 2: Gralhund Villa resolves itself, the Gralhunds might remain engaged with the Grand Game. They’ll know that the only way to re-establish their position will be to take possession of Golorr artifacts, and they’ll probably identify any Hrabbaz - Waterdeep: Dragon Heistartifact(s) held by the PCs as the most vulnerable. (But they are likely to use covert means to obtain it if possible.)

If the Gralhunds have somehow managed to retain possession of the Stone, they may be emboldened by their success and more actively pursue the Eyes. It’s more likely, however, that they will eventually realize that they’re out of their depth and use whatever Golorr artifact(s) they’ve managed to obtain as collateral for forming an alliance with another player in the Grand Game. Any of the four major factions can make enticing offers to them, but another possibility is that the Gralhunds simply decide to cut their losses and approach the Open Lord: They won’t get a cut of the money that way, but if they can spin it the right way they may get a lot of political capital out of their “material assistance to the realm”.

Their response team is modest, consisting of:

  • Hrabbaz, Lady Yalah’s bodyguard (DH p. 205)
  • A spy (MM p. 349)
  • A martial arts adept (DH p. 209)

GM Tip: Remember that the Gralhunds also have agents in Renaer Neverember’s home. If the PCs keep Renaer in the loop about their activities, those agents become a potential vector of information back to the Gralhunds.

OPEN LORD RESPONSE TEAM

Laeral Silverhand has the entire apparatus of Waterdeep’s government at her command. If she wants something from the PCs, that command will trickle down through the bureaucracy and be executed by a local team of city watchmen:

  • 1 veteran (MM p. 350)Laeral Silverhand - Waterdeep: Dragon Heist
  • 4 guards
  • Possibly accompanied by an apprentice wizard (DH p. 194)

DESIGN NOTE

The initial team sent by the Open Lord is designed to be a Medium encounter for the PCs. Which means that the PCs can totally take them in a fair fight (or have very good odds of running away successfully). This intentionally gives the PCs the option of doing so. (Once they do, of course, they’re probably living on borrowed time because the Open Lord has much deeper — and much more powerful — resources to call upon.)

This also means that the City Watch can easily be pitted against response teams from the other factions without trivially overwhelming them.

UNSEEN RESPONSE TEAMS

If you’re using the Unseen (from Introcaso’s Unseen Waterdeep, see Part 1B), they’ll most likely make their presence primarily felt through proactive response teams. (Sort of a, “Player Unseen has joined the game!” kind of thing.)

THE ILLUSIONISTS: Aila and Dallia Illmatti are twin sisters and also illusionists. They actually perform a stage act using their skills, and you might consider adding them to the Seven Masks Theater, with the Unseen infiltrating Jarlaxle’s operation there. If pursued, one of their favorite tricks is to have one of the sisters create an illusion of the other (giving them an opportunity to Wererat - Unseen Waterdeepescape with whatever they’ve stolen).

  • Aila and Dallia (illusionists, Unseen Waterdeep p. 29)
  • Kelso Fiddlewick (a wererat who disguises himself as a vagrant child, MM p. 209)
  • 2 thugs (MM p. 350)

STRIKE TEAM: As detailed on p. 4 of Unseen Waterdeep, this is a generic strike team that can be used to achieve any number ends.

  • Doppelganger (MM p. 82)
  • 01-50: 2 spies (MM p. 349)
  • 5175: 2 thugs (MM p. 350)
  • 7600: a second doppelganger

GALLO & FERRA: A male and female pair of lightfoot halfling wererats who often disguise themselves as beggar children in order to set up observation posts (see Unseen Waterdeep, p. 14). They could show up almost anywhere, and the PCs might not realize something’s amiss until the second or third time they spot them.

GM Tip: Kelso Fiddlewick, who’s part of  the crew Emmek Frewn uses to harrass the PCs’ attempts to open Trollskull Manor (see Dragon Heist, p. 42), belongs to the same pack as Gallo and Ferra.

FREELANCERS

As discussed in Part 1B, Bonnie’s Doppelgangers and the Black Viper should both be used as proactive elements.

BONNIE’S DOPPELGANGERS: See Dragon Heist p. 20. They are also part of faction missions on p. 35 and 27.

  • 5 doppelgangers (MM p. 82)

BLACK VIPER: See Dragon Heist p. 196. Also part of faction missions on p. 39 and p. 40.

THE THREE URCHINS

The Three Urchins - Waterdeep: Dragon Heist

The Three Urchins are detailed in a sidebar on p. 63 of Dragon Heist:

  • Nat is a lanky, 10-year-old deaf Illuskan girl with a wooden toy sword. She is the leader of the group and communicates using a sign language that she invented and taught her friends.
  • Jenks is a portly 9-year-old Turami boy with a cloak, a toy wand, and a stuffed owlbear “familiar”. He’s shy around strangers but brave when it comes to helping his friends.
  • Squiddly is a slim 9-year-old tiefling boy with an eye patch, a small bow, and a quiver of toy arrows. He rarely thinks before he talks or acts.

It may be odd to think of the Three Urchins as a “response team”, but they are a proactive node that the GM can bring onscreen as desired. A few things I’d consider:

  • Introduce the Urchins in Trollskull Alley, possibly even as part of the first scene where the PCs arrive at Trollskull Mansion. (They might be inside the abandoned building, rampaging around, pretending to fight trolls and such, and offering all kinds of stories about the ghost of a troll skull which haunts the building.)
  • Have them follow the PCs. They “fancy themselves as adventurers of sorts, and they are quick to idolize and emulate real-life ones.”
  • Have them interfere with faction missions (most likely while trying to help, unless the PCs have pissed them off).
  • Let them be valuable sources of information. They can show up in the streets around Gralhund Villa, familiar with the neighborhood. Nat might know Agorn because she grew up in the same neighborhood he lived in (and knows that he murdered his mother). And so forth.
  • Have them eavesdrop on the PCs and volunteer to help.

If you’re content to just have these kids as friendly, rambunctious supporting characters, that’s more than enough. They’ll be a charming and lovely part of your campaign.

But if you’re willing to go a little darker, there are a couple of additional options:

  • If the bad guys are looking for someone to kidnap in order to gain leverage over the PCs, one or more of the Urchins makes a great target. (Going to rescue them and discovering that they’ve already broken out of their cell and are causing huge headaches for the bad guys by sneaking around the outpost or lair where they’re being held also offers great comedic opportunities.)
  • As I will discuss at further length in Part 5, I think it necessary to give the PCs a stronger motivation to investigate the fireball that kills Dalakhar beyond “it happened sort of near us and it’s obviously a plot hook, so we should just go for it.” One way to provide that motivation is to kill someone the PCs care about as collateral damage. If it won’t be a deal-breaker for your group, I guarantee that killing one of the Urchins after the PCs have become friends with them will set them permanently on the warpath no matter how many city officials tell them to back off.

Go to Part 4: The Eyes of the Stone

Archives

Recent Posts


Recent Comments

Copyright © The Alexandrian. All rights reserved.