The Haunting of Ypsilon-14 is a pamphlet adventure for the Mothership roleplaying game. It’s just two pages long and designed to fold up as a trifold pamphlet. The goal is to make this an adventure that a GM can pick up, read in about fifteen minutes, and then immediately run. In addition to the super-fast character creation and streamlined rules of Mothership, the result is an RPG that you 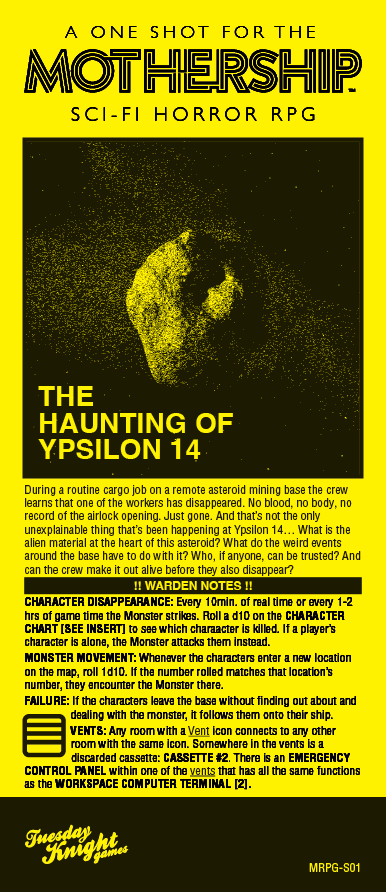 can pick up and play as easily as you might a board game or card game.
I think the short length of the adventure can also make it a great example of how I read and use published adventures, as described at length in How to Prep a Module. I’m going to try to give you a peek into my thought process as I read through Ypsilon-14: What I’m looking for, what I’m prepping, and how I’m solving problems before they happen at the table. Even if it’s all happening in just fifteen minutes.
Although I don’t think it’s necessary, you might want to grab a copy of the adventure to follow along.
SPOILERS AHEAD!
THE HOOK
The basic concept of Ypsilon-14 is that Dr. Ethan Giovanni, while studying a mysterious “yellow goo” discovered by asteroid miners, has woken up an alien at the mining colony and now it’s killing people.
The published scenario hook for the adventure is that the PCs have come to a mining asteroid (the titular Ypsilon-14) to pick up some cargo.
This is not a bad hook. It gets the PCs where the scenario is so that they can start interacting with it. What I notice, though, is that it could very easily require some heavy-lifting in actual play to get the players invested in the action and have a clear vector for taking action. (For example, it would be pretty easy for the PCs to just stay at the docking bay and wait, forcing the GM to figure out how to bring the action to them.) The scenario hook is relying on open-ended player curiosity, which can be fine, but isn’t particularly strong.
If I was planning to run this as part of an ongoing campaign, I would look to make the hook specific to the PCs and their goals: Not generic cargo, for example, but a specific thing that the PCs need. Or maybe the PCs learn that Dr. Giovanni has information that they need, and now they’ve tracked him to Ypsilon-14.
In my case, I’m planning to run Ypsilon-14 as an open table one-shot, so the hook will need to be more generic. (Although I might look for opportunities to feed specific hooks or connections to the adventure to various PCs: For example, if someone creates a former asteroid miner, I might suggest Ypsilon-14 as a place they previously worked.)
What I will do, though, is make the generic cargo pick-up more specific: The PCs have been hired to pick up a scientific sample from Dr. Giovanni.
I do this knowing that:
- The sample they’re picking up is the extremely dangerous yellow goo, which will encourage them to interact with it.
- Giovanni, having been infected by the yellow goo, is locked up inside his ship.
- His workstation, where he accidentally woke up the alien and also where I think I’ll place the sample container the PCs are supposed to pick up, is located down in the mining tunnels.
What I’m looking at here are the vectors of the hook: Where is the hook pointing the PCs?
The vector of the original hook terminated at the Docking Bay. As you can see, though, just a slight change to the hook creates vectors that point much deeper into the adventure.
With the PCs, therefore, motivated to follow those vectors, it will be much easier for the players to get invested in the scenario. Their actions in pursuing the vector will also give me more opportunities to bring the other elements of the adventures (e.g., people going missing and alien attacks) into play as part of the natural flow of the action.
CATCHING BOOBY TRAPS
Published adventures often have booby traps: Information that’s either missing or hidden that can unexpectedly sabotage you at the table.
Sometimes these are deliberately included by designers who want the GM to read the adventure as if it were a novel: They want you to be flat-footed by their surprise ending! And, for some reason, you’ll often read mystery scenarios where you have to first solve the mystery yourself before you can run it.
More often, they’re just mistakes and oversights.
For example, in Dr. Giovanni’s workstation in the mines:
A small WORKSTATION of scientific equipment has been set up nearby. A SCANNER relays readings from the pod to the Heracles [his ship] and a SCRAP OF PAPER sits on the desk that reads “0389.”
There are two booby traps here. The milder of the two is that I don’t know what “0389” means unless I cross-reference it to a different section of the adventure.
The more significant one is the scanner relaying readings to the Heracles: First, what do the readings say? I could improvise that, but it feels pretty core to the adventure so I’d probably throw some prep on that. More significantly, these readings aren’t mentioned in the write-up for the Heracles, so if the PCs go to the Heracles first, I could very easily not realize that PCs checking the Heracles’ computers should notice the scanner reading being relayed.
Another booby trap can be found with the crew listings. The adventure includes a great reference for the CHARACTERS in the adventure, listing everyone on the station. This write-up includes:
DANA. Head Driller. Stoich, professional, sullen.
KANTARO. Leader. Muscular, quiet, hasn’t bathed in a few days.
That’s all well and good. But in the adventure key for the crew quarters, we can also read:
KANTARO’S BUNK. Dana’s clothes mixed in with Kantaro’s laundry.
And you can probably immediately see the problem: Kantaro is in a relationship with Dana (or he’s a huge creep). But because that essential information isn’t included in the character write-ups, you could very easily end up roleplaying Dana and/or Kantaro earlier in the adventure without realizing they’re in a relationship and end up creating a continuity issue that booby traps you later.
This kind of “essential information missing from a section of the adventure that presents itself as a comprehensive reference” is a surprisingly common booby trap. Obviously, though, it can be cleared up if you just keep an eye open for booby traps while reading the adventure and make a quick note in, for example, their character write-ups.
INFORMATION FLOW
I also like to identify the essential information in a scenario, make sure I understand how the players will get that information, and improve this process where I can.
In the case of Ypsilon-14, there seems to be three key pieces of information that should be established at the beginning of the scenario:
- A miner named Mike is missing.
- Ethan Giovanni is a scientist who’s doing research onsite.
- The cast of characters — nine miners + a cat named Prince.
There doesn’t need to be a single, definitive vector for any of this information, and just having the mental list of what’s essential will go a long way towards setting you up for success at the table. But I’m not above giving myself a little clearer structure to work with.
First, you’ll note that I’ve already sorted Dr. Ethan Giovanni by connecting him to the scenario hook. So that’s done.
Second, in the adventure as written, Mike has been missing since last night and everybody knows it. So presumably, at some point, I can just have one of the NPCs give that information to the PCs. But what if we show instead of tell?
As written, when the PCs’ ship docks, Sonya, the team leader on Ypsilon-14, unlocks the docking bay door for them. What if, instead, Mike was supposed to be on monitoring duty? So the PCs dock, signal the mining station, and… nothing. They get no reply. You can give the players a little rope to figure out how they want to respond to that, but eventually Sonya will show up, open the door, and apologize on behalf of Mike’s dumb ass. Or, if the PCs have already hacked their way through the docking bay door by the time Sonya arrives, maybe that conversation goes a different way. Either way, “Mike was supposed to be here, where the fuck is he?” gets established through action that directly affects the PCs.
CAST OF CHARACTERS
Third, we have the cast of characters. This is essential information because (a) “Oh no! Jerome is missing now, too!” is probably more effective if the players know who Jerome is; (b) until the PCs figure out an alien is involved, this is your list of suspects; and (c) once things shift fully into survival horror mode, these are the people who need to be kept alive.
When an adventure has a large cast of characters like this, it’s vital that you don’t just introduce them all at once. It’s literally impossible for the players to process an info dump like that: They’ll never be able to remember their names, differentiate them as individuals, or form any meaningful relationship with them. The NPCs will just be an anonymous mob to them.
So when I see a big list of characters like this in an adventure, I’m immediately thinking about how I can split them up and sequence their introduction. In this case, my rough thoughts are:
- They meet Sonya first, as described above.
- One or two more people can come into this opening scene, probably prompting an additional discussion about the missing Mike. (Sonya: “Have you seen Mike?” “Not since last night after he broke the fucking shower.”) Maybe the cat could be in this scene and Morgan comes in looking for her?
- Throw together a quick adversary roster for everybody else.
The function of the “adversary” roster here is to just split everybody up into smaller groups and scatter them around the base. Specific groupings and locations probably won’t stick as the situation evolves, but it’ll still give me a good starting point for spreading out the introductions.
Looking at the cast list:
- It looks pretty easy to split them into On Duty and Off Duty.
- I can split the On Duty crew between those near the entrance to the mine in the Mine Tunnel and those working in the Depths.
- Off Duty crew can be split between Crew Quarters, Mess, and the Showers.
As I’m quickly spreading these characters around, I’m likely already getting ideas for how some of these scenes could be framed up. (For example, if I put Ashraf and Kantaro in the Mess, what might they be arguing about? Or is it Dana and Kantaro in there and they’re flirting with each other? Or is Dana supposed to be in her quarters, but she’s missing if you go looking for her because she’s actually shacked up with Kantaro in his quarters? If Rie is sleeping, how do they react if they get woken up? And so forth.)
If a particularly brilliant idea occurs to me here, I’ll jot it down for posterity. But I’ll usually just let these wash over me. It’s a sign that the scenario is beginning to take life in my imagination, but I’ll trust myself to find the right answers while improvising at the table.
WRAPPING UP
On that note, the intention of a minimalist adventure like The Haunting of Ypsilon-14 is to give the GM raw material and trust them to improvise.
This is, of course, good praxis: Don’t prep stuff that you can improvise at the table.
With that being said, if you see a place where the adventure is expecting you to improvise and either (a) you’re not comfortable improvising that or (b) you see a big value add from prep, then you should finish up by prepping that stuff.
For example, Sonya has a collection of cassette tapes in her quarters and she’ll blast music from her boombox. Improvising a bunch of titles for her cassettes is the type of thing that I, personally, can get hung up on in a session, so maybe that’s something I’d want to do ahead of time. (In this specific case, that’s being balanced against my desire to keep my prep for these open table one-shots somewhere between “extremely minimal” and “none at all,” so I’ll probably end up skipping it.)
As another example, with the large cast of characters it might be useful to grab pictures for each of them that you can show to the players to help keep them all straight. Along these same lines, if you’re not feeling confident in improvising these characters from the minimalist descriptions, then maybe it’s worthwhile to spin up a universal roleplaying template for each of them.
It’s important to remember that there’s no “right” answer here: It’s about what you feel confident improvising at the table and what added material, if any, seems valuable to you.
In this case, jotting down the prep described above took about fifteen minutes. That feels about right for how I’m choosing to use this module, and I think I’ve set myself up for success at the gaming table. What and how you choose to prep will different from the choices I made, but ultimately we have the same goal!