The Alexandrian

Search results for ‘hexcrawl’

Go to Part 1

On that note, let’s take a closer look at the practical techniques I use when stocking my hexes.

#0. HAVE A MAP

Our primary focus here is stocking hexes. But before you can do that, you need the map you’ll be keying.

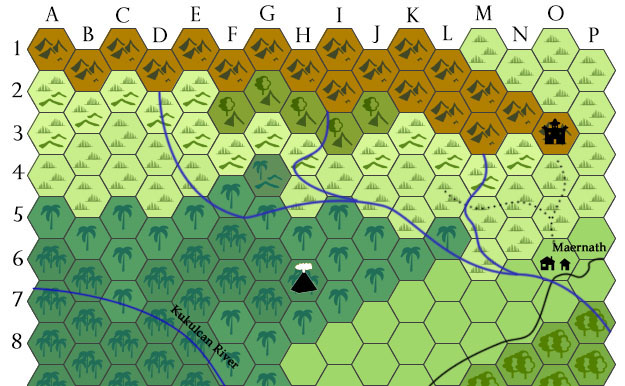
First, figure out how big you want your map to be. For the reasons we discussed above, I recommend a 10 x 10 or 12 x 12 map. 100 or 144 hexes should be more than enough to get started.

Second, place the home base for the PCs in the center of this map. (This way, as noted, they can go in any direction without immediately riding off the edge of your prep.) The home base might be:

  • A small town or city
  • An expedition’s base camp
  • A keep
  • An outpost
  • A dimensional portal
  • A crashed spaceship

There’s no limit here except your imagination. The key thing is that the PCs need to have a reason to keep coming back to this location. (This usually means some form of resupplying between one expedition and the next.)

Third, grab some hexmapping software. Current options include:

You can also use other world-mappers and then just drop a hex grid on top of your map, but I recommend creating a true hex map with one clearly defined terrain type per hex. (It will make travel modifiers a lot clearer.)

I also suggest large blocks of similar terrain, which can then immediately double as your regions. (Remember that any individual hex is huge. Just because you threw down “forest” as the predominant terrain type, it doesn’t mean there isn’t a lot of local variation within it.)

Finally, I recommend having two or three different types of terrain immediately adjacent to the home base: If the PCs go north, they enter the mountains. If they go west, they enter the forest. If they head south or east they’re crossing the plains. This gives a clear and immediate distinction which provides a bare minimum criteria that the PCs can use to “pick a direction and go.”

Fourth, throw down some roads and rivers.

You’re done.

#1. BE CREATIVE, BE AWESOME, BE SINCERE

Before we get into any tips, tricks, shortcuts, or cheats, first things first: Do some honest brainstorming and pour some raw creativity onto the page.

The neat ideas you’ve been tossing around inside your head for the past few days? Everything your players think would be cool? Everything you think would be cool? Everything you wish the last GM you played with had included in the game?

Put ‘em in hexes.

Then think about the setting logically: What needs to be there in order for the setting to work? For the stuff you’ve already keyed to work?

Get ‘em in hexes.

Bring your creativity to the table. And make sure everything you include is awesome, because life is too short to waste time on the mediocre or the “good enough” or the “I guess I need to do that.” If there’s something that feels mundane or generic, give it a twist or add something extra. (The Goblin Ampersand can be a good technique here.)

Finally, throughout this entire process, be sincere. I think it’s really important to stay true to yourself when you’re doing design work: You have a unique point of view and a unique aesthetic. Even when you’re bringing in material or inspiration from other sources, apply it through your own perspective and values.

#2. JUMP AROUND

It can be useful to start at Hex A1, go to Hex A2, and then systematically proceed on through the A’s before starting the B’s.

But if you’re working on A3 and you get a cool idea that belongs on the other side of the map, don’t hesitate: Jump over there and key up Hex F7.

That is not only useful from a practical standpoint: It also feels great when you get to column F and discover three-quarters of the hexes have already been filled.

#3. STEAL

Okay, you’ve filled a couple dozen hexes, but now you’re starting to run out of ideas. What next?

Steal.

If you’re reading this blog, I’m guessing you’ve got a stack of adventures that you’ve collected over the years. Go pull your favorite location-based adventures off the shelf and start plopping them down into your hexes.

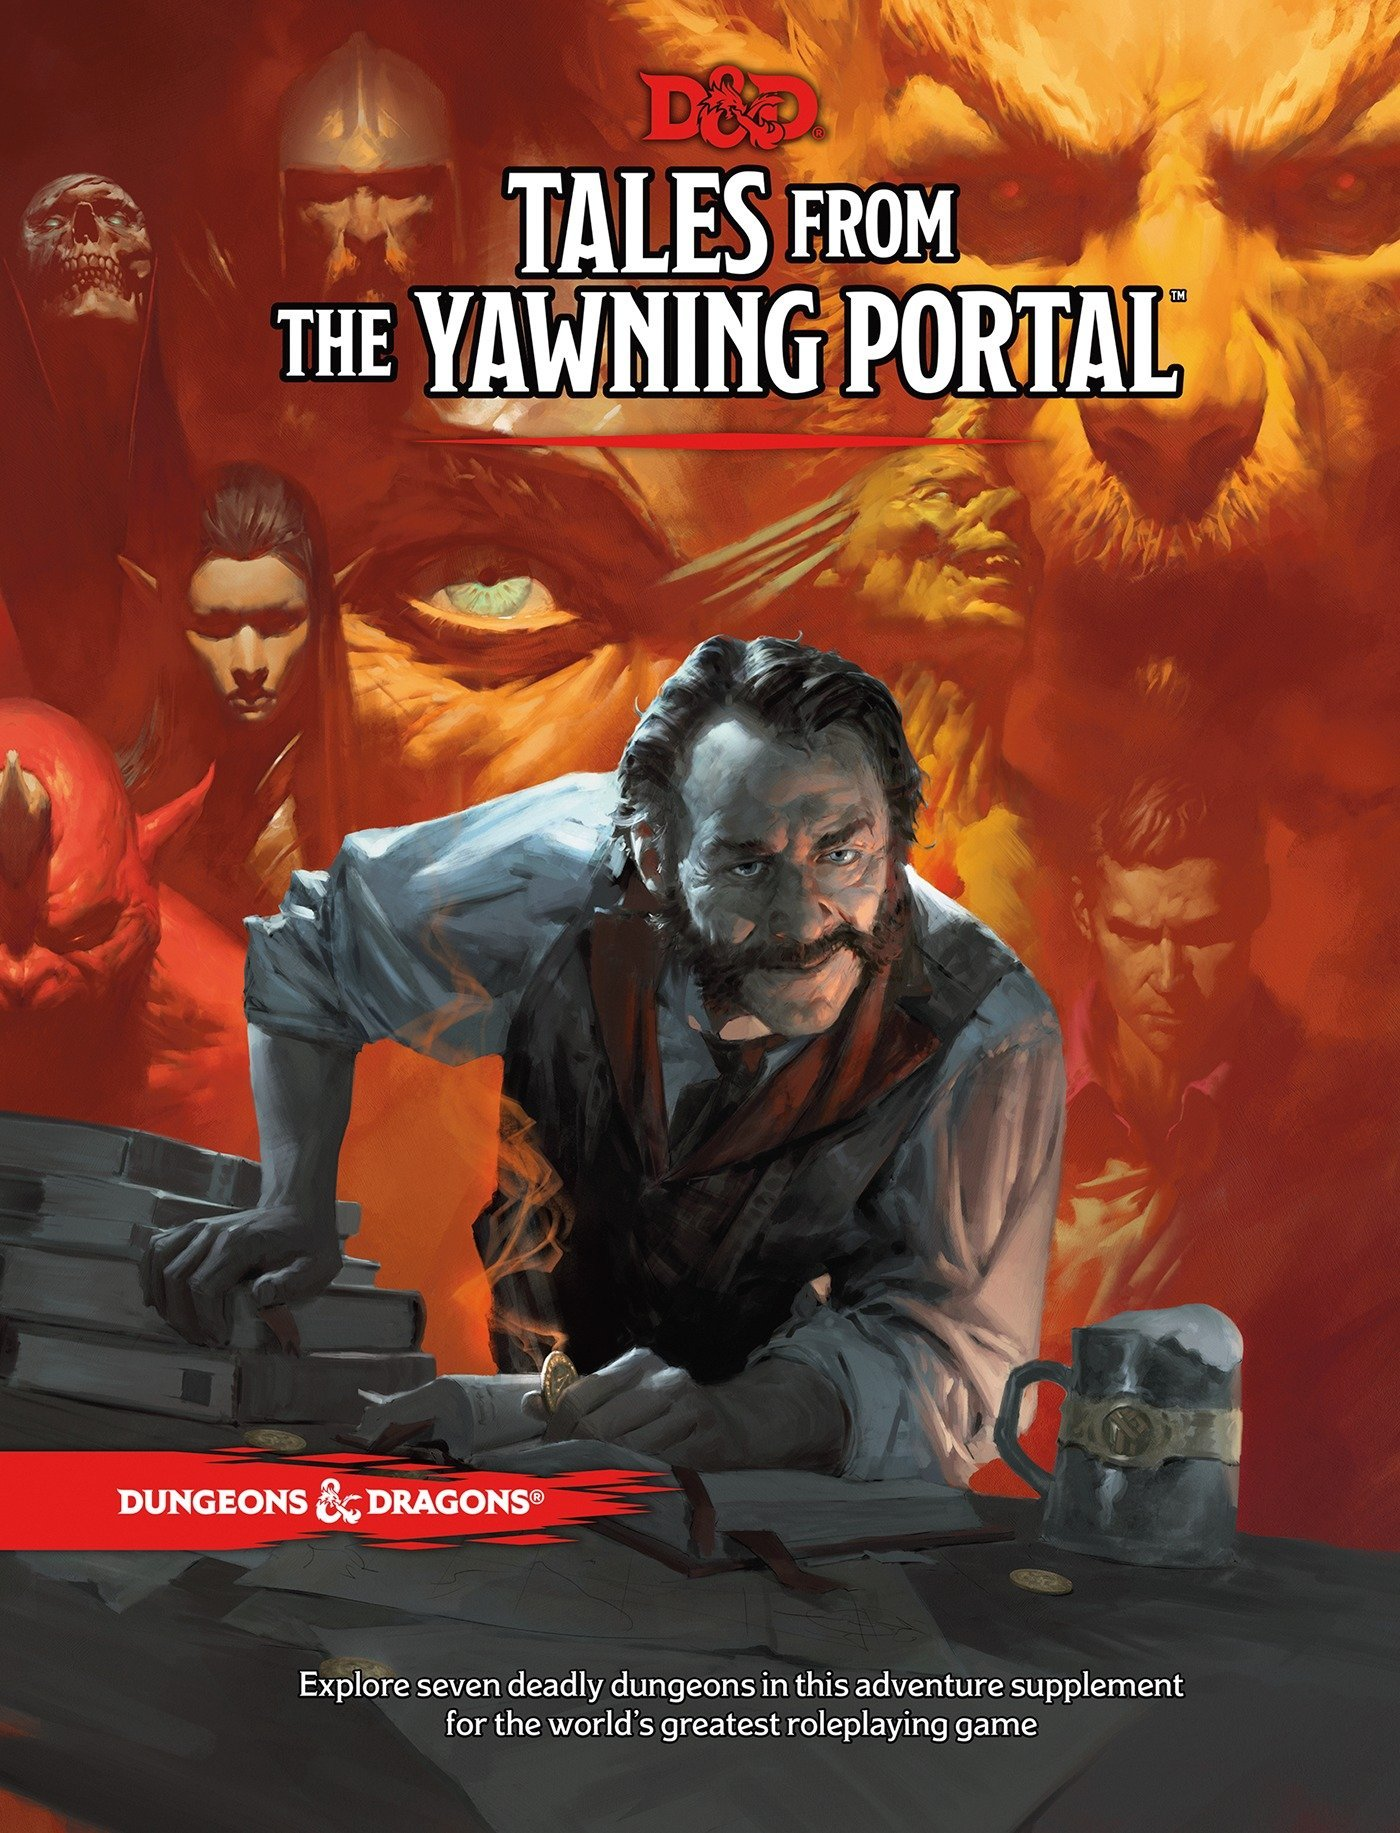
For example, consider the 5E adventure anthologies. Tales From the Yawning Portal has:

  • Tales From the Yawning Portal - Wizards of the CoastThe Sunless Citadel
  • The Forge of Fury
  • The Hidden Shrine of Tamoachan
  • White Plume Mountain
  • Dead in Thay (The Doomvault)
  • Against the Giants (Hill Giant Stronghold)
  • Tomb of Horrors

All of these locations could be dropped directly into your hexcrawl, although you might want to push the last three into hexes beyond your initial map as long-term goals for the PCs to work towards.

Next, flip open your copy of Candlekeep Mysteries:

  • Book of Ravens (Chalet Brantifax)
  • A Deep and Creeping Darkness (Vermeillon)
  • Price of Beauty (Temple of the Restful Lily)
  • Zikran’s Zephyrean Tome (Zikran’s Laboratory)
  • Zikran’s Zephyrean Tome (Haunted Cloud Giant Keep)

And just like that, we’ve keyed twelve more hexes.

Old school editions featured a lot of these “here’s a cool location” adventures, so if you’re willing to adapt material you can unlock 50 years worth of cool options. In my Thracian Hexcrawl, for example, I used:

And more.

Having 30+ years of collecting to fall back on is nice, of course. But even if you don’t have that kind of gaming library, you can find a ton of great stuff online for free. For example, the One Page Dungeon Contest is basically an all-you-can-eat smorgasboard for this sort of thing; I’ve already mentioned Dyson Logos’ maps (only one of many free map resources); and so forth.

#4. STEAL MORE

No. Seriously. Go steal stuff. Pillage and loot with wild abandon.

Not every adventure can be dropped straight into a hex, but even adventures that aren’t explicitly location-based will often feature cool locations that you can ripped out and easily adapted.

And the more you’re willing to adapt, the more you’ll be able to use. For example, “The Joy of Extradimensional Spaces” in Candlekeep Mysteries features Fistandia’s Mansion, an extradimensional sanctum accessible from a magical book in Candlekeep.

  • Drop the extradimensional component and you can drop the whole building into a hex.
  • Change the extradimensional access point to a statue or shrine or giant magic rune carved into the wall of a box canyon and you can drop that into a hex.
  • Give the mansion multiple magical access points and you can drop them into multiple (And you might as well toss the original magic book into a dungeon’s treasure horde somewhere, too.)

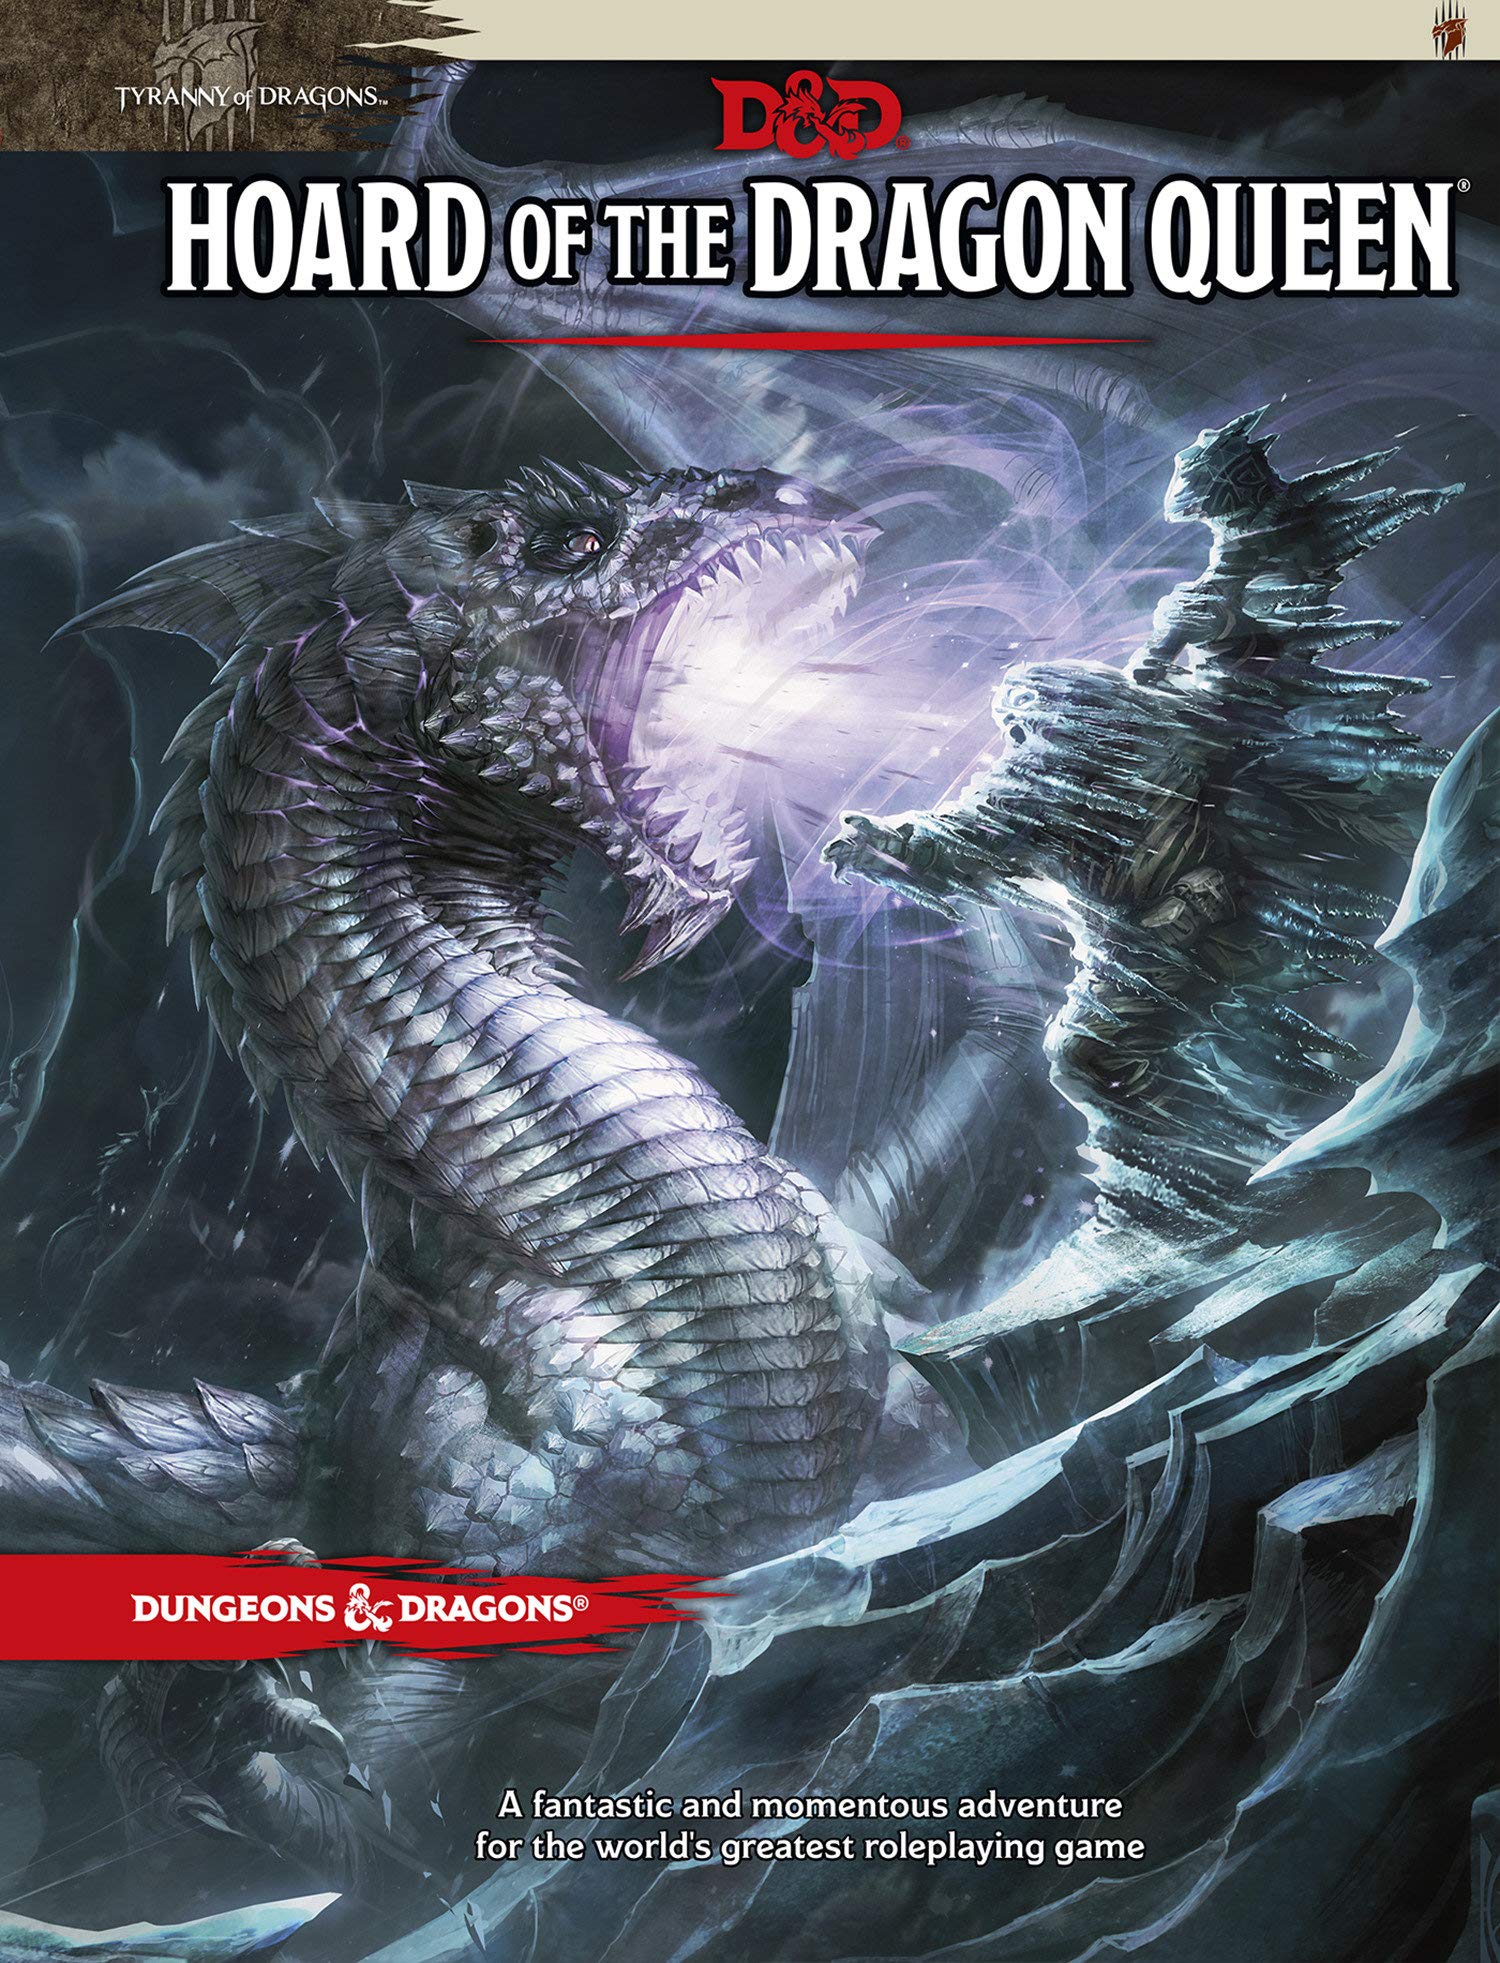
Grab any non-urban 5E campaign book you’re not interested in running and you’ll be able to continue harvesting. From Hoard of the Dragon Queen, for example, you could grab:

  • The village of Greenest as the campaign’s home base
  • Raider Camp (p. 16)
  • Dragon Hatchery (p. 23)
  • Carnath Roadhouse (p. 41)
  • Castle Naerytar (p. 43)
  • Hunting Lodge (p. 62)
  • Skyreach Castle (p. 76)

As you’re harvesting material like this, you may start to notice patterns. For example, we’ve got a bunch of giant-related content now:

  • Hill Giant Stronghold (from Tales of the Yawning Portal)
  • Haunted Cloud Giant Keep (from Candlekeep Mysteries)
  • Skyreach Castle (cloud giants from Hoard of the Dragon Queen)

How could we hook the lore of these locations together?

Also, when you’re harvesting material from a campaign book, you’re jettisoning the original connective material between the locations (which was probably some sort of linear plot), but the lore connections are still there. You can go one step further and strip those out, too. (Usually by adapting or genericizing them into something else.) But you usually don’t have to: By plopping them into a hexcrawl, you’ve effectively remixed the original adventure. In fact, you can use node-based scenario design to diversify these connections. Check out How to Remix an Adventure to trivially add even more depth to your hexcrawl. (You can, of course, use these same techniques to link up other hex keys, too.)

Another resource I love for this are back issues of Dungeon magazine. Sadly these are harder to come by these days, but each issue usually had a half dozen different adventures. Some could be dropped directly into hexes; others could be easily harvested for locations.

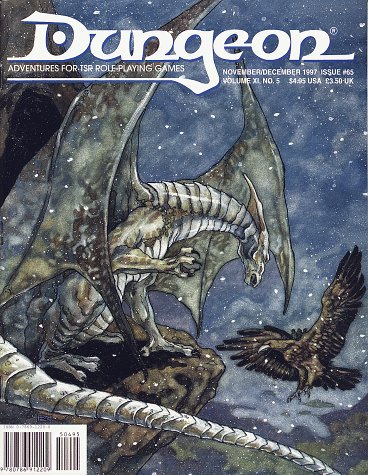
For example, let’s flip open Dungeon #65:

  1. “Knight of the Scarlet Sword.” This adventure details the Village of Bechlaughter and the magical silver dome in the center of the village which serves as home to a lich. Use the whole village or just use the dome.
  2. “Knight of the Scarlet Sword” also contains the Caves of Cuwain — the tomb of a banshee. Another location that can be used as a key entry.
  3. Dungeon Magazine #65“Flotsam” is a side trek featuring a couple of pirates who pretend to be legitimate merchants; they lure people onto their ship by offering legitimate passage and then rob them on the high seas. It doesn’t seem immediately appropriate for a forest hex key, but what if the PCs found this ship — and its weird, seemingly crazy crew — just sitting in the middle of the forest? Maybe it’s a witch’s curse or a strange haunting. Or just crazy people.
  4. “The Ice Tyrant” is a heavily plotted adventure, but we could start by ripping out the fully-mapped Lodge and placing it along any convenient road that needs an inn.
  5. “The Ice Tyrant” also contains a map for a Sentinel Tower occupied by evil dwarves. This can also be dropped straight into a hex. (Could it be connected with the dark dwarves from “The Forge of Fury” that we used earlier?)
  6. “The Ice Tyrant” finally features the Keep of Anghanor — guarded by a white dragon and containing a bunch of bad guys. (Could this dragon be related to the dragon cults from the Hoard of the Dragon Queen locations?)
  7. “Reflections” is another side trek, this one involving a cavern where a will o’ wisp has imprisoned a gibbering mouther. That’s another hex done!
  8. “Unkindness of Raven” is a location-based adventure triggered by stumbling across Crawford Manor while wandering through the wilderness. This is easy!
  9. “The Beast Within” is a location-based adventure triggered by stumbling across a werewolf’s cottage in the wilderness. Plop it in!

And there you go. One random issue of Dungeon and you’ve got another nine hexes keyed. Pick up a dozen issues and you could probably key a full 10 x 10 hex map entirely from the magazine.

Go to Part 3: Further Inspiration

Castle Construction - Asanee (Modified)

One of the principles of the Alexandrian Hexcrawl is that you key geography. In other words, your hex key features locations, not encounters. (Encounters are handled separately.) The distinction between a “location” and an “encounter” can get a little hazy if you stare at it for too long, but in practice it’s usually pretty obvious: If your key reads “an ogre walking down the road,” then the next time the PCs pass along that road the ogre will presumably be gone (particularly if they’ve killed it). If your key instead reads “an ogre living in a shack,” then even if the PCs kill the ogre, the shack will still be there.

Of course, one might argue that the PCs could do some quick demolition work on the shack and make it disappear, too. (That would be an excellent example of staring at the distinction for too long.) But the general point remains: You’re looking to key permanent geography, not ephemeral events.

Another key principle is that every hex is keyed. This can be a daunting prospect. When I created my Thracian Hexcrawl, for example, I started with a 16 x 16 hex map. That meant I needed to key 256 individual hexes.

My experience with that hexcrawl taught me that you can (and almost certainly should!) start with a smaller map. I generally recommend a 10 x 10 hex map, for a total of 100 hexes, with the PCs’ home base in the center of the map. The key thing, though, if you’ll pardon the pun, is that you want enough hexes so that the PCs can head in any direction and NOT fall off the edge of your map in the first session. Based on my practical experience, that distance appears to be roughly 5 hexes.

In the Avernian Hexcrawl, for example, I used a 10 x 6 map. I could get away with this because:

  • There were mountains on the northern and southern edges of the ‘crawl, acting as natural obstacles that would tend to focus PCs on the large valley between them; and
  • This hexcrawl features a map of the region which is given to the PCs. Although the PCs are not prohibited from moving beyond the edge of the map, such maps tend to also focus the PCs’ explorations.

The advantage, of course, is that I only needed to prep 60 hexes.

Similarly, Ben Robbins’ West Marches campaign featured an explicit limit: The home base was located on the western edge of civilization, and the PCs could go anywhere they wanted… as long as it was west into the unknown. If you used a similar set up for your campaign, you could effectively halve the number of hexes you need to key.

But whether we’re talking about 50 or 60 or 100 or 256 hexes, that’s still a lot of hexes. How can you get all of them prepped? It seems like a lot of work!

First, to be brutally honest, it is a lot of work. The prep for a hexcrawl is frontloaded: It’s a structure that requires you to put a lot of work in up front, with the pay-off that it requires very little prep to keep the campaign in motion once you start playing. (For example, with my Thracian hexcrawl I spent 2-3 intense weeks prepping the hex key, but then ran dozens of sessions with no additional prep beyond 5-10 minutes at the beginning of each session. Your mileage may vary.)

Second, because of that frontloaded prep, you should make sure that a hexcrawl is really the right structure for what you’re trying to do. There is a perception that “wilderness travel = hexcrawl” and that’s not really true. The hexcrawl structure is designed for exploration, and is really only appropriate if you expect the PCs to be constantly re-engaging with the same region. (This can make them ideal for an open table, where you’ll have multiple groups engaging the same region.) If the PCs are only traveling through a region or exploring it once or twice, then you’re going to end up prepping lots and lots of hexes that never get used, and that’s not smart prep.

Third, with all that being said, it may not be as much work as you might think. There’s a couple secrets to that.

The first secret is that, when you’re prepping material for yourself, polish is overrated. (Details are also overrated, with the proviso that essential details and awesome details should always be jotted down.) For example, if I were writing up a dungeon behind a waterfall for someone else to use, I’d probably take the time to mention how wet and slick the stairs leading down into the dungeon are; the damp moistness in the air of the first chamber (providing a slight haze that can be burnt away dramatically by a fireball trap); and the way the dampness gives way to a chilled condensation that hangs in glistening drops from the rough hewn walls as you descend into the dungeon.

But since I’m prepping this for myself, I don’t need to write that down.

Trust your own voice as a GM. During play, based on your intrinsic understanding of the scenario and the environment, it will provide the logical and evocative details you need to flesh things out. And by placing trust in yourself, you can save yourself a ton of prep time.

The second secret is that the amount of detail required to key a hex can vary quite a bit. You can use minimal keys. Just because something is geography, it doesn’t mean that it has to be elaborate. Something can be brief without being ephemeral. There can be a perception that every hex “should” have a 20-room dungeon in it. But remember that ogre’s shack? Your key doesn’t have to be any more complicated than that. Some times, it can be even less complicated!

SAMPLE HEX KEYS

We’re going to take a look at some actual hex keys I’ve prepped for my own hexcrawls. The goal here is to demonstrate the range of different key types that I use, so let’s start with the shortest:

B4. RED RUTH’S LAIR (Descent Into Avernus, p. 107)

Red Ruth has a heartstone.

This one is pretty simple: I’ve grabbed a location from a pre-existing adventure (in this case, Descent Into Avernus) and plugged it straight into the hexcrawl. If the PCs encounter this hex, I can just pull out the appropriate book and start running it.

In this case, I’ve also included a short note modifying the original adventure. (The NPC named Red Ruth has a heartstone.) You may not need such notes at all. In other cases, you might have several such notes. Whatever works.

Here’s another simple one:

K13 – RUINED TEMPLE OF ILLHAN

See hex detail.

This location was too detailed to include in my primary hex key. (Generally, I’ll bump anything longer than a single page out of the primary hex key. In my experience, it keeps the hex key cleaner and much easier to use.)

Much like the published adventure, I’m telling myself to go look somewhere else for the detailed adventure. In this case, it’s an adventure I wrote myself.

I keep these detailed adventure notes in a separate file folder, labeled and organized by hex number. For shorter published adventures, I’ll keep print outs of the adventures in the same file folder.

The details of the Ruined Temple of Illhan were previously posted here on the site. They can be found here. (The presentation there is slightly more polished than what would have been found in my original notes, but is substantially similar.)

B5 – BONE CRATER

A large meteor impact formed by a huge skull (more than ten feet across) that’s partially embedded in the center of the crater.

This is an example of what I think of as a landmark. Sometimes these landmarks are more involved or have hidden features to them, but generally they’re just single points of interest distinct from the surrounding wilderness. Regardless of their other characteristics, they’re almost always useful for PCs trying to orient their maps.

N15 – RECENT FOREST FIRE

Landscape is scorched. No foraging is possible in this hex.

Another short one. This is basically similar to a landmark, but it covers a vast swath of territory. (In this case, an entire hex.)

C2 – WYVERN SHAFT

60 foot deep shaft that serves as the lair of a wyvern. The wyvern has dug an escape tunnel that emerges from a hill a quarter mile away.

Wyvern: Has a large scar on its left side from a spear wound; has preferred to stay away from intelligent prey ever since. (MM, p. 303)

Treasure: 7,000 sp, 5 zircons (50 gp each)

A simple monster lair. I usually don’t bother with maps for this sort of thing: It’s easy enough to improvise a cave or shack or, in this case, a shaft. In fact, many smaller complexes with a half dozen rooms or less can also be managed without difficulty. (Assuming there’s nothing radically unusual about them, of course.) Alternatively, you might use a random floorplan generator or similar tool.

(Note the page reference. I know Wizards of the Coast is terrified of page numbers on the off-chance that they get changed in a future printing, but why not make life a little easier for your future self?)

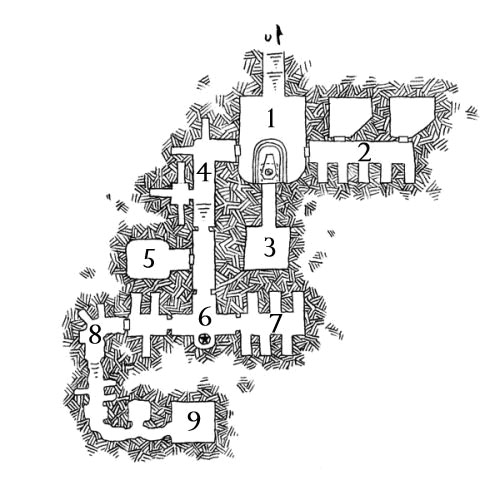
F15 – SKULL ROCK (on river)

Skull Rock - Based on Dyson Logos' Peridane's Tomb

A rock shaped like a skull thrusts out of the river. Crawling through the mouth leads to a crypt.

AREA 1: Mummified red dragon’s head (huge). Breathes flame that fills most of the room (fireball, DC 14). Secret entrance to treasure chamber lies under the head.

AREA 2: 5 wights, 50% in lair (MM, p. 300). The two rooms off this area have been pillaged.

AREA 3 – BURIAL OFFERINGS: 3000 gp, 3 golden spinels (200 gp each)

AREA 4: Trapped hallway. Arrows shoot from wall and alchemist’s fire from nozzles in the ceiling. (Chamber to the left has an incense burner in the shape of a squat, fat man worth 70 gp.)

AREA 5: Wight (MM, p. 300), no life drain but can detect magic, life, and invisibility. (Sniffs out magic and lusts for it.)

AREA 6: Bas relief skull. Insane. Asks incredibly bad riddles. (“What flies in the air?” “A bird.”), but then blasts those who answer with 1d6 magic missiles regardless.

AREA 7: Slain wights.

AREA 8: Staked vampires.

AREA 9: A lich (MM, p. 202) has been chained to the wall. Arcs of purple electricity spark off him in eternal torment. (Stripped of spellcasting and legendary actions.)

Notice the “on river” designator next to the key title here. That indicates that this location is on the river flowing through this hex on the map: If the PCs are following the river, they’ll automatically encounter this location.

This sort of fully-keyed “mini-dungeon” represents pretty much the upper limit of what I’ll handle in a hex key entry before bumping it into a separate document.

The map here is taken from Dyson Logos’ website. His site has repeatedly proven invaluable to me when stocking hexcrawls.

Go to Part 2: Stocking Your Hexes

Dragonriders in Camp - Algol (Edited)

Go to Part 1

Finding locations during a hexcrawl — including locations that you are specifically looking for — is handled primarily through the navigation and encounter rules.

SIMPLE EXPLORATION

In the simplest form of hexcrawling, expeditions will automatically encounter the keyed location in a hex when they enter that hex. Therefore, finding a location you’re looking for — e.g., the Tomb of Sagrathea — is simply a matter of finding the correct hex.

This may be slightly more difficult for the PCs to pull off reliably if you’re running with player-unknown hexes, but the procedure remains the same: The expedition will want to navigate to the area they suspect the location to be, then move through the area in some form of search pattern until they find what they’re looking for (by entering the correct hex).

Following roads or trails, of course, may make it much easier for the PCs to hit the right hex.

BASIC ALEXANDRIAN EXPLORATION

The Alexandrian Hexcrawl includes a number of optional and advanced rules that can add complexity, challenge, and choice to exploration.

As described in Finding Locations, above, Visible and Familiar locations can be automatically found by any character passing through the appropriate hexes (just as with simple exploration). Other locations, however, are found through encounter checks, so the expedition must be in the correct hex and generate a location encounter there.

Choosing the exploration travel pace — during which the expedition is assumed to be trying out side trails, examining objects of interest, and so forth — will significantly increase the likelihood of finding the location you’re looking for by (a) reducing your speed of travel (so that you’ll spend longer in any individual hex) and (b) doubling the chance of having an encounter. Compared to moving at a fast pace, for example, the exploration travel pace makes it six times more likely that you’ll find a location.

Optional Rule – Focused Search: If the expedition is traveling at exploration pace and looking for a location that they have specific information about, the DM may allow a third encounter check per watch for that location and only that location. (Any other encounters that would normally be indicated by this check are ignored.) Obviously if the location they’re looking for isn’t in the current hex, the DM can skip this check — they are, after all, looking in the wrong place.

Design Note: It may seem unreasonable that you can pass through a hex and not find a location within it. But hexes are, in fact, very large. For example, the entire island of Manhattan could fit into a 12-mile hex more than five times over. If it still feels unreasonable that the PCs could move through a hex and NOT find the location they’re looking for, you might want to consider the possibility that this location should be classified as Visible.

BASECAMP EXPLORATION

If an expedition wants to perform a dedicated exploration of a specific area, they can establish a basecamp. There are two basic watch actions associated with a basecamp: Make Camp and Area Search.

BASECAMP ACTION: MAKE CAMP

As an active watch action, a character can establish a camp suitable for 4 creatures if they have tents or similar equipment to shelter them. (Horses and similar creatures do not require tents, but must still be accounted for in camp preparations.)

If the expedition does not have equipment for shelter, the character can only establish a camp suitable for one creature (either themselves or someone else) per watch action.

Optional Rule – Camp Required: Characters without a proper camp require an additional Resting action to gain the benefits of resting. (It takes three Resting actions in a row to gain the benefits of a Long Rest. If using the advanced rule for lack of sleep, it takes two Resting actions in a row to avoid the consequences for not resting.)

Optional Rule – Favorable Site: A character can perform an active watch action to make an Intelligence (Nature) or Wisdom (Survival) check against the Forage DC of the terrain. On a success, they have identified a favorable campsite. Characters performing the Forager action in a favorable campsite gain advantage on their forage checks.

The check to identify a favorable site can also be attempted as part of a Scout action.

BASECAMP ACTION: AREA SEARCH

As an active watch action, a character can search the wilderness in the hex cluster around their base camp. Multiple characters performing this action simultaneously can form a search group (or multiple search groups if they split up).

Encounter Checks: Make a normal encounter check for the base camp, even if no characters remain in the camp. (An encounter would indicate that the base camp has been discovered.) Make an additional encounter check for each search group. (The search counts as a travel watch for the purpose of making this encounter check.)

Search Area: The hex searched by a search group can be determined:

  • Randomly. Roll 1d8 on the hex cluster chart below.
  • Directionally, if the search group indicates the direction they are searching. Roll 1d8, with any roll other than 7-8 (the base camp hex) indicating the hex in the selected direction.
  • By Hex, in which case the search group indicates which specific hex in the cluster (including the hex of their base camp) they wish to spend their time in.


Basecamp Hex Chart

Search Area – Large Hexes: If using larger hexes (or in particularly difficult terrain), it may not be possible for the PCs to reasonable travel to neighboring hexes in a single watch. In such cases, a travel watch would be required both before and after the Area Search action.

If circumstance or hex-size makes it impossible for the PCs to reach neighboring hexes even with a travel watch, then the Area Search action is limited to near-only searches in the base camp’s hex and it will be necessary to move the base camp in order to search other hexes.

Location Discovery: One character in each search group can attempt a Wisdom (Perception) or Intelligence (Investigation) check using the Navigation DC of the hex to find the location (+5 DC if the location is hidden). Additional characters in the group can assist, granting the searcher advantage on their check.

If there are multiple locations, randomly determine which one is found.

Note: At the DM’s discretion, they may assign an alternative DC to specific locations. If there are multiple locations, the DM may rule that an additional location is found for every 5 additional points of success.

Other Group Members: Characters performing Sentinel or Tracker actions can join a search group. (Note that the Wisdom (Perception) checks performed by sentinels detect approaching threats, as opposed to the checks made to find locations.)

This is an unusual post.

After writing Part 5: Encounters of the 5e Hexcrawls series, I received feedback from readers that the post wasn’t clear enough and needed several points of clarification. I concluded it would also benefit significantly from some substantive examples of the system in practice.

Which is, of course, what you’ll find below.

This material has been added to the original article (linked above, but I also didn’t want people who had already read the original article missing this update). So this post is being posted… and is also immediately completely redundant.

So if you haven’t read the original article, you should just do that now and skip the rest of this. Otherwise, read on!

EXAMPLE: SAMPLE ENCOUNTER TABLES

Location Check: 1 in 1d6

Encounter Check: 1 in 1d10

Border Encounter: 1 in 1d20

1d20
Encounter
# Appearing
% Lair
% Tracks
1-3
Lizardmen (hex A10, A13)
2d6+4
30%
50%
4-5
Tree trolls (hex C13)
1d2
40%
50%
6
Adventurers
2d4-1
10%
75%
7-9
Ghouls (hex A12, E9)
2d12
20%
50%
10-12
Zombies (hex E9)
3d8
25%
50%
13
Bat swarm
1
20%
5%
14
Jungle bear (hairless, use black bear stats)
1d2
10%
50%
15
Carrion crawlers
1d6
50%
50%
16
Giant leech
4d4
Nil
Nil
17-18
Orcs (hex B7)
4d6
25%
50%
19
Wild boars
1d12
Nil
25%
20
Tyrannosaurus rex
1d2
Nil
50%

Note: I indicate hexes which are already keyed as potential lairs for this creature type. This can inform the nature of wandering encounters and/or suggest a potential origin/terminus for tracks.

This table uses several advanced rules. When rolling an encounter, I would simultaneously roll a 1d6, 1d10, and 1d20 for each watch.

If the 1d6 result is a 1 (indicating a location encounter), it would indicate that the PCs have found the keyed location in the hex. If I’m not using simultaneous encounters, I would then ignore the other dice rolls (the location check “overrides” them; you could also just roll the 1d6, then the 1d10, then the 1d20, but that’s not necessary and is more time-consuming).

If the 1d10 check indicates an encounter, then you’d check the 1d20 roll to see which encounter table you should be rolling on. (You could also theoretically roll 2d20 of different colors, allowing you to immediately identify what type of encounter.)

With an encounter identified, you would then check % Lair, % Tracks, and # Appearing (although you don’t need to check for tracks if a lair encounter is indicated). Lairs and tracks are also exploration encounters, so if those are indicated when the party is resting, you can treat the encounter check as having no result and the watch passes quietly.

This is, of course, a fairly complicated example featuring a lot of the advanced rules all being used simultaneously. For a much simpler resolution you could just roll 1d12 (1 = wandering encounter, 12 = location encounter), roll 1d20 on the wandering encounter table (if a wandering encounter is indicated), and then the number of creatures appearing.

DESIGN NOTE: PROCEDURAL vs. DESIGNED ENCOUNTERS

A procedural encounter will usually generate one or more general elements. (For example, 1d6 friendly orcs.) As described in Breathing Life Into the Wandering Monster, the expectation is that the DM will contextualize this encounter. In other words, the procedural encounter is an improv prompt for the DM to create the encounter (often combined with a simulationist element of modeling, for example, what kinds of monsters lurk in the Darkovian Woods).

A designed encounter, on the other hand, is far more specific: You’re essentially prepping the material that you would improvise with a procedural encounter.

The Principles of Smart Prep maintain that you generally shouldn’t prep material that can be just as easily improvised at the table, so generally speaking I would describe most designed encounters as being training wheels for DMs who aren’t confident improvising encounters from procedural prompts yet. (There can be a number of exceptions to this, but they’re pretty rare in actual practice, in my experience.)

In other words, designed encounter tables typically result in a lot of wasted prep. They also get used up (a procedural encounter can be used over and over and over again to varying results; a designed encounter is specific and generally can’t be repeated). This creates gaps in your encounter table and a need to frequently restock them.

(Procedural-based encounter tables will also need to be tweaked or restocked from time to time – if the PCs wipe out the goblin village, it may result in no further encounters with goblins – but this is very rare in comparison.)

DESIGN NOTE: SETTING LAIR/TRACK PERCENTAGES

In designing your encounter tables, the % Lair and % Tracks values can be set arbitrarily. For a quick rule of thumb, use Lair 20% (or Nil for animals that don’t really have lairs) and Tracks 40%.

Older editions actually included values for one or both of these stats in their monster entries, so for some creatures you may be able to reference those older resources.

A gamist tip here is to increase the % Tracks value based on difficulty: If there’s a monster that’s a lot more powerful than everything else in the region, crank up the % Tracks so that the PCs are far more likely to become aware that it’s there than they are to run into it blindly.

A simulationist tip is to vary both numbers by a sense of the creature’s behavior. Here’s an easy example: How likely is a flying creature to leave tracks compared to a woolly mammoth? (See Hexcrawl Tool: Tracks for  thoughts on what types of tracks a flying creature would leave.)

A dramatist tip is to think about how interesting each type of encounter is for each creature type. Is a ghoul lair more interesting than running into a pack of ghouls in the wild? If so, crank up the ghoul’s % Lair.

The last thing to consider is that, as noted above, a Lair encounter will generally add a new location to the current hex. The higher you set the % Lair values on your encounter tables, the more often this will happen and the quicker areas of your campaign world will fill up with procedurally generated points of interest.

Conversely, how comfortable are you improvising this type of content? It’s good to stretch your creative muscles, but it may make more sense to keep the % Lair value low until you’ve gotten more comfortable with pulling lairs out of your hat.

Go to 5E Hexcrawls

Hexcrawl Tool: Tracks

May 20th, 2021

There are two places where tracks (along with the associated concept of tracking) can be found in the Alexandrian Hexcrawl: First, there is the Tracker watch action, in which characters can actively search for and follow tracks.

Second, the encounter system is designed to generate random encounters, lairs, and tracks.

Random encounters provide immediate obstacles and interludes while traveling, lairs spontaneously generate new locations in the hexcrawl (organically building up material along well-traveled routes as the campaign develops), and tracks are a trail that can be followed to a point of interest.

Thinking in terms of “tracks” seem to commonly conjure up the image of hoof prints in the sod, but we shouldn’t limit ourselves to that. In the wilderness exploration of the hexcrawl that sort of physical spoor is most likely very common, but the concept of “tracks” can really be generalized to “clue.”

For example, if we generated a result of “tracks” for bandits, that might mean footprints in the forest. But it could just as easily include a merchant caravan in panicked disarray due to their latest highway robbery; the dead body of a bandit that was critically wounded and abandoned; a bolt-hole containing documents implicating the mayor of a local village in collusion with the bandits; and so forth.

TYPES OF TRACKS

Spoor: What can be thought of as the “classic” tracks we commonly think of. This includes both physical prints and scents (particularly if you have a hound for a familiar or live life as a werewolf). Following a spoor path usually also means looking for and encountering other signs (like broken foliage) that are described below.

Spoor paths can include trails, which are paths used frequently repeatedly by a create. The common image here is the worn rut of a deer or fox path. Runs are similar to trails, but are less frequently used.

Subsurface trails are tunnels. In the real world, trackers frequently look for where small tunnels re-emerge (and will use the diameter of tunnels to identify creatures). In a fantasy world, it’s quite possible the tunnel will be more than large enough for adventurers to follow the spoor path right inside. (Tunnels created by one creature may also be used by other creatures.)

Sounds: The howl of a wolf, the roar of a dragon, the screech of a griffon, or the distant sound of a fireball exploding. Sounds emanating from nearby can be used as an encounter trigger, but distant sounds can (often ominously) indicate the presence (and direction) of creatures.

Smells: The zombie stench of putrefacting flesh, the lingering ozone odor of a beholder’s rays, the sulfurous stench of a hell hound, or the distinctive musk of more mundane creatures can linger in the air long after they have passed.

Moulting: Anything shed by a creature, such as feathers and fur. This can also include skin (like a snake) or an exoskeleton (like a crab, spider, or insect). Some lizards will actually lose their entire tails (a process known as “caudal autotomy”) in order to evade predators, and you could imagine similarly fantastical abilities. Perhaps there are creatures which, when threatened, will spontaneously generate a cloned copy of their “corpse” and leave it behind to slowly decompose into ectoplasmic residue.

Other creatures use parts of their bodies as weapons, which could be left behind in their victims or embedded in the environment, like the spines of a barbed devil being left in a tree.

On a similar theme, there might be body parts lost by animals due to hazard rather than nature (like a dismembered limb or pool of blood).

Food: This might include food that’s been stored (whether squirrels hiding nuts or a cache of the local rangers), but is probably more commonly partially consumed meals. This can include carcasses (including human corpses depending on which predators are active in the area), but also plants or area of foliage which have been grazed by herbivores.

Also consider pellets, which are masses regurgitated by hawks and the like. These include trace remnants of food, but are primarily made up of indigestible remnants from their meals (bones, exoskeletons, fur, feathers, bills, teeth, etc.).

Fewmets: The other end of the digestive track, specifically scat and excrement. Urine is also an option. Don’t be afraid to embrace the fantastical here, ranging from the well-known scale of triceratops poop to, say, the scorching phosphorescence of hell hound pee.

Kill Sites: This includes carcasses, but may just be signs (like blood spatter) left from a kill which a predator later dragged from the site (or consumed whole). This category is also worth calling out specifically because far more dramatic kill sites are frequently left by intelligent creatures (victims of goblin raiders or the rotting corpses left by poachers).

Glyphs: Intentional markings left by intelligent creatures. These might include navigational signs carved into trees, strange runic carvings, odd fetish sculptures, demonic graffiti, or simply a discarded note.

Sleeping Areas: Many sleeping areas will actually be generated as lairs, but there are also transit beds and lays, which are used as less frequent or irregular resting areas. For animals, this often takes the form of crushed vegetation. Intelligent creatures may leave a wide variety of signs (remnants of a campfire, a latrine, discarded food remnants, miscellaneous refuse, etc.).

Marring: The activities of beasts and monsters will often damage or leave their mark on the natural environment. Rubs are produced by an animal rubbing against trees or rocks. Gnaws and chews can give clear indication of the size of a creature’s teeth. (You might similarly find a place where intelligent creatures were practicing with their weapons or using a machete to chop through thick overgrowth.) Scratchings can be both intentional (sharpening your claws or digging for grubs) and unintentional (signs left from climbing or scampering over terrain).

In the realm of fantasy we might add to this things like burns (fire or acid), phase marks (distinct traces left by incorporeal creatures passing through physical objects), ectoplasm, and the like.

Tip: When imagining tracks and other signs, don’t get fixated on the ground. Remember verticality! In the real world, woodpeckers drill in trees above your head. In fantasy, bloated stirges can leave smears of blood up there, too.

SCALE OF TRACKS

Something else to consider is that tracks can vary from the obvious to the almost impossibly obscure. You can use this to provide varied flavor to tracking sequences, or to reward particularly good Wisdom (Perception) or Wisdom (Survival) checks.

Large scale tracks are significant and obvious. You might not automatically notice them, but even untrained people will likely recognize clear pawprints in mud, well-worn trails, significant damage to foliage, big animal carcasses, and the like.

Medium scale tracks are perhaps the most common (being left almost constantly by anyone or anything not intentionally covering their tracks), but are more difficult to notice or may only be significant to those with training. This can be stuff like gnaws and chews, pellets, and subtle vegetation breaks. It can also include more obvious tracks which have been obscured by the passage of time.

Small scale tracks usually require a sharp eye, special training, or both. They include many of the same signs as previous categories, but are subtler, sometimes as the result of extreme age. These are faint pawprints on hard ground, a handful of partially buried bones left from a months-old kill, or an orcish arrowhead buried deep in a tree trunk.

Ghost scale tracks almost certainly require training and experience to spot and interpret. They also frequently disappear quickly. This can include dullings (in which a creature passing through the morning dew leaves a “dull” area by brushing the water off foliage), shinings (later in the day, creatures walking through the grass press it down, revealing its shiny side), and other incredibly subtle tracks (like leaf depressions).

Back to 5E Hexcrawls

Archives

Recent Posts


Recent Comments

Copyright © The Alexandrian. All rights reserved.