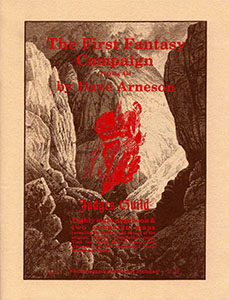
In Arneson’s Blackmoor, as described in the First Fantasy Campaign from Judges Guild, there are “fighting machines”, “water machines”, “flying machines”, and “teleportation machines”.
 For those unfamiliar with the First Fantasy Campaign, it is largely comprised of the raw notes Arneson was using to run his campaign. Very little effort is made in the way of explanation, and the notes are also frequently (and frustratingly!) incomplete. Or confusingly combine notes from different, incompatible eras of the campaign. No explanation is given for what any of these “machines” do (although PCs are able to build flying machines and there’s also an “ancient war machine” in a Dark Lord’s throne room which he uses to communicate with his subjects).
Everyone basically assumes that they know what the “teleportation machine” and “flying machine” are. (Although that’s an assumption that you might want to challenge: It is very easy to casually interpret these early documents through the lens of what we know Dungeons & Dragons would become, while forgetting that D&D didn’t actually exist yet when these documents were written.) “Water machine” and “fighting machine”, in any case, have proven more elusive.
Some have postulated that the “water machine” is a boat. That its entry on Arneson’s treasure tables is identical with his description of this magical item:
Skimmer: Can cross stretches of water at great speed, 50 mph and greater, as well as marsh and short (10 yards) stretches of low unobstructed land. Hitting a snag will wreck the Skimmer and cause the occupants one Hit Die in damage per 5 mph of speed. Chance of hitting a snag is about 1% per 100 miles of water, 5% in marsh, and 5% every time any land is crossed. All encounter chances can be ignored due to its speed.
This, however, appears doubtful to my eyes. To explain why, let’s talk a little bit about where these “machines” appear in Arneson’s notes. The Water Machine appears in two different treasure tables, one for Loch Gloomen (where it’s on the “Information” sub-table):
Crystal Ball 9, Teleportation Machine 4, Flying Machine 3, Fighting Machine 10, Water Machine 11, Special Devices 12 + 2, Ancient Books and Manuscripts 8 + 5, Stores of Normal Weapons 7, Clothes 6, etc.
And the other for Bleakwood (where it’s on the Equipment sub-table):
Crystal Ball 1-5, Illusion Projector 6-10, Teleporter 11-12, Flyer 13-17, Skimmer 18-20, Water 21-30, Dimensional Transporter 31-32, Time 33, Transporter 34-39, Borer 40-44, Screener 45-46, Communicator 47-51, Tricorder 52-56, Battery Power 57-66, Medical Unit 67-72, Entertainer 73-82, Generator 83-87, Educator 88-92, Robots 93-98, Controllers 99-00
Note that “Teleportation Machine, Flying Machine, Fighting Machine, Water Machine” has become “Teleporter, Flyer, Skimmer, Water” on the latter list. It’s possible that Water Machine does mean Skimmer, and Arneson simply repeated the same entry twice in a row on the table, but that seems unlikely.
On the other hand, this isn’t the only seeming repetition on the table: Note that “Teleporter” (i.e., Teleportation Machine) and “Transporter”, which one might immediately assume to be the same thing, are listed separately. I, however, suspect that these are not the same thing, that the “Transporter” is based more literally on Star Trek and is a large facility which you can use to beam yourself to other locations (but not take the equipment with you).
And, similarly, I think that the Skimmer and the Water Machine are two different things (albeit perhaps grossly similar in function).
One option for the Water Machine would be a submarine.
Another option I’ve considered is that these “Machine” entries are actually triggers for sub-tables that no longer exist. (This wouldn’t be the only example of missing sub-tables in the First Fantasy Campaign.) Looking at Supplement II: Blackmoor, we find a number of water-related magical items: Ring of Movement (Swimming), Manta Ray Cloak, Necklace of Water Breathing, Helm of Underwater Vision. These could easily be re-characterized as “Water Machines”, perhaps suggesting that the other Machine types are also sub-categories. One could imagine similar sub-tables for other Machine categories.
Something else to note, however, is that you’re more likely to get a result of “Water [Machine]” on the Bleakwood table than literally any other type of treasure except the “Battery Power”. The function of Battery Power is also unexplained, but it seems quite likely to be way of recharging Arneson’s science fantasy “magic” items. Is it possible that the Skimmer is the Water Machine of the Loch Gloomen table and the “Water” entry is some similar resource that could be used in conjunction with the other items? Could it actually be some form of liquid fuel that could be used to power vehicles like the Skimmer?
While potentially cool, there’s no question that it’s a fairly large reach. Supplement II also includes another water-themed item which purifies 10 square feet of seawater. If that’s all that a Water Machine does, it could explain why they were so ubiquitous.
BY WAY OF FIGHTING MACHINES
Let’s leave the Water Machines aside for a moment and talk about the other enigma here, the Fighting Machines. One suspicion is that these are, in fact, robots. (Note that there is no “Fighting Machine” entry on the Bleakwood treasure table, but an entry for “Robots” has been added.)
Here, however, is what the phrase “fighting machine” would have almost certainly conjured up in an SF pulp afficionado’s mind in the early 1970s:

The fighting-machines of H.G. Wells’ War of the Worlds are, of course, vehicles. But they also have a robotic aspect to them.
I’m actually drawn to the idea that all of the Machines are autonomous robots – some of which might also function as vehicles – specializing in the listed functionality. Thus:
- Fighting-Machines are Wellsian tripods (with some perhaps at a smaller scale, and the larger suitable for giving their controllers a huge advantage in Blackmoor-style war games).
- Teleportation Machines as robotic entities who, upon request, will teleport you to a location of your desire. (Or use the same function as a devastating offensive capability or means of flight.)
- Flying Machines as UFO-like objects guided by sentient intelligence. (I’m anachronistically thinking of the ship from Flight of the Navigator; although, again, at various scales.)
- Water Machines as submersibles? Perhaps.. Or perhaps simply water-proofed robots.
This also suggests the possibility that the “ancient war machine” is, in fact, a robot through which the Dark Lord speaks.
Looking again at seemingly duplicated entries on the treasure tables, I’ll note that teleport-type objects actually show up three times: Once as a Teleportation Machine, once as a Transporter, and once as a Teleportation amulet. If the Teleportation Machine is just a magic device allowing for teleportation, than its utilitarian function is basically identical to that the of the Teleportation amulet. But if the amulet is an item you can carry, the Transporter is a largely immovable facility, and the Machine is an autonomous robot/tripod… Well, you can see how these all become distinct items.
Weighing against this interpretation is the fact that you’d expect some of Arneson’s original players to have recounted running into Martian tripods or teleporting robots. On the other hand, there are truthfully very few accounts of those early adventures, and those accounts have very rarely (if ever) included mention of any robots. Or tricorders. And those are right there in black and white.
With that being said, I’m not claiming to have definitively revealed holy writ here. There’s simply not enough information preserved for us to ever recover definitive answers. But this is one of the cool things about exploring these ur-texts of the hobby: That first generation of GMs may have collectively never figured out how to effectively transmit what they were doing in writing, but in puzzling our way through the fragments they did leave behind, I find there’s an amazing alchemy of closure that takes place, prompting creative insights that would never occur in simply reading a more authoritative text.
Back to Reactions to OD&D
Go to Running Castle Blackmoor

 Unfortunately, the sounds of their struggle had attracted the attention of something else: A mechanical creature – lithe and angular with a body of smooth blue-gray metal – rounded the far corner. Vicious tines protruded from the joints along its arms, legs, and curved spine.


