The Alexandrian

Go to Table of Contents

We’ve previously discussed:

  • The continuity errors in Lulu’s backstory.
  • The continuity errors in Zariel’s backstory (including seeking vengeance against a Demon Lord of the Abyss by attacking the Nine Hells).
  • The failure to pay off the rediscovery of Lulu’s memories after positioning them as THE central mystery of the second half of the campaign.
  • That many of the tools given to the DM for managing Lulu’s memories are conceptually great (like a list of memory triggers and a definitive reference for her backstory), but unfortunately flawed and incomplete (i.e., giving a “definitive” reference that has both continuity errors and glaring omissions).

I’ve also briefly talked about my dissatisfaction with placing the Charge of the Hellriders in 1354 DR despite the fact that it was already legendary and of uncertain truth in 1358 DR. (This is definitely a non-essential fix. But, yes, I’ll be fixing it.)

In this installment of the Remix, we’re also going to be looking at Lulu’s dream quest and the other “memory dives” in the campaign.

One of the potential problems with Descent Into Avernus is that the PCs lack any sort of personal relationship with Zariel. She is, at best, a distant antagonist. Despite this, at the end of the campaign, the PCs are assumed to come face-to-face with her for the first time and immediately help her redeem her soul. This makes it really difficult to get the players emotionally invested in Zariel’s ultimate fate.

This is what makes the idea of Lulu’s dream quest so awesome! The PCs can actually experience the Charge of the Hellriders, the fall of Zariel, and all this other cool history the campaign is built around. They may not actually meet Zariel, but they’ll nonetheless get a chance to know her and, therefore, care about her.

… except the dream quest doesn’t actually do that. The dive into Lulu’s “memories” are structured around five “dreams”:

  • Dream 1: Explicitly something that didn’t actually happen.
  • Dream 2: Didn’t happen and isn’t a memory.
  • Dream 3: Actually just part of Dream 2.
  • Dream 4: Not a memory.
  • Dream 5: Lulu looks through a telescope and sees where the Sword is (except she doesn’t, actually).

This is a huge missed opportunity!

Dream sequences often all flat because they aren’t real and don’t mean anything. But they can be really amazing if they ARE meaningful and have real stakes. Which is absolutely the case with Lulu’s dream quest: Her memories are the central mystery of the campaign, right? And at stake is the location of the Sword of Zariel, which is the key to saving an entire city. Insofar as the players give a crap about this campaign, they will give a crap about what is revealed here.

Which is why it’s so frustrating that literally nothing is revealed.

So we’ll also be looking at how to structure these memory dives to provide a compelling “memory mystery” that delivers meaning and memorable pay-offs (pun intended). In fact, we’ll be adding a couple new memory dives to further enhance this portion of the campaign.

DEFINITIVE HISTORY OF ZARIEL & LULU

This is designed to be a broad, authoritative overview of the back story for Zariel and Lulu. You can assume that any place this reference contradicts the book-as-published that the change is deliberate.

THE AVERNIAD

  • Aeons ago, when the cosmos was still young and the Great Wheel had not been fully turned from the primordial planar chaos, Zariel fought in the Legions of Heaven. She served under the command of Ashmedai, a Celestial Marshal who rode a golden, winged lion.
  • Ashmedai and his legions were sent to Avernus. At this time, Avernus was a paradisical plane. Elysium and the Seven Heavens both desired to add it to their realms, and so their armies clashed upon its emerald plains.
  • The full tale of the Averniad is beyond the scope of our discussion today. (There are some who claim the full complexities of the celestial epic cannot be told in the course of a single mortal lifetime.) The important bit comes at the end: In the Great Betrayal, Ashmedai wrenched Avernus from the grasp of both Mt. Celestia and Elysium, instead claiming it for himself and aligning it with the Eight Hells. Thus Avernus became the Ninth Hell.
  • Ashmedai’s legions schismed between those who remained loyal to him and those who remained loyal to Mount Celestia. Ashmedai himself became Asmodeus, and his legion of fallen angels, using Avernus as a staging base, conquered Hell, wresting its crown from the brow of the dark lord Ahriman.
  • Zariel’s Long March: During the Fall of Avernus, Zariel’s commander – an angel named Chazaqiel – followed Asmodeus. Zariel and a small band of angels loyal to Heaven broke away and began a long march across Avernus before finally escaping down the River Styx (which in those days followed a very different course).

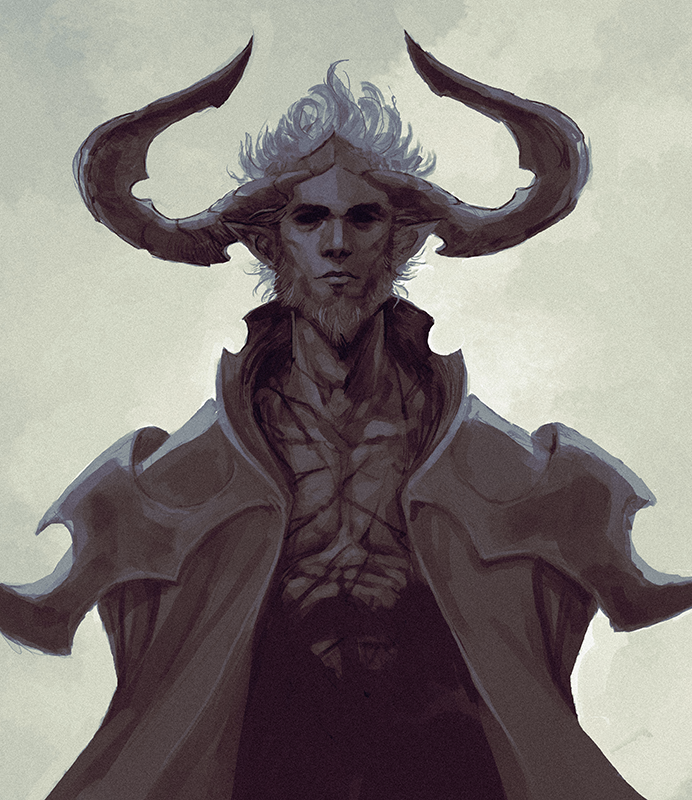
MEETING LULU: Her experiences during the Fall of Avernus had tainted Zariel’s mind with bitterness and anger. While recuperating within the starry groves of Lunia, Zariel met and befriended Lulu, a hollyphant who called the silvered forests of that plane home. When Zariel’s soul found peace and returned to Heaven’s legions, Lulu accompanied her as both friend and warmount.

THE TRIAL OF ASMODEUS

  • Long after the events related in the Averniad, a heavenly strike force penetrated Hell and captured Asmodeus, bringing him back to Mount Celestia to answer for his crimes. (There are some who believe that Asmodeus allowed himself to be captured, knowing what would happen next.)
  • Asmodeus claimed rights under the Pact Primeval. Also known as the First Law and quite possibly the first legal code to ever exist, it had been a founding agreement among the first Planes of Law that had emerged out of primordial chaos (and later became the Seven Heavens and Mechanus). Other pacts, such as those between Celestia, Elysium, and Olympus, had been based upon the authority of the Pact Primeval. By the time Asmodeus made his appeal, the Pact had been supplanted by other codes, but most of those codes ultimately still derived their legal standing from the Pact itself. Therefore, Asmodeus’ appeal to the Pact could not be ignored.
  • AsmodeusThus began the Trial of Asmodeus. Primus of the modrons was appointed as a neutral arbiter and judge.
  • The alleged crimes of Asmodeus, spanning aeons, were limitless. Even the testimony to their effect was seemingly without end, as an angelic horde bore witness, one after another. At last Primus, having grown weary of the proceedings, called a halt to the testimony: The scope of Asmodeus’ illimitable acts had been well-established and their sheer quantity was irrelevant.
  • Zariel, who had not yet had the opportunity to testify to the atrocities she had personally witnessed, was outraged. She violently demanded that she be allowed to speak, and when Primus ordered her to be silenced, the altercation sprawled into a brawl which completely disrupted the proceedings. (Was this the moment that Zariel first came to Asmodeus’ attention? Or had he had his eye upon her from the beginning?)
  • Asmodeus’ defense was simple: Although his former comrades interpreted his actions as a betrayal, they had not actually violated the principle of the Law. Indeed, they had upheld the Law by preventing an alliance between Hell and the Abyss which might have swept away all other planar powers. The Blood War fought by his devils now safeguarded Law from the Chaos of the Abyss.
  • In the end, Asmodeus prevailed. His acts may have been Evil, but Primus ruled that they were ultimately in accord with the Law, and were thus in accord with the Pact Primeval. The law which had once been the bedrock of Heaven now became Asmodeus’ holy right to test the merit of mortal souls (i.e., tempt them to evil) and claim those souls which were Hell’s due. (However, as part of Primus’ ruling, Asmodeus was also bound to always carry the Ruby Rod of Asmodeus, an artifact that both signified Asmodeus’ divine rights, but also bound him – and, through him, the other devils of Hell – to uphold the bargains they made with mortals.)

THE PURSUIT OF YEENOGHU

An almost incalculable amount of time then passed, during which Zariel and Lulu were living an eternal, angelic existence. Zariel remained of a martial temperament, waging war upon the forces of evil.

THE FIRST VISIT TO IDYLLGLEN

  • Several centuries ago (we could perhaps say the 8th or 9th century in Dale Reckoning, during the internecine conflicts which resulted in the Fields of the Dead becoming the Fields of the Dead), Zariel became aware that the demonic lord Yeenoghu had invaded the Material Plane and was personally leading a gnoll army that was sacking settlements north of the River Chionthar.
  • Zariel and a band of angels journeyed to the Material Plane to put an end to Yeenoghu’s depredations. They caught up with the demon lord in the village of Idyllglen.

THE DAUGHTER OF ASMODEUS

  • Zariel’s task force weren’t the only ones hunting Yeenoghu, however. A strike team from Avernus lead by Glasya, daughter of Asmodeus, had also been tracking Yeenoghu. They arrived during the battle and helped rout the demon lord.
  • Yeenoghu escaped, but his army was decimated and scattered to the winds. After the battle, there was tension between the celestial and infernal hosts, but Zariel and Glasya spoke for a short while and – having briefly been strange allies in the Blood War against the Abyss – agreed to go their separate ways.

Go to Part 6D-B: Lulu’s Memories (Zariel’s Crusade)

Ask the Alexandrian

Mark writes:

In your Dragon Heist Remix, you have changed events so that there’s some more breathing room between Chapter 1 [when the PCs investigate the disappearance of Floon and discover the real kidnap victim was Renaer Neverember] and Chapter 3 [when someone is assassinated on the PCs’ front doorstep].

As far as I can see, it’s assumed that the players will be doing faction missions, other character-related content, and fixing up Trollskull Manor.

I’m worried that the group will feel disconnected from the overarching plot and the moving parts of the factions in the Grand Game [i.e., the factions in Waterdeep that are all pursuing the half million gold pieces that were embezzled by Dagult Neverember].

What would you suggest to keep the players invested in the Grand Game in that interim period?

To start with, the expected experience is that the players/PCs won’t really know that there’s a Grand Game going on at the end of Chapter 1. What they’ll have is an introductory scenario that has been successfully wrapped up and a large, neon sign saying, “GO TO TROLLSKULL MANOR.” At best, they’ll have a cluster of loose threads:

  • There’s a Zhentarim/Xanatharian gang war.
  • The Zhentarim and Xanatharians are both interested in the gold embezzled by Dagult Neverember.
  • There was something inside Renaer Neverember’s locket.

There’s not really a defined way for the PCs to immediately pull at these threads. They’re deliberately enigmatical elements that are meant to sort of hang around until they get paid off later in the campaign.

So if the PCs choose to pull at these threads, it’ll be through some clever angle that the players creatively think up on their own initiative. That’s great! You just need to figure out how to roll with it. The Remix almost certainly gives you all the tools you need to do this. You’ll also probably want to try to breathe a little air into it, weaving the events of their investigation into the wider tapestry of Chapter 2.

(To a certain extent, the players are likely to breathe that air into it themselves: Once you can get a bunch of balls up in the air in your campaign – e.g., the investigation, renovating Trollskull, faction missions, the orphans, the business rival trying to sabotage them – the players will be forced to start juggling their priorities. If you aren’t hearing stuff like, “We can’t do that tonight, we have to meet with the distillery!” or “Meliandre can guard the tavern in case the dire rats come back, Bassario and Francesca will run that mission for the Harpers, and I’ll head back up to the Yawning Portal to see if I can find Yagra,” then just add more balls.)

For example, my group made the intuitive leap that Renaer’s mourning locket must be connected to his mother’s tomb. So after checking out their new digs at Trollskull Manor, they headed straight to the Brandath Crypts… well, mostly straight. They had to request a meeting with Renaer. Then they arranged a time when he could take them to the Crypts (“it can’t be tomorrow, because we’ve got that… thing we’re doing”). Once at the Crypts I was actually fascinated to see if they would discover the Vault where the embezzled gold was hidden early and sort of “short-circuit” the entire structure of the campaign, but they ended up missing their Wisdom (Perception) check. Regardless, the investigation had forged a closer relationship with Renaer (who ended up marrying one of the PCs), kept the players puzzling about the Grand Game, and offered a huge pay-off when the whole campaign circled back to the Crypts at the end. (“We were right here! Oh my god!”)

A more likely alternative is for the PCs to start poking around the Zhentarim and/or Xanatharians. That more or less leads straight into the core structure of the campaign: They’re investigating a faction, so you should point them at a faction outpost. (Once again, weaving these investigations into the broader scope of everything else happening in Chapter 2.) This activity might preempt some of the “later” revelations about the Grand game, but that’s just fine. (The idea of them being “later” revelations is really just a conceptual holdover from the heavily railroaded design of the published adventure. And we’re not doing that, right?)

The most likely outcome is that the group will have a little bit of a head start in the Eye Heists that follow the events of Chapter 3. We might imagine the players patting themselves on the back for getting ahead of things, but they probably won’t think of it like that. (The structure of the campaign is obfuscated from them. They don’t see how your notes are arranged and don’t know that this was “supposed” to happen later.)

BUT WHAT IF THEY DON’T?

Other groups, though, won’t pull at those threads from Chapter 1 — either because they can’t figure out how to do it or because they just don’t care enough to do it. That’s OK. It just means that the players’ focus is somewhere else. The events of Chapter 1 are still important. They’ll either foreshadow what comes later (“If only we’d paid attention to the clues in front of our face!”) or they’ll be a mystery that eats at the back of their brains. Anticipation heightens the eventual pay-off. (“Oh my god! It’s all connected!”)

Keep in mind, too, that the Chapter 2 material isn’t completely disconnected from the Grand Game: Virtually all of the initial faction missions, for example, either involve one of the factions from the Grand Game, are directly aimed at the events of the Grand Game, or result in revelations about the same. (The exception is the Emerald Enclave, which is probably one of the reasons why I never prioritized getting that faction involved in my Dragon Heist run.)

Note: Also look at Part 1C: Player Character Factions. The Grand Games of Waterdeep usually involve ALL of the byzantine factions of the city becoming collectively fixated on something. That includes the player character factions. Even if the faction play in Chapter 2 wasn’t connected to the Grand Game, it would BECOME connected by virtue of the PCs being connected to it.

One thing I would have liked to have designed for Dragon Heist would have been a series of detailed background events detailing the evolving gang war between Zhents and Xanatharians. I didn’t get that done for my campaign, but background events like these can also be a good way to keep elements of the campaign “in the mix” even when the PCs’ immediate attention is turned somewhere else.

BUSINESS AS USUAL

One last thing to keep in mind is that this whole approach doesn’t really stop when you hit the end of Chapter 2: The faction missions continue. Now that the tavern is open, you can use A Night in Trollskull Manor to provide a constant level of activity. The PCs are going to continue pulling at threads and having to deal with blowback from their actions.

In fact, once Chapter 3 starts off with a bang (pun intended), the only thing that’s likely to happen is that you’ll be tossing MORE balls into the air for the PCs to juggle.

If you have any questions for future columns, let me know in the comments! In Ask the Alexandrian, instead of looking at general methodology, theorycraft, or prep, I try to solve specific situations from actual play by asking myself, “If I were the GM in this situation, what would I do?”

Go to Ask the Alexandrian #1Ask the Alexandrian #3

Go to Part 1

In Chapter 4 of Icewind Dale: Rime of the Frostmaiden, as the PCs are climbing the mountain outside his fortress, the duergar tyrant Xardorok Sunblight releases a chardalyn dragon and sends it flying to ravage the ten towns of Ten-Towns.

The PCs are faced with a difficult decision: Continue their assault on Xardorok’s fortress or race back to Ten-Towns to stop the dragon’s rampage?

After posting Icewind Dale: Travel Times, I had multiple DMs and patrons ask me if I was also planning to look at this section of the book.

DRAGON’S FLIGHT

The chardalyn dragon flies from Xardorok’s fortress, which is named Sunblight, and targets each town in turn, flying from one to the next and razing it before continuing. On p. 188-9 of the book there is both a map of the route and this table:

The table, unfortunately, is not terribly helpful because it omits the time that the dragon spends destroying each town before leaving for the next. So let’s start with a replacement table, measured in hours from when the dragon leaves Sunblight:

TownArrivesDeparts
Dougan's Hole2 hours2.5 hours
Good Mead3 hours4 hours
Easthaven5.5 hours13.5 hours
Caer-Dineval14.5 hours15.5 hours
Caer-Konig16.5 hours18 hours
Termalaine20 hours26 hours
Lonelywood26.5 hours28.5 hours
Bremen30 hours32 hours
Targos32.5 hours40.5 hours
Bryn Shander41 hours53 hours
Sunblight56.5 hoursn/a

BLIZZARD: A blizzard starts shortly after the dragon leaves Termalaine. (See Icewind Dale, p. 11.)

CHASING THE DRAGON

Now we’re going to look at how and how long it takes the PCs to catch up with the dragon. (An important first step in stopping it). There are a couple things to know before we jump in here.

First, no matter where you’re going, it turns out that it’s always faster to go straight from Sunblight to Dougan’s Hole and then follow the roads from there. This would be true even if you could ride in a straight line (which your usually can’t due the lakes). So we’ll be using that as our baseline assumption when looking at travel times.

Icewind Dale - Sunblight to Dougan's Hole Map

Straight line measurements as the crow flies to other settlements (although most of these routes are impractical on land and, as noted, wouldn’t be faster anyway):

  • Dougan’s Hole: 10.5 miles
  • Good Mead: 12 miles (you need to cross Redwaters Lake and it’s not frozen over)
  • Easthaven: 14 miles (you need to cross the river, but it might be frozen over)
  • Caer-Dineval: 21 miles (Redwaters and Lac Dinneshere are in the way)
  • Caer-Konig: 25.5 miles (Lac Dinneshere is in the way)
  • Bryn Shander: 17 miles
  • Targos: 20.5 miles
  • Bremen: 22.5 miles
  • Termalaine: 24.5 miles (you need to cross Redwaters Lake)
  • Lonelywood: 25.5 miles (you need to cross the northern end of Maer Dualdon, which is not frozen over)

Although the amount of mountain travel differs slightly, in practice you can assume that each of the values above include 4.5 miles of mountain travel.

Second, even though the book features a scenario predicated on precisely timed overland travel, the travel times in the book are both inconsistent and imprecise. The first part of Icewind Dale: Travel Times sought to correct these problems, but I recognize that some people will still be using the values found in the book. So we’ll take the time to look at both scenarios.

BY THE BOOK

We’re going to assume that the PCs are traveling by dogsled, because the adventure contrives to make this true. In doing so, however, we immediately run into a problem: While the book gives a value for dogsled travel in the wilderness (1 mile per hour; ½ mile per hour in mountains), it doesn’t give a value for dogsled travel along roads. Instead, it inconsistently says “mounts and dogsleds can shorten these times by as much as 50 percent.”

For our purposes, we’re simply going to assume that dogsleds reduce these times by exactly 50 percent. And they do it along all roads.

Furthermore, for the sake of simplicity, we will also be assuming that the PCs make all necessary navigation checks (while traveling through mountains or in a blizzard).

Note: We’re still using the “by the book” times on the Travel Time Map from Part 1, which is still slightly modified to remove other inconsistencies in the book-given travel times.

ROUTE TO DOUGAN’S HOLE: If you go straight from Sunblight to Dougan’s Hole (see map above), there’s 4.5 miles of mountain travel (9 hours) followed by 6.5 miles of overland travel (6.5 hours), for a total travel time of 15.5 hours.

But if you take this route:

Icewind Dale - Sunblight to Dougan's Hole Map (Land Route)

Then there’s 3.5 miles of mountain travel (7 hours) and 7.5 miles of overland travel (7.5 hours), for a total travel time of 14.5 hours.

Using the faster route, if the PCs immediately leave Sunblight to chase the dragon, here are the travel times to various settlements (assuming they go directly to that settlement):

  • Dougan’s Hole: 14.5 hours
  • Good Mead: 16.5 hours
  • Easthaven: 18.5 hours
  • Caer-Dineval: 20.5 hours
  • Caer-Konig: 21.5 hours
  • Bryn Shander: 19.5 hours
  • Targos: 20.5 hours
  • Bremen: 21.5 hours
  • Termalaine: 22.5 hours
  • Lonelywood: 23.5 hours

FORCED MARCH & EXHAUSTION: The other thing to keep in mind here is that, assuming they left from Dougan’s Hole, the PCs already traveled 14.5 hours to get to Sunblight. If you assume they traveled 8 hours yesterday, rested, and then traveled another 6.5 hours today… well, after just 1.5 hours they’ll hit their 8 hour daily limit for travel and have to start a Forced March. The dogs will need to make Constitution saving throws at the end of each hour (DC 10 + 1 per hour past 8 hours) or suffer a level of exhaustion. After just two failed saves, their speed will be halved and after five failed saves their speed will drop 0.

However, the rules state that, “Sled dogs must take a short rest after pulling a sled for 1 hour; otherwise, they gain one level of exhaustion.” We could interpret this to replace the normal rules for forced marches, representing the legendary stamina of sled dogs. (This matches real world practices on the Iditarod Trail, so it’s not a huge reach.) This rest time is already calculated into the travel times listed above, so this largely solves the problem for us.

You’ll still want to give some thought to the effects this travel has on the PCs. 5th Edition doesn’t really have mechanics for being short on sleep and the relationship between the forced march rules and traveling in a vehicle are… vague. You might simplify this down to:

  • 1 level of exhaustion for each missed night of sleep.
  • A DC 10 Constitution check per 8 hours of dogsled travel, with 1 level of exhaustion on a failure.

SWAPPING DOGS: Once the PCs get back to the remnants of civilization, they might be able to periodically swap their dogs out for fresh dogs. Under ideal circumstances, this would allow them to run the dogs without a rest, effectively doubling their speed. The trick is that after two hours, they’ll gain two levels of exhaustion and their speed will be halved again. After five hours, the dogs can’t go any further.

Let’s assume that they can switch to fresh dogs in every town. (This isn’t a great assumption because some of the towns they go through will have been wiped out by the dragon. Plus, negotiating for dogs probably chews up some of the time saved. But for the sake of simplicity, let’s go with it.) We can re-calculate our travel times (these all assume they swap dogs in Dougan’s Hole; if no dogs survived there or if the town has already been abandoned in your judgement the numbers will have to shift):

  • Dougan’s Hole: 14.5 hours
  • Good Mead: 15.5 hours
  • Easthaven: 16.5 hours
  • Caer-Dineval: 17.5 hours (switch in Good Mead)
  • Caer-Konig: 18 hours (switch in Good Mead, Caer-Dineval)
  • Bryn Shander: 17 hours (switch in Good Mead)
  • Targos: 17.5 hours (switch in Good Mead, Bryn Shander)
  • Bremen: 18 hours (switch in Good Mead, Bryn Shander)
  • Termalaine: 18.5 hours (switch in Good Mead, Bryn Shander)
  • Lonelywood: 19 hours (switch in Good Mead, Bryn Shander)

BY THE BOOK – SCENARIOS

BEST CASE SCENARIO: By comparing the PCs’ best time (with dog-swapping) to the dragon’s arrival and departure times, we can look at a few likely scenarios.

The first thing to note is that it’s impossible to save Dougan’s Hole, Good Mead, Easthaven, Caer-Dineval, or Caer-Konig. The PCs literally can’t get to any of them fast enough. So the absolute best case scenario is that they head for Termalaine and get there about ninety minutes before the dragon does.

More generally, if the PCs choose any of the other five towns and head straight there, they’ll be able to get there before the dragon.

WILD GOOSE CHASE: The problem is that the PCs don’t know that. In order to accurately calculate where they can intercept the dragon they need to know:

  • its route;
  • how fast it’s going; and
  • how long it will spend destroying each town

Although they might be able to learn or intuit the first two, there’s no way for them to do anything but guess at the third.

This can easily lead to a disaster if they try to chase the dragon from one town to the next: Leaving Good Mead they know it was heading to Easthaven, so they head there only to find that the dragon has destroyed the town and moved on. So they race north along the road, hoping to catch it at Caer-Dineval or Caer-Konig… but they can’t. And now they’ve wasted so much time that they arrive in Termalaine too late.

WORST CASE SCENARIOS: If the PCs go to Dougan’s Hole, travel by road, and are reasonably accurate in anticipating the dragon’s flight path (by questioning survivors, etc.) most of the scenarios broadly look like the above: They catch up to it in either Termalaine or Lonelywood.

Worst case scenarios start rolling out if they deviate from this approach. Obviously, it’s possible for them to unnecessarily write off cities that could have been saved (“Let’s bunker up in Bryn Shander!”). But they might also do something like:

  • Ride to Bryn Shander to warn the largest city in Ten-Towns of the devastation. (They arrive at 17 hours, then spend an hour there.)
  • Having warned the leaders in Bryn Shander, they decide to ride to Easthaven to try to stop the dragon there! (They arrive at 20 hours.)
  • They ride north to Caer-Dineval and then Caer-Konig hoping to catch up! (They arrive at Caer-Konig at 23 hours.)
  • Oh no! Let’s go save Termalaine. (They arrive at 29.5 hours.)
  • Too late! To Lonelywood! (They arrive at 30 hours.)
  • Too late! They ride back to Targos (arrive at 31.5 hours), but don’t stop because the dragon must be attacking Bremen!
  • But they don’t get to Bremen until 32 hours, arriving just in time to watch the dragon fly over their heads back to Targos!

Most of these worst case scenarios seem to end up with them confronting the dragon in Targos. (The dragon spends 8 hours in Targos. That soaks a large margin of error at an intersection.)

IRRELEVANT CHOICE: One interesting conclusion from running these numbers is that the decision to attack or not attack Sunblight before riding back to Ten-Towns turns out to probably be irrelevant to the outcome as long as the PCs can clear the fortress without taking a short rest (which is likely).

RECOMMENDED TRAVEL TIMES

If you’re using the recommended travel rules from Part 1, there are two key differences to account for:

  • Dogsleds move at 4 miles per hour on roads (instead of 2 miles per hour).
  • You can also use the rules for fast pace travel from the DMG.

These benefits are offset to some extent if you’re using the optional rules for deteriorating roads, but I won’t be attempting to factor these into the calculations below.

Perhaps the most significant advantage is that by maintaining a fast pace, the PCs can get to Dougan’s Hole six hours earlier. These numbers assume that they maintain their fast pace on the roads and do not rest their dogs:

  • Dougan’s Hole: 8.5 hours
  • Good Mead: 9 hours
  • Easthaven: 10 hours
  • Caer-Dineval: 10.5 hours
  • Caer-Konig: 12 hours
  • Bryn Shander: 11 hours
  • Targos: 12 hours
  • Bremen: 12.5 hours
  • Termalaine: 14 hours
  • Lonelywood: 14.5 hours

RECOMMENDED TRAVEL TIMES – SCENARIOS

BEST CASE SCENARIO: We can see that Dougan’s Hole and Good Mead are still lost no matter what the PCs do, but it’s now quite possible for them to reach Easthaven while the dragon is only halfway through its destruction of the town.

DRAGON CHASE: The book actually recommends that the dragon leaves a town after it take 30 points of damage. Because the PCs are only slightly slower than the dragon under these rules, this arguably becomes a more interesting scenario (with the PCs able to readily catch up if they can intuit where the dragon is going next).

This also gives the players a reasonable chance to pull back, recuperate, and still be able to bring the fight back to the dragon.

POTENTIAL DRAWBACKS: These travel times make it significantly more likely that the PCs will be able to spare the bulk of Ten-Towns from disaster. Whether that’s a feature or not is probably in the eye of the beholder.

Personally, I like the idea that if Ten-Towns falls the PCs will feel responsible for it, rather than feeling that it was inevitable. On the other hand, maybe you’ve got some solid ideas for what post-apocalyptic Icewind Dale looks like and you want to put your thumb on the scales a bit for that.

AXEBEAKS

Axebeaks can match dogsled speeds on the tundra, but they don’t have the dogsled stamina we invoked above. Assuming the PCs use normal pace to ride to Sunblight, they ride 8 hours the first day and then 6.5 the next day.

This leaves them with only 1.5 hours of travel left on the day when the dragon heads for Ten-Town. They can take a fast pace back to Dougan’s Hole, but the axebeaks will need a long rest on the way. This means it takes 18.5 hours to get back (the dragon is heading for Termalaine):

  • Dougan’s Hole: 18.5 hours
  • Good Mead: 20 hours
  • Easthaven: 23 hours
  • Caer-Dineval: 24 hours
  • Caer-Konig: 25.5 hours
  • Bryn Shander: 24.5 hours
  • Targos: 25.5 hours
  • Bremen: 26 hours
  • Termalaine: 28.5 hours
  • Lonelywood: 29 hours

WAITING UNTIL MORNING: If they wait for morning before heading for Sunblight and triggering the dragon’s release, things get better: The axebeaks can get back to Dougan’s Hole with only a manageable forced march and no long rest:

  • Dougan’s Hole: 10.5 hours
  • Good Mead: 12 hours
  • Easthaven: 15 hours
  • Caer-Dineval: 16 hours
  • Caer-Konig: 17.5 hours
  • Bryn Shander: 16.5 hours
  • Targors: 17.5 hours
  • Bremen: 18 hours
  • Termalaine: 20.5 hours
  • Lonelywood: 21 hours

Swapping axebeaks (galloping them hard for 6 miles before they become exhausted and their speed halves) can improve these times somewhat. Swapping to a dogsled works better.

ON FOOT

What if the PCs go Sunblight on foot and can’t get Vellynne’s dogsleds there? If you’re just using the base travel rates from Rime of the Frostmaiden:

  • It takes them 29 hours to get back to Dougan’s Hole.
  • By that point, the dragon has destroyed Dougan’s Hole, Good Mead, Easthaven, Caer-Dineval, Caer-Konig, Termalaine, and Lonelywood.
  • It takes them a total of 41 hours to reach Targos, which is too late to save either Bremen or Targos. So those towns are also automatically destroyed.

Basically, the ONLY thing they can do is go to Bryn Shander, arriving shortly before the dragon does. If they don’t realize how bad things are and go to Easthaven and then Caer-Dineval first before backtracking to Bryn Shander, they’re entirely too late and the dragon has already flown back to Sunblight.

(Reality check, though: None of those calculations include forced march exhaustion or the need for sleep. So, basically, if they’re on foot, Ten-Towns is automatically razed. This is why the necromancer ex machina is waiting for them at the bottom of the mountain to drive them back to civilization.)

RECOMMENDED TRAVEL TIMES: Things look a little bit better if you can set a fast pace and travel roads at speed.

  • Dougan’s Hole: 14.5 hours
  • Gold Mead: 16 hours
  • Easthaven: 19 hours
  • Caer-Dineval: 20 hours
  • Caer-Konig: 21.5 hours
  • Bryn Shander: 20.5 hours
  • Targos: 21.5 hours
  • Bremen: 22 hours
  • Termalaine: 24.5 hours
  • Lonelywood: 25 hours

These numbers, though, still don’t factor in rest. A particular problem is that the PCs are likely to have arrived at Sunblight late in the day (having traveled 8 hours one day and then 6.5 hours the next). Let’s assume that they do a few hours of forced march the first night and a few more the next day, allowing them to arrive at Dougan’s Hole at just 22.5 hours. (At this point the dragon is already in Termalaine.)

The problem is they now need another long rest before traveling again. By the time they get up, the dragon is in Bremen (30.5 hours). With perfect information, they can reach Targos while the dragon is still there.

SWITCHING TO DOGSLEDS: But wait! What if they switch to dogsleds in Dougan’s Hole? With perfect information, they could get to Lonelywood just in time to see the dragon flying away. But in this scenario, saving Bremen becomes plausible.

Moral of the story? Walking is for chumps.

The concept of an RPG sandbox campaign often gets mixed up with a lot of other things. Some of these are common structures used for sandboxes (like Icewind Dale: Rime of the Frostmaidenhexcrawls). Others are just misnomers (like sandboxes being the opposite of a railroad).

(Quick definition: A sandbox campaign is one in which the players are empowered to either choose or define what their next scenario is going to be. Hexcrawls are a common sandbox structure because geographical navigation becomes a default method for choosing scenarios, which are keyed to the hexes you’re navigating between.)

Other conflations are subtler. A particularly common one is to conflate simulationism with the sandbox structure. One major appeal of the sandbox can be that it allows players to feel as if they’re “living in the world” because they’re free to do “anything,” which has a fairly large overlap with what people enjoy about simulationism.

But simulationism is not required for sandbox play.

A good example of this is the chardalyn dragon from Icewind Dale: Rime of the Frostmaiden.

SPOILER WARNING!

When the PCs approach a particular location on the map (Xardorok’s fortress), this triggers an event in which the dragon flies away to cause some havoc. In discussing this as part of a sandbox scenario, I was challenged: How could it be a sandbox if it was dramatically triggered by the PCs’ approach?

(Note: I’m just talking about triggering the dragon flight here. Shortly thereafter Rime of the Frostmaiden ALSO has an NPC show up to trigger a linear plot that ends the sandbox. I’m not talking about her. Just the dragon.)

The confusion here is due to the conflation of the sandbox structure and simulationism. A simulationist wouldn’t trigger the dragon based on the PCs’ approach. They’d probably do something like have Xardorok’s construction of the dragon be on a schedule with the dragon being released when Xardorok completes it, regardless of whether or not the PCs have found Xardorok’s fortress yet. (There are also other simulationist techniques that could be used here.)

But a sandbox isn’t dependent on simulationism. There’s nothing about dramatically triggering an event which is incompatible with the players remaining empowered to choose and define their scenario.

Go to Icewind Dale Index

Fractal Spheres - Pete Linforth

Go to Part 1

An idea we’ve sort of been flirting with here is that node-based design is fundamentally fractal: You can “zoom in” on a node and break it apart into more nodes. Or, conversely, you can “zoom out” of the local collection of nodes you’ve been adventuring in and discover it’s all part of just ONE node in a much larger web.

For example, let’s consider the Lytekkas vampire hypercorp:

  • At the highest level, we map their activity across seven cities: Chicago, the Old Angeles arcology, Shanghai, St. Petersburg, Reykjavik, Cheltenham, and the Lytekkas-Auberjonais L1 colony.
  • Pick one of those and open it up: Now you’ve got nodes representing all of Lytekkas’ major projects in the Chicago metroplex. (These would also have connections to the other cities.)
  • One of these involves the development of experimental blood-nannies (probably derived from the vampiric virus to mass-Renfield the population; or maybe an effort to control the negative side-effects of being a vampire).
  • Look inside that node and you find the half dozen or so people and facilities involved in the program.
  • The PCs identify and target a Lytekkas warehouse. This node is a heist scenario. There are elements of a heist scenario that are node-like, but it’s really a different structure, so this is the end of the road.
  • … or is it? Part of the heist scenario is the opportunity to secure blueprints of the target. We could resolve that with a skill check, but we could also design it as a micro-node-based scenario.

But you can also flip this whole thing around and see that the Lytekkas hypercorp is just one of the immortal corporations which can track their secret history from the 22nd century back to the Dutch East India Company in the 17th century, with each one of those immortal corporations being a separate node.

This fractal quality can be seen not just in the nodes themselves, but in the connections between those nodes: There’s functionally no limit to how many leads can be placed in a single node, nor in how many leads can be created that point to a node. There is always an opportunity to increase the complexity and interconnectedness of your node map, particularly if we’re talking about an ongoing campaign which is developing over time (and, thus, features connections being formed and broken over time).

At this point the pedants may point out that this isn’t truly fractal because there is a limit to how far we can take this: At some point we’ll end up with a node which is a person; which is a sole entity that cannot be subdivided.

But it’s more true than you might think: Even individuals can be reconceptualized as a node-based scenario consisting of their job, connections, family, etc. The question is not whether you can do this, but whether it is interesting to do so.

MANIFESTING & MANAGING COMPLEXITY

This fractal nature of node-based scenario design, as we’ve seen, allows us to manifest an almost limitless amount of complexity. That can be quite daunting.

But it also allows us to manage this complexity. One of the functions of node-based design is specifically to chunk information into manageable nodes so that you don’t have to try to juggle or keep the whole thing in your head at once.

If you’re getting overwhelmed by trying to handle all seventy nodes of the Lytekkas hypercorp, figure out how to categorize those nodes into manageable groups: By city of operation. Or secret projects. Or corporate division.

The “right” division is going to depend on your own personal preferences and the details of the specific scenario. You’re looking for the clear conceptual chunks that will allow you to keep on top of incredibly complicated campaigns, while ideally only needing to think about one chunk of the scenario or campaign at a time. (I talk a bit more about what the manageable limits for this are in Advanced Node-Based Design – Part 4: The Second Track.)

For a rough-and-ready example of this, let’s consider the Bangkok node in the Eternal Lies Remix. In my prep notes, you can see that I identified five nodes:

  1. Lowman’s Townhouse
  2. Phikhat Hwan
  3. Ko Kruk Island
  4. Sirikhan Estate
  5. Savitree Hunts the Investigators

The first two nodes are pretty standard node-based design: They’re distinct locations with (at least) three clues pointing at each.

But Ko Kruk Island is then broken into three separate nodes: The island itself, the Sirikhan Estate (a mansion on the island), and Savitree hunting the investigators (on the island).

Why?

To manage the complexity.

While the Sirikhan Estate is located on Ko Kruk Island, if the PCs are exploring the island (Node 3) I don’t need to think about every individual room inside the Estate (Node 4). And vice versa: if they’re in the mansion, I generally don’t need to worry about the whole island. Just like separating the individual rooms of a dungeon into separate keyed entries, separating this information lets me clearly focus on (and find!) what’s important RIGHT NOW.

(Speaking of fractal prep, of course, the rooms of the Estate are prepped as a location-crawl. So it’s individual rooms within a node (the Estate) within another node (the Island) within another node (Bangkok). You can really see how the prep structure lets me precisely narrow my focus.)

Node 5 was actually a late addition to my prep notes. I was originally trying to include that material in Node 3 — it’s stuff that happens on the island, so logically it should be in the “Island” chunk of information.

But the complexity of that particular event sequence was bloating the material to a point where I was finding it difficult to organize and reference it. If this is happening to your prep, it’s usually a warning sign that you need to break the material apart into more discrete chunks!

On the flip side, if the players become particularly fascinated by some aspect of the scenario or game world, it becomes relatively trivial for you to zoom in on it and explore it in more detail. Keep this in mind even when running the game: Zoom in on the node and/or add connections to it in response to the PCs’ actions. Slap in a simple node-template like the 5-Node Mystery and you’re good to go following the players down their rabbit hole. Who knows where it will take you?

Go to Part 4: Nodes Aren’t Everything


JUSTIN ALEXANDER About - Bibliography
Acting Resume

ROLEPLAYING GAMES Gamemastery 101
RPG Scenarios
RPG Cheat Sheets
RPG Miscellaneous
Dungeons & Dragons
Ptolus: Shadow of the Spire

Alexandrian Auxiliary
Check These Out
Essays
Other Games
Reviews
Shakespeare Sunday
Thoughts of the Day
Videos

Patrons
Open Game License

BlueskyMastodonTwitter

Archives

Recent Posts

Recent Comments

Copyright © The Alexandrian. All rights reserved.