The Alexandrian

Posts tagged ‘vladaam affair’

Dark Leaf mercenary with a bow

Go to Table of Contents

The slave trade in Ptolus is a gray market: It’s illegal to sell a slave within the city limits, but not illegal to own one (although more and more people disapprove or outright loathe the practice). The local trade is dominated by the Ennin, whose operations extend far beyond Ptolus and openly use the city as a distribution center while also maintaining a surreptitious black market.

The Vladaams don’t directly trade slaves, per se, but have deeply entwined themselves with the Ennin’s operations. There are some who consider the Ennin little than a front for the Vladaam, but this is not accurate. The Ennin are actually, unbeknownst to the Vladaams, a front for the Pactlords of the Quaan (Ptolus, p. 125). Most of the Ennin’s leadership are, in fact, Pactslaves.

For their part, the Vladaams are involved with the slave trade in two ways:

  • The Vladaams maintain a warehouse as a place where the Ennin can temporarily store slaves who are going to be sold at the Ennin Slave Market (Ptolus, p. 399)
  • The Fleet of Iron Sails – specifically the Pride of Morrain, Eye of the East, and Sarathyn’s Sail – are regularly used to transport slaves for the Ennin. These ships collect slaves from the Serpent’s Teeth and deliver them to the Ennin Headquarters (Ptolus, p. 168).

The Vladaam operations are detailed below, while details of the Ennin facilities can be found in the Ptolus sourcebook, as indicated above.

VLADAAM SLAVE SHIPS

The Pride of Morrain, Eye of the East, and Myliesha’s Sail each have a 50% chance of carrying a cargo of slaves. Otherwise, they’re currently carrying normal goods. Check The Fleet of Iron Sails to determine how often they can be found at port in Ptolus.

SMELL OF THE SLAVE SHIPS: The Vladaam Mages assigned to these ships regularly cast prestidigitation to clean out the holds, but it’s not enough to purge the sickening stench that clings to the slave holds – a mix of filth, excrement, blood, and putrescence.

CREWS

Captain: As detailed for each vessel.

Vladaam Mage: Use mage stats, MM p. 347. See Part 13: Red Company of Magi.

Vladaam Guards (1d6-2): Banewarrens, p. 45.

Advanced Vladaam Guards (1d6-2): Use knight stats, MM p. 347.

Sailors (2d8 x 3): Use commoner stats, MM p. 345.

  • Proficiency: Athletics, Perception, Navigator’s tools, vehicles (water).
  • Equipment: dagger, corncob pipe, chewing tobacco, 2d10 sp, Vladaam deot ring

SLAVE RUNS

  • Half Load: 2d4 x 10 slaves
  • Full Load: 4d8 x 10 slaves

VLADAAM SLAVE WAREHOUSE

Map of the Vladaam Slave Warehouse

This facility can temporarily store slaves who are going to be sold at the Ennin Slave Market. It’s used as either an overflow storage facility or as a place where the current stock of the Slave Market can be evacuated if the market is threatened by law enforcement. The Vladaams offer this service gratis in exchange for being allowed to use the slaves to process Liquid Pain (in area 9).

DARK LEAF: In order to distance the facility from the Vladaams, the security is managed by Dark Leaf mercenaries (Ptolus, p. 108) overseen by a centaur named Dilar.

DILAR: Dilar is a captain in Dark Leaf and in charge of the mercenaries here, but he is also deeply in debt as a result of gambling at the Oldtown curse den. Unbeknownst to either the Vladaams or Dark Leaf, Dilar is also involved with the chaos cults. (He appears in Night of Dissolution, p. 37, overseeing a meeting at a secret meeting hall just across the street from this warehouse.)

MALAR: Malar is lieutenant in Dark Leaf. He and the centaur used to be friends, but tensions and suspicions surrounding Dilar’s debts and cult activity have driven them apart. Malar would like to either supplant Dilar in Dark Leaf or make the hop to a better position with either the Vladaams or Ennin.

DENIZENS OF THE WAREHOUSE

DENIZENSLOCATION
2 Dark Leaf MercenariesEntrance
2 Dark Leaf MercenariesArea 1
2d6 unskilled laborersAreas 1 & 2 (day only)
6 Dark Leaf MercenariesArea 7
2 Vladaam Mages + 50% chance of 1d4 slavesArea 9

DILAR (d100)

  • 01-25: Area 1
  • 26-75: Area 7
  • 76-00: Not present

MALAR (d100)

  • 01-50: Area 7
  • 51-75: Area 9
  • 76-00: Not present

Dilar: Use veteran stats (MM, p. 350) with centaur traits.

  • +1 greatsword: Melee Weapon Attack: +6 to hit, reach 5 ft., one target. Hit: 11 (2d6+4) slashing damage.
  • Alignment: Chaotic Evil
  • Equipment: splint armor, +1 greatsword, ring of jumping, broken square ring, coiled viper amulet worth 10 gp, Vladaam house ring, 1 gp, 14 sp
  • Languages: Common, Elven

Centaur traits:

  • Charge: If Dilar moves at least 30 ft. straight toward a target and then hits them with a melee attack on the same turn, they target gains an extra 10 (3d6) piercing damage.
  • Multiattack: Dilar makes two attacks, one with his sword and one with his hooves.
  • Hooves: Melee Weapon Attack: +6 to hit, reach 5 ft., one target. Hit: 11 (2d6+4) bludgeoning damage.

Dark Leaf Mercenary: Use veteran stats (MM, p. 350) with wood elf traits.

  • Speed 35 ft.
  • darkvision 60 ft.
  • Spells: druidcraft, detect magic (1/day)
  • Fey Ancestry: Advantage on saving throws vs. Charmed condition.
  • Trance: Immune to sleep. Finish Long Rest in 4 hours.
  • Equipment: Vladaam house ring
  • Languages: Common, Elven

Malar: Use master thief stats (Ptolus, p. 612).

  • Malar has a Balacazar fiendish slave amulet (Ptolus, p. 398) which allows him to summon a Shoggti (Book of Fiends 5E, p. 199). The shoggti emerges by having its tentacles erupt through the surface of the amulet. There is an ornate B stamped on the back of the amulet, certifying it as a creation of the Balacazars.
  • Equipment: Vladaam house ring

Unskilled Laborer: Use commoner stats (MM, p. 353).

Vladaam Mage: Use mage stats, MM p. 347. See Part 13: Red Company of Magi.

Street map with the location of the Vladaam Slave Warehouse

Ptolus Map – H6

AREA 1 – WAREHOUSE

This front area operates as a legitimate warehousing business, run by the Vladaams and servicing various local businesses and markets. The ceiling is 50 feet high.

AREA 2 – UPPER WAREHOUSE

This area is basically a very large “ledge” about ten feet above the level of Area 1.

GM Background: This elevated area exists only to make room for the lower storerooms (Areas 4-6). Architecturally this doesn’t make much sense, though. The unintuitive layout exists only to obfuscate the existence of the slave warehouse below.

AREA 3 – STAIRS

These stairs lead down to Area 4.

ALARM: The head of an antlered buck has been hung on the wall of the landing. It has an alarm spell that sends a mental alarm to Dilar. The alarm is triggered by anyone who doesn’t wear a Vladaam house ring.

GM Note: The laborers never use these stairs.

AREA 4 – LOWER HALLWAY

This stone hallway is rarely used.

AREA 5 – LOWER STOREROOMS

These storerooms have the appearance of being used for legitimate storage (barrels, casks, boxes, crates, etc.). Any inspection, however, reveals that there’s a thick coating of dust on everything. Opening the crates reveals that they contain mostly garbage and miscellaneous junk.

GM Background: These storerooms exist only to provide a pleasant fiction masking the entrance to the slave warehouse in Area 6.

AREA 6 – ENTRANCE TO THE SLAVE WAREHOUSE

At first glance, this area is identical to Area 5.

DC 20 Intelligence (Investigation): Several crates along the back wall are fastened together. They can be unlatched from the wall and then slid away to reveal the stairs leading down to Area 7.

AREA 7 – SLAVE WAREHOUSE

A floor of bare stone, worn smooth with a single trap door in it to the right of the stairs. A board with various papers and bills of sale pinned to it has been placed on the wall next to the stairs. A bank of ten levers on the wall to the left. Multiple cell doors line the far wall, extending down a hallway to the right.

LEVERS: A bank of ten levers. They require a key (which is held by someone in this room; with a duplicate held by Dilar) and open the nine cell doors and the secret door.

TRAP DOOR: A spiral stair below the trap door leads down to Area 9.

SECRET DOORDC 20 Intelligence (Investigation): The secret door to the east leads to a section of old sewer that was capped and bypassed during a sewer renovation long ago. A section of this sewer breaks through into a portion of Ghul’s Labyrinth, which provides access to the Ennin Slave Market.

POSTED BILLS: Includes the Business of the Vladaam Slave Warehouse handout.

IRON COFFER (10%): There’s a 10% chance an iron coffer is present containing 500 gp, 40,000 sp, and 50,000 cp with instructions to have the Ithildin couriers ship it to the Red Company of Goldsmiths on Gold Street.

AREA 8 – SLAVE CELLS

The facility typically holds 2d20 slaves as an overflow facility from the Ennin Slave Market.

  • 75% chance per ship that some of the slaves here were shipped in on the Pride of Morrain, the Eye of the East, or the Myliesha’s Sail. (See Vladaam Slave Ships, below.)

BIG CELL: 25% chance that the large cell holds a special creature/slave. If this is the case, double the number of mercenaries in this room. Examples of such “special guests” could include:

  • 1d4 cockatrices
  • 1d4+1 ogres
  • 1d2 hippogriffs
  • Giant Ant Queen

AREA 9 – LIQUID PAIN FACILITY

The main area of this chamber is outfitted as a high-end alchemy laboratory.

COTS: Two eastern niches contain cots on which Vladaam Mages sleep. Small trunks slid under each cot contain (see handouts):

LIQUID PAIN APPARATUS: The western niche contains four upright glass cylinders, each large enough to hold an erect man or woman. Shackles suspended from the ceiling allow the Vladaams to string up slaves upside down within each cylinder, while various tubes, syringes, and metallic attachments can be fastened onto someone so hung.

  • Liquid Pain: The apparatus allows one to withdraw 2d8 doses of agony (“liquid pain”) from a person suspended within one of the glass cylinders. The procedure lasts for ten minutes and the victim must make a DC 18 Wisdom saving throw or suffer 2d6 Constitution damage. (This is treated as psychic damage for the purposes of immunity and resistance.) On a successful save both the damage and the yield are halved.

Next: Vladaam Slave Ships

Oldtown Apartments (Modified Map) - Night of Dissolution (Monte Cook Games)

Go to Table of Contents

The Vladaams own a block of apartments in Oldtown on Crossing Street, which are primarily as housing for members of the Vladaam deot. Recently, as detailed in the “Temple of Deep Chaos” adventure in The Night of Dissolution, a chaos cult took control of one of the buildings and used it as a site for testing and developing askara, a potent magical poison which turns its victims into venom-shaped thralls.

A few weeks ago, a party of adventurers cleaned out the chaos cultists and did their best to destroy the cultists’ research. The building was sealed for a time by the city, but then reclaimed by the Vladaams. Members of the Red Company of Magi moved in to figure out what the chaos cultists had been doing, and the project was quickly taken over by Aliaster Vladaam.

During this same time, Navanna Vladaam became aware that the Banewarrens had been breached (as described in Chapter Four of the Banewarrens campaign). She began mounting expeditions into the Banewarrens and began bringing the “banes” she liberated to the Oldtown Apartment so that they, too, could be studied by Aliaster in the labs he’s established here.

DESIGN NOTES & BACKGROUND

This is a tricky location. As presented here, it reflects both the actions the PCs in my group took when raiding the apartment building and how events played out in the Banewarrens (thus determining, for example, which banes Navanna was able to bring back here). I prepped the following timeline for how events played out here:

  • 09/22: The “outraged” Vladaams force the city watch to remove their quarantine on their apartment complex.
  • 10/06: Navanna brings the body of the pain demon here from the Banewarrens.
  • 10/10: The Vladaam Pain Devil Research notes are added to area 6.
  • 10/10: Contents of BW05 weapon vaults brought here by Navanna.
  • 10/15: Aliaster duplicates the hell scourge & agony’s caress abilities of the pain devil. Four of the Twelve Claws gain hell scourge grafts (including the two guarding the front door).

If you’re running The Vladaam Affair independent of one or both of these other campaigns, you can just assume that an NPC party of adventurers raided the Temple of Deep Chaos and got Navanna involved with the Banewarrens. (Or, alternatively, maybe the Temple of Deep Chaos is still located beneath the apartment building, unknown to the Vladaams and filled with chaos cultists preparing to take back what the Vladaams have taken from them.)

If, on the other hand, your PCs are also playing through one or both of those adventures, you’ll want to modify the adventure key here to reflect how events actually played out (and are playing out) at your table.

Either way, you’ll likely want to review the original key describing this building in Night of Dissolution.

It’s also worth noting that overly curious PCs might be able to track Navanna and/or the banes here back to the Banewarrens. That could present a novel opportunity for the PCs to get involved with the Banewarrens campaign, but if that doesn’t interest you, you might want to provide an alternative source for the magic items Aliaster is studying.

Also of note is that the other apartment buildings in the block are still inhabited by various members of the Vladaam deot (who are largely or entirely unaware of what’s going on next door). If the PCs are tracking a member of the deot or looking for a Vladaam to question, their target could easily be a tenant of this apartment block.

Oldtown - Crossing Street (Deluxe Ptolus City Map)

Oldtown
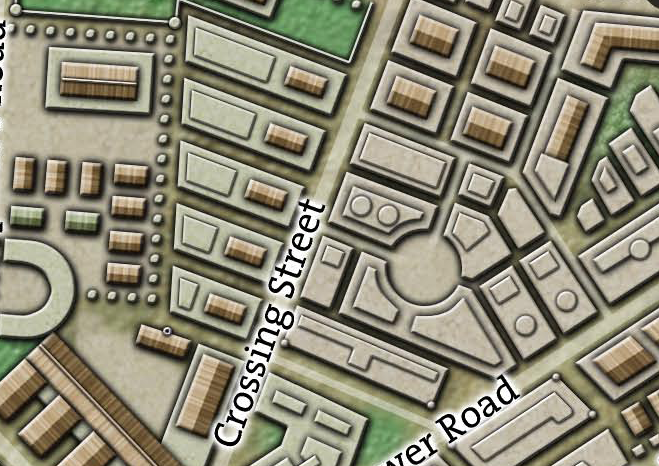
Crossing Street – D4

DENIZENS

During the day there is a 60% chance that Aliaster Vladaam (Ptolus, p. 101) is present conducting research. If he’s present, there’s a 10% chance that another member of the family (Navanna, Gattara, or Godfred) is there – either to check up on him, collaborate with him, or just to see what all the fuss is about.

Aliaster will run at the first sign of trouble (using teleport to get out), but if other family members are present things could get ugly.

DENIZENS - NIGHTLocation
Hell-Scourged Claws (x2)Front Door
DENIZENS - DAYLocation
Hell-Scourged Claws (x2)Front Door
Vladaam Researchers (x4)Second Floor

Vladaam Researcher: Use acolyte stats, MM p. 342. See Part 13: Red Company of Magi.

Hell-Scourged Claws: The Twelve Claws are Navanna’s werewolf agents (see Ptolus, p. 101 and Part 5: The Vladaam Estate). Aliaster has reverse-engineered a pain devil’s hell-scourge (see Area 6, below) and grafted them onto

  • Hell-Scourge. Melee Attack Roll: +6, reach 5 ft. Hit: 15 (2d8+6) slashing damage.
  • Flurry of Steel. As a bonus action, a hell-scourged claw can make two attacks with their hell-scourges.
  • Agony’s Caress. As a bonus action, a hell-scourged claw can send elemental pain cascading through the scourge. Those struck by a hell-scourge must make a DC 12 Constitution saving throw. On a failure, the target becomes Restrained as their body is wracked with pain beyond imagining.

FIRST FLOOR

All of the cocoons and nests on this level have been removed to the second floor. Crude buttresses have been erected using wall of stone to reinforce the weakened floors of the upper level. The holes punched in the ceiling have also been repaired.

AREA 1 – ENTRANCE

Furnished with simple, badly dilapidated and blood-stained furniture: Tables, chairs, and a pair of divans.

AREA 1A – STONE BUTTRESSES/PATCHED CEILING

A large hole in the ceiling of this room has been patched and a wall of stone has been used to support the floor and walls.

AREA 1B – STONE BUTTRESSING

This room also contains a wall of stone used to reinforce the upper floor.

AREA 2 – FORMER APARTMENT

This room was destroyed by venom-shaped thralls. It has been left in a broken shambles.

AREA 3 – FORMER INJECTION ROOM

A large wooden table stand sin the middle of an otherwise barren room.

AREA 4 – FORMER PRISON

DOOR (Strong Wood): AC 15, 27 hp, DC 20 Dexterity (Thieves’ Tools). Unlocked currently, but could be secured.

Smeared feces on the wall.

AREA 5 – THE HOLE

A hole in the corner of the room has been boarded over.

TRAP IN THE SHAFT: Below the boards is a shaft leading to the sewers. Anyone climbing through the shaft will trigger a flame strike that will fill the shaft and column above and below it, inflicting 4d6 fire damage and 4d6 radiant damage. DC 14 Dexterity saving throw for half damage.

  • DC 20 Intelligence (Investigation), DC 24 Dexterity (Thieves’ Tools)

AREA 6 – PAIN DEVIL RESEARCH ROOM

The body of a pain devil is laid out and dissected on a worktable in the center of the room.

PAIN DEVIL (as it would appear in life): Skin of glistening ebony. Eyes a blood-red crimson. Mouth a toothless maw with razored lips. Chains are fused about its wrists, each animate with hatred.

  • The body is remarkably well-preserved in death (although now vivisected). Note that the animate chains have been burnt away, leaving only charcoaled stubs on the creature’s wrists.

RESEARCH: Papers arranged on the worktable constitute the Vladaam Pain Devil Research.

GM Background: I added a pain devil to one of the Banewarrens vaults, further modifying it so that its hell-forged scourges were grafted to its wrists. The PCs in my campaign freed it, fought it, and killed it. Navanna Vladaam retrieved the corpse and brought it here. D&D 5th Edition stat blocks for a pain devil can be found in Chains of Asmodeus, p. 249.

VLADAAM PAIN DEVIL RESEARCH

These research notes describe an autopsy and magical dissection.

GROSS CHARACTERISTICS

  • Pitch black skin with scabrous patches of gem-like glistering. The flesh appears resistant to decay, but there is an intermittent degradation of its luster.
  • The vitreous humour of the eye appears to be filled with blood, but not of the creature’s own. Origin of the blood is uncertain, but appears to be integral to the function of the eye.
  • Body does not possess teeth, but instead several ranks of razor-sharp lips capable of independent motion along a horizontal plane.
  • Charcoaled stubs on the creature’s wrists appear to be the remains of biometallic chains or possibly lashes. Beneath the stubs are receptor sites triggered to serve as channels of emotional extremity.
  • Nystulean worms react with stress when placed within the creature’s transluminal aura. Despite the body having been deceased for days or possibly weeks, the strength of this lingering aura of pain and hatred is intense. During life it may have actually been capable of inflicting physical duress.

Additional preliminary notes are given, hypothesizing ways in which the biomagical properties of the creature could be reverse engineered and applied.

AREA 6A – WEAPONS RESEARCH

Multiply display cases for weaponry have been installed around the periphery of the chamber.

WEAPONS: These weapons are tainted. They were retrieved from the Banewarrens (Outer Vaults — Area 11). The weapons all have a Forge Mark on them.

  • +1 battle axe
  • +1 greatsword
  • +1 longsword
  • +1 mace
  • +1 unholy shortsword
  • +1 scimitar
  • +1 greataxe
  • +1 longbow
  • dagger of venom
  • sword of life stealing

GM Background: Although these weapons are being studied by Aliaster, there’s actually little of interest about them other than historical curiosity.

FORGE MARK: Worked in red gold and ebony, this forge mark indicates that these weapons were wielded by the Legion of Bhor Kei.

Forge Mark of the Legion of Bhor Kei

AREA 7 – COCOON/NEST RESEARCH

The remains of three venom-shaped thrall cocoons and four nests (most severely burnt) have been gathered in this room. There are also samples from an osyluth cocoon taken from the Banewarrens (Outer Vaults — Area 4).

AREA 8 – SECONDARY ALCHEMY LAB

DOOR (Steel-Cored): AC 19, 40 hp, DC 18 Dexterity (Thieves’ Tools). Can be barred from the outside, but is not generally secured.

A secondary alchemical laboratory has been set up here to study the specific remains of the unusual nest that was in this area (the victim became a protoplasmic goo similar to a gibbering mouther, see Night of Dissolution).

  • The researchers have discovered strength-boosting alchemicals in the burnt remains of the nest and are attempting to isolate them.

DRAUGHTS OF MORPHEUS: Letter from Grui to Aliaster attached to a black ebon box lined with purple velvet. Designed to hold eight bulbs of thick, black oil; it currently holds five. (These are draughts of Morpheus.)

GM Background: The researchers here have been using draughts of Morpheus to work even longer hours.

LETTER FROM GRUI TO ALIASTER

Milord Aliaster the Wise—

Please accept these Draughts of Morpheus with the most sincere compliments of your sister. If you should have need of any further aids to your work or workers, do not hesitate in your request.

Grui
Master of the Alchemical Laboratories
upon the Brewer’s Close

AREA 9 – PRIMARY ALCHEMICAL LABORATORY

The primary alchemical laboratory has been erected here. Two sets of cocoons and nests are in various states of deconstruction, with various alchemical solutions being applied in an attempt to restimulate growth.

NOTE ON NECESSARY ALCHEMICAL SUPPLIES

We’ll need a fresh supply of Naiad’s Tears if we’re going to prevent the cross-contamination endemic in this fecund material.

Also—I have an urgent need for Serenity Draught. It seems to be of great use in easing the side effects of the hell-scourge grafts currently suffered by Navanna’s wolves.

Send word to the lab on Guilder Street and lay in a goodly supply of both… and perhaps a word about the efficacy of the Serenity Draught should be sent along to Brewer’s Close.

                                                                                                -Aliaster

VLADAAM ASKARA RESEARCH NOTES

These research notes describe ongoing studies of the “severely charcoaled organic remains” found in the Oldtown apartment complex. The goal of the research is clearly an attempt to reconstruct the “mutagenic and metamorphic compounds used to create the hybridized morphologies.”

In other words, the researcher clearly does not know the term askara and the research is an attempt to reconstruct its properties. To this end, they have dissected and analyzed various tissue samples and are now in the process of applying various alchemical substances in an effort to “reinvigorate growth.”

GM Note: This handout is written for PCs who participated in the vents of Night of Dissolution and are familiar with the term “askara” and, broadly, what the cultists were trying to accomplish. If that’s not the case in your campaign, you’ll want to rewrite the handout appropriately or present the information in a different way.

Go to Part 16: Vladaam Slave Trade

Back to Surveyor’s Headquarters

AREA 7 – ANTECHAMBER OF ARTIFACTS

A vault of white marble.

AREA 8 – BOOK OF INFINITE SPELLS

Scribal stalls line the long walls of this chamber to the right and left. At the far end of the room, there is a stand of bloodwood holding the Book of Arkath.

BOOK OF ARKATH: Each page of the Book of Arkath contains a random spell. Once a page is turned, it can never be flipped back – paging through the Book of Arkath is a one-way trip and, as far as anyone has been able to determine, once a spell has appeared, it does not reoccur. If the book is closed, it always opens to the page it was on before the book was closed.

Once per long rest, a reader attuned to the Book of Arkath can cast the spell to which the book is opened. If the reader is a spellcaster and the spell appears on their spell list, they can cast it up to four times per day. Each time a spell is cast, there is a 1 in 6 chance that the page of the book will automatically turn.

In addition, each time a page is turned (whether willingly or not), there is a 1 in 20 chance that the book vanishes.

The book currently displays protection from energy.

SCRIBAL STALLS: A number of freshly copied scrolls can be found among the scribal stalls.

  • scroll of creation
  • scroll of teleport
  • scroll of control winds
  • scroll of kin curse*
  • scroll of call of the topaz*
  • scroll of harroc adulese (hunter serpent)*

* Exotic spells, see The Spells of Arkath.

GM Background: Under Guildmaster Essetia’s guidance, arcane members of the Brotherhood copy the spell currently displayed in the Book of Arkath. The page of the book is then turned.

AREA 9 – NECROMANCER’S STONE

Upon a platform of substarrae within a bulging cylinder of transparent arenak, sits the Necromancer’s Stone.

CYLINDER: A small plaque written in Old Prustan read, “The Necromancer’s Stone, wielded by the Squirming Horde, cleaved by the vanguard of Nulara Aretari during the Ghulwar.”

  • Substarrae: A purplish black metal. The secrets of its creation were lost long aeons ago, but it’s stronger than even adamantine.
  • Transparent Arenak: A silvery-black metal with a hundred times the strength and durability of normal steel. It has been alchemically treated to become transparent, but retains all the properties of adamantine.

NECROMANCER’S STONE: The Necromancer’s Stone is one of the primal stones – like the alchemist’s Philosopher’s Stone, Sorcerer’s Stone, God’s Stone, Druid’s Stone, and so forth.

In game terms, the Stone has XX charges and regenerates 2d10+4 charges daily at dawn. While holding it, the wielder can use an action to expend 1 or more of its charges to cast one of the following spells from it, using their spell save DC + 10: animate dead, blight, command undead*, create undead, death knell*, gentle repose, halt undead*, and soul bind* (trapping the soul within the Necromancer’s Stone). For spells that can be cast with higher spell slots, the wielder chooses which “slot” to use and spends a number of charges each equal to the “slot” level.

The wielder can also cast raise dead (5 charges) – whether the normal time limit has expired or the soul resists.

The Stone can also be used to create an undead hallow (4 charges) for 24 hours. An area 60 feet around the wielder is imbued with necromantic energy, although the spell fails if the radius includes an area already under the effects of a hallow spell. Undead creatures within the area are immune to turning and non-undead creatures (other than the wielder) cannot enter the area unless they succeed at a saving throw. For each additional charge expended, the wielder can also imbue the undead hallow with one effect:

  • Courage. Undead cannot be frightened while in the area.
  • Darkness. Darkness fills the area. Normal light, as well as magical light created by spells of a lower than 5th level, can’t illuminate the area.
  • Energy Protection. Undead creatures have resistance to one damage type of the wielder’s choice, except for bludgeoning, piercing, or slashing.
  • Fear. Non-undead creatures (other than the wielder) are frightened while in the area.
  • Silence. No sound can emanate from within the area, and no sound can reach into it.

The wielder of the Stone is permanently under the effects of death ward and gains advantage on skill checks and saving throws related to necromantic spells or effects.

This particular Necromancer’s Stone was created during the Ghulwar and was wielded by the legions of Ghul before being captured by Nulara Aretari’s army in the Field of Moonsilver. It’s tainted and bestows two levels of exhaustion to any non-chaotic or non-evil character carrying it.

COMMAND UNDEAD
Level 3 Necromancy (Sorcerer, Wizard)

Casting Time: 1 action
Range: 60 feet
Components: V

You speak a one-word command to all undead creatures you can see within range. Any target must succeed on a Wisdom saving throw or follow the command on its next turn. The spell has no effect if the target is living, if it doesn’t understand your language, or if your command is directly harmful to it.

Using a Higher-Level Spell Slot. The range of the spell can be increased by an additional 10 feet for each additional spell slot level.

DEATH KNELL
Necromancy Cantrip (Cleric)

Casting Time: 1 action
Range: Touch
Components: V, S
Duration: Instantaneous

You draw forth the ebbing life force of a creature and use it to fuel your own power. Upon casting this spell, you touch a living creature who is currently making death saving throws. If the subject fails a Constitution saving throw, it dies and you gain 2d4+4 temporary hit points.

HALT UNDEAD
Level 3 Necromancy (Sorcerer, Wizard)

Casting Time: 1 action
Range: 120 feet
Components: V, S, M
Duration: Concentration, up to 1 minute

Choose up to three undead creatures you can see within range. Each creature must succeed on a Wisdom saving throw or be paralyzed for the duration of the spell. The effect on a creature is broken if it is attacked or takes damage.

Using a Higher-Level Spell Slot. You can affect an additional two undead for each additional spell slot level.

SOUL BIND
Level 9 Necromancy (Cleric, Sorcerer, Wizard)

Casting Time: 1 action
Range: 60 feet
Components: V, S, M (a black sapphire gem)
Duration: Permanent

You draw the soul from a newly dead body and imprison it in a black sapphire gem worth at least 1,000 gp per level or CR of the creature whose soul is to be bound. The subject must have been dead no more than 1 minute and can attempt a Wisdom saving throw to avoid imprisonment.

The soul, once trapped in the gem, cannot be returned through raise dead, resurrection, or any similar spell or effect, not even a wish or miracle. Only by destroying the gem can one free the soul (which is then still dead).

Necromancer’s Stone is covered by the Open Game License.

AREA 10 – THE STATUE OF VLADAAM

A massive statue standing at one of this chamber depicts a hulking creature of black demon-flesh. Its skull seems to push out from the skin of its face, depicting a bone-white countenance with two flaming coals for eyes.

STATUE: The base of the statue is labeled in Old Prustan – VLADAAM, VESTED OF THE GALCHUTT.

  • DC 24 Intelligence (Investigation): By pushing the V’s in both “VLADAAM” and “VESTED” simultaneously, a panel opens in the base of the statue. It contains The Ritual of Flessh (see handouts).

SEARCH – DC 18 Wisdom (Perception): To detect the secret door leading to Area 11.

GM Background: This statue depicts Vladaam, a Vested of the Galchutt and the founder of House Vladaam.

AREA 11 – DARKENING ENTRANCE

This area is affected by a darkness spell.

COMMAND PHRASE: Those speaking the command phrase (“let us hold and send forth the eye of all knowledge”), which can be found in the Oath of the Brotherhood, can perceive the room as if the darkness spell were not present.

CURSE: Anyone dispelling the darkness spell or passing through the room without speaking the command phrase must succeed on a DC 24 Wisdom saving throw or become cursed: Their shadow becomes animate. Although it remains attached to the victim, it dances wildly, causing the victim to suffer disadvantage on Hide checks unless they’re in an area of total darkness. The effect is permanent, although a remove curse spell ends the effect.

AREA 12 – CRYPTS OF THE BROTHERHOOD

Each of these crypts contain a former, high-placed member of the Brotherhood. This includes all of the guildmasters of the Red Company of Surveyors since the 7th century.

AREA 13 – FONT OF ASCENSION

This is a natural cavern. Carved stairs at the rear of the cave lead down to Area 12. The far side of the cavern opens out onto a cliff face on the edge of Oldtown, providing a breathtaking vista across Ptolus and down to the sea.

ILLUSION: The cave entrance is masked by an illusion from the outside.

FOUNTAIN: A burst of water from the wall softly falls in a burbling cascade through a complicated, multi-tiered fountain of gilded, glinting gold. Each tier of the fountain contains a small, golden sculpture depicting an animal with a rune or sigil on its chest: An eagle, a stag, a bear, a cat, an owl, a wolf, a dolphin, and a hawk.

  • DC 15 Intelligence (Religion): These holy animals were associated with the Elder Gods before those strange deities vanished from the world.
  • DC 25 Intelligence (Arcana): To recognize the runes as being an ancient antecedent of modern dreamspeaking notation. (Advantage on this check if the character is proficient in the Dreaming Arts.)
  • DC 20 Intelligence (Investigation): There’s a hidden compartment at the base of the fountain. It contains The Passing of the Jewels of Parnaith (see handouts).

GOLDEN ANIMALS: The golden statuettes can be removed. Once removed, touching the sigils will cause them to glow. If all of the sigils are activated, each statuette will transform into a cunningly wrought piece of gold. These can be joined together to form an illitor (Ptolus, p. 485).

An illitor is a complex item encompassing a golden belt, armband, and bracelet, each connected to the others by thin golden chains.

GM Background: Only someone wearing an illitor can access the pergolas which lead to the Jewels of Parnaith.

Go to Part 14D: Inner Sanctum Handouts

Map of the Inner Sanctum of the Surveyor's GuildBack to Surveyor’s Headquarters

The Red Company of Surveyors, along with the Fleet of Iron Sails, are, in many ways, the public face of a secret organization known as the Brotherhood of Yrkyth. While their ships charted the Whitewind Sea, the Brotherhood coordinated the gathering of arcane knowledge. They were also involved in the creation of Yrkyth’s “Engima Engine” (the plans for which are still held here within their inner sanctum).

Following Yrkyth’s disappearance in 651 IA, the Brotherhood withdrew even deeper within its cloak of secrecy. Although deeply tied to a variety of Vladaam activities, the Brotherhood is notable because none of the current Vladaam family are members. It’s a secret within a secret. However, the Brotherhood does arrange for certain arcane information gathered by the Brotherhood to be transmitted to the family for its benefit. (For example, the Brotherhood was responsible for forging the family’s connection with the dark dwarves in Catar, which resulted in the family gaining the services of the dark dwarf alchemy masters. See Part 7: Alchemical Labs.)

The sign of the brotherhood are four quills laid over each other to form the pattern of a diamond.

AREA 1 – GRAND ENTRANCE OF THE BROTHERHOOD

The walls, floor, and ceiling of this chamber are polished obsidian.

THE TABLE OF THE BROTHERHOOD: When a command phrase is spoken (“let us hold and send forth the eye of all knowledge”), a table and chairs rise from the living stone of the floor. The table has a long hollow running down its center, which can be filled with liquid for the Toasts of the Brotherhood.

HIDDEN CACHES – DC 20 Wisdom (Investigation): Two hidden caches, each in the center of the long walls, facing each other.

  • Cache 1: Holds the Rites of the Brotherhood and Spells from the Wisdom of Arkath. (See handouts.)
  • Cache 2: Holds 12 doses of Thoth’s Incense. There is a courier slip inside with a point of origin from an address on Brewer’s Close
  • GM’s Background: This is the address of Alchemical Lab 1 – Bodyworks.

STAIRS: Lead to Area 7 of the Surveyor’s Headquarters, above.

AREA 2 – THE STELLAR LUMINOUS TABLET

Upon a three-tiered dais of blue diamond crystal stands a rectangular table upon which stands a strange apparatus next to a crystalline slab which glows with a blue-hued radiation. The light is strange – shadows seem darker here and inexplicable patterns dance in the corners of one’s eyes.

THE TABLET: The crystalline slab is a tablet formed from a white mineral that is always cold to the touch. It bears two columns of angular sigils, one column beneath a crescent glyph and the other beneath a circular glyph.

  • Sigils: The sigils resist all magical efforts at translation.

BLUE RADIANCE OF ERYSH: The Stellar Luminous Tablet emits a blue-hued radiation that induces an awareness of the higher order of dimensions. The radiance overpowers all other illumination and resembles ultraviolet “black light” illumination. Within the radiance, as noted above, shadows seem somehow darker than they should be and odd patterns seem to dance.

  • DC 16 Intelligence (Arcana): Recognizes the light as the Blue Radiance of Erysh.
  • DC 20 Intelligence (Arcana): To be familiar with the properties of the Blue Radiance.
  • Divinations: The Blue Radiance of Erysh is an extremely potent tool for the purposes of meditation, divination, and sorcerous research. Divination spells cast within the radiance are treated as if they had been cast with a spell slot one level higher.
  • Crafting Magic Items: Magic items crafted within the Blue Radiance of Erysh gain extra potency at the GM’s discretion. (Spells cast through such an item might be treated as being cast with a higher spell slot, but other – and stranger – effects are also encouraged.)
  • Madness: Those who make frequent use of the Blue Radiance of Erysh are often subject to obsession and madness. With intense, frequent exposure users become canker ridden and anemic. Anyone casting a divination spell within the Blue Radiance of Erysh must make a DC 16 Wisdom saving throw or suffer a short-term madness. Anyone spending more than 1 hour within the Blue Radiance of Erysh must make a DC 12 Wisdom saving throw (repeated once per day they remain within the radiance) or suffer a long-term madness.

APPARATUS OF LENSES & CRYSTALS: On the dais next to the Tablet. It can be rotated into position over the Tablet.

  • DC 12 Intelligence (Arcana): To intuit that the apparatus is divinatory is nature. If the properties of the Blue Radiance are known (per the checks above), the full function of the device can be intuited (as described below).
  • DC 20 Intelligence (Arcana): By correctly aligning the lenses and crystals around the Stellar Luminous Tablet and then casting divination spells through it, the efficacy of the Blue Radiance is doubled. (Treat the resulting spell as being cast with a spell slot two levels higher.)

GM Background: Recovered from one of the ecrupoli located throughout the Serpents Teeth in the Whitewind Sea. (The ecrupoli are the ruins left behind from the cities and settlements of Galchutt worshipers.)

(Thanks to Planet Algol for the Blue Radiance of Erysh.)

AREA 3 – SHRINE OF TERROR

The floor at the far end of this chamber is sunken down into a pit containing a cyclopean statue. The statue is positioned so that its head rises just above the edge of the pit, its multi-eyed gaze immediately fixating upon any entering through the door.

STATUE: The statue is broken and badly worn, leaving only the upper body of the figure (which is nevertheless 40 ft. tall). One arm lies on the floor of the pit, curved around the base of the remaining statue.

Broken Shaddom Statue

GM Background: The statue depicts a shaadom (Ptolus, p. 595). It was taken from an ecrupoli in the Serpents Teeth.

EFFECT OF THE STATUE:

  • Terror: Creatures gazing upon the statue must make a DC 14 Wisdom saving throw or become frightened for 1 minute. While frightened by this spell, a creature must take the Dash action and move away from the statue by the safest available route on each of its turns, unless there is nowhere to move. If the creatures ends its turn in a location where it doesn’t have direct line of sight to the statue, the creature can make a new DC 14 Wisdom saving throw. On a successful save, the effect ends for that creature.
  • Fascination: Creatures who succeed on the first saving throw must make an additional DC 18 Wisdom saving throw or become disturbingly drawn to the statue (moving 10 ft. towards it each turn). The spell lasts until the victim touches the statue or is forcibly removed from the room.
  • Lingering Whispers: If a victim touches the statue while under the effects of fascination, the statue will enter their dreams. Each night they will be visited by a progressively disturbing vision of the statue (starting with its eyes, torso, and eventually revealing the writhing tentacles of its lower body). This is accompanied by sibilant whispers and the like. The victim will awake each morning having suffered 1d2 levels of exhaustion.

The lingering whispers of the statue can be removed by casting remove curse with a 5th level spell slot within an area affected by a hallow spell.

AREA 4 – THE SAGA OF YRKYTH

The walls of this outer chamber are inscribed with the Saga of Yrkyth (see handouts).

AREA 5 – SHRINE OF YRKYTH

A bronze statue depicts a one-armed man with a handsome, bearded face. One foot is raised to stand upon a thrust promontory of black rock. The figure’s gaze seems fixed upon some distant horizon. The name YRKYTH is emblazoned across the base of the statue.

DC 20 Intelligence (Investigation): To find a compartment hidden in the promontory of black rock which contains the Enigma Engine Lore (see handouts).

AREA 6 – GUILD INITIATION CHAMBERS

These chambers are used as a processional of initiation into the Brotherhood of Yrkyth.

AREA 6A – CHAMBER OF WANDS

Six wands are laid out on a table of mahogany in the center of the room.

  • wand of magic missiles
  • wand of invisibility
  • wand of darkness
  • wand of magic missiles
  • wand of false life
  • wand of enlarge person

GM Background – Initiation Ritual: The initiate must take one of the wands and break it, representing their dominion over arcane lore and their contempt for the trappings of power (when the true power lies within them).

AREA 6B – CHAMBER OF EGGS

The southern end of this chamber (beyond the pillars) is shrouded in magical darkness.

EGGS: Upon marble plinth sitting within the darkness are three eggs – two blue eggs and one red egg.

GM Background – Initiation Ritual: An initiate must break the two blue eggs without harming the red egg.

AREA 6C – CHAMBER OF THE SIGIL

A small writing station with various inks and tattooing instruments faces the far wall of the chamber. One sits at the station cross-legged upon a padded cushion.

ARCANE SIGIL: An invisible arcane mark is written upon the wall, directly in front of the writing station. Anyone capable of seeing it will find that it glows with an almost blinding intensity (DC 10 Constitution saving throw or blinded for 1d10 minutes). The sigil has a different color for each person who views it – sometimes the difference is subtle in hue; often it is radically different. Many report undertones to the hue of an unearthly or indescribable character.

GM Background – Initiation Ritual: An initiate must copy the sigil onto their own body. This is extremely difficult (requiring an appropriate skill check at DC 24), although using a prestidigitation spell makes it easier (requiring a DC 15 Intelligence (Arcana) check).

AREA 6D – CHAMBER OF THE OATH

The entrance to this chamber is blocked by a wall of fire. Anyone bearing the sigil from Area 6C can pass through this wall of fire freely.

THE BLACK REVELER: Upon the wall is what appears to be the mounted body of some feathered monstrosity, but is, in fact, just a cleverly constructed fake.

Black Reveler

THE SIGN OF THE BROTHERHOOD: The four-quilled diamond-feather guild badge appears in bas relief upon the floor.

GM Background – Initiation Ritual: An initiate must kneel upon the Sign of the Brotherhood before the Black Reveler (which depicts one of the incarnations of Bhor Kei) and swear the Oath of the Brotherhood of Yrkyth (see handouts).

Go to Part 14C: Crypts of the Brotherhood

Fairy Reading a Book - warmtail

Go to Red Company of Magi

LETTER FROM GATTARA TO TIANT

Sweetest Tiant,

Your words tantalize me, and I shall be certain to reward you with the most delightful suffering as punishment for your impudence.

In fact, you have spurred me to a wonderful bit of inspiration: I have sent a messenger to Runshallot Street and asked them to send you the next several doses of their liquid pain as soon as it has been extracted from their apparatus. I know how much you love to indulge, and I would not ask you to restrain yourself entirely, but save some for our games later.

Bring it to the curse den on Nethar Street and we’ll get a private room.

And a private plaything.

 Gattara

GM Background: “Runshallot Street” is the Vladaam’s Slave Trade Warehouse. Gattara is also referring to the curse den in the Guildsman District.

REPORT FROM THE RESEARCHERS ON CROSSING STREET

Guildmaster Arzan,

I hope you find these tissue samples as fascinating as we have. You have several days before the preservations spells would need to be renewed. I have also included chrysalid samples.

I think you can assume that we’ll be continuing our work at Crossing Street for the foreseeable future. Not only are there still many questions to be answered before we untangle the riddle of what was being done here, but Mistress Navanna has been delivering new artifacts for our study. Due to the demands, Master Aliastar has had us establish an additional laboratory.

The work is hard, but fascinating. I don’t know that we could sustain the long hours without the assistance of Master Grui’s arts.

                                                                                                Sathara

GM Background: Sathara is a Vladaam Researcher working at the Oldtown Apartments. The tissue samples come from a pain devil, while the chrysalid samples were taken from the nests of the venom-shaped thralls. Master Grui is a Vladaam alchemist who has been supplying draughts of Morpheus to help the researchers work long hours.

A GUIDANCE FROM RENN SADAR TO THE ARCHMAGE CRETAI

Cretai,

I am, of course, disappointed to learn that there’s no chance the Box of Shadows might have been placed within the Banewarrens before they were sealed, although I suppose it’s good not to have wasted the effort on a fruitless enterprise.

I’m also sorry to report that I’ve been unsuccessful in obtaining any of the crystalline research from the Eslathagos project for you. The oversight triad is being unusually secretive, one might almost suggest panicky. If you can think of anything that might influence Unirthorm, Rinirgen, or Kaeran Altarstone to loosen their lips, I do hope you’ll let me know. I can confirm, however, that the crystal lenses are a crucial lynchpin in the operation of whatever the technomantic devices seal the Spire.

Fortunately, this missive is not wholly dedicated to disappointments. In the immediate aftermath of Rehobath’s power play, the Inverted Pyramid suffered a paroxysm of panic and certain old archives were unlocked. Among these were journals of Peruun pertaining to the Divine Blight. The project was only briefly pursued before those fearing it might trigger the very return to the Days of Blood that others sought to guard against prevailed. During this time, however, I was able to secure copies of Peruun’s notes, which I have attached here. I wish you luck in unlocking the secrets of the Blight and look forward to reaping the rewards with you when that day comes.

Don’t forget that you owe me a cup of ale next time you see me at Danbury’s,

                                                                                                Lord Renn Sadar

The attached research notes pertain to an arcane energy, referred to as Divine Blight, which temporarily severs the connection of a priest to the Nine Gods.

The efficacy of the energy cannot be questioned, but mastering the Blight for practical applications — a targeted spell or an enchantment upon a weapon, for example — appears to be an unmet challenge.

GM Background: The box of shadows is described in Ptolus, p. 636. “Eslathagos” refers to Eslathagos Malkith, the Banelord (Ptolus, p. 79) and the “Eslathagos project” assumes that the Inverted Pyramid is involved with the exploration of the Banewarrens (as described in the Banewarrens adventure). Peruun is a founding member of the Inverted Pyramid, who in his latter years became fascinated by chaositech. He wrote a number of journals, some known and many lost, which were encoded with an arcane cipher designed to confound comprehend languages and similar spells.

Go to Part 14: Surveyor’s Guild

Archives

Recent Posts

Recent Comments

Copyright © The Alexandrian. All rights reserved.