The Alexandrian

Posts tagged ‘rpg scenarios’

This post contains material which will be added to Part 6C of the Avernus Remix.

In addition briefing the PCs on the parts she needs, Mad Maggie can provide them with some initial leads on where they may be able to find some of them. The alphanumeric hex references below are map coordinates from the hex map in Part 7B, which you can use to quickly identify where these leads can potentially take the PCs.

Astral Pistons: She’s heard that an oni named Malargan — the forgemaster of Kolasiah, a local warlord — has a set of astral pistons in his forge. (Hex A5)

Astral Pistons: Uldrak the Tinker, whose shop is based out of a titanic helmet located in the western end of the Plains of Fire, had a set of astral pistons in stock a few years back when one of Maggie’s riders (now dead) needed repairs for an antique warmachine. It’s possible he might still have a supply. (Hex D5)

Heartstone: Mad Maggie and Red Ruth (Hex B4) were part of a coven along with a third night hag named Gaunt Gella. Mad Maggie believes that Red Ruth killed Gella and stole her heartstone. Maggie suspects that Red Ruth is still located somewhere in Avernus, but she doesn’t know where. However, she has heard rumors that Red Ruth has been seen at Mahadi’s Emporium from time to time, and the PCs might check there for a lead to Red Ruth’s current location.

Note: “Gella” means “the one with the golden hair.” Consider having a quiet, emotional moment for Mad Maggie where she remembers the beautiful hair of her fallen friend. It’s up to you whether or not Red Ruth was actually responsible for Gella’s death.

Alternatively, Gaunt Gella was bald, but collected the heads of blonde mortals.

Nirvanan Cogbox: Nirvanan cogboxes are a modronic technomancy. Maggie has heard that a modron ship crashed on the shores of the Styx contra-Dis from Fort Knucklebones. (The ship is located in Hex H5, but it’s actually an elemental galleon from Eberron and does not have a cogbox.)

Design Note: At least three instances of each component have been seeded into the Avernian hexcrawl. (The Three Clue Rule waves hello.) In Part 7I: Avernian Rumor Tables, you will find additional rumors that can lead the PCs to these disparate sources.

Mad Maggie gives four leads, and she should give them all at once. She gives two different sources for one component, one possible source for a second component (although she doesn’t exactly know how to track that source down), and an incorrect location for the fourth component.

This spreads four experiences across these leads:

For one component, the PCs have two leads and can choose one. (Establishing the idea that they have multiple options for finding the components.)

For another, they’ll have to follow up their lead to figure out where they can actually find the component. (Establishing the idea that they’ll need to actively investigate to find these components.)

For the third component, they’ll discover a dead end and need to find a different way.

For the fourth component, they’ll have no lead at all. (Establishing the idea that this isn’t just a “do what Mad Maggie tells you” fetch quest; instead, they’ll be in the driver’s seat for figuring out how to obtain these components.)

With no additional explanation, simply receiving these four leads from Mad Maggie will teach the players a lot about the form, structure, and expectations of the Avernian hexcrawl.

Go to Remixing Avernus

Go to Part 1

I thought this would be the last set of these capsule reviews, in which my goal is to give a very high overview of my thoughts/impressions of each book, but I just recently discovered that Rhodarin Press has put out a whole suite of Avernus-related PDFs, so I’ll be taking a peek at those in the near future, too.

These reviews were written as part of my survey of Descent Into Avernus-related material on the Dungeon Masters Guild while working on the Alexandrian Remix of the campaign. Unless otherwise noted, the material has not been playtested.

You may also want to review this Guide to Grades at the Alexandrian. The short version: My general philosophy is that 90% of everything is crap, and crap gets an F. I’m primarily interested in grading the 10% of the pile that’s potentially worth your time. Anything from A+ to C- is, honestly, worth checking out if the material sounds interesting to you. If I give something a D it’s pretty shaky. F, in my opinion, should be avoided entirely.


Encounters in Avernus
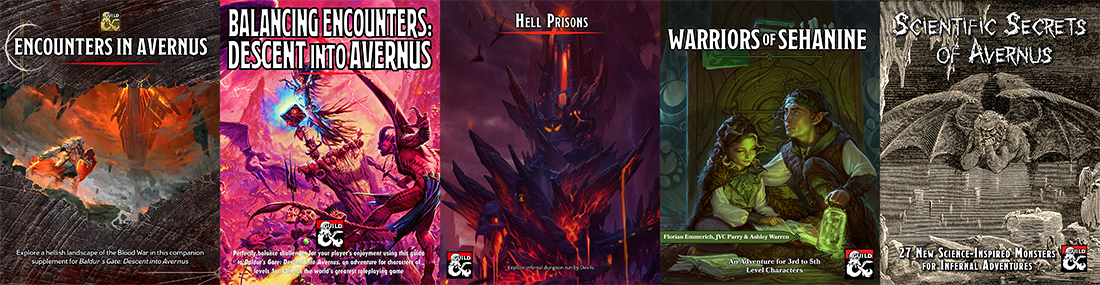
ENCOUNTERS IN AVERNUS: I’ve previously talked about how I found Baldur’s Gate: City Encounters to be a very disappointing offering in comparison to Waterdeep: City Encounters. I’m pleased to report that Encounters in Avernus – designed by M.T. Black, James Haeck, James Introcaso, Rich Lescouflair, Shawn Merwin, and Ashley Warren – is much closer to the Waterdeep volume in terms of its value and quality.

The book provides four categories of encounters: There are encounters for Avernus in general, encounters for characters near the River Styx, encounters in the city of Elturel, and also a pair of “encounter chains” which are more accurately light sub-plots you can work into your Descent Into Avernus campaign.

The proof is in the pudding here: I’ve incorporated the Elturel encounters into Part 5C of the Remix and you’ll find the Avernus encounters in Part 7H.

The weak point of Encounters in Avernus, for me, is the Styx-related encounters: The tone of these encounters are almost universally comedic. This is just NOT what I’m looking for in Hell, rendering the encounters worthless. (Nor is the humor, featuring stuff like bad puns, particularly good.)

Despite this, you’ll find a ton of value between the covers here and, given its inclusion in the Remix, I’m obviously recommending that every Descent Into Avernus DM snag a copy.

  • Grade: B-

Descent Into Avernus: Feathers of ZarielDESCENT INTO AVERNUS – FEATHERS OF ZARIEL: Feathers of Zariel is a seven-page PDF with one page of content and six pages of ads.

The basic concept is somewhat interesting: Feathers shed from Zariel before her fall are divine relics, a memory of what Zariel once was. If Zariel can obtain them, she can turn them into dark feathers, corrupting their powers just as she herself was corrupted.

Unfortunately, the execution is completely lacking. The items are ludicrously unbalanced and utterly fail to realize any of the interesting potential of their concept. The bait-and-switch of advertised page count also leaves a bad taste in my mouth.


Note: If you wanted to run with the concept of Zariel’s lost feathers (possibly they were all shed when she fell and scattered throughout Avernus), I’d combine that with the memory mystery of the Remix: Each feather might hold a shard of Zariel’s memory. If Zariel herself prizes them (either because she can transform them into dark artifacts or simply because she wants to secure her memories), they can give the PCs additional bargaining power if they meet her.

  • Grade: F

Blood of Avernus: An Expansion of Avernus' River StyxTHE BLOOD OF AVERNUS – EXPANDING THE RIVER STYX: This short “adventure” is simply not very good. The tone is set with incredibly poor proofreading and then continued with a rambling, largely incoherent style.

The central conceit reimagines the Styx into a living, demonic entity. Oaths can be sworn to this entity and if these oaths are broken, the Styx will inflict a curse on you. As far as I can tell, the general idea is that one or more of the PCs will swear such an oath and then break it. (How you’re supposed to arrange for that to happen is… vague.)

The avatar of the Styx lives in a cave located… somewhere?

The adventure consists of the PCs journeying to this cave, which is handled entirely as a series of random encounters. Once they reach the cave (which is not described), they can negotiate with the Styx to remove their curse.

  • Grade: F

Balancing Encounters: Descent Into AvernusBALANCING ENCOUNTERS – DESCENT INTO AVERNUS: This book includes entries for every single encounter in Descent Into Avernus and provides detailed scaling notes for those encounters based on the relative strength of your group.

Fewer players? More players? Lower level? Higher level? Powerful magic items? Stripped naked by a devilish encounter that went awry?

Balancing Encounters will put the encounter you need at your fingertips.

Those of you familiar with the Alexandrian will likely know I don’t put a lot of stock into hyper-precise encounter balancing. But the great range of support given here makes this book useful for far more than just chasing the false idol of the “perfect encounter.” (The introduction of the book actually talks about this.) In addition to providing broad adjustments to radically different groups, the high-powered encounters are also likely to prove useful for anyone wanting to transition to Descent Into Avernus from another adventure, like the approach described in From Waterdeep to Avenus.

  • Grade: B+

Hell PrisonsHELL PRISONS: Filp Gruszcyznski has created a really cool mythology in which Hell creates prisons that “purify” the lowly souls of the damned who would otherwise become lemures through torture so that they will “ascend” into more powerful devils for the glory of the Blood War. (And, since they exist, Asmodeus and Zariel use them for other purposes, too.)

Gruszcyznski then presents the Hell Prison in a modular format: He includes a sample prison for pick-up-and-play utility, but presents a whole bunch of plug-and-play components – rooms with different functions like Lairs, Prison Wings, Summoning Chambers – that can be combined and re-combined into different layouts to rapidly generate multiple prisons.

The presentation reminds me a little of the old Frontier Forts of Kelnore module from Judges Guild, which similarly presented the concept of ancient imperial border forts built to a common, but customizable plan which had also been turned to various uses (or fallen into ruins) over the centuries since the empire’s fall.

If there’s one thing I’d like to see from Hell Prisons it would be for each modular component to have more pre-built variations. A few of the chambers have this (for example, the Prison Wing has a list of different prisoners who might be held there), but it would be great if more or all of the chambers had 4-6 different variants.

But even without that, this is a really great little book that crams a ton of utility and reusability between its covers.

  • Grade: B+

Warriors of the SehanineWARRIORS OF THE SEHANINE: Warriors of the Sehanine is yet another adventure prominently advertised on the Dungeon Masters Guild as being for use with Descent Into Avernus which (you guessed it) has nothing to do with Descent Into Avernus. I’d ask why creators do this, but obviously it works: They have my money and they’re getting a review out of it.

As a module, this is pretty good: A black dragon with an interesting twist has assaulted the fortress of a druidic order. The PCs encounter refugees from the assault and are asked to journey to the fortress and save children who were trapped in the fortress when it fell to the dragon. When the PCs reach the fortress, they discover that other enemies of the druidic order have seized the opportunity to pursue their own agendas.

However, it’s not without shortcomings.

First, it has what I refer to as a pointless hexcrawl. There’s a hex map with several dozen hexes… only four of which have anything keyed to them. Either the PCs will have a map and the hexcrawl is virtually pointless (they are traveling to the fortress, not exploring the forest… which has nothing to discover even if they were exploring). Or the PCs don’t have a map and the assumed form of play is to… wander around aimlessly with the DM periodically saying “you see more trees” until they finally stumble into the correct hex that has the adventure in it? That seems like a poor experience.

Second, the map of the fortress is confusingly incomplete and also missing entries keyed in the text. It’s not incomprehensible, but you’ll definitely have to puzzle your way through it.

Third, the “I’m too wounded and need to recuperate, so you’ll have to go without me” is a gag that doesn’t work in D&D because the PCs will just cast a cure spell.

Fourth, the PCs have one goal: Rescue the kids. They might also decide that they also want to slay the dragon. Oddly both of these goals are keyed to areas directly OUTSIDE the entrance to the fortress, so the adventure kind of ends before it even begins?

However, these quibbles – while somewhat significant – are fairly easy to triage in practice. And there’s a lot of good, meaty material fleshing things out here.

  • Grade: C+

Scientific Secrets of AvernusSCIENTIFIC SECRETS OF AVERNUS: This collection of twenty-seven Avernian fiends is built on the gimmick that each monster is inspired by a cool scientific fact, with each entry actually citing a scientific study.

In truth the gimmick is a little thin, with most of the monsters seeming to be only slightly or tangentially related to the scientific source material. (Although it’s a good example of how you can find creative inspiration almost anywhere.) But the actual monsters have a pretty good hit rate, which is, of course, the key measure of value in a monster manual.

Some of my favorites in Scientific Secrets of Avernus include the cranium crabs (soul-devouring devil crabs using skulls as their shells), malebranches (canid devils who gather errant lemures and drag them in chains across Avernus), flesh-eating splendors (swarms born from the cursed flesh of a succubus that seek to destroy beauty), and the screaming ash elementals (which steal the voices of their victims’ screams).

  • Grade: B-

More DMs Guild Capsule ReviewsGo to the Avernus Remix

Descent Into Avernus: Zariel's Fall

Go to Table of Contents

Design Note: This post contains the revelation lists associated with Lulu’s Memory Mystery, including a lot of material that the PCs discover while exploring Avernus in Part 7 of the Remix. See Using Revelation Lists, for tips and tricks on how to make best use of these lists.

REVELATION LIST – ESSENTIAL

This revelation list features revelations I’ve deemed “essential” for the players to (a) have a comprehensive picture of Lulu’s missing memories and (b) fully comprehend and appreciate Zariel’s story (particularly any path through the Avernian Quest which includes returning or using Zariel’s Sword).

LULU MEETS ZARIEL:

  • Triggered Memory: Hearing Zariel’s Name
  • Zariel’s Bridge (Hex G5)
  • Questioning Mahadi

TRIAL OF ASMODEUS

  • Triggered Memory: Heated Argument With a Devil
  • Adjunct Court of Hell (Hex G1)
  • Asmodean Pillars (Hex A3)

FOUNDING THE CRUSADE

  • Questioning the Hellriders
  • Triggered Memory: A Gathering of Forces
  • Memory Dive: The Dream Machine

THE THREE GENERALS: YAEL

  • Questioning the Hellriders
  • Triggered Memory: Downed PC / Companion/ Ally
  • Memory Dive: The Dream Machine
  • Memory Dive: Vision From Torm
  • Questioning Lux Arakxis (Hex F2)

THE THREE GENERALS: OLANTHIUS

  • Questioning the Hellriders
  • Triggered Memory: Lulu Comes to High Hall
  • Memory Dive: Vision From Torm

THE THREE GENERALS: HARUMAN

  • Questioning the Hellriders
  • Memory Dive: Vision From Torm
  • Zariel’s Bridge (Hex G5a)

CHARGE OF THE HELLRIDERS: THIRD VISIT TO IDYLLGLEN

  • Questioning the Hellriders
  • Triggered Memory: A Magic Portal
  • Memory Dive: The Dream Machine
  • Memory Dive: Vision From Torm
  • Questioning Lux Arakxis (Hex F2)

CHARGE OF THE HELLRIDERS: BATTLE OF AVERNUS

  • Questioning the Hellriders
  • Triggered Memory: Downed PC / Companion / Ally
  • Memory Dive: The Dream Machine
  • Questioning Lux Arakxis (Hex F2)

ZARIEL FELL AFTER THE BATTLE OF AVERNUS

  • Memory Dive: Claiming the Sword / Vision From Torm
  • Questioning Haruman / Olanthius
  • Mirror of Mephistar (Hex I1)

LULU & YAEL SENT TO HIDE ZARIEL’S SWORD

  • Triggered Memory: Seeing the Styx
  • Triggered Memory: Yael’s Last Words
  • Memory Dive: Vision of Torm / The Dream Machine
  • Questioning Yael

LULU WANDERING: THE WANDERING EMPORIUM

  • Triggered Memory: Seeing Zariel’s Flying Fortress
  • Memory Dive: The Dream Machine
  • Questioning Agamemnova Hex (Hex F2)

LULU WANDERING: AT ZARIEL’S COURT

  • Triggered Memory: Seeing Zariel’s Flying Fortress
  • Questioning Haruman
  • Questioning Mahadi

LULU WANDERING: L’ZETH’S AMBUSH

  • Triggered Memory: Meeting Bitter Breath
  • Questioning Bitter Breath

Homework: In her wanderings in Avernus, Lulu could have visited any or many other locations in Avernus. You can add these to the revelation list (perhaps including triggered memories) to further flesh out Lulu’s back story, provide useful lore, or both.

REVELATION LIST – COOL STUFF

These additional revelations cover material from the Zariel/Lulu backstory that are significant, but not required for the Avernian Quest to make sense. Mostly I’ve created this list to properly distribute this lore throughout the campaign. Because these are non-essential elements, it’s not strictly necessary to follow the Three Clue Rule. (Although I generally have because it’s just good praxis.)

AVERNIAD

  • Memory Dive: Claiming the Sword
  • Sibriex (Hex E5)
  • Zariel’s Bridge (Hex G5)

ZARIEL’S LONG MARCH

  • Memory Dive: Claiming the Sword
  • Questioning Haruman
  • Sibriex (Hex E5)

FIRST VISIT TO IDYLLGLEN

  • Memory Dive: Claiming the Sword
  • Questioning Olanthius
  • Questioning Yael

SECOND VISIT TO IDYLLGLEN

  • Memory Dive: The Dream Machine
  • Questioning Olanthius / Yael
  • Random Encounter: Allip’s Secret

“DREAM A LITTLE BIGGER”

  • Memory Dive: Vision from Torm
  • Memory Dive: The Dream Machine
  • Questioning Olanthius / Yael

THE RECKONING: SIEGE OF DIS

  • Questioning Haruman
  • Mirror of Mephistar (Hex I1)
  • Random Encounter: Escort to Dis

THE RECKONING: ZARIEL’S IMPRISONMENT

  • Questioning Haruman
  • Mirror of Mephistar (Hex I1)
  • Zariel’s Bridge (Hex G5)

THE RIFT WAR

  • Questioning Haruman
  • Baron Barur Tolmanen (Hex F2)
  • The Rift Mound (Hex C2)

THE RIFT WAR: ZARIEL’S SECOND AVERNIAN MARCH

  • Questioning Haruman
  • Baron Barur Tolmanen (Hex F2)
  • Zariel’s Bridge (Hex G5)

THE RIFT WAR: ZARIEL BECOMES ARCHDUCHESS

  • Questioning Haruman
  • Baron Barur Tolmanen (Hex F2)
  • Zariel’s Bridge (Hex G5)

Go to Part 6D-H: Lulu’s Memories (The Four Memory Dives)

Descent Into Avernus: Mahadi's Emporium

Go to Table of Contents

These memories — identified by the associated trigger condition that prompts Lulu to remember them — are presented in no particular order. Be flexible with what will and will not trigger a memory: if it seems close enough that you can draw a clear parallel between what Lulu is currently experiencing and her memory, lean into that.

You might also decide that some other circumstance — something like significant trauma or just every time Lulu levels up — might be an appropriate trigger for a random memory. To that effect, I’ve included a random die roll on the trigger reference table below if you want to select the triggered memory randomly.

It’s not necessary for Lulu to recover all of these triggered memories. Don’t feel like you need to force them into play. In fact, triggering all of them might be overkill.

If you miss a trigger, it’s fine to just wait for the trigger to occur again. If the trigger would definitely not occur again, then it’s okay to just skip it. Memory is, after all, a fickle thing. (You might also flag such a “missed” memory to be used for a randomly triggered memory if you’re doing that.)

SHARING LULU’S MEMORIES

If Lulu is a PC, then implementing these triggered memories is relatively easy. (The only decision you need to make is whether to describe them openly at the table or just privately share them with Lulu’s player so that they can roleplay how they tell the other PCs about it.)

But what if Lulu’s an NPC?

The most direct solution is for her to simply describe the memories as she regains them. If you want to more directly describe them to the players as something experienced directly by their characters, there are a couple of options:

First, during the Vision from Torm, the god can — while impressing the import of Lulu and her lost memories — forge a connection between the PCs and Lulu. When a memory gets triggered, both Lulu and the PCs experience it. (This link might be between Lulu and the entire group, or it might only be between Lulu and the PC who put on the helmet and received the Vision from Torm.)

Second, Lulu is telepathic and abruptly recovering these memories is a traumatic mental experience. When a memory is triggered, she might involuntarily broadcast it. You might limit this broadcast to the PCs (i.e., she’s broadcasting to those she trusts and is friends with) or it might just be an open blast to anyone nearby (which could result in any number of unforeseen consequences depending on which NPCs happen to be within range at the time).

MEMORY TRIGGERS

d20Trigger
1Hearing Zariel's Name
2Heated Argument With a Devil
3Lulu Comes to the High Hall
4Downed PC / Companion / Ally
5Seeing Zariel's Flying Fortress
6Meeting Bitter Breath
7Seeing the Styx
8Yael's Last Words
9A Gathering of Forces / The Refugee Caravan
10Name or Holy Symbol of Lathander
11Being Imprisoned
12A Magic Portal

Hearing Zariel’s Name: “Zariel! That was the name of my angel!” Lulu remembers that the name of the warrior angel who was her friend was Zariel. She has a flash of Zariel’s beatific face smiling in dappled, silvery moonlight. “Fair met, Lulu. I am Zariel, solar of Celestia.”

Heated Argument With a Devil: Zariel is being held by a phalanx of winged angels, she is screaming at someone. Zariel wants to… testify? Someone is on trial. Zariel feels that justice isn’t being done. “Your betrayal, Ashmedai, cost us everything! No matter what this farce of justice ordains! No matter what Primus lets you get away with! I will speak my truth!”

Lulu Comes to the High Hall: Double vision of the High Hall and the old citadel that once stood atop the tor. When she passes through the doors, the vision will intensify and she will see Yael kneeling before Olanthius. Olanthius reaches down and offers Yael his hand, saying, “Speak to me of your Crusade, milady.” Yael responds, “Thank you, Lord Olanthius.”

Downed PC / Companion / Ally (someone Lulu has formed a meaningful connection with): Lulu remembers flying above a blasted wasteland of black rock and red sands. There was a woman on her back softly weeping. Below them a vast sea of devils surges in the opposite direction. She tries to fly even faster. Looking back, at the center of the converging mass of fiends she sees a beam of golden light shooting into the air. And at the center of the beam a beautiful, angelic women with white, bloodstained wings struggles against the mass that slowly overwhelms and quenches her light. The woman on Lulu’s back swallows her tears and says, “Turn and face what is to come and not what is behind. We must fly fast, my friend. We have far to go.” Yael… That was the woman’s name. Yael.

Design Note: If appropriate, this memory could be progressively triggered. For example, only the second time it’s triggered does Lulu remember that there was a woman on her back. And only on the third time does she remember the woman’s name.

Seeing Zariel’s Flying Fortress: Lulu has a double vision of seeing the flying fortress from a different angle (and possibly at a much closer distance). From this other angle, she’s been leashed with a length of grey, woven rope and is surrounded by a small band of people: A woman dressed entirely in animated, mulit-colored silk cloths that drift around her body. A pair of horned devils with pitch-black skin. Several scampering imps. A smiling, bearded man in silk robes with a jambiya blade thrust into a sash around his waist.

As the group approaches the fortress, a semi-circular silver platform slowly levitates to the ground. It appears to be operated by a bearded devil who stands near a copper pedestal. Lulu and her group board the platform and it begins to ascend back towards the fortress…

DM Note: This group is the entourage Mahadi led to gift Lulu to Zariel. (Note that in the Remix, Mahadi gifted Lulu himself, rather than merely selling her to anonymous devils.)

Meeting Bitter Breath: Lulu is being escorted by half a dozen devils across the red sands of Avernus. Zariel’s flying fortress hangs in the sky behind them. Lulu feels… drunk? Concussed? Confused, certainly. Like she’s viewing the world through a grey veil or haze. Time seems to rush by; or perhaps turgidly skips about. Descent Into Avernus: LuluThe flying fortress is gone now. But then, suddenly, there’s an explosion of black energy that utterly consumes one of the devils escorting Lulu. Over a reddish dune ahead of them, a pack of infernal war machines churns into view. An arcanist hangs precariously off the side of one of them slinging spells. The devils with Lulu are thrown into confusion, but try to take up some form of defensive position. One of them is run over by a war machine; smashed flat into the red dust in a smear of black ichor. A horned devil leaps from one of the vehicles and lands in a confused cluster of devils. Her tail whips out, tripping one of the devils and sending them crashing into the dust. She spears another on the end of her trident and laughs with joyful rage. “Tell Zariel that not one of her servants is safe from the vengeance of Bitter Breath!”

Seeing the Styx: A flash of memory. Lulu is riding on some sort of ferry steered by a dark-haired women. The woman has a large sword strapped to her back that glows softly with a golden light. They’re heading down river. The banks of the river are quite high, blocking Lulu’s view of the surrounding landscape. But from one bank comes a demonic howl. And then another. The howls are getting closer…

Yael’s Last Words: Yael’s last words to Lulu, as she sacrificed herself to raise the alabaster fortress, were, “All that’s left now is the dream.” If Lulu hears someone say something similar to that – e.g., “all we need now is the dream machine” or “all that’s left to do now is killing that devil” — she might have a very brief flash to a dark-haired woman saying, “All that’s left now is the dream,” before being swallowed up by an impossibly bright light that emanates from something held between her hands.

A Gathering of Forces / The Refugee Caravan: Lulu is in the form of a giant, golden-furred mammoth. Her angel is riding upon her back. They are at the head of a huge column of mounted soldiers, riding out of the gates of a city. The riders all wear a badge depicting twin suns — one larger than the other.

Name or Holy Symbol of Lathander: Lulu hears an impossibly loud trumpeting noise (that no other character can hear).

DM Note: Lulu is literally “hearing” the memory of her own trumpet, as she called out across the planes and had her prayer answered by Lathander. This effect might repeat upon repeated exposures to Lathander’s iconography, perhaps with the sound growing dimmer upon each repetition until it fades away.

Being Imprisoned: Lulu flashes back to the sensation of being entombed in a warm, spongy, moist substance. A reddish light slowly suffuses her surroundings. There’s a sense of pressure coupled to a desperate need to escape. Her limbs are lethargic, but she begins weakly thrusting against the pulpy mass which imprisons her. There’s a tearing sensation followed by a hot blast of dry wind. There’s something wrong with her vision… as if a red caul had been pulled across her eyes. But the light… the light is so bright…

A Magic Portal: Zariel is mounted upon Lulu in front of a swirling portal of red energies. They stand in a green field stained with blood. The portal is almost hypnotic. Lulu can’t pull her eyes away from it. Zariel cries out to someone that Lulu can’t see in the memory — shadowy shapes that are lost to her damaged mind. “He has taken one of our own! To rescue and to salvation! Charge!” Lulu leaps through the crimson portal…

DM: Not simply ANY dimensional travel, but specifically a portal. (This is not, therefore, triggered when the PCs are plane shifted to Avernus. But it’s likely to happen in the Grand Cemetery.)

Go to Part 6D-G: Lulu’s Memories (Memory Revelations)

Go to Table of Contents

LULU’S MEMORY MYSTERY

As we’ve discussed, recovering Lulu’s memories is a central pillar of the campaign: It is essentially the only way to recover the Sword of Zariel, and while the Sword of Zariel is not essential (in the Remix) it is certainly positioned as a major goal and resource.

Getting the Sword, it should be noted, is almost entirely procedural: Get the pieces for the dream machine. Strap Lulu into it. Ta-da! You get the location of the Sword of Zariel.

But if we take a step back, the real goal is to get the players invested in the True History of Zariel. The process of piecing together this enigma:

  • Provides a tantalizing mystery that will keep the players engaged with the campaign and eager to figure out more.
  • Creates a context for their interactions with the denizens of Hell (particularly the former Hellriders and others who participated in those events).
  • Builds a relationship (albeit by proxy) with Zariel, creating the emotional foundation for the campaign’s conclusion.
  • Elevates the procedural accomplishment of activating the dream machine by providing not only the location of the Sword, but simultaneously a sense of closure on Lulu’s story.

So how do we build this mystery?

Lulu’s Original Memories, the ones that she has when she first appears in the campaign, are our foundation. Structurally, these are the facts that we know the party will have at any given point in the campaign. Ideally, we’ll want enough chunks that the players can begin rampantly speculating about how they’re connected, but vague enough that no definitive answers are really possible. We can think of each chunk as a “catalyst,” in the sense that they give the speculations of the players material to react with (and will likely speed up that speculation, too).

Lulu’s Triggered Memories are the memories that she spontaneously regains, either semi-randomly or in response to specific stimuli. These will primarily be additional catalysts — they’ll be vague enough to mostly raise new questions, providing fresh fodder for the players’ theory-crafting. (The more of these the PCs gain access to, however, the more complete their understanding of Lulu’s history will become, making it easier to figure out how events relate to each other.) Some of these triggered memories, however, can also be rewards, providing definitive answers for some of Lulu’s experiences.

If the PCs follow the Sword of Zariel threads all the way to their conclusion, there will also be four Memory Dives. These are the Vision from Torm, the Dream Machine, Claiming the Sword, and Zariel’s Spark. Each allows the players to actually experience parts of Lulu’s and Zariel’s story.

There will also be Other Sources of information on Zariel’s history. (If we think of the mystery as primarily being the True History of Zariel, then we’ll also recognize that Lulu’s memories are just one way of achieving that goal!) These can include historical records, questioning the “surviving” Hellriders, etc.

Finally, we’ll organize all of this using Revelation Lists.

In doing so we will, of course, observe the Three Clue Rule. But we’ll want to use some special care here.

First, we want to structurally protect the memory dives. These should feel like big, momentous events with significant pay-offs for the effort the players have put into achieving them. We don’t want to “spoil” them because if they don’t reveal anything new, it’ll deflate the moment. Therefore, the memory dives should have:

  • Clear, definitive versions of events that could only be imperfectly understood before.
  • Lynchpin moments that could NOT have been learned previously.
  • Really mysterious, obscure versions of NEW events (i.e., new catalysts that can only be cleared up by future revelations).

This means we need to pace and position our revelation lists (and the clues in those lists) so that they set-up and pay-off the memory dives. We can actually think of each memory dive as a funnel, with certain revelations/clues positioned before the funnel and others generally not available until after the funnel. (It should be noted that the structure of the scenario more or less mirrors these funnels: For example, the PCs will almost certainly have the Vision from Torm before leaving Elturel; they won’t be able to journey to the Scab before the Dream Machine; and so forth.)

LULU’S ORIGINAL MEMORIES

Lulu is suffering from amnesia. Her first memory is of “waking up” in the red sands of the Avernian wastelands. (Although she only later learned that she was on Avernus, the First Layer of Hell.)

  • She wandered for an interminable period of time before coming to the River Styx.
  • She followed the River Styx out of Avernus, journeying through the Outer Planes.
  • After any number of adventures, Lulu passed through a portal and found herself in a place called the Nexus, a seemingly endless gothic castle filled with magical portals. There she met Niveral-Sca, the Mistress of Eternity. Niveral-Sca had iridescent skin that gleamed with serpentine scales, her pupil-less eyes gleamed with a golden light, and her small feet never seemed to touch the ground when she walked. Hearing Lulu’s story, she identified a portal that would return her to the world of the home she dimly remembered (see below).
  • Passing through this portal, Lulu emerged in Neverwinter in 1488 DR.
  • She made her way south from Neverwinter, eventually returning to the area around Elturel.

Lulu only has a few fragmentary memories of the time before her inexplicable amnesia. (These have returned to her slowly over time since she first woke up without any memory at all.)

  • Her strongest memories are of being friends with a beautiful warrior angel. She and the angel came to a city called Elturel and led an army of knights from that city on a charge into Hell itself. (Lulu doesn’t remember the actual battle, but assumes they must have lost and guesses that this is how she lost her memories. Having returned to modern Elturel, she now knows that these events must have taken place a long time in the past.)
  • Sometimes this feels like a magician’s trick: She remembers riding through the portals to Hell, seeing the plains of Avernus stretched out in front of her, and then… Everyone is gone and she’s on the Avernian plains all by herself.

Other fragments of memory include:

  • A silver beach beneath a pair of blue moons. (Sometimes she remembers her warrior angel being with her there.)
  • Flying over a vast, dark ocean. The water reflects a sky filled with diamond-like stars. In the black depths below, a huge whale seemingly made from golden motes of light swims.
  • Looking out a window made from gems set into silver and gold, across a verdant landscape where metallic dragons flit through the sky.
  • The taste of blood and fur in her mouth.
  • A busy marketplace carved from a cliff-face. She was speaking to a winged lion with the kind-yet-stern face of a man.
  • Flying over a boundless expanse of black, cracked basalt. A single-file line of strange, polyhedral-shaped creatures marches below, stretching from horizon to horizon.

Design Note: This can be used as either a handy reference for the GM and/or, if Lulu is a PC, given as a handout to her player. I also recommend empowering the player to flesh out any of the events that happened in Lulu’s life after she “woke up” in Avernus. (For example, they could make up any number of stories about her adventures along the Styx.) Check out Running the Campaign: Designing Character Backgrounds and Dragon Heist: Creating the Characters for how this type of player/GM collaboration on character backgrounds can work in practice (although the process is sort of inverted here).

DM’S INFO: The last few fragments of Lulu’s memory are mostly visions from the Seven Heavens of Mount Celestia. They are, in order:

  • The beaches of Mercuria.
  • Flying over the waters of Lunia (with a celestial whale in the depths).
  • Looking out the window of Bahamut’s Palace, also in Mercuria.
  • Killing a gnoll during the First Visit to Idyllglen.
  • The market of Heart’s Faith in Lunia.
  • The Great Modron March. (Not this one, though. The dates don’t line up.)

Go to Part 6D-F: Lulu’s Memories (Triggered Memories)

Archives

Recent Posts

Recent Comments

Copyright © The Alexandrian. All rights reserved.