THE DREAM MACHINE
The dream machine allows multiple subjects to be strapped into it and share the dreams of the primary subject. Lulu is the primary subject here, and the dream machine should allow her to dive into and recover memories that she has lost. Mad Maggie will encourage as many PCs as possible to join Lulu in the machine so that they can help her in recovering her lost memories.
Once everyone is attached to the machine, Mad Maggie will activate it (and will continue monitoring its activity from outside the shared dreamscape) while promising to pull them out if things get too rough.
SNIPPET – TUNING INTO LULU’S DREAMS: There’s a strange rushing sensation and/or sound (it’s difficult to differentiate one sense from another for a moment) and then all of the PCs open their eyes to find themselves with Lulu in an infinite, featureless white void.
- A moment of double vision: The PCs realize that they are looking out of each other’s eyes. (So PC 1 is looking out of PC 2’s eyes and is seeing themselves, for example.)
- They hear Mad Maggie’s voice cackling out of the white void all around them: “That’s odd! One moment!”
- There’s a high-pitched squeal, everyone’s vision blurs, and then they’re all looking out of the correct sets of eyes.
- Mad Maggie says: “That’s better! Now, give me just a moment to synchronize your soul-streams with the heartstone. [PC’s name] seems a little choleric.”
- As Mad Maggie adjusts the machinery, the white void slowly morphs or shifts or phases in and out of a sickeningly pink and fluffy landscape that slowly comes more and more into focus until it finally solidifies around the PCs… this is the inside of Lulu’s mind.
- Mad Maggie: “You should all be on the same beam now. This may hurt a little. I’m going to adjust the machine to harmonize with her Styx-tainted memories.”
- The fluffy pink landscape begins to undulate precipitously. It seems to accelerate unevenly in semi-random directions, rushing past the PCs and Lulu in a dizzying display. Then pieces of the pink fluff seem to either desiccate or decay; turning into faded brown patches or, in some cases, a dripping black sludge.
- The effect accelerates — more and more of the pink fluff turning into a sickening morass that swirls about the PCs in a whirl of multi-shaded black. PCs need to make a DC 13 Dexterity or Wisdom check to avoid having this black muck cling and stick to them. On a failure, they will suffer disadvantage on their first check in the vision.
VISION – THIRD VISIT TO IDYLLGLEN: The black sludge sloughs away to reveal a field of battle. It’s chaotic. The battle lines of Zarielite crusaders have met a ravening mass of gnolls and the front lines are a frantic melee. [PC’s name] is just dragging their sword free from the dead body of a gnoll.
- Lulu is nearby and Zariel is mounted atop her. But even in that moment of respite, Zariel cries out, “Lulu! Help hold the line here! I’m going to get a lay of the land!”
- As Zariel shoots straight up into the air, another clot of gnolls comes rushing down the hill.
Encounter: Zariel can be seen circling above. You might describe her occasionally diving down towards some distant part of the battlefield, only to reappear above on the next round.
- 4 gnoll fangs of Yeenoghu (MM, p. 163)
- 7 gnoll pack lords (MM, p. 163)
- 16 gnolls (MM, p. 162)
Second Round: A “gnoll” archmage strides to the top of the hill about 250 feet away. There’s only a 50% chance per round that it focuses its spellcasting on the PCs’ section of the battle. (You can describe other spells zipping off to blast away NPCs fighting to either side.)
- Use stats for archmage (MM, p. 343), with following changes.
- Damage Resistance cold, fire, lightning; bludgeoning, piercing, and slashing from nonmagical weapons.
- Damage Immunities poison
- Condition Immunities poison
- Senses truesight 120 ft., passive Perception 12
Wrap Up: At a time of your choosing (probably when the PCs are finishing off the gnolls in their immediate vicinity and/or when they’ve credibly threatened the archmage), there is a terrible trumpeting sound that echoes across the field of battle.
- It’s followed by a monstrous voice echoing through a bullhorn. It speaks Abyssal: “Cast off! Cast off! Demons of the Abyss, to arms! To arms! We ride for the flag of Yael! At Yael we strike!”
- On its next action, the skin of the “gnoll” archmage sloughs off, revealing a chitinous, winged, demonic form that takes to the air and flies towards the bullhorn’s command.
- “To Yael! To Yael we ride!”
SNIPPET – SECOND VISIT TO IDYLLGLEN: Just as the demon’s gnoll-skin sloughed away, the fields of Idyllglen begin to decay once more into that thick, black sludge.
- The PCs can hear the sound of something metallic being struck repeatedly; like a cheap gong.
- Mad Maggie’s voice from a distance: “Worthless junk! Worthless! Align you thrice-cursed pile of barlgura dung! Align, damn you!”
- The black sludge churns for a moment longer and then grows still. Just a black void that seems to press in on the PCs from all sides.
- Out of the darkness: “You’re no ogres! Identify yourselves!”
- There’s a blazing golden light: Lulu! Lit up as if golden flames danced through her fur! Zariel is astride her. The sudden light also reveals a small band of irregularly outfitted soldiers, led by a woman with long black hair. [Yael]
- Zariel says, “Know ye that I am Zariel! By the compact of old and in heed of your call, I return to you in your hour of need!”
- The woman smiles, walking forward: “I am Yael of Idyllglen. And we are sore pressed, milady.”
- Zariel dismounts and extends her hand, clasping Yael’s: “I am glad to you meet you, Yael of Idyllglen.”
Montage of Lost Conversations. There’s a horrible screech and the vision flies apart in tatters.
- Mad Maggie: “Hold on in there! One of the bile ducts has gotten wedged open!”
What follows are just fragments of conversation (the PCs may not even see all the speakers, who are indicated in brackets for the DM’s elucidation):
- “Yeenoghu has returned! He razes the settlements of the Winding Water!” [a messenger to Zariel and the Three Generals, precipitating the Third Visit to Idyllglen]
- Zariel: “Chazaqiel has betrayed all we believe in. You must see that! To Hell with her if that is what she wants, but we would break our oath to follow her!” [Zariel rallying those loyal to Heaven before her Long March during the Averniad]
- “Which of us do you think sees more clearly?” [Asmodeus, tempting Zariel to her fall]
- Zariel: “The demon lord flees before our wrath! And he has taken one our own! To rescue and salvation! Charge!” [Zariel unwittingly leading the Three Armies through the portal to Avernus]
- “My friend, you will find the aid of the Emporium to be all that you will ever wish.” [Mahadi, shortly before he splashes Lulu with water from the Styx]
- Zariel: “It may be madness. But will you join me?” Yael: “Aye. Let’s dream a little bigger.” [Yael and Zariel forming the Zarielite Crusade]
VISION – LAST STAND ON THE STYX: They hear Yael’s voice continuing to speak, but now it’s some sort of eldritch chant. It seems to pulling at them. Their vision begins to clear. They find themselves surrounded by a gentle undulation. Like the surface of a scrying pool, it shows them:
- Yael and Lulu onboard an infernal ferry sailing down a river [the Styx].
- The ferry has been hulled and is slewed to one side; it’s slowly sinking.
- They’re surrounded by demons. Lulu has just gored two of them with her tusks and, with a shake of her head, hurls them overboard.
- Yael is casting a spell. Her chanting voice is literally drawing the PCs towards it. They can resist this effect with a DC 14 Wisdom save if they choose to (in which case they remain in the undulating space for what follows, but can choose to leap through at any time).
Yael is casting a summon celestial spell (see Tasha’s Cauldron, p. 110). PCs who are drawn through the undulating surface of the vision actually become the Celestial Spirits she summoned that day. Yael says, “Well… it seems the gods can still hear us, even here.”
- Let the players choose whether they wish to be Avengers or Defenders (Tasha’s Cauldron, p. 110).
- Although they have the stat block of a Celestial Spirit, they use their own normal attack bonuses and have their own physical appearance, but with golden, glowing skin and hair that seems to be made from pure light.
- If Lulu is a PC, she’ll assume the role of her former self.
Shortly after the Celestial Spirits arrive, Yael calls out to Lulu: They’re losing the ship! They need to flee back into Avernus to escape the demons tracking them from the Abyss! Yael flies off on Lulu’s back, leaving the Celestial Spirits to cover their retreat.
Encounter. This is not an encounter designed for the PCs to win. (If they do, great. End it there.)
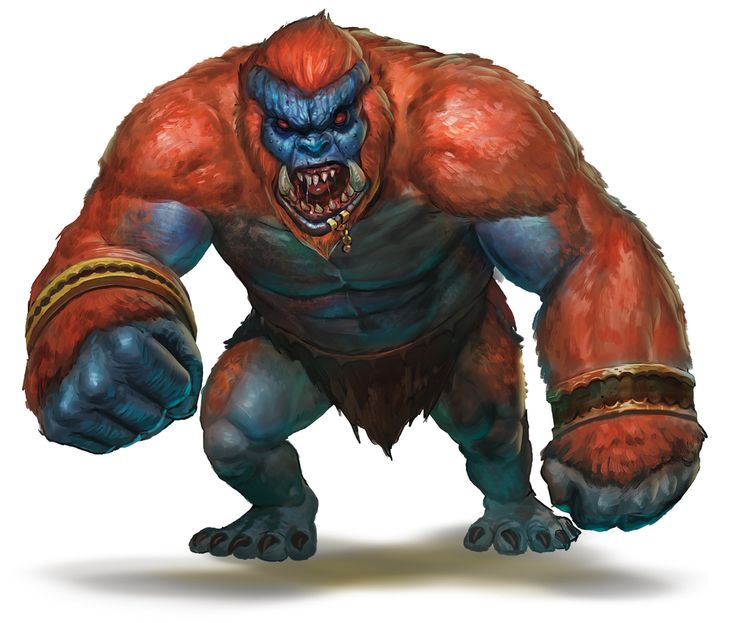
- 2 shadow demons (MM, p. 64) + 4 barlgura (MM, p. 56) on the ferry
- 8 barlgura on the shore; 1d4 leap onto the boat each round
- 4 glabrezu (MM, p. 58) on the shore, shouting orders to the barlgura (they’ll come across at an opportune time)
- A flock of 8 vrock (MM, p. 64) on the shore next to the glabrezu, some of whom take off and pursue Lulu and Yael (send all of them if Lulu is player-controlled) while the rest continue assaulting the boat
Wrapping Up. This vision ends when the Celestial Spirits have been overwhelmed or, against all odds, destroyed the demonic war party.
SNIPPET – LULU CROSSING AVERNUS: As the PCs return to the undulating place, they see Lulu and Yael flying low across the Avernian wastelands.
There’s a kind of “glitch” and then it’s just Lulu flying by herself. The glitch repeats, and Lulu the War Mammoth is replaced by Lulu the Cute Little Elephant. Another glitch and now it’s Yael walking alongside the Cute Little Elephant.
DM Note: Lulu’s many, fractured memories of wandering Avernus are getting mixed up.
VISION – LULU & ZARIEL IN MERCURIA: There’s a final glitch as they see Lulu the Cute Elephant again, flying across the red sands of Avernus. The hue of the sands slowly shifts to a silverish color as the skies above darken and fill with a cascade of diamond-like stars shining bright.
The vision of Lulu fades away and they find themselves on a beach, the wine-dark waves gently lapping a beach of gleaming silver sand.
Arranged on the beach are eight pairs of frozen figures: Each pair is the same two figures in different positions and poses. Lulu (in her “fuzzy war mammoth” form) and Zariel, talking to each other.
Vignettes. The pairs of figures remain frozen until one of them is touched. Touching a frozen vignette causes it to come to life, playing out a brief snippet of the long-ago conversation between the two friends.
DM Tip: If Lulu is a player character, you could give her the script for each vignette to play out her historical part with Zariel.
Vignette #1 – Planning to Return: Zariel is standing, staring up at the stars. Lulu is curled around her feet.
- Zariel: I look out across the vast gulfs of the multiverse, and I am the sick for the need of change.
- Lulu: If change is what you’re looking for, then you’ll need to look somewhere new to find it.
- Zariel: It’s these mortals. Speaking with them – feeling the heat and fleeting speed of their passion – has aroused in me the truth. We may be eternal, but they are not. And if we fail them, our eternity makes the failure even greater.
- Lulu: Could mortals truly make such a difference in your heart?
Vignette #2 – The Disaffected Angels: Zariel wading through the waves.
- Lulu: And when the infinite forces of the Abyss sweep down upon us?
- Zariel: Then we will fight! [she laughs] But, no. Once a beachhead exists, others will flock to our cause. I am not the only disaffected angel! Give them but a chance, and they will seize it!
Vignette #3 – Dream a Little Bigger: Lulu and Zariel standing side by side, looking up at the stars.
- Lulu: From the Powers of Heaven? You’re certainly following her advice! Your dream is impossibly large!
- Zariel: Perhaps. But we’ll dream it together?
- Lulu: Forever.
Vignette #4 – What Army? Zariel and Lulu sitting on the beach facing each other.
- Lulu: You already have an army!
- Zariel: [after a moment’s confusion] You mean Yael?
- Lulu: And her militia. Yes!
- Zariel: That’s a force for bandit ogres, not demonwars!
- Lulu: But it could be!
Vignette #5 – Secrets from Heaven: Lulu and Zariel sitting on a log side by side.
- Zariel: They will not appreciate having their hand forced.
- Lulu: Then we must keep it a secret.
- Zariel: For as long as we are able.
Vignette #6 – Mortal Army: Zariel petting the top of Lulu’s head.
- Lulu: Then it will be a crusade.
- Zariel: A crusade of the valiant, whose courage shall never be broken!
Vignette #7 – Giving the Mortals a Chance: Zariel hovering a few feet off the ground, her wings spread wide. Laughing. Lulu looking up at her.
- Zariel: They have! They have made all the difference! … And perhaps that is the key. From eternity nothing can change, but if the mortals are given a chance…
- Lulu: What sort of chance?
- Zariel: To fight! To take up swords and say that their destiny is their own! That they’re no longer children! That they will no longer stand idly by while gods and godlings waste eternity!
Vignette #8 – The Second Front: Zariel is sketching something in the silver sand with her finger; Lulu is hovering in the air, looking down over her shoulder.
- Lulu: But to what end?
- Zariel: To disrupt the balance! Demons vs. devils. Heaven vs. Hell. The Great Wheel is a trap. It turns, but never ends. We will break the wheel.
- Lulu: How? Where?
- Zariel: The Blood War. The Powers of Heaven refuse to intervene – to break an eternal cycle endlessly consuming mortal souls. But if we created a second front – if we broke the balance – that might be all it would take.
SNIPPET – JANDER’S BETRAYAL: Zariel is astride Lulu and General Yael is beside them on her black charger. The battle flags of Yael’s crusaders are nearby. They stand atop a small rise on the Avernian plains surrounded by a vast array of soldiers.
Zariel: The demon army is buckling under Olanthius’ assault. I think Haruman may be able to catch them in a pincer and end Yeenoghu’s terror for all time.
Yael: I agree. As long as my army holds strong, we can keep the devil army engaged until their bloody work is done.
At that moment, a desperate trumpet sounds out across the battlefield. Zariel, Yael, and Lulu jerk their heads around.
Yael: I gave no order!
Lulu: What’s happening?
Yael grabs ahold of Lulu’s fur and shouts, “Fly! We need to see!”
Lulu launches into the sky, carrying both Yael and Zariel into a formation of pegasus-riding Crusaders.
Yael: Report!
Pegasus Rider: Sunstar’s platoon has sounded a retreat!
Yael: What?
Pegasus Rider: The call is spreading!
Looking down, they can see that a huge section of Yael’s army is peeling away towards the large portal through which Yeenoghu led the Crusaders to Avernus. Small units from other sections of the army – including some from Haruman’s and Olanthius’ armies – are following.
Zariel: What has he done?
Insight (DC 12): Zariel is in despair. She’s lost. Uncertain. Doesn’t know what to do. Her hope is breaking.
Another Pegasus Rider: What should we do?
Insight (DC 12): Yael sees Zariel’s despair and for a moment it washes over her. She, too, is losing hope. And then a steely strength seems to enter her eyes; her back straightens.
Yael: Send a messenger. Order Jander to turn back. Then rally the rest of the reserve! We’re going to charge the devil army! We have to keep them off Haruman’s back!
The doubt vanishes from Zariel’s eyes.
Zariel: The rest of you form up on me! We’ll need to intercept those flying devils! Keep them off the riders below!
Yael lets go of Lulu and plunges back towards the army waiting below.
Mad Maggie can be heard again: “What was that? One moment, the cogbox is rattling up a storm.”
Following Zariel’s orders, the pegasi begin gathering into a three-dimensional formation above the battle.
Mad Maggie: “The cogbox is resonating with something in there! A powerful memory! Hang on! I’ve got a shifter around here somewhere!”
There are rattling noises. The sound of metallic items being thrown around.
The pegasi are now in formation. Zariel’s eyes drift to the portal, where Jander Sunstar and the Hellriders are fleeing back to the mortal plane.
They aren’t turning back.
The portal snaps shut.
Zariel orders the charge.
Mad Maggie: “I’ve got it!” A screeching sound of metal on metal.
SNIPPET – THE BLOODY CYST: The memories glitch. You’re back a few moments earlier. Yael is still clinging to the side of Lulu. “We’re going to charge the devil army!!”
The memory glitches. Repeats. Yael is clinging to Lulu’s fur. “We’re going to—”
Mad Maggie: “Turn you bastard!”
The memory glitches. Repeats. She lets go and begins to fall… and fall… and fall…
Mad Maggie: “There it is!” The sound of a clutch box screeching, and then gears slamming into place.
The battlefield melts away beneath Yael. The memory reshapes itself.
Yael stands next to Lulu in the Avernian wastelands. They’re alone. Yael slumps against Lulu’s side, clutching her fur to stay on her feet. She’s looking toward the horizon: There’s a huge cloud of dust. Some massive force is approaching.
She turns and looks in the opposite direction. A cluster of black spots can be seen in the distance. They’re far away, but Lulu’s sharp eyes can see them: Demons. And they’re getting nearer.
Yael: It’s done. There’s no place left to run.
Lulu: There has to be something we can do!
Yael: There is… Do you trust me, Lulu?
Lulu: To the very end.
Yael draws the Sword of Zariel. It bursts with golden, divine light. A beacon which seems to call out a challenge to the approaching forces of evil.
Yael raises the Sword high above her head. “To all the Gods of the Seven Heavens, I plead for your aid! In the name of Zariel, Solar of Celestia. In the name of Yael of Idyllglen. In the name of the mortal souls who have died in this noble cause! I beg a boon to fulfill the final wish of a dying angel! I beg you not to forsake the greatest and most daring of your warriors!”
Lulu rears back on her hind legs, raises her trunk, and trumpets. The sound is deafening, yet simultaneously soothing. You can feel the hollyphant pouring her own celestial essence into Yael’s call, the sympathetic resonance of her trumpet echoing across the Avernian plains as she drives Yael’s plea across the planes.
And there was an answer.
Not a voice perhaps. But a presence. Riding Lulu’s trumpet back across the planar boundaries.
“Lathander…” Yael murmurs. “Thank you.” And then she plunges the sword down into the rocky surface of the Avernian wastelands. There’s a huge burst of holy light.
Lulu cries out. “Yael! No!” She can feel Yael poruing her own life force into the gift Lathander had offered.
Yael looks up at Lulu and smiles. “All that’s left now is the dream.”
The light intensifies. It’s a blinding blast that never seems to end.
But then it does. Rising from the ground – from the confluence of holy might and mortal sacrifice – is an alabaster fortress. Here the Sword will be protected. Here the Sword will be safe.
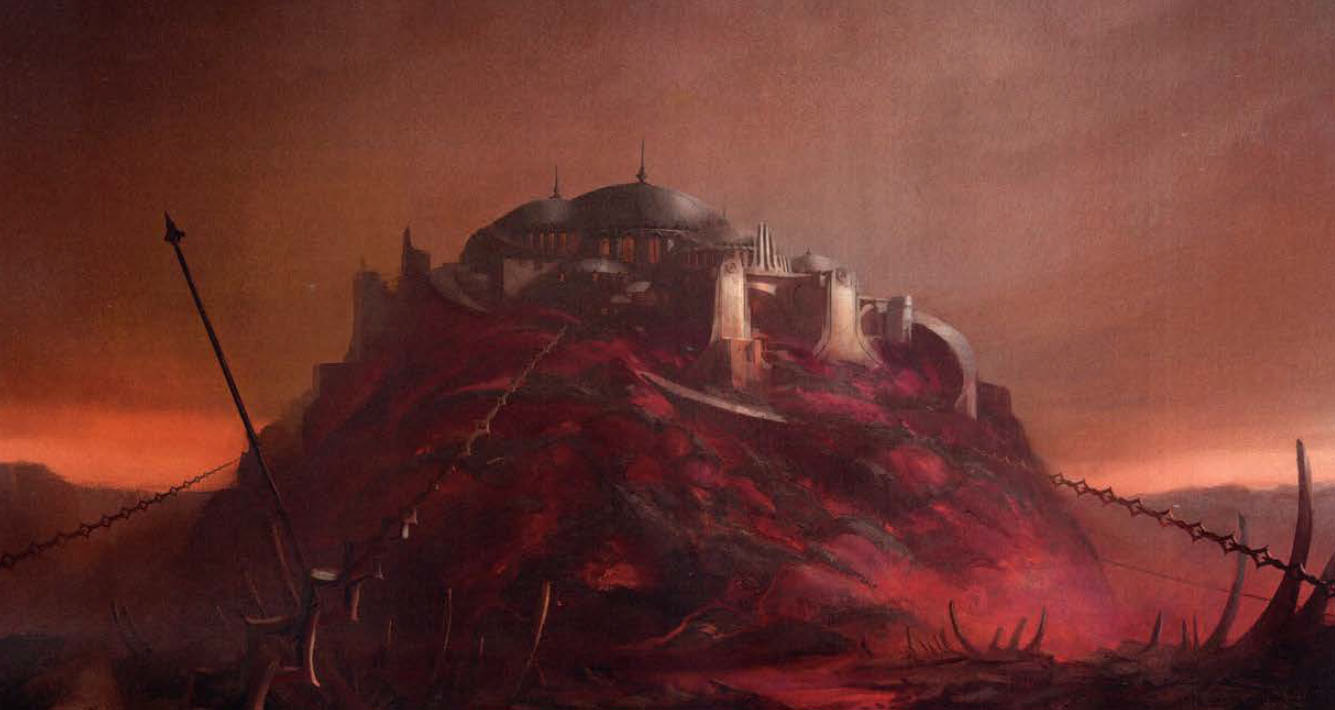
But the skein of Avernus itself rebels at this holy touch. The wastelands seethe and boil in a pustulential eruption. A cancerous, bloody cyst surges upwards, engulfing the fortress, Yael, and Lulu herself.
Note: This final vision reveals the location of the Sword of Zariel to the PCs, which is within the Bloody Cyst (Hex F4).
It is very likely that the PCs will have seen the Bloody Cyst before this: It’s positioned in Hex F4 because (a) characters crossing the bridge in Hex G5a will likely run into it and (b) this also makes it a convenient landmark for NPCs to use while giving directions. (One of my patrons also recommended that Mahadi’s Emporium could be camped out at the base of the Bloody Cyst at some point.)
So the intention here is that the players will be able to say: “Holy crap! The Cyst? We know where that is! We’ve walked past it like a dozen times!”
If not, that’s okay: Lots of people in this area of Avernus know the location of the Bloody Cyst and can point the PCs to it if they start describing it and asking for directions.