The Alexandrian

Archive for the ‘Roleplaying Games’ category

Storm King's Thunder: Hekaton's Imprisonment - Wizards of the Coast

Go to Table of Contents

ANALYZING THE REVELATION LISTS

With the published revelation list from Part 2 in hand, we can use it to quickly assess weak points in the campaign. And there are obviously some things that immediately jump out at us.

First, though, I should say that I was somewhat surprised by how robust this revelation list appears to be. You can see that a lot of these revelations are flush with clues. Certainly more than I had initially thought when simply reading through the campaign book.

However, the word “appears” is somewhat key here.

The thing to note is the lack of variety in the clues. Notice how many of them are some form of Question a Giant. This creates two problems.

First, a lack of variety in your clues can result in a flat and uninteresting investigation. You can see how the primary experience of this campaign could easily boil down to, “Talk to a giant. Talk to another giant. Talk to another giant. Talk to another giant. Talk to another giant.”

Second, and more importantly, this uniformity is a hidden form of fragility. The Three Clue Rule states that for any conclusion you want the PCs to make, you need to include at least three clues. And, technically, talking to a giant in Bryn Shander, talking to a giant in Helm’s Hold, and talking to a giant in Port Llast are three different clues.

But the function of the Three Clue Rule, ultimately, boils down to redundancy. Because these clues are all identical in form (you have to question a giant), they can all fail in the exact same way (the players don’t question a giant). Maybe the players never even consider the possibility of questioning a giant. Or maybe one of the PCs is a dwarf who has sworn an oath of vengeance on giant-kind (a reasonable character concept for a campaign pitched as “take the fight to the giants’ doorsteps!”) and will never take a giant prisoner. There are lots of possibilities, just as there are for missing any clue. The point is that the number of clues in these cases may only offer an illusory robustness.

We can see the effect here clearly, I think, if we look at the Phase 5 revelation lists after removing all forms of Questioning a Giant:

PHASE 5 – DEN OF THE HILL GIANTS

  • Eye of the All-Father, p. 151. Oracle gives them directions.

PHASE 5 – CANYON OF THE STONE GIANTS

  • Eye of the All-Father, p. 151. Oracle gives them directions.
  • Silixia (Grayvale), p. 88. This young brass dragon will point the PCs towards Deadstone Cleft.

PHASE 5 – BERG OF THE FROST GIANTS

  • Eye of the All-Father, p. 151. Oracle gives them directions.

PHASE 5 – FORGE OF THE FIRE GIANTS

  • Eye of the All-Father, p. 151. Oracle gives them directions.
  • Track Triboar Raiders (Triboar) p. 60.
  • King’s Request (Citadel Adbar), p. 78. King Harnoth asks the PCs to raid Ironslag.
  • King and Queen’s Request (Citadel Felbarr), p. 79. King Morinn and Queen Tithmel ask the PCs to raid Ironslag.
  • Questioning Drow Raiders (Gauntlgrym), p. 85-86. Drow thieves from Ironslag can be caught in Gauntlgrym.

PHASE 5 – CASTLE OF THE CLOUD GIANTS

  • Eye of the All-Father, p. 151. Oracle gives them directions.
  • Random Encounter, p. 69. The PCs see Lyn Armaal flying above them.

In a single glance we can immediately see that only the Forge of the Fire Giants remains robustly supported by the Three Clue Rule, and the fragile funnel through the Eye of the All-Father is also obvious.

ANALYSIS: THE ENDING

Looking at the full revelation list, the other thing that’s obvious is that the end of the adventure doesn’t work.

The clear intention is that the PCs are supposed to unveil the conspiracy between Iymrith, Mirran, and Nym. But, as far as I can tell, there’s really no way for them to discover that conspiracy (other than blindly asking the oracle).

Furthermore, the final sequence of the campaign — making an alliance with Serissa, tracking down the Morkoth, rescuing Lord Hekaton, and then raiding Iymrith’s lair — is strung together by only the thinnest of threads. It’s easily broken, literally leaving the campaign at loose ends.

This is all exacerbated by another problem with the ending, one which is not specifically revealed by the revelation list: The central goal of the campaign is “stop the giant attacks.” The rescue of Lord Hekaton and the death of Iymrith is explicitly presented — structurally, textually, and diegetically to the characters — as the way to achieve this.

But… it doesn’t.

The root cause of the giant attacks is that the Ordning was broken. That happened before Hekaton was kidnapped and has nothing to do with the woes of the Storm King’s court or the machinations of Iymrith. So… yeah. Logically, there’s no reason that saving Hekaton or killing Iymrith would resolve that problem.

This is basically confirmed by the “Adventure Conclusion” section on page 230 of Storm King’s Thunder, which more-or-less says, “We ran out of pages. There is no conclusion.”

The first problem, obviously, is that the adventure doesn’t have an ending.

The second problem, though, is that it’s obvious from the beginning that saving Hekaton won’t logically solve the problem the PCs are trying to solve. This makes it incredibly difficult (bordering on the impossible) to motivate the PCs to do any of that. This plays a large role in why the end of the adventure is so tattered. It’s really difficult to design clues pointing to a conclusion when the conclusion doesn’t make any sense.

REVISING THE REVELATION LISTS

To fix these problems, we just need to revise the revelation list — fleshing it out with additional clues that will make the scenario more robust.

Before we do that, however, there are two big questions we should answer.

First, do we want to maintain the funnel through the Eye of the All-Father?

My personal predilection is to say no.

The structure doesn’t really make a lot of sense in terms of the game world. These giant raids are happening all over the place and are kind of a big deal. (If you’ll pardon the pun.) It doesn’t really seem logical that the PCs are supposed to seek out a hidden temple in order to figure out anything substantive about why the raids are happening or where the threat is coming from.

The structure is not particularly interesting in its own right. In fact, almost the opposite is true. In Phase 3 of the campaign the PCs are motivated to go traveling through the Savage Frontier, scooping up a variety of leads as they go that motivate further travel. But because, with one esoteric exception, the campaign is designed to funnel the PCs through Harshnag (who shows up as a “random” encounter on p. 118) to the Eye of the All-Father, none of these leads actually go anywhere. As a result, the campaign kind of just spins its wheels.

You can certainly improve this by including more clues leading to the Eye of the All-Father, but (a) such clues are easier to justify seeding into the giant lairs and (b) it’s probably more effective to ditch the funnel, let the PCs investigate the various giant factions independently, and then include the Eye of the All-Father as an additional (and very powerful) resource in continuing those investigations.

Second, how do we fix the fundamental problems with the ending?

There’s really two parts to this. First, the structure of the mini-arc around the Storm King’s court (identifying the Iymrith conspiracy, tracking down the Morkoth, rescuing Lord Hekaton, raiding Iymrith’s lair) needs to be made more robust in its own right, with a fully functional revelation list that adheres to the Three Clue Rule.

Second, there’s the more fundamental problem of the campaign not actually providing a conclusion that ends the giant violence.

The easiest solution to this problem would be to revise the premise of the campaign to match its actual structure. As written, Storm King’s Thunder ends when Lord Hekaton is returned to his throne and vengeance has been taken on the conspirators who betrayed him. If we want this to be our conclusion, then we simply need to set things up so that this outcome does, in fact, end the violence.

In other words, the giant attacks are caused by Lord Hekaton’s disappearance, so that his return logically brings them to an end. And we can do this by either (a) having the All-Father break the Ordning due to Hekaton’s disappearance or (b) skipping the whole concept of the Ordning and just having the giants out of control because Hekaton’s court is in disarray and no longer able to control them.

As noted, this is easily done. (It’s at least 99% accomplished by just remembering that the Ordning was now broken when Hekaton disappeared and having the various giant factions report things accordingly.) I think the drawback, however, is that “the king is dead, so everything is chaos” is just metaphysically much less interesting than the deeper and more profound upending of the giants’ social order by the All-Father.

The other option, therefore, is to re-align the ending so that it syncs up with the existing lore. Broadly speaking, I see two possibilities here:

  • The PCs systematically eliminate every giant threat; or
  • The PCs help one of the giant factions achieve victory in the new Ordning, ending the conflict.

The first approach can be crudely achieved by going from one giant lair to the next and stabbing giants in the face until there are no more giants, but I think there are both aesthetic and practical problems with this. The short version is that it’s difficult to really take the giant threat seriously if it can be trivially solved by five people acting alone.

This is something a lot of narratives — particularly “chosen one” narratives — get wrong. To understand why, consider two examples that get it right: Star Wars and The Lord of the Rings. Luke, Han, Leia, Chewbacca, and the droids can all be absolutely essential to the rebel victory, but if the Death Star was just blown up by the Millennium Falcon flying solo (pun intended), the stakes would immediately collapse. The same would be true if there were no armies in Middle Earth and Frodo and Sam could just walk up to Mt. Doom unaided and defeat Sauron. In both cases, the heroes are larger than life because they are the essential lynchpins in a much larger effort.

The final conclusion from all this, ultimately, is that the PCs will need to (a) figure out how they want to solve the problem and (b) start forming alliance(s) to make that happen. The good news is that, whatever course they decide to chart for themselves, we’ll probably be able to handle it through a common structure.

We’ll come back to that. Let’s start by revising the revelation lists leading up to that conclusion.

Throughout these revised revelation lists, I will be providing a description of how the lead should be integrated into the campaign. You may still need to figure out exactly how to do the final implementation, and I do recommend incorporating these clues into your prep notes for a location/scenario so that they don’t need to be cross-referenced from the revelation list.

Go to Part 3A: The Three Cities

Storm King's Thunder - Wizards of the Coast

Go to Table of Contents

In Part 1 we broke down the overall structure of Storm King’s Thunder. To briefly recap:

  • Phase 1: Nightstone.
  • Phase 2: The Three Cities, in which the PCs go to Bryn Shander, Goldenfields, or Triboar (which is subsequently attacked by giants).
  • Phase 3: The Savage Frontier, a pointcrawl in which the PCs journey across the North.
  • Phase 4: Eye of the All-Father, in which the PCs recover giant artifacts stolen by Uthgardt barbarians in order to convince a powerful oracle to give them guidance.
  • Phase 5: The Giant Lairs, in which the PCs raid one or more giant lairs to gain the magical artifact they need to teleport to Maelstrom (the court of the storm giants).
  • Phase 6: Finding Hekaton, in which the PCs rescue the king of the storm giants and then hunt down Iymrith in its lair.

Once we understand the structure of the campaign, we can analyze it.

Looking at the totality of Storm King’s Thunder, it’s fairly clear that the pointcrawl is largely non-essential. (This should not be understood to mean that it’s bad or that it shouldn’t be part of the campaign. If our adventures were only made up of what was structurally essential, they’d be pretty dreary and uninspiring affairs.) While the pointcrawl in Phase 3 makes the world feel alive and can be a good way to deliver additional leads to make the scenario more robust, ultimately the campaign requires the PCs to follow the node-based scenario into the funnel that will take them to Phase 4.

So the primary focus of our analysis will be the node-based structure of the campaign, and we can do that by looking at the revelation list.

Because of the auxiliary pointcrawl, it should be noted that there are a number of leads in the campaign pointing to “non-essential” nodes. Their function, as we’ve noted, is to keep PCs moving through the Savage Frontier so that they can continue triggering pointcrawl content. We won’t be including all of these leads in the list below, instead focusing on the campaign-essential revelations and the clues that point at them.

REVELATION LISTS AS PUBLISHED

PHASE 2 – BRYN SHANDER

  • Morak’s Quest (Nightstone), p. 31. Morak sends the PCs to Markham Southwell in Bryn Shander to tell him that his sister is dead.
  • Blod Stone (Berg of the Frost Giants), p. 156 & 165. This magical artifact points towards the nearest blood relative of Artus Cimber, which is currently Sirac of Suzail in Bryn Shander.

PHASE 2 – GOLDENFIELDS

  • Morak’s Quest (Nightstone), p. 31. Morak sends the PCs to tell Miros Xelbrin in Goldenfields that his parents are dead.
  • Escorting Ghalvin Dragonmoor (Den of the Hill Giants), p. 144. Freed from the hill giants, Ghalvin asks the PCs to escort him back to Goldenfields.

Note: I’m including Ghalvin Dragonmoor here for completeness, but it doesn’t completely hold up. The function of this revelation is to put the PCs in Goldenfields to experience the hill giant attack. If they’re rescuing Ghalvin, they’ve probably devastated or destroyed the hill giants, making the attack on Goldenfields potentially unlikely. (Although in certain circumstances you might be able to recast it as the hill giants coming to Goldenfields in pursuit of the PCs.)

PHASE 2 – TRIBOAR

  • Morak’s Quest (Nightstone), p. 31. Morak sends the PCs to tell Darthag Ulger’s ex-wife, who lives in Triboar, that he was killed.

Note: As written, the DM is supposed to only give the PCs one of Morak’s Quests (essentially choosing which of the three Phase 2 cities they’ll go to).

PHASE 4 – EYE OF THE ALL-FATHER

  • Claugiyliamatar (Kryptgarden Forest), p. 96. If the PCs enter Kryptgarden Forest, the green dragon flies out of her lair and informs them the Eye of the All-Father can tell them “what must be done to end the giant menace.”
  • Harshnag (Proactive Node: Harshnag), p. 118. If the PCs “randomly” encounter Harshnag, he tells the PCs they should consult the oracle to “learn how best to end the giants’ threat to the North.”

Note: Claugiyliamatar lies at the end of a short quest line which originates in Goldenfields (p. 52). Naxene Drathkala sends the PCs to a dragon expert in Waterdeep, who then sends them to the Kryptgarden Forest to look for the green dragon.

PHASE 5 – DEN OF THE HILL GIANTS

  • Eye of the All-Father, p. 151. Oracle gives them directions.
  • Questioning Giant Raiders (Goldenfields), p. 51. PCs can intimidate the giants to lead them back to their home base.
  • Questioning Giant Pillagers / Ogres (Random Encounter), p. 70 & 71.
  • Questioning Giant Raiders (Uluvin), p. 112.
  • Questioning Moog (Random Encounter – Old Tower), p. 116-17.

PHASE 5 – CANYON OF THE STONE GIANTS

  • Eye of the All-Father, p. 151. Oracle gives them directions.
  • Silixia (Grayvale), p. 88. This young brass dragon will point the PCs towards Deadstone Cleft.
  • Questioning Giants of Grayvale Run (Grayvale Run), p. 88. This is not indicated as a lead in the text, but these giants are from Deadstone Cleft.
  • Questioning Giants in Llorkh (Llorkh), p. 96. This is not indicated as a lead in the text, but these giants are from Deadstone Cleft.
  • Questioning Zorkh (Orlbar), p. 103. Mute stone giant can point characters towards Deadstone Cleft.

PHASE 5 – BERG OF THE FROST GIANTS

  • Eye of the All-Father, p. 151. Oracle gives them directions.
  • Questioning Bryn Shander Raiders (Bryn Shander), p. 41-42. This is not indicated as a lead in the text, but these giants are from Svardborg (and could also be tracked back to their ship).
  • Questioning Fireshear Reavers (Fireshear). This is not indicated as a lead in the text, but these giants are from Svardborg.
  • Questioning Helm’s Hold Reavers (Helm’s Hold). This is not indicated as a lead in the text, but these giants are from Svardborg.
  • Questioning Luskan Reavers (Luskan). This is not indicated as a lead in the text, but these giants are from Svardborg.
  • Questioning Port Llast Reavers (Port Llast). This is not indicated as a lead in the text, but these giants are from Svardborg.

PHASE 5 – FORGE OF THE FIRE GIANTS

  • Eye of the All-Father, p. 151. Oracle gives them directions.
  • Track Triboar Raiders (Triboar) p. 60.
  • King’s Request (Citadel Adbar), p. 78. King Harnoth asks the PCs to raid Ironslag.
  • King and Queen’s Request (Citadel Felbarr), p. 79. King Morinn and Queen Tithmel ask the PCs to raid Ironslag.
  • Questioning Drow Raiders (Gauntlgrym), p. 85-86. Drow thieves from Ironslag can be caught in Gauntlgrym.

PHASE 5 – CASTLE OF THE CLOUD GIANTS

  • Eye of the All-Father, p. 151. Oracle gives them directions.
  • Random Encounter, p. 69. The PCs see Lyn Armaal flying above them.

PHASE 6 – A GOLDEN GOOSE COIN WAS FOUND NEAR QUEEN NERI’S BODY

  • Serissa’s Mission (Hold of the Storm Giants), p. 209. If Serissa is convinced the PCs want to help, she gives them the coin.

PHASE 6 – LORD HEKATON IS HELD ON THE MORKOTH

  • Questioning Lord Drylund (The Grand Dame), p. 219.

CONCEPT REVELATIONS

In addition to the structural revelations, there are also a few key concepts that the PCs need to learn.

THE ORDNING HAS BEEN DISSOLVED

  • Questioning Giants. Hypothetically, you could talk to almost any giant in the campaign and they’d be able to explain that the Ordning has been dissolved. (This includes Harshnag, p. 118.)
  • Eye of the All-Father, p. 151. If the PCs ask why the giants are rattling sabers, the oracle will tell them the Ordning has been dissolved.

LORD HEKATON IS MISSING

  • Questioning Nirva & Jaral (Secomber), p. 107. These cloud giants know that Hekaton is missing.
  • Questioning Harshnag, p. 118. When he shows up, Harshnag can tell the PCs that Hekaton is missing.

IYMRITH IS ACTUALLY A BLUE DRAGON

  • ???

MIRRAN & NYM ARE CONSPIRING WITH IYMRITH

  • ???

YOU NEED A CONCH TO REACH MAELSTROM

  • Eye of the All-Father, p. 151. The oracle tells you.

Go to Part 2B: Revising the Revelations

5E Monster: Honeytrap

December 19th, 2021

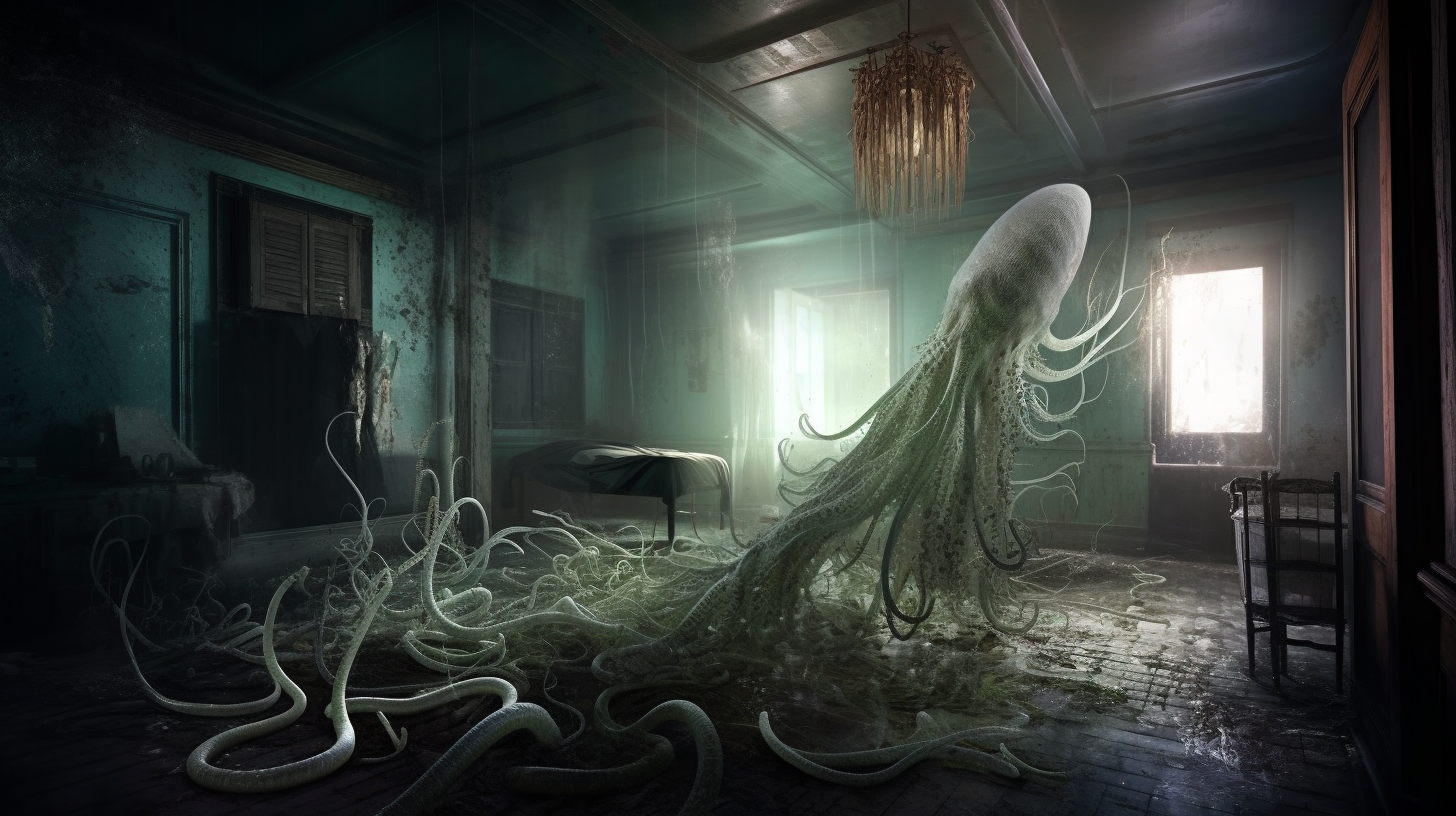
The honeytrap is a roper-like creature which relies on deceit and camouflage to trap its prey. The upper half of its body bears the appearance of a beautiful young maiden, but this beauty is wrapped around a mass of tentacular horror.

Quicksand Hunter. The honeytrap’s favored tactic is to secrete a corrosive chemical capable of rendering even solid rock into a quicksand-like liquescence. When its prey draws near, the honeytrap will cry in terror and plead for their aid. It will wait until they are at their most vulnerable before striking: Its sternum will part into a ravenous maw, exuding a half dozen coiled tentacles which will burst forth and wrap themselves lethally around the honeytrap’s would-be saviors.

Tentacular Chase. The honeytrap prefers to lure its victims into a dangerous mixture of complacency and chivalry before striking, but those seeking to flee a ravenous honeytrap may be shocked as it wrenches itself free from its muck-ridden hunting grounds and pursues them with great speed upon a second tumultuous mass of tentacles extruding from its “maiden” waist.

More startling even than that diabolic chuckle was the scream that rose at my very elbow from the salt-compounded sand – the scream of a woman possessed by some atrocious agony, or helpless in the grip of devils. Turning, I beheld a veritable Venus, naked in a white perfection that could fear no scrutiny, but immersed to her navel in the sand. Her terror-widened eyes implored me and her lotus hands reached out with beseeching gesture.

The Abominations of Yondo, Clark Ashton Smith

HONEYTRAP

Large monstrosity, chaotic evil


Armor Class 18

Hit Points 119 (14d10+42)

Speed 40 ft.


STR 19 (+4), DEX 13 (+2), CON 17 (+3), INT 12 (+1), WIS 11 (+0), CHA 17 (+3)


Skills Athletics +7, Deception +6, Persuasion +6, Stealth +5

Senses darkvision 60 ft., passive Perception 10

Languages Common, Elven

Challenge 8 (3,900 XP)

Proficiency Bonus +3


Grasping Tendrils. The honeytrap has six tendrils. Each tendril can be attacked (AC 18; 20 hit points; immunity to poison and psychic damage). Destroying a tendril deals no damage to the honeytrap. A tendril can also be broken if a creature takes an action and succeeds on a DC 16 Strength check against it.

Quicksand Liquiescence. A honeytrap can turn a 10 ft. radius of earth, dirt, or stone into quicksand in 1d4 minutes by excreting a powerful, acidic chemical. If a honeytrap is slain, moves, or stops excreting the chemical, the ground will re-solidify within 1d4 hours.

A creature entering quicksand sinks 1d4+1 feet and becomes restrained. At the start of each of its turns, the creature sinks another 1d4 feet. Creatures in quicksand can attempt a DC 10 + the number of feet it has sunk Strength check to escape. This check is made with advantage if they have hold of a rope or similar item attached to something out of the quicksand.

A creature completely submerged in quicksand cannot breathe and begins to suffocate. They are also no longer able to escape the quicksand without assistance.

A creature outside can pull a creature out of quicksand as an action with a DC 5 + the number of feet the target creature has sunk into the quicksand Strength check.


ACTIONS

Multiattack. The honeytrap makes six attacks with its tendrils, uses Reel, and makes one attack with its bite.

Bite. Melee Weapon Attack: +8 to hit, reach 5 ft., one target. Hit: 31 (6d8+4) piercing damage.

Tendril. Melee Weapon Attack: +8 to hit, reach 30 ft., one creature. The target is grappled (escape DC 15). Until the grapple ends, the target is restrained and has disadvantage on Strength checks and Strength saving throws, and the honeytrap cannot use the same tendril on another target.

Weakness. A honeytrap’s strands sap an opponent’s strength. Anyone grabbed by a strand must succeed on a DC 15 Constitution saving throw each round or suffer a level of exhaustion.

Reel. The honeytrap pulls each creature grappled by it up to 15 ft. straight toward it.


The encounter creation guidelines in the Dungeon Master’s Guide and Xanathar’s Guide to Everything are both based on the idea that you know how many PCs are in your group. Then you do a table lookup, do a little math, and – presto! – you have a budget to spend on your encounter, expressed as either an XP amount or a number of creatures of a particular challenge rating.

But what if you’re using a published adventure with a party that’s a different size than the one recommended? For example, what if you’re running Curse of Strahd (“for four to six players characters”) but your group only has three PCs?

Going strictly by the book, you would need to deconstruct the encounters in the book to calculate the original XP budget, determine what difficulty the encounter was designed for (Easy/Medium/Hard/Deadly), calculate the correct XP budget for your PCs, and then rebuild the encounter using the new XP budget. (Which may or may not be possible with the original creature(s) used in the encounter.)

Here’s the tip: It’s a lot easier to adjust the level at which your PCs play the adventure than it is to redesign every single encounter.

  • For Tier 1 & Tier 2 characters, increase their level by +1 for each “missing” PC from the party.
  • For Tier 3 & Tier 4 characters, increase their level by +2 for each missing PC.

Or vice versa for additional PCs.

To put that another way, if a published adventure’s recommended level is X, then at Tier 1 & 2 use it for PCs who are level X + 1 per fewer PC and Tier 3 & 4 use it for PCs who are level X + 2 per fewer PC.

So if you’re running Dragon Heist, which is recommended for five PCs, with a three-person group, you’d either want to start them out as 3rd level characters (instead of 1st level characters) or run a prequel adventure or two to level them up to 3rd level before using the published Dragon Heist campaign.

BONUS TIP #1

Challenge ratings are not that precise. They’re not designed to be a guarantee (nor can they be). They are a very rough approximation of “on average.”

Some “balanced” encounters will be easy. Some will turn out to be surprisingly difficult.

That’s okay. No game, no adventure, no session is about a single encounter.

The flip-side of this is that you don’t need to worry too much about getting an encounter exactly right. It’ll mostly get washed out in the general noise – the imprecision of the system, encounters being designed over a spread of challenge levels, situational conditions of the battlefield, and so forth.

This is also why Wizards of the Coast can release adventures “for four to six player characters” of a given level. Such adventures are designed for five PCs. They’ll be a little bit harder for four PCs and a little easier for six PCs, but it’ll be just fine.

BONUS TIP #2

In terms of strict math, the rule of thumb described here breaks down for very large groups of 9+ PCs. But there are more significant balancing issues based on action economy that make creating and running encounters for such large groups more of a special snowflake in any case. (Short version: Ten PCs, with all their attacks and all their special abilities, are able to wreak an amount of havoc that is out of linear proportion to a group of four. But, conversely, you can’t just use more powerful creatures, particularly at lower levels, because the monsters can one-shot individual PCs before they go down.)

For groups of 8 PCs, rather than running higher-level adventures, you can get pretty good mileage out of taking an adventure designed for five PCs and just doubling the number of creatures in the encounter.

For groups of 9+, adjust the encounter based on the difference between the PCs’ group size and a group size of eight, and then double the number of creatures. (This breaks down somewhere in the teens, but I would… uh… strongly recommend not running groups that large.)

This can create some weird narrative challenges if the encounter was, for example, with a solo boss or the like. But those are the types of encounters which really don’t work with large groups in any case, so you’ll just need to give them a little more TLC.

BONUS TIP #3

Whatever approach you’re taking to encounters — prebuilt, custom built, or otherwise — remember that you can always dial it in over time: If the encounters you’re building are too hard, trim the XP budgets in the future (no matter what the by-the-book math says). If you’re running a published adventure and the PCs are steamrolling the opposition, hold back on leveling them up. Or, vice versa, level them up faster if they’re struggling.

As you’re getting a feel for things, keep in mind that you have to miss by A LOT and for a very long time for “too easy” to not be fun.

You only have to miss once for “too hard” to be a campaign-ending TPK.

So erring on the side of easy is recommended. You can dial it up from there.

Mailbox: Postbriefkasten

Go to Part 1

GM: One of the villagers approaches you. “Thank you, brave hero, for slaying the dragon! You have saved all of our lives!”

Hero: You are most welcome.

GM: “I have a task that I believe only you could possibly accomplish!”

Hero: If it is within my power, I will do it.

GM: “You are most kind, mighty hero!”

Hero: And what is the task?

GM: “Please deliver this letter to my niece in Watertown.”

Scenario hooks like this — where the PCs are tasked to perform as mundane messengers — are surprisingly common. I think of these as mail carrier hooks. They don’t always involve a literal letter or message; sometimes it’s an object that needs to be delivered, or maybe the PCs need to go and retrieve something instead of delivering it.

The root of the problem, I believe, is that mail carrier hooks are extremely common in (a) published adventures and (b) video games.

They’re common in published scenarios because the hooks in a published scenario are, by necessity, generic: The writer doesn’t know who the characters are or what’s been happening in your campaign, so they can’t tie the hook to any of those elements. It’s unfortunately really easy for “generic” to trip over into bland.

Such scenarios are also often set in specific locations that the writer feels obligated to bring the PCs to. Having an NPC literally say, “You need to go to there,” is the easiest possible way to make that happen. And the most generic possible reason for an NPC to say that is a sealed envelope that needs to be delivered.

They’re even MORE common in video games, where “I have turned on a switch state and put an item in your inventory, go to Point B to turn off the switch state and remove the item from your inventory” is nearly the most simplistic programming possible. Want to implement a lot of content quickly and/or signal the players that it’s time to move onto the next zone? Mail carrier hooks are super-easy to implement.

And because published scenarios and video games are probably the most significant exemplars for new GMs, these boring, generic scenario hooks infect their scenarios, too. Eventually many people — players and GMs alike — come to accept them as a rote expectation of the game.

GM DON’T #12.1: MAIL CAR ON THE RAILROAD

The problem with mail carrier hooks is that they tend to reduce the PCs to mere errand boys. A particularly insidious implementation of these hooks, therefore, is to string them out in a linear sequence and then railroad the players through them.

An NPC tells the PCs where to go. The PCs go there and meet another NPC. That NPC tells them where to go. Repeat forever.

There’s a certain dark elegance to the scheme’s simplicity. If you’re just going to force the players to do exactly what you want them to do anyway, you might as well just tell them where they’re supposed to go. And, as we’ve discussed, the delivery of a sealed envelope (or it’s equivalent) is the absolute most generic way to do it: Anyone can hand you a letter and they can tell you to take it literally anywhere.

(Obligatory “don’t railroad your players” here.)

Stringing together these arbitrary, generic interactions, however, will often begin to breed a meaningless lack of care in the players: The figurative envelope is, ultimately, empty. The first NPC is not telling them to seek the second NPC because that actually matters; they are doing so in order to move the PCs to the next place they’re supposed to go. And the players are not doing it because they care about what happens; they’re doing it because the GM is telling them to do it.

This, by itself, is a terrible malaise that will sap the strength and vitality of a campaign. But it can become particularly cancerous if this attitude feeds back into the Game Master: Seeing that their players don’t care about the content of the hook (because that content is, of course, a mirage), the GM stops caring, too. The whole structure now becomes a kind of cargo cult: The NPCs, of course, must have a “reason” why the PCs need to go where they tell them to go, but since the reason doesn’t matter, it simply degenerates into a rote recitation divorced from true cause and effect.

The Descent Into Avernus campaign for D&D 5th Edition is a textbook example of what this looks like in practice. The entire campaign follows this structure of a mail carrier railroad. In one notable example, the PCs are trying to reconstruct the lost memories of an amnesiac friend. They are told that a particular NPC knew their amnesiac friend during the period of their friend’s lost memories. So they seek out the NPC who, of course, recognizes their amnesiac friend and then… nothing. The adventure provides no explanation of what the NPC’s memories of their friend are.

Because, of course, the NPC’s role is not to provide those memories. That would be meaningful and this is a cargo cult which has forgotten meaning. The NPC’s role is to tell the PCs to go and talk to a different NPC, and they do that. And, having done that, the expectation is that the PCs will continue on to the next NPC. It’s assumed that the players are on the same page; that they won’t actually care about why they were sent here, because they have been trained to discount meaning.

If you aren’t part of the cargo cult, the result seems utterly bizarre. The presence of an envelope surely implies the presence of a letter; if you are sent to hear the memories of an NPC, then surely those memories will be shared. But in the cargo cult, of course, the act of delivering an envelope has become entirely separated from the concept of a letter.

The result, of course, is disastrous.

When this structure becomes full-blown, the whole backbone of the campaign is built on nonsense. The inevitable consequence is that this rot will spread into the rest of the campaign. If you’ve learned that the central plot you’re following has no meaning, then it’s a pretty short step towards believing that nothing else in the campaign has meaning.

SCENARIO HOOKS THAT MATTER

The key solution here is to use scenario hooks that matter. If the players care about what they’re doing and/or if what they’re doing is important, that escalates everything else that happens at the table.

Once we understand this, we can see that a mail carrier hook is not fundamentally wrong. The trick is recognizing that the structure of a mail carrier hook is so utterly devoid of purpose that it becomes crucial for the message itself to be of great import.

In Storm King’s Thunder, another 5th Edition D&D campaign, for example, there are number of mail carrier hooks. Some of them are quite mediocre; things like, “Hey, could you deliver some horse harnesses for me?”

But there’s also mail carrier hooks like, “Giants are invading! The Harpers must be warned!” And that’s clearly meaningful. It matters. The PCs will feel important being asked to do that.

So how do we make scenarios hooks that matter? How do we make the players care about the hook?

Well, one way, as we’ve seen, is to increase the stakes. Put big important stuff — people’s lives — on the line. The entire movie of 1917 is not only one shot; it hangs entirely on the single goal of delivering a message that will save thousands of lives. And it is absolutely compelling.

The most effective thing you can do, though, is simply listen to your players. What do they already care about? People, places, things, goals. Whatever it is, simply tie your hook to that and your work is already done. You just need to make sure that the tie is significant. (Someone the PCs caring about asking them to deliver a generic message isn’t inherently significant. You need to make the message important or, better yet, vital to them.)

If you’re using a published adventure, take the time to identify the generic hooks and make them specific and important to the PCs. The difficulty of this can vary, but it’s generally a lot easier than you might think. The key thing is to identify elements in the published adventure which can be adapted or recast to fit the existing lore of your campaign. (At the beginning of the campaign, this will primarily be drawn from the PCs’ backgrounds. Later it will build on your shared experiences at the table.) This is a topic I discuss at greater length in The Campaign Stitch.

Go to Part 13: Boxed Text Pitfalls

Archives

Recent Posts


Recent Comments

Copyright © The Alexandrian. All rights reserved.