The Alexandrian

Archive for the ‘Roleplaying Games’ category

Tales from the LoopNINTENDO SLUGS

Gauntlet (Tengen)

As I mentioned in my discussion of the system cheat sheet I prepped for Tales from the Loop, I think the proscribed structure for The Mystery is particularly important for making the game work as its designed. Therefore, when I sat down to design a scenario I pretty much prepped it as a one-page cheat sheet using the various phases of the mystery as headers for lists of simple bullet points. I’m expanding on that format somewhat here to make it slightly more explicable for people who are not living in my head, but not by much.

INTRODUCING THE KIDS

The Mystery always begins with one Everyday Life scene for each kid. Most of these should be pulled from their Problems, Prides, and Relationships, but I think it works well to include a couple Everyday Life scenes that will later tie into the mystery (either directly or indirectly):

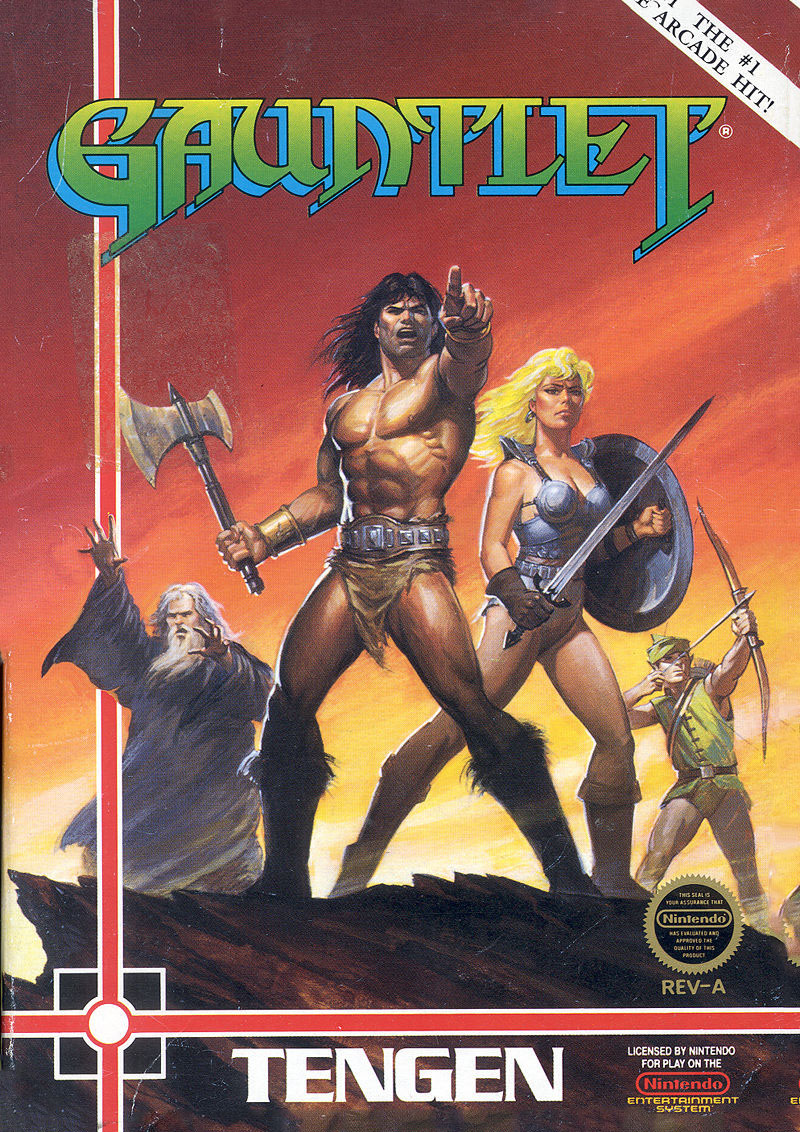
  • A kids’ friend wants to trade for their best video game cartridge. They offer the much-prized Tengen Gauntlet.
  • One of the kids is asked by their teacher to audition for the school play (Bye, Bye Birdie).
  • A friend approaches one of the kids and tells them they’ve found a dead “alien” in the woods. (It’s actually just a dead cougar.)

INTRODUCING THE MYSTERY

Make sure to continue alternating between Mystery and Everyday Life scenes. The consistent return to “normalcy” and its contrast to the strange things happening around the kids is essential for effective pacing in Tales from the Loop.

  • Finding a half dead “brain slug” dying somewhere. (It looks roughly like a gray, pulsing manta ray, but considerably smaller — perhaps 12 inches across. If it dies completely, it rapidly deteriorates into a grayish, gelatinous mass — sort of like a jellyfish washed up on a beach.)
  • Observing a “seance circle” at school. (This is a weird fad that’s going around the school where kids participate in a “seance” and talk to mysterious figures who appear in their “visions”. By default, the kids are just faking with this, but the scene can be heightened later by having the seance circle get infested with brain slugs.)
  • Molly (a girl in 4th grade) is crying on the playground after school. She is scared and hungry because her older sister and parents are “acting weird” and they aren’t fixing her meals.

SOLVING THE MYSTERY

MOLLY’S HOUSE

  • Her parents and sister have been infested with brain slugs. The family is in something of a stupor and the slugs can be examined as long as they are not directly disturbed.
  • Cables from the house can be followed into a field behind the house where the modified echo sphere is (see below).
  • Molly’s parents could also be followed to the modified echo sphere if they are observed long enough. They might also see Molly’s sister returning to the house with a stack of modified NES cartridges.

MODIFIED ECHO SPHERE

  • Plugging NES cartridges into the echo sphere modifies their programming and their substrate structure.

MODIFIED NES CARTRIDGES

  • When plugged into a Nintendo, they rewire the hardware so that it transmits a signal.
  • Transmission is directed and can be oriented or triangulated to the water tower on top of Pill Hill (see below).
  • Cracking open either a modified cartridge or modified Nintendo reveals massive, clearly alien alterations to the technology inside. This includes a glittering “silver sheen” (which is actually some form of nanomachinery).

WATER TOWER ON PILL HILL

  • The top of the water tower has been modified with several large, blocky pieces of equipment and is coated with the “silver sheen”.
  • 4-5 slug-controlled humans patrol the area around the base of the tower.
  • 1-2 slug-controlled humans are workign on the walkway atop the tower.

COUNTDOWN

  • The NES console belonging to one of the kids (preferably the one who traded for the Gauntlet cartridge) floats into the air and begins glowing with weird lights.
  • The best friend of one of the kids gets converted by a slug.
  • The parent(s) of one of the kids gets converted by a slug.
  • Teacher brings in a box of slugs and wants the kids to hold them.
  • The Congregation begins: The slug-possessed begin moving towards the Pill Hill Water Tower.
  • The Water Tower is activated. Those possessed by brain slugs fall into a coma and most die.

ANTAGONIST COUNTDOWN – DART PERSONNEL

DART is aware that something has escaped their facility and they’re trying to track it down.

  • Kids see a white van observing the school.
  • The DART van follows the kids, creeping slowly down the street behind them.
  • DART personnel burn down an infected house.
  • Kids at school are called in for “medical check-ups”.
  • The kids see the DART van crashed into a tree; its engine smoking and the DART personnel missing. (They might see them later up at the Water Tower.)

Tales from the Loop - System Cheat Sheet

(click for PDF)

I usually prep these cheat sheets for RPGs that I play or run, and I’ve shared many of them here on the Alexandrian in the past. For those who haven’t seen them before, they summarize all the rules from the game — from basic action resolution to advanced skill options. It’s a great way to get a grip on a new system and, of course, they’re extremely valuable during actual play and for introducing new players to a game.

This particular cheat sheet is for Tales from the Loop, a very interesting game in what I call the “nostalgia kids” subgenre of urban fantasy / supernatural horror. The players take on the roles of young children in an alternative version of the 1980’s based on the astonishingly beautiful artwork of Simon Stålenhag:

Tales from the Loop - Simon Stålenhag

The enigmatic Loop (some form of experimental particle accelerator) has been built around the kids’ hometown, which has subsequently become plagued by any number of fantastical oddities which will draw the children into all sorts of trouble as they investigate their mysteries.

HOW I USE THEM

As I’ve described in the past, I keep a copy of the system cheat sheet behind my GM screen for quick reference and also provide copies for all of the players. Of course, I also keep at least one copy of the rulebook available, too. But my goal with the cheat sheets is to consolidate information and eliminate book look-ups: Finding something in a couple of pages is a much faster process than paging through hundreds of pages in the rulebook.

The organization of information onto each page of the cheat sheet should, hopefully, be fairly intuitive. The division of pages is mostly arbitrary.

PAGE 1: A visual reference for the pieces of technology known to the public in the alternative history of the Loop – magnetrine vehicles, robots, and Loop surface stations.

PAGE 2: All the basic mechanical structure of the game. Some may be surprised by the inclusion of the Principles of the Loop and The Mystery in this position of primary importance, but although the game falls short in actually realizing the structured experience of Apocalypse World (something I will perhaps talk about at greater length at some future date), I think it is nevertheless true that following the Principles and the Mystery is essential for making Tales from the Loop work as a game.

PAGE 3: Primarily the advanced rules associated with specific skill uses. I’ve seen (both firsthand and through various secondary reports) a lot of these rules get glanced over by groups playing the game, but here, too, I think understanding and implementing the very specific structures the game offers here (particularly what I refer to as the “Question and Tinker” mechanics) are essential. (And if you’re not using bonus effects whenever possible – particularly in carrying their effects forward into the next beat of the scenario – you’re really fighting the system more often than not.)

WHAT’S NOT INCLUDED

These cheat sheets are not designed to be a quick start packet: They’re really useful as a tool for an experienced player teaching the game to new players, but you’ll find it really difficult to learn the game from scratch by just reading through them. (They are an adjunct to the core rulebook, not a replacement.)

You also won’t find character creation rules here.

MAKING A GM SCREEN

These cheat sheets can also be used in conjunction with a modular, landscape-oriented GM screen (like the ones you can buy here or here).

Personally, I use a four-panel screen and use reverse-duplex printing in order to create sheets that I can tape together and “flip up” to reveal additional information behind them. Since there’s really only two pages of mechanical information for Tales from the Loop, that’s not really necessary, of course. I’d suggest slipping a map of the kids’ hometown into your third panel. If you’ve got a fourth panel, you could even drop your scenario notes in there (which I’ve found can fit comfortably as a series of bulletpoints on a single sheet of paper).

Tales from the Loop

Go to Part 1

Eclipse Phase: Crater Dreams - Black Mercury

DEVELOPMENTS

These developments can be used flexibly by the GM to model ongoing events at the crater. They might complicate things during the PCs’ operation (for example, the corrupted hab robots attack them). Or they might be used to describe ongoing events for PCs who place the compound under surveillance (for example, security responds to Balthasar’s breach of the Asteroid Dome, perhaps creating an opportunity for the PCs to infiltrate areas left temporarily undefended).

BALTHASAR BREACH:

  • The researcher named Balthasar succumbs to the basilisk dreams.
  • Balthasar enters the Asteroid Dome, removes the protective glove from this suit, and touches the asteroid. He is rapidly infected by Silver Basilisk.
  • A high-security alert is triggered, with security personnel moving into the research spike. (The most likely outcome is that the first people to breach the Asteroid Dome succumb to Balthasar’s Silver Basilisk effect.)
  • Another option would be to trigger this event just after the PCs have secured the security feed at the Security HQ. (So they’ve secured the compound, but then everything starts going to hell.)

HAB CORRUPTION:

  • Silver Basilisk manages to infect the Sensor AI through an intermittent visual basilisk hack which appears on the surface of the asteroid (and is picked up by the sensors).
  • Sensor AI corrupts the hab repair robots, which begin rebuilding the Research Spike in disturbing ways.
  • Sensor AI begins trying to hack and corrupt the other AIs.

CARLYLE’S INSANITY IS DISCOVERED

  • He attempts to flee across the Martian plains, but is tracked down by the security personnel and then shipped to a mental institution in Pathfinder City for study.
  • He remains there for a week before the people assigned conclude there’s nothing more of use that can be gleaned from him; then his ego is wiped and his morph is destroyed.

Go to Part 7: Security Team

(PDF Link: After several failed attempts to get the Security Team stats formatted to appear on the webpage, I’ve decided to throw in the towel and give a PDF version for superior utility. Early Access Patreon backers can also download a PDF of the full adventure, as they can for my other scenarios.)

Eclipse Phase: Crater Dreams - Research Spike (Side View)

Roof: 50 meters wide. Upper level: 40 meters wide. Lower Level: 30 meters wide.

Shaft: 6 meters wide. 40 meters high.

Asteroid Dome: 12 meters wide. 6 meters high

SURVEILLANCE
  • Every room has standard audio/visual feeds sent to Security HQ.
AREA 1 – PREPARATORY LAB

This lab contains equipment for preparing and decontaminating samples before they’re sent over to the labs in the Research Hab.

PERMEABLE NANOBARRIER: A large hole in the floor leads to the Shaft below. The hole is sealed with a gel-like substance – a permeable nano-barrier which can be easily passed through, but which will effectively decontaminate anything passing through it.

  • Unprotected flesh would literally be flayed away by disassemblers if it passes through the nanobarrier.

AREA 2 – SECURITY DOOR

STAIRWAY: Of a white, gleaming plastic. It can collapse down and become a lift pallet.

DOOR TO AREA 1: This door features biometric identification and can only be opened by the Security AI (or other personnel in the Security HQ).

AREA 3 – OBSERVATION ROOM

Eclipse Phase: Crater Dreams - Research Spike (Map)A window of transparent polymer looks into the shaft chamber.

AREA 4 – DECONTAMINATION CHAMBER

The full decontamination process takes 2 minutes.

STEP 1: NANODETECTORS: In the ceiling, suck air out of the chamber for analysis.

STEP 2: DECONTAMINATION MIST: To unprotected biomorphs, this acts a toxin that causes eye irritation and difficulty breathing. 1d10 damage, -30 modifier to sight-based Perception tests, and a -20 modifier to all other actions.

STEP 3: NANOSWARM – MICROBIAL CLEANERS: Released into the room.

AREA 5 – HALLWAY / HAZMAT SUITS

Sharp angling of the exterior wall.

HAZMAT SUITS: 12 hazmat suits hang in individual sterilizing chambers.

STAIRWAY: Of a white, gleaming plastic. It can collapse down and become a lift pallet.

AREA 6 – HALLWAY / RESEARCH DRONE STORAGE

Sharp angling of the exterior wall.

RESEARCH AI FORK: The Research AI Fork is running off a server in this room.

DRONES

  • HAB REPAIR ROBOTS (x2)
  • ROBOMULE

HAB REPAIR ROBOT: Crab-like frame. Panopticon, pg. 157.

Walker 4/20 (max 20 kph), Armor 4/4, DUR 40, WT 8

Access Jacks, Chem Sniffer, Electrical Sense, Enhanced Vision, Extra Limbs (6), Grip Pads (+30 Climbing), Headlights, Maker, Nanoscopic Vision, Repair Spray, Tool Kit, Utilitool

AI: Hardware: Industrial 40, Hardware: Robotics 40, Perception 30.


ROBOMULE: Human-sized, but horizontal and with six legs. Legs can also transform into flippers for swimming (deploy reusable flotation bladders). Carry 250kg of cargo over long distances.  Upper surface made of smart materials that transform into straps, etc. Gatecrashing, pg. 162.

Walker 4/20 (max 35 kph), Armor 4/4, DUR 40, WT 8

Access Jacks, Extra Limbs (6), Headlights, Maker


AREA 7 – ACCESS SHAFT

SENSORS: Monitored by the Sensor AI; 40% chance that the feed is also being monitored by a human.

  • HYPERSPECTRAL: +20 Perception modifier (Panopticon, pg. 162)
  • INFRARED: With active infrared lighting (+10 Perception modifier).
  • INFRASOUND: Capable of detect footprints within 20 feet (+30 Perception modifier).
  • PRESSURE SENSORS
  • QUANTUM RADAR (Active)
  • RADIATION SENSE
  • T-RAY/X-RAY/GAMMA RAY (Active)
  • ULTRAVIOLET
  • SPECIAL VISION: Nanoscopic Vision, Polarization Vision

MOVING LADDERS: Four moving ladders spaced around the walls of the shaft. Grabbing onto the runs will cause the ladder to begin moving. (Two ladders go down; the other two go up.) The ladder can also be climbed normally.

AREA 8 – ASTEROID DOME

SENSORS: As per Area 7, but with 80% chance that feed is being monitored by a human.

  • CHEM SNIFFER
  • GHOST IMAGER (Panopticon, pg. 152)

FLOOR: The floor of the crater itself. A wide pit has been excavated (using scourer nanoswarms), revealing the asteroid which thrusts up out of the ground.

ASTEROID: A multi-faceted prism of silver crystals filling a latticework of silver-black. The lattice is constantly sheened with Silver Basilisk oil.

FRACTAL ARMS (x3): Fractal, mechanical arms extend from the walls. These can divide down to micrometer scale; have enhanced chemical sensor suites; and can release scourer nanoswarms.

  • SCOURERS: Analyze the dirt, regolith, ice, etc. in a region and then remove it, layer by layer. Anything not matching that pattern is location tagged and the swarm uses ultrasound to clear the item and clean it. (Gatecrashing, pg. 160)

MANIPULATOR CUFFS (x3): Stored in silver tubes attached to the dome wall.


MANIPULATOR CUFFS: Attached as a forearm cuff to the outside of a vacsuit. Utilitool and mobile lab. Controlled through arm movements and mesh signals. Protrudes 2-meter long telescoping manipulator. Can bend, flex, and squeeze through openings only 2mm wide. Can also detach and move under its own power (using flexible treads). Feels like an extension of the user’s hand. (Gatecrashing, pg. 160)

Tracked 2/8 (max 8 kph), DUR 5, WT 1

Access Jacks, Electrical Sense, Enhanced Vision, Fractal Digits, Grip Pads (+30 Climbing), Mobile Lab, Nanoscopic Vision, Shape Adjusting, Telescoping Limb, Utilitool


Go to Part 6: Developments

Go to Part 1

Eclipse Phase: Crater Dreams - Research Hab

(150 meters wide)

EXTERIOR

  • Building is on 10-foot high stabilizing stilts.
  • Mostly made out of white plasteel. The windows are clear plastic with protective metal blinds on the outside.
  • Bundles of cable run from the Research Hab around the perimeter of the crater to the Security HQ.
    • These contain hardwired camera and communication feeds.

SURVEILLANCE

  • Every room including the private quarters are monitored with standard audio/video feeds. The sensory feeds are hardwired to the Security HQ.
  • Chemical sniffers and radiation detectors in the labs (areas 5-12).

AREA 1 – CENTRAL CORRIDOR

Generally only the door facing the crater is used. (The building is prefabbed.)

AREA 2 – MESS

Cheap, one-piece plastic chairs and tables secured to the floor using solid adhesives.

The fabber here has broken down. Canned goods are being fabricated in the Security HQ and then carried over here.

AREA 3 – RESEARCHER QUARTERS

For security purposes, these chambers are kept extremely depersonalized. (Security monitors this using the sensory feeds.)

AREA 4 – CARLYLE’S QUARTERS

The security feed for Carlyle’s quarters have been compromised: Carlyle’s muse is feeding false data to make everything appear normal.

BED: The bed is affixed to the ceiling. (Carlyle melted the solid adhesive bonding it to the floor and then secured it to the ceiling.)

  • A nest of bedding has been huddled up on the floor beneath the bed.

TABLE: A table has been magnetically attached to the wall. The surface of the table is covered in a multi-colored mélange of scrawled symbols and diagrams.

  • UNDER THE TABLE: If the table is removed from the wall, a tiny diorama will be found glued to the wall in the hollow space beneath the table’s central pillar. The diorama is a replica of the asteroid dome (area 8 of the Research Spike), including, most notably, a replica of the crystal-like extrusion which appears to be smeared with blood.
  • SCRAWLS: If each color of ink is separately extrapolated as a layer of data, they are revealed to be star charts. Specifically, they are constellations as viewed from the Martian sky directly above the Research Spike, with each layer of color representing an epoch of time progressively farther in the past. (Starting 50,000 years ago and increasing to 500,000,000 years.)

AREA 5 – LAB SECURITY CHAMBER

BRAINSCANNING: Access to the labs requires identification verification using a portable brainscanner (Panopticon, pg. 152). A set of six chairs line the room, allowing an entire lab team to be processed simultaneously.

  • This process is monitored by the Research AI.

HAZMAT SUITS: 12 hazmat suits hang in individual sterilizing chambers.

AREA 6 – SAMPLE STORAGE

This room contains a number of freezers and shelving units with individual components formed from self-sealing smart materials.

  • Usually used for storing scientific samples, but the only samples currently being held here are a number of soil samples extracted from the surrounding terrain.
  • Most of the storage space is going unused.

BURN UNIT: The room also contains a sterilizing burn unit suitable for destroying toxic or dangerous materials.

  • This unit vents to a containment unit which can either be sealed and removed or vented to the outside atmosphere.

AREA 7 – GENERAL LAB

Fully-stocked laboratory suitable for general scientific study, but it’s going essentially unused on the current project.

RESEARCH AI: Research AI is running off a server in this room.

AREA 8 – DECONTAMINATION CHAMBER

The full decontamination process takes 2 minutes.

STEP 1: NANODETECTORS: In the ceiling, suck air out of the chamber for analysis.

STEP 2: DECONTAMINATION MIST: To unprotected biomorphs, this acts as a toxin that causes eye irritation and difficulty breathing. 1d10 damage, -30 modifier to sight-based Perception tests, and a -20 modifier to all other actions.

STEP 3: NANOSWARM – MICROBIAL CLEANERS: Released into the room.

AREA 9 – SUPPLIES

This room contains supplies for the laboratories. It notably includes:

  • Nanodetectors
  • Nanoswarm – Scientific Nanoanalyzer
    • Specifically designed to analyze compounds down to a molecular level.
  • Nanoswarm – Cleaner
  • Specimen Containers

AREA 10 – SOIL LAB

SAMPLES: The samples have been carefully tagged with the GPS locations where they were picked up (mostly from within the crater, but also samples up to 3 km away from the crater).

REPORTS: Stored on the local servers.

  • No foreign matter was found in the ejecta, which would suggest that whatever impacted in the crater didn’t vaporize or suffer structural disintegration of any kind. (This is extremely unusual for an impact crater.)
  • The 3D map of the asteroid dome (area 8, Research Spike) prepared by the scourer nanoswarms is on file here.

AREA 11 – BIOCHEMICAL LAB

WORK: The primary work here was an effort to replicate and map the DNA traces from the silver-black oil taken from the asteroid.

SILVER BASILISK SAMPLE: A small sample of Silver Basilisk in a diamond-crystal faraday container is kept in the lab’s sample case.

  • FARADAY CONTAINER: Gatecrashing, pg. 160. Superconductive charged wires block radio signals, electrical charges, and electromagnetic radiation from getting in or out.

SHREDDED BASILISK: In order to study the complex, interlaced DNA of Silver Basilisk, the researchers have ripped it apart using terahertz lasers and are attempting to individually cultivate the DNA strands. “Shredded basilisk”, however, remains highly toxic due to the fractal nature of the exsurgent virus (which will attempt to reconstitute itself).

  • Anyone exposed to shredded basilisk must make a DUR test (DUR x 4 if they have medichines or toxin filters). If they fail, there’s a 10% chance they’re affected as per second generation Silver Basilisk as the shredded basilisk migrates to the brain.
  • Otherwise, shredded baslisk inflicts a -5 modifier to COO, REF, and COG per week while simultaneously making the victim suffer extreme hallucinations and act as a focal point for Basilisk Dreams. Half this damage is dealt permanently to the ego (even if it resleeves). If any aptitudes are reduced to zero, the morph is effectively paralyzed and catatonic.

AREA 12 – BIOINFORMATICS LAB

WORK: This lab is using biological data analysis techniques to study the interactions, functions, and properties of the X-91 oil.

TISSUE SAMPLES: They’ve infected three major sequences of stem-cell-derived microbiological tissue with X-91 oil. (Each sequence consists of thousands of closely related samples that have had their DNA altered only slightly one from the next in an effort to analyze variant interactions with the oil.)

  • All of these are potential infection vectors for Silver Basilisk (although a character can make a DUR test or a DUR x 3 test if they have medichines or toxin filters).

SECURITY MONITOR: This room has access to the surveillance feeds from the asteroid dome (Research Spike, area 8).

  • This allows the researchers to remotely observe and study the X-91 asteroid.

REPORTS: Stored on the local servers.

  • The X-91 oil appears to use a partially synthetic cell structure featuring incredibly complicated systems of intracellular communication using a protean peptide (which is constantly changing its shape and apparent function according to principles and stimuli that the researchers have been unable to fully identify).
  • There are macro-level reactions in the “anomalous large cells” of the X-91 structure which appear to be in reaction to the presence and proximity of specific individuals. This has made isolating micro-interactions difficult.
  • Instructions have been prepared to begin testing on animal subjects when their work moves to a larger facility.

 Go to Part 5: Research Spike


JUSTIN ALEXANDER About - Bibliography
Acting Resume

ROLEPLAYING GAMES Gamemastery 101
RPG Scenarios
RPG Cheat Sheets
RPG Miscellaneous
Dungeons & Dragons
Ptolus: Shadow of the Spire

Alexandrian Auxiliary
Check These Out
Essays
Other Games
Reviews
Shakespeare Sunday
Thoughts of the Day
Videos

Patrons
Open Game License

BlueskyMastodonTwitter

Archives

Recent Posts

Recent Comments

Copyright © The Alexandrian. All rights reserved.