The Alexandrian

Archive for the ‘Roleplaying Games’ category

Dungeon of the Dead Three - The Revised Key

Go to Table of Contents

For ease of use, these key entries are designed to completely replace the matching entry in the book (unless otherwise noted).

Design Note: My actual process for assembling the revised key is pretty straightforward. First, I run through my list of things that I think need to be changed. When I’m not writing essay-long explanations of my thought process for public consumption, this would usually just be a short, bullet-pointed list.

In addition to stuff that I think needs to be fixed, this list would also include any cool ideas that reading through the key had spurred in my imagination. You can see a little bit of that here with Area D13 and the corpsedamp zombies, but I’ve mostly eschewed it for this exercise.

Once that’s done, I simply run through my revelation list (as seen in Part 3C), and place every clue that’s supposed to appear in the location. It’s not unusual for this to be a two-way street, with additional clues being added as I develop the revised key and then being added to the revelation list (instead of vice versa).

D4. NORTH MASSAGE ROOM

In addition to the normal key for this room (DIA, p. 20):

Secret Door: Opened by rotating a circular piece in the stained glass window next to it.

D7. BHAAL’S ALTAR

In addition to the normal key for this room (DIA, p. 21) there is a wax tablet and stylus lying on the altar next to the entrails. This tablet contains various prophecies which have been divined from the entrails:

  • When the box is opened in the house of Alaundo, the path forward shall be revealed.
  • One of four shall be damned to Hell. One of four shall be struck by a thunderbolt. One of four shall rise.
  • The great Sun shall be blackened and the devil legions of Avernus shall conquer Elturel.
  • Conflict shall come to the Great Cities of Waterdeep, Athkatla(?), and Iriaebor.
  • Volcanic fire shall tremble the peaks of Orsraun.
  • Of the West shall speak the Tears of Selûne, and they shall weep upon the Inner Sea.

GM Note: The “house of Alaundo” refers to Candlekeep (Alaundo founded Candlekeep and foresaw the coming of the Bhaalspawn). The “great Sun” refers to the Companion. The other prophecies are either nonsense or unrelated to Descent Into Avernus (although players might conclude that “one of four” refers to the Council of Four).

D9. DEAD THREE DOORS

Descent Into Avernus - Dungeon of the Dead Three

Each door is carved with a full-figured bas relief of a different person.

Wisdom (Perception) – DC 10: The carvings are very old The stone is worn and some of the carvings show other signs of damage, along with some evidence of recent repairs. (For example, one of Bhaal’s scythe-like hands appears to have been broken off and only recently re-attached.)

Intelligence (Religion) – DC 10: On success, recognize the figures as depicting the Dead Three.

  • East Door – Bane: A tall, armored man wearing a bucket helm. His right gauntlet is painted black and clutches a set of shackles.
  • South Door – Myrkul: A cloaked figure whose face is hidden under a cowl. In his skeletal hands he clutches a screaming human skull.
  • West Door – Bhaal: A powerfully built, skull-headed man with long, curved blades where his hands should be.

D12. BANE’S ALTAR

Generally use the normal key for this room (DIA, p. 22), but if Yignath is present, rather than torturing Klim Jhasso for fun, he is using a blacksteel razor to carve infernal text into his skin. (If Yignath is no longer present, the blacksteel razor lies on the altar.)

Blacksteel Razor: Blacksteel is dark, silent, and nonreflective. It makes no noise when striking other objects or creatures (even if it is broken or shattered). Blood clings to the razor, rather than spraying or dripping.

Infernal Carvings: “In the name of Bane, we offer adulation to Zariel, Archduchess of Avernus. In the name of Bane, we give the blessing of one god to another. In the name of Bane, we give blessing unto the unholy conquest of Elturgard. In the name of Bane, we offer adulation under the fear and tyranny born in her name.”

D13. MORGUE

  • Far end of the room has collapsed. Four wooden beams brace the ceiling.
  • Three sarcophagal slabs have been converted into work tables. Two are covered with vials, alembics, and similar alchemical and arcane apparatus. The center slab has a human cadaver lying atop it, partially dissected with its various organs and viscera neatly organized around it. (If Flennis is taken by surprise here, she will be actively studying the corpse.)
  • Several large pipes have been bolted to the collapsed wall of rubble. They twist their way towards a huge vat of iron standing near the sarcophagal slabs.
  • If they have not been taken from this room, three bloated corpsedamp zombies are strapped to the north wall. Various tubes leading from the iron vat are attached to the corpses.

Wisdom (Perception) – DC 14: To notice the very faint smell of rotten eggs. It can be traced back to the collapsed wall, where the smell is stronger. (Anyone specifically inspecting the collapse will automatically detect the smell.)

  • This is corpsedamp gas. See areas D15 or D18 for full description (including guidelines for identifying the gas and its properties). There is no risk of explosion here as the gas is not sufficiently concentrated.

Iron Vat: This is a pressurized vessel, collecting corpsedamp gas that’s leaking through the collapsed wall. The tubes connected to it are designed for the creation of corpsedamp zombies (the current crop is more or less ready to go). The tubes have long needles at the end of them and are basically just jammed into the corpses.

  • If the pipes weren’t harvesting the corpsedamp gas here, the leak would be much more significant.

Dissected Corpse: A DC 14 Intelligence (Arcana) test suggests that someone is experimenting with exposing internal organs individually to the corpsedamp gas.

Work Tables: The Missive of the Hidden Lord Ω handout can be found here.

D15. SMALL FLOODED ROOM & GAS BUILDUP

On Approach: DC 10 Wisdom (Perception) check to notice the smell of rotten eggs. (Once in the chamber itself, the smell intensifies to a putrid stench anyone will immediately notice.)

  • Four rotting wooden beams rise from the murky water to brace the ceiling here.
  • A pile of rubble in the northwest corner.
  • Northern tunnel narrows to just 2 ½ feet wide.

Rubble: Nothing of interest here.

Corpsedamp Gas: Open flame triggers explosion (4d6 fire damage, DC 15 Dexterity saving throw for half damage). All wooden beams are destroyed by the explosion, which may trigger a roof collapse. The explosion burns away the gas, which builds up slowly and becomes danagerous again after 24 hours.

  • Intelligence (Arcana) / Wisdom (Survival) – DC 12: Misidentifies the gas as stinkdamp; a toxic and explosive gas.
  • Intelligence (Arcana) / Wisdom (Survival) – DC 15: Correctly identifies the gas as corpsedamp. Most often extracted by necromancers from rotting corpses, it has a number of properties favorable to their work.
  • Intelligence (Arcana) – DC 18: Corpsedamp gas is particularly notable for allowing the creation of corpsedamp zombies — shambling undead literally bloated by the mass of gas used to animate them. Corpsedamp zombies are vulnerable to fire, but explode when killed.

Roof Collapse: If the beams are destroyed, 25% chance of roof collapsing. 4d10 bludgeoning damage, DC 15 Dexterity saving throw for half damage. Room remains open, but is difficult terrain.

  • A roof collapse in this area will have an additional 50% chance of extending 1d4 x 5 feet up each passage leading to this room. (Check for each passage.)

D17. MYRKUL’S ALTAR

  • A dry room.
  • The north wall is partially collapsed.
  • A stone altar in the center of the room with humanoid skulls and bones piled around it. The top of the altar is covered with dozens of half-melted, unlit candles made of black wax.

Wisdom (Perception) – DC 14: Notice the very faint smell of rotten eggs. It can be traced back to the collapsed north wall, where the smell is stronger. (Anyone specifically inspecting the north wall will automatically detect the smell.)

  • This is corpsedamp gas. See areas D15 or D18 for full description (including guidelines for identifying the gas and its properties). There is no risk of explosion here as the gas is not sufficiently concentrated.

Altar:

  • If one or more black candles are lit, they shed a green light that reveals black writing on the walls. It reads, in Common, “RISE AND BE COUNTED!”
  • If someone says, “RISE AND BE COUNTED!” within 5 feet of the altar, the words vanish as bones hidden under the debris at the north end of the room rise up and knit together, forming three animated human skeletons that obey the commands of whoever spoke the words.

Black Candles: These candles have been marked with the names of those targeted by the Dead Three cultists — Edmao Eduarda, Wemba Oshrat, Madhuri Akhila, Leiv Diomids, Aneta Diomidis, Annika Silverleaf, Shohreh Letitia, Iolanthe Oshrat. (Valeria Nuska and Weronika Nuska would also be included if Amrik has identified them.)

  • Intelligence (Religion) – DC 14: These candles symbolically offer “Myrkul’s blessing” (i.e., death) unto those named upon them. Myrkullites believe that the smoke from the candles rises up, seeks out the lungs of the one so “blessed,” and blackens them. (Some magical versions of the candles do just that.)
  • GM Info: This ritual is not a required part of the cultists’ dark work. It’s just the priests’ way of offering an unholy blessing to their task.

D18. LARGE FLOODED ROOM & GAS BUILDUP

On Approach: DC 10 Wisdom (Perception) check to notice the smell of rotten eggs. (Once in the chamber itself, the smell intensifies to a putrid stench anyone will immediately notice.)

  • The room is flooded.
  • The ceiling is supported by numerous wooden beams.

Corpsedamp Gas: Open flame triggers explosion (4d6 fire damage, DC 15 Dexterity saving throw for half damage). All wooden beams are destroyed by the explosion, which may trigger a roof collapse. The explosion burns away the gas, which builds up slowly and becomes danagerous again after 24 hours.

  • Intelligence (Arcana) / Wisdom (Survival) – DC 12: Misidentifies the gas as stinkdamp; a toxic and explosive gas that is heavier than air.
  • Intelligence (Arcana) / Wisdom (Survival) – DC 15: Correctly identifies the gas as corpsedamp. Most often extracted by necromancers from rotting corpses, it has a number of properties favorable to their work. It is easily mistaken for stinkdamp, and is similarly heavier than air.
  • Intelligence (Arcana) – DC 18: Corpsedamp gas is particularly notable for allowing the creation of corpsedamp zombies — shambling undead literally bloated by the mass of gas used to animate them. Corpsedamp zombies are vulnerable to fire, but explode when killed.

Roof Collapse: If the beams are destroyed, 25% chance of roof collapsing. 4d10 bludgeoning damage, DC 15 Dexterity saving throw for half damage. Room remains open, but is difficult terrain.

D19. PARTIALLY COLLAPSED CRYPT

  • Most of the room has fallen in.
  • Debris field mostly buries a stone sarcophagus.

Wisdom (Perception) – DC 14: Notice the very faint smell of rotten eggs. It can be traced back to the collapsed south wall, where the smell is stronger. (Anyone specifically inspecting the collapse will automatically detect the smell.)

  • This is corpsedamp gas. See areas D15 or D18 for full description (including guidelines for identifying the gas and its properties). There is no risk of explosion here as the gas is not sufficiently concentrated.

Sarcophagus: Empty. Looted years ago.

D20. HALF-PLUNDERED CRYPT

In addition to the normal key entry for this area (DIA, p. 24) the far wall of the crypt is badly cracked, but shows signs of being repaired. (Corpsedamp was also leaking into this room, as in Area D19, but efforts have been made to seal the cracks and prevent the leak.)

D23. DOOR

Instead of a secret door, the door leading to D27 is a normal wooden door.

D26. BHAAL’S REST

  • The middle of the room is occupied by an open stone sarcophagus, but the floor has been cleared (as a resting place for the followers of Bane).
  • There are six dusty bedrolls on the floor.
  • Sconces in the north and south wall.
  • There are three footlockers against the far wall.

Footlockers: Two of these are battered and worn with years of use. The third is clearly of better construction and is also padlocked. (This latter footlocker belongs to Vaaz and contains the Missive of the Hidden Lord φ and Vaaz’ Correspondence handouts.)

D30. TIAMAT’S STOLEN TREASURE

Use the normal key entry for this room (DIA, p. 26) except for Chest 4.

Chest 4 contains a bronze crown with fire spires (250 gp) that weights 2.5 pounds. Each spire is shaped and painted to resemble one of the five kinds of chromatic dragon (black, blue, green, red, and white). It has been carefully packed in shaped padding; there is a second hollow in this packing material that would appear to fit a mask, but there is nothing in it. (GM Note: It does not fit the mask from Chest 3. This mask is located in Vanthampur Manor.)

Crown: Around the interior of crown is an inscription, written in Draconic: “From Avernus we summon her. To Tiamat we pledge fealty.”

Go to Part 3F-C: Dungeon of the Dead Three – Adversary Roster

Dungeon of the Dead Three - Descent Into Avernus

Go to Table of Contents

The revised background for the Dungeon of the Dead Three is covered in Part 3B: Lore of the Vanthampur Investigations. Short version: Duke Vanthampur discovered an ancient temple dedicated to the Dead Three under the Heapside neighborhood. She sealed off the connections to the sewers and built the Frolicking Nymph bathhouse on top of it in order to create a secret entrance. She has most recently offered the temple to the Dead Three cultists in exchange for their assistance (which currently takes the form of murdering refugees).

There are a number of elements in the Dungeon of the Dead Three that we’re going to be adjusting, polishing, or enhancing. We’ll start by looking at those issues in detail, then present a revised key, and round things out with an adversary roster.

THURSTWELL’S IMP SPIES

We’ll start in the very first room of the dungeon: D1, the Courtyard.

An invisible imp is perched on the southeast fountain. If the characters look as though they intend to cause trouble, the imp observes them quietly until they enter the bathhouse, then flies to Vanthampur Villa in the Upper City to alert Thurstwell Vanthampur, the oldest of Duke Thalamra Vanthampur’s sons. Thurstwell instructs the imp to return to its post but takes no further action, hoping that the characters dispose of his brother, Mortlock

Thurstwell’s imp spies actually turn up several times and they almost always do the same thing: They invisibly watch the PCs while taking no action. Then they fly to Thurstwell and report what they saw. And then Thurstwell doesn’t do anything with that knowledge.

Ever.

My first instinct when seeing an element that’s designed so that the PCs never become aware of it and which has no impact on anything the PCs will do or experience is to just delete it. (It’s actually kind of amazing how many published adventures include this sort of thing.) But there are a couple of clever imp interactions and the central idea of Thurstwell as a crippled spider stuck in his home, able to exercise his will upon the world only through his imp servitors while jealously observing his able-bodied siblings going out and about in the world, is a really great character beat.

So what we really need here is for the imp spies to become meaningful. Which primarily means that Thurstwell needs to take meaningful action in response to what the imps see. A few possibilities:

  • He sends an imp to barter with the PCs. (He’d probably like them to kill one or both of his brothers. If he’s feeling daring, or if the PCs have already succeeded at eliminating his brothers, he might even ask them to kill his mother so that he can take her place at the head of the family. If the PCs were to go all in on this, you could have an alternate trajectory where, the job done, he asks them to take the infernal puzzlebox to Candlekeep and have it opened.)
  • He sends a murder squad of Dead Three Cultists (Descent Into Avernus, p. 28) to kill the PCs.
  • He sends an abduction squad to kidnap a refugee that the PCs care about so that he can use them as leverage. (Maybe to leverage them into an alliance. Maybe to force them to back off.)

Basically, if you play Thurstwell as proactive and Machiavellian, he can either become an unexpected ally or a hated enemy (or both).

WATER LEVELS

There are several text-to-map mismatches in the dungeon, but the most significant are those related to the flooding in the dungeon.

First, Area D8 is described as a “dry alcove”:

Descent Into Avernus - Dungeon of the Dead Three

In addition to the coloring, the stairs should be placed NORTH of D8, not east.

The design of the dungeon actually does a good job of having the flooded portions of the dungeon consistently lower than the rest of the dungeon. Which is why the failure to color in Area D23 (which is correctly described as flooded in the text) is also an error:

Descent Into Avernus - Dungeon of the Dead Three

You may want to mark your copy of the map to make sure you get these details right while running the adventure.

THE DEAD THREE DOORS

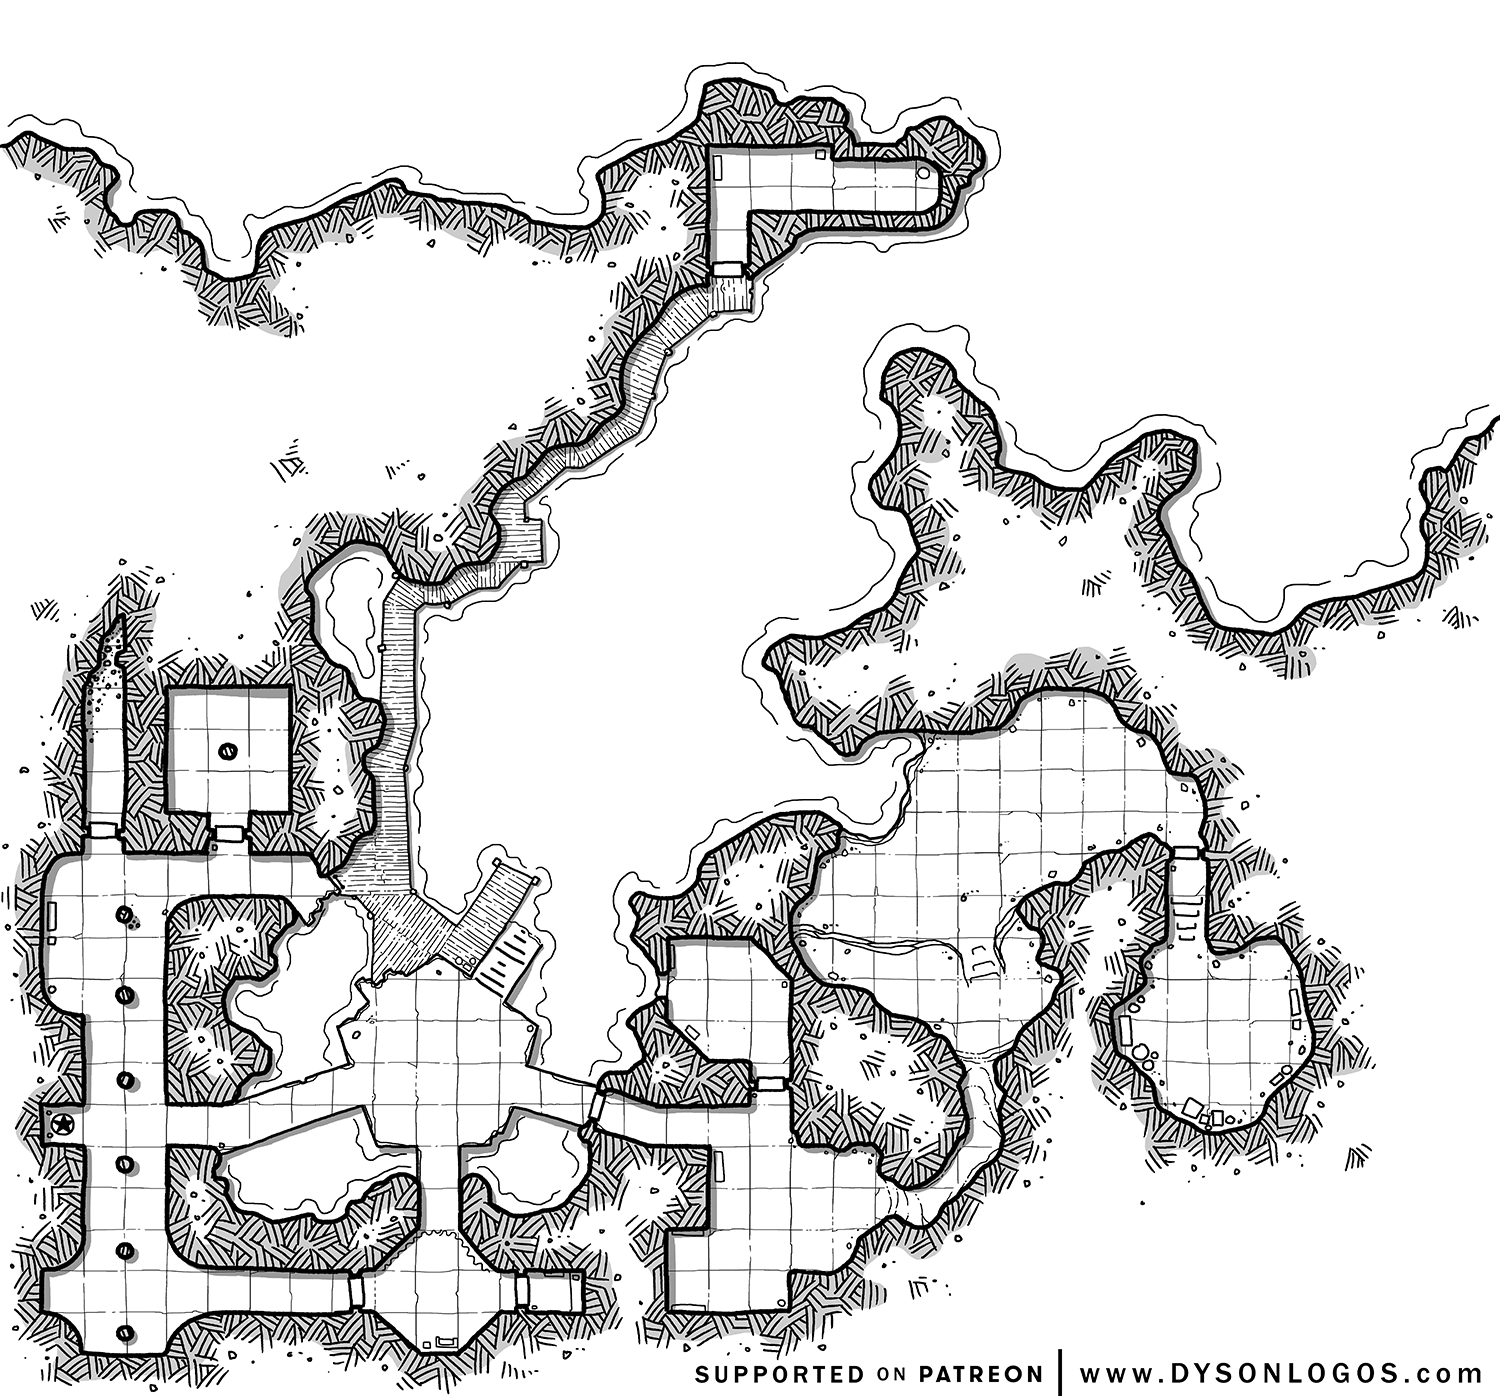
Let’s take a look at Area D9. There are four passages that lead out of this area: One comes from the entrance, while the others lead to cultists/shrines belonging to one of the Dead Three Gods (Bhaal, Bane, Myrkul).

Descent Into Avernus - Dungeon of the Dead Three

There are also three doors in Area D9:

  • East: Bane
  • North: Bhaal
  • South: Myrkul

Am I crazy or should the door to the north actually be to the west so that all of the themed doors match the themed content behind them?

In practice, this would mean that the PCs are likely to come in from the entrance and be presented with three creepy doors that they have to interpret and choose and between. Not only is this a cool moment that would set the tone for the entire dungeon, it’s also an opportunity for a meaningful choice. Instead, there’s just a random choice stripped of meaning.

The simple solution here is to just move the door (and you’ll see that in the revised key below), but we’ll also be delving more deeply into the possibilities here in Part 3G: Xandering the Dead Three.

DUNGEON GAS

Area D18 is filled with explosive gas.

Descent Into Avernus - Dungeon of the Dead Three

The gas has these properties:

  • Invisible
  • Lighter than air
  • Smells like rotten eggs

These are the properties of modern natural gas (which is actually odorless, but since 1880 has had the smell added through the use of an odorant called mercaptan). I’m fairly certain this is not a coincidence, and the designers probably just defaulted to the explosive gas they were most familiar with.

But it’s a choice worth examining. For example, D18 is actually the lowest point in the complex, so it might make more sense to go with a heavier-than-air gas that could CONCENTRATE here, rather than a lighter-than-air gas that dissipates. This would allow you to describe the faint smell elsewhere in the complex where the gas is entering the area (D13, D17, and D19 would be good choices).

This is about more than just being “logical” or having an “accurate simulation” (the layout of the dungeon is designed; you can design it however you want). It’s about meaningful choice and problem-solving: If the PCs can detect the presence of gas leaks before entering Area D18, it gives them the opportunity to gather information and then use that information.

(The adventure kind of does this by saying that any character approaching D18 detects the smell and can make a skill check to recognize its significance. But that’s just a bang-bang interaction; not an opportunity to think, analyze, and make meaningful choices.)

Similarly, D18 is a chokepoint. You have to walk through it to get from one side of the dungeon to the other. “Bringing a lit torch or other open flame into the gas-filled room triggers an explosion…” But: “Followers of the Dead Three carry torches…” Hmm.

The adventure notes that the cultists will extinguish their torches before passing through Area D18, but it’s probably a stronger choice to go one step further here and give them light sources that reflect the environment: Safety lamps or light spells, for example. PCs, seeing this, could realize the danger of an open flame.

In addition to problem-solving, this type of thing also gives the dungeon the feeling of a complete environment rather than just a bunch of disconnected, individual rooms.

So what we’re looking for is a gas with these properties:

  • Invisible
  • Heavier than air
  • Has a distinctive smell (naturally, without the addition of odorants)

In researching safety lamps I discovered that the word dampf, in German, means “vapour.” In England, the term became used to describe a variety of gases encountered during mining:

  • Firedamp refers to a flammable gas, most often methane.
  • Whitedamp refers to a smothering, toxic gas (usually carbon monoxide resulting from burning coal). This is the gas which canaries were famously used to detect.
  • Stinkdamp is hydrogen sulfide. Poisonous, corrosive, and very flammable, with the foul odor of rotten eggs.
  • Afterdamp, the toxic mixture of gases left in the aftermath of an explosion. Could be any mixture of the above.

So we can look at that list and identify stinkdamp as the gas we’re looking for.

In remixing the dungeon, however, there are a few more things I’d consider.

First, the risk of an explosion in Area D15. (Looking at the map it seems logical that gas flowing down to D18 would also flow down to D15.) Whether the PCs encounter D18 or D15 first, even if they trigger one explosion they’ll have an opportunity to apply that lesson and avoid the next one. (Or, if they’ve figured out how to avoid the explosions, they potentially get twice the pay-off for it.)

Descent Into Avernus - Dungeon of the Dead Three

Second, there should be some clear indications that the cultists are trying to fix the gas leak problem. (And probably the sewage flooding the place, too. Yuck. They’re not Moander worshippers.)

Third, I think it would be cool if the cultists were USING the gas for something. Experiments in the Morgue (D13) seem cool. So rather than using stinkdamp, we’re going to use corpsedamp. Usually extracted by necromancers from rotting corpses, corpsedamp can be useful to their work in a number of different ways. I’ve previously written about corpsedamp here, including stats for corpsedamp zombies. So we’ll also swap out some of the skeletons and replace them with these experimental undead.

ELUSIVE MORTLOCK

We’ll talk about this in more detail in Part 3G, but looking at the dungeon on a macro-level it’s relatively easy to see that it’s fairly linear: There are a couple of side branches and a couple of loops, but the design strongly funnels you through the full dungeon to Area D29, where the essential encounter with Mortlock that links you to the next scenario is located.

We talk about some of the other problems with this encounter in Part 3 of the Remix, but the thing to note here, once you identify D29 as the essential Must Have Encounter™ for the adventure to continue, is that the only way to get to Area D29 is through the secret door in Area D23:

Descent Into Avernus - Dungeon of the Dead Three

I was initially going to describe this as a weird choice, but I think we can realistically describe it as simply being a bad choice. This is something I’ve talked about before, but you’ve created a chokepoint here which makes your scenario very fragile: If the PCs don’t find/go through that secret door, you literally have to toss out the next 232 pages of the book. So a secret door is a bad choice.

But they’ve also sort of tripled down on this bad choice:

  • The secret door is in a weird location: Just sitting in the middle of a hallway. That actually makes it far more likely that the PCs will simply never think to look for a door there.
  • They’ve put a cultist guard here who, upon spotting the PCs, runs off to a different area. This will have the effect of making the PCs chase him, making it even more likely that they won’t take the time to search this random chunk of hallway.
  • They go to oddly great lengths at several points in this dungeon to specifically prevent the PCs from learning about this secret door. (Which, again, is absolutely necessary for the entire campaign to happen.) For example, in Area D14 there is a rat. They actually take the time to specifically tell the DM that if the PCs use speak with animals, this rat DEFINITELY won’t tell them about the secret door.

I’m not a big fan of this kind of needless stonewalling in any case, but here it’s basically perverse.

Now, the work we’ve done revising the revelation lists for the Vanthampur Investigations (see Part 3C) has greatly reduced the fragility of Act I of Descent Into Avernus overall, and this is no longer a Must Have Encounter™. However, it’s still structurally ideal for the PCs to confront Mortlock here: You don’t need to force it to happen, but it also doesn’t make a lot of sense to go out of your way to prevent it from happening.

One way we could remove the fragility of this secret door would be to use the same solution we’ve applied everywhere else: The Three Clue Rule. Simply add three clues pointing to the existence of the secret door, giving the players a robust opportunity to have the revelation that it exists and then track it down.

Another solution might be making it explicit that (a) Mortlock Vanthampur is in the dungeon and (b) you need to confront/kill him. That way if the PCs have seemingly cleared the entire dungeon but HAVEN’T found Mortlock yet, they’ll know that there must be a secret door and they can scour the place until they find it.

But in this case the solution is considerably simpler:

Get rid of the secret door.

There’s absolutely no reason for this door to be a secret door, so just make it a regular door.

CRAMPED CORRIDORS

This is actually not a complaint which I have about the scenario, but one which I’ve seen expressed by a number of GMs (including several who have contacted me directly about it): The Dungeon of the Dead Three is filled with 5-foot-wide corridors and relatively small rooms, and this results in unsatisfactory combat encounters.

I haven’t actually run the scenario (so take this with a grain of salt), but I’ve run enough similar dungeon compounds over the years that my initial reaction to this complaint is strong skepticism. The claustrophobic conditions of a dungeon like this present unique strategic challenges, but it behooves the players to turn those strategic challenges to their advantage (rather than vice versa).

With that being said, to make a dungeon like the Dungeon of the Dead Three really come alive, you need to break the preconception (that’s been subconsciously ground into you by dozens, hundreds, or thousands of encounters from published scenarios) that fights “belong” to a particular keyed room.

For example, if you look at the necromite fight keyed to Area D10:

Descent Into Avernus - Dungeon of the Dead Three

… that looks like a really boring fight. A 15’ square? With three of those squares being occupied by NPCs?

But what you need to do is recognize that THIS is the real encounter area for the fight:

Descent Into Avernus - Dungeon of the Dead Three

It’s particularly important to understand this if you’re using a battlemap! It’s very easy to hamstring an interesting encounter by artificially limiting what you actually draw or present as the battlemap for it.

(I talk about these issues more in Running the Campaign: Dungeon as Theater of Operations if you’re interested.)

With all that being said, if this is an issue that concerns you, it looks to me like you can just interpret the map as being drawn at a 10 foot scale instead of a 5 foot scale. Nothing seems to go particularly wonky in doing so.

CULTISTS DOING WEIRD SHIT

Is it weird that one of the cultists has decided to stand guard in D23 “standing in the water” when he could go up the nearby stairs and not have his feet rot off? Yes.

But the cultists down here are doing all kinds of nonsensical shit that I don’t really understand, so maybe it’s just a gimmick that I don’t grok. For example, two days ago they killed a guy and just left his corpse floating in the water for no apparent reason. Or there’s the room where three cultists are lying on the floor “pretending to be dead”… just for fun? On the off-chance somebody chooses this precise moment to stop by?

I don’t get it. Maybe you do. But if you don’t, it’s something you might want to think about before running the dungeon.

DEAD THREE LEADERS

One subtle thing that I almost forgot to talk about because I actually did it subconsciously: Although the local leaders of the Dead Three cults do appear to be named in Descent Into Avernus (Yignath, Flennis, and Vaaz), only one of them is explicitly identified as such. The Remix not only calls particular attention to their identity for the benefit of the DM, it also gives some methods for the PCs to learn their identities.

Identifying the leaders isn’t strictly essential, so I didn’t bother doing a full Three Clue Rule work up for it, but you’ll note that I’ve dropped their names into various pieces of correspondence and you should also make a point of having cultists blabber them out when questioned.

Giving the players an opportunity to figure out the bad guys’ hierarchy here will give them a target list to aim for. This not only gives them the satisfaction of figuring something out, it also gives the Dungeon of the Dead Three a structure in play that’s just slightly more meaningful than “clear the dungeon” (even if, in actual practice, they still end up clearing every room).

TIAMAT TREASURE

There’s this weird little, somewhat abortive subplot here where the Vanthampurs have somehow stolen treasure from the hoard of Tiamat in Avernus. Some of the treasure is here in the Dungeon of the Dead Three and some of it is in Vanthampur Manor. As the PCs leave the dungeon, they encounter Tiamat cultists who have come to retrieve the treasure.

Descent Into Avernus - Tiamat CultistThe original intention appears to have been for this stolen treasure to be a significant plot point (Descent Into Avernus, p. 6): “By returning her stolen treasure, characters can convince Tiamat to break Elturel’s chains.” But it seems to have been dropped at some point during development (although mentioned in this opening summary, the treasure doesn’t actually factor into any negotiations the PCs have with Tiamat later in the scenario), leaving only some weird vestigial bits.

OPTION #1: My initial inclination was to basically finish expurgating the material from the adventure by removing the encounter with the Tiamat cultists and just not caring about where the cultists’ treasury came from. It feels like very little (if anything) is lost if you do this, and you can easily just excise the encounter if you’d like.

ESTABLISHING LORE: However, I did see an opportunity to use the Tiamat relic in the treasury to establish the key piece of lore that Tiamat is imprisoned in Avernus (since she will factor into the Avernus section of the campaign).

WHERE DID THE TREASURE COME FROM? The explanation (and significance) of how and why the treasure was stolen from Tiamat’s hoard appears to have been lost at some point during the campaign’s revision. Rebuilding all of that from scratch is probably more complication than I’m interested in dealing with, and if you’re going with Option #1 it’s largely irrelevant.

However, some of the additional material added to the Remix established that the Dead Three cult leader Yignath is easily distracted and may be pursuing projects other than the refugee murders. I decided this would include a burglary at Hhune Manor, in which he stole this treasure and also kidnapped Satiir Thione-Hhune. Mortlock allowed Yignath to keep the money, but has sent Satiir to Vanthampur Manor to be used as political leverage.

(Because the Shield of the Hidden Lord is no longer stolen from the Hhunes in the Remix, this also explains Satiir’s presence in Vanthampur Manor.)

OPTION #2: Having done all this, I realized that the Tiamat cultists had suddenly become both relevant and interesting again. In this option, the Hhune treasures included a number of Tiamat-related artifacts, including two pieces — a mask and a crown (see relevant lore below) — that were deeply desired by Arkhan the Cruel. Wards of the Hhune vaults had long hidden them from Arkhan’s sight, but once they were removed from the vault they became vulnerable and the cultists were sent to retrieve them.

  • The cultists’ interest in the artifacts will direct or redirect the PCs attention to them, allowing us to emphasize the key piece of lore.
  • If the PCs are aware that the mask has been removed from the cache and taken to Vanthampur Manor, they may be able to convince the Tiamat cultists to assist them in raiding the manor.
  • Alternatively, the Tiamat cultists might figure out where the mask is independently and complicate the PCs’ raid by executing their own raid at the same time.
  • If the PCs assist the cultists in retrieving the artifacts, they are thanked “on behalf of Arkhan the Cruel.” If they encounter Arkhan when they travel to Avernus, he will be more inclined to aid them.

RELEVANT TIAMAT LORE: The full history of Tiamat is a twisted knot that I’m not going to attempt to unravel at the moment. There are three key facts:

  • She once ruled Avernus, but the evil dragons born of the vast spawning pits she created proved ineffective in the Blood War and Asmodeus deposed her. (This epoch of Avernus would have predated even Gargauth’s rule by eons.)
  • Tiamat is somehow imprisoned in her lair, which also guards the entrance from Avernus to Dis, the second layer of Hell.
  • In the Year of the Bloodbird (1346 DR), Untheric cultists successfully summoned an aspect of Tiamat in the form of the Dark Lady. When the Dark Lady first appeared, she wore a simple crown and mask. It is, in fact, this crown and mask which the cultists seek. (They have no magical powers; they are merely historical curiosities held in great reverence by those who have pledged their fealty to the Dragon Queen.)

Go to Part 3F-B: Dungeon of the Dead Three (Revised Key)

This post contains SPOILERS for Waterdeep: Dragon Heist.

A unique challenge to running urban campaigns is figuring out what happens if the PCs, confronted with some horrible crime or circumstance, do the logical thing and seek help from powerful allies. And the scope of this problem tends to grow as technology (or its magical equivalent) improves communication, travel speeds, or both. (Low level D&D characters in the middle of the woods tend not to have any recourse; modern teenagers with cellphones are a completely different story.)

In my experience, the problem also intensifies in what I’ll call mythological settings, where single individuals (powerful wizards, Sith lords, starship captains) can be possessed of immense power. This is because it can be both easier for the PCs to get access to these characters and often harder to explain why they don’t want to get involved.

Let’s take a step back for a moment: Why is this a problem?

First, it really mucks up the challenge level of the scenario when Batman calls in Superman to deal with the Joker. Second, it’s dramatically unsatisfying to go through all the preamble of a conflict only to be sidelined while Elminster heads off to experience the end of the story.

Now, let’s address the elephant in the room: There’s often an unspoken genre convention and/or table agreement that calling in the Big Guns is generally poor form and shouldn’t be done because it’s disruptive to the desired experience. If you want to make that a spoken agreement more power to you, but there are a couple things to be aware of:

First, this can actually create a different sort of problem for some players because it creates a tension between what their characters should be doing (based on their understanding of who that character is) and what that character is allowed to do. For some players, making this an explicit, spoken agreement can resolve this problem (because with the option definitively off the table the tension disappears). But for other players, it will actually make the problem worse because either acknowledging the tension or explicitly prohibiting the choice is even more disruptive to their roleplaying.

Second, calling in the Big Guns is not exclusively a problem. It’s also an opportunity. And there’s a lot of really cool experiences that you’re taking off the table if you just flat out ban these interactions. Superman shouldn’t just swoop into every Batman story, but World’s Finest crossovers can be really awesome.

On the flip side, this also means that sometimes players call in the Big Guns because it’s what makes sense for their characters to do… but that doesn’t necessarily mean that they want to do it as players! They don’t want to be sidelined while the Big Guns take care of everything, and they’re actually hoping that you’ll reject the offer so that they can have done the right thing in roleplaying their character truthfully AND get what they want by continuing to be in the starring roles in the rest of the adventure.

All of which means that, at some point, you’re going to run into a situation where the PCs decide that it’s time to call in the Big Guns.

What happens next?

#1. IT WORKS

They call in the Big Guns, the Big Guns have a good reason to be involved, and they come in and deal with the situation. Problem solved!

The trick here is to frame getting the help of the Big Guns as being the major accomplishment and then just letting loose and really enjoying the curb-stomping done by the Big Guns as the reward for a job well done.

If you want an example of this from another medium, look at The Lord of the Rings. Most of The Two Towers consists of the heroes trying to convince one major ally or another to put some skin in the game: Theoden, Treebeard, etc. Or take this scene from the movies:

Pippin literally summons an entire army to help solve his problems.

This approach works if the players see the Big Guns as a manifestation of their will; no different than a fireball or a powerful magical artifact. THEY were the ones who called on the Big Guns. This can be a tricky balancing act to pull off, but it can be immensely satisfying when you do.

#2. THEY’RE BUSY

The Big Guns are busy doing something else and therefore cannot help.

This can be used preemptively if there’s a time crunch (“Sorry, Harry, Dumbledore isn’t in his office right now”), but it can be equally effective if the conflict comes up at the last possible second: “Great. Glad we’re all gathered here to go down into the Vault together. Now that we’re fully committed to this course of action, let’s— Wait! There’s a tarrasaque attacking the harbor! I’ve got to go!”

This works better, of course, when it emerges naturally out of the narrative. For example, in my Dragon Heist campaign the group had recruited Renaer and the Black Tears to assist in raiding the Cassalanters. That gig resulted in them “arresting” (i.e., kidnapping) Lord Cassalanter and taking him to the Blackstaff. At this point, I could clearly see the risk of the PCs’ contributions for the rest of the campaign getting washed out by a confluence of powerful NPCs: The stakes had gotten high enough that it would be hard to justify the Blackstaff and the Open Lord of Waterdeep not getting directly involved. So I framed the Blackstaff’s response accordingly: She called up Renaer and the Black Tears to help her perform a rapid-fire investigation of the Cassalanters to accumulate the evidence necessary to “make the arrest legal after the fact.”

The Blackstaff and Renaer were still helping the PCs, but only off-screen and tangentially.

You can also bake larger priorities into the setting. For example, in my Ptolus campaign there’s an invading army that’s marching towards the city. No matter how dire the stakes are in whatever scenario the PCs have gotten themselves involved in, it’s not hard to argue that preparations for a literal war are more important, giving me an easy trump card that I can play any time I need it.

On the other hand, you don’t actually need to go into a lot of detail as long as you’ve firmly established that the NPC in question is tied up in more important affairs; that they’re operating at a higher tier than the PCs. For example, when the Dragon Heist PCs later sent word to the Blackstaff that they’d located the Vault, the Blackstaff simply replied, “Good luck! Let me know how it goes!” The implication was that she was busy doing something else and trusted the PCs to take care of it.

On that note: You usually want the NPC, even though they don’t have the time or resources to deal with the problem, to acknowledge how clearly important the information the PCs are bringing them is, rather than belittling it. (Unless, of course, the PCs really are just wasting their time with trivialities.) This validates the players’ actions AND ratchets up the stakes.

The quickest way to achieve this effect is for the NPC to say, “This is clearly very important… which is why I’m deputizing you to deal with it.” In my Ptolus campaign, for example, I had the Commissar specifically deputize the PCs to deal with the local activities of the chaos cults. Ergo, any time they discovered some new, horrible thing that the chaos cults were involved with, the official response could neatly default to, “Keep up the good work!”

Another effective way of handling this brush off is for the Big Gun to give the PCs’ some form of assistance, even if they can’t get directly involved: A suitcase full of cash. A platoon of elven archers. The phone number of an old friend in Cairo they should talk to. Et cetera.

This idea of rewarding the PCs for going to the Big Guns is a common theme here: Even if the Big Guns turn the PCs down flat and refuse to help, if there’s still some sort of reward for having gone to them in the first place, then the players will feel validated in their choice. (It also tends to just make sense, unless the PCs were completely off-base in their belief that the NPC would care about what’s happening.)

#3. THERE’S A REASON THEY CAN’T HELP

Later in my Dragon Heist campaign, when Lady Cassalanter kidnapped one of the PCs’ adopted kids, the PCs sent a message to the Blackstaff.

Since we’d already established that the Blackstaff was investigating the Cassalanters, there was no good reason for her not to drop everything and come to help. But I knew that a fight with Lady Cassalanter would become trivial if the Blackstaff was involved, so Lady Cassalanter erected some wards around her location that would have specifically detected the Blackstaff’s approach (since she knew that the Blackstaff was now involved and had been investigating her family). The Blackstaff detected the wards, warned the PCs, and veered off. She’d be nearby, but with Lady Cassalanter holding a hostage it was just too risky for her to come barreling in with the PCs.

(This was also a hybrid because the Blackstaff actually gave them valuable intel on where Lady Cassalanter might be holding their son, so she’d already helped them to a certain extent and the PCs had been rewarded for calling her in. You can read about what happened next in this campaign journal.)

In my Ptolus campaign, another major element of Act II is the exploration of the Banewarrens. These, once again, pose a potentially existential threat in the middle of the city, and there once again needs to be some explanation for why the city authorities and other major players don’t come barging in to resolve the crisis. In this case, I simple turned the Banewarrens into a point of religious dispute. The two halves of the schismed Church effectively checkmated each other, and the civil authorities in the form of the Commissar refused to get involved because of the tangle of Church politics.

#4. SPLIT THEM UP

Morpheus - The Matrix Reloaded

“We have not come here by chance. I do not believe in chance. When I see three objectives, three captains, three ships, I do not see coincidence. I see providence. I see purpose.” – Morpheus, The Matrix Reloaded

Now that the Big Guns have been called in for the actual op, split the group up: While the Big Guns do one thing, the PCs need to do another.

For example, we could imagine a Dragon Heist campaign where the PCs have successfully recruited the Blackstaff or Manshoon or Laeral Silverhand to come into the Vault with them and retrieve Neverember’s stolen hoard. But as the Vault cracks open, the bad guys suddenly arrive with something so incredibly dangerous — the Cassalanters summon a pit fiend, or Xanathar himself shows up with a bevy of gazers and mind flayers, or Jarlaxle teleports in with a platoon of elite drow mercenaries — that the Big Gun has to deal with it. They turn to the PCs and shout, “This could all be a distraction! Get into the Vault! Make sure the gold is secure!”

This is also a good example of how, as the GM, you want to pay attention to why the players want to call in the Big Guns. For example, they may have concocted some incredibly convoluted scheme that requires them to be in nine places at the same time and they have no idea how they can pull it off by themselves. That’s a perfect opportunity to just lean back, let them bring in the Big Guns without fuss, and then peel them off into separate action groups.

#5. FLIP IT AROUND

Now that the Big Guns are involved and putting themselves in charge, they send the PCs to do something crucial for their success.

Returning to our example of the Dragon Heist Vault, when Jarlaxle shows up with his force of drow mercenaries, the Blackstaff turns to the PCs and says, “Hold them off here! I’m heading into the Vault!” Once the drow goons are defeated, the PCs follow and discover the Blackstaff standing over the dragon she’s just slain. A dragon?! Phew! Good thing they called her in!

If you’re more dramatically inclined, you can also frame this so that the PCs show up just in time to take the shot that finishes off the dragon. “Thank you!” says the Blackstaff. “It was a more difficult foe than I had expected!” Or whatever.

You can also reverse expectations here by making it LOOK like the crucial part of the mission (i.e., the thing that the Big Guns are going to go do) is one thing and the ancillary goal is some other thing, while in reality it’s actually the exact OPPOSITE. So the PCs get sent to pursue the ancillary goal in a supporting capacity, but then it turns out they’re actually doing the absolutely vital thing that’s going to save the day! (“I thought Griznak was going to be at the fort?!” “Yeah, well, he’s here, and we’re out of time. Let’s go!”)

#6. THEY ARE THE BIG GUNS!

The zero-to-hero dynamic of D&D tends to get ingrained to the point where we sometimes forget that it’s fully possible to have a campaign dynamic where there AREN’T any Big Guns to appeal to because the PCs are the biggest guns around.

This can be particularly true within a specific set of parameters.

Even in D&D, it’s quite possible to run a campaign where, once the PCs hit mid-level play, they’re the most powerful people in town (and possibly for hundreds or thousands of miles around).

On that note, even if they aren’t the biggest guns in town, this is nevertheless a great time to have low-level adventuring parties come knocking on the door with problems that they need a Big Gun to solve for them.

FURTHER READING
Random GM Tip: Calling in the Little Guys

Go to Table of Contents

Forty years ago, the Poisoned Poseidon was a pirate ship that tormented the Sword Coast. Its captain was the warlock Kelton Hunter, who used his ill-gotten gains to fund his infernal spellcraft. In 1457 DR, the pirate warlock sailed the Poseidon at the head of a pirate fleet into the harbor of Baldur’s Gate itself. In a duel with local adventurers, powerful spells caused the massive ship to be washed ashore, leaving it high and dry nearly a hundred feet from shore in the Brampton neighborhood. Kelton himself is said to have vanished, although locals still tell the story of how devils dragged him through a portal to Hell itself.

No one wanted to pay to have the hulk removed, and so for several years it lay abandoned, slowly sinking into the muck while serving as a breeding ground for rats and a lair for various ne’er-do-wells. When the old retaining walls of the dock (damaged during the Spellplague) were finally repaired in the 1470s, however, the ground around the Poseidon stabilized and new construction sprang up around it. The ship itself was converted into a tannery.

In 1492 DR, Dead Three cultists quietly took over the tannery. Other employees were cycled out and cultists were brought in. The Poseidon still operates as a profitable tannery, but serves as a front for cult activities.

LOCATION OF THE POSEIDON

 The Poisoned Poseidon is located here:

Baldur's Gate - The Poisoned Poseidon

I’d originally looked at placing it on the far western edge of Brampton, but realized this would basically put it directly across the street from the Low Lantern (see Part 3H: Trafficking Amrik). Nonetheless, we can see how the investigation is going to send the PCs tramping about in the Brampton neighborhood, so it’ll probably be a good idea to review the details on the neighborhood and see what else is in the area before running this session.

Of course, since I’m creating the Poisoned Poseidon out of whole cloth, it doesn’t actually appear on the map. But I did pick a section of the map that fit my general image for the tangled warren of buildings I imagined lying around the ship. (Take a peek at Random GM Tip: Visualizing City Block Maps.)

With a little bit of photoshopping, though, I was able to add the ship to Baldur’s Gate (and threw in Insight Park, too):

Baldur's Gate - The Poisoned Poseidon & Insight Park

You can buy the high-resolution isometric map and top-down map from Mike Schley’s web store. The image above is a relatively tiny section of the isometric view, but I’ve maintained the same resolution so if you buy the map you should be able to add it seamlessly using any image manipulation program.

REFUGEES ON THE DOCKS: One of the reasons for using the Poisoned Poseidon and placing it on the Docks, is to provide an opportunity to view the Elturian refugee crisis from a different angle. The docks just to the east are crowded with refugees trying to find passage on already overbooked ships. Where to? For most of them, it almost doesn’t matter. They’re hoping that the situation will be better in Amn or Waterdeep or Daggerford or Neverwinter or almost anywhere. (Many of them might believe that whatever happened to Elturel is coming for Baldur’s Gate next and they just want to get as far away as possible. See Rumors of Elturel.)

MAPS OF THE POISONED POSEIDON

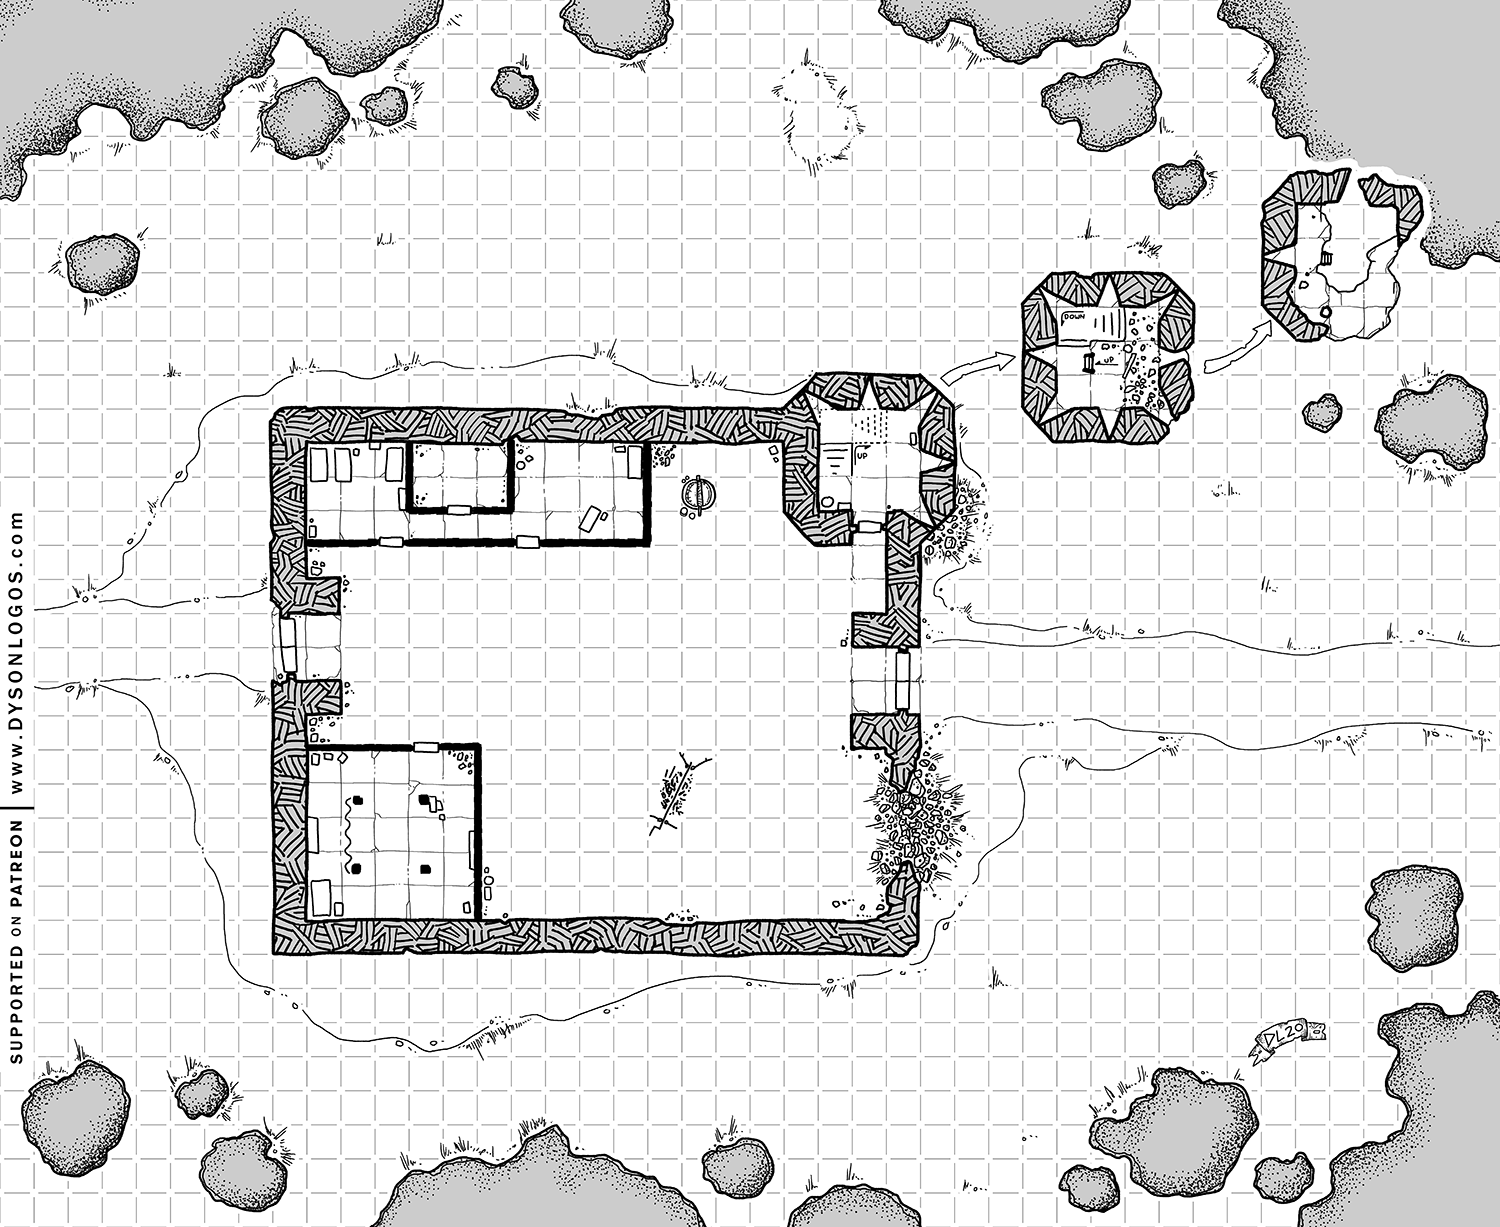
In creating the Poisoned Poseidon, I hacked together several different maps. First, to position the ship into the urban environment, I took Dyson Logos’ map of Mistshore from Dragon Heist (a slice of which you can see here) and hacked it together with the Third-Story Run map from his website.

The Poisoned Poseidon - Street Map

For the lower decks of the ship, I grabbed one of Mike Schley’s maps from Ghosts of Saltmarsh, did some quick photoshopping to make it match the neighborhood map of the ship, and then added a Lower Hold from Dyson’s Buried at Sea:

The Poisoned Poseidon - Lower Decks

Dyson’s map had actually been of an ersatz ship — a crypt that had been made to resemble a ship — but that didn’t matter: For our purposes, the Lower Hold is the part of the ship that had sunk into the muck. As some point, this unintentional “basement” was expanded by knocking a hole in the back of the ship.

(It was this image that actually decided me on the Poisoned Poseidon: When considering locations that could serve as a murder sites for the Dead Three cultists, Dyson’s Wolf Tower and Vanshiro Reliquary were also on the short list.)

And, of course, because we’re hacking maps together here, the “set dressing” is that of an active ship rather than one which has been converted into a tannery. The scale also changes from 10’ squares to 5’ squares.

KEYING THE POISONED POSEIDON

I’m going to describe the Poisoned Poseidon in broad strokes. If you want to write up a detailed key of each room, it should be a fairly straightforward extrapolation.

As the PCs explore the Poisoned Poseidon, they’ll also be exploring a medieval-style tannery. My primary reference for this was Kim Rendfeld’s short article “Odd Jobs — Tanning: A Medieval Dirty Job,”which I recommend checking out.

OUTBUILDINGS: A wooden staircase on the north side of the ship leads up to the deck. A number of buildings have been erected directly next to the old hull. These mostly contain supplies for the tannery (chemicals, blades, stretching racks, etc.).

MAIN DECK: The main deck is generally kept clear, but there might be a stack of tanned hides ready for sale. A crane has been installed on the poop deck that is used to raise and lower heavy material from street level.

MAIN DECK – CABINS: The Master of Souls’ quarters are found in the fore cabin. One of the aft cabins is a meeting room. The Poseidon Correspondence handout can be found here.

LOWER DECK: Most of the lower deck is used to store the untreated skins of slaughtered cattle that are delivered to the tannery, along with the blood, dirt, manure, hooves, and horns that come with them.

LOWER DECK – CABINS: The aft cabins are used as sleeping quarters for the murder squad. The smaller fore cabin has been converted into an armory. The larger fore cabin contains three small shrines, one dedicated to each of the Dead Three.

HOLD: The fore chamber is a work floor where skins are trimmed. The aft chamber has huge vats. Here skins are sprinkled with urine or soaked in an alkaline solution of wood ash and lime before being folded, hair-side in, and taken down to the Lower Hold.

In the main hold, skins which have been treated in the Lower Hold are brought back up and placed in stone treatment vats containing a solution made from the bark of spruce firs. They remain here for as long as a year before being ready for sale.

LOWER HOLD – CATACOMBS: The various niches lining the catacomb halls are stacked with urine-soaked skins (they are kept here until the rotting hair has loosened). The four iron doors lead to small cells where prisoners are held to various purpose.

LOWER HOLD: The lower hold is studded with wooden racks on which treated hides are spread. Special knives, which hang on the walls, are used to scrape the hair off one side and whatever flesh remains on the other. Several huge vats are then used for washing: A solution of pigeon droppings or dog shit removes the lime.

In the center of the Lower Hold is a table. Shohreh Netitia’s corpse lays there. A side table contains a disturbing variety of surgical instruments and three brands (each with the holy symbol of one of the Dead Three). The Poseidon Papers handout can be found amidst these instruments and Shohreh Netitia’s refugee papers can be found among her personal effects.

  • Refugee Papers: A DC 15 Wisdom (Perception) test reveals the papers to be forgeries. The forgery can also be detected if the PCs look to verify the origin of the papers (for example, by cross-referencing the refugee lists in the High Hall; or tracking down the official tabularius whose authorizing seal supposedly appears on the papers).

ADVERSARY ROSTER

Iron Consul + 3 Fists of BaneMain Deck
2 CommonersLower Deck(tannery workers)
2 Fists of Bane + 2 NecromitesLower Deck - Cabins(resting)
ReaperHold
4 CommonersHold(tannery workers)
Master of Souls (Remigio)Lower Hold(preparing body)
2 Fists of BaneLower Hold - Tunnels(guarding cells)

* Remigio has already cast animate dead today, leaving him with only one 3rd level spell.

Stat blocks for Dead Three cultists can be found in Descent Into Avernus, p. 231-235.
See Art of the Key: Adversary Rosters for details on using an adversary roster.

OBSERVING THE POSEIDON: PCs who place the Poisoned Poseidon under observation will be able to observe the regular routine of both the tannery and the murder operation.

  • Fists of Bane and Necromites from the Lower Deck cabins relieving the watch on the main deck.
  • Tannery workers collecting supplies from the outbuildings.
  • A shipment of raw cattle hides being delivered from the Hamhocks Slaughterhouse.
  • Tanned hides being loaded onto a cart and taken to the Wide for sale.
  • The reaper leaving to go to the Frolicking Nymph Bathhouse (see Part 3F: Dungeon of the Dead Three) and then returning with written instructions. (He’s likely to then meet with the Master of Souls in the Main Deck cabins.)
  • A necromite and two Fists of Bane leaving with Shohneh Letitia’s corpse (to be dumped in Insight Park).
  • A messenger from the Frolicking Nymph Bathhouse carrying a letter indicating that they’ve located Iolanthe Oshrat. (The messenger then returns to the Dungeon of the Dead Three.)
  • A necromite and two Fists of Bane leaving to kidnap Iolanthe Oshrat (their next victim).

QUESTIONING CULTISTS: Cult members can be interrogated, although they won’t cooperate easily. All of them know that their instructions come from the cult leaders at the Frolicking Nymph bathhouse. Only the Master of Souls knows that they are specifically targeting Elturian knights.

(The tannery workers are also Dead Three worshippers. They know the murders are happening, but they aren’t “read in,” so to speak. They do know that instructions come from some other cell of the cult, specifying who the targets are.)

Some names you can use for cultists, if needed:

  • Fahul (a Fist of Bane)
  • Thando Ora
  • Joslyn Ifa
  • Zangaroa

POSEIDON CORRESPONDENCE

Remigio—

I’m not really surprised to hear that Fahul is complaining about living in a tannery, the fastidious little weasel. I’m pretty sure Vaaz just wanted him out of his hair when he assigned him to you. If he keeps giving you a headache, remind him what the alternative is. I doubt he’ll find the noxious fumes of this sewer we’ve been gifted under the bathhouse any better.

                                                                                                                Flennis

Remigio—

Expect more Fists from the Frolicking Nymph within the tenday. And probably a couple of Night Blades. Now that the Agent has his operation fully established, he should be able to start feeding us targets at a faster clip.

                                                                                                                Flennis

Master of Souls,

I hope all things are well. I have heard complaints from one of my Fists, but I assure you that neither I nor the Emissary lend it any credence. The Emissary does suggest, however, that your minions begin dumping the bodies farther afield. He wants us to “spread the terror,” and is also concerned that the park may become a security concern.

                                                                                                                Vaaz

POSEIDON PAPERS

SHOHREH NETITIA

Hazel skin. Green eyes. Dark brown hair braided in two tresses.

Residence: Cuiric’s Boarding House

Relation: Great-Grandmother

She lives near the Frolicking Nymph. An abduction squad or observers could be sent from the bathhouse if it would be easier.

FOLLOWING UP: Cuiric’s been dead for a hundred years, but his boarding house is run by his great-granddaughter Laila. She found the door to Shohreh’s room broken down and reported it to the Flaming Fist, but there’s been no follow-up. Shohreh’s great-grandmother was a Hellrider, but there’s no clear way of discovering that (unless, of course, the PCs get clever). The relevant clue here is that whoever is feeding names to the Dead Three cultists is interested in who they’re related to (which might prompt the PCs to ask questions when backtracking the other victims, see Part 3D: Investigating the Murders).

Go to Part 3F: Dungeon of the Dead Three

The Trade Way - 5th Edition

So here’s a thing about the Forgotten Realms that’s bugged me off-and-on for thirty years: You see that gap in the Trade Way?

It shouldn’t exist.

According to traditional Faerunian lore, the Trade Way runs from Luskan in the north all the way to (depending on time period/edition) Amn or Tethyr or Calimport in the south. There shouldn’t be a gap in it.

It turns out that the origin of this gap is from this map in the 1st Edition Forgotten Realms Campaign Setting boxed set:

The Trade Way - 1st Edition

For a long time I assumed that this passage from the campaign setting was responsible for the gap:

In recent years, some evil agent allied with he orcs, trolls, and bugbears of the High Moor succeeded in opening a gate to the Nine Hells within [Dragonspear Castle]. Strengthened by a growing army of devilkind, the combined forces of the High Moors tribes devastated the area from The Way Inn to Boarskyr Bridge, such that today that part of the Trade Way is not considered safe territory.

Given the absence of the road from the map, I thought “not considered safe” and “devastated” might mean that the Trade Way had actually been destroyed here, severing the easiest trade route between the northern and southern reaches of the Sword Coast.

This was not actually the case. In fact, an army had marched against the devils of Dragonspear Castle, sacked it, and established regular armed patrols out of the Way Inn.

Before we move on, however, let’s talk about what happens between Scornubel and Baldur’s Gate:

Baldur's Gate & Scornubel - 1st Edition

For an even longer time (based on the map), I assumed that the Trade Way actually was interrupted here: Trade would come down the road to Scornubel and then take the Chionthar River to Baldur’s Gate before continuing south.

This also turns out not to be the case: The Trade Way has always entered Baldur’s Gate via the city’s north gate, which would imply that there must be a road which runs from Scornubel to Baldur’s Gate (and various snippets of text support this).

But here’s the odd thing: Elturel is never described as being on the Trade Way, despite the fact that logically a road from Scornubel to Baldur’s Gate would pass right through the city. In fact, Elturel is explicitly NOT on the Trade Way; instead a road heads northeast from the city and “meets the Trade Way” at the village of Triel.

Now, more detailed maps DID exist:

The Trade Way - 1st Edition

(Thanks to @roboros for pointing this one out to me.)

You can see from this map that the “gap” is actually a section of less-developed road along the Trade Way. There’s still no road between Elturel and Scornubel, however, so we still don’t know how the Trade Way gets from Scornubel to Baldur’s Gate.

The next map was, as far as I can tell, produced for the Forgotten Realms Atlas (1990):

The Trade Way - Forgotten Realms Atlas

The big difference here is that the road leading directly from Dragonspear Castle to Baldur’s Gate has been upgraded to a major road. Which also prompts a new question: Why isn’t THIS road used as the Trade Way?

We do have another source here: Ed Greenwood’s original map.

These were apparently displayed at Gamehole Con in 2019 and you can find photos of them here.

The details are a little hard to see, but we can generally make out that the maps we’ve seen so far largely echo Greenwood’s original cartography. (The only quibble I’d have is that I’m fairly certain the intention is for two roads to leave Boareskyr Bridge to the south; not for one road to run several dozen miles south before splitting.) The big thing to note here is that the lack of a road between Elturel and Scornubel is NOT a production error; Greenwood didn’t have it on his original map.

This brings us to 2nd Edition, which largely follows what we’ve seen so far but notably labels the road to Baldur’s Gate as the “Coast Way”:

The Trade Way - 2nd Edition

(We’ll come back to this.)

The Realms map was then completely redone for 3rd Edition:

The Trade Way - 3rd Edition

It turns out this map is very controversial among Realms experts. While adding considerable detail, it notably introduces a number of errors. (For example, in this section you can see how the road which is supposed to cross the Winding Water at the Troll Claw Ford is depicted here as missing the Troll Claws entirely.)

As far as the Trade Way is concerned, it’s a mixed bag. The decision has been made to upgrade its entire length to a major road, and it’s also added the road between Scornubel and Elturel that we’ve hypothesized must exist. But the route still isn’t particularly clear: West of Elturel, the road now cuts far to the northwest (almost all the way to the Troll Claws), and this section hasn’t been upgraded to a major road like the rest of the Trade Way.

Let’s move onto 4th Edition:

The Trade Way - 4th Edition

This map is… interesting. It’s obviously a regression in terms of detail, but there are also a number of glaring inaccuracies. (The road crossing the river far to the east of Baldur’s Gate instead of passing through Baldur’s Gate is probably the most notable for our purposes.)

The other notable thing here, however, is that the writers of 4th Edition also clearly wondered why the Trade Way would go all the way easy to Scornubel if there was a road heading straight to Baldur’s Gate.

Their solution was simple: It doesn’t. In 4th Edition, the Trade Way no longer goes to Scornubel. The write-up of Scornubel never mentions the Trade Way and the description of the Trade Way itself makes it fairly explicit:

Over the centuries, numerous separate caravan paths coalesced into a well-traveled route along the western edge of Faerun called the Trade Way. Regular traffic once extended from Luskan to Calimport, but has been truncated since the Spellplague. It now runs from Waterdeep to the southern edges of Tethyr. Parallel to but usually some distance from the coast, the route moves farthest east just north of Baldur’s Gate, where Elturgard paladins guard the crossing at the Winding Water River. Few, if any, of the lands through which the Trade Way passes are completely safe, and caravan guards are in constant demand.

(Somewhat incoherently, however, the same campaign guide still asserts that the Trade Way crosses Boareskyr Bridge. Which, of course, it wouldn’t do if it’s following the road to Baldur’s Gate.)

This brings us back to 5th Edition’s version of the Realms, with the original version of the gap we looked at to begin with. My understanding is that 5th Edition’s cartography went back to the original 1st Edition maps in order to sort of “get back to basics.” Unfortunately, the result was to also reintroduce a lot of errors and shortcomings from those original maps (including the gap in the Trade Way).

THE TRUTH OF THE TRADE WAYS

When I started this write-up, my original intention was to basically just say, “Hey! Look at the gap!”

But it turns out there’s a deep lore here.

If you do a close reading of the 1st Edition boxed set (which I, in fact, just did while fact-checking all this), you’ll discover that the entire idea of there being a single “Trade Way” is an illusion.

There was a Trade Way from Amn to Waterdeep. For example, Baldur’s Gate was “situated on the northern shore of the river, astride the Trade Way from Amn to Waterdeep.”

But there was another Trade Way, from Waterdeep to Iriaebor:

[Elturel] has been seeking ways to unseat Scornubel as the major trading town on the Trade Way between Waterdeep and Iriaebor.

And it is this second Trade Way that goes to Scornubel!

The reason there’s no road from Scornubel to Baldur’s Gate (and why Elturel is explicitly not on the Trade Way) is because there ISN’T a Trade Way between Baldur’s Gate and Scornubel.

They’re two different Trade Ways. (In fact, my suspicion would be that there were originally many more Trade Ways. These were just the ones that got particular mention in the first boxed set.)

In the 2nd Edition boxed set, the addition of the “Coast Way” was actually an attempt to make the difference between the two different routes clear. In fact, this boxed set never refers to Baldur’s Gate as being on the Trade Way. Instead, “it is situated on the northern shore of the river, astride the Coast Way from Amn to Waterdeep.”

But I suspect that due to all the prominent references to Baldur’s Gate “being on the Trade Way” and “the Trade Way follows the coast” that already existed, this distinction became confused. In short order, the Coast Way was effectively just another name for the Trade Way, and shortly thereafter it would be explicitly stated as being such, reintroducing the confusion.

Of course, this means that there’s actually ANOTHER gap in the Trade Way, this one between Scornubel and Iriaebor:

Scornubel to Iriaebor - 1st Edition

Unfortunately, there doesn’t seem to be any clear solution to this. No maps of the Realms appear to depict roads heading south from Scornubel.

Nevertheless, the original intention is fairly clear: The Trade Way from Waterdeep split north of the Winding Water, heading to Amn (gateway to the South) and Iriaebor (gateway to the Inner Sea).

LOST IRIAEBOR

I think the real victim here is Iriaebor.

If the cartography accurately depicted the Trade Way running all the way through to the City of a Thousand Spires, Iriaebor wouldn’t just be one of a number of cities crammed in around the Far Hills. Instead, it would very clearly be the Constantinople-like lynchpin between the Sword Coast and the Dalelands.

Let me show you what I mean by sketching in the “missing” roads on the 1st Edition map (imagining the Trade Way punching through the Reaching Wood southeast of Scornubel for lack of a better option):

Reimagined 1st Edition Map of the Trade Way to Iriaebor

(click for larger image)

The importance of Iriaebor immediately leaps out. It’s obvious at a glance that it’s the only game in town for east-west travel for hundreds or thousands of miles in either direction. Every campaign in the Dalelands that wanted to go to Waterdeep would have gone through Iriaebor, sitting almost directly in the middle of the map with every road north of Amn leading straight to it.

I find it quite plausible to imagine that more DMs, designers, and novelists would have been drawn to the city. In the Cyclopedia of the Realms, page 54 might have become well-thumbed:

The Ruler of Iriaebor is Bron, who was an adventurer catapulted into the position in the heat of a shooting war between merchant families. Bron feels Iriaebor has the resources to become another Waterdeep…

Let’s spend a little moment dreaming of Bron’s dream together.

Archives

Recent Posts


Recent Comments

Copyright © The Alexandrian. All rights reserved.