 There are, in my opinion, two big lessons to take away from our review of the history of location keys: First, there is an obvious need to separate information that should be immediately available to the PCs from the more detailed information in the room.
Second, there is a clear and logical desire to break up and organize the information in the key so that the GM doesn’t have to wade through a wall of text in order to pluck out the information that they need at any given moment.
The real question, of course, is how the information in the key can be effectively organized for the GM’s use. We’ve already rejected the idea of a rigid or dogmatized format, but there has to be something better than just puking everything out onto the page and hoping you can pick out the useful bits later.
The ultimate solution, in my experience, is to focus on the sequencing of information: How the information will flow (or is likely to flow) at the actual gaming table.
TITLE OF THE ROOM
Start with the title of the room. Technically, this is optional, but I find that a good title instantly orients you: It tells you what type of room it is and can also serve as a valuable reminder and touchstone if you’ve familiarized yourself with the adventure.
BOXED TEXT
We start with boxed text which conveys the common information that anyone walking into the room would immediately perceive. (“You see a box in the corner with a weird symbol painted on it.”)
This doesn’t have to literally be text in a box, of course, but it should be clearly delineated from the rest of the key and contain all of the information that should be immediately conveyed when the PCs first enter the room. I also think of this section as seen in a glance.
Brendan over at Necropraxis makes the interesting point that if you’re confronted with a wall of text in a published module, you can often yank out a useful “seen in a glance” section by strategically using a highlighter. Here’s an example from the Tomb of Horrors:
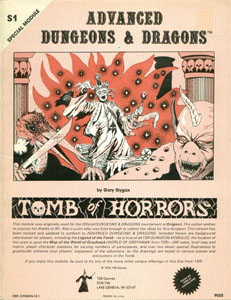
It was actually while attempting to run the Tomb of Horrors that I first realized how important it was to clearly segregate the “initial player briefing” for an area from the general description of that area. (And also the importance of making sure that the initial briefing is complete and accurate.) This is actually what led me to create a complete revision of the Tomb specifically designed to make it easy for the GM to run it.
REACTIVE SKILL CHECKS
Directly after the boxed text are the reactive skill checks which should be made immediately by anyone entering the room. These are typically perception-type checks, but they might also be knowledge checks. (For example, a See Hidden roll to notice that there are small spiders crawling all over the box. Or a History check to recognize the symbol on the box as the royal seal of Emperor Norton.)
It’s actually surprising to me how often I see this type of information mishandled in published adventure keys. For some reason you’ll get six paragraphs describing the room in detail and then, buried somewhere near the bottom, the author will suddenly reveal that the PCs should have made a Spot check to see if they notice that the ceiling is coated in flammable oil. (What this usually means at the table is that the PCs will have spent several minutes exploring all the stuff described in those first six paragraphs before I notice that a Spot check should have been made 10 minutes ago. Whoops.)
SIGNIFICANT ELEMENTS
At this point, each significant element in the room is independently described with additional details that will become important if characters investigate or interact with it. (“Inside the chest is a ruby which has been cracked in half. You can see that the inside of the ruby is filled with empty spider’s eggs.”)
What constitutes a “significant element”? Basically anything that the GM needs more information about. Most of the time that means anything that the players are likely to interact with or investigate.
This is usually pretty self-evident. For example, look back at that highlighted example from Tomb of Horrors. If you started grabbing significant elements from the “seen in a glance” stuff, you’d end up with something that looks like this:
Old Jars: Filled with dust and impotent ingredients of all sorts.
Clay Pots/Urns: These obviously once contained unguents, ointments, oils, perfumes, etc.
Vats: Each of these vats contains murky liquid. They are affixed to the floor and too heavy to move.
Notice that the bold title makes it easy to find the information you need. It also makes it easy for the GM to quickly process what the room contains and how it “works” in play. (What’s in this room? Old jars, clay pots, urns, and some vats. What happens when they look in the jars? They see that they’re filled with dust and impotent ingredients.)
DEVELOPING SIGNIFICANT ELEMENTS
Let’s focus on those vats a bit more.
Obviously I’m cheating with the key above because there’s a lot more information about those vats in Gygax’s original key. We could certainly just plop all that info into a big paragraph:
Vats: Each of these vats contains murky liquid. The 1st holds 3’ of dirty water. The 2nd contains a slow-acting acid which will cause 2-5 h.p. of damage the round after it comes in substantial (immersed arm, splashed on, etc.) contact with flesh – minor contact will cause only a mild itch; at the bottom of this vat is one-half of a golden key. The 3rd vat contains a gray ochre jelly (H.P.: 48; 4-16 h.p. of damage due to its huge size) with the other half of the golden key beneath it. The vats are affixed to the floor and too heavy to move. The key parts are magical and will not be harmed by anything, and if the parts are joined together they form one solid key, hereafter called the FIRST KEY. As the acid will harm even magical weapons, the players will have to figure some way to neutralize or drain off the contents of the 2nd vat, as a reach-in-and-grope-for-it technique has a 1% cumulative chance per round of being successful.
But it’s pretty easy to see how we just end up with a wall of text again doing that.
What we need to do is break that information down even further. I typically do that with bullet points, although really any sort of hierarchical structure will work just fine. More important than the particular method, however, is the methodology behind it: What you want to do is to move from the general to the specific while paying particular attention to how the players are gaining that information.
There’s some useful reading on this topic over at Courtney Campbell’s Hack & Slash: “On Set Design”. The specific method Courtney lays out over there is pretty heavily dogmatic and far too limited in its application for my tastes, but the specific way that he conceptually breaks down a room key is useful. Expanding on his basic thoughts, I would say something like this:
- List all the visible items in the room (i.e., vats).
- Beneath those items, list information that would be gained by simply looking more closely at the object (i.e., the vats have liquid in them). Then list information that requires specific actions to be taken to discover (i.e., the liquid in the 2nd vat is acid). (This latter category notably includes items which are found within a container.)
- Now do the same thing for items or features of the room which are not immediately visible (i.e., a secret door that requires a Search check).
The logic here should be fairly obvious: In interacting with a room, the players are most likely to start by asking questions about the things they’ve just been told about (so put information about those items up front). They’ll start with general questions and then proceed to detailed investigation (so put the information in that order).
The point, of course, is not to say “this is the order in which they must search the room”. You’re just organizing the information in the way that makes the most sense. And if it makes more sense to put information about some hidden element of the room first because it provides important context for the other stuff… well, do it. We’re just discussing a useful way of thinking about how to organize the information, but actual adventures are idiosyncratic so break down and organize the features of the room in whatever order makes sense to you.
GM BACKGROUND TAG
Over the past few years, I’ve found one other distinction particularly useful in my location keys: The “GM Background” tag.
Here’s a simple example from a recent adventure in my Ptolus campaign:
9. UNFINISHED ANTI-FEAR DEVICES
Four unfinished clockwork devices atop copper rods lie on the floor or lean against the walls.
Fear-Cleansing Devices: These are partially completed fear-cleansing devices (see area 1).
- Arcana (DC 30): To reverse engineer them and complete them (1d4 days).
- GM Background: These were to be installed in this area and north of area 20, but the work was never completed.
The point of the tag is to include details that can provide important context for the current location without cluttering up the functionality I want to be able to quickly reference during play. For example, this same key without the GM Background tag would look like this:
9. UNFINISHED ANTI-FEAR DEVICES
Four unfinished clockwork devices atop copper rods lie on the floor or lean against the walls.
Fear-Cleansing Devices: These are partially completed fear-cleansing devices (see area 1). These were to be installed in this area and north of area 20, but the work was never completed.
- Arcana (DC 30): To reverse engineer them and complete them (1d4 days).
It’s a minor example, but hopefully you can see how the primary description of the fear-cleansing devices is now slightly more cluttered and a little more difficult to process quickly.
The tag is particularly useful for information of the “this is what this ruined room used to be” and “this is what the NPCs use this room for” variety. Instead of saying “the room is filled with broken, ruined furniture” and then providing a lot of details about the furniture in your key, it’s a lot easier to say “the room is filled with broken, ruined furniture (and it used to be a barracks)”. If the PCs start poking around the broken furniture, the background information gives you enough context to improvise the details.
A word of caution with the GM Background tag: It should be brief, to the point, and infrequently needed. If you find your room keys becoming dominated by background information it’s likely that you’re doing something wrong: Refocus your attention on the stuff that PCs can actually learn (and how they can learn it).
THE FULL KEY
And now we can put it all together.
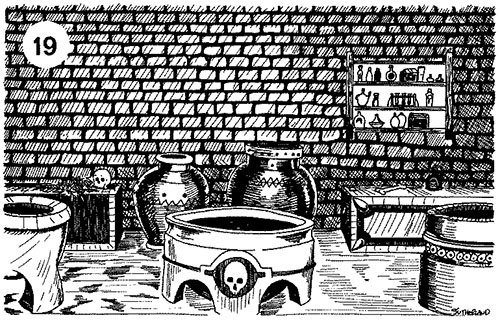
19. LABORATORY AND MUMMY PREPARATION ROOM
All of the walls in this chamber are lined with shelves and upon these are old jars. There is a large desk and stool, two workbenches, and two mummy preparation tables. There are clay pots and urns on these tables and the floor. Linen wrappings are in rolls or strewn about. Dried herbs of unidentifiable nature, bones, skulls, and the like litter the workbenches. In the south are three vats of about 7’ diameter and 4’ depth.
Spot (DC 15): To notice a lack of dust around the third vat.
- GM Background: This lack of dust is due to the presence of the grey ochre jelly.
Old Jars: Filled with dust and impotent ingredients of all sorts.
Clay Pots/Urns: These obviously once contained unguents, ointments, oils, perfumes, etc.
Vats: Each of these vats contains murky liquid. They are affixed to the floor and too heavy to move.
- Vat 1: Filled with 3’ of dirty water.
- Vat 2: Filled with slow-acting acid. Minor contact will cause a mild itch. Substantial contact with flesh (immersed arm, splashed on, etc.) will cause 2-5 hp per round. The acid will harm even magical weapons.
- Golden Key Part: Beneath the acid is ½ of a golden key. A reach-and-grope-for-it technique has a 1% cumulative chance per round of finding the key.
- Vat 3: Contains a gray ochre jelly (48 hp, 4-16 hp of damage due to its size).
- Golden Key Part: Beneath the grey ochre jelly is ½ of a golden key.
Golden Key Parts: The key parts found in the vats are magical and will not be harmed by anything. If the parts are joined together they form one solid key, hereafter referred to as the FIRST KEY.
Of course, not every location key needs to be this complicated. But if you compare this to the “wall of text” version from the original module, I think it should be fairly obvious how much easier it will be to navigate and use this key in actual play: Read (or summarize) the boxed text. Scan the bolded points of interest. Follow the players’ lead.
I find that when I’m working with keys in this format I can generally pick up material and run it on-the-fly even if I haven’t reviewed it in weeks or months. With the types of keys being published in the industry today, however, I can’t do that: There’s no easy way to efficiently parse and run keys featuring multiple paragraphs (and often multiple pages) of poorly organized and undifferentiated material.
HOMEBREW vs. PUBLISHED
The final thing that should be mentioned here is that there’s been a certain degree of “polish” attendant to most of my discussion of the location keys so far. This is a natural consequence of trying to communicate clearly with you, but it’s not necessarily a great example of how you should actually do it at home.
When you’re prepping location keys for your own campaign, you don’t need to be so neat and tidy (nor so loquacious). Bullet point your boxed text; jot down quick notes. Whatever works for you. Complete sentences are overrated: Get the information across in the most efficient fashion possible.
Remember: Your location key is not the work of art. It is a tool that you use to create awesome stuff at the gaming table.
Hone that tool, treat it well, and it will pay you back a hundredfold.
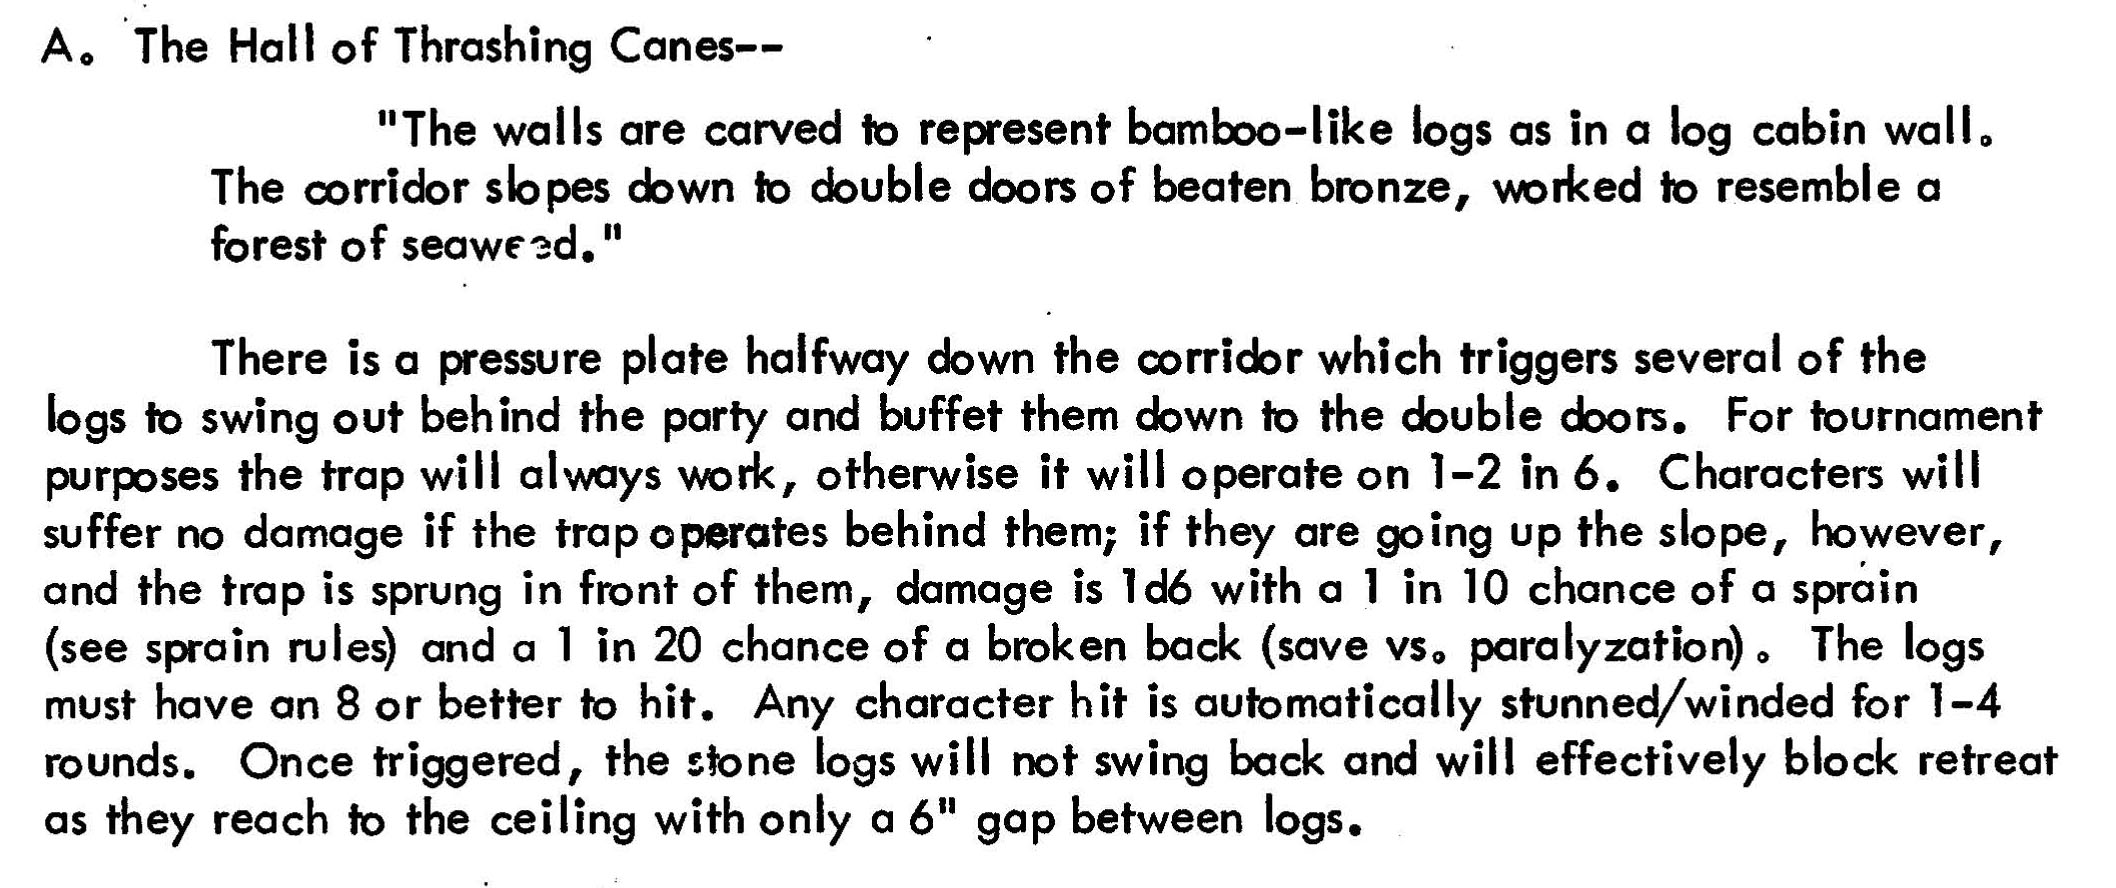
![2. The Hall of Thrashing Canes:
[BOXED TEXT] The sides of this corridor are carved to resemble walls of bamboo-like logs. The passage slopes down from a single door on its western leg, the lintel of which has been crafted to represent a stylized cavern entrance, to double doors of beaten bronze, worked to resemble a forest of seaweed. [END BOXED TEXT]
There is a pressure plate halfway down the hallway which triggers a trap. Several of the logs will swing out from either wall and buffet the party towards the double doors. For tournament play, the trap will always work. For campaign adventure, the trap will be triggered on a 1 or 2 in 6.](https://thealexandrian.net/images/20140519f.jpg)