The Alexandrian

Over the past couple weeks you may have noticed that I’ve been going back and finishing a couple of old essay series that had been left incomplete. These are actually a lot more time-consuming to accomplish than you might think because the first thing I have to do is go back and re-read the original essays in order to get back into the flow of the thoughts that were left unfinished. The reason the series ended up unfinished in the first place is because I would get distracted by projects of a higher priority. The reason they stayed unfinished is because it was hard to justify the large chunk of time required just to review the existing material. (In a couple of cases I actually started reviewing the material multiple times, only to once again get distracted more pressing demands.)

The reason they’re getting finished now is because of my Patreon. My patrons allow me to push less interesting projects to the side so that I can devote the time and effort necessary to continue creating material here at the Alexandrian.

As I write this, my Patreon is at $47.50 per post. The reality is a little bit more complicated backstage because a lot of my patrons have set maximum contributions. So by the end of month my posts are actually only earning at little over $20. (Which is totally cool. The fact that people can very precisely control their spending is one of the really great things about Patreon.)

What I’d really like to do is convince enough of you to become my patrons to push my total up above $50 for the month of March. To encourage you to do that, let me share with you a couple of things about the way my Patreon works.

First, the Alexandrian updates on a schedule of Monday, Wednesday, and Friday. In general, that means 12-13 posts per month. So if you backed for $0.10 per post, you’d be spending $1.20 or $1.30 per month to support the Alexandrian. Is the content you find here worth that much to you? (If not, that’s OK.)

Second, the reason I do a per post contribution instead of a monthly contribution is because the Alexandrian hasn’t always updated on reliably. I don’t want to feel guilty if there’s a month where I can’t produce as much material and I don’t want you to feel ripped off. If you’d really prefer to make a monthly contribution, fortunately, Patreon offers the best of both worlds: Set your contribution level to the amount you want to contribute and set your maximum contribution to the same amount. As long as I post something each month, you’ll make the monthly contribution you want to.

Third, what you’re not paying for is all the other content that gets scheduled around that Monday-Wednesday-Friday content. This is the Thought of the Day, Check This Out, Shakespeare Sunday, the RPGNet archive reviews. All that stuff is just “bonus”.

Fourth, if you back $1 or more per post you get Early Access. Which is kinda cool. But what makes it really cool is that you receive the early access updates in the form of a PDF. So if you’ve ever wanted content from the Alexandrian in an easy-to-save / easy-to-print format, this is a super easy way to get it.

For example, a couple days ago I sent all my Early Access patrons a PDF package containing the full, 12-part Hexcrawl series, the DM worksheet, and the two hexcrawl cheat sheets that will be appearing on the site tomorrow.

$0.10? $0.25? $1.00?

Patreon for the Alexandrian

… even the smallest of pledges can add up to wondrous things.

Go to Part 1

This will be the final installment in this essay series. My goal here will be to describe the actual process of what I do at the gaming table while running a session of my Thracian Hexcrawl. I’m not entirely sure how useful it will be, but I”m hoping it will provide some sort of insight.

This post is going to be an attempt to provide an abbreviated, annotated record of actual play from my hexcrawl campaign. The goal is to show what I was thinking, the decisions I made, the procedures I used, the tools I exploited, and so forth.

SETUP

An hour or so before the game is scheduled to start, I’ll set up the table.

I sit at one end of a long dining room table. I place a TV tray to the left of my chair and another TV tray to the right of my chair. Then I pull out the box that I keep all my Thracian hexcrawl material in.

On the TV tray to my right I place the Binder that contains the campaign key and the Folder which contains the documents detailing individual locations.

There’s a second folder which contains a DM screen, the four pages of reference tables that I paperclip to the DM screen, a copy of the campaign map, and several copies of the DM’s worksheet I designed for hexcrawling. I place the worksheet on the table in front of me. I place the DM screen on the TV tray to my left. And I conceal the campaign map behind the DM screen.

Next, the rulebooks: I have several copies of Volume 1: Men & Magic that I place in a stack on the table for the players. I take my copies of all three OD&D booklets and place them in a stack behind the DM screen to my left.

I also have a stack of graph and hex paper, including several “communal maps” that have been drawn by the players. These are placed on the table.

I also have a stack of three folders: One for blank character sheets, one for living characters in the campaign, and one for characters who have died. I place these folders on a counter off to one side of the room. (I rarely need to access them, so it’s easiest just to have them out of the way.)

I print out a copy of the Campaign Status sheet for the current session and also place it on the table in front of me.

I grab my dice bag and pull out the dice I need: 2d4, 6d6, 6d8, 2d10, 2d12, 6d20. 6d6 for fireball and lightning bolt damage. 6d8 because it means I can roll an entire day’s worth of encounter checks in a single go. 6d20 because I can simultaneously roll an entire mob’s attack rolls. (The 6d20’s are selected in three pairs of matching colors because it allows for easy grouping for mixed types.)

BEGINNING OF THE SESSION

As players arrive, I pull their character sheets out of the appropriate folder. Many players need to choose which of their active PCs they’re going to be playing.

Two things happen at this point:

  1. I make a rumor check for each primary PC (not for hirelings). There’s a 1 in 3 chance for each PC that they’ll receive a rumor. (The current rumor table is part of the Campaign Status document. It’s generated based on the activities of PCs in previous sessions and by randomly generating hex numbers and creating rumors based on the contents of the generated hex.)
  2. I make a morale check for each hireling employed by the active PCs. On a success, the hireling continues adventuring with their employer. On a failure I use a system based on the OD&D reaction table to determine the hireling’s action: They might automatically leave their PC’s service or demand an additional bonus of some variable amount. (Usually nothing happens because the players have learned to keep the morale of their hirelings high.)

I keep a master list of every hireling in the campaign — including their current loyalty and morale values — in the Campaign Status sheet.

While I’m doing this, the players are generally getting prepared for the adventure. This includes:

  1. Discussing what their expedition is going to be.
  2. Buying equipment.
  3. Hiring hirelings.
  4. Any other business they might need to attend to while in town.

If they go looking for hirelings, I have a simple system I use to determine how many hirelings are currently available for service in town; what classes they are; and what level they are.

STARTING OUT

While the players are wrapping things up, I’ll grab my 6d8 and roll them: Virtually all of my regions use a 1 in 8 encounter check. Each roll, therefore, represents a full day’s worth of encounter checks (since there are six watches in a day). By reading the dice left-to-right as they fall, I can very rapidly determine which watches in the day have an encounter. Since I don’t yet know where the PCs will be on those days, I can’t generate the specific encounters (which are region-dependent). But on my DM’s worksheet, I can write down the Day/Watch when encounters will be happening. By generating three or four days worth of encounter checks up front, I can simplify my workflow once the PCs hit the road.

(Note, however, that if I know at this point that the PCs are going to be heading in a direction which will almost certainly have them traveling through a given region for a lengthy period of time, I can also go ahead and generate full encounters at this point.)

Maernath - Thracian Hexcrawl
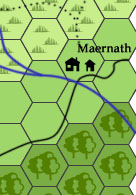
In this case, the PCs are in the city of Maernath, located in hex O6. Maernath is an old city-state in this setting. It was here long before the Duchy of Thracia began pushing east in recent years (establishing the Keep on the Borderlands and the logging village of Caerdheim to the south) and the City Fathers occasionally chaff against the “authority” of the newcomers. Although the early adventures of the PCs were based primarily out of Caerdheim (which was near the Caverns of Thracia), an increase of interest in the Palace of Red Death to the north led to an increased number of expeditions being mounted from Maernath. Those expeditions resulted in various PCs gaining a lot of lore about the area surrounding Maernath and that, in turn, spurred even more expeditions here.

The PCs leave town along the road heading south. They’re lightly encumbered (12″ movement) and they’re traveling along a road through open plains, so they can travel 12 miles per watch. Maernath’s position within hex O6 is biased, so it only takes 4 progress to exit the hex. They’re aiming for the river, which is on the road right on the border of the hex (so they obviously have no difficulty finding it).

Their goal is to follow the river into the Old Forest (in hex P7), so now I’m going to look ahead: Their course along the river takes them through the near side of the hex (6 miles away) into hex P6 and from there they will then pass through the near side of hex P7 (another 6 miles). Although they’ve left the road, they’re still traveling through open plains and the river provides enough of a track that they’re still traveling at 12 miles per watch. Total it up:

4 miles (Maernath to river) + 6 miles (O7 to P6) + 6 miles (P6 to P7) = 16 miles

Which means they’ll arrive at the edge of the Old Forest a little over an hour into their second watch. This is notable because, looking at my DM’s worksheet, I can see that the second watch of the day has an encounter. I can determine the time in the watch by rolling 1d8. The result I get is a 3, which basically means the encounter is scheduled to take place just as they’re reaching the edge of the Old Forest.

1. First, there’s a 50% chance that the encounter will be the location keyed to the hex. I roll the dice and it is not. (If it had been and they were traveling through open country, I would flip to the location key and they would have that encounter. In this case, however, they’re following the river: Unless the keyed encounter for this hex was on the river, they would not encounter it. That would either result in no encounter happening despite the check or they might experience an encounter connected to the keyed location. For example, the keyed location for P6 is Orkam’s Hole, which is inhabited by a family of basilisks, so they might spot basilisk footprints in the muddy banks of the river.)

2. If the PCs are in a hex bordering another region (and they are), there’s a 50% chance that they’ll get an encounter from the other region instead.

3. I roll a 13, so that’s exactly what’s going to happen.

4. I flip to the Old Forest encounter table and roll. The result I get is “Slimes”, which has a sub-table which generates Gray Ooze. The slimes don’t have any % chance of being a Lair or Tracks encounter, so I can skip that step.

Given the confluence of all the factors involved, I’m going to have the Gray Oozes appear just as the river passes beneath the boughs of the Old Forest. They’ll be draped down from the tree branches above the river like some kind of horrific spanish moss.

INTO THE OLD FOREST

Forest River

After the PCs have dealt with (or avoided) the Gray Oozes, they’ll be able to continue along the river. It’s a medium forest and their speed is going to drop by 1/2. They had 8 miles of movement left in their second watch, so they’ll be able to gain 4 progress through hex P7.

Three miles along the river, however, they come to a tree on the south bank of the river with the Dwarven letter “mu” carved into its trunk. They’re familiar with it. In fact, one of the PCs left it here as a marker: Gordur, a powerful orc stronghold, lies several miles due south from this spot.

This, however, is not their goal. They continue along the river for another mile and then make camp for the night. The next day, they continue another two miles until they find a similar tree with the Dwarven letter “thod” carved into it. This marker was placed due north of the Crypt of Luan Phien. The crypt is their ultimate goal and so now they turn south, away from the clear navigational marker of the river and into the depths of the Old Forest.

At this point, they need to start making Navigation checks. Epicaste, a hireling rescued by the dwarf Aeng from the Caverns of Thracia, is the group’s best navigator, so she steps forward and takes point.

1. It’s a medium forest, so the Navigation DC is 16.

2. Epicaste blows the check. (Possibly because Delmhurst, another hireling, keeps second-guessing her.) I roll 1d10 to determine the group’s veer. With a roll of 8, I determine that they’re veering to the right. Instead of heading due south into hex P8 (which is where they want to go), they’re going to end up in hex O8.

When does that actually happen? Well, they entered hex P7 from due north. Whether they’re leaving into hex P8 or O8, they’re still exiting through the far side of the hex. So they need to rack up 12 progress to exit the hex. They’d gained 4 progress in the hex during their second watch; they’ll gain another 6 progress in their third watch of travel (the following day), and they’ll enter hex O8 about midway through the second watch of that day.

I’ve also generated an encounter for the second watch of the second day, so once again I generate a random time and determine that the encounter will be taking place after they’ve entered hex O8. This is particularly important because this time the encounter I generate is a location encounter, so I flip to the key for O8:

Me: “Towards the waning hours of the day, you enter a small clearing. Criss-crossing branches grow into what appear to be houses with walls of woven moss.”

Aeng: “I don’t remember this.”

Delmhurst: “I think the thousand-year dummy has gotten us lost again.”

It turns out the strange houses are empty and abandoned. It’s getting late in the day, so the PCs decide to make camp here for the night. They’ll try to backtrack their trail the next day and figure out where they made the wrong turn.

 CONCLUDING THOUGHTS

 And that’s basically all there is to it. With a strong key and a clean procedure, the hexcrawl will flow naturally in response to the explorations of the PCs, drawing them deeper and deeper in to the mysteries of the wilderness.

Although this is the final essay in this series — and the end of my thoughts on hexcrawls (at least for the moment) — there will be one final installment containing system cheat sheets for hexcrawling.

Go to Part 13: Hexcrawl Cheat Sheets

Yesterday I posted a scenario for Numenera called “The Last Precept of the Seventh Mask“. The scenario features multiple religious sects fighting for control of the body of the Seventh Mask (a religious leader denoted by the strange, mask-like biotech growth which extrudes from their face). The basic idea is that the PCs will approach the camp of one of these sects, get hired to protect them on their journey to the aldeia of Embered Peaks, and then be forced to deal with the other factions in an orgy of violence and collusion and zealotry.

But when I ran the scenario? That’s not what happened.

THE STARSCRIPT CAVERN

The Narthex - Numenera

The PCs in this campaign have been traveling around inside the Narthex. You don’t need to know much about the Narthex except that it’s bigger on the inside than the outside and that it teleports semi-randomly around the landscape of the Ninth World. (If you want to basically think of it as a TARDIS that doesn’t travel through time and can’t leave the planet its currently on, you wouldn’t be too far wrong. Except this particular TARDIS is populated by a group of religious zealots that the PCs have inadvertently ended up being in charge of. But I digress.)

For this particular scenario the Narthex was going to appear at a location they couldn’t predict. It was important, therefore, for the local resident expert to look at the starscape above their arrival point to figure out where they had ended up. When they emerged from the Narthex, they found themselves inside a giant cavern with walls covered in ancient runes that glowed with a faint silver light. The starscript writing described the Narthex as a holy relic, but whoever had worshiped the Narthex here was long dead and gone.

As they emerged from the cavern, however, to gaze up at the stars above, they saw the lights of a camp further down the side of the mountain.

RAVAGE BEAR DELIGHT

The camp itself was tucked out of sight behind some tall outcroppings of rock, but they could hear the distant sounds of the people who were resting down there.

The idea here should be pretty obvious: I expected them to go down to the camp. There they would meet the Bensal kokutai and Fassare would ask for their help in guarding the body of the Seventh Mask on its journey to Embered Peaks.

But that’s not what happened.

Instead, they decided to simply keep quiet, take their star readings, and retreat back to the Narthex.

So I checked my notes. What would happen next?

Well, a pack of six ravage bears was supposed to attack the Bensal kokutai encampment that night. So they did. The PCs heard the roar of the ravage bears (and identified them) as they rushed the camp.

Once again, the intention should be obvious: I expected the PCs to rush down to help the unknown campers. They could drive off the ravage bears and–

Nope.

The PCs had suffered a previous encounter with a pair of ravage bears and their bodies still bore the scars to prove it. Six of them? No, thank you. They rolled up their star charts and ran back to the Narthex with the screams of the ravage bears’ victims echoing in their ears.

IN THE MORNING’S LIGHT

The next morning the PCs came back out of the Narthex and went down to investigate the camp. The ravage bears had… well, ravaged it. Tents were shredded. Dismembered limbs and half-devoured bodies were strewn about. It was clear that several more bodies had been dragged away from the site.

The only incongruous element was the bier of the Seventh Mask, which I decided had been left undisturbed by the ravage bears. Two of the PCs — Laevra and Sheera — were incredibly creeped out by this and the biotech, mask-like growth on the corpse’s face didn’t help matters much. While Laevra, the nano, examined the mask, another PC — Phyros, a clever jack who employs magnetism — decided it would be funny to program his morphable mask to look exactly like the biotech extrusion. Laevra and Sheera, for their part, were largely unamused.

Laevra eventually concluded that there was still living activity within the biotech of the mask. The group fell into a debate about whether or not they should cut it off the corpse: Laevra had curiosity on her side. Phyros, for all of his monkeying about with the morphable mask, was legitimately concerned that it might be infectious or dangerous.

While this debate continued, I decided to have a group of Caral kokutai show up on their flying platform. Since the Caral kokutai had been stalking the Bensal kokutai, this made sense. I also thought it might offer me an opportunity to re-hook the scenario: The Caral were just as interested in transporting the Seventh Mask to Embered Peaks. Like the Bensal kokutai, the Caral kokutai would also be concerned by the other factions in the area and could easily ask the PCs for help.

Of course, that’s not what happened.

APOTHEOITES

Remember that Phyros had made his morphable mask look just like the Seventh Mask?

Yeah.

As the energy platform of the Caral kokutai swept down into the grotto, their initial hostility towards finding the PCs standing in the midst of the carnage melted away into confusion as Phyros presented himself as the Eighth Mask. This story wasn’t completely plausible: Generally speaking, the Eighth Mask — as a reincarnation of the Seventh Mask — should have been no more than a babe. But with an extremely glib tongue, Phyros managed to sow enough confusion to convince the Caral kokutai scouts they should bring their leader, Moora, to him. (It helped that he was able to spin the gory deaths of the Bensal kokutai as being some sort of “righteous fury” directed upon heathen unbelievers.) Then, with a major effect on a final persuasion role, he convinced them that there were secret rites he needed to perform with the body of the Seventh Mask in secret. That meant that all of the Caral kokutai left, planning to return shortly with Moora.

So what were the “secret rites” that Phyros needed to perform?

Well, as it turned out, they entailed grabbing the body of the Seventh Mask and hightailing it back to the Narthex.

Entering the Narthex, it should be noted, means taking a liftshaft (i.e., elevator) down into a vast, extradimensional space. Exiting the liftshaft, you enter the Nave: A seemingly bottomless (and topless) shaft crisscrossed with gantries and catwalks.

As soon as the PCs reached the Nave in this particular case, they hauled the Seventh Mask’s corpse out of the lift, sliced the mask off its face (revealing a featureless face of fresh, baby-like flesh), pocketed the mask, and then dumped the corpse over the railing into the abyssal darkness below while resolving not to leave the Narthex again until it had jumped to a new location.

THE END

The best part? This is the third time that Phyros has ended up falsely presenting himself as a religious icon or deity. He’s not even doing it on purpose!

There are probably a lot of GMs who would look at this sequence of events as a failure of some sort. The PCs “wrecked the scenario”. My preparation was “ruined”.

But if you take a moment to look at how I actually prepped this scenario, you’ll note that I was never actually wedded to a particular outcome. Instead, as I described in Don’t Prep Plots, I created a kit with a number of tools:

  • The starscript cavern
  • The kokutai culture and their religious beliefs
  • The corpse of the Seventh Mask
  • The Bensal, Caral, and Gatha kokutai
  • The chirogs
  • The ravage bears
  • The map of the local area

And while I would have liked to have gotten the Gatha kokutai and the chirogs involved, the reality is that most of those tools got used. Virtually none of them got used the way that I had expected, but the scenes that actually played out were really entertaining and insightful and memorable largely because they were unexpected. The table was filled with laughter and there were also some really meaningful questions asked about who they had become as individuals when they ran and left the Bensal to their fate.

Now, if I had invested a lot of time into carefully preparing schedules of ambushes for the road from the Bensal camp to Embered Peaks? Then I would have wasted a lot of time and had a lot of prep “ruined” by what happened. So I’m glad that I emphasized smart prep and trusted my instincts at the table to handle the rest.

This adventure for Numenera is designed as a prequel to “The Beale of Boregal” scenario from the core rulebook. For my Wandering Walk campaign I felt the events of “Beale” would be enhanced if the PCs were already familiar with the aldeia of Embered Peaks and the peculiar properties of its numenera.

BACKGROUND

The kokutai is a hive religion made up from many different factions (each of which is also referred to as a kokutai). The kokutai as a whole is led by the Mask, a holy leader marked by his or her Visage of the Seventh Mask
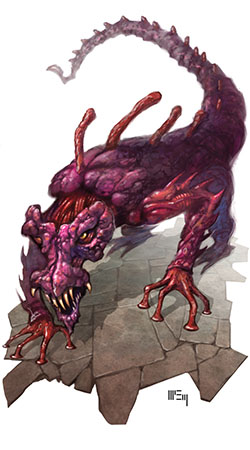
face: A strange, mask-like biotech growth which extrudes into a faceless visage.

Before their death, each Mask is supposed to reveal the identity of their next reincarnation in the form of a prophetic riddle. Solving this riddle (a process referred to as the Race of the Riddle) is meant to be a competition between the kokutai, with the winning kokutai (i.e., the one who finds the next incarnation of the Mask) receiving favor for their particular teachings within the religion.

The Seventh Mask, however, failed to deliver a riddle before his death. Some kokutai are interpreting this as a riddle in itself. The Bensal kokutai, however, have a different plan: They are carrying the body of the Seventh Mask to the aldeia of Embered Peaks, where it is said that the devoirs possess a machine which allows them to as a single question of the deceased. If they can uniquely receive guidance from the Seventh Mask through the devoirs, they’ll have an obvious and significant advantage in finding the Eighth Mask and securing their position of dominance within the kokutai.

THE MASK: If surgically detached, the mask functions as yesterglass when worn by another. (See Artifacts & Oddities 1, pg. 8.) The kokutai are unamused by this sacrilege.

THE HOOK

While traveling, the PCs spot the camp of the Bensal kokutai. Fassare, their leader, is concerned: Her scouts have disappeared and she has been receiving dreams of black prophecy during her meditations over the body of the Seventh Mask. She wants to hire the PCs as bodyguards and escorts to see the Bensal kokutai expedition safely through to Embered Peaks. She can offer them in payment:

If the PCs push for more information, Fassare will tell them that she fears that they are being hunted by “apotheoite kokutai”. These false worshipers, according to Fassare, seek to find the Seventh Mask’s body and destroy it.

Alternative Hook: They could be directly hired to track down the Bensal and steal the corpse of the Seventh Mask. Their employer could be another faction of the kokutai (including those described below), a bizarre collector, or a time-traveling version of the Seventh Mask intent on creating a trans-temporal rumor (depending on how weird you want to get).

THE JOURNEY

Map of the Embered Peaks Region - Numenera

1. BENSAL CAMPSITE: Where the PCs meet the Bensal kokutai for the firs time.

2. SCRUB BRUSH PASS: There’s a pass which cuts between the peaks here and heads straight to Embered Peaks. It has an artificial look to it and, unlike the surrounding landscape, is filled with scrub brush giving way to a brown and desiccated forest.It’ll cut time off the trip, but it gives unique opportunities for ambush.

3. GEYSER OF DUST: Going the long way around the mountains takes longer. Here you pass a geyser of dust which plumes perpetually thirty feet into the air. (It can be seen from about about 7 miles away.)

EMBERED PEAKS: Nestled in the palm of a mountain that looks like a giant seven-fingered hand (from which the town takes its name).

THE FIRST NIGHT

During the first night, the Bensal kokutai camp is attacked by six ravage bears. (This attack is a coincidence and has nothing to do with the hostile forces arrayed against the Bensal’s mission.)

Ravage Bears - NumeneraIf the PCs track the ravage bears back to their lair, they will find two ravage bear pups.

RAVAGE BEARS (x6): L4, health 30, damage 7, armor 1

  • Movement: Long
  • Might defense L6.
  • Runs, climbs, and jumps at L7.
  • Ravage Grasp: Grab foes with powerful arms. Victim suffers 4 points of damage per turn in addition to damage from attacks.
  • Fury: If it takes more than 10 points of damage, reduce defense by one step and increase attacks by one step.
  • Blind: Immune to visual effects. Olfactory effects can confuse and “blind” it temporarily.

BENSAL KOKUTAI

The Bensal kokutai was favored by the Seventh Mask. Their leader is Fassare, who is intent on retaining her kokutai’s favor during the time of the Eighth Mask.

FASSARE: L5, health 15, damage 3, armor 1.

  • Defend at L6.
  • Resist mental effects at L6.
  • Gain 4 Armor for 10 minutes via a force field device implanted in her cerebellum.
  • Minor telekinesis (from same device).

BENSAL KOKUTAI WARRIORS (x8): L2, health 6, damage 4, armor 1. Speed defense L3 (due to shield)

OPPOSING FORCE: CARAL KOKUTAI

The Caral kokutai think the Bensal kokutai’s plan is a great idea… they just want to do it themselves. Their primary interest is taking control of the Seventh Mask’s body and taking it to Embered Peaks. (And if they have to do it over the dead bodies of the Bensal, that’s fine.)

ATTACK PLATFORMS (L8): The Caral have access to briefcase-sized cyphers that, when activated, separate into four parts which form the corners of a solid energy field that can be used to fly through the sky with 4-6 people.

  • Energy Weapon: 8 points of damage. (The perimeter of the attack platform pulses, coalesces, and then expels the energyform.)
  • Duration: 1d4 hours of flight
  • Movement: Long

The Caral have three of these platforms, although they’re likely to only use two in their first attack.

MOORA: L5, health 15, damage 3, dual wields a pair of ray emitters. Moora dual-wields ray emitters.

  • Ray Emitter – Concentrated Light (L8): 200 feet, 8 damage, 1 in 1d6 depletion
  • Ray Emitter – Concentrated Light (L5): 200 feet, 5 damage, 1 in 1d6 depletion

CARAL KOKUTAI WARLORDS (x2): L4, health 15, damage 4, armor 3. Speed defense L6 (due to shield)

CARAL KOKUTAI WARRIORS (x12): L2, health 6, damage 4, armor 1. Speed defense L3 (due to shield)

OPPOSING FORCE: GATHA KOKUTAI

The Gatha kokutai believes that the Bensal kokutai’s plan is a sacrilegious corruption of the Seventh Mask’s body. They’re more bloody-minded than that the Caral and seek to wipe out the “Bensal apotheoites” and their “Bensal heresy”.

LIGHTNING FENCE (L5): The Gatha have four reality spikes (Numenera, pg. 293) which can be activated in conjunction to form a four-sided fence of lightning  15 feet high. Passing through the fence inflicts 5 ambient damage. (They’ll use the fence in an effort to divide the Bensal’s forces and, if possible, isolate the Seventh Mask’s Body.)

MIGALA: L5, health 15, damage 5. Attacks at L6. Resists mental effects at L6. Migala carries a bandolier of detonations. Roll on the Cypher Danger Chart (Numenera, pg. 279) once per encounter.

  • 8 detonations (Numenera, pg. 284; determine randomly)
  • Detonation (gravity) (Numenera, pg. 284)

GATHA KOKUTAI WARLORD: L4, health 15, damage 4, armor 3. Speed defense L6 (due to shield)

GATHA KOKUTAI WARRIORS (x15): L2, health 6, damage 4, armor 1. Speed defense L3 (due to shield)

CHIROGSChirog - Numenera

A local chirog tribe has become aware of the Bensal’s pyred procession. Like all chirogs, they despise numenera. Because they consider the body of the Seventh Mask to be a numenera relic, they now seek to destroy it.

The pack leader does not speak, but is surrounded by a choir of three alpha males who speak for her in alternating voices.

CHIROG PACK MEMBERS: See Numenera, pg. 235.

PACK LEADER: L4. Has a mental attack that inflicts 4 Intellect damage (bypassing armor).

ALPHA MALES (x3): L5, health 18, damage 6, armor 4.

TACTICAL NOTES

This scenario should not be run as a simple string of three mass combats. The various kokutai and chirogs should use varied tactics; retreat in the face of unexpected danger or loss; and the like. A few thoughts:

  • One group or another may attempt to suborn the PCs, either by convincing them that the Bensal kokutai are in the wrong or simply promising to pay more for their services.
  • A kokutai group that has been badly damaged might try to parley with the Bensal kokutai. (Or ally with the other kokutai, allowing for a joint assault featuring both attack platforms and a second lightning fence.)
  • The Bensal kokutai might ask the PCs to approach one of the harrassing apotheoite kokutai in order to form an alliance against a common enemy. (For example, the Gatha might be convinced to forgive their heresy and protect the Seventh Mask’s holy vessel from the chirog. Or the Caral might be convinced to help them drive off the Gatha in order to assure that the riddle of the Seventh Mask can be discovered.)
  • The Caral might launch a stealth operation to steal the body (either during the night or while the PCs are distracted by an attack from another group). The scenario could turn into either tracking them down or racing them to Embered Peaks.

If the players are losing interest, it’s probably time to launch an all-out assault to finish things up. Or go the other way and have a kokutai appear on the horizon, give a ceremonial chant of mutual respect, and then leave (signaling the permanent end of the conflict).

Embered Peaks itself can make a good location for a final ambush. It will provide a distinct environment from the overland ambushes and encounters and you can get innocent bystanders involved and/or caught in the crossfire.

Note that the opposition presented here assumes that the Bensal kokutai will be assisting the PCs. (You may wish to use my rules for NPC allies.) Without assistance, PCs — particularly low-tier PCs — will find themselves rapidly overrun by the powerful factions seeking the Seventh Mask.

Tales from the Table: Precepts of the Seventh Mask in Actual Play

Hamlet is almost universally acknowledged as Shakespeare’s greatest masterpiece. Among his plays it is also, without doubt, the most complicated of texts. (One might even say convoluted.) Some of its mysteries may never be truly unraveled, but I think we can achieve a fair degree of certainty in a great many matters. Doing so, however, is going to require a great deal of untangling. So before we tackle that seemingly overwhelming task, let’s get straight to the scripts:

HAMLET – FULL SCRIPT

HAMLET – CONFLATED SCRIPT

(If you want to follow along come Monday night, you want to grab the Conflated version. That’s the one we’ll be performing from.)

THE THREE TEXTS

We have three source texts for Hamlet. (More than any other play by Shakespeare.)

The First Quarto (Q1) was published in 1603. In addition to the date, its title page reads, in part: “As it hath been diverse times acted by his Highness’ servants in the City of London : as also in two Universities of Cambridge and Oxford, and elsewhere.” Although this text has been periodically identified as Shakespeare’s “rough draft” such theories seem to have little merit. Instead, this heavily corrupted text shows clear indications of memorial reconstruction: An actor (most likely one hired for the touring company) attempted to reconstruct the play from memory and possibly his sides (a written copy of his lines and his cues).

(The tour referenced on Q1′ s title page also may explain one of the most significant changes to the text: The characters of Polonius and Reynaldo are renamed Corambis and Montano. Robert Polenius was the founder of Oxford University and John Reynalds was the President of Corpus Christi College in Cambridge. The similarity of the names might have been interpreted as a veiled insult at the universities, which could explain why the names would be changed.)

Although its heavy corruption and abbreviation may be largely the result of its memorial reconstruction, Q1 may also record the gross structure of a probable theatrical cut intended for the touring production. (The quarto text of Richard III shows evidence of being derived from a similar script cut and conflated for touring.)

One year later in 1604, the Second Quarto (Q2) was published. Also referred to as the “good quarto”, Q2 shows evidence of having been derived from the author’s foul papers. Whatever manuscript it was derived from, however, appears to have been difficult for the compositors at the publishing house to read. (This can be deduced from its many errors.) Q2’s text also shows evidence of the compositors referring back to the text of Q1 for certain passages, most likely as an independent reference whenever they were having difficulty reading the foul papers. (We can identify the Q1 influence whenever spelling and punctuation of the text suddenly matches Q1’s precisely. A similar practice can be found in the second quarto of Romeo & Juliet, which was similarly published after a first quarto based on memorial reconstruction was released.)

The fact that the good text of Q2 was published so rapidly after the appearance of Q1’s bad text has led many people to conclude that it was specifically published in response to Q1. There’s no supporting evidence for that theory, but it certainly sounds plausible.

Hamlet next appears in the First Folio of 1623. And this is where things get complicated: In virtually all cases, when a good quarto of a Shakespeare play existed, the First Folio text was typeset using the quarto text as its source. This isn’t the case with Hamlet: Punctuation, spelling, and even word choice varies considerably between the Q2 and F1 texts. The F1 text also includes 70 lines lacking from the Q2 text, but simultaneously omits 230 lines which can be found in Q2.

And to make matters even more complicated, there are points where F1’s compositors were clearly referring to the Q2 text in the same way that Q2’s compositors were looking at Q1’s text.

UNIQUE PASSAGES

During the 18th, 19th, and much of the 20th century, the standard editorial practice has been to conflate the Q2 and F1 texts into a single text. Recently, however, Hamlet has gotten swept up in a scholastic movement based around the premise that Shakespeare rewrote/revised his own plays. Under this interpretation, F1 is interpreted as a revision of Q2’s rough draft. (Or, occasionally, the reverse.) Most notably, the third edition of Arden’s Hamlet went so far as to print the Q2 and F1 texts as completely separate plays, editing them largely independently of each other.

The truth, however, I suspect lies somewhere inbetween.

Let’s start by looking at the sizable passages missing in one text or the other.

F1- ONLY: There are, according to the third Arden edition, three passages of 4 lines or more which are present in the First Folio but not in the Second Quarto: 2.2.238-267 (starting with “Let me question more in particular” and ending with “I am most dreadfully attended”); 2.335-399 (starting with “How comes it? Do they grow rusty?” and ending with “…Hercules and his load, too.”); and 5.2.68-5.2.81 (starting with “… to quit him with this arm?” and ending with “Peace, who comes here?”).

The last of these passages is clearly a mistake in the Q2 text: It leaves behind a dangling and unresolved sentence fragment.

But what of the first two? They were topical allusions to the acting companies of children that were popular at the time Shakespeare was writing the play. It has often been assumed that they were cut from the play when they were no longer topical, but this only raises the question of why they can be found in F1 and not Q2 (when F1 is the shorter script which appears to have been cut). Thankfully, there’s a solution. James Bednarz in Shakespeare and the Poet’s War argues convincingly that the references were specifically cut from the Second Quarto for its publication in 1604 because the allusions were too topical. By 1604 the Children of the Chapel had become the Children of Her Majesty’s Chapel under the patronage of Queen Anne. Moreover, Queen Anne was from Denmark. Lines that had been harmless fun 5 years earlier could now be seen as political attacks on England’s new Queen.

If we accept that as a plausible explanation, we can now explain the absence from Q2 of all three major F1 “additions” to the text: Two were cut for political reasons, and one was cut by mistake.

Q2-ONLY: According to G.R. Hibbard’s Oxford edition of the play, there are 18 passages of 3 or more lines found in Q2 which are not found in F1. I’m not going to cite them all here, but what I find interesting is that removing these passages from F1 requires “mid-line cuts”. While it seems unlikely that someone making additions to a play would split a single line and splice in a dozen new lines of verse, people cutting verse plays will often mend an incomplete verse line created by their cut by matching it up with another half-cut line later in the text.

Thus it seems very likely that the Q2 passages were removed from the F1 text, not added to the Q2 text.

CONCLUSION: So we can hypothesize that the F1-only passages were, in fact, present in the original Q2 text. And we can further hypothesize that the Q2-only passages were cut from the F1 text and not added to the Q2 text. From this a clear conclusion emerges: The F1 source text was created by cutting lines from the Q2 source text.

WHITHER THE Q1 TEXT?

How does the Q1 text fit in here?

Let’s again turn our attention to the large passages unique to either the F1 or Q2 text. Of the three F1-only passages, two of them can be found in the Q1 text. (The third is missing from a scene which is badly mangled and heavily abbreviated above and beyond the absence of this passage).

Even more notable, however, is that none of the eighteen Q2-only passages can be found in the Q1 text. In fact, many of the cuts are precisely mirrored. For example, after 1.1.107:

F1: “The source of this our watch, and the chief head / Of this post-haste and rummage in the land. [gap] But soft, behold, lo where it comes again.”

Q1: “Is the chief head and ground of this watch. [gap] But lo, behold, see where it comes again.”

And after 1.4.16:

F1: “… it is a custom / More honored in the breach than the observance. [gap] Look my lord it comes.”

Q1: “It is a custom more honored in the breach than the observance. [gap] Look, my lord, it comes.”

CONCLUSION: The source of the Q1 text was a touring script prepared prior to its memorial reconstruction and publication in 1603. Since it includes the F1-only passages and excludes the Q2-only passages, we can conclude that this touring script was prepared from the F1 source text. Furthermore, we can conclude that the cuts made to form the F1 source text were made to the Q2 source text and not the published version of Q2 (since, obviously, Q2 had not yet been published).

THE BIG LOOP

From this we can now draw a clear conclusion regarding the textual history of Hamlet: The Q2-source was cut to form the F1-source. And the F1-source was then cut to form the Q1-source.

The Q1-source was then published, through memorial reconstruction, as Q1. But now it gets tricky, because Q2 was published from Q2-source but was also influenced by the Q1’s text. And F1 was published from F1 source, but was also influenced by the Q2 text.

So Q2-source to F1-source to Q1-source to Q1 which influences Q2 which influences F1… The textual history of Hamlet is basically a big loop.

Which goes rather a long way towards explaining why the text has been confusing editors for four hundred years.

TEXTUAL PRACTICES

Assumptive Conclusion 1: We know that cuts were made to Q2-source to form the F1-source. Those cuts may have been made by Shakespeare, but there’s really no way to know. On the other hand, we know that there was a Q2-source which was almost certainly in Shakespeare’s hand (or as close to that as we will ever get). Ergo, we use the Q2 as our source text, but we also conflate in the F1 text to more accurately reflect the original Q2-source (since we know those passages were removed from the publication of Q2, but not from the Q2-source text).

Assumptive Conclusion 2: Q1 is a corrupted text and Q2 was known to reference it. Ergo, a Q1/Q2 agreement against F1 is paradoxically more likely to indicate that F1 is correct and that Q2 is copying an error from Q1. On other hand, an F1/Q1 agreement could contra-indicate Q2, but could just as easily reflect a change made during the cuts to the F1-source and so are generally not followed unless the Q2 text is nonsensical. (Where the texts of Q2 and F1 agree with each other, of course, there’s no problem at all.)

Assumptive Conclusion 3: Q1 is based on memorial reconstruction of a touring production. Ergo, it reflects actual stage practices contemporary with Shakespeare (but not necessarily Shakespeare’s direction in all cases). Thus, its directions are generally useful. (In addition, some of its new scenes, perhaps written for the purposes of tightening the play, might provide some clues to original interpretation on key questions of character.)

See Also:

Special thanks to the Enfolded Hamlet, without which it would have made a full comparison of Q2/F1 readings too time-consuming for the limits of this project.

Source Text: Second Quarto (1604)

1. Original emendations in [square brackets].
2. Emendation from Q1 in [italicized brackets].
3. Q2-only passages in <diamond brackets>.
4. Emendation from F1 in {curled brackets}.
5. F1-only passages in {italicized curled brackets}.
6. Speech headings silently regularized.
7. Names which appear in ALL CAPITALS in stage directions have also been regularized.
8. Spelling has been modernized.
9. Punctuations has been silently emended (in minimalist fashion).
10. Act and Scene divisions corrected.

Originally posted on November 18th, 2010.


JUSTIN ALEXANDER About - Bibliography
Acting Resume

ROLEPLAYING GAMES Gamemastery 101
RPG Scenarios
RPG Cheat Sheets
RPG Miscellaneous
Dungeons & Dragons
Ptolus: Shadow of the Spire

Alexandrian Auxiliary
Check These Out
Essays
Other Games
Reviews
Shakespeare Sunday
Thoughts of the Day
Videos

Patrons
Open Game License

BlueskyMastodonTwitter

Archives

Recent Posts

Recent Comments

Copyright © The Alexandrian. All rights reserved.