As we’ve previously discussed, exploration can take several forms. The most basic form is simple curiosity, in which you just randomly look around hoping to find something interesting. This is, more or less, the level of exploration provided by the basic hexcrawl structure: You pick a direction and you march forth to see what’s there.
And there’s nothing wrong with that. Curiosity is the bedrock of exploration. But for a hexcrawl to truly come to life, the players need to be able to learn information about the region so that they can:
- set specific goals,
- ask specific questions, and
- plan their expeditions.
This is the function of the rumor table, which in its most basic form is simply a random table: Roll a die and tell the players a rumor. Each rumor provides a tangible nugget of information about the region:
d10 Rumor
1 North of Graykeep, there is a ruined arena which is home to minotaur.
2 A merchant has been kidnapped by goblins in the Old Forest.
3 An ogre living along Silkmauk Road has been known to offer aid and enigmatic trinkets to travelers.
4 There are ancient altars of red jadeite scattered throughout the area.
5 The old imperial fort stands on a plateau southwest of town.
6 The lizardmen of Tockmarsh are said to treat all tabaxi as if they were gods.
7 A white wyrm’s lair lies at the headwaters of the Red Rapids river.
8 A nymph of the White Wood will trade magic items for a vial of your tears.
9 In the Old Forest there’s a circle of stone sarsens. Stand amidst them and blow on horn of mistletoe and you can open a fairy gate.
10 Flying carpets have been seen in the skies around Mt. Skarlap, which lies east of town.
You can see how the rumors on this table would instruct the PCs about local regions (Old Forest, the Tockmarsh, White Woods) and interesting adventuring sites (old imperial fort, Graykeep, ruined arena, Mt. Skarlap) that they can now consciously choose to seek out (or use as navigational markers) rather than just stumbling across them randomly.
If this information is so useful, why not just give it all to them in one big infodump? Partly this comes down to effective pacing. In an exploration-based campaign, you really want the players to be slowly learning new things about the area over time. This also avoids information overload: By spreading the information out over time, it becomes easier for the players to process it and use it. (It’s the same reason you don’t read a textbook cover-to-cover, instead processing a section of the textbook and then applying it through practice problems, classroom discussions, etc. before proceeding to the next section.)
Conversely, if you only want to give the PCs a few rumors at a time, why go to the trouble of stocking an entire rumor table? Why not just design the handful of bespoke rumors that you’re going to give them? Well, as we’ll see, a good rumor table is an incredibly useful runtime tool for the GM, useful for responding to any number of actions which might be taken by the PCs.
STOCKING THE RUMOR TABLE
Stocking a rumor table is pretty straightforward: Figure out what size die you want to roll, list that number of rumors, and number them. (Or, vice versa, make a list of rumors until you run out of ideas or feel like you have enough, then count them, and assign whatever die size seems most appropriate.)
But how many active rumors should you aim to have in your hexcrawl?
There’s no one-true-answer here. Personally, I like to have twenty. A d20 is convenient, and it gives you enough rumors to cover the breadth of the hexcrawl without going overboard. (If you own a d30, that can also be a fun way to use that unusual die. But a table of d100 rumors, in my experience, can be a lot of work to prep without really providing a lot of extra value.)
In making each rumor, you’re going to be looking at its source, focus, type, and truth value.
SOURCE
The source of a rumor might be a:
- hex
- random encounter tables
- roads/paths/trails
- factions
- NPCs
Basically, anything you’ve keyed or created for the hexcrawl can (and arguably should!) be fodder for your rumor table.
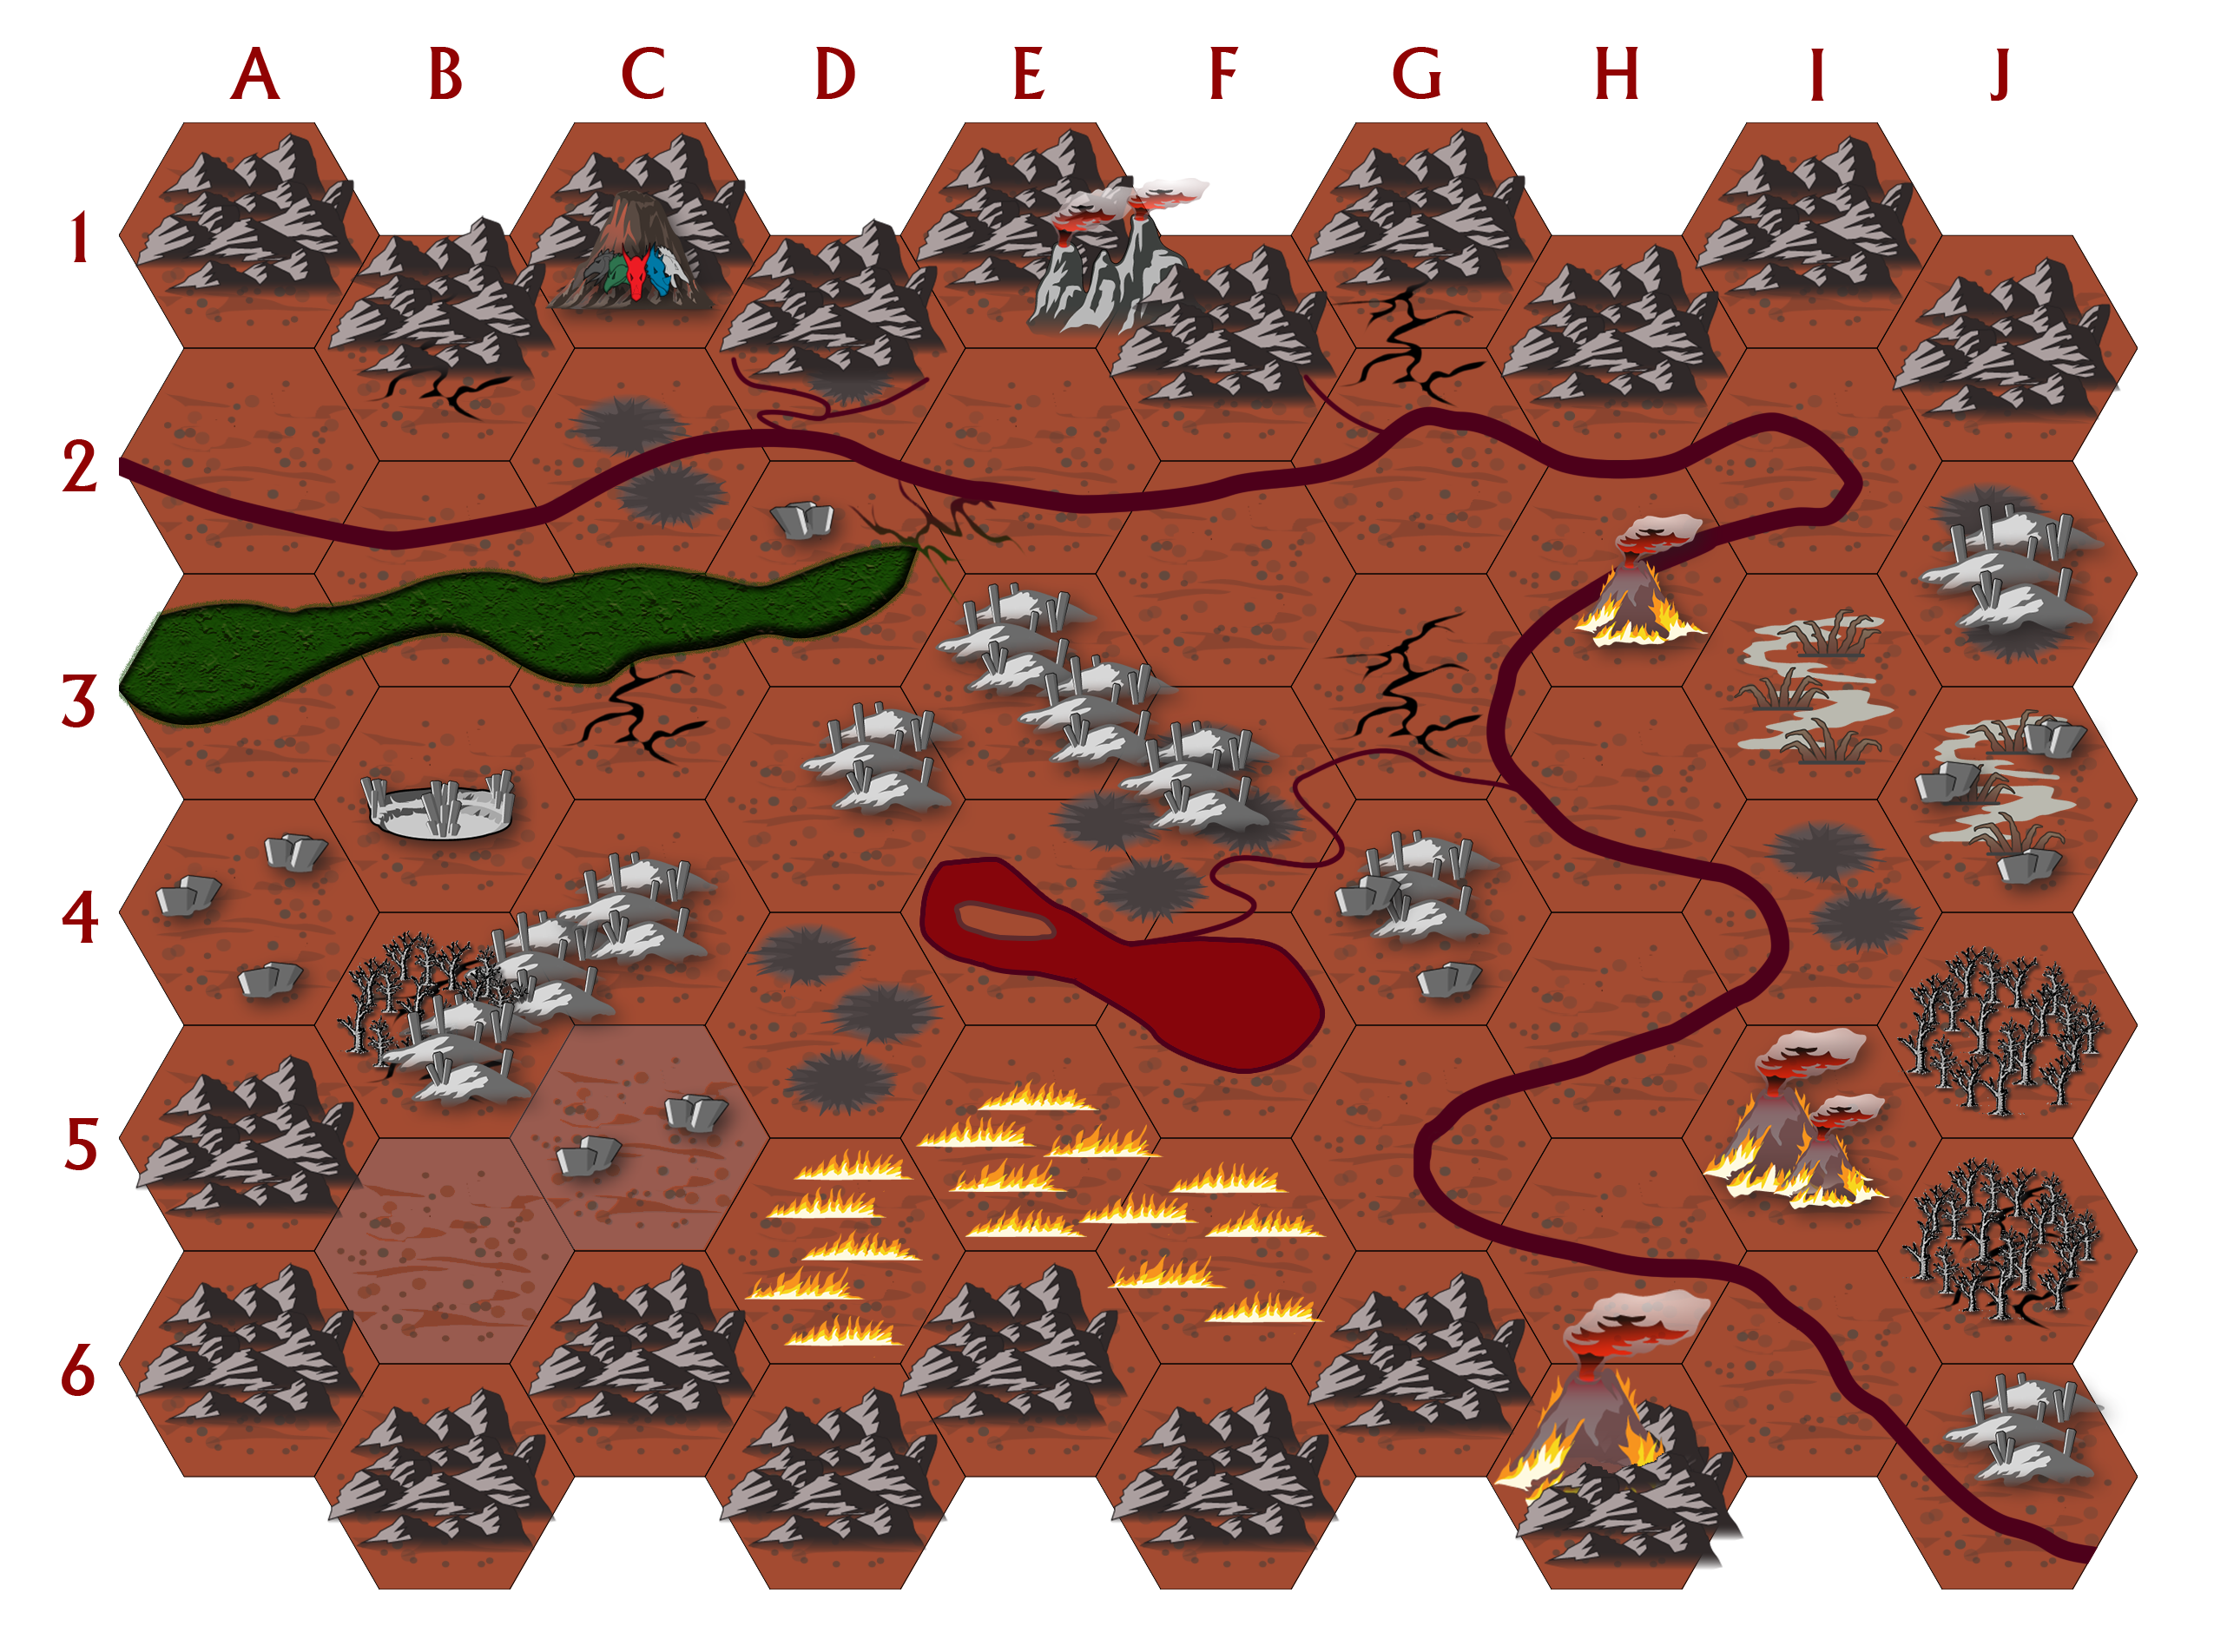
In fact, if I’ve started struggling to come up with new rumors to stock my rumor table with, a technique I’ve found useful is to just pick a random hex, look at what I’ve keyed there, and then figure out a rumor that could lead the PCs to it. (If you’ve done a 10 x 10 hexmap, for example, you can just roll two d10’s, cross-reference their position, and look at the resulting hex.)
Playtest Tip: You can also use this “pick a random hex, that’s your rumor” technique during actual play to generate rumors even in the absence of a stocked rumor table. Obviously this means you need to be a little more comfortable improvising rumors, but it’s a very flexible technique which, crucially, requires zero prep.
FOCUS
Potential focuses for a rumor can include:
- Location
- Creature
- Object
- Actions/Situations (including threats and upcoming situations)
- Background/Lore
For example, let’s consider one of our example hexes from Hexcrawl Addendum: Designing the Hexcrawl:
C2 – WYVERN SHAFT
60 foot deep shaft that serves as the lair of a wyvern. The wyvern has dug an escape tunnel that emerges from a hill a quarter mile away.
Wyvern: Has a large scar on its left side from a spear wound.
Treasure: 7,000 sp, 5 zircons (50 gp each)
What rumors could we generate from this?
Location: Adventurers exploring the Red Plateau southwest of town report seeing a mysterious 60-foot-deep shaft.
Creature: A wyvern has been seen flying over the Red Plateau.
Object: A wyvern attacked a tax assessor’s wagon along the Southway and carried off a lockbox containing 7,000 sp. It was last seen flying west.
Situation: A wyvern has been attacking travelers along the Southway.
Lore: A generation ago wyvern eggs were taken from the Red Plateau and sent east so that the hatchlings could imprint on imperial wyvern riders. The practice ended because the plateau became depopulated as a result of the egg-harvesting.
Note that, regardless of the rumor’s focus, each rumor is actionable, in the sense that it gives a clear location for the PCs to go. This is not strictly necessary, but should be much more the rule than the exception: The primary function of the rumor table is to guide and inform the PCs’ explorations, and it can’t do that if the PCs lack the information necessary to do anything with the rumor. (For example, a rumor that just said “there’s a wyvern in the area” is, at best, very limited in its utility, because there’s no way for the PCs to go looking for the wyvern other than just wandering around randomly.)
The actionable specificity of the rumor can vary quite a bit, though. “West of the Southway” is less precise than “check out the Red Plateau,” which is less precise than “the adventurers offer to sell you a map indicating the precise location of the shaft for 10 gold pieces.” But even the vaguest of these nevertheless provides some specific direction.
TYPE
Thinking about a rumor’s type, in my experience, is mostly useful if I’m struggling to come up with a good rumor. But most rumors will fall into one of five types.
Local Color tells you something about an area or the people/monsters who live there (e.g., “The White Woods lies north of Mt. Skarlap” or “the ealdorman is a man named Harlan, who lost his wife in a goblin raid twenty years ago”). Local color may be actionable — if you know the White Wood exists, then you can choose to go there — but lacks a specific motivation for doing so.
Other local color may not truly be actionable at all. As such, you might even want to maintain a separate table of Local Color Rumors that you can consciously choose to mix in with more meaningful intelligence.
Opportunities offer a reward, payoff, or some other form of gain. Treasure is always great — caches of magic items or bounties paid for the capture of an outlaw, that sort of thing — but there are many forms of reward: land, favors, a chance to flirt with a handsome centaur. Think about what motivates your PCs and seed that into your rumor tables.
Challenges are like opportunities, but with the addition of some clear threat or obstacle which must be overcome in order to gain the reward. Capturing a bandit to get their bounty is an example of this, as is a mine infested with goblins or a haunted forest where rare alchemical reagents can be found.
One form of reward that may not be immediately apparent is the simple desire to be a Big Damn Hero. If you tell the players that farms in the Fieflands are being attacked by mutant marauders, the desire to save the day may be more than enough to prompt them.
This is aided and abetted by the common D&D conceit that “where there be monsters, there by treasure.” If you tell the PCs about a wyvern attacking travelers along the Southway, you don’t probably don’t need to tell the players that “the wyvern is guarding a cache of treasure” for them to infer it.
Dangers are like challenges, but without reward. The other way to think about this is that a challenge or opportunity is something that the PCs might set as a goal for themselves (find the nymph of the White Wood, slay the wyvern, etc.), but a danger is something for them avoid, most likely while pursuing other goals. It’s the Valley of the Monocs they should go around; or the red gems in Cawthorne Keep that should be eschewed.
The distinction here can be kind of hazy, and will likely even shift as the PCs grow in power and ability. (“There’s a dragon over there!” is a terrifying danger to a group of 1st level characters, but a rich opportunity that will leave higher level characters salivating at the thought of looting its hoard.)
Mysteries are similar to opportunities, but the “reward” is simply unraveling the unknown and/or learning secret lore: What’s causing those strange lights in the Tockmarsh? Why are there 60-foot-wide shafts drilled into the earth all over this area? Who built the red jadeite altars?
This category of rumor really relies on humanity’s innate curiosity: It may take nothing more than offering the players an enigma to fill them with a burning desire to resolve it.
A final thing to note is that we’re categorizing the content of the rumor, not necessarily reality: For example, a rumor might offer an opportunity of an abandoned silver mine… and it’s only when they arrive that the PCs discover it’s infested with goblins. Something offered simply as a mystery to unravel might nevertheless result in discovering a huge treasure hoard.
TRUTH VALUE
Keeping this distinction between rumor content and reality is also useful as we look at the truth value of the rumor. Rumors can be:
- True
- False
- Partial (there is a hermit in Shamrock Cave, but the rumor didn’t mention he’s a psychotic axe murderer)
- Mixed (the “friendly old hermit in Shamrock Cave” exists, but he’s not friendly)
In structural terms, the key thing to keep in mind is that even a completely false rumor can nevertheless motivate the PCs to go somewhere or do something that will result in adventure.
What you want to avoid, however, is continually offering them rewards and then leaving them with nothing. As long as the players are getting reliably enjoyable experiences following rumors (even when the rumors are false), they’ll continue following them. If that stops being true, however, the players will just ignore rumors as being worse than a waste of time, and all of the wonderful utility of rumors will be lost to you.
Go to Part 2: Hearing Rumors