 Consider this: In 1974, create water was a 4th level spell and create food was a 5th level spell. That meant you wouldn’t have magical access to a water supply until you had a 6th level cleric in the group; and you wouldn’t have magical access to food until you had a 7th level cleric. (By 7th level you’re considered a major religious leader and at 8th level you’re assumed to be founding your own churches.)
This remained true in the Basic line of the game all the way through the Rules Cyclopedia in ’91. In the Advanced line of the game, however, things shifted. In the 1st Edition PHB create water became a 1st level spell.
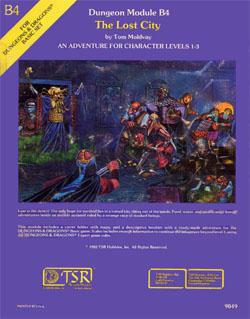
What does this mean? Well, it means that B4 The Lost City was a viable scenario in the Basic game, but not in the Advanced game:
Days ago your group of adventurers joined a desert caravan. Halfway across the desert, a terrible sandstorm struck, separating your party from the rest of the caravan. When the storm died down you found that you were alone. The caravan was nowhere in sight. The desert was unrecognizable, as the dunes had been blown into new patterns. You were lost.
(…)
The second day after your water ran out, you stumbled upon a number of stone blocks sticking out of a sand dune. Investigation showed that the sand covered the remains of a tall stone wall. On the other side of the stone wall was a ruined city.
The whole concept of being driven into an ancient ruin because you’re short on water pretty much ceases to be an issue. This is even more true in 3E when the already devalued create water became a 0-level orison.
But like the wings of a butterfly, the subtle shift in this single spell actually has a profound impact on gameplay.
THE WIDER EFFECT
As my old school 1974 campaign moved towards hexcrawling, my players began figuring out how to equip their characters for wilderness exploration. The hexcrawling was based around a fairly basic system (which served as the test pilot for the wilderness exploration mechanics found in Legends & Labyrinths). It’s not a mass of complexity, but it does provide a basic model for:
- Travel Time
- Navigation
- Discovery
Combined with the standard systems of encumbrance and a daily requirement of food and water, the result was a fairly plausible demand for supplies (particularly if they were heading into the jungle where potable water was difficult to come by).
What they quickly discovered was that, for any journey of appreciable length, they couldn’t physically carry the necessary supplies. So they needed horses.
But horses pose a problem if you need to go spelunking. So they needed hirelings to care for the horses.
And once you’ve got hirelings watching the horses, it doesn’t take much imagination to start hiring men-at-arms to come into the dungeon with you.
All these hirelings, of course, need their own supplies. Which means more horses. And eventually pack horses. (The latter, particularly, once they started hitting treasures that they couldn’t easily haul back in a single load.)
After some trial and error, each group found their own equilibrium. But, in general, adventuring parties grew. And as the parties grew, the need for larger, more elaborate, and more rewarding ventures grew.
The reality of this dynamic is actually more complex than this, of course. (For example, I also believe the fact that hirelings are given a prominent place as a major feature of your character in the original rulebooks plays a large role in making them a major feature in old school play. Take those same rules and put them somewhere else in the rulebook and that gameplay doesn’t get as much attention.) But the need for supplies was, in a very real sense, the camel’s nose in the tent: Take that need away, the need for horses disappears. The need for horses disappears, the hirelings disappear.
And I’d argue it can actually be taken one step further: Take low-level hirelings away and you take away mid-level fiefdoms because you haven’t developed the skills or style of play necessary to gradually transition into those fiefdoms. The entire original “end game” of the game disappears.
THE LARGER METAPHOR
The other thing about create water as a spell is that it’s a small example of a larger phenomenon in D&D which is often overlooked.
Specifically, it’s an ability which removes gameplay.
I’ve spoken with many game designers who consider this to be a huge mistake. It was certainly a motivating factor in the design of 4th Edition. A similar motivation gives you the game world scaling of Oblivion.
But I, personally, think it’s great: As you play D&D, the game shifts. At 10th level you aren’t playing the same game you were playing at 1st level.
If we consider this narrow slice of the game, D&D basically used to say: “Okay, you start out exploring a nearby dungeon for 2 or 3 levels. Then you start exploring the wilderness and you have to really focus on how to make those explorations a success — supplies, navigation aids, clear goals, etc. We’ll do that for 3-4 levels and then, ya know what? I’m bored with that. So we’ll keep doing the explorations, but we’re going to yank out all that logistical gameplay, replace it with some magical resources, and start shifting the focus of wilderness exploration to staking out fiefdoms and clearing the countryside. We’ll do that for 3-4 levels. By that time you’ve probably transitioned pretty thoroughly into realms management, so we’ll just give you this teleport spell and we can probably just phase that ‘trekking through the wilderness’ stuff out entirely.”
(Of course, it’s not really gone because the same players are running multiple PCs. So if they’re in the mood for some hexcrawling on Tuesday night, they’ll just bring out their lower level characters to play.)
You’ll find these kinds of abilities studded throughout the game. Their impact has been dulled somewhat over the years (and removed pretty much completely from 4th Edition), but this fundamental panoply of gameplay experiences continues to be a major strength of classic D&D.


