The Alexandrian

Posts tagged ‘blades in the dark’

Blades in the Dark drives its narrative through the interplay of factions. One of the factions described in the core rulebook are the Fog Hounds, a “crew of rough smugglers looking for a patron.” Their goals (as expressed in the form of a faction clock) include:

  • Eliminate rival smugglers (8)

And their enemies are:

  • Bluecoats (canal patrol), the Vultures (rival smuggling outfit, Tier I)

The Bluecoats are another full-featured faction in the setting, but the Vultures are not. The only reference to them, in fact, is what you see here.

In my current Blades in the Dark campaign, however, the PCs have ended up in a war with the Fog Hounds. It seems quite likely that an enemy-of-my-enemy situation will arise in one form or another, making the Vultures of particular importance in what will happen next.

So I needed to fully flesh out the Vultures, and I thought that might prove useful to other Blades in the Dark GMs.

THE VULTURES

A smuggling operation focused on the spirit trade.

Tier: I

Hold: Weak

Faction Clocks

Recruit a powerful envoy with connections in Whitecrown (6)

Learn how to counterfeit “bespoke” spirits; fake individuals (8)

Turf: Warded building in Old North Port (HQ). Private passenger car that can be attached to trains (with smuggling compartments). Tangletown pit-fighting operation, featuring taxidermied animals possessed by bottled spirits.

NPCs: Wendel Messerli (public “leader”; young, earnest, convincing).  Nicoline (true leader of the Vultures, traveling as a hobo; stealthy, fiery, clever). Christel the Fisherwoman (whisper, whose face is never the same twice; many-voiced, powerful, duplicitous)

Notable Assets: Hobo information network that hitch the rails. An array of Imperial transport and cargo documents, some forged and some legit. Spirit lures that can fish spirits out of the depths of the Void Sea.

Quirks: The Vultures have a secret language of hand-signs derived from hobo signs used at the stations to communicate car destinations and threats. The true leader and founder of the Vultures is Nicoline, a hobo who still chooses to live the wandering life of the rails and veils. Wendel is a fresh-faced youth who presents himself as the leader of the group when necessary, but meets secretly with Nicoline on transcontinental rail journeys to receive orders and strategy.

Allies: The Circle of Flame (clients), The Gray Cloaks

Enemies: The Dimmer Sisters, The Fog Hounds, Spirit Wardens

Situation: The Fog Hounds have targeted the Vultures for elimination, hoping to secure the rail-based smuggling routes that the Vultures currently command. Using Christel’s unique skill set and the custom lures she can create, the Vulture specialize in retrieving specific spirits from the Deathlands. They are hoping to be able to use their new connections with the Circle of Flame, who have found them useful agents, to learn more about the Lost District and gain access to the ancestral spirits there.

Blades in the Dark - System Cheat Sheet

(click here for PDF)

Blades in the Dark is a really cool little game with three major claims to fame:

  • A detailed system for running and developing a criminal crew.
  • An innovative system for running heist scenarios using a combination of flashbacks and an “engagement roll”.
  • A very unique approach to framing action resolution through a combination of setting position and level of effect.

As with my other cheat sheets, this cheat sheet is designed to summarize all of the rules for running the game — from Action Roll resolutions to Downtime activities. It is not, however, designed to be a quick start packet: If you want to learn how to play Blades in the Dark, you’ll want to read through the core rulebook. These cheat sheets are a long-term resource for both GMs and players, and can serve as a great tool for experienced players teaching newcomers, but it’s a cheat sheet, not a textbook.

These cheat sheets also do not include what I refer to as “character option chunks” (for reasons discussed here). You won’t find the rules for character creation, the character playbooks, or the crew sheets here. (Although you can find many of those resources at bladesinthedark.com.)

VERSION 3

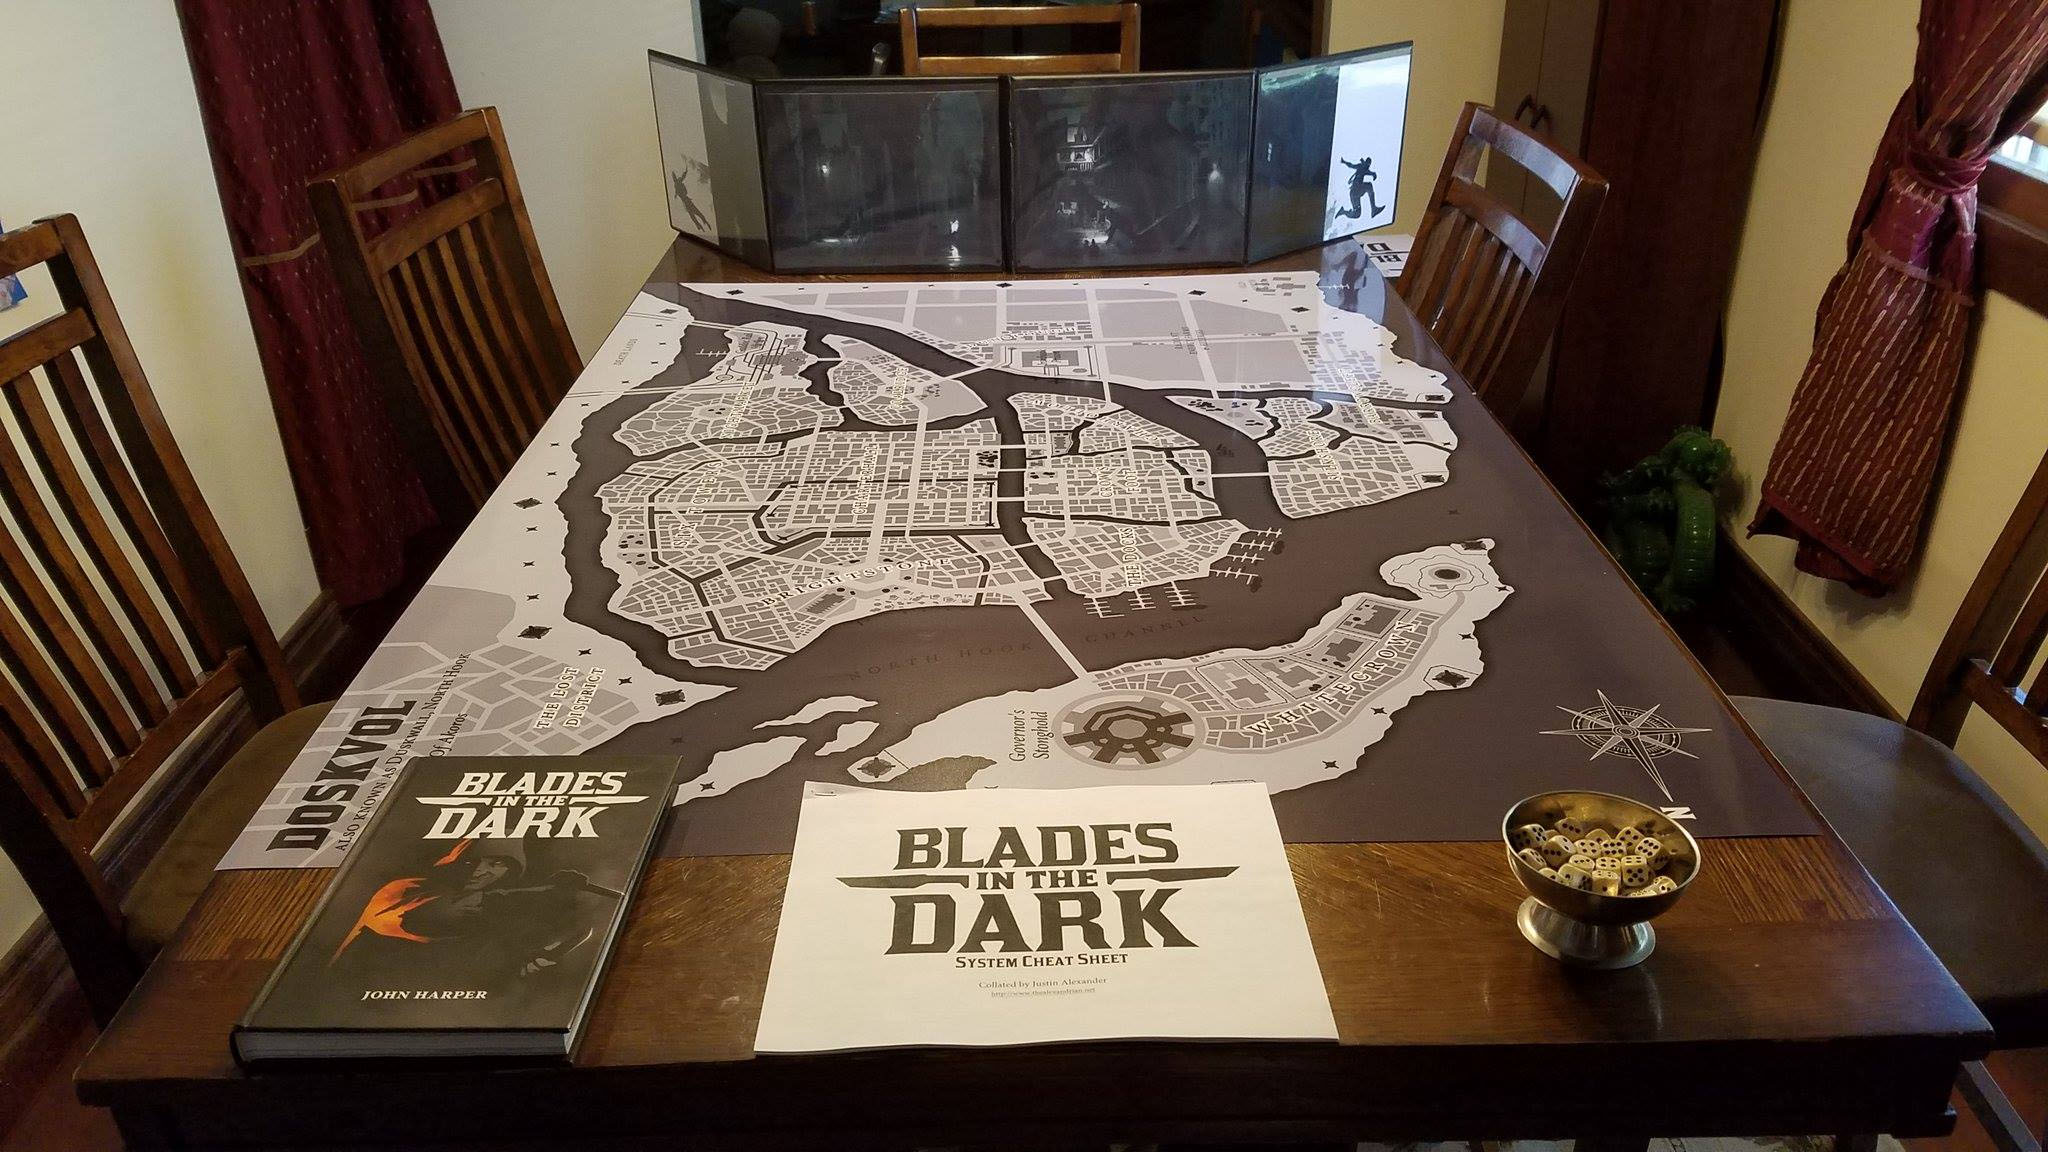
My normal procedure for creating these cheat sheets is to (a) write them up, (b) use them in actual play for several sessions, (c) iteratively revise them as necessary, and only then (d) share them here on the Alexandrian. For Blades in the Dark, however, I posted a picture to Twitter of my table set-up for the game:

Blades in the Dark - Ready or Play

The sexy map (printed by ABC Sign & Graphic) drew a lot of attention, and the prominent positioning of the cheat sheets unexpectedly created a lot of demand for them. This sort of short-circuited my normal process and, after using them in only a single session, I rushed them up onto the site.

Since that time, however, I’ve used the sheets in almost a dozen more sessions and it became clear that there were not only a number of errors, but also some significant shortcomings with them. These new versions of the sheets, therefore, have reorganized the existing material to configure it more usefully, but also added several significant new chunks of information:

  • Duskvol District Modifiers: Getting these in front of the players has a really tangible effect on how they organize their affairs and run their scores.
  • Glossary of Strange Forces: I found that our group was getting a little too “fantasy generic” in my handling of the setting, so I wanted to refocus myself on the very specific “demonic steampunk ghost apocalypse” vibe of the game.
  • Action Ratings – Expanded Reference: I’d originally decided not to include this material and went with my normal “list of attributes/skills” method for cheat sheets. But the clear definition of what each action rating is for and, even more importantly, where those action ratings weakly overlap is actually really crucial to running Blades in the Dark correctly. During play we were constantly reaching for the rulebook to look this stuff up, which is exactly the material you want in the cheat sheet.

If you still want the original versions of these cheat sheets, they can still be found here.

HOW I USE THEM

I usually keep a copy of my system cheat sheets behind my GM screen for quick reference and I also place a half dozen copies in the center of the table for the players to grab as needed. The information included is meant to be as comprehensive as possible; although rulebooks are also available, my goal is to minimize the amount of time people spend referencing the rulebook: Finding something in the 8 pages of the cheat sheet is a much faster process than paging through the full rulebook. And, once you’ve found it, processing the streamlined information on the cheat sheet will (hopefully) also be quicker.

The organization of information onto each page of the cheat sheet should, hopefully, be fairly intuitive.

Page 1-2: Core Resolution. This includes all of the core rules for action resolution, including action rolls, resistance rolls, fortune rolls, consequences, harms, stress, and progress clocks (plus additional resources related to those topics).

Page 3-4: Scores & Crews & Factions. Re-sequencing this material made the cheat sheet more intuitive to navigate. I’ve also dropped Incarceration rules onto page 4.

Page 5-6: Downtime. And once your score is done, everything you need for downtime activities (including vices).

Page 7: Miscellanea. Collecting together rules for Coins, Rituals, and Crafting.

Page 8: Deep Reference. The new references for Duskvol District Modifiers, Glossary of Strange Forces, and the Expanded Reference for Action Ratings. (Obviously you’d want to swap out the Duskvol modifiers if you’re running with a different setting, such as U’Duasha from the special edition of the game.)

Page 9: Principles. This page includes the game’s “core loop”, the standards for who controls which types of decisions (Judgment Calls), and the best practices/goals for players and GMs alike.

MAKING A GM SCREEN

These cheat sheets can also be used in conjunction with a modular, landscape-oriented GM screen (like the ones you can buy here or here).

I usually use a four-panel screen and use reverse-duplex printing in order to create sheets that I can tape together and “flip up” to reveal additional information behind them. After some experimentation, this is the set-up I’m currently using for Blades in the Dark:

  • Panel 1: Action / Effect (with Deep References behind it)
  • Panel 2: Consequences / Progress Clocks / Magnitude
  • Panel 3: Scores (with Crews and Principles behind it)
  • Panel 4: Downtime (with Downtime Activities and Miscellanea behind it)

This allows you to reference roll results, consequences, and the magnitude table with a single glance to your left. You can intuitively flip up the Action Rating page to find the expanded Action Rating material behind it. To your right you’ll be able to flip through the material for Scores  & Downtime on the final two panels (with miscellaneous details tucked behind each).

Something else I experimented with was leaving a panel open and sliding in the one-page reference for the current District. But as the action in my campaign seems to frequently shift betweeen districts, this ended up being more finicky than valuable.

It’s likely that these sheets will continue to evolve through play. Recently, for example, I’ve realized that I really want a reference for the different hours of the day (Blades in the Dark, p. 240) so that I can set the time of night more accurately. (This is perhaps particularly notable because the setting’s eternal night disrupts my normal time descriptors.) You might jot those down on the currently blank sheet on Panel 1. Maybe it would be useful to pair that with a map of Doskvol you could flip up to reference quickly?

FURTHER READING
Advanced Starting Situations
Alternative Starting Situations
Progress Clocks
The Vultures


Blades in the Dark - John Harper

Go to Part 1

Last time we looked at some alternative starting situations for Blades in the Dark which were more or less inline with the default starting situation presented in the core rulebook. This time we’re going to look at slightly more complicated options that will push the boundaries of what we can try while still having a fundamental foundation in the mechanical and narrative structures of the game.

THE USUAL SUSPECTS

  • The PCs have been incarcerated. Although none of them knew each other before prison, they were somehow thrust together inside: Maybe they were arrested at the same time. Maybe they were assigned to the same cellblock or the same work gang.
  • Ask the players individually what they were arrested for. Ask them collectively how they met.
  • Look at the prison claims on p. 149 of the core rulebook. These claims are usually gained through incarceration rolls, but for our introductory scenario we’re going to run a prison score. Have the players pick a claim they want to pursue.
  • As with crew claims in the outside world, taking control of a prison claim will require the PCs to go through the faction who currently controls it. Pick that faction and figure out how they’re securing or operating the claim currently.
  • After the first score is resolved, cut ahead to the point where all of the PCs have been released from prison: Now that they’re free, they’re ready to form a crew and make a name for themselves.
  • For their second score, look at the prison claim they took and figure out what outside action and/or infrastructure is needed to sustain it. (For example, how can they take pressure off a guard that they’ve paid off? How can they keep their smuggling channel clear?)
  • Pick a second faction that’s trying to muscle in on the crew’s action (or maybe simply looking to compete with them). The second score is fending off the threat.

A few tips:

  • The faction standing between the scoundrels and their prison claim can be the Bluecoats. It is, after all, their job to keep things secure in Ironhook.
  • After the first score is complete, it may be effective to cut directly to a scene featuring the last member of the crew getting released from prison and/or showing up at the crew’s new hideout.
  • The trick to making this situation work is really embracing the claustrophobic nature of the prison job and creating a strong contrast with life on the outside.
  • This starting situation is likely to be more challenging for the PCs because it almost certainly means having a negative status with two different factions (instead of a negative-positive split between a couple of factions). Be aware of that and perhaps give the PCs a chance to quickly ingratiate themselves with a third faction. (This third faction could be opposed to the factions they’ve already alienated in an “enemy of my enemy” kind of deal.)

Blades in the Dark - John HarperEXAMPLE – SMUGGLING: Ironhook is riddled with ghost doors, a legacy of the long history of pain and violence within the prison’s walls. Keeping them sealed and warded is an important part of prison security. A fief-witch of the Dimmer Sisters has managed to drill through the wards around one of the doors, however, creating a spirit tunnel from a second ghost door in Dunslough. The ghost door in Ironhook opens in a laundry. The PCs will need to figure out how to get regular, long-term access to the door. They’ll also need to figure out how to deny access to the crew currently running it.

This could turn into a jailbreak scenario. But if they use the ghost door to break out of prison, it’s virtually certain the guards will discover and seal the door, eliminating the Smuggling claim. (That’ll probably piss the Dimmer Sisters off even more, honestly.)

If they keep the smuggling channel open, then when they get out of prison they’re approached by the Lampblacks. Their gang war with the Crows has spread to Ironhook, and the lampers want the PCs to smuggle weapons in so that they can “retaliate”. They’ll pay well, but a big influx of weapons will put a lot of heat on the PCs’ operation. If the PCs refuse, the lampers will try to seize the spirit tunnel for themselves. If the PCs go for it, the Crows will get wind of the deal and try to intervene.

EXAMPLE – ALLIED CLAIM (CULT SANCTUARY): Down in the Heart – the core of the Ironhook complex – there are the tangled, maze-like remnants of the original prison and the castle which preceded it. And somewhere within that maze is a forgotten, hidden temple dedicated to the Night Queen. It’s one part Shawshank Redemption, one part Tomb Raider as the PCs follow the enigmatic clues left in the notes of a true believer!

Once inside the temple, each of them can dip a black opal in the milky pool of the Night Queen’s tears, pledging themselves to her service.

When the PCs get out, a Night Queen cult comes looking for the opals. And a different cult, this one pledged to the Squamous Red, seeks to destroy them.

AT WAR!!!

  • Pick a faction. The PCs are at war with that faction!
  • The PCs effectively start as a Tier 0 faction with Strong hold, as per a standard campaign. But they’ll immediately increase in hold if the war ends, just as they would with any other war.
  • Ask the questions:

GM asks: Who started the war?

Players ask: What damage have they done to us?

GM asks: How do you strike back?

  • And that’s the first score.
  • For the second score, have the other faction hit the PCs’ crew.
  • At this point, have a second faction either sympathetic to the PCs or hostile to the PCs’ enemy approach the PCs. They’re willing to ally with the PCs… but they’re not doing it out of the goodness of their heart. (The cost will likely end up being the third or fourth score.)

Tips:

  • This is a very difficult starting situation. It’s probably best used with advanced players who already have experience running a Blades in the Dark crew.
  • The PCs effectively start at a higher Tier than normal (although temporarily reduced due to the war). Consider this fair compensation for the unusually difficult starting situation.
  • When picking an enemy faction, you need to pick one with a Tier equivalent to the PCs or, at most, one higher. As a starting crew, the PCs have very limited resources and a gang war is hard to endure at the best of times. (This is also why the structure brings in an early alliance.)
  • When using this structure, you might want to consider starting the PCs’ crew at a higher Tier than usual. (This will also open up more options for the faction they’re in conflict with.)
  • This structure can also be a good way to launch a Season Two (Blades in the Dark, p. 206). Close out the previous season, let some time pass, and then cut to in media res as the opposing faction throws a firebomb through the window of the crew’s hideout. YOU’RE AT WAR! Now what?

Blades in the Dark - John Harper

Blades in the Dark includes a specific suggested starting situation: A war in the Crow’s Foot neighborhood between the Crows, the Lampblacks, and the Red Sashes. If you look around the web for examples of actual play, therefore, it’s unsurprising that you’re going to find a lot of gang wars in Crow’s Foot.

And that’s good. One of the (many) reasons the game has been seeing so much success is that John Harper very adroitly gave you literally everything you need to pick up the game and begin running a campaign immediately and with zero effort.

With that being said, I think you’ll get much better results if, instead of using the canned example of a campaign premise, you create a custom premise. Harper, smartly, includes a generic structure for doing that (the same generic structure that’s used to create the specific War in Crow’s Foot example), as described on p. 203:

  • Set two factions directly at odds, with opposing goals. They’re already in conflict when the game begins. Both factions are eager to recruit help, and to hurt anyone who helps their foe.
  • Set a third faction poised to profit from this conflict or to be ruined by its continuation. This faction is eager to recruit help.
  • Establish an opening scene at one of the faction’s headquarters. The PCs are meeting with the faction leader or second-in-command, who summarizes the current situation as they see it and then make a demand of the crew or offer them a job. What could the PCs’ type of crew do for this faction to help them?

I further recommend that you don’t do this until the end of your Session 0. That will allow you to personalize your starting situation to the crew the players have created, picking factions and struggles accordingly.

(For those unfamiliar with the game, the setting includes 20-30 factions that come prepackaged with agendas which are mechanically coded into progress clocks. This makes it really easy to flip through a few pages, grab a couple factions, and identify their conflicting agendas, although these techniques could work equally well, albeit with a bit more elbow grease, if the GM was creating brand new factions, too.)

This default structure is quite excellent at setting up a dramatic starting situation. But it is obviously not the only structure capable of doing that, so we’re going to explore a few alternatives. With a significant number of Blades in the Dark GMs wrapping up their first campaigns and now looking to start their second, I think these will prove particularly useful in shaking things up a little bit.

AIM AT A CLOCK

  • Pick a faction and one of that faction’s faction clocks.
  • Have the faction hire (or compel) the PCs to achieve that goal for them.

This won’t necessarily work well for every faction clock in the book, but it will present the PCs with a specific, multi-step goal, while giving them flexibility in figuring out how to achieve it. This allows the PCs to define their own scores right out of the gate, rather than simply being hired to do specific jobs.

A few tips:

  • Players may want to default to a single, straightforward strike to achieve whatever the goal is, but that won’t work. These are big, complicated goals. That’s why they have a progress clock. Make them set up their vectors.
  • Look at the “Enemies” section of the faction the PCs are working for as sources for likely scores that can help achieve the faction’s progress clock.
  • It should probably take two to four scores (possibly supported by various downtime actions) to fill the progress clock. These scores don’t need to be run to the exclusion of any other activity: Mix in unrelated (or tangential) scores. Or, more effectively, let the PCs choose to mix in such scores as they begin defining their own agenda.

EXAMPLE – THE CITY COUNCIL. Three of the councilors (Bowmore, Clelland, Rowan) have aligned against Strangford and are maneuvering to remove the house from the council. (6-clock)

So here the PCs are approached by Bowmore, Clelland, and/or Rowan and told to create a situation in which Strangford will be removed. Blackmail? Criminal prosecution? Assassinations? Whatever. Each score will fill 1-3 ticks on the clock. (Maybe a number of ticks equal to the Tier of the target? Or Tier +1?)

EXAMPLE – THE LOST. The Lost, a group of street-toughs and ex-soldiers dedicated to protecting the downtrodden and hopeless, are seeking to destroy the cruel workhouses in Coalridge. (4-clock, repeating)

This one seems pretty straightforward: Assassinate foremen. Blow up buildings. Steal payroll. Again, whatever works.

AIM AT A CLAIM

  • Have the players pick one of the claims from their crew’s claim map. Ask them questions in order to define exactly what the claim is. (And why they want it.)
  • The first score will be to secure that claim.
  • Pick the faction that currently controls the claim. As with any other seizure of a claim, this will be the faction opposing the PCs’ attempt to take the claim.
  • Pick another faction that also wants the claim. As soon as the PCs take the claim, this faction will either approach them in order to leverage the claim or will attempt to take it from the PCs. (Either way, this will probably end up being the second score.)

Blades in the Dark - John HarperAnd a few tips for this one:

  • This option really pushes the focus onto the crew-building component of the game.
  • If you want powerful factions to be involved, the claim does not have to be directly controlled by one of them. (Which would most likely be too difficult for a Tier 0 crew to seize.) Instead, it may be some small sub-division or subservient organization.
  • The squabble over this particular claim is just one small part of a conflict between the two factions you’ve chosen to have involved. In creating that conflict, you can use the nature of the claim they’re competing over as a creative guide.
  • This also means that, in the act of securing the claim, the PCs have inserted themselves into the middle of this conflict. How the factions react to his will depend on how these first couple of scores play out; but they will react. Set up some progress clocks and let them start ticking.

EXAMPLE – ASSASSINS (FIXER). The fixer is a man by the name of Otto Fingaria. He currently works closely with the Deathlands Scavengers, who have discovered an ancient bunker in the mountains east of Duskvol. The find is a rich one, and they’ve been slowly funneling its contents through Fingaria for the past few months. The Dimmer Sisters have become interested in Fingaria’s trade; some of them have suggested an ancient prophecy has come due. The Dimmer Sisters want to know the location of the bunker, and they’ll go through Fingaria to do it.

EXAMPLE – BRAVOS (TURF). The gang decides that they want to take control of a training gym for boxers in Coalridge; they’ll use it as a front for their strongarm mercenary work and also as a recruiting ground for a cohort. (Tim is also potentially interested in fixing matches on the circuit.) The gym is located in the middle of a Skov ghetto, though, and Ulf Ironborn at Akorosians trying to muscle in on Skovlander businesses. If the PCs can nevertheless take control of the gym, they’ll be visited by the Billhooks: They’ve heard there’s new management and they want to make sure the PCs are onboard with supporting their fixing of the boxing matches.

CONCLUDING THOUGHTS

Ultimately all of these methods take two or more factions, put them in conflict with each other, and then create a vector by which the PCs end up somehow stuck in the middle of that conflict. This should probably be unsurprising, because in large part that’s what Blades in the Dark is ultimately about: The conflict between powerful factions and the path by which the PCs become one of those powerful factions (or are destroyed in the attempt).

The distinction between these methods largely lies in (a) how the GM draws inspiration for the most pertinent faction conflict at the beginning of the campaign and (b) the method by which the PCs become involved. The latter is crucial in terms of shaping what actually happens at the gaming table: Battling over turf is different than choosing sides, which is different again than being hired to potentially instigate the conflict.

NEXT: Advanced Starting Situations

Blades in the Dark - Crew Mission Type Table

(click for PDF)

This PDF collects the mission types listed for each crew type in Blades in the Dark on to a random table that can be used as a procedural content generator. As detailed below, it’s particularly effective when used in conjunction with the more specific procedural content generators already found in the core rulebook.

USING THE TABLE

FIRST: Roll 1d6 + 1d4 to generate a mission type. Option: Roll 1d8 + 1d4, with results of 7 or 8 on the d8 defaulting to the crew’s type. (This creates a result that will be biased towards the crew’s type, while also leaving open a sizable opportunity for other mission types.)

OPTION #1 – USE OPPORTUNITY TABLES: Roll 1d3 + 1d6 on the appropriate crew’s opportunity table and combine with the mission type.

  • Assassins, p. 103
  • Bravos, p. 107
  • Cults, p. 111
  • Hawkers, p. 115
  • Shadows, p. 119
  • Smugglers, p. 123

Example: “Smuggle Arcane/Weird” + “Union organizers want to arm factory workers in advance of a strike” tells you what kind of weapons the union organizers are looking for.

Example: “Sabotage” + “A master assassin has come out of retirement for one more job; many would pay well to know who their target is” means your mission isn’t just to figure out who the target is, but to prevent the master assassin from carrying it out.

OPTION #2 – USE WORK TABLE: Rolling 1d4 + 1d6 on the WORK table may seem superfluous, but can also combine with the mission type in unexpected ways (e.g., “Disappearance” + “Hollow or Revivify” resulting in a job where you need to kidnap a corpse in order to revive it).

  • Blades in the Dark, p. 306

Example: “Accident” + “Burglary or Heist”. It’s that much harder to kill someone and make it look like an accident when you ALSO need to purloin something from their person/house.

Example: “Augury” + “Poison or Arrange Accident”. Cult mission types can be difficult to interpret for other crews. In some cases, the crew may just be engaging in cult-like activity (attempting to gain a powerful augury by giving a noblewoman a very powerful poison that causes prophecies regarding their blood relations to appear as blood welts on their skin). You might also invert the scenario so that the crew is seeking to prevent a cult from carrying out the mission. Or the crew might be hired by the cult to do the mission.

FINALLY: Flesh things out with the other SCORES tables.

  • Client/Target, p. 306
  • Connected to Person/Faction, p. 307
  • Twist or Complication, p. 307

Play Blades in the Dark!

Archives

Recent Posts


Recent Comments

Copyright © The Alexandrian. All rights reserved.