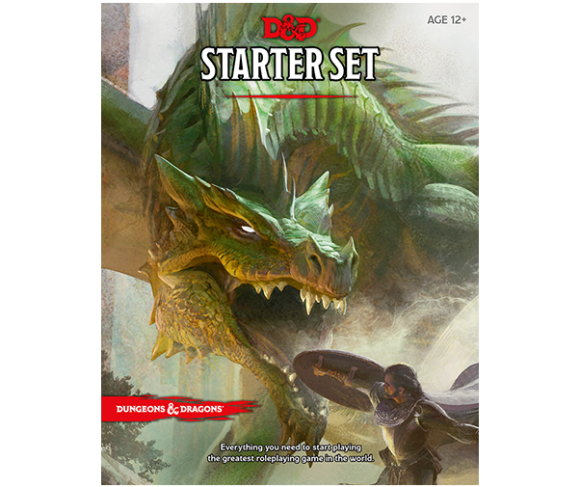
With Phandelver and Below: The Shattered Obelisk arriving on bookshelves as we enter the twilight months of 5th Edition in anticipation of the release of D&D 2024 / OneD&D / whatever we end up calling it, I thought it would be interesting to go all the way back to the beginning and take a peek at the D&D Starter Set first published in 2014.
But let’s start by going even further back and discussing the history of D&D introductory sets. (This is something I discuss in even more detail in Every Edition of D&D if you want to go on a real deep dive.)
D&D was originally published as a boxed set in 1974. In 1977, however, the product line bifurcated: Advanced Dungeons & Dragons would be published as a set of three hardcover books, while Dungeons & Dragons would be published in the boxed Basic Set. (This is why that version of the game is often called Basic D&D.)
In 1981, the Basic Set was revamped and an Expert Set was added as a supplement. In 1983, the Basic and Expert sets were revamped again, and the Companion, Master, and Immortals boxed sets were also added.
Now, here’s the key thing: Dungeons & Dragons was NOT the same game as Advanced Dungeons & Dragons. The Basic Set (and its supplements) were a complete, stand-alone game that even had its own campaign worlds and adventures.
Starting in 1991, this changed. The Basic D&D game remained distinct from AD&D for a while longer, but its rules were compiled into the Rules Cyclopedia. Later, after Wizards of the Coast bought D&D, they would end Basic D&D and drop the “Advanced” moniker from the 3rd Edition of AD&D (now referred to simply as D&D). A multitude of Basic Sets, Introductions, First Quests, Starter Sets, Adventure Games, and Basic Games would continue to be published as boxed sets, but there was an important difference:
They weren’t complete games.
They were pay-to-preview ads for the Player’s Handbook, and they were usually designed accordingly: You bought them. You played them once. Then you threw them in the trash, bought the core rulebooks, and never touched them again.
I’ve talked in the past about the fact that I think this killed D&D’s gateway product and did an incredible amount of harm to the entire RPG industry. Personally, in my ideal world, D&D would be a game sold in a box, and when new players asked, “What do I need to play D&D?” you’d say, “You need the big box with DUNGEONS & DRAGONS on the cover.” Simple.
Obviously, we don’t live in that world. But this should give you a barometer for what my ideal Starter Set would look like: It would be a meaty, full-featured version of D&D. It would introduce complete neophytes to roleplaying games and teach them not only how to play, but also how to be a Dungeon Master. It would give a complete gaming experience, even if you never picked up the Player’s Handbook or Dungeon Master’s Guide.
And if you bought it, you would absolutely not feel like you paid money to have someone tell you that you should buy something else.
OPENING THE BOX
So let’s crack this thing open.
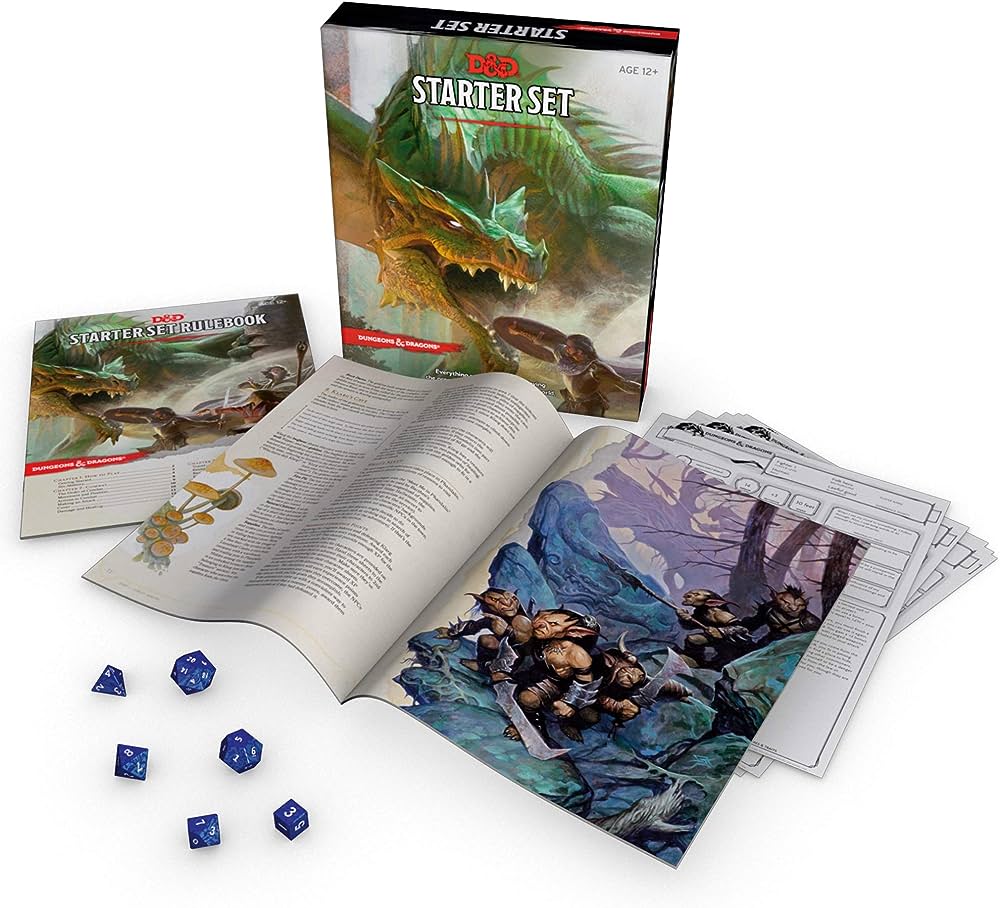
What’s actually in the D&D Starter Set box is pretty barebones:
- The 32-page Starter Set Rulebook, which gives you all the rules for the game.
- The 64-page Lost Mine of Phandelver, which serves as an adventure book, monster manual, magic item vault, and index.
- Five pregen characters sheets.
- A set of dice.
Honestly, I think this barebones approach is okay. You don’t need a fancy gizmos and gadgets to play a roleplaying game. Would a poster map of the Phandalin region (where Lost Mines of Phandelver is set) have been a nice bit of highly practical bling that might have been wonderfully intriguing to a new player? Almost certainly.
But barebones here gives you an MSRP of $20, which is an absolutely fabulous price point. That puts the Starter Set in the territory of an impulse buy, and that was often even more true in actual practice. (I got my copy for $10.)
Nevertheless, there are a couple of things I will ding here: First, the included dice set only includes one d20 and one d6, which I think is inadequate for a game that includes advantage/disadvantage and the fireball spell.
Second, the two booklets would really benefit from cardstock covers. Instead, they’re just stapled paper and very flimsy.
THE RULEBOOK
The Starter Set Rulebook is very good.
The introduction it provides to RPGs — what they are, how they’re played, etc. — is workmanlike, but solid in its execution. More importantly this is a complete and fully functional rulebook. It’s not painfully incomplete. It doesn’t constantly tease with how the real rules are in another book. It’s a rock solid volume, and you could run a complete Tier 1 campaign with this rulebook with zero difficulty.
In fact, except for one thing that we’ll get to in just a moment, you could run multiple Tier 1 campaigns.
Combined with the magic items and monsters found in the companion volume, a DM has enough material that they could comfortably create their own campaign. I could even imagine someone skipping the Player’s Handbook and Dungeon Master’s Guide, grabbing a Monster Manual to give them more options for foes, and continuing to game happily for months or years or forever.
This is, in case I’m not being clear, a really fantastic achievement.
Unfortunately, as I hinted above, there are a couple gaping holes here that, in my opinion, stop this from being a total triumph.
First, there are no rules for character creation. Instead, players will need to pick one of the five pregen characters included in the boxed set. This is the truly crippling blow, and the only thing that truly limits the Starter Set.
Second, the books do a pretty good job of orienting first-time Dungeon Masters. There’s a lot of practical advice for how they can referee the session, make rulings, set up adventure hooks, narrate the action, play the monsters, and so forth. But the major oversight is that they never actually tell the DM how to run the dungeons included in the adventure book.
D&D actually has a long history of failing to do this (the 5th Edition core rulebooks are actually worse!), but it’s ultimately kind of amusing when you realize that the Starter Set includes multiple, detailed explanations of exactly how boxed text is supposed to be used, but nothing on how dungeons are supposed to be used.
For example, at the beginning of the adventure they tell you:
- This is boxed text. You should read it.
- Here is a list of specific things you should do; including getting a marching order so that you know where the PCs are positioned when the goblins ambush them.
- When the goblins ambush them, this is the step-by-step guide for how combat should start and what you should be doing while running the combat.
- Here are several specific ways that the PCs can track the goblins back to their lair, and here’s a walk-thru of how you can resolve each one.
This is all great. Concrete, specific advice presented in a clear and highly usable format.
But then the PCs get to the goblins’ lair and… nothing.
To be clear, they do a fantastic job of presenting the dungeon:
- General Features
- What the Goblins Know (always love this)
- Keyed map
- And, of course, the keyed entries describing each room.
Again, these are all great.
But the step-by-step instructions for how you’re actually supposed to use this material? It just… stops. The designers obviously just assume that reading text out loud requires a detailed explanation, but how you run a dungeon is just a skill that everyone is born with.
Which is, of course, really silly.
But I digress. As I mentioned, this problem is a much larger and more systemic than the D&D Starter Set. It’s just particularly sad to see the ball getting dropped in an introductory product.
QUIBBLES & NITPICKS
Two more quick nitpicks before we do a proper dive into the adventure book.
First, Wizards of the Coast is allergic to referencing page numbers and I don’t get it. The “logic,” which they’ve explained from time to time, is that they don’t want to include, for example, a specific page number in the Monster Manual because it’s possible that they’ll revise the Monster Manual and the page numbers will change.
But in the 20+ years they’ve been eschewing page numbers, and I cannot emphasize this enough, they have never done this. The first time it might happen is next year.
It’s, frankly, dumb in general because it makes their books much, much harder to use than they need to be. And in the specific case of the D&D Starter Set it’s even dumber because this is a self-contained product. If you were to some day revise the Starter Set, you could just update the page references.
But because Wizards of the Coast is allergic to page numbers, brand new DMs will be cursed with needlessly flipping back and forth through the books, trying to figure out where specific sections are after the authors wave vaguely in their direction.
(I will give them partial credit for an Index that isn’t complete garbage.)
Second, the random encounter procedures for dungeons given in the Starter Set are kinda garbage. They give random encounter tables, but then instruct brand new DMs, “Make an encounter check whenever you feel like it. Or don’t. But you definitely should. But don’t make too many of them, because you’ll ruin your game. How many is too many? Eh. I dunno. You’ll figure it out. Maybe.”
I suspect this text may have originally been more closely tied to detailed dungeon procedures which were present in pre-5th Edition D&D Next playtest material but removed from the game entirely at the eleventh hour. But this is, nonetheless, bad praxis, and even moreso in material you’re presenting to first-time DMs.
LOST MINE OF PHANDELVER
Which finally brings us to Lost Mine of Phandelver, the adventure book.
I’m not going to beat around the bush here: This is good.
It’s really, really good.
I’m pretty comfortable describing Lost Mine as the single best introductory adventure D&D has ever had, and I don’t think the competition is even close.
First, it’s not just an adventure. It’s an entire campaign. In just 50 pages, Lost Mine of Phandelver presents seven — seven! — different scenarios plus the lushly detailed village of Phandalin. (The other 14 pages in the booklet are devoted to the monster manual, magic item vault, and rules index.) I am completely blown away by this.
And it’s not just the amount of material presented here. This is a really good campaign, and it’s particularly excellent as an exemplar for new DMs figuring out how to make their own campaigns.
We can start by looking at the structure of the campaign:
- Lost Mine of Phandelver starts with the PCs on their way to the village of Phandalin.
- A simple ambush-based scenario hook pulls the PCs into a goblin lair called the Cragmaw Hideout. The initial encounter is a perfect kickoff for first-time players and DMs, starting with an intriguing enigma (dead horses lying in the road) before smoothly transitioning to a combat encounter featuring a simple, but meaningful tactical dilemma for the players.
- The Cragmaw dungeon itself is absolutely fantastic: It’s non-linear. It takes advantage of the third-dimension. The key is clear, clever, and features several really cool ideas (like the dams that the goblins can use to create a defensive flood). It repeatedly emphasizes the opportunity not only for combat, but also roleplaying and clever problem-solving. Everything here implicitly tells the players that their choices matter and teaches the DM how to actively respond to what the PCs are doing.
- The Cragmaw hideout also features multiple scenario hooks, giving the players several options to pursue.
- Whenever the PCs arrive in Phandalin (whether they head there immediately or after pursuing the scenario hooks from the Cragmaw hideout), the entire village is set up to deliver another half dozen or more scenario hooks to them. The result is that the players end up with an entire menu of scenario hooks to choose between, once against emphasizing that their choices matter.
- The individual scenarios are also interconnected, in a really beautiful node-based design that ultimately funnels the PCs into the campaign finale at Wave Echo Cave, which (a) has been foreshadowed since the very beginning of the campaign and (b) is another fantastic dungeon scenario with excellent non-linear design and multiple factions.
I really can’t emphasize just how great this is.
On top of this rock solid campaign frame, the individual adventures are, as I’ve already suggested, equally excellent. I’ve mentioned the strategically interesting non-linear design of the dungeons and the Three Clue Rule, but they also feature retreating foes, personalized magic items redolent with history and flavor, and a wonderfully varied cast of characters.
On top of all that, although I quibbled about the presentation of the random dungeon encounters, the random wilderness encounters are given a very effective procedure AND they’re linked to the scenarios, providing another level of interconnectivity in the campaign.
THE VERDICT
The Starter Set Rulebook is very good, but unfortunately flawed in a couple key ways.
That almost doesn’t matter, though, because I’d pay $20 for just Lost Mine of Phandelver in a heartbeat. And I’d do it even faster than that if I could.
Best introductory adventure for D&D ever published? Definitely.
Best adventure book of any kind published by Wizards of the Coast? Quite possibly.
Overall, the 1983 Basic Set probably remains the best introduction to D&D ever published. But if I’d been given Lost Mine of Phandelver when I was a first-time DM, it would have made me a much better DM than I was, and that’s something special. Even if you’re an experienced DM with years of play under your belt, it’s still a really enjoyable campaign that’s immaculate in its construction.
I really can’t recommend it highly enough.
Grade: A
- Lost Mine of Phandelver: A+
Lead Designers: Mike Mearls, Jeremy Crawford
Design Team: Christopher Perkins, James Wyatt, Rodney Thompson, Robert J. Schwalb, Peter Lee, Steve Townshend, Bruce R. Cordell
Adventure Designers: Richard Baker, Christopher Perkins
Publisher: Wizards of the Coast
Cost: $19.95
Page Count: 96
D&D Beyond: Lost Mine of Phandelver (Free!)
FURTHER READING
Review: D&D Essentials Kit
Review: Dragons of Stormwreck Isle (D&D Starter Set 2022)