I’ve done several of these cheat sheets now, but for those who haven’t seen them before: I frequently prep cheat sheets for the RPGs I run. These summarize all the rules for the game — from basic action resolution to advanced combat options. It’s a great way to get a grip on a new system and, of course, it also provides a valuable resource at the table for both the GMs and the players. (For more information on the procedure I follow when prepping these cheat sheets, click here.)
This set of cheat sheets is for Kenneth Hite’s Trail of Cthulhu. I’ve talked about the GUMSHOE system in past, including what I consider to be its flaws and limitations. Have I been converted? Hmm… not exactly, but I’m not going to get into it here. (Partly because I want to let those thoughts finish baking before sharing them.) So why have I prepped a system cheat sheet for the game? Well, partly because Hite’s really good at what he does: The Stability/Sanity mechanics are fantastic (particularly the metagame methods of playing out long-term madness). And the method used to present the Mythos by treating it as a catalog of mysterious possibilities instead of an encyclopedia of cemented facts is just flat-out excellent and is possibly enough to recommend purchasing the core rulebook even if you never intend to play the game at all.
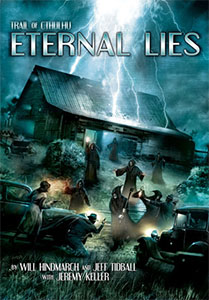 But the major reason is Eternal Lies, a mega-campaign designed for the game by Will Hindmarch, Jeff Tidball, and Jeremy Keller. My great love for The Masks of Nyarlathotep and the influence it had on my node-based approach to scenario design may be well-known to readers of the Alexandrian, and Eternal Lies, while having very little directly in common with that campaign in terms of setting or plot, manages to capture perfectly almost everything that I love about its structure while, in my opinion, improving the actual content within that structure. I’ll also be talking more about Eternal Lies at some point in the near future, but the key element here is that it’s prompted me to run an entire Trail of Cthulhu campaign and that means I need a cheat sheet.
Which means that you get a cheat sheet, too.
HOW I USE THEM
I keep a copy of the system cheat sheet behind my GM screen for quick reference and also provide copies for all of the players. Of course, I also keep at least one copy of the rulebook available, too. But my goal with the cheat sheets is to summarize all of the rules for the game. This consolidation of information eliminates book look-ups: Finding something in a half dozen or so pages is a much faster process than paging through hundreds of pages in the rulebook.
The organization of information onto each page of the cheat sheet should, hopefully, be fairly intuitive. The actual sequencing of pages is mostly arbitrary.
Page 1: The core mechanics coupled to a list of the investigative and general abilities. Being able to rapidly identify pertinent investigative abilities that might be able to pull information out of a scene is pretty much the heart and soul of the GUMSHOE system, so I put these lists front-and-center for easy reference during play.
Pages 2-3: I’m not 100% satisfied with the sequencing of information on these pages. (For example, the stuff on “Explosives” should conceptually come under “Combat Options” instead of proceeding it.) But I made some compromises to make everything fit onto two pages instead of three, and in actual play this doesn’t seem to have a significant impact on ease of reference.
Pages 4-5: Similarly, my original intention was to get all the Stability and Sanity rules on one page, but they just don’t fit. So Sanity spills over onto its own page, but fortunately the remaining space is filled up nicely with the rules for Tomes and Magic.
Page 6-7: I knew the “Explosives” table was going to be part of the cheat sheet as soon as I read it in the rulebook. (Explosives may not come up frequently, but that table is too finicky for me not to want it at my fingertips whenever it comes up in play.) I wanted the references for “Credit Rating” handy because it felt important to keep that contextualized. The page on “Firearms” got added later based on the fact that I kept reaching for it during actual play.
MAKING A GM SCREEN
These cheat sheets can also be used in conjunction with a modular, landscape-oriented GM screen (like the ones you can buy here or here).
Personally, I use a four-panel screen and use reverse-duplex printing in order to create sheets that I can tape together and “flip up” to reveal additional information behind them. My Trail of Cthulhu screen currently looks like this:
- Page 1: Basic Mechanics (Credit Rating/Explosives printed on the opposite side, Firearms behind it).
- Page 2: Basic Combat (with Physical Injury/Recovery/Other Danggers behind it).
- Page 3: Stability
- Page 4: Sanity/Tomes/Magic
I hope you find them useful!