FIGHT CHOREOGRAPHY
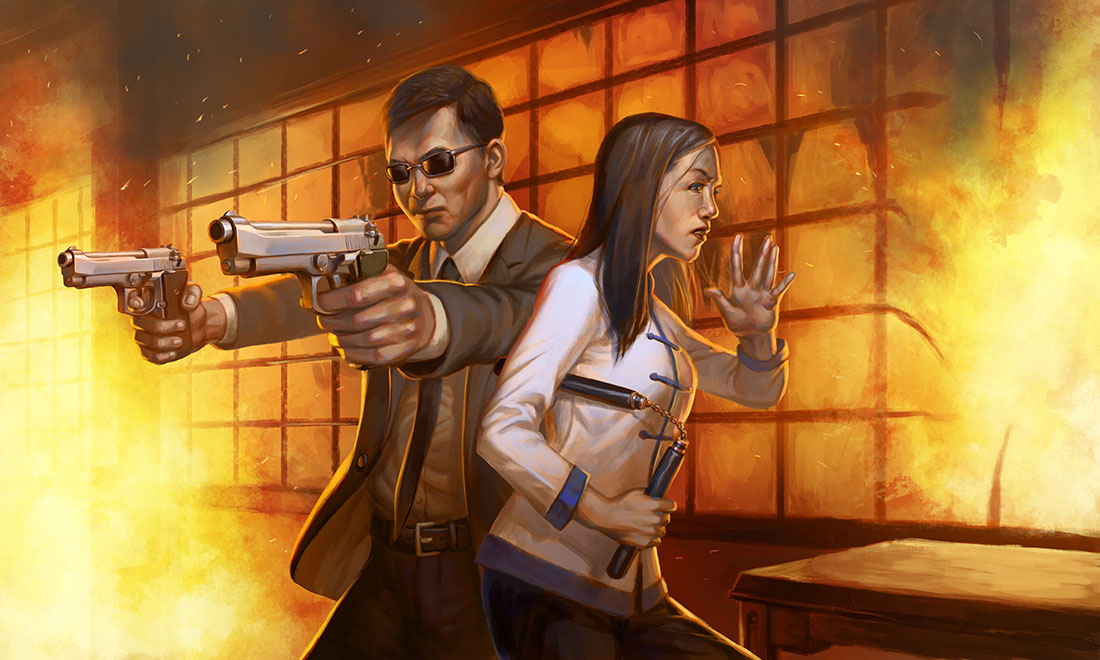
Feng Shui is a game about pulse-pounding action and face-pounding fights. One of your key responsibilities as a player is to describe your character’s actions as if they were part of one of the greatest action movie fight sequences of all time. (You can do this because you have an unlimited budget and zero safety concerns.) Whether you’re performing a stunt or not, what your character does should sound awesome.
Some people can find this daunting. It can feel like a lot of pressure to have to always come up with something awesome. So here’s the first secret: If you can’t think of anything, it’s okay to go with something simple. It’s okay to just say, “Lao Zhi punches Ting-Ting in the face.”
A second (and related) secret is this: Not every single attack needs to carry the weight of the entire fight. Great action sequences are exactly that: Sequences of actions that build on each other. If you have an idea for an amazing, splashy centerpiece – great! But it’s also okay to just say something nifty and pass the baton to the next player.
Passing the baton quickly, clearly, and efficiently is almost as important as the action you actually take. If you keep the pace of the fight boiling along, you’ll often find the awesomeness of the fight seeming to grow as if of its own accord.
Respect the dice. Before the dice are rolled you don’t want to commit to a description that’s dependent on the outcome of the dice. For example, you don’t want to say, “I punch Ting-Ting so hard that one of her horns cracks in half, goes flying across the room, and gets stuck point-first in the wall.” (the attack check fails) “Okay, none of that actually happens.” There are generally two ways of respecting the dice, one basic and the other more advanced:
- Hold narration. The simpler option is to limit your action declaration to something very basic (“I try to punch Ting-Ting”), possibly no more than the mechanic or schtick you’re using (“I’m going to use Pincer and attack Ting-Ting”). Once the outcome of the action is known, you can narrate its full glory.
- Narrate to the point of success/failure. The more advanced technique is to fill both sides of the attack check with cool choreography. The trick here is to correctly identify the point at which success or failure is ultimately determined and only narrate up to that point. (“As the BMW speeds past, I leap in through the open window and try to punch Ting-Ting in the face.”) Once the action is mechanically resolved, you (or the GM) can pick up from that moment and complete the action appropriately. (“You punch Ting-Ting so hard that she flies out the far side of the car and goes rolling across the tarmac.” or “You leap through the window, but Ting-Ting raises one hand and grabs your fist in mid-air, stopping all your forward momentum. You’re now hanging halfway out of the car.”)
Extra Tip: Focus on one or two of these techniques at a time. When you get comfortable with a particular technique, add another one to your repertoire. Within just a few sessions you’ll have lots of options at your fingertips.
Add one cool detail. Start by adding just one cool detail your description. So if you’re thinking, “I want to punch Ting-Ting in the face,” you might add one detail and say, “I punch Ting-Ting in the face so hard that one of her teeth flies out.” Things to think about if you’re having trouble thinking of a cool detail include:
- Invoke your weapon (“I smash my fist into Ting-Ting’s face; as I pull my hand back we can see blood dripping from my brass knuckles”) or your schtick. If all else fails, you can just name your schtick (“I’m Strong as an Ox when I punch Ting-Ting in the face!”).
- Use the environment (“I leap up onto the railing and then even higher, pile-driving my fist into Ting-Ting’s face with all the force of gravity behind me”). This can include amazing lighting and sound design by master cinematographers and the best foley artists in the biz. (“My fist plows into Ting-Ting’s face and the boom of the impact echoes through the empty warehouse like a cannon shot.”)
- Describe hair or costuming. (“I punch Ting-Ting in the face, then step back and smooth the front of my bespoke suit from W.W. Chan and Sons.”) This can include the hair and costuming of your opponent. (“Ting-Ting’s head snaps back so quick her hair can’t keep up and her face disappears into a swirl of glistening black.”)
- Use quippy dialogue. (“Looks like you’ll have to move up that dentist’s appointment.”)
- Describe the camera move. Seemingly impossible camera moves are great because you don’t need to figure out how to actually film them. (“The camera whips around as we exchange blows, then zooms down my arm, following the arc of my fist as it plows into Ting-Ting’s face.”) Slow motion will almost always awesome something up, but is best used sparingly. X-ray shots (showing internal damage) are innately awesome, but need to be used even more sparingly.
Extra Tip: Looking at your character’s personality and schticks, you can actually prep some of these cool details before play begins. (For example, a Bodyguard has the Fast Draw schtick. You can brainstorm cool ways to describe how your character fast draws their weapon before ever sitting down at the table.) This can be particularly true for characters with Sorcery schticks, where this brainstorming also begins laying down the rules for how your particular brand of magic works.
Don’t let this become a trap, though: The best descriptions are still going to be those that arise organically and spontaneously out of the immediate circumstances. The best fight choreographers come prepared, but continue to collaborate and develop ideas.
Describe awesome misses. In The Matrix there’s a shot where Agent Smith throws a punch at Neo, misses, and his fist plows through a concrete column. Earlier a host of mook cops unleash a wall of machinegun fire at Neo and Trinity. Not a single bullet hits, but the barrage of gunfire completely annihilates the room — marble panels explode, rock goes flying through the air, Neo does a cartwheel through the rubble.
These are all examples of awesome misses: In an RPG we have a bias towards dismissing missed attacks because nothing changes mechanically, or we describe them as embarrassing failures for the attacker. But in action movies missed attacks are often just as impressive as the big blows (wreaking environmental damage), and near-misses are often highlights of the awesome martial arts ability of the person avoiding the blow.
Improvise props. As Robin D. Laws says, “If you want to hit somebody with a pair of skis, you say there’s a pair of skis there, and there is.” This is a central principle of the game: If there’s something that can make the fight a little more awesome, the camera can always pan over to reveal it. This extends to scenery, too. If you need to jump out of a third-story window, then of course there’s an awning down there to break your fall. If you need a trampoline to launch yourself up to the demon’s head and land a roundhouse kick, then of course there’s a gymnasium just on the other side of the wall.
Think about the environment where you’re fighting. What would be there? How could you use it to whup ass? If that particular object hasn’t been mentioned, you don’t need to ask the GM, “Are there any cars parked on the street?” You can just describe your character running over the top of them in order to jump up and reach the demon’s horns, yanking its head down and slamming it into the wall.
Reuse props. Once skis or a trampoline have been introduced to a fight scene (whether by you or by somebody else), look for ways to use that prop again. And again. And again. This works best if there’s a new twist to the action each time you reuse the prop.
Jackie Chan is a master of this, with many of his movies featuring a fight sequence in which a single everyday object (like a ladder or refrigerator) is constantly reinvented to attack, defend, or simply get in the way.
Tie actions together. Similarly, you can tie your current action to another action that just happened. The easiest example of this is ganging up on a single foe. (“Now that Ching has pulled the demon’s head down towards the ground, I deliver an incredible uppercut that sends it reeling backwards! It falls onto a Ferrari, crushing it flat!”) But more elaborate combos are possible, like scooping up the gun Bai Lin kicked out of the triad mook’s hands and firing it at the sorcerer Xiong Xuegang.
Off-turn collaborations. If someone is materially assisting you, that’s a Boost and needs to be mechanically accounted for. But the battlefield is a dynamic place and you shouldn’t picture the other characters all standing in freeze-frame while you’re resolving your action. You can describe yourself as switching weapons by sliding across the floor and scooping up a sword dropped by the recently deceased OR you can shout, “Bai Lai! Toss me that sword!” and then then let Bai Lai describe executing a perfect roundhouse kick that sends the sword swooping into the air so that you can snag it mid-flight. You can describe yourself running up a wall OR you can describe jumping off Bai Lai’s head to reach the balcony.
Extra Tip: Describing other characters (PCs and GMCs alike) battling in the background of your shot is another effective way of tying the action together. This background action isn’t mechanically resolved and will never inflict wounds (if it was significant it would be the focus of the shot, right?), but it once again emphasizes the fluid nature of the battlefield.
Flexible action descriptions. You have a great deal of leeway in how you choose to describe your attacks and schticks. This may be obvious with Martial Arts, but it’s equally true for Guns. Don’t forget the rules for Unconventional Attacks (Feng Shui 2, p. 110) which spell out that you can use your normal Attack Check to take advantage of the location to do straight-up damage with the same Smackdown as your default weapon. So, yes, you can shoot somebody. But you can just as easily shoot the chandelier and have it fall on them: The mechanics are identical; there’s no penalty for this.
Extra Tip: These are sometimes mistaken for stunts. Actions are only stunts if they do something more than damage the target: So slamming a chandelier into someone and causing them damage isn’t a stunt. Dropping a chandelier onto someone so that it pins them to the ground and they can’t move IS a stunt.
Elaborate your supernatural theme. This flexibility of action description extends to Sorcery and Creature Powers, too. What can be most effective for this is to develop a consistent mystical motif or set of arcane rules for your character. Maybe they inscribe spells onto slips of paper and then burn them for effect. Maybe they unlock sorcerous powers by pushing needles into specific acupuncture points on their body.
You shouldn’t feel tightly bound by these “rules.” Quite the opposite: Developing a supernatural “language” for your characters gives you a rich toolkit for improvising new material. For example, maybe you start by scribing spells on slips of paper and burning them. Then you slap one of these onto a hopping vampire to bind it in place. Then you place them around a building to ward it against evil. Then you paint the symbols directly over the acupuncture points of an ally in order to mystically aid them.
(This is in many ways like reusing props or tying actions together, just over the long term.)
If you ever need to do something completely new? Well, it’s a good thing you visited that secret Tibetan monastery in the Ancient Juncture between episodes. Or studied those ancient tomes you found in the ruins on Taiwan island. Or maybe it’s just something you learned from your master but haven’t mentioned before.
Extra Tip: Improvising awesome fight choreography is a skill. And, like any skill, it can be learned, practiced, and improved. Here’s an exercise you can use to practice away from the table: Take a really great fight film — any of the ones in the orientation list work, but also stuff like The Matrix, Rocky, Raiders of the Lost Ark, or John Wick – and narrate the action as it happens on screen, as if you were describing it to your gaming group. It may sound silly, but it will build your repertoire of action descriptions and push you to improve how you connect and transition between actions in a fight.
SPEAKING CINEMATIC LANGUAGE
In Feng Shui the characters don’t break the fourth wall. They don’t wink at the camera, get thrown into the stage lighting, read the subtitles, or anything like that. (This tends to degenerate the game into farce or parody, which isn’t what we’re aiming for.) As players, however, it is frequently effective to express things through a cinematic lens. The GM will introduce a scene by describing how the “camera” pans across it. As a player, you’ll talk about the extreme close-up on your magic cop’s Colt .45 as they jam it into the squealing face of a cyber-chimp.
When you first start doing this, it may feel like an awkward or artificial conceit. But it’s just a different way of communicating character, intention, and the narration of fictional reality. As you become more familiar with the technique, you’ll find that it naturally evokes the heightened reality and the particular types of story beats from the action mash-up genre we’re seeking to emulate.
In speaking cinematically, there are any number of techniques (close-ups, smash cuts, slow motion) that are common in films on both sides of the Pacific. Here are a few that are particular to the Hong Kong action genre that you might be less familiar with.
Inner Dialogue with Micro-Flashbacks. Instead of using voice-over or narration, Hong Kong films will often communicate the inner thoughts of their characters through a very quick sequence of flashbacks. These micro-flashbacks are usually only one or two seconds long, and often consist of footage or snippets of dialogue seen earlier in the film.
For example, if someone sees their friend get riddled with bullets, you might get four or five shots in rapid succession summarizing the entire course of their relationship. Or if someone is at their boyfriend’s bedside in the hospital, there might be a quick flash of the scene where they first met at the beginning of the film.
You can use this same technique to communicate your character’s inner thoughts to the table. Instead of saying, “Ying thinks that this is a terrible idea.” You might say, “We cut from Ying raising an eyebrow to a shot of Chunky falling down that pit in the Tomb of the Jade Emerald. And then a shot of Chunky tripping the infrared lasers at the Met. And then a shot of that time Maggie hit him in the face with a cream pie. Then Ying says, ‘Sure. Why not? What could go wrong?’”
Visual Emotions. Just as you create scenery in a fight scene to do cool kung-fu tricks, you can create scenery in interstitial scenes to express emotion — family photos, religious iconography, a flower vendor selling jasmine blossoms, the smell of a burning leaf.
As with micro-flashbacks, it’s usually best to keep these short and punchy. But if your character’s anger fills the whole scene, then it’s just fine if you keep coming back to the image of the flames in the hearth behind them roaring up and filling that end of the room in a reddish light.
Freeze Frame Emphasis. Freeze frames (usually close-ups of a character’s face or moments of group celebration) are used to emphasize emotional beats of particular importance. They are often used at the end of a film, and such scenario-enders are most likely to be invoked by the GM. But they can also be found elsewhere, usually at particularly important emotional turns or moments of transition, and you should feel empowered as a player to describe such cinematic freeze frames to highlight significant personal milestones to the rest of the table.
Ensemble pieces will sometimes feature a series of such freeze frames at the end of the film, emphasizing each character in turn. GMs may use a similar technique, framing up each freeze frame and prompting each player to fill it with their character’s current emotional state.
This technique was more popular in classic Hong Kong films and seems to have become less used in recent years, but that’s no reason not to include it in the Feng Shui mash-up.
Bullet Time. True bullet time (as opposed to just slow motion) is almost virtually exclusive to The Matrix. (Even the Matrix sequels didn’t actually use it.) But it nevertheless deserves a call out here.
Cue Music. Movies are not strictly a visual medium. The soundscape is also a vital part of the artform. You can invoke the audio of cinema at the game table just as you can camera angles and cuts. Describe the music playing in the scene to invoke your character’s emotional state, signal how important the current moment is to them, for humorous effect, or for any of the other myriad signals music can send.
(If you’re feeling ambitious and it’s appropriate for your table, you could actually select a hero track for your PC and then literally play it at key moments during the game. Over time you and the rest of the group could develop a rich variety of leitmotifs.)
A NOTE TO THE GM
If you’re planning to run Feng Shui for a new player, consider sending them the link to this essay to quickly orient them to the game. You may find a lot of the techniques described here are also useful tricks to add to your own toolkit.
The cheat sheet below is designed to be serve as a quick, at-the-table reminder of the techniques and expectations described here.
FENG SHUI – NEW PLAYER CHEAT SHEET
DEFAULT ACTIONS:
- Hit up a contact
- Attune to a feng shui site
- Pursue a melodramatic hook
CINEMATIC LANGUAGE:
- Inner dialogue with micro-flashbacks
- Visual emotions
- Freeze frame emphasis
- Bullet time
- Cue music
FIGHT CHOREOGRAPHY:
Remember:
- Pass the baton
- Respect the dice
One Cool Detail:
- Invoke your weapon
- Name your schtick
- Use the environment + light/sound
- Describe hair or costuming
- Use quippy dialogue
- Describe the camera move
- Slow motion & X-ray shots
Advanced Techniques:
- Describe awesome misses
- Improvise props
- Reuse props
- Tie actions together
- Off-turn collaborations
- Flexible action descriptions
- Elaborate your supernatural theme
FURTHER READING – FENG SHUI
System Cheat Sheet: Feng Shui 2
Feng Shui: Filling the Shot
Feng Shui: Using the Shot Counter
Prep Notes: Hong Kong Task Force 88


