SESSION 26C: THE RIDDLE OF ILTUMAR
August 24th, 2008
The 14th Day of Kadal in the 790th Year of the Seyrunian Dynasty
THE KING’S ROAD
They headed back to the Ghostly Minstrel. In the lobby, they met Elestra on her way out, quickly filled her in on the details of the deal they had made, and gave her the platinum she was due.
“Where are you going now?” Tee asked.
“I’m just going out to the listen to the Spirit of the City,” Elestra said. “See what I can find out. Maybe ask around about the Brotherhood.”
“I don’t think you should,” Tee said. “I don’t want us drawing the kind of attention that asking those type of questions might bring. I don’t want to wake up with Wuntad in my room. I already did that with the Balacazars and I didn’t like it.”
“Okay,” Elestra said. “That’s probably true.”
While they were discussing their options, they were joined by the others. Ranthir returned to an idea that had occurred to them during the “meeting of all things” on the 11th – that the prophecy referring to the “street of kings” could be a reference to King’s Road in the Nobles’ Quarter.
Feeling that they otherwise had a dearth of solid leads – and reflecting on the fact that Elestra had probably had a very close encounter with certain death when she had attempted to follow a similar lead on Brandywine Street by herself – they decided to head up to King’s Road together.
When they arrived, however, they realized they really had no idea what they were looking for. The prophecy said: Arrived too late, the act has been done. The wind was against them, letters intercepted on their way. The conspirators were fourteen of a party. By the street of kings shall these enterprises by undertaken.
“Arrived too late?” Elestra said. “Does that mean we already missed it?”
Tee frowned. “Maybe. But even if we haven’t, it sounds like this is something that’s going to happen here. So unless we just happen to be here at the right time, I’m not sure what we’re going to see.”
In the Nobles’ Quarter, there were two major thoroughfares running away from the Dalenguard – Crown Street to the south and King’s Road to the north. Near the Dalenguard, King’s Road was filled with a variety of expensive shops, restaurants, and other storefronts dedicated to serving the rich and decadent tastes of the major merchant houses: Moleshan’s, The Jewel, Buckingham’s, The Dry Easel, and the like.
Further to the north, however, King’s Road ran past a number of merchant estates maintained by the major merchant house – Dallimothan, Nagel, and Rau – along with a number of other mansions, including Castle Shard.
Their particular attention was drawn to the Crown Theater – far enough to the north not to be lost in the sea of businesses near the Dalenguard, yet something more than enigmatic, luxurious, and inaccessible estate.
Making inquiries at the theater’s box office, they learned that the current production was The Merchant Warlord – a lavish opera telling the historical tale of Nulara Aretari, the warlord who married into the Aretari merchant family and served as the original First Commander of the nascent Mercenary Army during the Battle of Salesia, helping to create the modern nation of Arathia. Tickets were 25 gold crowns, a staggering sum that left Tee gaping.
A few minutes after they left the Crown Theater, the group was approached by a pair of city guardsmen. Upon reflection, they realized that they looked rather out of place among the pervading opulence of the Nobles’ Quarter, and that wandering openly up and down the length of King’s Road had probably attracted the wrong sorts of attention.
Tee flirtatiously talked the guards off them – weaving some tale about wanting to see a show at the Crown Theater – but the group decided that, since they didn’t seem to be accomplishing anything any way, it was probably time for them to leave. They returned to Midtown and then split up to go their separate ways.
TOR’S MORNING
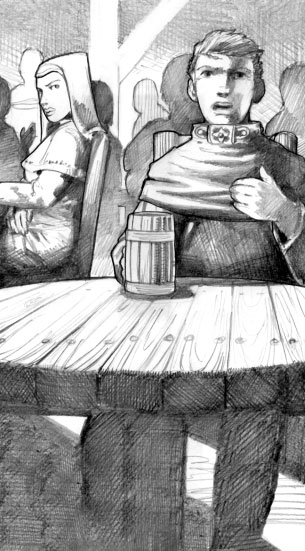
Tor returned to the Bull and Bear Armory, where he found Iltumar manning the shop. After exchanging a few pleasantries, he asked Iltumar if Hirus was about.
“He’s upstairs tending to Sholum,” Iltumar said. “I’ll go get him. Can you keep an eye on things?”
Before Tor really had a chance to respond, Iltumar had bounded through the door in the back of the shop. Tor could hear him running up the stairs.
The shop was empty when Iltumar left, but a few moments later a young, blond-haired woman came in through the door. Tor suddenly felt himself to be bearing a responsibility he wasn’t sure how to discharge. He awkwardly explained to the woman that the shopkeep had just stepped out, but would be back in just a moment.
The woman nodded and began casually perusing the various weapons hanging along one wall. Tor kept a wary eye on her, but she didn’t seem to be doing anything suspicious. A few minutes later, Hirus and Iltumar came downstairs.
Iltumar moved to assist the woman who had been waiting, while Tor and Hirus stepped outside to have a private word. Tor ascertained that Iltumar had duties around the shop until midday, but after that would be free. Tor offered to take Iltumar riding with him after he’d finished his duties, if that would be all right with Hirus.
Hirus smiled. He thought that Iltumar would like that a great deal. Tor told him to let Iltumar know, and that he would be back at noon to pick him up.
Hirus went back into the Bull and Bear. Tor grabbed a carriage at the mouth of Delver’s Square and rode it to the alley off Yarrow Street where they had met with the enigmatic information broker known as Shim. Within mere moments of walking down the alley, he was rewarded with the sight of Shim slipping between the cracks of the wall.
“Master Tor,” Shim said with the sound of an unseen smile in his voice. “A pleasure to see you again. What can I help you with?”
For a minimal fee, Tor arranged for one of Shim’s men – whoever they might be – to keep an eye on him for the next few hours.
“You want me to keep an eye on… you?” Shim said, slightly bemused.
“That’s right,” Tor said. Although he didn’t tell Shim his exact suspicions, he suspected that the Brotherhood might be keeping Iltumar under observation. If they were, he wanted to know about it.
Leaving Shim’s alley, Tor returned to the Bull and Bear. Iltumar was waiting for him with an excited grin on his face.
“Have you ever jousted before?” Tor asked him as they stepped back out into the square.
Iltumar shook his head.
 “Do you have a horse?”
Iltumar shook his head.
“Have you ever ridden before?”
Iltumar shook his head.
“Okay,” Tor said. “Let’s start by getting you a horse.”
They went to the stables behind the Ghostly Minstrel. Tor said hello to Blue and patted him on the nose, and then made some quick arrangements to rent a horse for Iltumar.
As they rode north along Lower God Row – Tor easing into the comfortable familiarity of the saddle and Iltumar awkwardly trying to stay on his mount – Tor gently tried to broach Iltumar’s thoughts.
“How have you been?”
Iltumar shrugged.
“Hirus has been worried about you.”
Iltumar’s whole body tightened. “Is that why you asked me to ride with you?”
Tor backed off. Iltumar obviously wasn’t going to respond to direct inquiries about whatever was going on, so he would just have to reach out and leave his hand there in the hope that Iltumar would take it.
They rode out of the city through the North Gate and spent a little over three hours just riding through the open prairies around the city. Tor slowly coached the lad into a greater sense of confidence in the saddle, all the while trying to convince him – without saying as much – that, if Iltumar wanted adventure, all he had to do was ask.
When they were done, Tor returned to the Bull and Bear with a very sore – but very happy – Iltumar. He made arrangements, if Iltumar would like, to meet him again in a couple of days.
Once Iltumar had said his farewells, Tor rode Blue back to Shim’s alley.
“You were right,” Shim said. “You were followed.”
“By who?”
“A blond woman dressed in the robes of an Imperial priestess.”
“An Imperial priestess?” Tor frowned. “Where did she go?”
“She followed you to North Gate and then waited in the area until you returned. Then she trailed you back to Delver’s Square. After you left the kid, she hung around outside the Bull and Bear.”
Tor paid Shim and left.
ELESTRA’S MORNING
Elestra decided that she wanted to ask around town about the Brotherhood after all. “I’ll just be careful,” she said to herself.
And she was. Poking her nose into all the right places and asking discreet questions, she learned that an organization calling itself the Brotherhood of Ptolus was quietly recruiting young men and women with idealistic-sounding jingo. She ran into a couple of walls, but eventually made contact with Jamill – a member of the Brotherhood with strange tattoos, numerous scars, long black hair, and the sunken eyes of a shivvel addict.
Elestra voiced interest in joining the Brotherhood, but Jamill wasn’t willing to talk about it until they were in “a more private place”. They agreed to meet at a tavern called the Onyx Spider on Tavern Row at two o’clock.
To kill the time, Elestra grabbed some newssheets and started asking around about recent events in the city. After spending several days in Ghul’s Labyrinth, she was still feeling a little disconnected.
On the 12th, a man named Doonhin – a salt merchant in the South Market – was accused of killing his wife by throwing her off the Stormwrought Campanile (a freestanding belltower in the Temple District that’s said to be a sanctuary from bad omens, ill luck, storms, and evil magic). Doonhin has been pleading his innocence, claiming to have been magically charmed by a sorcerer.
On the 13th, there had been another Flayed Man killing. This one had taken place in the Guildsman’s District, suggesting that the killer might be moving out of the Warrens.
And only a few hours earlier, around noon, the Rat’s Nest – a pub on Tavern Row – had been vandalized.
DOMINIC’S MORNING
Dominic spent the morning shopping. He bought Tee a bouquet of flowers and a charming necklace for her birthday, delivering them to her room at the Ghostly Minstrel. The gifts brought a huge smile to Tee’s face, and she thanked him profusely.
Dominic also stopped by Myraeth’s Oddities and bought a scroll describing a magical ritual which could be used to deliver short messages over long distances. He hoped that Ranthir might be able to learn the ritual and improve the group’s ability to communicate during times of separation. After delivering Tee’s birthday presents, he crossed the hall and knocked on Ranthir’s door.
“I have a present for you, Ranthir!”
Ranthir quirked an eyebrow. “You know it’s not my birthday, right?”
NEXT:
Running the Campaign: Background to Foreground – Campaign Journal: Session 26D
In the Shadow of the Spire: Index