Recently I’ve been watching a really nifty web-series from Double Fine called Dev Play: They grab game designers and play through classic video games with them. The best episodes are the ones featuring designers playing their own games, like this one of John Romero playing through Doom:
Watching that brought back fond memories of Doom II. One of the things that you could, of course, do with the Doom games was designing your own levels. And way back in 1994, that’s exactly what I did.
In order to really understand and appreciate the vintage deathmatch map I’m about to share with you, though, you have to understand something about the weapon design of Doom II (which I still maintain had the absolute best weapons balance of any deathmatch ever designed). Specifically, you have to understand the quirks of the BFG-9000.

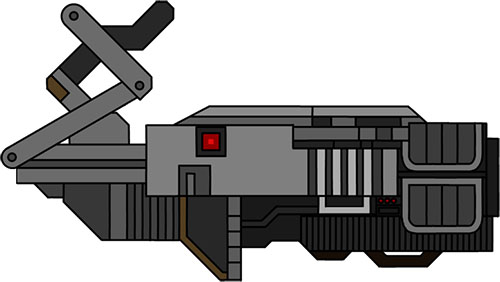
With this gun you could rain the destruction of green plasma down upon your enemies. But for a significant period of time, the exact mechanism by which the BFG-9000 worked was largely unknown. It wasn’t really until Tony Fabris, after painful experimentation, released his “BFG FAQ” that people really began to appreciate just how clever this weapon was. The short version is that the BFG-9000 deals damage in two steps:
First, there is the primary plasma ball. The plasma ball deals a ton of damage, but often not enough damage to outright kill the target.
Second, a moment after the primary plasma ball detonates, twenty invisible traces are sent out from the player who fired the BFG-9000. Each of these traces deal less damage, but the closer you are to the person who fired the gun the more of the traces will hit you. (The damage from these traces also decreases over distance.)
Note that the key feature here is that the traces emanate from where you are when the detonation happens, not the location from which you fired a gun. That allows you to, for example, fire the BFG-9000 at a wall, step out from behind the corner, and allow the blast traces to kill someone.
BFG WONDERLAND
Which brings us to the deathmatch level I designed, which was specifically designed to be an arena for high-skill BFG-9000 maneuvers. As I wrote in the original data file for the level:
BFG WONDERLAND is composed of a main central room — from which four corridors lead off. The rocket launcher is available along the northern passage, shotguns available along the eastern. If you take the western passage you’ll find a plasma rifle and a door leading to an ammo dump which will be discussed later.
The central challenge of the level, however, is the southern passage — which is several thousand units long. At the end of it is the BFG9000. Due to the great length of this corridor (and the general openness of the rest of the level) the BFG does, indeed, become a “thinking man’s weapon”. Dodging the green ball as it comes down the corridor and then getting behind your opponent before the ball detonates or racing after your ball because otherwise your opponent will be too far away before it detonates makes this an “intelligent” level with instantly deadly consequences for mistakes.
Many, many hours were spent dancing around the southern passage in LAN deathmatches. Maybe next time you get a hankering to pull out Doom II, you might do the same.


Link not working. 🙁
The F and G in the link are the wrong way around. It’s easy to get around but I thought you’d want to know.
Link fixed. Bloody hell.
Lysdexics of the world, Untie!