The Alexandrian

Search results for ‘urbancrawl’

Wages of Vice - Journeys Through the Radiant City (Wizards of the Coast)

Go to Part 1

WAGES OF VICE (T.K. Johnson) struggles quite a bit with continuity problems and fragility, with the former also contributing quite a bit to the latter.

There are two major continuity glitches. First, it’s fairly clear that the original premise of the adventure was changed at the eleventh hour. As published, the premise of the adventure is that five years ago the Kings of Coin — who rule the city-state of Zinda — made a deal with a witch named Proud Edun. The witch would use her magic to create the jeli flower, a crop with fantastic commercial value which would make Zinda (and, more importantly, the Kings of Coin) fabulously rich.

In return, the Kings of Coin agreed that their firstborn children would all serve as Proud Edun’s apprentices, learning her magical arts. But Myx Nargis Ruba, one of the Kings of Coin, said, “Hey. What if, instead of doing that, we just murder her?”

And the other Kings of Coin agreed and Proud Edun was murdered.

But there’s enough references scattered around the adventure, that it’s clear the original version of this backstory was that Proud Edun was promised the souls of the children. (If I had to make a wild guess, I would guess this was changed because it was too similar to the premise for “The Fiend of Hollow Mine.”) The problems this creates, however, are mostly ignorable.

The other major continuity glitch, though, is more fundamental. The premise of the adventure is that Proud Edun’s daughter, Kala Mabarin, has shown up to claim revenge by killing the kids who were supposed to be apprenticed to her mother. After the first murder, though, reality in the adventure just kind of bifurcates.

In one half of the adventure, Madame Samira Arah — the newest member of the Kings of Coin who (a) doesn’t know about the original double-cross of Proud Edun and (b) is the commanding officer of the Silent Verse, which is the Kings of Coin’s police force — has warned the Kings of Coin of the danger posed by Kala Mabarin and ordered all of their kids into protective custody.

In the other half of the adventure, however, nobody has warned the Kings of Coin and their kids are just wandering around, attending official functions, and getting openly targeted by Kala Mabarin.

This state of affairs just kind of randomly switches back and forth, depending on whichever scene the PCs happen to be in at the moment. It’s incredibly disorienting and fairly fundamental to the scenario, making it one of those crux points where I find players start checking out because the game world stops feeling real to them.

This is compounded because the core structure of the scenario is simultaneously arbitrary, unintuitive, and deprotagonizing.

The basic hook is that the PCs arrive in Zinda to attend — and I know this is going to shock you — a festival. As soon as they arrive at the festival, which is called the March of Vice, they stumble upon the corpse of Jacopo, Kala’s second target and first victim. They get sucked up into the investigation when Madame Samira arrives on the scene and says, “Outsiders? Sounds useful for a case that reeks of powerful conspiracies.”

I love Madame Samira. She’s a fantastic character. I think she’s the major saving grace of the entire adventure. She is simultaneously outsider and insider, and the more she learns about what Madame Samira - Journeys Through the Radiant Citadel (Wizards of the Coast)really happened, the more she’s like, “Blackmail over all my political rivals? How fascinating. Tell me more.”

Samira’s own conflict between what’s right and what’s useful adds a delightfully independent vector of ethical haze to a scenario that’s already dripping with moral gray.

From this point, the “investigation” (which can only be loosely described as such) follows a linear path:

  • Samira hires the PCs and tells them to go to Thornapple tavern, where they can question Zenia, one of the Coin heirs. Zenia was targeted for assassination yesterday, but escaped, triggering the lockdown.
  • On the way to the Thornapple, the PCs coincidentally walk straight into another assassination attempt.
  • At the Thornapple, the PCs walk straight into another assassination attempt. (A redo on Zenia.)
  • Zenia’s father then confesses that this is all his fault and tells the PCs the whole back story with Proud Edun…

… and this is weird, because he doesn’t actually know that. He has no information identifying the killer as Kala or linking Kala to Proud Edun. (That doesn’t happen until later in the scene and only if (a) the PCs took prisoners and (b) they succeed on a skill check.)

In any case…

  • The PCs have absolutely no leads. However, if they’ve learned what Kala looks like (which they easily may not), they can just ask around randomly to see if anyone on the street has seen her. If they do, a random person will tell them, “Yes. She was heading towards the conclusion of the adventure.”
  • The PCs can then head to the conclusion of the adventure and walk straight into another assassination attempt, where they can either capture, kill, or negotiate with Kala.

Ultimately, “Wages of Vice” is juggling some really interesting ideas, but doesn’t really manage to pull it off, in my opinion.

Grade: D

Prep Notes: If you’re running this adventure, I recommend prepping a list of the Kings of Coin and their kids. “Okay, so who are the kids being threatened?” is a question the players are very likely to ask. The adventure has this information, but it’s scattered across the text in a very unuseful way.

Sins of Our Elders - Journeys Through the Radiant Citadel (Wizards of the Coast)

SINS OF OUR ELDERS (Stephanie Yoon) sees the PCs leave the wine festival in Zinda so that they can head over to the springtime festival of Dan-Nal in Yeonido.

The core cool of Yeonido are the gwishin. Derived from Korean mythology, the dead in Yeonido often rise as undead spirits with unfinished business. This often includes fulfilling unfulfilled duty or correcting imbalance or injustice.

I really love Yoon’s decision to make the gwishin a central pillar of Yeonido as a setting — a haunted city that seeks to draw a veil over their unquiet spirits while discretely making right what they can and appeasing what they cannot. You can frame up an entire campaign with this concept: ghost-hunters settling sins-made-manifest. Virtually any adventure you can imagine can be hung from gwishin hooks with a uniquely supernatural flair: one part Perry Mason, one part Cold Case, one part The Ring.

“Sins of Our Elders” is, of course, itself based around a gwishin mystery. Long ago, the magistrate Dae Won-Ha spent decades doing ??? that resulted in prosperity for Yeonido, but her work was constantly being undermined by Young-Gi, the younger brother of Queen Young-Soo. Young-Gi’s efforts failed, and Won-Ha became a hero of the common people, but also Young-Gi succeeded and Won-Ha became a figure of infamy. Also Young-Gi arranged it so that the credit for whatever it was Won-Ha had done was given to Queen Young-soo. This all happened so long ago that the infamous(?) Won-Ha has passed from living memory, and also so recently that Young-Gi and other people who knew her personally are still alive.

Ten years ago, Queen Young-Soo died and Won-Ha’s gwishin appeared. The PCs need to figure out who the gwishin is, why she’s pissed off, and how she can be appeased.

The core problems of “Sins of Our Elders” mostly have their root in this backstory. It’s vague at best and seemingly contradictory more often than not. The problem is that it’s incredibly difficult to Sins of Our Elders - Wizards of the Coast
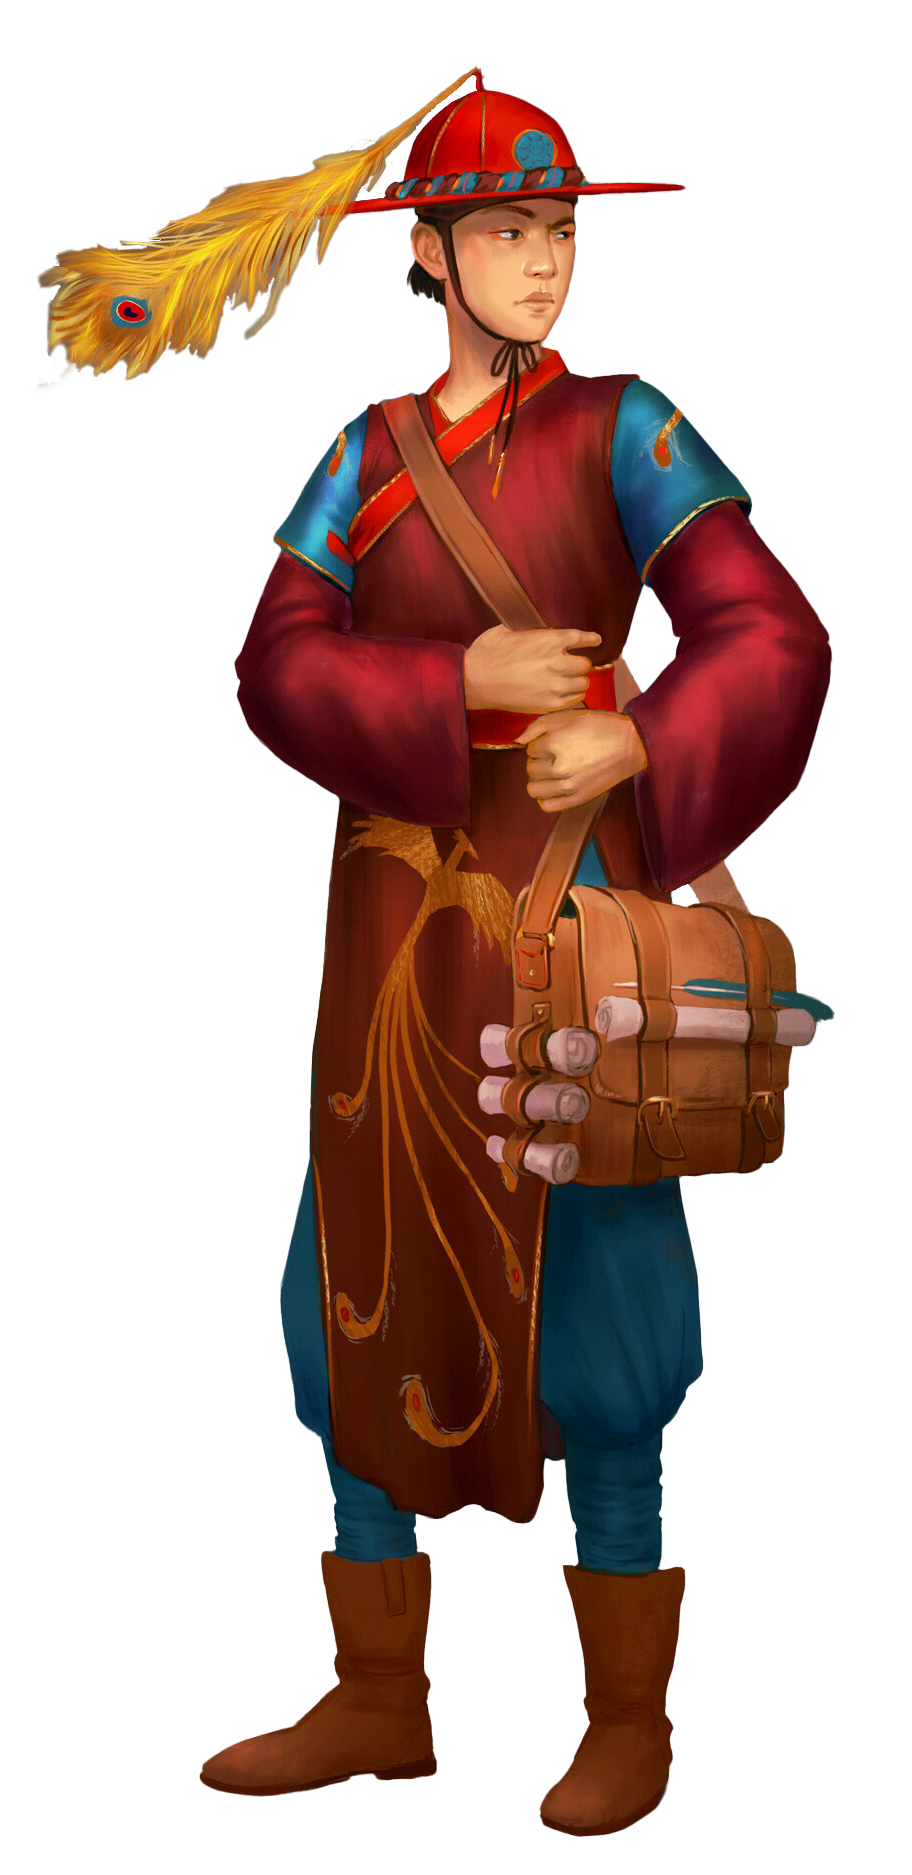
design a coherent mystery when the solution to the mystery hasn’t been defined. It’s like a murder mystery where the solution is “somebody was killed somewhere with some sort of weapon.” You can’t really build clues to reveal the truth if there’s no truth to be revealed, and so “Sins of Our Elders” continually struggles to provide clear clues for Won-Ha’s true legacy because “she did good stuff” doesn’t give you any sort of concrete revelation.

You can see another example of this vague backstory infecting the adventure in the hook. Dae Won-Ha has been taking her revenge on Yeonido in the form of a magical fog. The fog descends on an area, robbing the people there of their memory while Won-Ha wreaks havoc and destruction and terror. Then the people sort of “wake up” in the aftermath, ignorant of everything they did (and that happened in the fog).

This curse is beautifully thematic: The Yeonidons don’t even realize what’s happening to them. It’s a curse of forgetfulness as vengeance for being forgotten.

So, as I mentioned before, this has been going on for ten years when the PCs arrive in Yeonido. The fog doesn’t affect outsiders, so the PCs immediately realize that something weird is—

Hold up.

It’s been ten years and no outsiders have come to Yeonido and noticed the fog in all that time?

At the other end of the adventure, the conclusion is also fatally flawed by the lack of a clear foundation.

Logically, “Sins” is an adventure that would end with the PCs discovering the true story of Dae Won-Ha and then taking action to make sure the truth is known. But there isn’t a true story to discover, so there’s nothing for the PCs to reveal. This forces a conclusion which can be roughly summarized as, “Jeez, Won-Ha. You’re really overreacting. Yes, the Queen and her brother conspired to rewrite the history books and make you look like a villain, but we found a teacup you signed that was gathering dust on a shelf and a couple other trinkets, so it’s not like you’re completely forgotten.”

And then Won-Ha is like, “Yes. You’re right. As long as that teacup is gathering dust, I can rest easy in my grave.”

I really want to like “Sins of Our Elders” because there’s some really cool potential in it, but it just doesn’t quite hold together for me.

I would give the adventure itself a D, but the raw potential of the Yeonido setting gazetteer pulls the whole package up into the C-range.

Grade: C-

Prep Notes: What “Sins of Our Elders” desperately craves is a specificity. A specific truth that happened. A specific lie that was told. One way to achieve that is to make Won-Ha a martyr. This gives you a specific event — the martyrdom — that can be clearly stolen from her.

For a full dose of irony, what if she perished trying to get rid of a powerful gwishin that threatened Yeonida?

Perhaps this could be the gwishin of a dragon, whose grievance with the city was connected to the environmental damage wrought by Yeonido’s expansion. Dae Won-Ha had done much to right those wrongs and bring balance back to the community, but only by offering herself could she quiet this final threat.

This adds a thematic level to the adventure:  Dae Won-Ha offered herself to restore balance.

Queen Young-Soo’s version was that she went out into the forest and slew the spirit, setting a tone of violence and conquest which still informs the Tiger District’s expansion into the forest land.

The Truth and Reconciliation at the conclusion of the adventure isn’t just about who gets credit; it’s about understanding the true moral of the story.

If you’re revising the adventure in this way, it shouldn’t be too difficult to bake your new revelation lists into many of the scenes framed in the published adventure. You might also want to change the central structure from “an NPC tells the PCs where they should go to investigate” to a district-based urbancrawl with a handful of sub-revelations (e.g., “Who’s this Young-Gi guy we keep hearing about?”)

Aurumvorax - Journeys Through the Radiant Citadel (Wizards of the Coast)

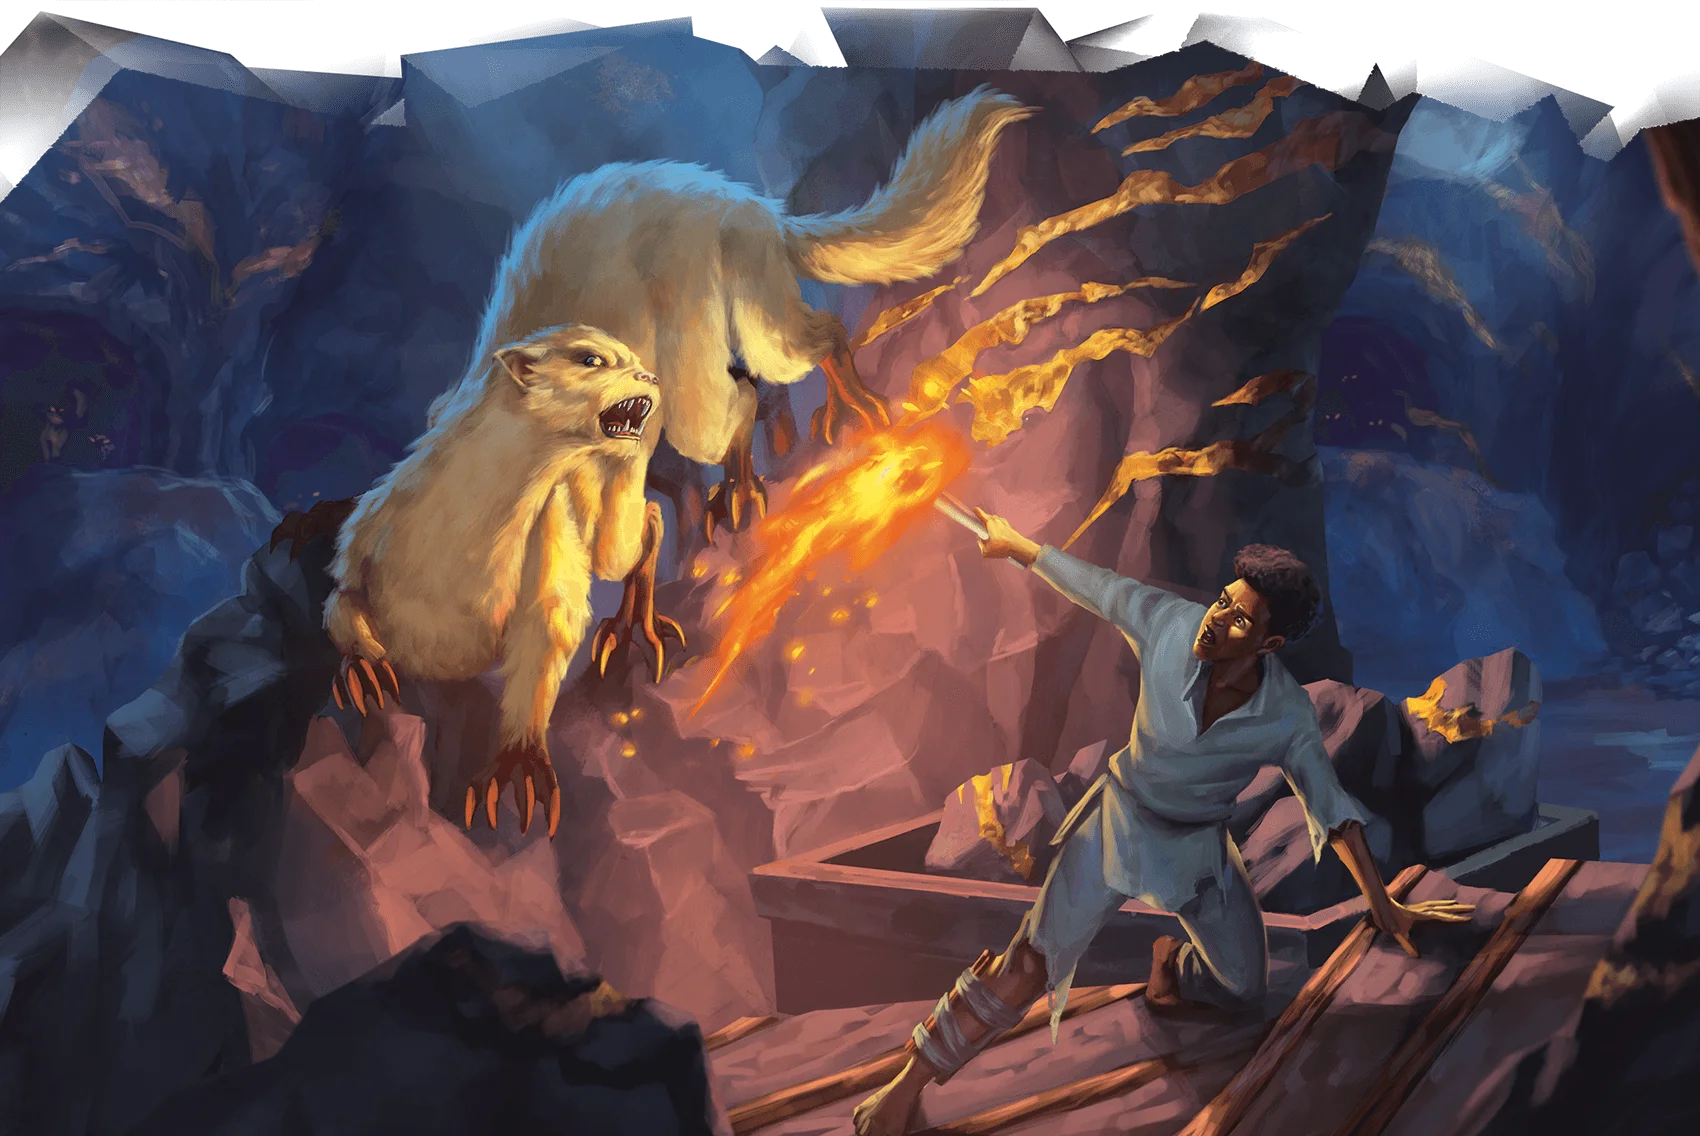
GOLD FOR FOOLS AND PRINCES (Dominique Dickey) features the most adorable of the Gygaxian “I think the PCs have too much treasure” metal-eaters — aurumvoraxii.

The adventure is set in the Sensa Empire, where generations ago the aurumvoraxii were hunted to extinction. This has allowed the gold mines of the empire to prosper.

Enter two princes: Prince Kirina and Prince Simbon, both of whom are vying to be named the heir to the imperial throne. Prince Kirina has hatched a scheme which involves triggering a cave-in in the mines while simultaneously summoning aurumvoraxii. After secretly creating the crisis, he’ll head down into the mines and heroically solve it, improving his reputation generally and, most specifically, with the powerful Aurum Guild who oversees the mines. Kirina is, of course, quite unhappy when both Prince Simbon and the PCs stick their noses into the situation.

This is a strong premise for an adventure. The problem, unfortunately, is that it’s executed as a nonsense railroad:

  • After some giant scorpions attack, the PCs need to track them back to an alley and make a skill check to find conjuration runes. (Prince Kirina also summoned these scorpions for no reason other than to provide clues revealing his involvement. Which I think is super polite of him.)
  • Even though people are dying in the mines, everyone will insist that the PCs go talk to some random scholar about the runes they found. Good news! The scholar is the bad guy working with Kirina. (How lucky!)
  • While talking to the scholar, the PCs need to randomly decide to steal some papers off his desk for no reason. If they succeed on a skill check, they do.
  • Then they need to make a skill check to analyze the notes, revealing that the scholar is the one who designed the spell that was used to summon the giant scorpions. The PCs will not be allowed to do anything about this.
  • The PCs now go down into the mines with Prince Kirina and Prince Simbon. While there, they have to make a Perception check to notice that Kirina has a piece of paper.
  • If they succeed on the check and notice the piece of paper, they must now decide to randomly steal it for no reason, requiring a Sleight of Hand check to do so.
  • The paper proves that Kirina has a copy of the spell that was used to summon the giant scorpions. The adventure assumes that the PCs won’t do anything about this until they return to the surface, which… uh… have you ever met any PCs?

If I were to write an essay on how to design a mystery scenario (and I have), this would be pretty much exactly how I would tell you to NOT do it.

“Gold” requires:

  • Questionable investigation decisions by the players. (For example, just randomly stealing papers from people for no reason.)
  • A sequence of 6+ skill checks, missing any one of which completely derails the investigation.

All of which ultimately unlocks a semi-hilarious interaction with Prince Kirina where the PCs make a DC 14 Charisma check to convince him to confess to high treason in front of a huge crowd of people.

There are some ideas here which are potentially interesting, but they’re inchoate to the point where there’s nothing really worth salvaging, in my opinion.

Grade: F

Prep Notes: “Gold for Fools and Princes” is the first adventure in Journeys Through the Radiant Citadel to not feature a festival. But you should totally add one.

The premise of the adventure requires the essential bit of exposition that the aurumvoraxes were wiped out by Emperor Kassa, allowing the gold mines of the Sensa Empire to prosper. But, as written, there’s no way for the PCs to know that until after they’ve identified the aurumvoraxes. So the core revelation of, “Oh no! They’re back!” is handed off to an NPC.

But if you add a Festival of Gold, staged by the Aurum Guild to celebrate the anniversary of Emperor Kassa eradicating the aurumvoraxes, you can slip that bit of exposition in (along with a bunch of other stuff about the importance of the Guild and the mines).

Beyond that, if I were running “Gold,” I would probably strip it down to its core:

  • Get rid of the Machiavellian stuff.
  • Cave-in opened up a cave that had hibernating aurumvoraxii.
  • The two princes are competing for glory, providing a cool roleplaying crux against the challenge of the dungeon.

But to really make it sing, you’ll probably also want to redesign the dungeon to feature encounters that could play strongly into this dynamic. (At a minimum, I’d want the princes to be able to meaningfully split up instead of being stuck on a linear path.)

Go to Part 5

Necromancer's Work - warmtail

Go to Campaign Status Documents

If you’re running a sandbox campaign with ‘crawl-type scenarios (dungeoncrawls, hexcrawls, urbancrawls, etc.), you’ll most likely want to restock those scenarios.

For example, let’s say that there’s a ruined keep west of the village in Hex F6. As the campaign begins, this dungeon is filled with rausling bandits who have been staging raids on the merchant caravans and other travelers passing through the area. At some point, the PCs decide that they’re tired of being harassed by rauslings, so they track the bandits back to the keep and wipe out them out.

The keep now stands empty. That’s a really easy form of status quo, and it could persist for any length of time. But do you want the keep to stand empty forever?

Quite possibly not! In fact, it can be very interesting to have someone else move into a dungeon the PCs have already cleared out once. Going into a dungeoncrawl when you already know the layout of the dungeon is a distinct experience and a very different strategic challenge. Plus, the changes made by the new inhabitants can provide cool surprises!

So what I’ll do when running a hexcrawl sandbox is simply list all of the locations that are currently empty. After each session, I’ll go down the list and make a restocking check for each location on the list (usually 1 in 6 or 1 in 8). If the check succeeds, I’ll figure out who’s moved in (more on that below), create a new version of the adventure notes, and remove the location form the restocking list.

Updating the scenario notes is actually quite similar to doing a dungeon status update, with most of the work being done by simply swapping in a new adversary roster. Rather than doing a “diff file” for the updated room key, though, I’ll take the time to briefly modify my original adventure notes, print up a new copy, and file it in the appropriate spot. (There’s no way to be certain when the PCs will actually re-engage with the dungeon, after all.)

Tip: Even in non-sandbox campaigns, it can be fun to restock and revisit old dungeons. For example, in my Ptolus campaign the PCs cleared out the Temple of the Ebon Hand. Later they hit another cultist stronghold, but some of the cultists escaped. These cultist refugees ended up taking refuge in the abandoned Temple of the Ebon Hand, where the PCs eventually tracked them down.

RESTOCKING MEGADUNGEONS

The same methodology can also be applied to megadungeons. Basically you want to split the megadungeon into sectors and then make restocking checks for each applicable sector.

There are a couple different approaches I’ve used for defining sectors. In my Castle Blackmoor campaign, I followed Dave Arneson’s lead and split each dungeon level roughly into quarters. In other megadungeons, I’ve typically taken a more bespoke approach of looking for the “natural” break points in the dungeon. (For example, if you’ve got two chokepoints in the dungeon, all the rooms between those chokepoints are a natural “sector” that’s likely to be occupied by a particular faction.) The most important thing, I think, is for the sectors to make sense to you. As long as that’s true, it will be much easier for you to keep track of them and also to interpret the “meaning” of your restocking checks.

There are two types of restocking checks you can use in the megadungeon: empty sectors and disturbed sectors.

Empty sectors work more or less like cleared hexes, checking each empty sector once per prep period. (Although I’ve found that 1 in 4 or 1 in 6 seem to have better results as intervals.)

Disturbed sectors, on the other hand, involve tracking each sector the PCs enter during an expedition into the megadungeon, and then checking each one during the next prep period. After checking the disturbed sectors from the previous session, you clear that list.

Of course, both techniques can also be used in tandem (checking both empty and disturbed sectors during each prep period).

Tip: These techniques can also be used with medium-sized lairs and other dungeons that don’t quite aspire to “mega.”

OTHER RESTOCKING CHECKLISTS

You can use similar techniques with other scenario types, too.

For example, if you’re running a heist scenario and the PCs get made during onsite surveillance. How long does it take for the target to figure out that something is wrong and increase their security? Obviously you could just make that decision, but you could also drop this onto your campaign status document and make daily “restocking” checks to see when the reinforcements get installed.

(This can become quite interesting in a more complicated campaign where the heist is only one of several things that the PCs are juggling at the same time.)

RESTOCKING PROCEDURES

The actual process of restocking can be considerably easier if you’re using a game system that comes packaged with procedural content generators. For example, you just have to flip through the 1974 D&D manuals to find detailed dungeon stocking tables and treasure generators. On the other hand, these tools are largely or completely absent from 5th Edition D&D. (And most other RPGs.)

When these tools are absent, I’ll often make the effort to create them. There are also a few universal techniques you can use to fake it until you make it. For example, the AD&D 1st Edition Monster Manual conveniently has almost exactly one hundred pages of monsters. I’ve done a whole bunch of ad hoc stocking over the years by just rolling percentile dice, flipping to the appropriate page, and then randomly picking a monster on that page.

Also think about how you can use tools you’ve already created. For example, if you’re running a hexcrawl or megadungeon you’ve probably created a random encounter table. You can use this same table to determine creature type(s) for your restocking. (This can be limiting, though, as it means you won’t be injecting anything new into your campaign. On the other hand, that may actually be desirable in many cases.)

Next: Event Fallout

Witches' Secrets - diter

Go to Part 1

With a fully stocked rumor table ready to go, it’s time to deliver your rumors to the PCs. Broadly speaking, there are three approaches to doing this (and you’ll probably want to use all three): proactive, reactive, and opportunistic.

Playtest Tip: No matter how they actually get a rumor, you can have the players roll for their rumor! It’s a fun way for them to feel involved in the process and can increase their sense of “ownership” over the rumor they get.

PROACTIVE

Proactive methods sort of “push” rumors on the PCs without the players taking any specific action to acquire them.

INTERVAL TRIGGER: At some regular interval, the PCs pick up new rumors. This might be once per week, at the end of each adventure, once per downtime, or any such trigger.

ACTION/LOCATION TRIGGERS: You might also trigger rumor delivery based on actions the PCs take which are not, explicitly, looking for rumors. For example, they might get new rumors each time they return to town or visit a new town. Or perhaps taking any non-solitary downtime action triggers rumor acquisition.

In City-State of the Invincible Overlord, individual city buildings would be keyed with specific rumors (which would be delivered when the PCs visited those locations). That feels like low-value prep to me, but it could perhaps be used to good effect as a spice.

CHARACTER CREATION: It’s a very good idea to give any brand new character one or more rumors to kick things off. Before play even begins, these rumors will give them the knowledge to start setting goals and making navigational decisions.

RUMOR CHECK: At any point where you have a proactive rumor trigger, you can make a rumor check instead of automatically granting rumors. You’ll also want to decide if it’s possible to gain multiple rumors at the same time, and whether rumors are gained individually or by the whole group.

For example, in my last open table hexcrawl campaign, every new character would get 1d4 rumors (the stuff they’d heard before the player started playing them) and I would make a 1 in 6 rumor check for each PC at the beginning of each session (representing stuff they’d heard around town since the last time we’d seen them in play).

REACTIVE

As the players learn how useful rumors can be, they’re likely to start actively seeking them out. They may also go looking for other types of information without specifically thinking in terms of “rumors,” but which nevertheless can feed rumors to them.

INVESTIGATIVE ACTION: The investigation action is part of the urbancrawl scenario structure, but this covers any effort by the PCs to deliberately canvass a community for information. This effort might require a Charisma (Investigation) or similar check, with the number of rumors gleaned being determined by the relative success of the check.

TAVERN TALK: Buying a round of drinks and plying others over a cup of grog in the common room of a tavern is another common shorthand for gathering rumors.

BROADSHEETS & BULLETIN BOARDS: Broadsheets (the antecedents of newspapers) and bulletin board notices are formal packaging of “rumors,” allowing the PCs to periodically check in and receive a fresh packet of information. (You can imagine any number of similar packages, ranging from town criers to magic mirrors murmuring cryptic prophecies.) The content of each package (broadsheet headlines, job offers on the bulletin board, etc.) can be bespoke creations, but it’s just as easy to roll them up randomly from your rumor table.

RESEARCH: Delving into the tomes of the local library or digging through the musty scrolls of the official chronicles may not turn up any rumors dealing with purely current events, but there are any number of rumors that can nevertheless be delivered through PC research (e.g., the trade in wyvern eggs a generation back).

ADDING COST: Regardless of the precise method pursued by the PCs, you might consider attaching a cost to it (for buying a round of drinks, well-placed bribes, access fees at the university library, etc.). I’d recommend against making this a particularly large fee, since obviously you don’t want to discourage players from pursuing rumors. Something like 1d6 gp is quite reasonable.

Another option is to make the fee optional, but have it grant a bonus to the PCs’ skill check (making success more likely or improving the quality or number of rumors gained). In this case, since it’s not essential, you can elect to make the cost more substantial.

Once a cost, optional or otherwise, has been attached to rumor-gathering, one cool thing you can do is add this cost to the equipment list for your campaign: Now every new player rolling up a character and every returning player looking to resupply for their next expedition will have an in-their-face reminder that hunting for rumors is something they can do.

OPPORTUNISTIC

Because the whole point of the rumor table is to impart information to the players, you should seize opportunities during play that you can use to leverage your rumor table. For example:

  • During any broad social interaction (e.g., the players say “we spend the evening drinking at the tavern”) you might mention one or two interesting things they pick up in the general conversation.
  • During specific interactions with NPCs, the rumor table can be used to generate topics of conversation.
  • NPCs might be specifically questioned or interrogated about the area.

In practice, the rumor table can be an incredibly versatile tool, and whenever a dollop of information would be useful or provide a bit of spice, you can simply roll or select an appropriate rumor for the situation.

CONTEXTUALIZING RUMORS

When giving a rumor to a player, you can simply drop it in their lap: “You’ve head that a wyvern has been attacking travelers along the Southway.” It works. There’s nothing wrong with it. In fact, it may often be the best way to present a particular rumor. (For example, when I’m handing out rumors to newly created characters at my open table, I don’t feel a need to get fancy about it: Here’s the stuff you know. If you’d like, maybe you could tell me how you know it.)

Frequently, however, you’ll find it more effective to contextualize the rumor – to explain exactly how they came by the information and perhaps even give them the opportunity to play through it. This is when you frame up a scene at the local tavern where the PCs have noticed a young man with a freshly bandaged wound on his shoulder. Now they can strike up a conversation with him, learn his name, and hear from his own lips the tale of how the wyvern attacked his caravan and carried away his sister. They can see the haunted look in his eyes as he describes how her screams still echo in his ears.

Now those wyvern attacks have been given a face.

If you want a more detailed breakdown of how to contextualize this sort of thing, check out Rulings in Practice: Gathering Information. But the short version is:

  1. Summarize how they’re looking for information.
  2. Frame the key moment where they’re actually receiving the information. (This may include playing out a short scene, but it may not.)
  3. Contextualize the information, taking cues from the situation, characters, etc. to provide a specific slant or POV on the rumor.

If you’re uncertain how the PCs might have found the information, ask the players what they’re looking for then. See what they throw at you and then play it forward. Or here’s a short list of options:

  • Talking in a tavern. (Is it a quiet conversation? Or do they hear someone boisterously boasting at the next table?)
  • Saw the information posted somewhere (a wanted poster, a bulletin board, etc.).
  • Chatting with a friend. (Which friend? Ask the player if you don’t know.)
  • Performing research. (Where?)
  • A letter. (From who?)
  • A tarot reading, fortune telling, or divine vision.

OPEN TABLE RUMOR POOL

Here’s a fun technique that seems to work best with an open table, but can also be adapted for a dedicated campaign: When a PC gains access to a rumor, it gets added to the open table rumor pool. This list of rumors can be posted in the group’s Discord, put on a wiki, periodically updated by e-mail, or whatever other method of coordination your group is using.

When a rumor is resolved (e.g., the wyvern is slain), reward Inspiration. You can limit this to just the group who resolved the rumor, but it may be even more effective to award it to every single PC in the campaign. This heightens the sense of community in the open table, and can also motivate people to get back to the gaming table ASAP. (Since otherwise their Inspiration will be “wasted” if someone resolves another rumor before they can use it.)

You can also leave the decision of whether to share a rumor with the open table rumor pool up to the individual players: Doing so gives them the opportunity to benefit if someone else can capitalize on the information, but keeping a rumor secret might be desirable if they specifically want to exploit it for their own gain.

MODERATE YOUR RUMORMONGERING

Rumors are good.

Too many rumors, however, will overload your players. They just turn into meaningless noise, and the players will just tune them all out. So, paradoxically, too many rumors can end up being functionally identical to no rumors at all.

In short, to achieve maximum effect with your rumors, you want to limit how many of them you’re handing out.

How many? Well, this depends on the players. I’ve had some players who keep meticulous notes and will have a couple dozen rumors scrupulously listed (and even carefully cross-referenced to their maps!). I’ve had other players who get a third rumor and basically say, “Fuck this noise.” So this is really something you have to play by ear and be willing to adjust on-the-fly.

The key thing to moderate, though, are your proactive rumors: Opportunistic stuff tends to be linked to specific interactions which makes it more significant. And reactive stuff, obviously, is happening at the players’ own request, and so is naturally not overburdening them.

In many ways, though, this is ideal in any case: You really just want a smattering of proactive stuff to (a) help players who would otherwise be lost and (b) remind players that rumors exist, prompting them to do their own legwork to dig up more information on their own recognizance (and to whatever amount they want).

With that being said, you may also want to limit the group’s ability to systematically drain all the available rumors out of the campaign. You might want to, for example, limit them to 1d4 rumors per downtime or per session. Alternatively, perhaps villages are limited to 1 rumor, towns to 1d4 rumors, and metropolises to 2d6 rumors (1d4 of which require special effort). This structure can actually be used to motivate the PCs to explore more: You want more information? You’ll have to go to the big city.

Go to Part 3: Restocking Your Rumor Table

Woman With the Red Umbrella - grandfailure (Modified)

Go to Part 1

So now you have a stack of notes about the city. How do you actually use them during play?

The key is that virtually all actions in the city boil down to either finding information or going to a location.

For finding information, check out Rulings in Practice: Gathering Information for an in-depth look. Finding the information will almost always involve going somewhere. Often the information the PCs are looking for will be (either directly or indirectly) a location, too – a service they need, a resource, the place where their enemy is hiding out, etc.

Once the PCs are heading to a location, look at your notes for the district they’re going to. Then:

  1. Name the district and point to it on the map. (“You head over to the Docks.”)
  2. Mention a landmark – a major street they travel down, a building they pass, an art installation, etc. (“Passing down Fishwives’ Lane, the smell of gutted tuna thick in the air…”)
  3. Make an encounter check for a scenic encounter. (Or, alternatively, automatically run an encounter.) (“…you see a dragonborn fishmonger offering to sell freshly harvested oyster pearls. He says one of them is a rare rainbow pearl, a sign of good luck.”)
  4. Describe the location they arrive at. (“Dominic’s hovel is tucked into a narrow side street just past the red docks. There’s smoke coming out of the crooked chimney, so somebody must be home.”)

Advanced Technique: Make the encounter check first. If an encounter is indicated, you can then choose to frame the encounter at either the landmark or the destination itself. It’s a convenient way of adding context to procedurally generated content, and can also be a great way of adding unexpected complications to whatever location the PCs are heading to.

And that’s all it takes.

The districts and landmarks weave together the geographical fabric of the city. The encounters provide a low-level of activity not directly connected to the PCs or what they’re immediately engaged with, creating the sensation that the city is in constant motion.

By the same token, this doesn’t need to be a straitjacket. Maybe you mention two  or three landmarks instead of just one. Maybe you complicate things by checking for encounters in each district the PCs pass through. Or, conversely, once you’ve established the life of the city as a pervasive presence at the table, you may find that effective pacing demands fast-forwarding past an encounter and cutting straight to the action.

Follow this procedure rigorously for a couple or three sessions to make sure you’ve really internalized it, but then do what feels right, knowing that you can always return to this procedure as a safe and effective foundation.

INTRODUCING THE CITY

Now that we’ve established our basic procedure, let’s take a closer look at our first session: How do we go about introducing a city to the players?

If one or more of the PCs live in the city or are otherwise familiar with it, particularly if it’s going to be the focal setting of the entire campaign, I will prep a short player briefing to orient them. This will include:

  • The map.
  • Two or three sentences describing each district.
  • Maybe one page of common services (list of taverns, list of weaponsmiths, etc.).

Give this briefing to the players before or during Session 0 so that it can inform character creation.

As with most such handouts, five pages is probably the longest you’d want to make this. Any longer and, in my experience, most players won’t actually process the information. (Paradoxically, the more information you try to cram into the handout, the less information about the city the players will actually take away from it.)

It may also be useful to note that this player briefing largely mirrors the material you’ve prepped for yourself. If you’re doing minimal prep yourself, you can often just strip out the random encounter tables and be good to go.

But what about the adventurer at the gate scenario, where a PC is coming to the city for the first time?

Generally, I will still give them the map. Even if the PCs technically wouldn’t have one, it’s just too useful as an easy point of common reference at the table. (I will often print out poster-size version of the map and hang them on the wall of the gaming room, using a laser point to indicate locations.)

Advanced Technique: If you’d rather run a streetcrawl until the PCs have taken action to orient themselves within the city (which might be literally obtaining a diegetic map, but could also simply be sufficiently exploring the city, closely questioning a local, visiting every district, or something else along those lines), that can be a very immersive technique. In a peaceful city, however, you may not find that the streetcrawl to be particularly compelling.

At this point, focus on the players’ goals, but use those goals as a vector for the player briefing.

For example, if the players say that they’re going to spend a day or two getting to know the city, that’s super simple: You can just give them the player briefing.

But maybe they say something like, “Let’s find an inn.”

Depending on what their goal is, you might call for some kind of skill check to see if they can find it – Streetwise, Charisma (Investigation), Library Use, something like that.

Advanced Technique: Even if they’ll definitely find the thing they’re looking for, you might still call for the skill check and use fail forward techniques to make the check meaningful. Maybe on a success they can find a really good deal and/or on a failure they get marked as rubes by pickpockets.

If it’s a common service, present them with the multiple options you prepped earlier. (High-, middle-, and low-class for hotels, for example). Specifically call out the different districts these services are in. If they went looking for a weapons shop, you might say, “There’s an elven bowyer in Emerald Hill or dwarven crafters in the Guildsman District.” You’re not just saying, “These districts exist.” You’re inviting the players to make a choice based on these districts. That’s significant. The districts are now an active part of the players’ thinking about the setting. The more they do that, the more the city comes alive in their imagination.

As this point, the PCs are going to pick a location to go to – either a common service they’ve selected or some specific location that brought them to town in the first place (e.g., the tower of the High Mage Ghulak). This is simple: Just use the urban procedure we detailed above… but with one important addition!

For the district of the location they choose, include the description of the district from the player briefing. You can probably work these two or three sentences into the description of their journey to the inn or tower or whatever.

As the players work their way through their shopping list (or whatever brought them to the city), you’ll be organically building up their understanding of the city over time. The scenic encounters, landmarks, and the locations found in the adventure scenarios you’re running will gradually draw them further and further into the setting, resulting in them setting goals that are increasingly specific (“let’s find the leader of the Red Bandit pickpockets who tried to rob us” or “that abandoned lighthouse looks cool, let’s go check it out”).

In play, this might look something like this:

  • The PCs enter a new town and go looking for an inn.
  • “People milling around the gate suggest three choices: The Lion’s Purr in Midtown, the Wandering Sword in the Merchant District, or the Wallowed Pig in the Penury Ward.”
  • The players select the Wandering Sword.
  • “You head south into the Merchant District. Most of the buildings here are two stories high – small businesses with apartments for the owners above them. You notice that there’s an abandoned lighthouse standing in the middle of town… which is a weird place for a lighthouse to be. You find the Wandering Sword on Southward Street.”
  • At this point you can describe the Wandering Sword and have a short scene there while the PCs arrange for their rooms. They decide to check out that lighthouse.
  • On the way to the lighthouse, you describe them passing through the market square (another landmark in the Merchant District). As they leave the market, they have a random encounter with Red Bandits who attempt to waylay them.
  • After dispatching the Red Bandits, they proceed to the lighthouse (which is a small adventure site you’ve prepped).
  • When they return to their rooms at the Wandering Sword, the encounter check is negative, so you simply describe them passing through the Market Square again (it’s night now, so the stalls are deserted).
  • Discussing their plans for the next day, the PCs decide to find the Red Bandit’s gang house. So the next morning you call for a Gather Information check and, when they succeed, say, “You ask around and discover it’s an open secret that the Red Bandits control a dilapidated apartment building in Penury Ward, which is officially known as Laketon, but had been riddled with poverty for generations.” (You’ve snuck in a little extra district briefing there.)
  • The PCs head for the apartment building.
  • “You head down Tabernacle Way [landmark] into Penury Ward. Passing the Church of the Bloody Saint [landmark], you’re approached by several of the beggars who camp in the church’s yard.” The beggars here are a random encounter and suggested that the Church of the Bloody Saint would be a good landmark to use here. After a short roleplaying scene with the beggars (during which you might seed other rumors or information about the city), the PCs continue to the apartment building.

And so forth.

Once the players are familiar with a district, of course, you can obviously stop briefing them on the district. At this point, the newcomers have acclimated to the city and you simplify back into the standard urban procedure.

OPTION: BACKGROUND EVENTS

A final option you can add to your cities to give them even greater depth are background events.

These are events running in parallel with the campaign, but which don’t directly affect the PCs. They include stuff like:

  • The mayor has been indicted on corruption charges.
  • Hyperdyne Industries has bought out Cobalt Enterprises.
  • Another Redjack murder has happened in the Penury Ward.
  • All of the department store Santa Clauses vanished into thin air simultaneously at 12:02 PM.

They appear as newspaper headlines or as random gossip when the PCs are chatting with an NPC. Layering these into your urban-based campaign is a great way of adding even more depth to the city.

Of particular note here are factions, which are often a part of many urban campaigns. Describing the offscreen actions of these factions through background events weaves them into the life of the city, making them a pervasive part of the environment and enhancing the actions directly affecting the PCs as part of the campaign by making the factions vast in their scope.

FURTHER READING
Thinking About Urbancrawls
Ptolus: In the Shadow of the Spire
Dragon Heist: The Alexandrian Remix

Dweredell Background – Gods

August 16th, 2021

The Dweredell Project aims to expand the city-state of Dweredell, which originally appeared as a brief gazetteer you can find here, into a tri-crawl featuring a hexcrawl, megadungeon, and urbancrawl. I’m not ready to officially launch the Dweredell Project. This isn’t even really a sneak peek. But I had a request to share the gods from my campaign world, so I’m pulling this material out now.

THE PANTHEON

The pantheon of the Western Lands consists of the Nine Gods.

  • Athor, the Father
  • Crissa, the Mother
  • Itor, God of War
  • Itehl, The Trickster / God of Craft and Civilization
  • Sarathyn, the Virgin Goddess / Goddess of the Void
  • Sayl, the Sun Goddess / Goddess of Life and Sexuality
  • Tohlen, God of Nature / God of the Harvest
  • Bahl, God of the Dead
  • Vehthyl, God of the Enigma / God of Knowledge (Magic and the Unknown)

The gods are commonly arranged into dualities:

  • Athor and Crissa, Husband and Wife / Mother and Father. The head of the Pantheon.
  • Itor and Itehl, the Twin Brothers. They have an antagonistic relationship. Sarathyn often intercedes to protect Itor from the machinations of his mischievous brother.
  • Sarathyn and Sayl, the Twin Sisters. They represent the twin sides of love (chastity and sexuality).
  • Bahl and Tohlen, Gods of the Climes and Seasons. Maintainers of the natural orders.
  • Vehthyl, the Lone God. He set in contrast to the rest of the Pantheon.

In some teachings, alternative dualities are given. (Sarathyn andTohlen, for example, are seen as gods of ultimate negation, while Sayl and Bahl are, in some tales, locked in a forbidden love.)

Another common grouping are the Four Children (Itor, Itehl, Sarathyn, and Sayl).

PATRON ANIMALS

  • Athor: Eagle
  • Crissa: Hawk
  • Itor: Stag
  • Itehl: Snake
  • Sarathyn: Dolphin
  • Sayl: Wolf
  • Tohlen: Bear
  • Bahl: Owl
  • Vehthyl: Cat

HOLY SYMBOLS

Nine Gods - Holy Symbols

Athor – Cross. Also known as the Cross of the Father or the Knight’s Cross, Athor’s Cross is the standard badge of Pantheon worship. It is also used dominantly in many Barundian heraldries.

Crissa Ankh. Also known as the Arms of the Mother, Crissa’s Ankh is a symbol of motherhood and compassion.

Itor Sword and Chalice. Itor’s primary holy symbol is a sword, but when Itor’s Sword is inverted it becomes Itor’s Chalice. As the sword it’s a symbol of martial prowess. As the chalice it’s a symbol of comradery and friendship. The two symbols are often joined as one (a symbol known as the “hourglass”) in heraldry.

Itehl – Daggered Cross. More formally known as the daggered cross, Itehl’s Dagger is a symbol of practical thought and logic. It is also the symbol of betrayal.

Sayl – Sunburst. Also known as the Wheel of Light, the sunburst is a symbol of life, sexuality, and fertility.

Sarathyn Starwheel. Also known as the Wheel of Night, the starwheel represents purity and perfection.

Bahl – Heart of the Diamond / Eye of the Veil. Although Bahl only has a singly holy symbol, it is known by two names: the Heart of the Diamond and the Eye of the Veil. It is more commonly known as the latter, with the former being an archaic usage.

Tohlen – Crescent Moon. Also referred to as Tohlen’s Scythe, the crescent moon is a harvest symbol.

Vehthyl – Silver Serpent. Vehthyl’s holy symbol is the silver serpent. It takes several forms, including the serpent doubled, the serpent rearing, the serpent crawling, the serpent winged, and ouroborus.

SAINTS & AVATARS

The Saintly Orders consist of the Living Saints who have served the Nine Gods throughout history. Each of the nine gods have a separate order. Also known as the Chosen, these devout among the faithful serve as powerful conduits for the gods to channel their influence into the world.

The saints are also thought by some to be reincarnated, or at least their portfolio of service is passed on.

The Avatars worshipped as divine heroes in the Five Empires. They are sometimes described as the first saints; sometimes as saints who served the Pantheon as the whole (instead of being chosen by individual gods). In some tales each is associated with one of the gods, making them more like other saints (and also giving rise to the legend of the Lost Two or Lost Twins, who are supposedly the missing eighth and ninth avatars).

  • Taran, the King
  • Khazel, the Warrior
  • Dorien, the Mage
  • Ratuul, the Guide
  • Massahl, the Rogue
  • Arathan, the Pure
  • Oruk, the Barbarian

At one point the Imperial Church incorporated the stories of the Avatars into its orthodoxies, but over time a number of heresy cults came to worship the Avatars as gods themselves. In an attempt to root out these heresies during the Time of Reflection, the Church sought to sever all ties between the Avatars and the Pantheon. Once the Time of Reflection came to an end, however, this position eventually softened. The Avatars are now generally seen as servants of the Holy Order. (Although, of course, there are those who keep alive the Old Beliefs.)

THE IMPERIAL CHURCH

During the time of the Dominion, and the years of darkness which followed it, man’s memories of the gods grew dim. But the Pantheon was never truly forgotten: The power of the Nine could not be denied by even the strongest of dictators, nor their light quenched by the deepest of shadows. The old beliefs survived in rural cults and backwater rituals.

The origins of the Imperial Church lie in the tumultuous time of consolidation which followed the Wars of Empire. Hundreds of disparate fiefdoms had been roughly forged into new empires, and it remained to be seen whether they could be drawn together into a new society. Pockets of rebellion and resistance began to arise, and among the most dangerous of these were the resurgent Pantheon cults.

The resolution of this emerging crisis came during the reign of Atal the Second. Upon his deathbed, the Seer of Aldoreil, secret Master of the Crimson Cult of Vehtyhl, had prophesied the coming of the One Who Would Follow – a divine messenger from the gods who would bring form to their voiceless words. The Second Emperor, who was also a secret member of the Crimson Cult and followed the Seer as its master, formed the Council of Vehthyl and charged them with finding the One Who Would Follow.

The Council of Vehtyhl spent long years in their search before finally discovering the newborn One Who Would Follow. Atal the Second proclaimed the newborn babe Novarch, the Living Voice of the Nine Gods.

In the Novarch’s name, nine Councils were convened – one for each of the nine gods. These councils were made up of the greatest prophets, messiahs, and religious leaders of the age. Each council refined their teachings and rituals into a scripture, and at a grand Council of Councils these disparate scriptures were unified into the True Teachings of the Holy Order. Those who had refused to participate found their teachings ignored and, in many cases, deliberately suppressed. The Church, with the Emperor’s support, had declared itself the mortal will of the Holy Order upon the Many Worlds.

The next several decades saw the Church consolidate its power within the Seyrunian Empire: Countless trinity churches were built. The ranks of the priesthood swelled. The remaining Pantheon cults were ruthlessly stamped out for their heretical teachings. (It was also during this time that many of the druidic orders were forced to leave the Empire, either fleeing through the Imperial Pass or up into the barbarous lands of the north.)

Then, in 103 YD, at the dawn of the Second Imperial Century, three Merchant Princes of Arathia traveled to Seyrun in the guise of common merchant captains. They presented themselves before the Novarch and for three days they listened to his teachings. At the end of the three days, they had become faithful followers of the Imperial Church. It was the beginning of the Great Conversion.

The Imperial Church spread like wildfire through the Arathian lands. Within the decade every Arathian merchant caravan carried with it at least one priest of the Church — missionaries who spread the true teachings to every corner of the known world.

Barund’s outer lands had already become home to a significant number of the Church’s followers as a result of frequent travel beyond the Pythian. Now, with the Arathian merchants as a focal point, the faith was spreading through Barund’s inner lands as well. In 127 YD, at the request of the King, the Novarch came to Barund. After several weeks of discussion, the King, along with the entire royal family, officially converted to the true teachings of the Imperial Church. The Novarch then performed the Holy Coronation, anointing the King with his holy blood. The Line of Kings, like the Atalian Dynasty, was now recognized as a divine bloodright.

CHURCH HIERARCHY:

Imperial Church - Hierarchy. Novarch to Gold Fatars to Silver Fatars/Prelate of Barund to Prelates to Priests to Lesser Priests to Novitiates.

Robes:

  • White with Blue Bands: Novitiates
  • White: Priests
  • Purple: Prelates
  • Purple with Gold: Prelates of Barund
  • Silver: Silver Fatar
  • Gold: Gold Fatar
  • Red: Novarch

Priests: Priests are also referred to as Fathers/Mothers, while Lesser Priests are known as Brothers/Sisters.

Chapels: Chapels are minor places of worship. They are watched over by Lesser Priests and typically dedicated to a particular saint.

Trinity Churches: Also known as the “lesser churches”, each trinity church is organized around a trinity of the gods. They are watched over by Priests or (in the case of more important churches) Prelates.

Solitary Churches: Unlike the trinity churches, the solitary churches (or cathedrals) are each dedicated to the worship of a single god. There are only nine solitary churches for each of the nine gods (for a total of eighty-one cathedrals). There is a solitary church for each god in each of the Seven Imperial Provinces, one within the city of Seyrun itself, and one beyond the borders of the Imperial Provinces. These last nine churches are also known as the Outer Churches, and although the original intent was to bring in an influence from beyond the heart of the empire, in practice the Outer Churches are viewed as the least among equals. The solitary churches in Seyrun itself are also known as the Imperial Cathedrals.

The Prelate of Barund: The Prelate of Barund is ostensibly the head of the Church in Barund, answerable only to the Council of Councils and the Novarch himself. However, as a result of the Twenty Year War, there are – in fact – two Prelates of Barund, one appointed by the Church; the other appointed by the King of Barund.

Nine Councils: The nine councils represent the third tier of the Church’s leadership. Each of the Solitary Churches is watched over by a Silver Fatar, and the nine Silver Fatars for each of the gods forms a council.

Council of Councils: Each of the nine councils is headed by a Gold Fatar, and the nine Gold Fatars make up the Council of Councils.

Novarch: The leader of the Church. The Living Voice of the Nine Gods.

VENNOC REFORMISTS

In 742 the King of Astalia accused the priests of the Imperial Church of espionage. After a quick trial and political stand-off, the priests were banished and the religious practices of the Church were outlawed. The charges were probably a pretense. One month later, the king issued the Reformist Proclamation, declaring that the Imperial Church had lost its way and become an instrument of Seyrun rather than the gods they were meant to serve. The Reformist Church of the Holy Order was formed shortly thereafter.

Quickly declared a heresy by the Imperial Church and banned in Seyrun, Barund, and Hyrtan, the Reformist Church nevertheless found great acceptance in Vennoc. Within a handful of years a number of other “reformist churches” had sprung up throughout the Protectorates – some seeking to “recapture” the “true meaning” of the Reformist movement, others simply seeking to reach out to the Pantheon in their own way.

Outside the Vennoc Protectorates, the Reformists were initially rebuffed – even in Arathia, although the Arathian government never banned their practices. In 751, however, after the outbreak of the Twenty Year War, Barund lifted its ban on the Reformists. Although the Barundians were still resistant to the Reformist beliefs, this meant that the end of the Twenty Year War opened a gateway to the Borderlands for the movement.

During the Twenty Year War, the Reformist movement had slowly grown strong in Vennoc. Now, in the Borderlands, as in Vennoc, the Reformists were able to take root. As the movement grew in the Borderlands, it also began to spread back into Arathia as Arathian merchants brought the movement back with them.

In recent years, the movement has even found adherents among the lands of the Hyrtanian Alliance, and Hyrtan’s outright ban on the Reformist churches has been weakened to a set of strict mandates. Only in Seyrun does the ban on the Reformists remain absolute, and even there the Reformists have been making inroads. Secret inroads, but inroads nonetheless.

EXAMPLE REFORMIST CHURCHES

Reformist Church of the Holy Order: There are no less than a half dozen churches known as the Reformist Church of the Holy Order. Many state-backed Reformist Churches were created by the rulers of the various Protectorates in the early days of the movement – either as a personal means of severing their ties to the Imperial Church, or as a direct response to Astalia’s actions. Many of these have faded away. Others became independent entities, and most of those have since joined with the original Reformist Church, still based in Astalia.

The People’s Councils: A recent creation of the Reformist movement are the People’s Councils. The People’s Councils believe that the Nine Councils should be true democracies, with all of the faithful participating in each decision. Although popular to some extent, the movement has currently stagnated on logistical problems: They can’t figure out how to organize themselves into anything other than a local group without sacrificing their tenets.

Reformist Church of the Mother and the Father: One of the earliest of the Reformist churches, the Reformist Church of the Mother and the Father believes that Athor and Crissa hold a pre-eminent place within the Holy Order. They believe that the only true means of reaching out to the gods is through the Mother and the Father.

Church of the Three Trinities: Believes that Athor/Crissa/Itor, Sarathyn/Sayl/Bahl, and Itehl/Vehthyl/Tohlen are each individual gods. The doctrine of the Church is confused, but since the religious practices include massive weekly orgies, it’s proven to be quite popular among certain segments of the population. It’s generally laughed at and ignored by the other churches (although the Imperial Church, of course, frowns on it particularly).

Church of the Twin Sisters: Worships Sarathyn and Sayl. Extremely matriarchal.

EXAMPLE REFORMIST CULTS

Order of the Oak: The Order of the Oak worships Sarathyn and Tohlen as harvest gods. (Their interpretation of Sarathyn is… odd.) The Order of the Oak is primarily known among the agricultural villages of Amsyr.

The Cult of Jade: The worship of the Cult of Jade revolves around tiny jade miniature of the nine gods. The cult recognizes nine different types of jade, and each of the nine gods is said to possess “nine faces” – the Nine Faces of the Nine Gods – each represented by a different type of jade. (Crimson Jade, Black Jade, Green Jade, Gold Jade, White Jade, Blue Jade, Violet Jade, Silver Jade, and Diamond Jade)

HOLY BOOKS

The first Council of Councils organized the scripture of the Pantheon into nine texts, each named after one of the gods: the Book of Athor, Book of Crissa, and so forth.

Design Note: By and large, I have intentionally left large swaths of these holy books as terra incognito, giving myself — and others now! — plenty of room to insert whatever we need. A good example of this is when the time came for me to flesh out the Orders of Knighthood.

ORDERS OF KNIGHTHOOD

Any order of knighthood has three things in common:

  1. They follow the Code of Law as laid down in the Book of Athor.
  2. They adhere to the Martial Code as laid down in the Book of Itor.
  3. They honor the Seven Compassions as laid down in the Book of Crissa.

The Code of Law is your bedrock “thou shalt not” stuff: Don’t murder, steal, enslave your brother, and so forth.

The Martial Code is essentially your standard chivalric ideal: Face your opponent fairly and honorably.

The Seven Compassions are a bit more philosophically complex, and are also referred to in some commentaries as the Seven Cares. The compassions are of the self, the companion, the stranger, the task, the thought, the memory, and the true. In other words, care for yourself, for your companions, and for stranger. Take care with what you do and what you think, and it shall be remembered. And if you can do all of that, then you will know true compassion. (For most people, the Seven Compassions boil down to “be nice to people” and “think before your act.”)

Collectively these are also known as the Way of Knighthood.

THE DEEDS OF HONOR: Although not an official part of the Way of Knighthood, the Deeds of Honor are intimately tied to the popular conception of “what it means to be a knight.”

The Deeds of Honor, as written in the Book of Itor, are a collection of legendary tales of valor, honor, bravery, and faith. In some ways they serve as a kind of “scorecard” or exemplar of heroic actions. “He lives his life by the deeds of honor” is a common saying.

Archives

Recent Posts


Recent Comments

Copyright © The Alexandrian. All rights reserved.