The Alexandrian

Posts tagged ‘eclipse phase’

Eclipse Phase - System Cheat Sheet

(click for PDF)

As I’ve mentioned in the past, I frequently prep system cheat sheets for the RPGs I run. These summarize all the rules for the game — from basic action resolution to advanced combat options. It’s a great way to get a grip on a new system and, of course, it also provides a valuable resource at the game table for both the GM and the players. (For more information on the methods I use for prepping these sheets, click here.)

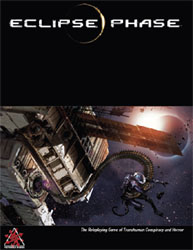
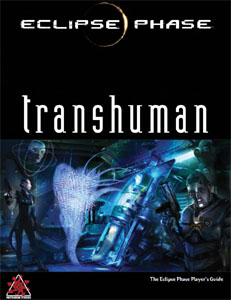
This particular set of cheat sheets was designed for Eclipse Phase. It should be noted that these cheat sheets aren’t designed to serve as a quick start packet: They’re designed to be a comprehensive reference for someone who has read the rulebook and will almost certainly prove wholly insufficient for teaching you the game. (Although they do serve as a valuable adjunct reference if you’re teaching someone the game.)

VERSION 2

A couple years ago I posted a system cheat sheet for Eclipse Phase. At the time, I was still designing my system cheat sheets primarily to serve as packets of reference material. As a result, the sheets were designed to be printed in portrait orientation. Shortly thereafter, I began experimenting with incorporating the sheets into my GM screen, using a restickable glue stick to create a Post-It-like bond for attaching the pages to the Eclipse Phase GM Screen.

As I discussed in On the Use of GM Screens, however, I prefer landscape screens and I now use a customizable screen. As a result, I started using landscape formatting for my cheat sheets, with an eye towards using them in the screen. This has proven to be a huge success, and I’ve also found that the landscape format is conducive to better, tighter organization of the material as well.

I’ve now revisited my Eclipse Phase sheets and converted them to a landscape formatting (along with several other improvements and corrections. If you still want a copy of the original, portrait-oriented sheets, you can find them here.

WHAT’S NOT INCLUDED

The most notable absence from these cheat sheets are what I refer to as “character option chunks” (for reasons discussed here). So you won’t find psi sleights or the effects of specific nanodrugs listed here.

HOW I USE THEM

I keep a copy of these cheat sheets behind my GM screen for quick reference and also place a half dozen copies in the center of the table for the players to grab as needed. The information included is meant to be as comprehensive as possible; although rulebooks are also available, my goal is to minimize the amount of time people spend referencing the rulebook: Finding something in the 14 pages of the cheat sheet is a much faster process than paging through a 400 page rulebook. And, once you’ve found it, processing the streamlined information on the cheat sheet will (hopefully) also be quicker.

The organization of information onto each page of the cheat sheet should, hopefully, be fairly intuitive. The actual sequencing of pages (combat before hacking, hacking before psi) is mostly arbitrary. The sheets as they currently exist have been tweaked several times based on actual play experience.

PAGE 1 – BASIC MECHANICS: Most of the stuff on this page should become irrelevant fairly quickly because players are going to rapidly memorize it through play. The information in “Your Muse and You” is more verbose and advisory than the sort of material I normally include in a system cheat sheet, but after a few sessions I found that new players were routinely under-utilizing their muses. Adding this chunk of material significantly improved this. The Common AI stat blocks also facilitate muse usage,but are generally a useful reference for a world filled with AI agents.

PAGE 2 – APTITUDES / SKILLS: A generally useful reference for any system (particularly one with this many different, overlapping skills). I use the Learned Skill Ranges reference for quick-generating NPC stat blocks (using a method I’ll probably end up sharing here at the Alexandrian at some point in the near future).

PAGE 3-4 – COMBAT REFERENCE: For new players, you can skip over the advanced options on the second page easily enough. (This is also a great example of the advantages of the landscape layout over the portrait layout: This same information took 3 pages in the original version of the cheat sheet and was considerably less user friendly.)

PAGE 5 – HEALING: I wrote in my notes for the original version of the cheat sheets that I wanted to include information for medichines, nano-bandages, and repair spray (the ubiquitous equipment used for healing), but didn’t want to spill the information onto multiple pages. All that information now fits on a single page.

PAGE 6 – MESH / BOTS / SYNTHS / VEHICLES: The new layout allowed for a major consolidation of material here. (The AI stat block for bots/vehicles has been moved to the Common AI stat blocks on the first page.)

PAGE 7 – HACKING / SECURITY: Three pages of information reduced to two pages, plus I was able to add a Software reference.

PAGE 8 – REPUTATION / SOCIAL NETWORK: I think this page may have actually worked better in the portrait layout.

PAGE 9 – RESLEEVING:

PAGE 10 – PSI / STRESSFUL SITUATIONS: One of the major oversights on the original sheets were the guidelines for Stressful Situations. (Which meant that my early EP players were getting off very lightly when confronted with horrific things!)

PAGE 11 – MISCELLANEOUS: What it says on the tin.

A SIMPLER SET

If you’re looking for a quick introduction to the system for new players, here’s what I recommend:

  • Page 1: Basic Mechanics (tell them to report test results as “# out of #”, for example “I rolled 32 out of 65”)
  • Page 3: Basic Combat (emphasize how valuable combat modifiers are)
  • Page 5: Health and Healing (make sure they understand wound/trauma thresholds; you can’t trust players with their own bookkeeping until they do)
  • Page 6: Basic Mesh usage (emphasize how valuable Research tests are)
  • Page 8: Reputation / Social Networks (grokking this is like half the battle in understanding how the Eclipse Phase universe fundamentally works)

For this approach to work, you’ll want to avoid PCs that are focused on jamming, hacking, or psi. That’ll be very limiting in a long-term campaign, unfortunately, so you might want to start with a couple of one-shots to build up system familiarity. Or, alternatively, set aside time with the specific players interested in those areas to review those rules.

There is also, of course, setting information that you’ll want to pass on. I recommend 10 Things You Should Know About Eclipse Phase as a good way for accomplishing that.

MAKING A GM SCREEN

As mentioned, these cheat sheets can also be used in conjunction iwth a modular, landscape-oriented GM screen (like the ones you can buy here or here).

Personally, I use a four-panel screen and use reverse-duplex printing in order to create sheets that I can tape together and “flip up” to reveal additional information behind them.

The Eclipse Phase: System Cheat Sheet is licensed under the Creative Commons Attribution-Noncommercial-ShareAlike 3.0 Unported License.

One of the problems a lot of RPG sourcebooks have is that they don’t include enough practical, game-able material: The type of stuff that you can actually bring to the table and start playing with. Over the past few years, however, I’ve started leveraging a lot more utility out of my RPG setting sourcebooks by simply rolling back the clock.

Perhaps the easiest way to explain what I mean is by way of example.

A SIMPLE EXAMPLE: DROPLET

Droplet - Eclipse Phase: Gatecrashing

In the Eclipse Phase universe, the Pandora Gates allow humanity to skip across the galaxy at faster-than-light speeds. The Gatecrashing supplement details a selection of the many worlds which lie beyond the gates, including the world dubbed Droplet.

One of the cool things about Eclipse Phase is that Posthuman Studios has licensed the entire game under a Creative Commons license. So if you want to follow along, you can download the Gatecrashing PDF for free from Rob Boyle’s site and follow along. (The section on Droplet starts on page 89.)

The core thing to know about Droplet is that it was once home to an intelligent race that humanity refers to as the Amphibs. The Amphibs gave rise to a technological civilization about 1 million years ago and then abruptly died out. They left remarkably durable ruins scattered all across the planet, but the most significant Amphib artifact is the titanic Toadstool:

TOADSTOOL

This unique alien construct rises from the floor of a shallow ocean, just offshore from Davis Island, approximately 600 kilometers from the Droplet Gate. It is shaped like a mushroom with a stalk 80 meters in diameter, rising 90 meters above the ocean’s surface and extending 80 meters down to the ancient volcanic bedrock that makes up that coastline. Above this “stem” is a flattened ovoid, 460 meters in diameter and 110 meters thick. It is clearly artificial and seamless, made of unknown but sturdy composite materials. After detailed examinations, scientists now believe this structure is over a billion years old, likely established well before the evolution of the Amphibs, when Droplet itself was a much different planet. Despite its age, the Toadstool appears to be in perfect condition, as if it was created no more than a few years ago. Close scrutiny has revealed that its walls swarm with specialized nanotechnology that keep it in perfect repair, removing algae-like biological growths that would normally accumulate from the ocean.

Researchers also assume that these nanomachines— or some other unknown mechanism—are responsible for the fact that the stem of the Toadstool is only 200 meters from the shore despite a billion years of erosion and slowly shifting geology. Though the Toadstool has proven to be impenetrable to all forms of scanning, a careful examination of the underlying rock indicates that this structure is mostly hollow. So far, all attempts to gain entrance to the Toadstool have failed. The walls are made of exceptionally hard materials and repair themselves within moments of any damage being done. No one has been willing to use nuclear weapons or other similarly devastating means to breach this construct’s walls, since the goal is to get inside and not to destroy it. Extensive Amphib ruins have been found in the vicinity of the Toadstool. The native life forms clearly built a large city around it and considered the Toadstool important to their culture. There is no evidence that they ever learned more about it than transhumanity currently knows, but simple graphics of the Toadstool can be found on many of their items that were in daily use.

Amongst the Amphib ruins which surround the Toadstool there are also a number of ruins belonging to another extinct race known as the Iktomi. Gatecrashers have found Iktomi ruins all over the galaxy, but it’s quite unusual to find them on Droplet because the physical conditions of the planet are completely dissimilar to their other habitats. The most logical conclusion is that the Iktomi were just as fascinated by the Toadstool as humanity is. As with their other sites, however, the Iktomi appear to have vanished a few thousand years ago, leaving only their dream shells.

The other odd thing about the Toadstool is that async psi-sensitives find its proximity intensely unpleasant.

USING DROPLET

And that’s pretty much it as far as Droplet is concerned.

If you wanted to use Droplet in your campaign, one way of doing that, of course, would be to figure out what happens next: What is the secret of the Toadstool? Does it manifest its purpose in some terrible way? Are there hidden archives within the Iktomi ruins which might shed light upon it? And so forth.

These approaches, however, take only minimal advantage of the material found in the Gatecrashing supplement. The stuff you’re creating is certainly being built on the foundation of the material found in the sourcebook, but the active material — the stuff you’re really using in your game — is all being created from scratch.

There’s nothing wrong with simply standing on the shoulders of giants and creating new stuff, of course, but the other way you could approach Droplet would be to simply rewind the timeline. Back things up to the point before humanity had found Droplet and then have the PCs step through as the first explorers of this unknown world. Now all of the stuff described in the supplement becomes active fodder for your game:

  • The PCs get to stumble through the Amphib ruins surrounding the Pandora Gate and become the discoverers of a lost alien race.
  • They’re the ones who discover an Amphib map guiding them to the Toadstool.
  • They get to probe the Toadstool and discover its strange properties.
  • It’s a PC async who first experiences the “blinding stimuli” of the Toadstool.

And so forth.

After you’ve leveraged all that material, of course, you’re now free to continue building on that foundation in exactly the same way that you could before. But now that foundation has been made intensely personal for your and your players: They lived that stuff. So when a Go-Nin team comes through the Pandora Gate and tries to stake a claim to the Toadstool, the conflict which erupts between the scientific missions the PCs have been sponsoring and the hypercorporate stooges becomes intensely meaningful to them.

SELECTIVE REWINDING

In the case of Droplet we’re basically rewinding the whole setting. That’s a technique that can actually work in a lot of RPG settings, but it’s also quite possible to take just one aspect of the setting and back it up half a step.

For example, in Shadows of Asia for Shadowrun, we can read about how Queen Michelle of Shaanxi rose to power by funneling support from her sanctuary in England to the rebels fighting the military junta in her homeland. We don’t have to wind back the entirety of the Shadowrun setting in order to back the clock up a couple of ticks and have the PCs running Michelle’s guns.

CONCLUDING THOUGHTS

I think what’s going on here is some combination of two factors:

First, the creation of an RPG setting is an inherently narrative creation. And we have a strong desire to bring our narratives to a conclusion.

Second, most of us live in a world that we largely perceive as as status quo: The United States government was here yesterday. Our job was here yesterday. They will still be here tomorrow. (Of course, we all occasionally experience big changes in our lives. But the change generally comes to an end and then we’re in another form of status quo.)

But when it comes to an RPG, the status quo is generally not very useful. What we’re interested in is the cusp. The thing that is about to happen (or which is currently happening) that the PCs can get caught up in.

Some setting supplements, of course, are better at this than others. For example, I had Heavy Gear: Life on Caprice readily to hand as I was writing this up and I flipped through it looking for a good example I could use. I couldn’t find anything, though, because every single gazetteer entry seemed to make a point of describing what was happening right now. For supplements like that, this tip becomes irrelevant. They’ve already got you perched on the cusp. You just need to push!

Eclipse Phase - Posthuman StudiosA quick review for those unfamiliar with the Eclipse Phase system: It’s a percentile system where you need to roll equal to or under your skill level in order to succeed. If you roll a success, your margin of success is equal to the number you rolled on the dice. If you roll a failure, your margin of failure is equal to the number you rolled minus your skill level.

(So if your Fray skill is 45 and you roll 27, your margin of success is 27. If you roll 89, your margin of failure is 89 – 45 = 44.)

Playing Eclipse Phase at Gencon this year, I noticed once again the difficulty some people have grokking this method of “calculating” margin of success. Part of the problem is that it’s discordant with how venerable percentile systems like Call of Cthulhu calculate margin of success (by subtracting the number you rolled from your skill rating). And part of the problem is that Eclipse Phase actually swapped methods between subtracting numbers and reading the die roll between printings. (The post-Catalyst Labs versions of the game should really have been clearly labeled a Revised Edition, frankly.)

But laying all of that aside, the huge advantage of the “read the die” method of calculating margin of success is that it completely eliminates calculation at the table when calculating margin of success: All you have to do is look at the dice. When you can get everyone to grok that (and to report their rolls as “XX out of YY” instead of just “succcess”) it makes the game run with incredible smoothness. (Margins of failure still require calculation, but the system doesn’t use them nearly as often.)

Having concluded that there’s a huge upside to calculating margin of success like this, without further ado I present several different conceptual frameworks that can help you (or someone else) grok the concept:

  • Success starts at 00 and grows from there, so the higher you roll the better your success (assuming that you succeed).
  • It’s like blackjack: You want to get as close to your target number as possible without going over.
  • It’s like The Price is Right: The dice are naming a price and you want that price to be as close to the actual price (i.e., your skill rating) as possible.
  • Your skill rating is like a gravity well: Successes start far away at 00, but the closer they get to your gravity well the faster they go and the bigger the explosion when you punch that guy in the face.

(For some reason face punching always features heavily whenever I’m teaching a new system to people.)

UNTESTED: MARGIN OF FAILURE

Okay, now that you’ve grokked how Eclipse Phase does margins of succcess, let me strain your credibility by proposing a similar method for handling margin of failure in the system. (This is really just a random thought that occurred to me as I was writing out the above.)

The key point here is that the system (a) rarely cares about margin of failure and (b) when it does, it only cares if you missed by either 30 points or 60 points. (The former are referred to as “severe failures” and in my system cheat sheet I refer to the latter as “horrific failures”, although I don’t believe the rulebook ever gives a formal term for them.)

So the method here is really simple:

  • A roll of 70 or less is a severe failure
  • A roll of 40 or less is a horrific failure.

The system also has a handful of effects which are determined “per 10 margin of failure”. (For example, shock damage can knock you unconscious for 1 round per 10 MoF.) To calculate that, simply subtract the tens digit of your result from 9. (So if you roll 77, you would be shocked for 9 – 7 = 2 rounds.)

If you’re looking for a conceptual framework, think of failure as emanating from 99 and growing in magnitude. Note, too, that higher is always better with this system: A higher success is a better success; a higher failure is a better failure. What my mind initially tries to interpret as a discontinuity actually makes sense if you just imagine success and failure emanating from opposite ends of the spectrum while the outcome is a linear comparison to your skill rating.

Gencon 2014 - The Best Four Days in Gaming

I mentioned a couple days ago that I’d just returned from Gencon and a few people asked me to talk a little bit about my experiences there. As I mentioned, I ran 5 games and played in 4:

  • Numenera: Into the Violet Vale (ran 3 sessions)
  • The Strange: Eschatology Code (ran 2 sessions)
  • Cthulhu Masters Tournament (played in 2 rounds)
  • Eclipse Phase: Detente
  • Eclipse Phase: Overrun

This was more intense but considerably less varied than last year, when I played in 6 games (including Call of Cthulhu, Lady Blackbird, Eclipse Phase, Shabal-Hiri Roach, and Numenera).

The sessions of Numenera and The Strange I ran were actually the very first con games I’ve ever run. And I made a very conscious decision to jump in with both feet by signing up to run two sessions of each. What I wasn’t anticipating was that this would, in turn, lead to a very intense pre-con experience, too: I didn’t receive the scenarios I was running from Monte Cook Games until August 2nd, which meant I had less than two weeks to read them, prep them, and playtest them. (I ended up running two playtest sessions of The Strange: Eschatology Code and one session of Numenera: Into the Violet Vale with various assortments of my local players.) The core rulebook for The Strange was also just released and so I found myself having to run the game without actually having read the core rulebook yet. (I actually still haven’t finished the core rulebook.)

The Strange - Bruce Cordell and Monte CookTHURSDAY MORNING SURPRISE: I was supposed to launch my Gencon experience by playing in an 8 AM game of Numenera run by an independent GM unassociated with the official MCG events. I haven’t had much of a chance to actually play the game since last Gencon and I was looking forward to it. Unfortunately, the GM was a no-show. That meant that I was sitting at a table in the Marriott with four players who were all desperate to try out this awesome game. Meanwhile, right next door at the JW Marriott, I had all my supplies for running Into the Violet Vale.

Well… you can guess what happened next. We headed over to the JW Marriott’s bar, sat in comfy chairs, and I inaugurated my experience of GMing at con twelve hours earlier than I was anticipating. The session, albeit somewhat abbreviated on time, proceeded fabulously. (This was followed by a desperate scramble to print out new character sheets for the scenario so that I would have enough for my official games. Fortunately, the JW Marriott has a FedEx store on the second floor.)

THE STRANGE: Since Gencon last year, Numenera has rapidly dominated my roleplaying, displacing D&D 3.5 as my most played game. I am just as excited about The Strange. I talked more about it over here, but the short version is this: If you’ve dismissed this as just a simple “dimension hopping” game, take the time to give it a second look. It’s doing some really interesting and unqiue stuff within the genre.

I will also say that Eschatology Code, the scenario Bruce Cordell wrote for Gencon, is simply fantastic. It has certain limitations as a scenario for home play (although it would be a strong way to kick off a campaign), but it’s one of the tightest and most effective convention scenarios I’ve had the pleasure to see. No spoilers, but if you get a chance to play it, I recommend seizing the opportunity.

ECLIPSE PHASE: I’m a huge fan of Eclipse Phase and my experiences with their games this year were great. I had some confusion with my schedule (Google Calendars shifted the times of all my events when I switched time zones heading into Indianapolis) and I ended up being an hour late for the first scenario. After apologizing profusely for being an unintentional jackass, however, I settled into a really nifty scenario involving multiple factions fighting over control of one of the Pandora Gates. Midway through the scenario I had a Crowning Moment of Awesome(TM) and actually got a round of applause at the end of the session for it. Woot!

(During the convention I also got two rounds of applause while GMing, one after pulling a back-to-back doubleheader of Numenera and ThStrange that lasted until midnight on Friday.

CTHULHU MASTERS TOURNAMENT: This was my second year participating in the Cthulhu Masters Tournament and this year (after fleeing a Hound of Tindalos during the Fall of Saigon in a very memorable scenario where they actually built a helicopter for use to roleplay in) I advanced to the second round. This tournament is really fabulous and the caliber of players it attracts is simply marvelous.

THE LOOT: The two Gencon acquisitions I’m most excited about are Run, Fight, or Die and Level 7: Invasion. (The Strange would also be on the list, but I kickstarted it and received the rulebook a couple weeks earlier.)

Run, Fight, or Die - Richard Launius

Run, Fight, or Die was designed by Richard Launius (of Arkham Horror fame). I first glanced at it many moons ago when it was being kickstarted, but the pitch for the game was basically “King of Tokyo with zombies” and my response to that was, “Meh.” (As it is with pretty much all “it’s X plus zombies!” pitches.) But I slid into a demo game on the con floor and really, really enjoyed the game: The central keep-and-roll mechanic is similar to King of Tokyo, but that’s where the similarity ends: Run, Fight, or Die features immediate punishment for pushing your luck, which adds an extra dynamic of risk to the standard procedure or looking for the most favorable combination. The combinations themselves are actually progressive in interestingly discontinuous ways, which means that you can actually end up shooting past your desired result. Finally, the central conflict of the game — in which hordes of zombies move closer and closer towards you — creates a rich tactical environment in which you have to balance and choose between short-term and long-term consequences.

The whole package is just fabulous. I’ve played it a dozen times since getting home from Gencon and I’m pretty firmly convinced that it’s going to be a huge hit at my Game Night parties.

Level 7: Invasion - Privateer Press

I haven’t actually had a chance to play Level 7: Invasion yet, so I really can’t pass any kind of judgment or provide any kind of insight about it. But I’m a huge fan of Level 7: Escape and Level 7: Omega Protocol. The progressive storytelling in the series evolving through radically different types of games (Level 7: Escape is a co-op ‘crawler, Level 7: Omega Protocol is a players-vs-masters tactical combat game, and Level 7: Invasion is a geopolitical wargame) is really fascinating to me.


Eclipse Phase: Transhuman - Posthuman StudiosThis post is a little hyper-specialized in its focus, but it was a mechanical concept that was tickling my hindbrain so I decided to just pull the trigger on it.

Flexbot morphs are formed from multiple, shape-adjusting modules which can flexibly reconfigure themselves into a multitude of forms: Multi-legged walkers, tentacles, hovercrafts, and so forth. In addition, their individual modules are capable of sprouting fractal-branching digits (capable of breaking into smaller digits down to micrometer scales, allowing for ultra-fine manipulation).

Eclipse Phase: Transhuman introduces a new set of rules for flexbots allowing them to incorporate specialized modules. (For example, a Beekeeper module can be used to deploy nanoswarms.) In order to support these specialized modules, Transhuman also introduces a system for calculating the characteristics of a morph formed using various configurations of specialized modules.

In order to use these rules, however, you need the stats for a basic flexbot module. Transhuman provides stats for a Yeoman module which is supposed to replace the basic flexbot morph, but it actually results in a very different stat block. So what I’ve done is to create a basic flexbot module that you can use to build a flexbot morph virtually identical to the one described in the core rulebook. I’ve also tossed in a cheap flexbot module and also something nifty called a silvershot module.

NEW FLEXBOT MODULES

A basic flexbot morph (as described in Eclipse Phase, pg. 144) contains 5 basic flexbot modules.

(Following the rules for combining flexbots, this would actually result in a morph with Durability 24 instead of the Durability 25 found in the core rulebook. But that’s the closest you can mathematically get.)

BASIC FLEXBOT MODULE

Robot Concept Art - Sean YooThis is the basic module found in a typical flexbot morph. In a typical configuration, one of those modules is the size of a small dog (roughly 75 centimeters high x 75 centimeters long x 25 centimeters long), but they’re capable of significantly compressing or extending their dimensions using their Shape Adjusting enhancement (see Transhuman, pg. 208).

Enhancements: Access Jacks, Basic Mesh Inserts, Cortical Stack, Cyberbrain, Fractal Digits, Mnemonic Augmentation, Modular Design, Nanoscopic Vision, Shape Adjusting
Mobility System: Walker (4/16), Hover (8/40)
Aptitude Maximum: 30
Durability: 8
Wound Threshold: 2
Advantages: Armor (4/4)
Notes: Small Size trait (Transhuman, pg. 95)
CP Cost: 4
Credit Cost: High


CHEAP FLEXBOT MODULE

Originally marketed by Starware, this cheap alternative to a typical flexbot module quickly gained an extremely negative reputation. Consumer advocacy groups leaked the full blueprints for the design in an effort to discredit Starware, but this ironically just resulted in a lot of people having access to it. Down-on-their-luck flexbots sometimes don’t have any choice but to substitute in a cheap Starware knock-off if one of their main modules is damaged.

Enhancements: Access Jacks, Basic Mesh Inserts, Cortical Stack, Cyberbrain, Mnemonic Augmentation, Modular Design, Shape Adjusting
Mobility System: Walker (4/16), Hover (4/28)
Aptitude Maximum: 20
Durability: 6
Wound Threshold: 2
Advantages: Armor (2/2)
Disadvantages: Lemon trait
Notes: Small Size trait (Transhuman, pg. 95)
CP Cost: 1
Credit Cost: Moderate


SILVERSHOT MODULE

Robot Concept Art - Sean YooSilvershot modules are designed with specialized, multi-channel connections using superconducting material to synchronize high-speed, cross-modular communication through massive redundancy. A flexbot formed entirely from silvershot modules can move like quicksilver, although the advantage debilitates rapidly if non-silvershot modules are introduced.

Enhancements: Access Jacks, Basic Mesh Inserts, Cortical Stack, Cyberbrain, Mnemonic Augmentation, Modular Design, Shape Adjusting
Mobility System: Walker (4/16), Vectored Thrust (8/40)
Aptitude Maximum: 30
Speed Modifier: +1 (Reflex Boosters)
Durability: 8
Wound Threshold: 2
Advantages: REF +10, Armor (4/4), Reflex Boosters
Notes: Small Size trait (Transhuman, pg. 95)
CP Cost: 8
Credit Cost: High (minimum 10,000)

COMBINING FLEXBOT MODULES

Unless noted otherwise, only physically attached modules should be considered when combining the modules of a flexbot into a flexbot morph’s stats.

Enhancements: In general, the flexbot morph is considered to have all of the enhancements and traits available to their individual modules. The exception would be any enhancement or trait that would require the entire morph to be augmented (unless, of course, all of the flexbot’s modules possess the enhancement or trait). (For example, a chameleon skin would only cloak the module possessing it.)

Mobility System: For each module which lacks a specific mobility system, the movement rate of the morph with that mobility is halved. (This penalty is cumulative for each module which lacks the mobility system.)

Robot Concept Art - Sean YooFlexbot modules can reshape themselves to possess any mobility system based on purely mechanical principles (hopper, hover, roller, rotorcraft, snake, submarine, tracked, walker, wheeled, winged). A module cannot have more than two mobility systems shaped at a time. Assume shaped mobility systems have a movement rate of 4 meters.

Aptitude Maximum: Use the highest maximum available for each aptitude.

Speed Modifier: Flexbots use the Speed of its slowest module.

Durability: Take the highest Durability among the flexbot’s modules and add half the Durability (round up) of each additional module. Calculate the morph’s Wound Threshold (Durability ÷ 5) and Death Rating (Durability x 2) normally based on the morph’s total Durability.

  • Damage: Damage is assumed to be evenly divided between a flexbot’s modules. (As an optional rule, determine which specific module was hit and apply the damage accordingly. This would only become important if a specific module separates from the flexbot or if that module is disabled, in which case the flexbot would lose any enhancements or traits specific to that module.)

Advantages/Disadvantages: As with enhancements, a flexbot morph is considered to have all the advantages and disadvantages possessed by their individual modules.

  • Ability Scores: Flexbots use the highest bonus for each aptitude. Multiple bonuses to the same aptitude from different modules do not stack.
  • Armor: A flexbot’s Armor Value is equal to the average Armor Value of its modules (round up).
  • Individual flexbot modules count as a small target (-10 modifier to hit in combat)

This is a quick reference. Refer to Transhuman (pg. 203-206) for the complete rules.

Archives

Recent Posts


Recent Comments

Copyright © The Alexandrian. All rights reserved.