The Alexandrian

The Alexandrian’s Patreon

October 16th, 2018

The Adventurers at Rest - Alex Drummond

It’s time for our local membership drive!

First, I want to thank all of current Patrons for all of their support. The Alexandrian has been pretty reliably updating 12-13 times to month in 2018, and that’s only possible because my patrons give me the time to create all the nifty content which (if you’re reading this) I hope you enjoy!

Since the last time I actively pimped my Patreon, there have been some changes to the way it’s structured. This is primarily because Patreon has been aggressively working to eliminate the micro-payments which originally made the platform so attractive. Without the support for those micro-payments, there are now two primary ways of supporting the site:

PER POST: Simply set a per post contribution. The goal is for the Alexandrian to update on a schedule of Monday, Wednesday, and Friday every week. This translates to 12-13 new posts, which usually translates to at least 20,000 words per month.

MONTHLY: If you’d rather make a flat monthly contribution (regardless of how many posts I actually make), simply donate that amount AND set that amount as your monthly maximum.

TIER REWARDS

EARLY ACCESS: All patrons of the Alexandrian get early access to the posts. Sometimes this “early access” is only a matter of a few minutes because a post is going live immediately after I write it, but even then it can still be valuable because patrons get exclusive access to PDF versions of the articles.

Higher tier rewards include:

HANGOUT CLUB: Join me for a free-for-all chat on Google Hangouts. We’ll chat about gaming or anything else that tickles your fancy. The patrons are in in charge here!

REQUEST LINE: For special patrons, I’ll write articles or reviews on request. (Subject to approval.)

GAME CLUBS: For the highest tier levels, you can also join my ongoing open table campaign(s) via Google Hangouts. Check out the Patreon page for details.

WHAT’S COMING

What, exactly, will you be supporting? Stuff currently on my radar for development here at the Alexandrian:

  • So You Want to Be a Dungeon Master? A step-by-step guide to becoming a DM.
  • A fully developed hexcrawl mini-setting.
  • An open table structure and adventure set for Prince Valiant.
  • More Scenario Structure Challenges, Open Table Manifesto exposés, and Smart Prep focuses
  • … and, by popular demand, my Taint and Kaostech rules for D20.

And, of course, the Running the Campaign featurettes following the In the Shadow of the Spire campaign will also continue as a regular Friday feature.

If you enjoy the content here at the Alexandrian, please consider supporting us! Even just $1 a month can make a big difference!

Patreon for the Alexandrian

… even the smallest of pledges can add up to wondrous things.


Go to Part 1

Castle Blackmoor - Level 1 - Quadrants

The creative and evolving process of restocking a megadungeon is something I discuss at length in (Re-)Running the Megadungeon. I’m not going to rehash that material here, and if you’re unfamiliar with that earlier essay you might want to take a few minutes to peruse it.

As I’ve mentioned in the past, I find that the process of restocking a dungeon is as much art as science: You want to look at the context of how events are evolving within the dungeon — the actions the PCs have taken, the responses NPCs have to those actions, and so forth — in order to determine how the dungeon will evolve over time.

With that being said, I often find it rewarding to incorporate random procedural content generation. It can prompt me to pursue unusual creative directions and force me out of my comfort zone. It can also “force” me to put in the work when it can sometimes be easier to default to “nothing happens”. For example, at the beginning of every session in my OD&D Thracian Hexcrawl I would check every dungeon lair that had been previously cleared out by the PCs with a 1 in 8 chance that it had been repopulated. This “forced” me to revisit areas that I might otherwise have left fallow.

For Castle Blackmoor I could have easily just used my standard procedures for megadungeons: A kind of instinctual “feel” for each section of the dungeon, combined with on-demand procedural content generation checks or creative inspiration for restocking each section. (I, personally, draw a distinction between game mechanics and procedural content generators: Although they can be superficially similar, I think their function in the game is quite different. One way that this manifests in my campaigns is that I consider mechanical results binding; they can’t — and shouldn’t! — be fudged. Procedural content generators, on the other hand, exist to prompt creativity and, because they’re not mechanics, they’re not mechanically binding. But I digress.) Since my design goals for Castle Blackmoor were explicitly about exploring an alternative to my typical megadungeon procedures, however, I thought it made sense to take a closer look at the restocking methods I would use with the dungeon.

As far as I know, however, Arneson never explained his restocking procedures. (If he even had a formal procedure.) So there’s nothing explicit for us to base our restocking techniques on. What we can do, however, is look at how a restocking procedure could be created to capitalize on the tools provided by the Arnesonian procedures we’re using.

Here are three approaches that I developed.

EMPTY ROOMS METHOD

The first option would be to simply rerun the original stocking procedure between sessions: Check each empty room to see if it now contains an encounter. If so, generate the encounter.

The problem with this method, even if it is limited only to the room that the PCs passed through during the previous session, is that it will, statistically speaking, usually lead to the generation of more creatures than the PCs are eliminating. The dungeon will slowly turn into an overcrowded tenement.

GLENDOWER TEMPLATE METHOD

An alternative would be to use your original dungeon key as a Glendower template during restocking: Check each empty room which has a protection point budget to see if it has been reinhabited. If it has, respend the original protection point budget and check to see if the room has treasure.

This method has the advantage of simplicity. It also eliminates bookkeeping during the session: You don’t need to keep track of exactly which areas the PCs have “tapped” in their explorations, you can simply check the key after the fact to see which areas have been depopulated.

A potential disadvantage of this method is that it can result in the dungeon becoming predictable: The same rooms will always be where monsters live, and the other rooms will never be filled.

Under the logic that your Glendower template was designed to present an interesting tactical challenge regardless of how its budget is “filled”, however, this might actually be viewed as a feature. Any predictability of the dungeon will also be undercut by your wandering monster checks. It’s not like there will be any place in the dungeon where the PCs will be “safe”; it’s more like there are certain areas of the dungeon which make for good lairs, and those are the areas that monsters keep moving back into.

QUADRANT CHECKS

When Arneson adapted the Blackmoor dungeons for convention play in the late ’70s, he instituted a quadrant-based system of wandering monsters: He divided the map for each dungeon level into a quadrant and pregenerated a random encounter for that quadrant. (“Players rolling a wandering monster in Quadrant A will have encountered Sir Fang!”) It’s an effective system for pushing specific, prepackaged content into play in a convention setting, but it’s not a system I was particularly interested in exploring.

For the purposes of restocking, though, this concept of “dungeon quadrants” interests me. It can be somewhat crude, but it also mirrors my own “sector” understanding of a dungeon complex. (These are the Tombs, this is Columned Row, these are the Worg training facilities, this set of rooms ‘belongs’ together, as does this one over here, etc.) If you wanted more detail, you could block out specific sectors. Quadrants, however, give you a simple one-size-fits-all approach that can be quickly slapped down onto any level of the dungeon.

You’ll still want to use common sense, of course: In the map above, for example, you can see how I’ve tweaked the borders of each quadrant on Level 1 to follow natural divisions in the dungeon corridors.

Here’s the procedure I’ll be experimenting with:

  1. For each quadrant that the PCs entered during the previous session, there is a 1 in 6 chance that it will be restocked.
  2. For each restocked quadrant, check each uninhabited room (using the normal stocking procedures) to see if it is now inhabited.
  3. Check ALL rooms in the quadrant for treasure, although rooms that were currently inhabited only have a 1 in 20 chance of generating new treasure.

Note that this procedure can add new encounters even to areas that the PCs haven’t previously depleted. This is intentional, and a likely explanation would be creatures reinforcing their ranks in response to the armed thugs rampaging around their homes.

It’s quite possible that, after a little playtesting, you may want to tweak the odds listed here. As I write this, I haven’t actually had much chance to put these into practice yet. (I suspect 1 in 8 for the quadrant test might be a better fit. And the 1 in 20 chance for adding treasure to currently inhabited areas might be too low, but I’d rather be conservative with the money spigot.)

Next: Special Interest Experience

IN THE SHADOW OF THE SPIRE

Session 16A: To Labyrinth’s End

Grinkel Mine - Collapsed Tunnel

There was another hall directly opposite the one they had emerged from, but they could see that it ended in a complete collapse after only a few dozen feet. (A careful examination of Ranthir’s maps suggested that this was part of the same collapse that had blocked their progress on the upper level.

In the Laboratory of the Beast I use collapsed tunnels primarily to create an illusion of scale. Although this particular complex was already quite large (comprising 60+ rooms), I wanted to give the impression that it had originally been even larger. So I simply collapsed part of the complex.

There are a couple techniques that I think help to sell this illusion:

First, the complex needs to already have some scale to it. I’ve found that if you just map two or three rooms and then collapse a tunnel that supposedly leads to a vast complex that no longer exists, the players don’t really feel it.

Second, include smaller collapses that the players can discover the other side of (by circling around). The fact that stuff exists behind this collapse will reinforce the illusion that there were vast chambers behind all of those other collapses, too.

A brief digression here: Why did I decide 60+ rooms was enough and then evoked the rest of the complex by collapsing corridors?

Simple: I ran out of ideas.

When I sat down to design the Laboratory of the Beast, I brainstormed a bunch of ideas, reviewed the original brainstorming notes I had compiled when starting the campaign, and did a quick survey through some bestiaries for cool stuff I could include. Then I started mapping, jotting down which ideas went into which rooms as I went. Along the way I discovered some new ideas, and other stuff got thrown out when I discovered I didn’t actually like it or that it didn’t fit with how the rest of the complex was developing.

And then, somewhere down on the second level, my list of ideas had dwindled to almost nothing. So I collapsed the remaining tunnels. Then I went back up to the first floor and tweaked the map so that the collapse extended vertically, too.

WHY?

From a design standpoint, the primary reason to use this technique is when a particular dungeon concept requires a certain scale – “vast dwarven city”, “sprawling military laboratory”, “petrified remains of a demon so large its veins are corridors” – but in actual practice you’re not interested in spending the time necessary to explore the entirety of that scale.

This can also be true in a fractal sense: This complex should have had barracks for 500 men. It’s not difficult to map that, but searching 500 nondescript beds is boring, so drop a ceiling on most of the barracks complex and call it a day: The PCs will still be able to get a sense for how the dungeon functioned (“I guess these were the barracks”), but you bypass potential drudgery.

In general, collapsed tunnels also suggest age and imply danger. They can also create a sense of mystery. (And sometimes that mystery will be paid off if a collapse can be navigated or circumnavigated.)

In the dungeons of Castle Blackmoor, Dave Arneson used collapses in order to change the topography of the dungeon itself, thus altering the tactical and strategic properties of the megadungeon. Perhaps most easily used in campaign structures where the PCs are repeatedly re-engaging with the same dungeon complex, it’s also possible to sparingly use this gimmick by collapsing tunnels while the PCs are still inside the dungeon. In addition to the immediate peril of the collapse itself, the PCs will be posed with a new challenge as they try to figure out how to get back out of the dungeon. (There’s a scenario by JD Wiker in Dungeon #83 called “Depths of Rage” which uses this gimmick and which I ran to great effect in my first 3rd Edition campaign.)

Collapses can also open passages that didn’t previously exist. And, in either capacity, they can serve as triggers: The dark dwarves who are invading the outer dwarven settlements because their own realms have been destroyed by a cataclysm. The breaching of an ancient eldritch prison. Deep goblins finding new pathways to the surface. And so forth.

AND WHAT IF?

One thing to be aware of when using collapsed tunnels is the possibility that the PCs will figure out how to excavate or bypass them. (This becomes particularly true as they reach higher levels and gain access to magical resources that can make this task increasingly trivial.)

It can be useful, therefore, to have some sense of what’s “back there” behind the collapse, just in case your players make it necessary for you to know. This is probably just good design advice in general, honestly, and you can see that with the examples above: I knew that there were more beast-themed laboratories beyond the collapses. When we dropped the ceilings on the barracks, we knew that they were barracks. These complexes weren’t just random assemblies of randomness; they were built (and inhabited) with purpose, and if you understand that purpose then you’ll just naturally know what’s behind the collapse.

Thinking about this too much, of course, is a trap. The odds of the PCs deciding to clear some random collapse are actually quite low, so going into any sort of detailed prep about what’s back there is almost certainly wasted prep and should be avoided. (It also likely negates the entire reason you collapsed those tunnels in the first place; i.e., to avoid prepping that stuff.)

BUT WAIT!

What if you want the PCs to excavate a tunnel and find a bunch of cool stuff behind it?

This can be tricky to reliably pull off. The natural reaction most people will have to seeing a blockade of solid stone is to go somewhere else. Most players will also be guided by the meta-knowledge that dungeon collapses rarely have anything mapped behind them, so the hard work of clearing all that rock is likely to be met with the GM literally stonewalling them.

(Pun intended.)

In order to overcome that natural and cultivated aversion, you’ll need to turn the area beyond the collapse into an attractor: You need to create a specific desire/need for the PCs to clear the collapse. For this, you’ll want to employ the Three Clue Rule: Old maps depicting the area beyond the collapse. Withered undead who murmur about lost riches. And so forth. Maybe it will become clear that whatever brought the PCs to the dungeon in the first place must lie beyond the collapse.

Get digging!

Ptolus - In the Shadow of the Spire

IN THE SHADOW OF THE SPIRE

SESSION 16A: TO LABYRINTH’S END

January 19th, 2008
The 6th Day of Kadal in the 790th Year of the Seyrunian Dynasty

They left the Temple of Asche. Tee headed down towards South Market to meet with Edarth and collect their payment for the consignment of gems. The rest of the group split up: Ranthir and Elestra headed back to the Delver’s Guild Library to continue Ranthir’s research. The others headed towards the Undermarket and began asking questions about the taint and showing around the tainted objects they had recovered.

Their goal was to find out more about the taint or the objects or both. Maybe there was some other way that they could dispose of the objects or cleanse themselves of the taint.

Unfortunately, their inquiries were unsuccessful. Those who had any familiarity with the taint could only give them one piece of advice: Stay away from it.

Sheva Callister told them the same thing when they asked her about it: “There are dark things beneath the city. Some look for the power to withstand them, but in my experience its better to learn how to avoid them.”

RETURN TO THE LOWER LEVEL

By noon they had all returned to the Ghostly Minstrel. They had learned nothing of value, but at least they had the money they would need to pay the Temple for their cleansing rites the next day.

Despite the fact that neither Tee nor Ranthir were feeling entirely well, the decision was made to return to Ghul’s Labyrinth. “I’d rather not just sit around and wait,” Tee said. “Besides, I may feel a little under the weather, but it’s not that bad.”

They first thing they did was open the doors to the temple of ebony, throw every item they had identified as tainted into the room, and then slam the door shut again. Then they headed straight back to the area they had been exploring before being driven out of the complex by their wounds. The strewn wreckage of the constructs was undisturbed, and they took this as a sign that there were no more immediate threats in the area.

On the far side of the chamber of the jewel scarabs they found a series of workshops that had apparently been dedicated to the creation of various constructs.

In the first of these chambers there was a large forge built into the corner. Strange metal frames were built up here and there and the middle of the room was dominated by a large stone worktable. The materials in this room had been badly damaged, but Ranthir estimated that it could still be quite valuable (worth 2,000 gold pieces or more). However, the total weight of it all – more than five thousand pounds – quickly dissuaded them from any thoughts of looting the place.

The new chamber appeared to be a parts storage of some kind. The walls of the room had been carved out with numerous cubbyholes, cabinets, shelves, and the like. Ranthir identified these golem construction parts as being more valuable – worth 5,000 gold pieces — and lighter weight (only a thousand pounds or so). But it was still more than they could hope to carry out of here. (“We’ll need to come back with hirelings,” Agnarr said, gazing appreciatively around the room.)

In the next chamber there were several rack-like structures running down the length of either wall. Most of these racks were empty, but two of them still contained mechanical constructs.

Thoon Constructs - Monster Manual V

Various sections of these constructs, however, were open. They had either been disassembled or were never complete to begin with. Ranthir was intrigued at the thought of completing them, but this was a project that would undoubtedly require a great deal of study and even more time.

For now they moved on, taking a hall that led east out of this final chamber. This took them into another workroom in which a large drill – literally ten feet long and half as thick – was suspended from scaffolding. The drill was flanked by two workbenches and was clearly unfinished. However, Ranthir was able to ordain enough of its mechanisms to recognize that, intact, it would have been self-propelling. The drill’s cutting surfaces were edged with at least 9,000 gold pieces worth of adamantine.

While Ranthir had been examining the drill’s mechanisms, Tee had been poking through the workbenches. In one of the many drawers, she found a cedar box inlaid with Ghul’s skull sigil in blackoak on the lid.

(more…)

Go to Part 1

Dungeons of Castle Blackmoor - First Fantasy Campaign (Judges Guild)

This is the point where we take all of the procedures we’ve discussed up to this point and put them into practice in order to generate a dungeon key.

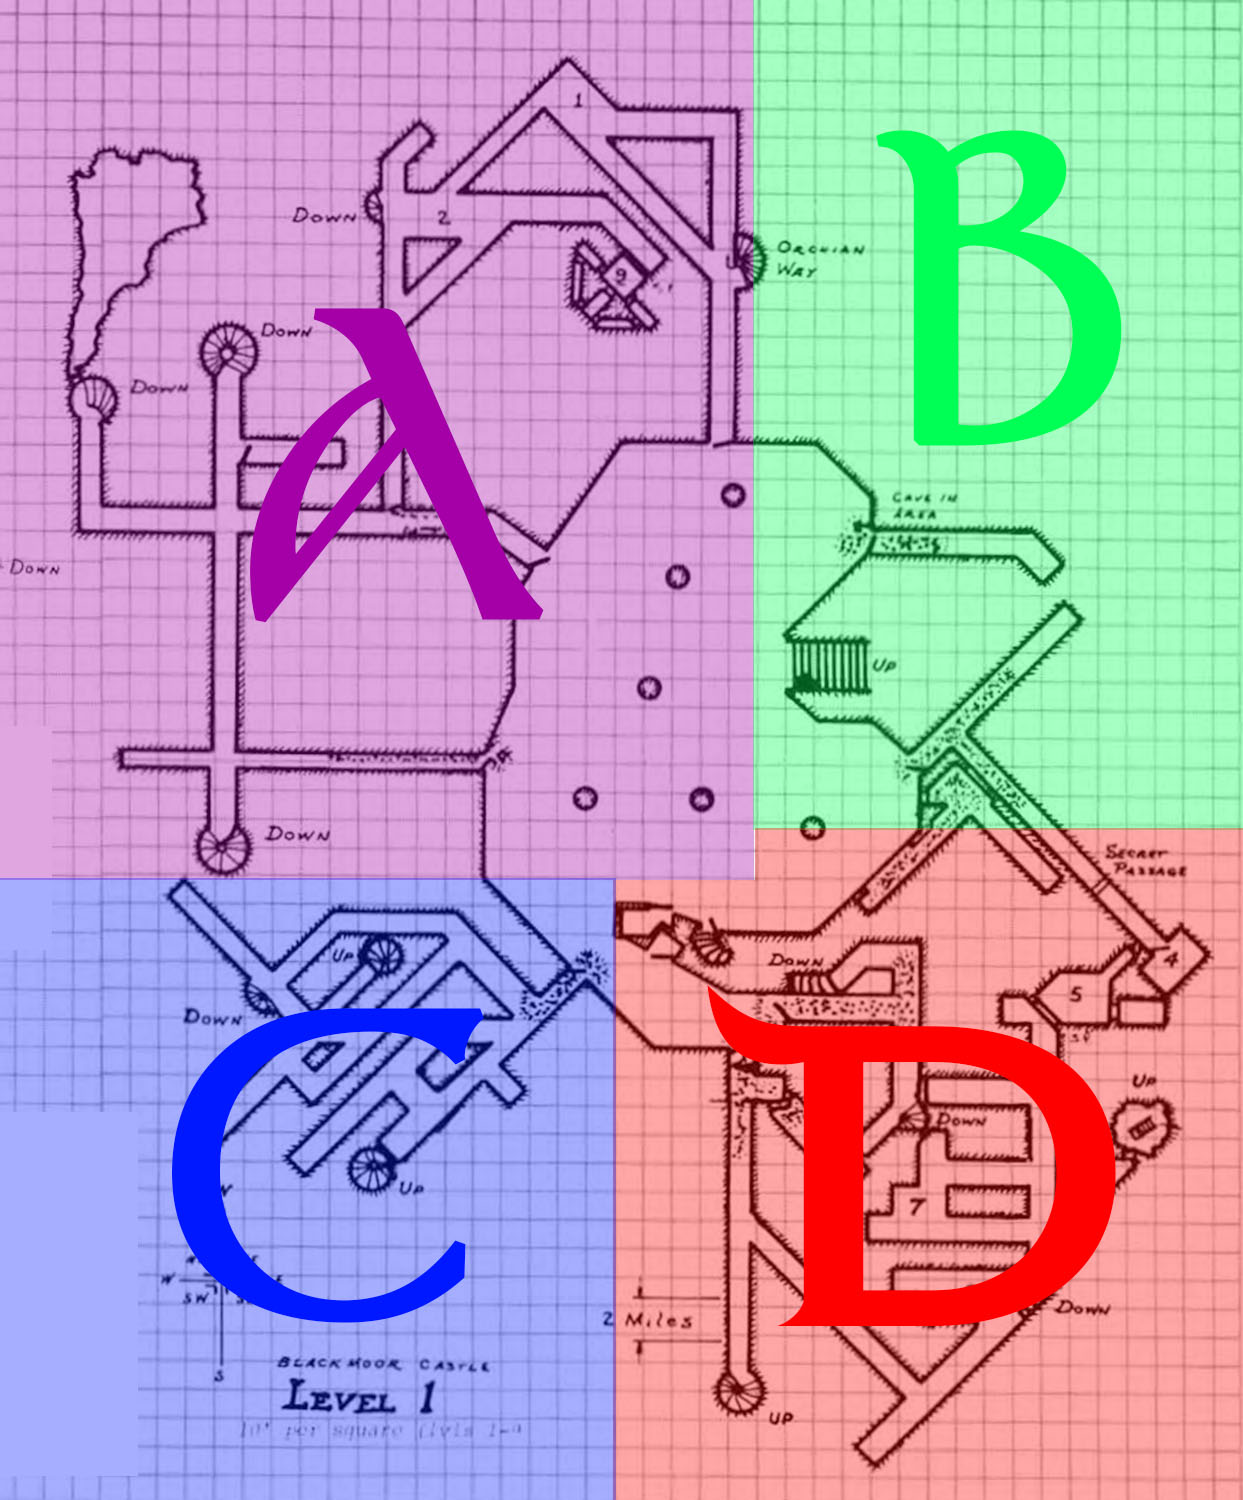
In order to make full use of this material, you’ll need copies of the Blackmoor Dungeon maps. The maps from the First Fantasy Campaign are ideal, but those from Zeitgeist Games’ Dungeons of Castle Blackmoor are adequate, despite introducing a number of new errors. (The most notable of which was that the cartographer didn’t understand how Arneson indicated secret doors on his maps, so missed several of them and turned the rest into normal doors.) The Zeitgeist Games release does have the advantage of currently being available on DriveThruRPG.

Even without the Blackmoor maps, however, it should be noted that these procedures can be used with any dungeon (particularly those designed along megadungeon lines), even one of your own! So you could grab Undermountain or the Castle of the Mad Archmage or Rappan Athuk and go to town. Or pull out the graph paper and get to work. You wouldn’t be the first, but you would join the same heady tradition as Greg Svenson’s Tonisborg, Richard Snider’s Baronies, and Gygax’s Greyhawk.

There are four versions of the key available for download as Microsoft Word files:

Blank TemplateGlendower TemplateSeed 1Seed 2

COLLECTED ZIP FILE

THE KEYS

BLANK TEMPLATE: This file is a blank template for stocking the dungeons of Castle Blackmoor. It includes the first seven levels, with a table including spots for Protection Points, Creatures, and Treasure/Notes. When I stocked the dungeon, I did three passes:

  1. Check each room for habitation and, if so, generate Protection Points.
  2. Go back to each room with a Protection Point budget and generate creatures.
  3. Make treasure tests for all of the rooms.

It stops at Level 7 because that’s where Arneson’s guidance for protection point budgets stopped. I’m not certain whether it makes more sense to continue increasing the point values at higher levels or allow them to plateau at 50 x 1d10, and I figured putting the current material into play might help elucidate the matter. (So we’ll see where that leads us the in future.)

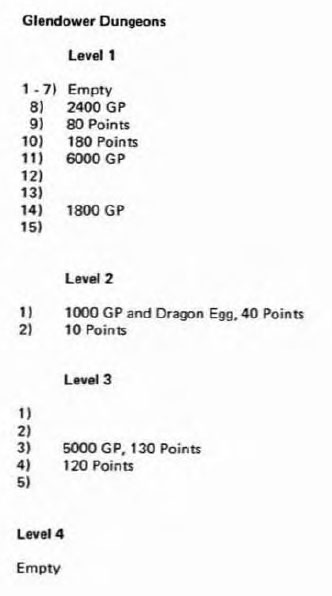
GLENDOWER TEMPLATE: I’m referring to this format as a Glendower template because it’s modeled after the presentation of the Glendower Dungeon in the First Fantasy Campaign:

As I described in Reactions OD&D: The Arnesonian Dungeon, I found this particular format fascinating because the combination of treasure + protection point budget creates a specific tactical “shape” for the dungeon, but allows the GM to completely reinvent the dungeon on-the-fly each time they run it: This time you spend the protection point budget on goblins and ogres and the Glendower Dungeons are an outpost of the Goblin King. Next time you spend them on Nazgul and it’s a wraith-infested ruin haunted by the ancient nobles who once ruled its halls. The next time it’s infested with giant spiders. And so forth.

A Glendower template can also allow the GM to more precisely indicate what the inhabited areas of “interest” are in a dungeon while still providing an ample opportunity for random generation to create spontaneity in actual play. (That is not the case here; this Glendower template of the Blackmoor dungeons was randomly generated.)

SEED 1: This was the result of me fully stocking the Blackmoor dungeon levels. This is the version of the dungeon that I’ve been running (and which it looks like I’ll be continuing to run for awhile longer as an open table).

SEED 2: To demonstrate the flexibility of the system, I started over and started a second seed of the entire dungeon. (This took about 45 minutes to do all seven levels.) Perhaps the most notable take-away, in my opinion, is how the same stocking procedure can create radically different versions of the same dungeon.

For example, in the Seed 1 version of the dungeon I generated only one encounter (featuring 23 hobbits) on Level 1 and Level 2 was also sparsely inhabited. In Seed 2, however, the upper level is filled with hostile fey (including an attack force in the very first room!) and Level 2 is crawling with bad guys. In play, entering the Seed 1 version of the dungeon was a slow, tense build as empty corridors rolled out behind the party. The Seed 2 dungeon, on the other hand, would be an immediate meatgrinder.

OBSERVATIONS FROM STOCKING

What have I learned from actually putting these stocking procedures into practice?

Primarily that the system starts breaking down for me around Level 5. There are two interlinked problems.

First, it feels weird for most of the Group III creatures to appear in small hordes. Getting results like 6 Balrogs or 5 Dragons feels weird. I’ve decided to roll with it and see how that develops in actual play, but one option to explore in the future would be tweaking the procedures to favor one “Big Boss” with minions generated from the Group I or Group II tables. However…

Second, regardless, the increased point values at the lower levels fund huge numbers of bad guys. Results like “50 Nazguls” or “Giant, Basilisk, 8 Nazguls, 11 Ogres” or “23 Ents” are quite common.

This is inherent to Arneson’s stocking method, but the maps of Castle Blackmoor don’t adjust to reflect the nature of the encounters being generated: The rooms on the lower levels remain tiny and cramped.

Based on Arneson’s surviving key of the lower levels, this doesn’t seem to have bothered him: For example, he keys 250 dwarves into a 10′ x 40′ long space. Or 60 ogres into a 10′ x 10′ room.

For the moment, I’ve decided to play it as it lies, simply letting the keyed results stand as they were generated. If my players manage to delve down to those lower levels, it’s possible that I will discover (or create) some method of play that makes sense of these sorts of encounters. Given my predilection for complex, multi-room tactical scenarios, for example, it probably wouldn’t be difficult to interpret large hordes in one room as actually spilling out into neighboring chambers. Another option would be to interpret such entries as actually suggesting that the keyed room is merely the entrance to some sub-level of the dungeon. You can find a suggestion of that in my Seed 1 notes:

Castle Blackmoor - Level 4 - Area 13

Level 4, Area 13: 56 Elf/Fairy – crystal ball; they must live beyond a magic portal in this dead end

Perhaps I’ll grab a few random Dyson Logos maps and have them on hand and simply use them as necessary. To fit them into the tight geography of the Blackmoor dungeons may be a trifle difficult, but extradimensional portals and long inter-level passages that locate the sub-level somewhere else or drop down/up at steep angles to connect with the wider tunnel systems around Blackmoor can simplify the difficulties.

Upon reflection, I actually quite like this “outpost entrance” model: Use a handful of the indicated creatures as a “door guard” of sorts and then use the remaining creatures indicated to stock the sub-level / micro-dungeon behind the outpost entrance. In this model, the lower levels of the dungeon would fall naturally into armed enclaves linked to the central dungeon topography. (This also feeds well into my personal vision of the dungeon as a place where materiel both Ancient and Evil wells up from the depths. These outposts become literal wells from which strange and eldritch things emerge into the dungeon core.)

But I digress.

More generally, I would note that the problem here is not necessarily with the strength of the encounters generated, but rather with the fact that the maps weren’t drawn to reflect the results the stocking procedure was generating. If you were using these same procedures to stock your own dungeons, the problem can be trivially resolved by mapping accordingly.

USING MINIMALIST KEYS IN PLAY

Running a dungeon using a minimalist key is, of course, an act of improvisation: You take scraps of information, throw them into the cauldron of your imagination, and you see what comes spilling out. As you do this over time, the details you’re creating will begin interacting with each other and creating new details.

In some cases, a story will come spilling out of the key as you’re rolling it up. For example, look at Level 4 of Seed 1:

The dice got in a rut and filled the entire north side of this level with Fighting-Men. This section of the dungeon also features a number of connections to the wider network of tunnels which surrounds the Castle Blackmoor dungeons. These tunnels, in turn, feature a number of exits to the surface. Putting these facts together, it’s easy to “see” that these fighting-men are actually bandits, staging their raids out of this hideout.

Or look at Level 6 in Seed 2: Here the dice pumped out 70+ Nazgul. I don’t know exactly what those Nazgul are doing down there, but the entire level — let’s call it Wraith Hall — will be heavily influenced in terms of visuals and content by their domination here.

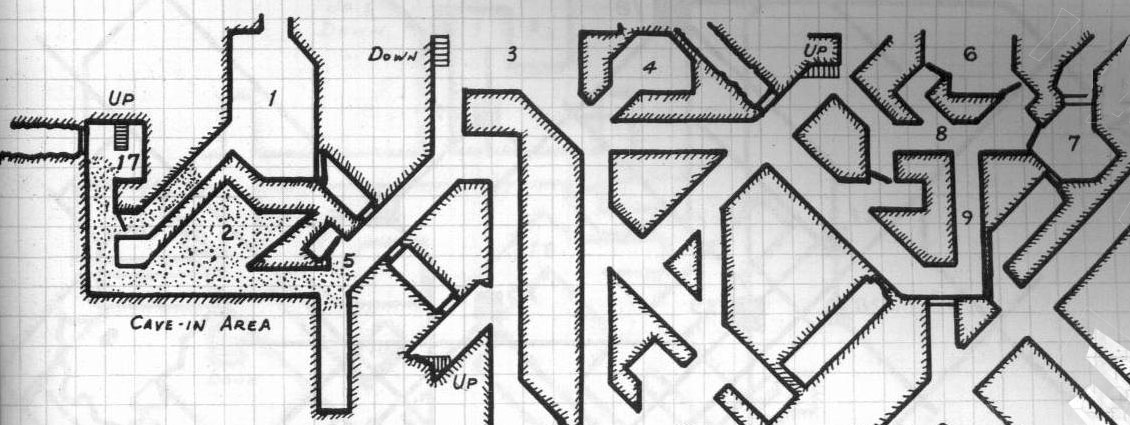
More ideas will come into focus once play begins. For example, as I mentioned before, on Level 1 of the dungeon I had only generated a single encounter featuring 23 hobbits in Area 6:

Castle Blackmoor - Hobbit Warrens

It became clear to me that this must mean that this entire corner of the first level must actually be a hobbit warren! If the PCs ever go over there, they’ll find round doors and curved tunnels that — if they’re human — are rather too small for comfort. What are the hobbits doing down here? Well, they were first met as the result of a random encounter roll, so I decided that they must be patrolling the upper levels of the dungeon for Baron Fant, keeping them clear of dangers. (Which is, of course, why the upper two levels are, in this version of the dungeon, relatively unpopulated.) Which is why the PCs met Sir Alcestis, a brave hobbit knight dressed in blue livery, and his crew of hobbit wardens.

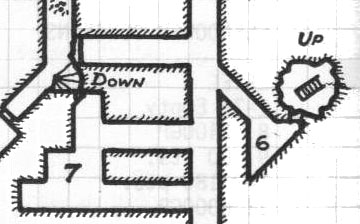
Later the PCs find the secret doors leading to Area 9:

Castle Blackmoor - Level 1 - Area 9

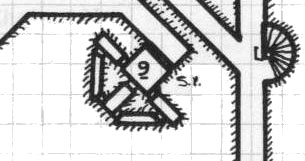
Checking my key I see that this area contains a magic sword (the N Sword), but not creatures. The odd shape of the rooms and the presence of the sword combine to create a creepy chamber with full-length mirrors on each of the three walls: Those looking into one of the mirrors will see themselves holding the sword in their hand.

What’s the sword look like? Well, I check the Sword Matrix and I see that the N Sword is an anti-lycanthropic blade. So I describe it as have a hilt of gray fur with a kind of “tassel” attached to it. (Why? No particular reason. It’s just the image that occurs to me.)

Finding the N Sword is particularly interesting in this specific context, however, because one of the PCs has been bitten by a lycanthrope earlier in the session. In rolling up its variable stats, I discover that it is only intelligent enough to communicate by “passing on gross emotions”, so when the PCs successfully extricate the sword from the puzzle of the three mirrors, I describe the “tassel” as curling up like the tail of an angry cat and pointing directly at the afflicted character. This ability to detect lycanthropes at a short range isn’t listed in the sword’s stat block, but it follows logically (and, more importantly, awesomely) from the creative chain we’ve been following to get to this point.

Next: Restocking the Dungeon

Archives

Recent Posts

Recent Comments

Copyright © The Alexandrian. All rights reserved.